Review: 7Artisans 35mm f/1.4 Lens for Leica M

By Anthony Gyzen and Sara Long

For the last two months, I’ve been testing the 7Artisans 35mm f/1.4 lens for Leica M-mount, which 7Artisans sent me to review. I’ve shot one one roll of Portra 400 on the Leica M6 and one photoshoot on the Sony A7III, but most of the time, I used this lens with the Leica M 240.

Screen Shot 2020-11-10 at 9.45.02 AM.png

This lens is the second 35mm M-mount lens that 7Artisans has produced. It isn’t made in the DJ-Optical factory, but is still manufactured in China. This lens retails at $429. In comparison, Leica’s current 35mm f/1.4 costs $5,895.

Screen Shot 2020-11-10 at 9.44.42 AM.png

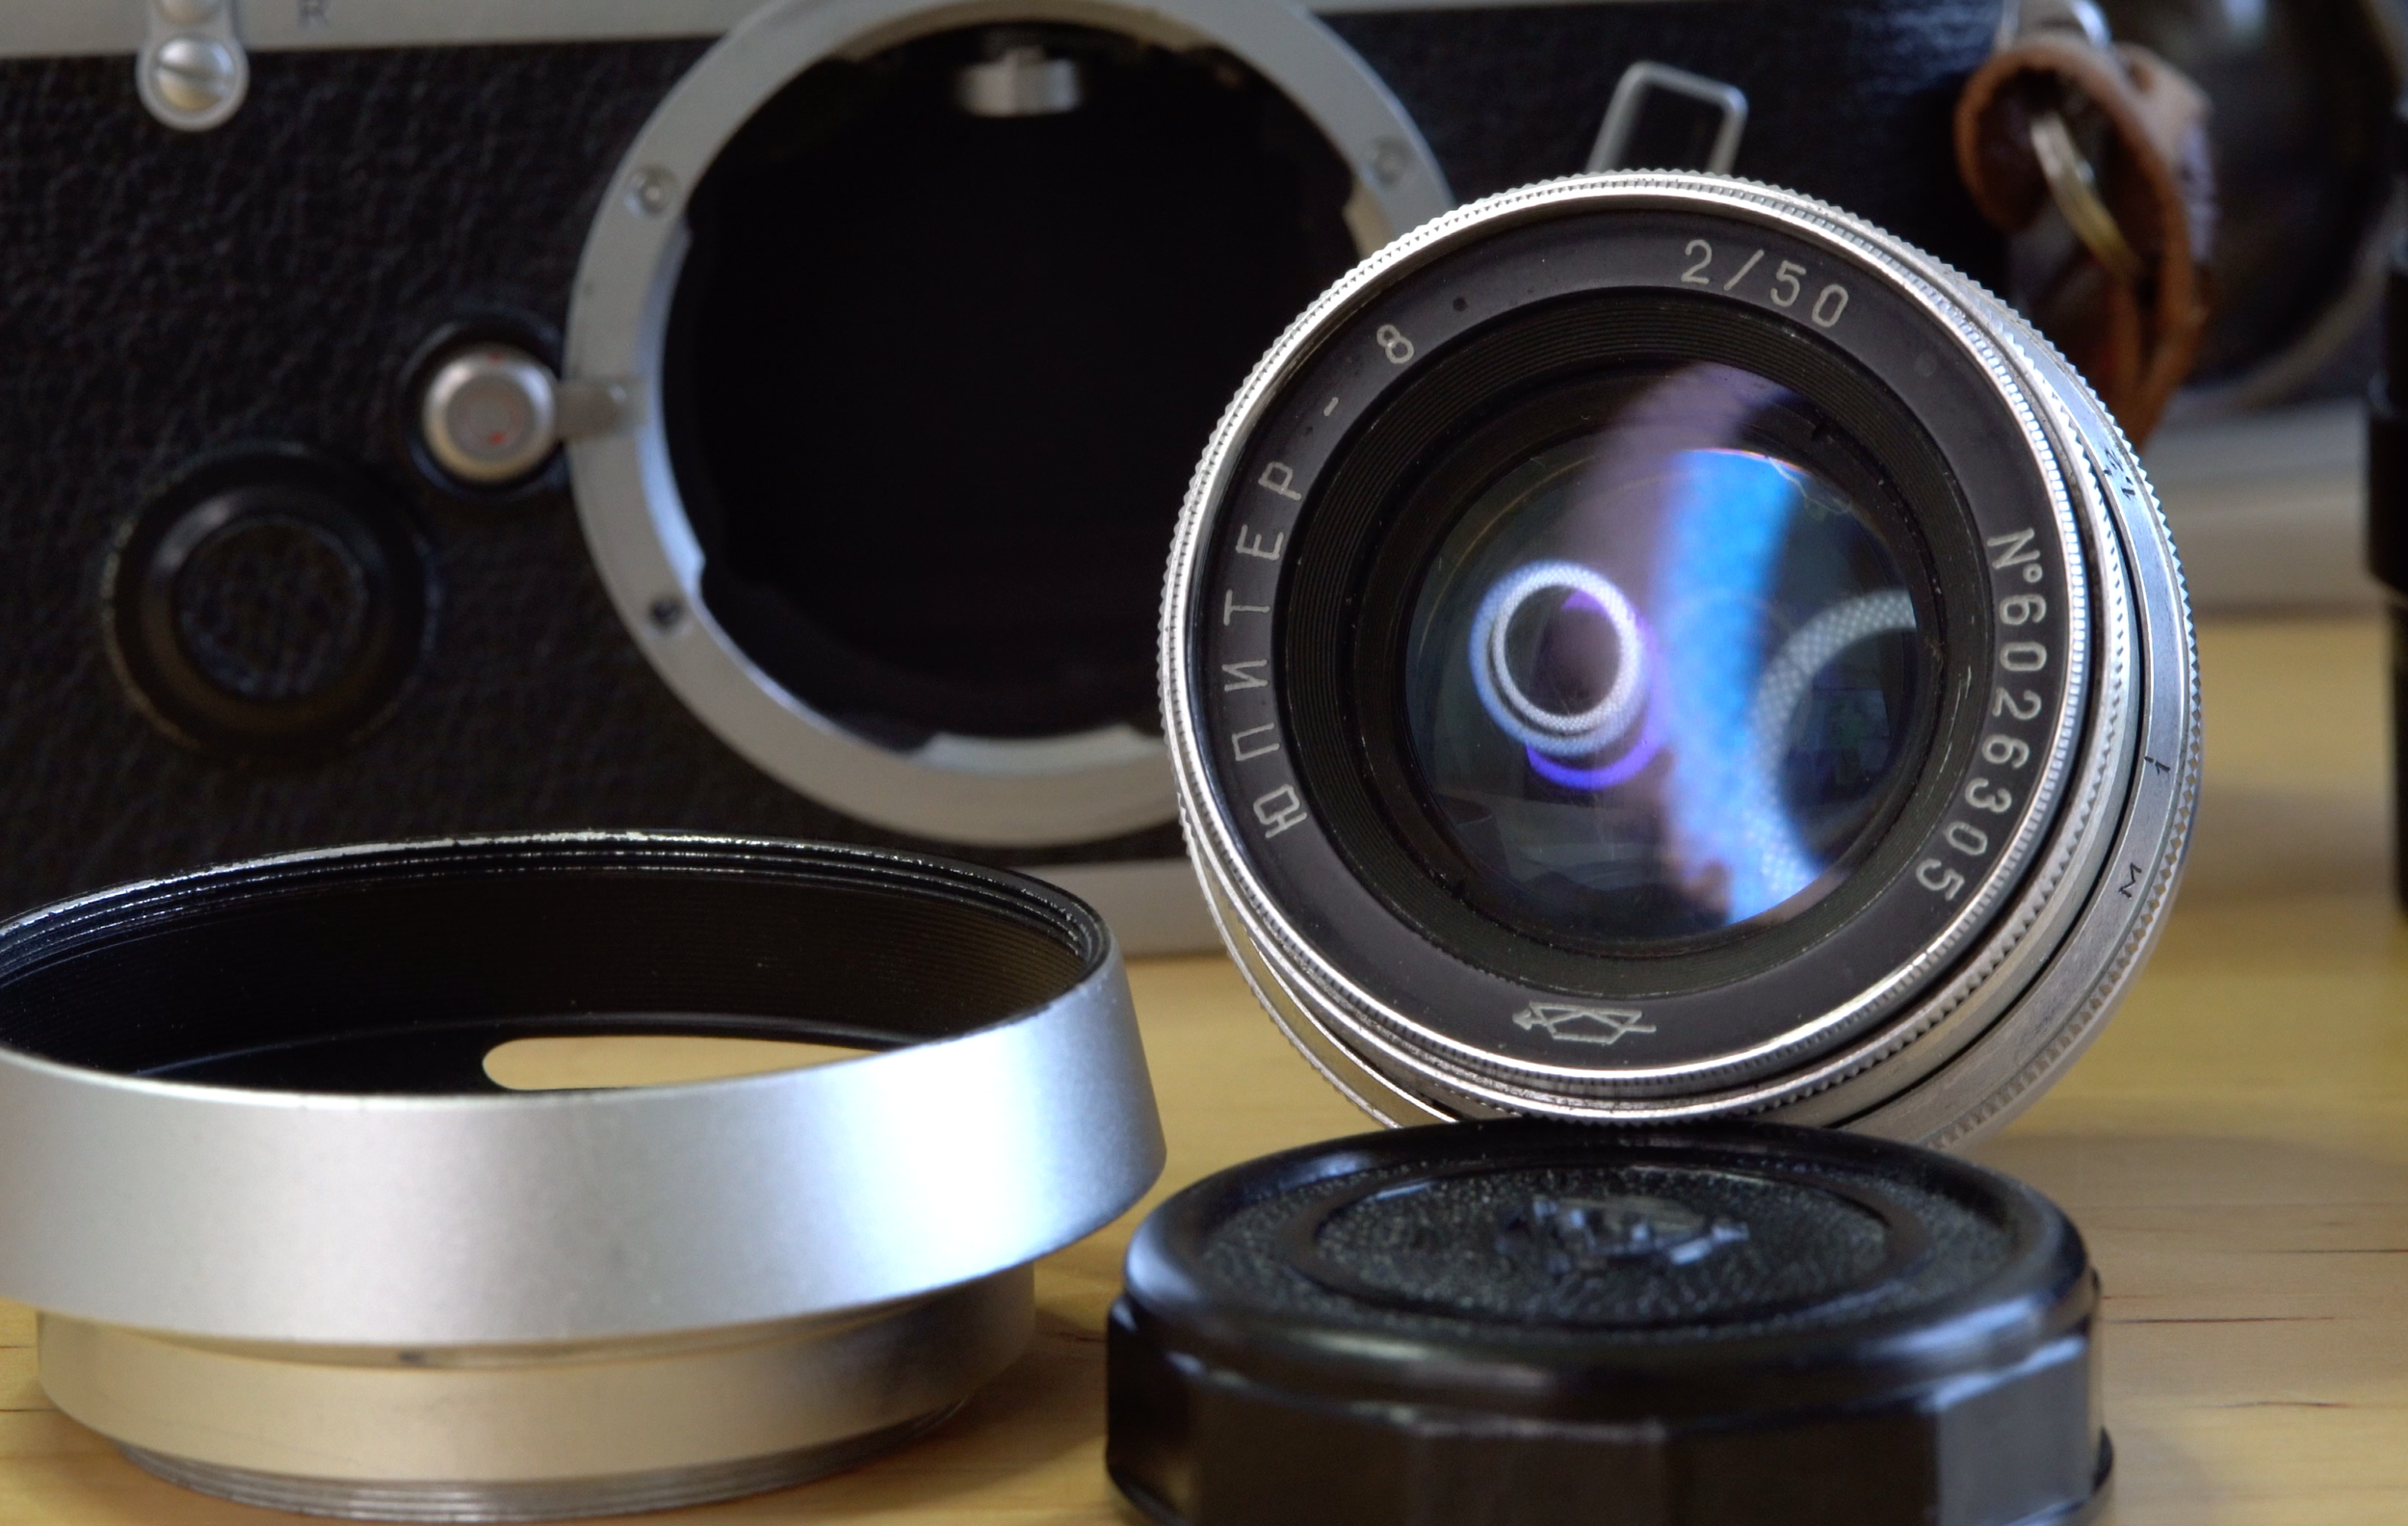
If you have experienced 7Artisans M-mount lenses, you’ll know that you may need to calibrate your lens for your rangefinder. Calibrating on a digital Leica is much easier than calibrating on an analog Leica, which may take several attempts to get correct. On digital, simply follow the calibration instructions included in the lens box. On an analog Leica, open the film back, put a piece of scotch tape across the film plane, and then follow the calibration instructions.

Screen Shot 2020-11-10 at 9.45.28 AM.png

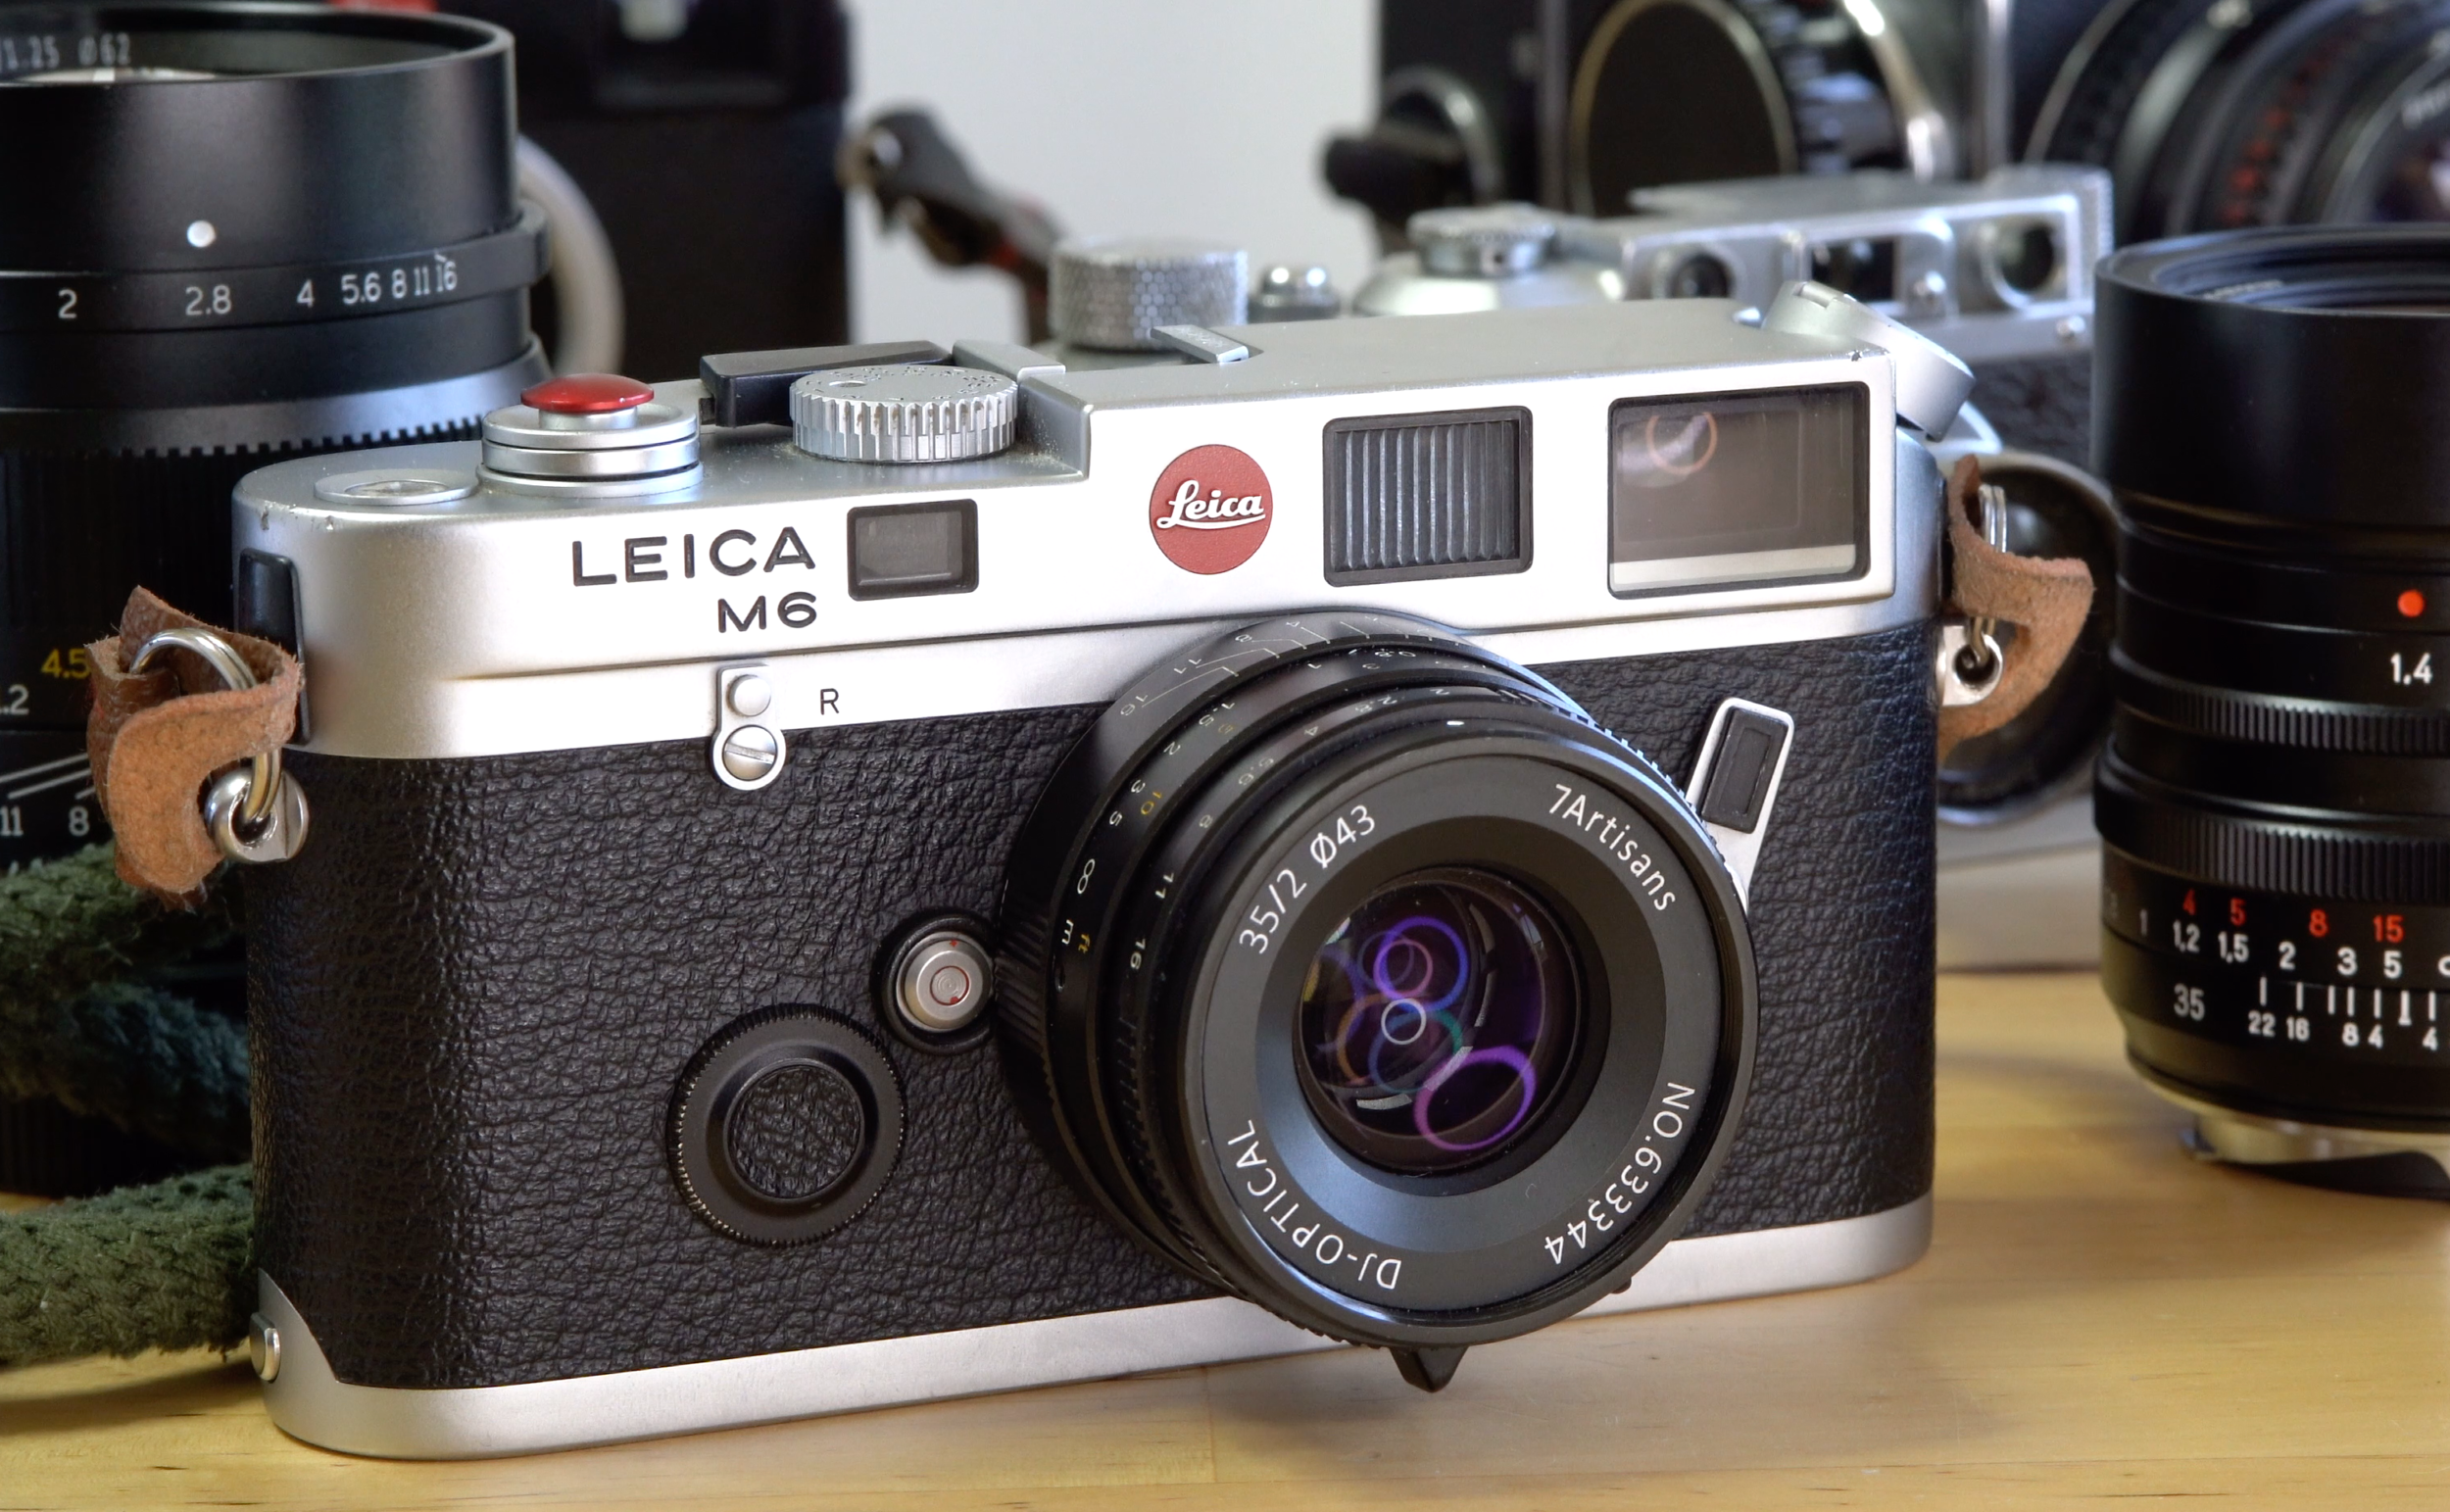
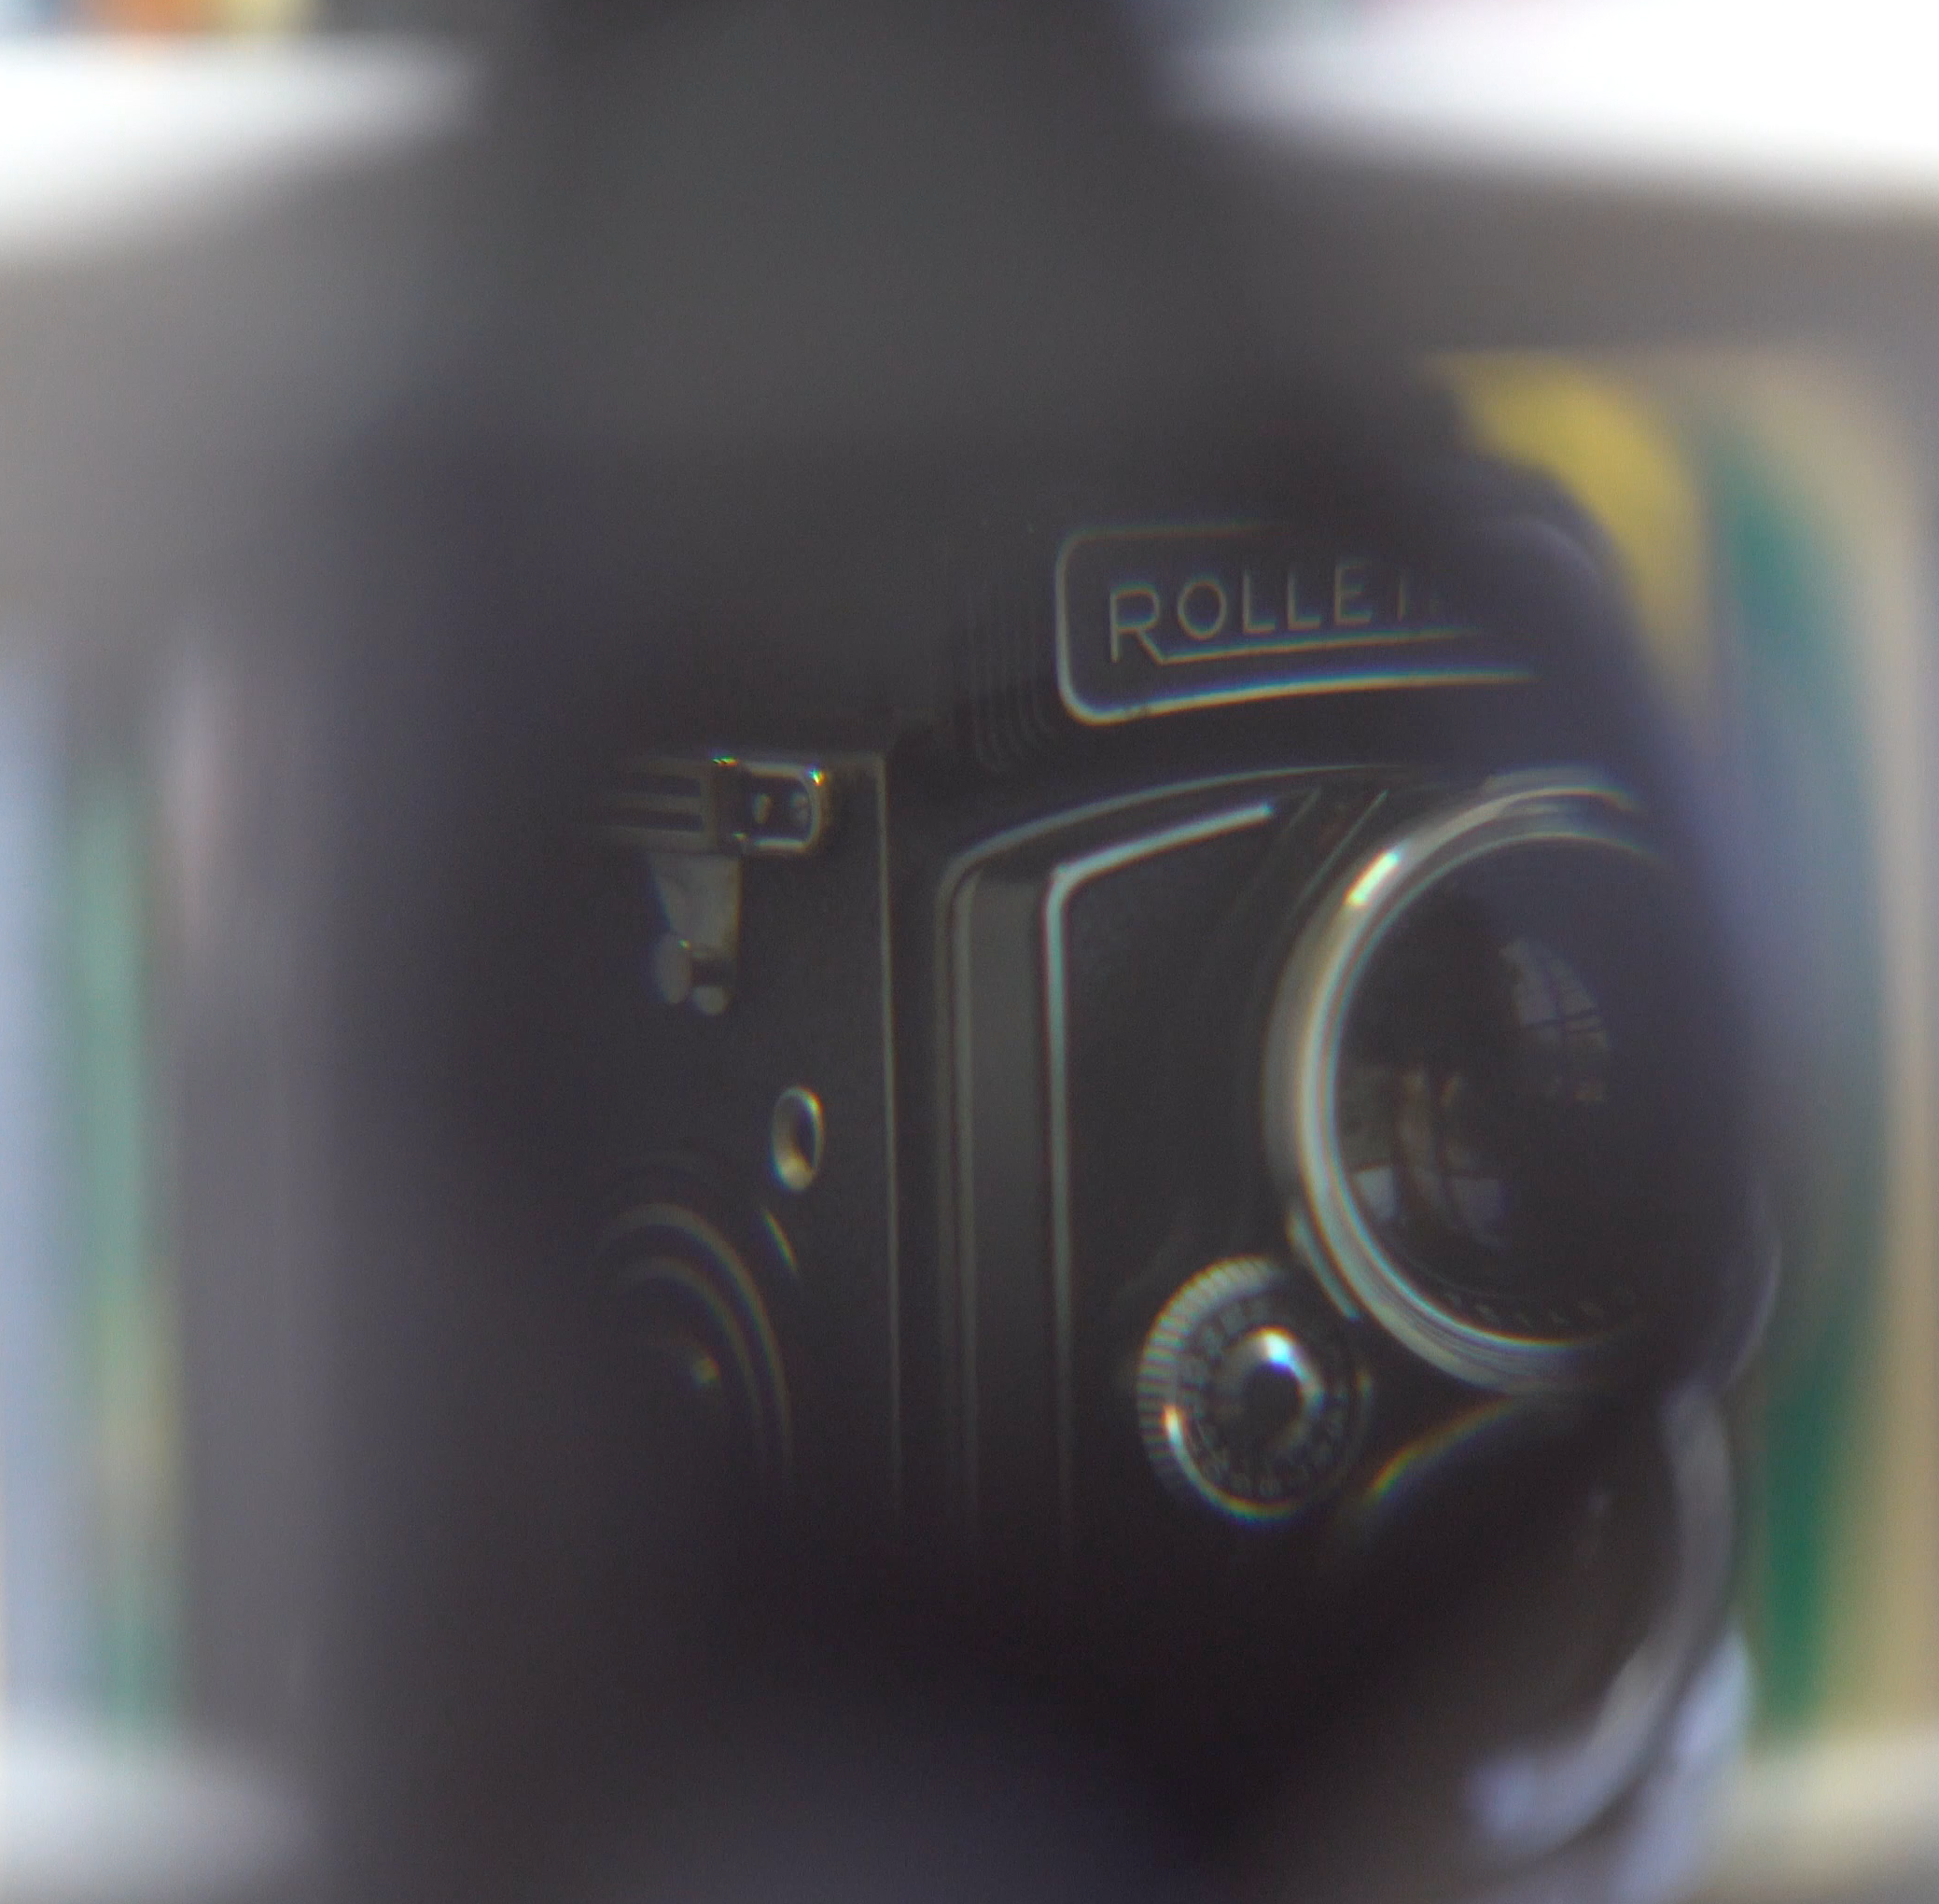
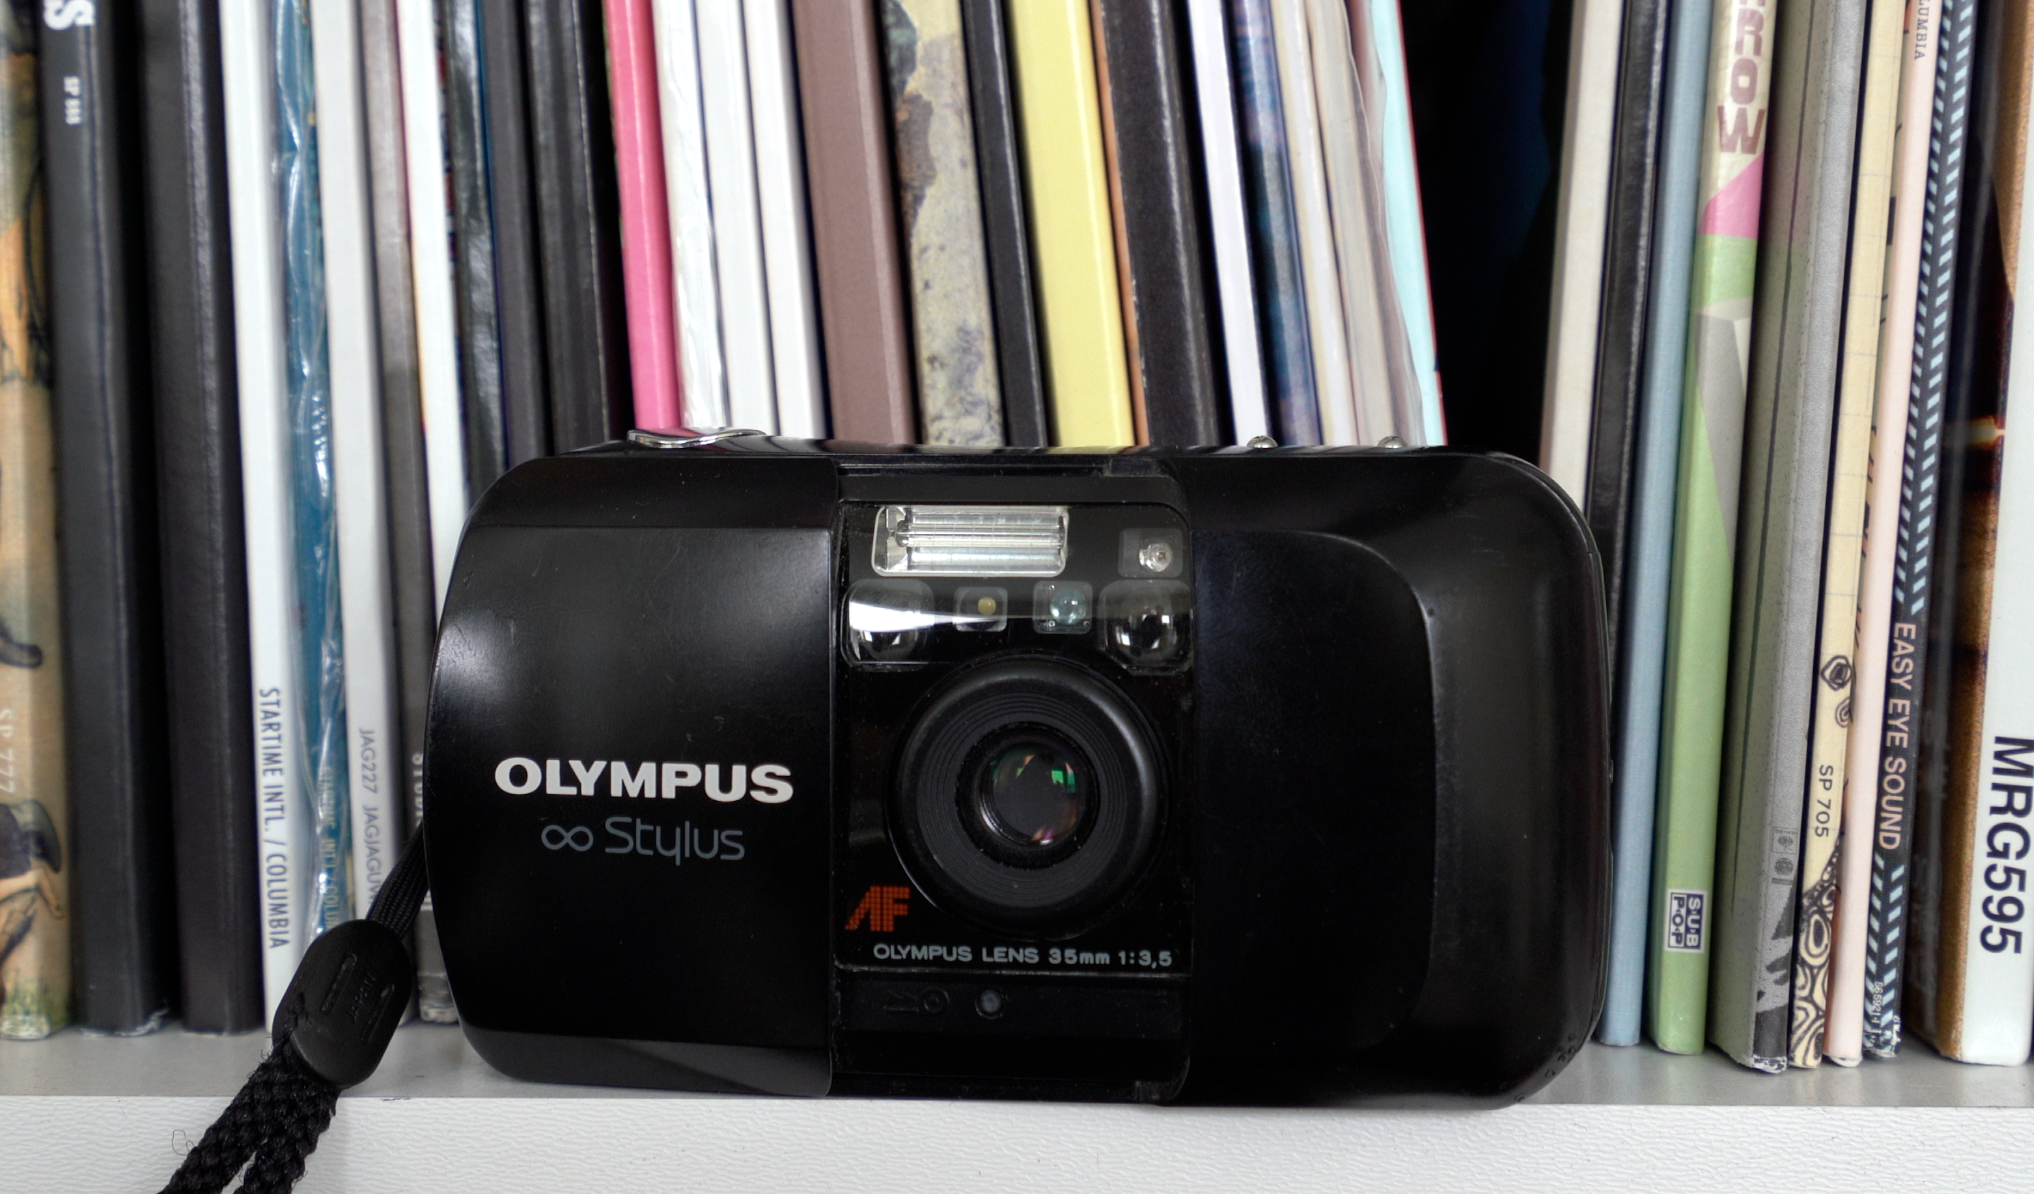
You’ll also notice that this lens has a distinctive new design language, unlike the previous M-mount lenses, which were heavily inspired by Leica’s design. The body has a different black paint than previously released lenses, as well as red accents on the distance markers and the Chinese character Wen, meaning “Street Photography” or “Social Documentary Photography,” in red on the hood. The markings around the front element aren’t painted like the markings on the barrel of the lens, and it doesn’t look quite as nice.

Screen Shot 2020-11-10 at 9.46.01 AM.png

It’s a very solid feeling lens, made of all metal and glass, weighing 377g or about 13.3oz without caps. This is not the smallest 35mm f/1.4 M-mount lens on the market, for example, Leica, Voigtlander and TT Artisans all have more compact offerings.

Screen Shot 2020-11-10 at 9.43.52 AM.png

This lens takes 49mm filters and has a built-in retractable lens hood, which, in my experience, gets snagged on the front of the lens while opening and closing. Besides that, it’s very convenient to have a hood built in.

Screen Shot 2020-11-10 at 9.47.22 AM.png

Viewfinder blockage is just the bottom right corner. The focusing is done all internally, so whether you’re at minimum or infinity, this lens isn’t going to get larger and block more of your viewfinder. This lens has a native minimum focus distance of .7 meters, or about 2.3 feet. If you are planning on adapting this lens to another camera system, like E-mount, you can get a close focusing adapter to greatly increase that minimum focus distance. The focusing ring is smooth, but also has a nice resistance to help achieve precise focus. You can always add a focus tab if that is your preference. This lens has a short focus throw at 100 degrees.

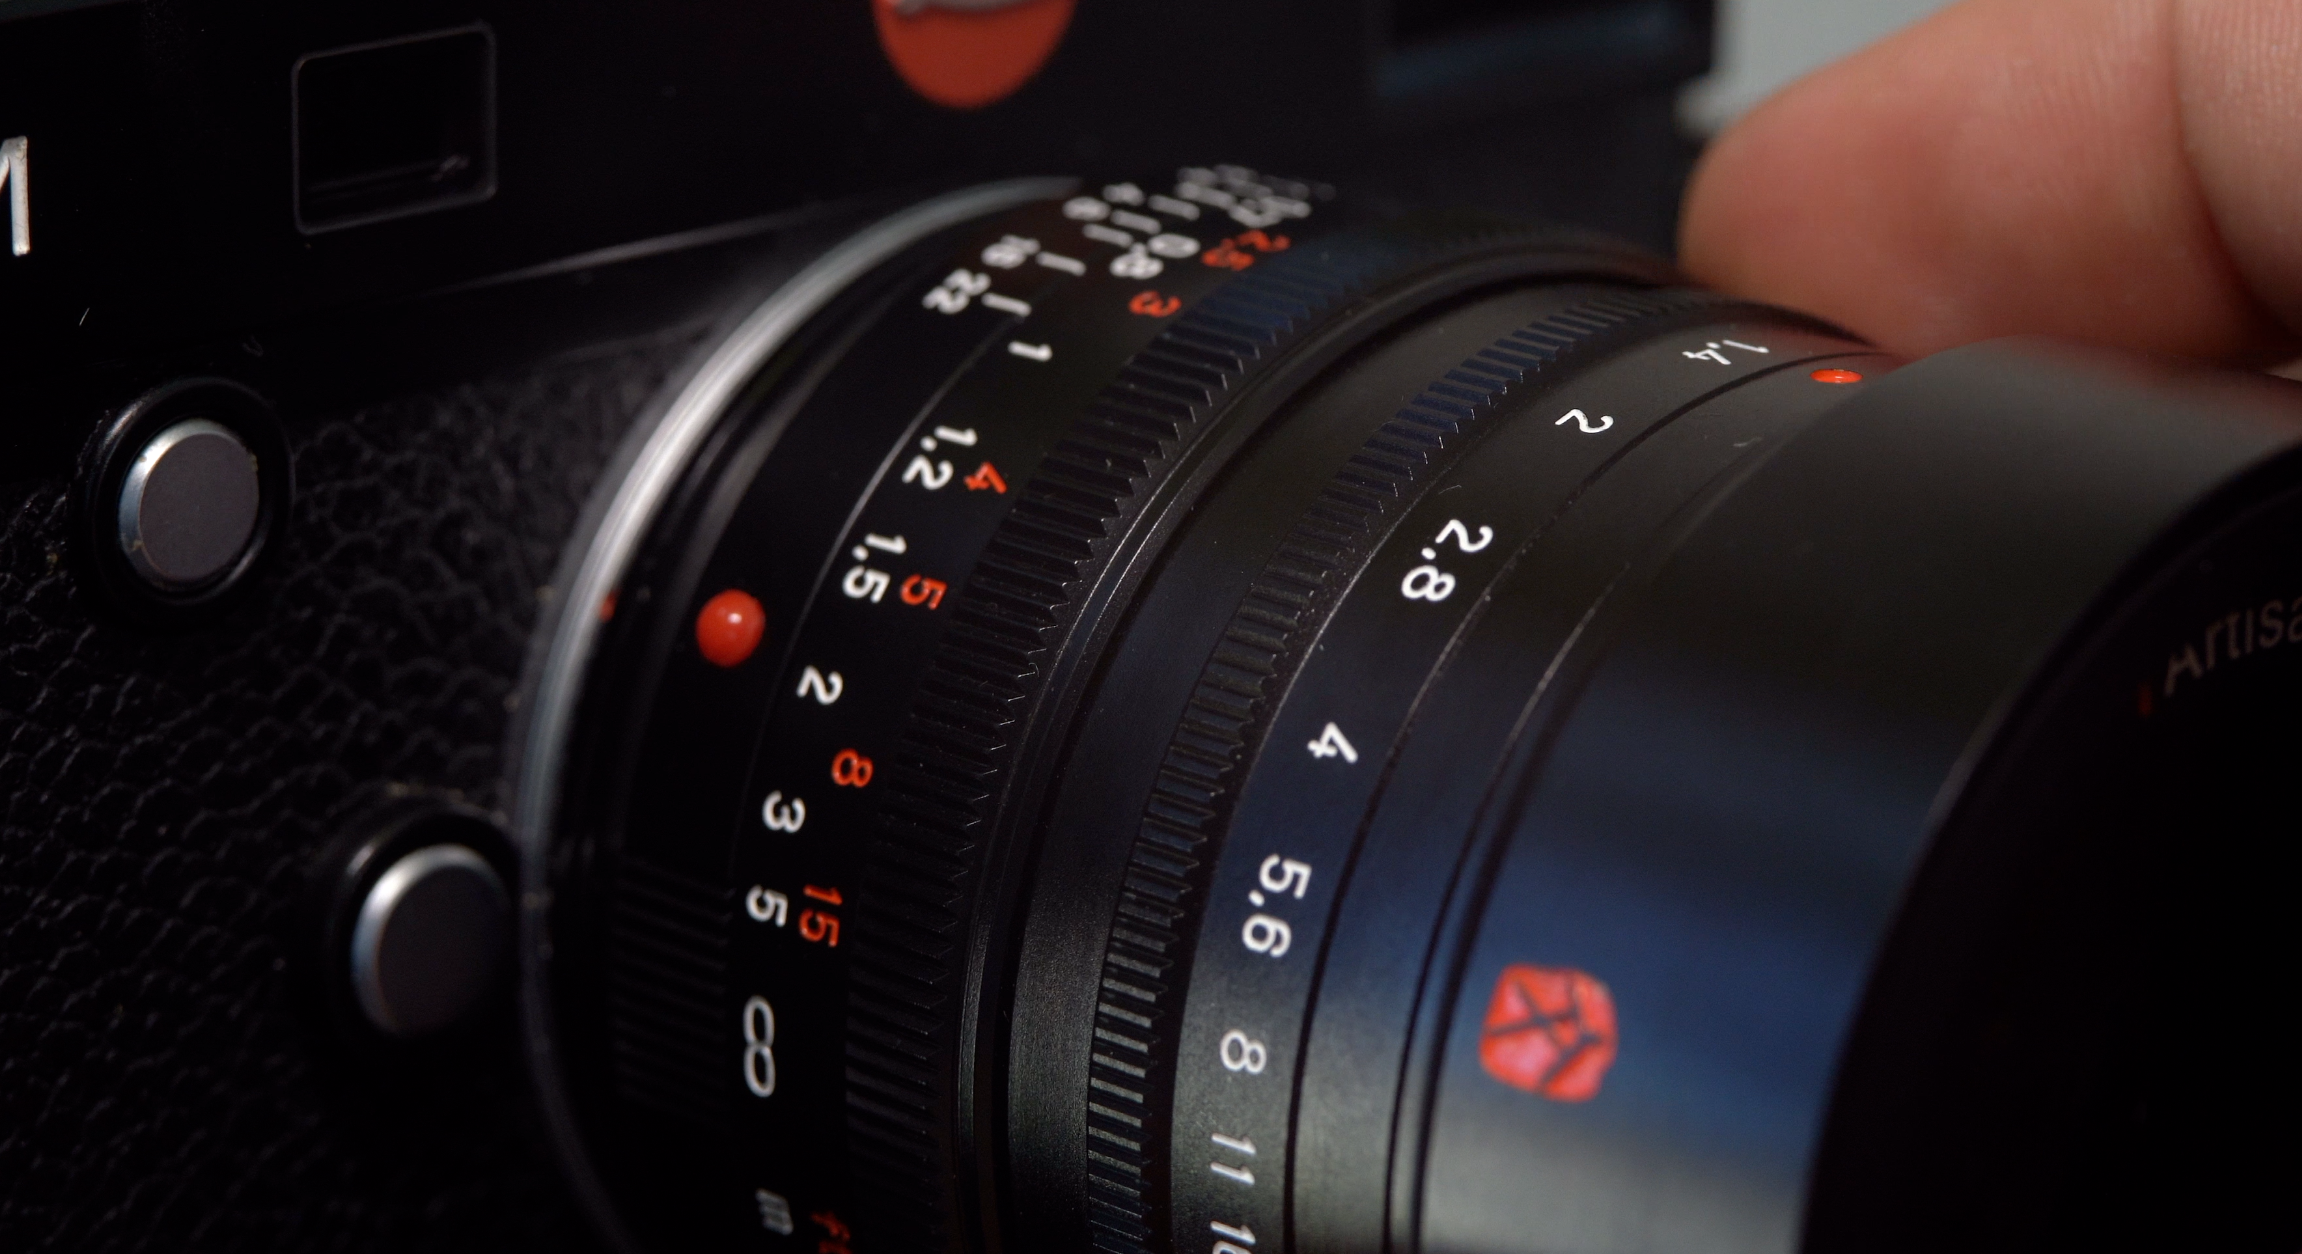
This lens has a very large aperture range, from  f/1.4 to f/22. Equipped with a 10 bladed aperture diaphragm, the aperture ring is smooth to adjust and has a nice tactile click for each stop.

Screen Shot 2020-11-10 at 9.48.04 AM.png
Screen Shot 2020-10-26 at 10.10.30 AM.png

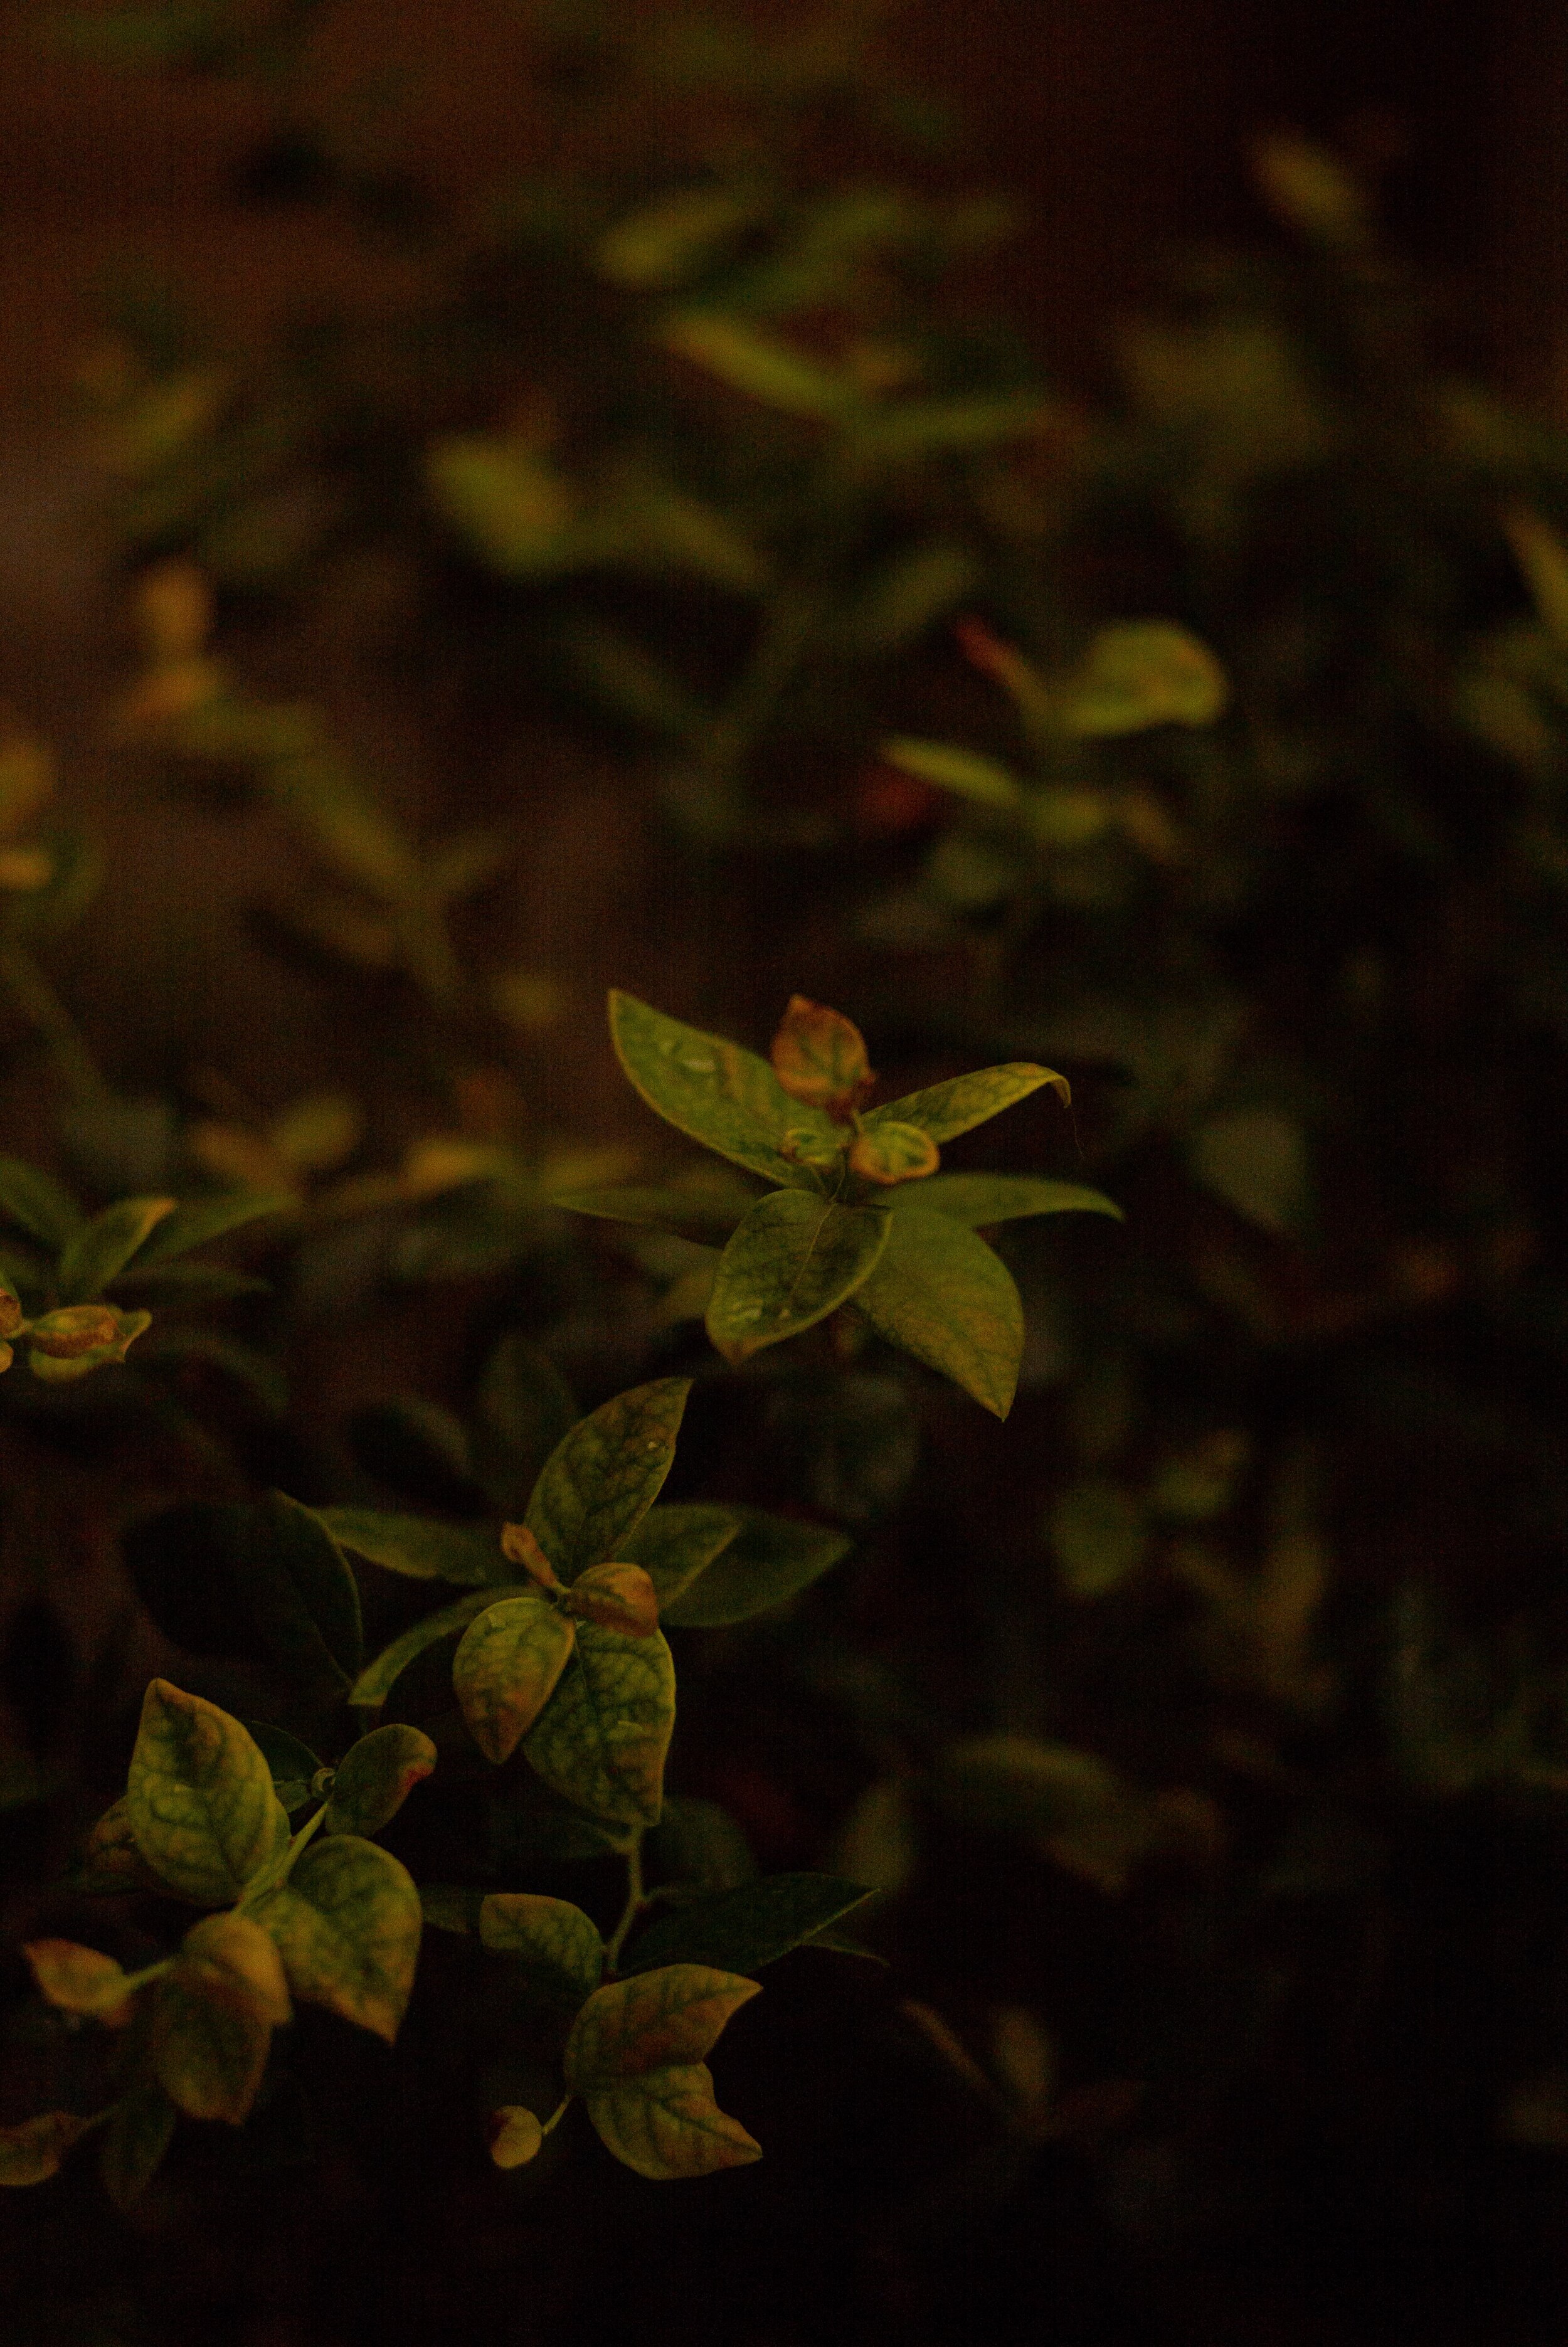
When I went out, I was excited to get back into shooting 35mm focal length—I’d been using a lot of portraits and telephoto lenses for the previous few months. I did worry that it would be tough to get focus at f/1.4, but upon reviewing my images, I don’t think I missed focus even once. This makes me confident that I’ll get accurate focus in low light.

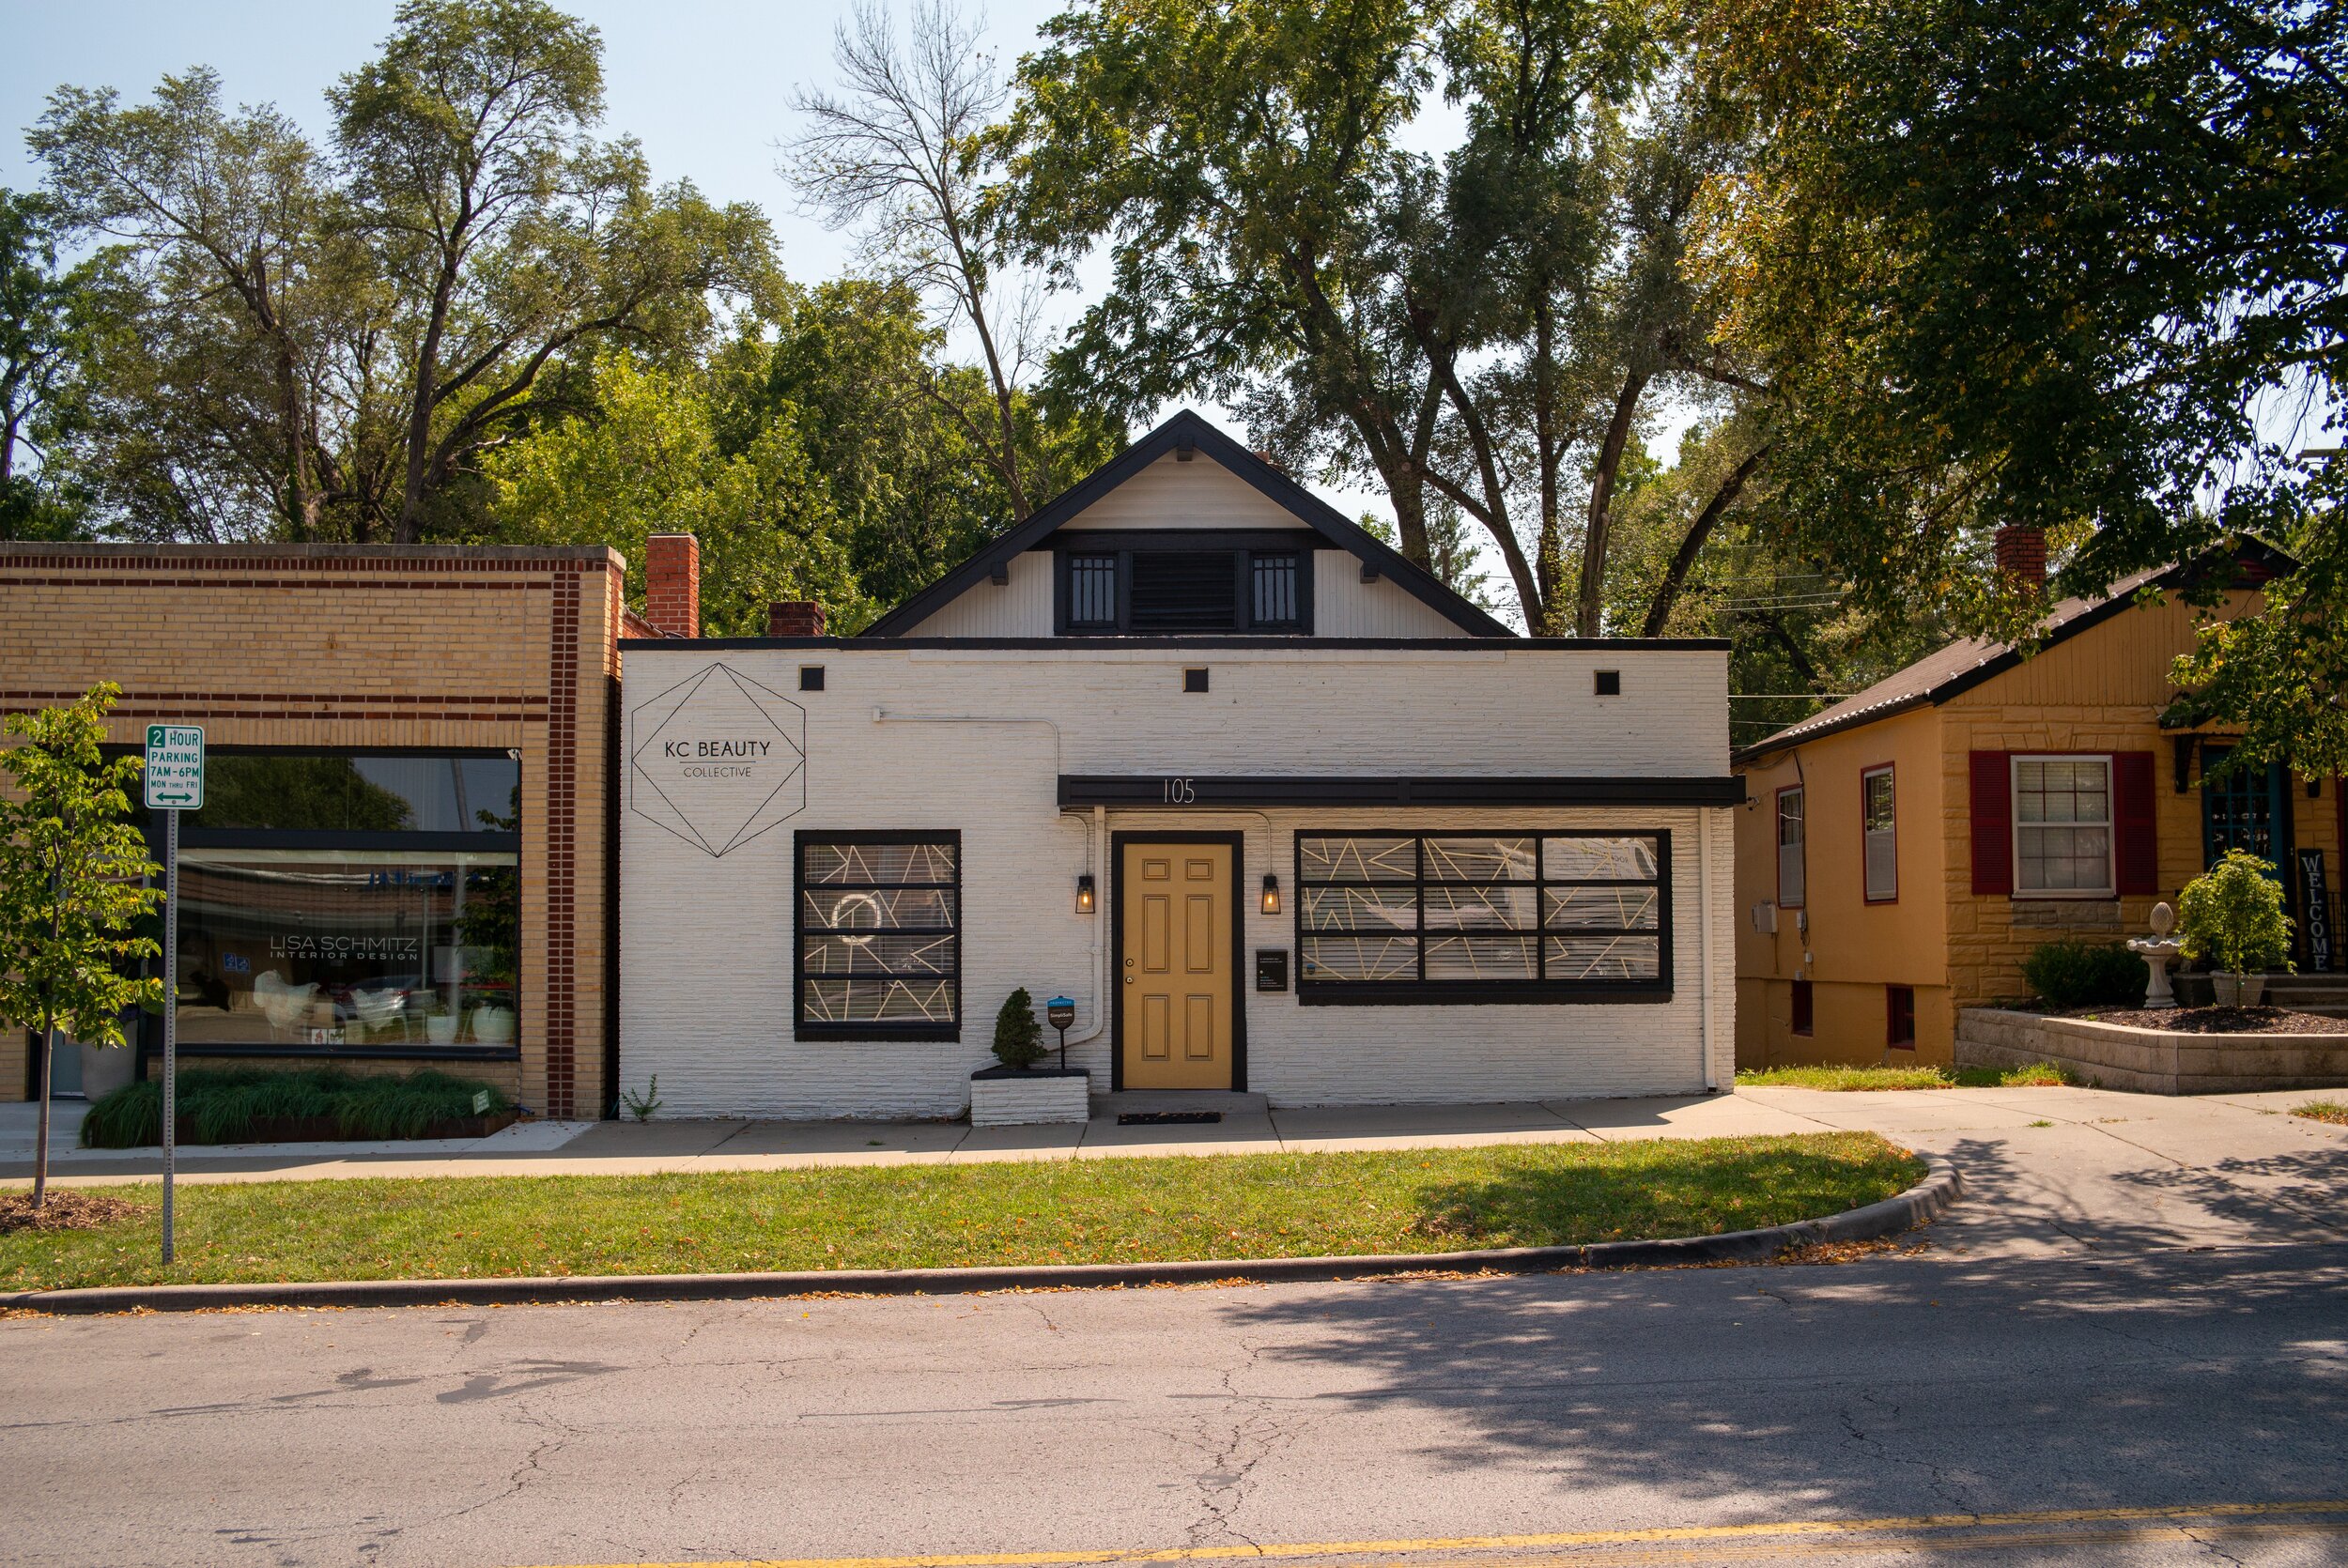
As with most lenses in this price range, the lens is sharpest at f/4-f/8. Shooting faster than f/4 still provides images that are very sharp in the center, but the corners do become softer. I noticed slight vignetting when shooting with wide apertures; however, it was never overwhelming, and could be corrected in Lightroom.

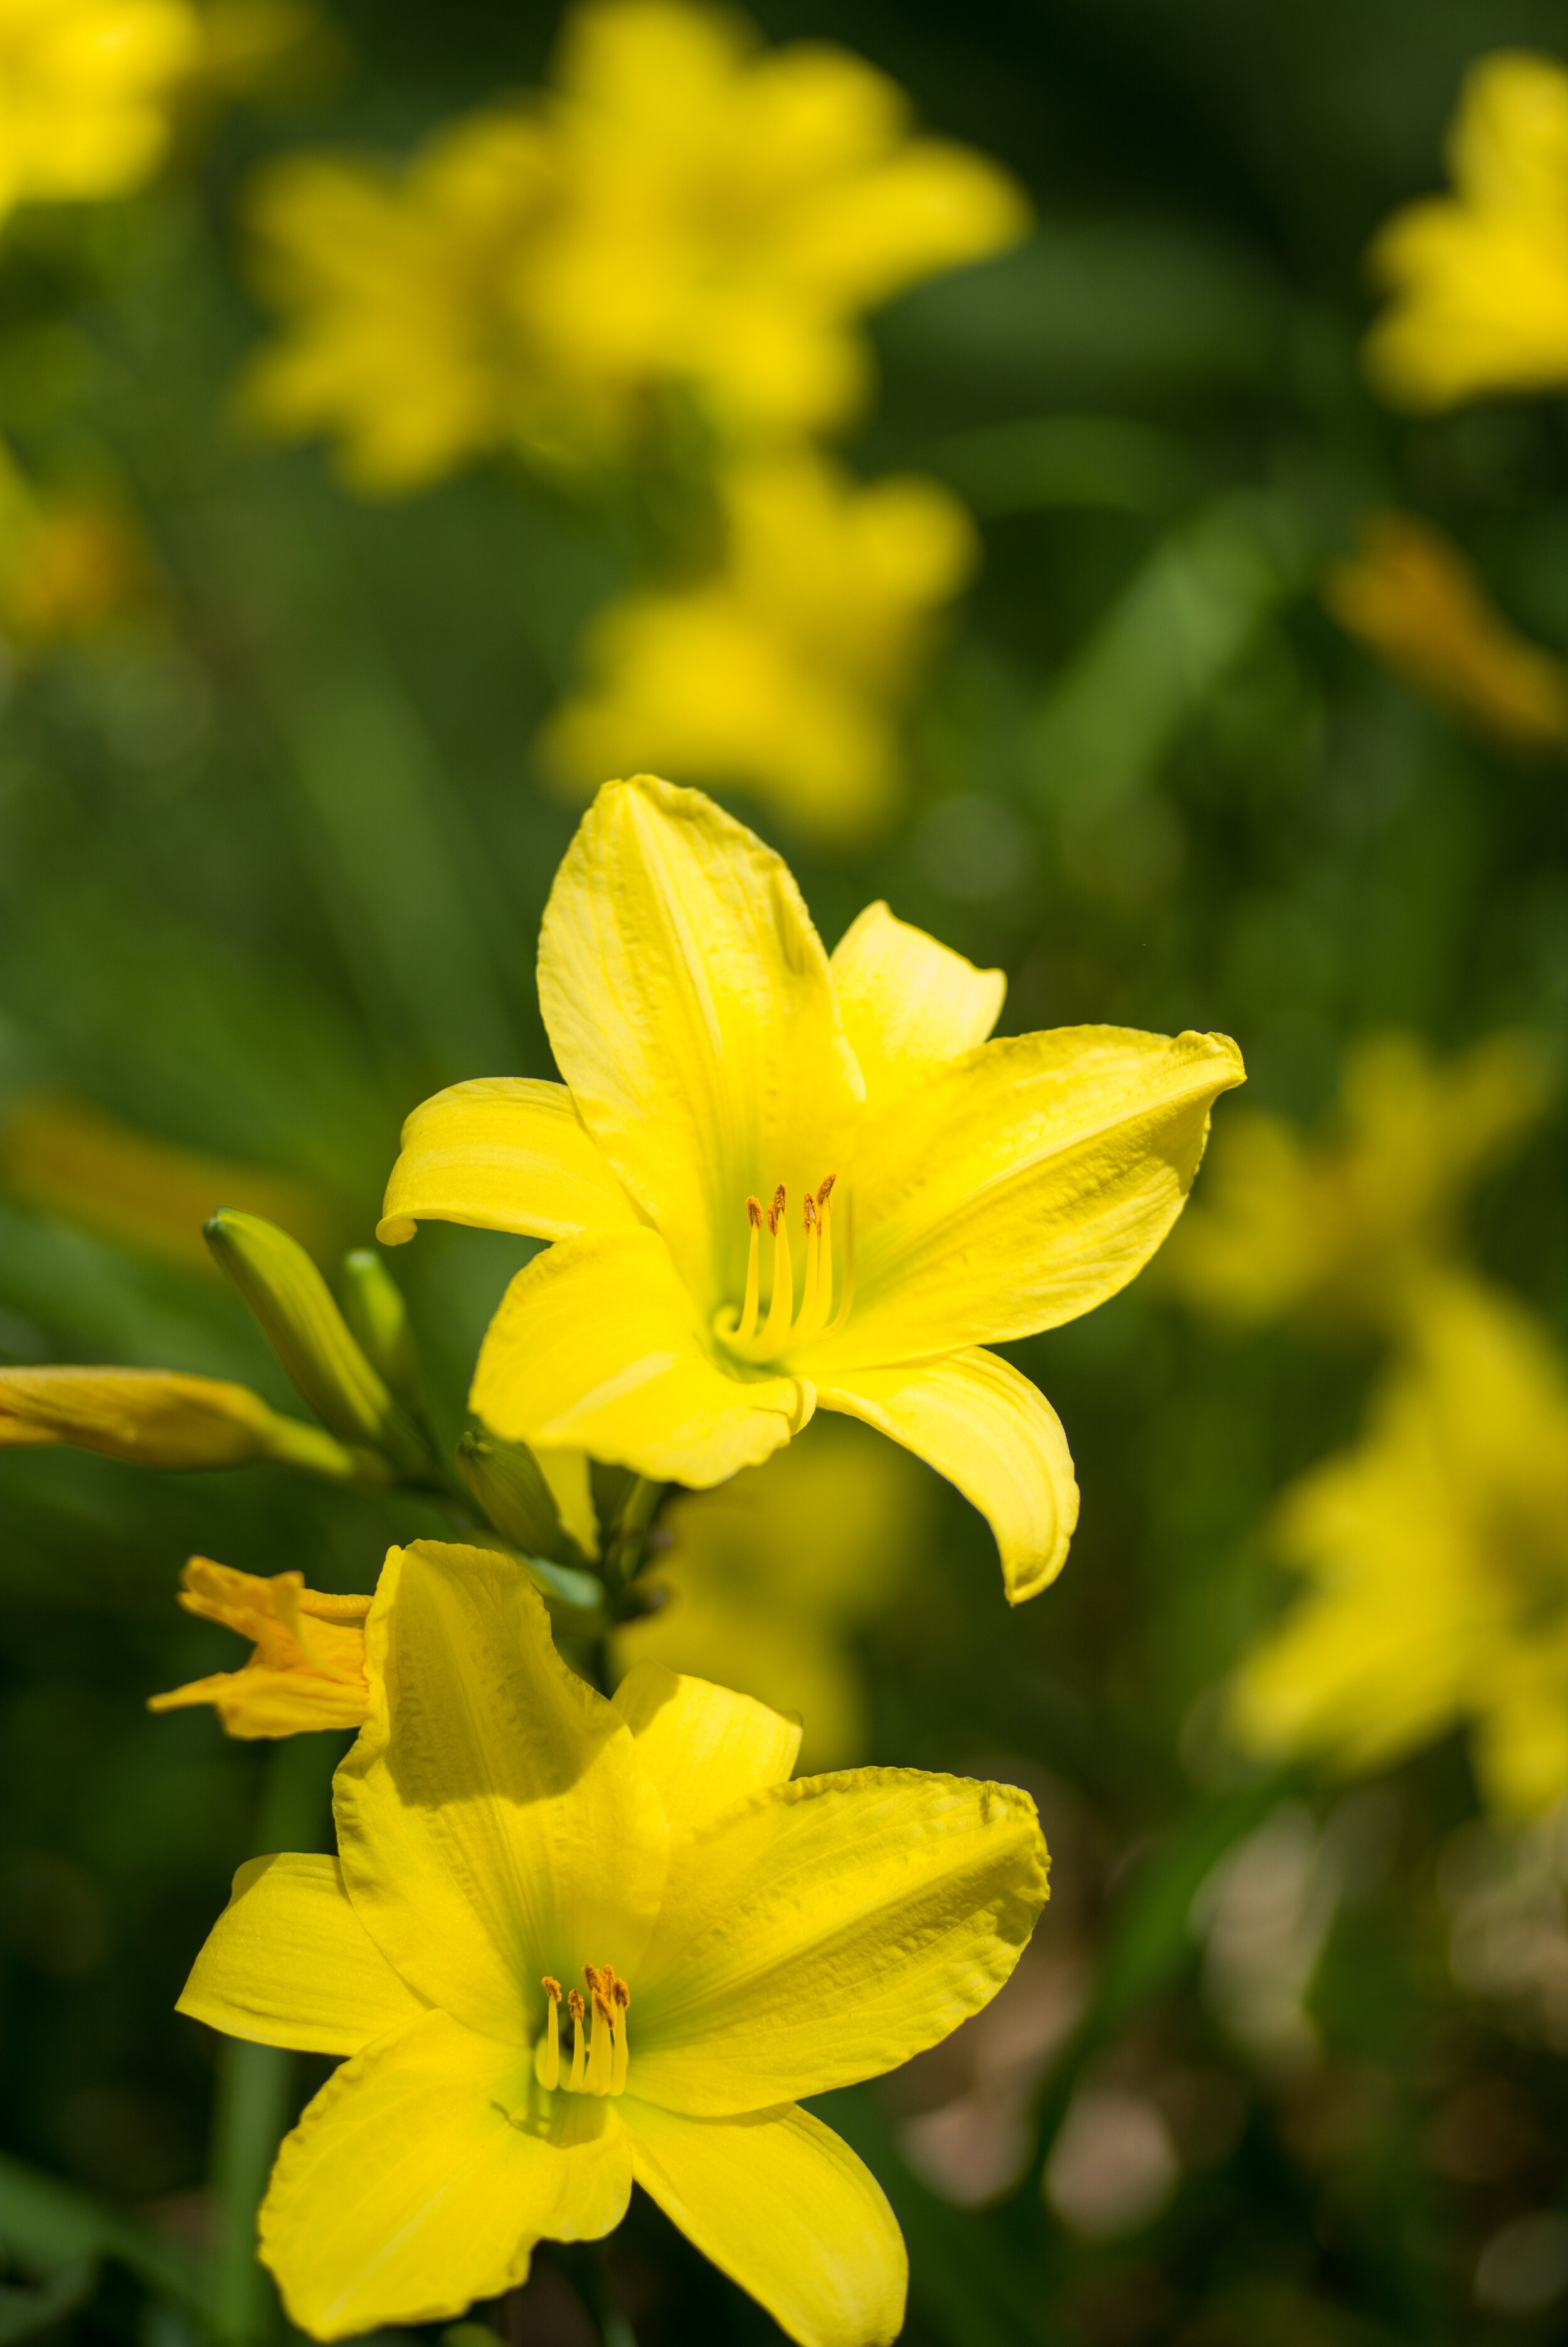
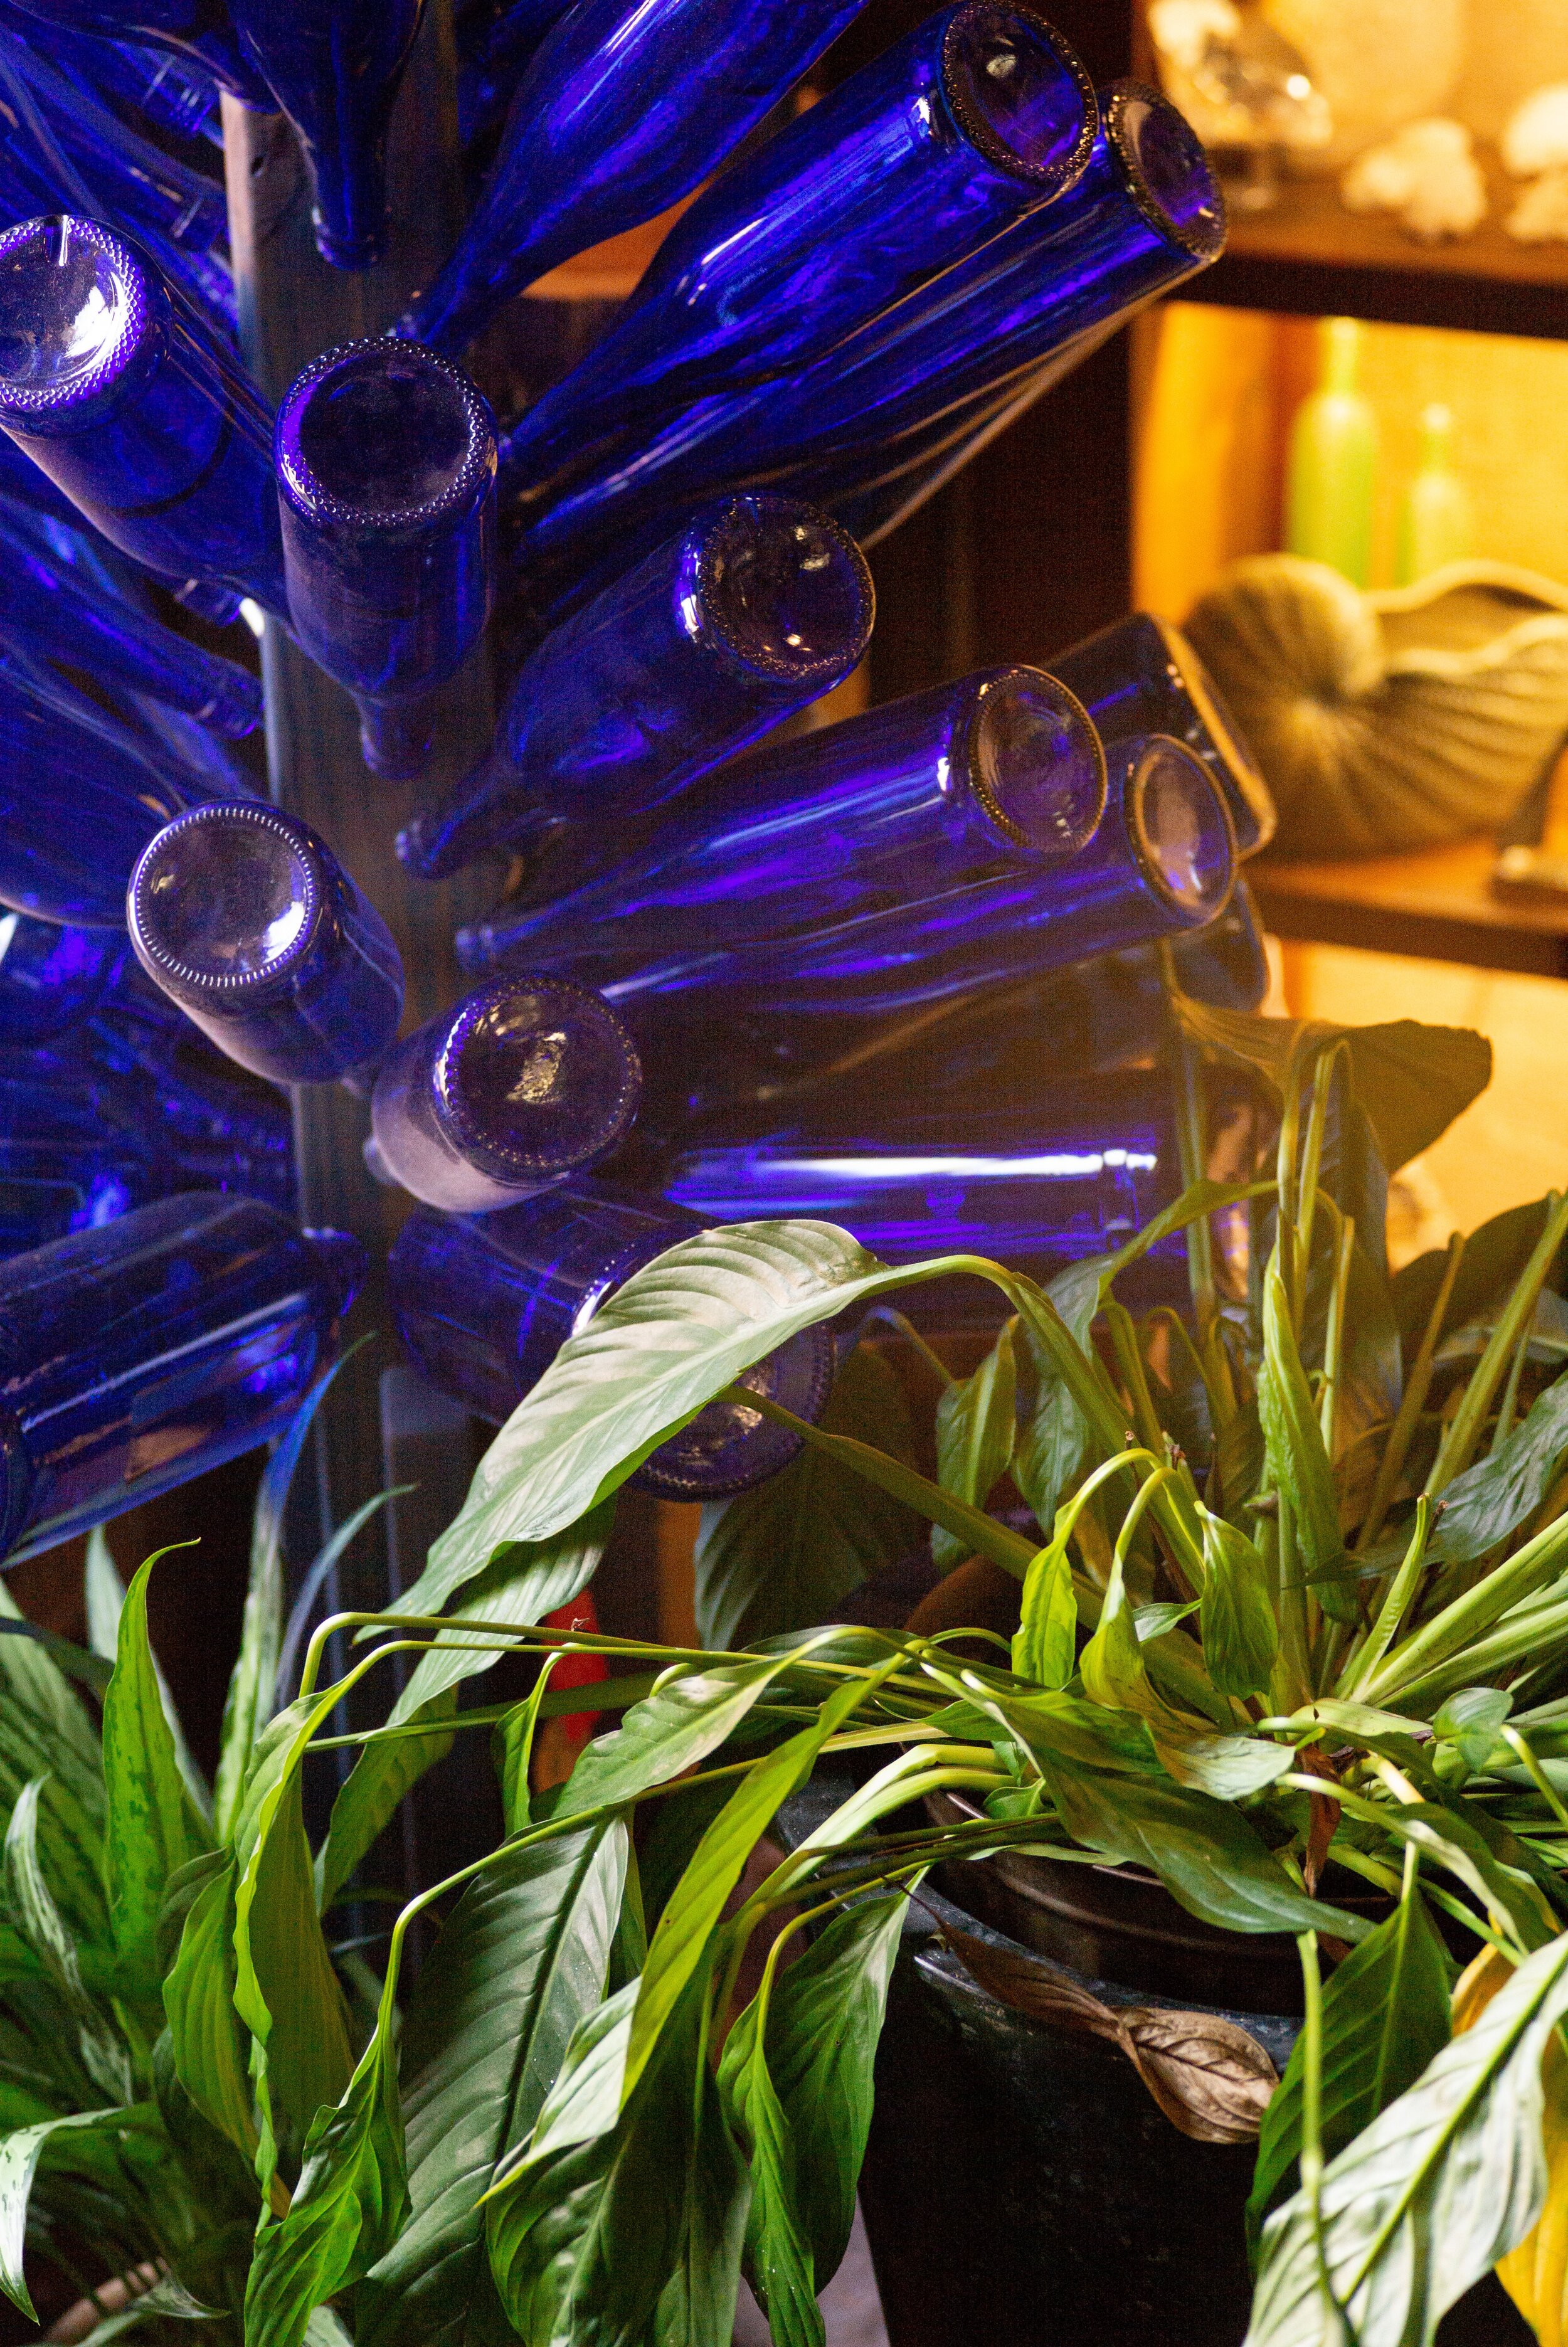
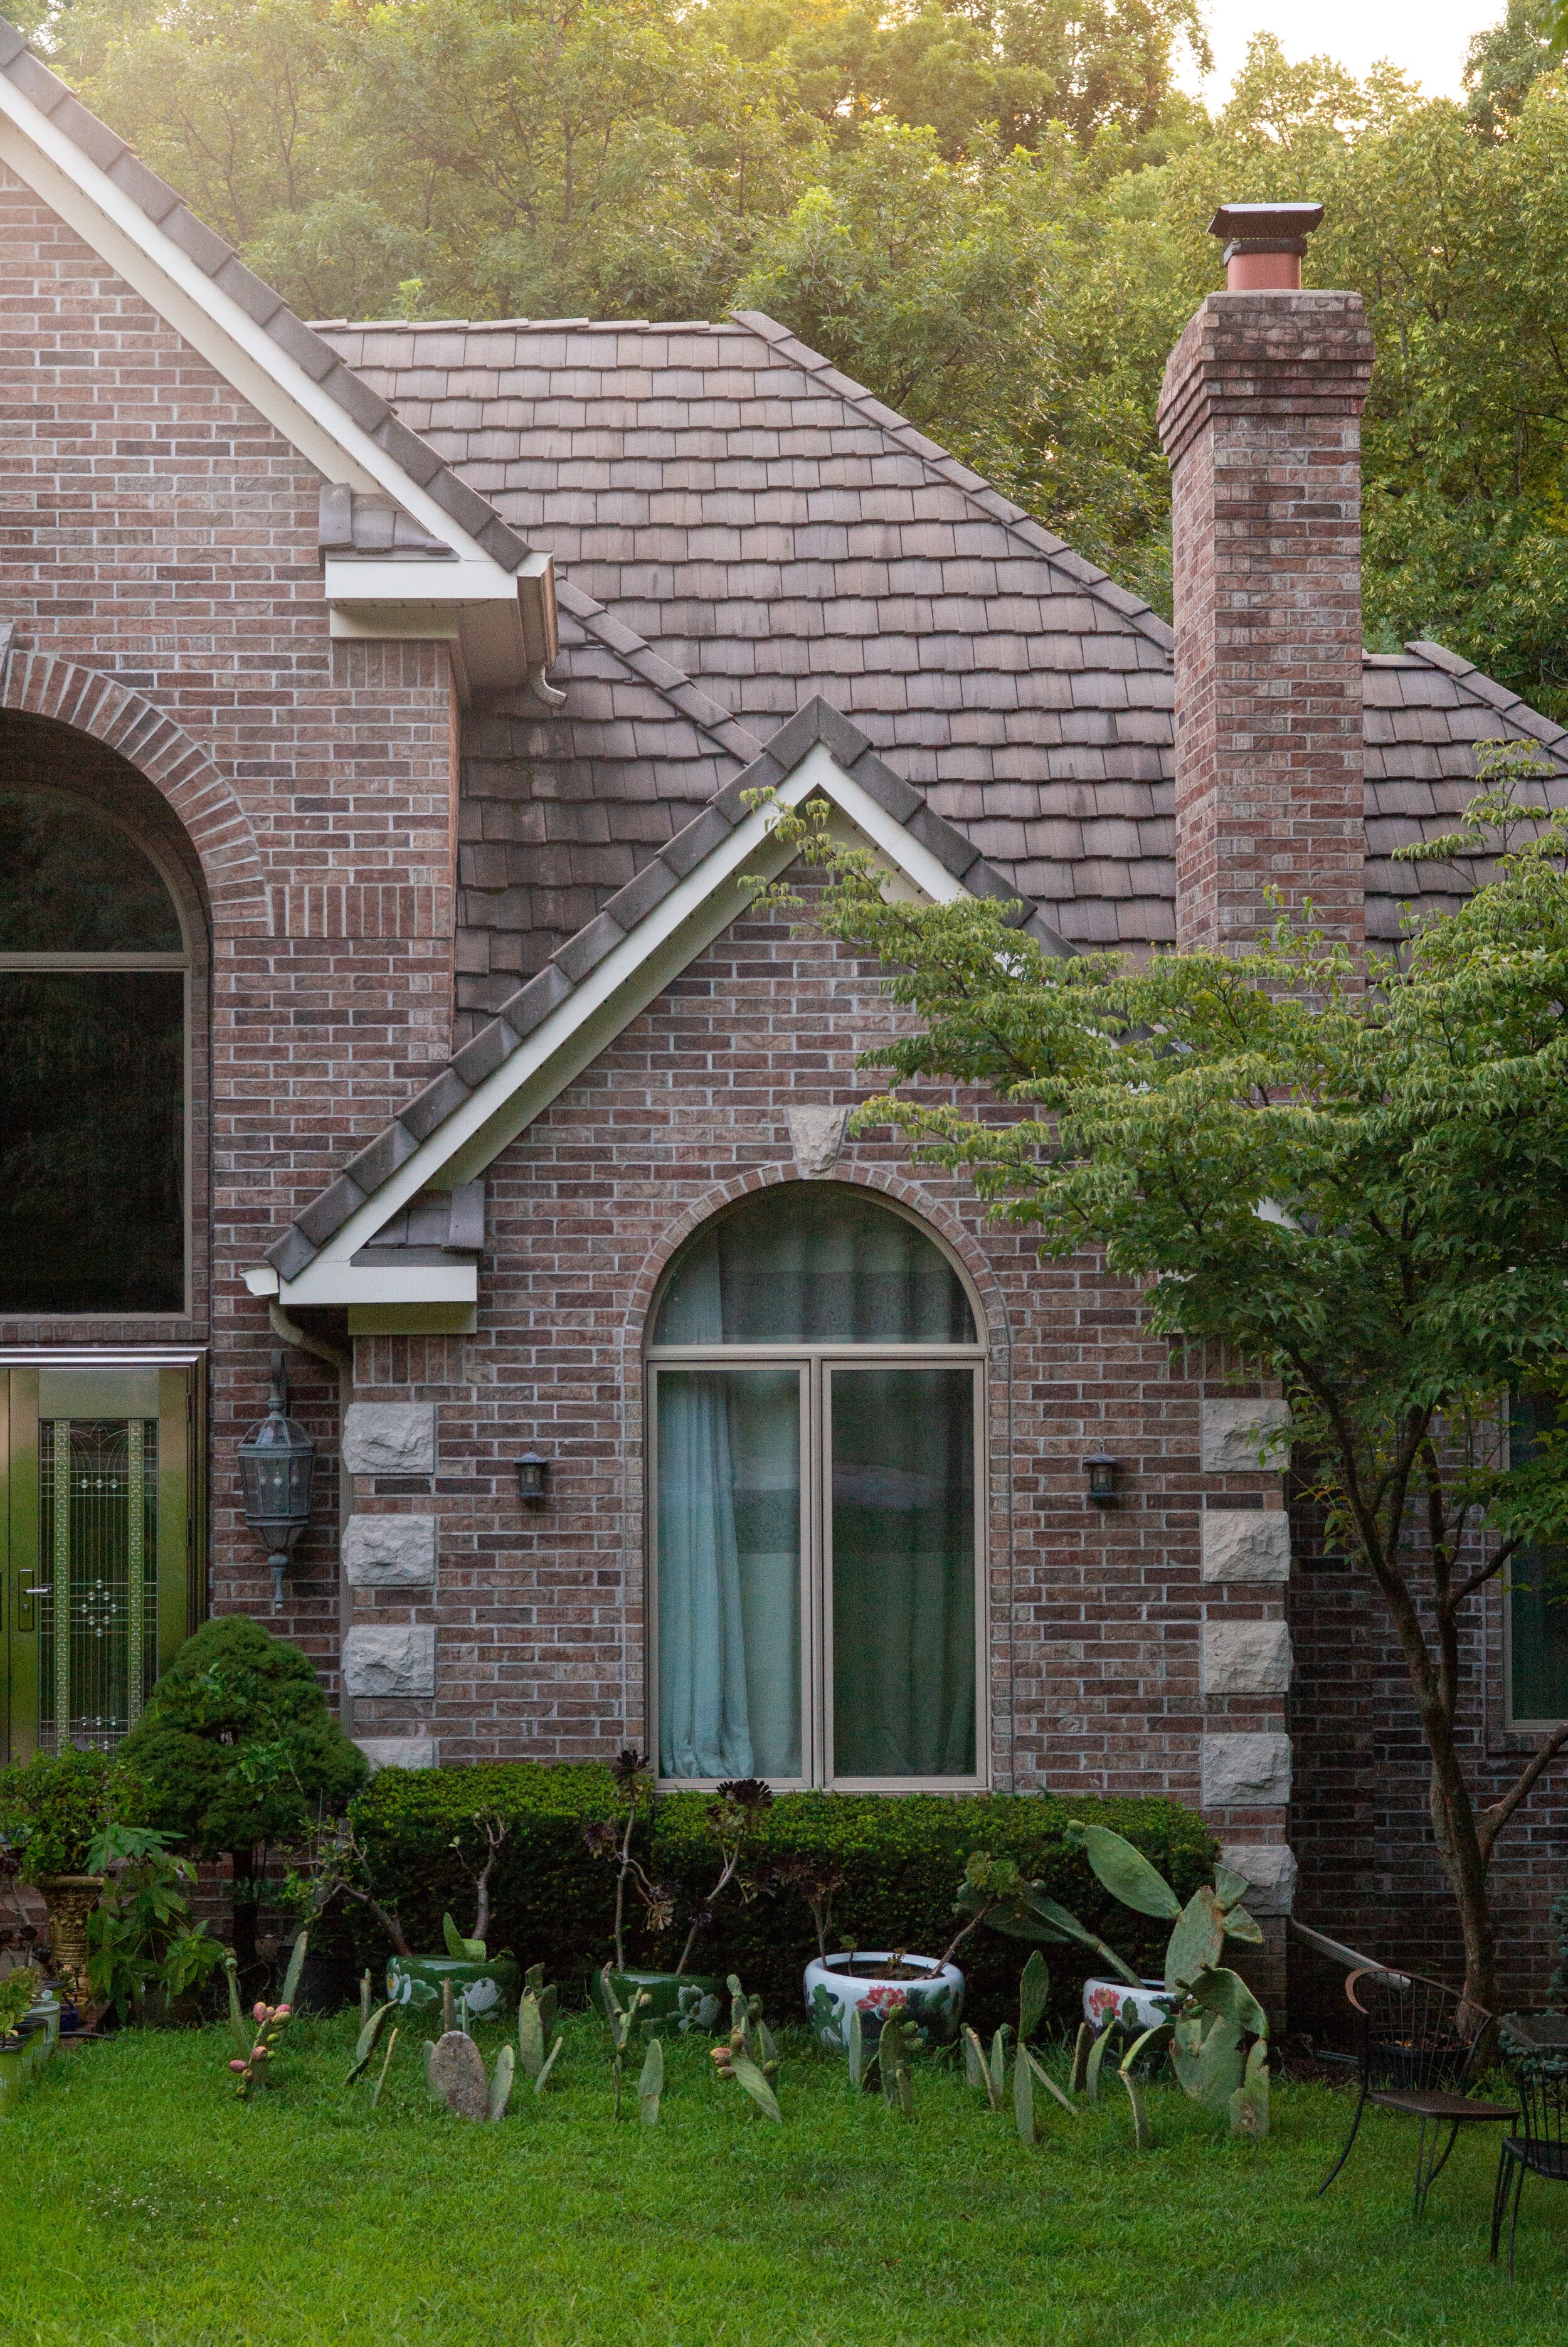
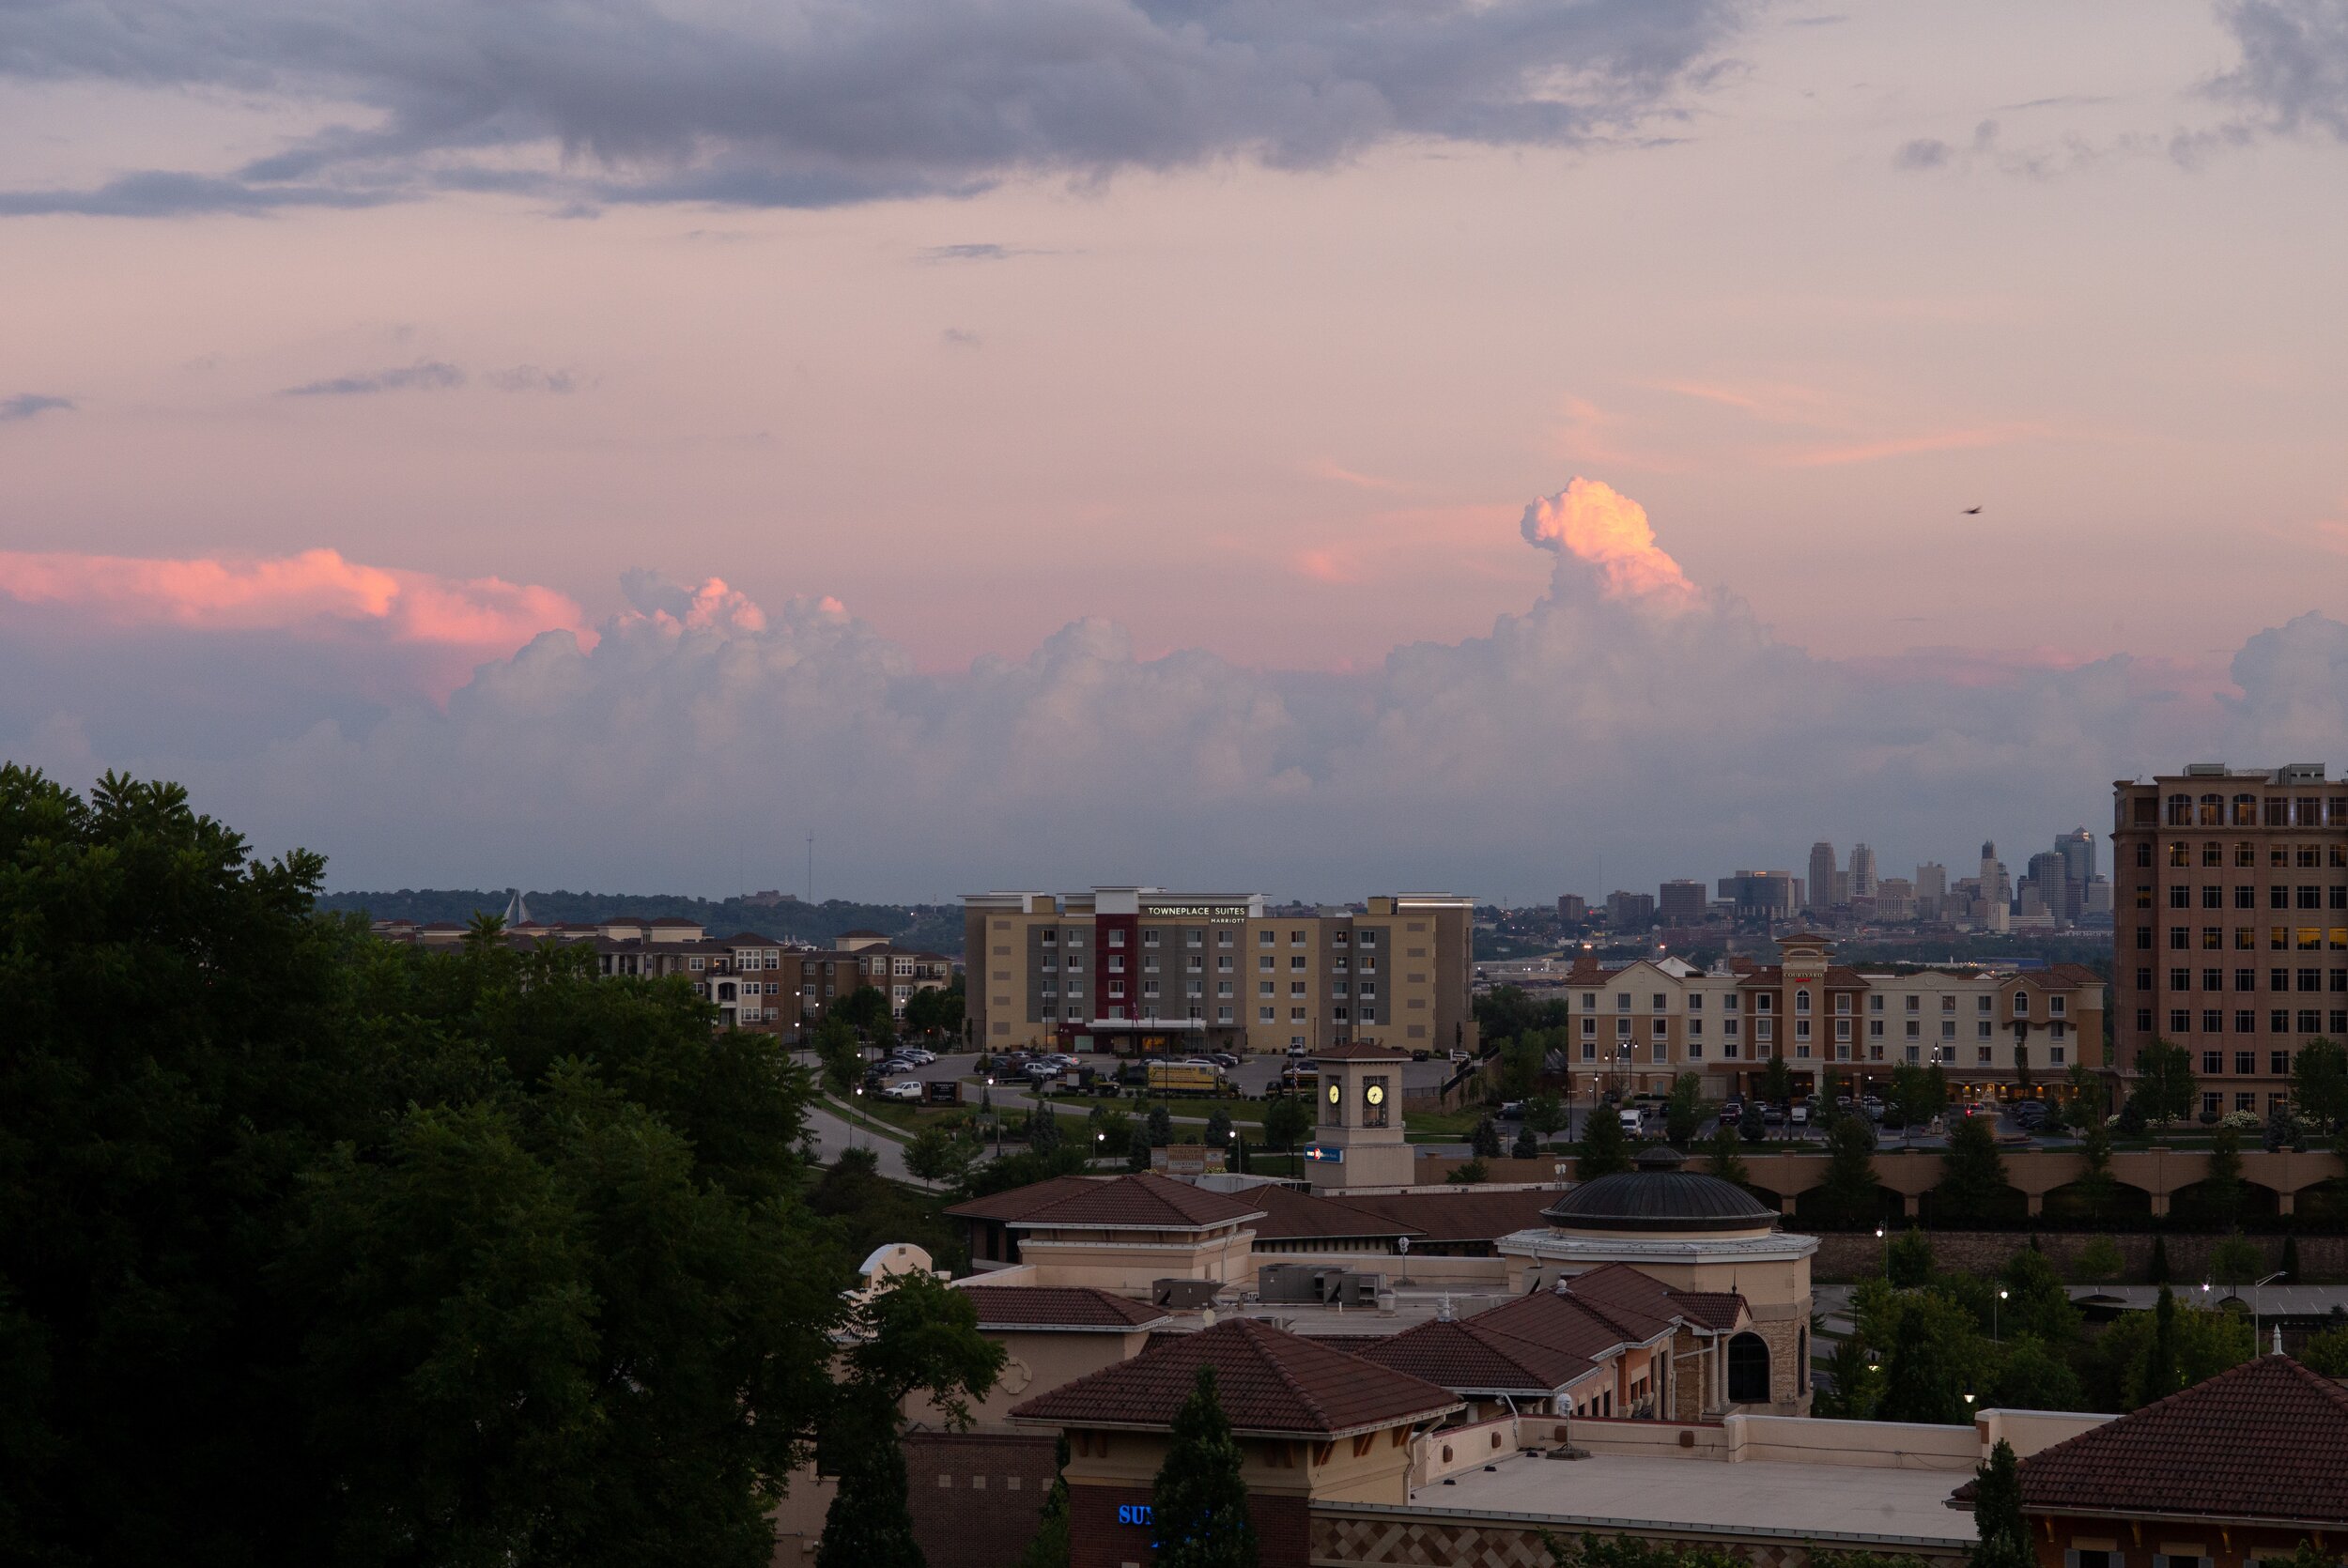
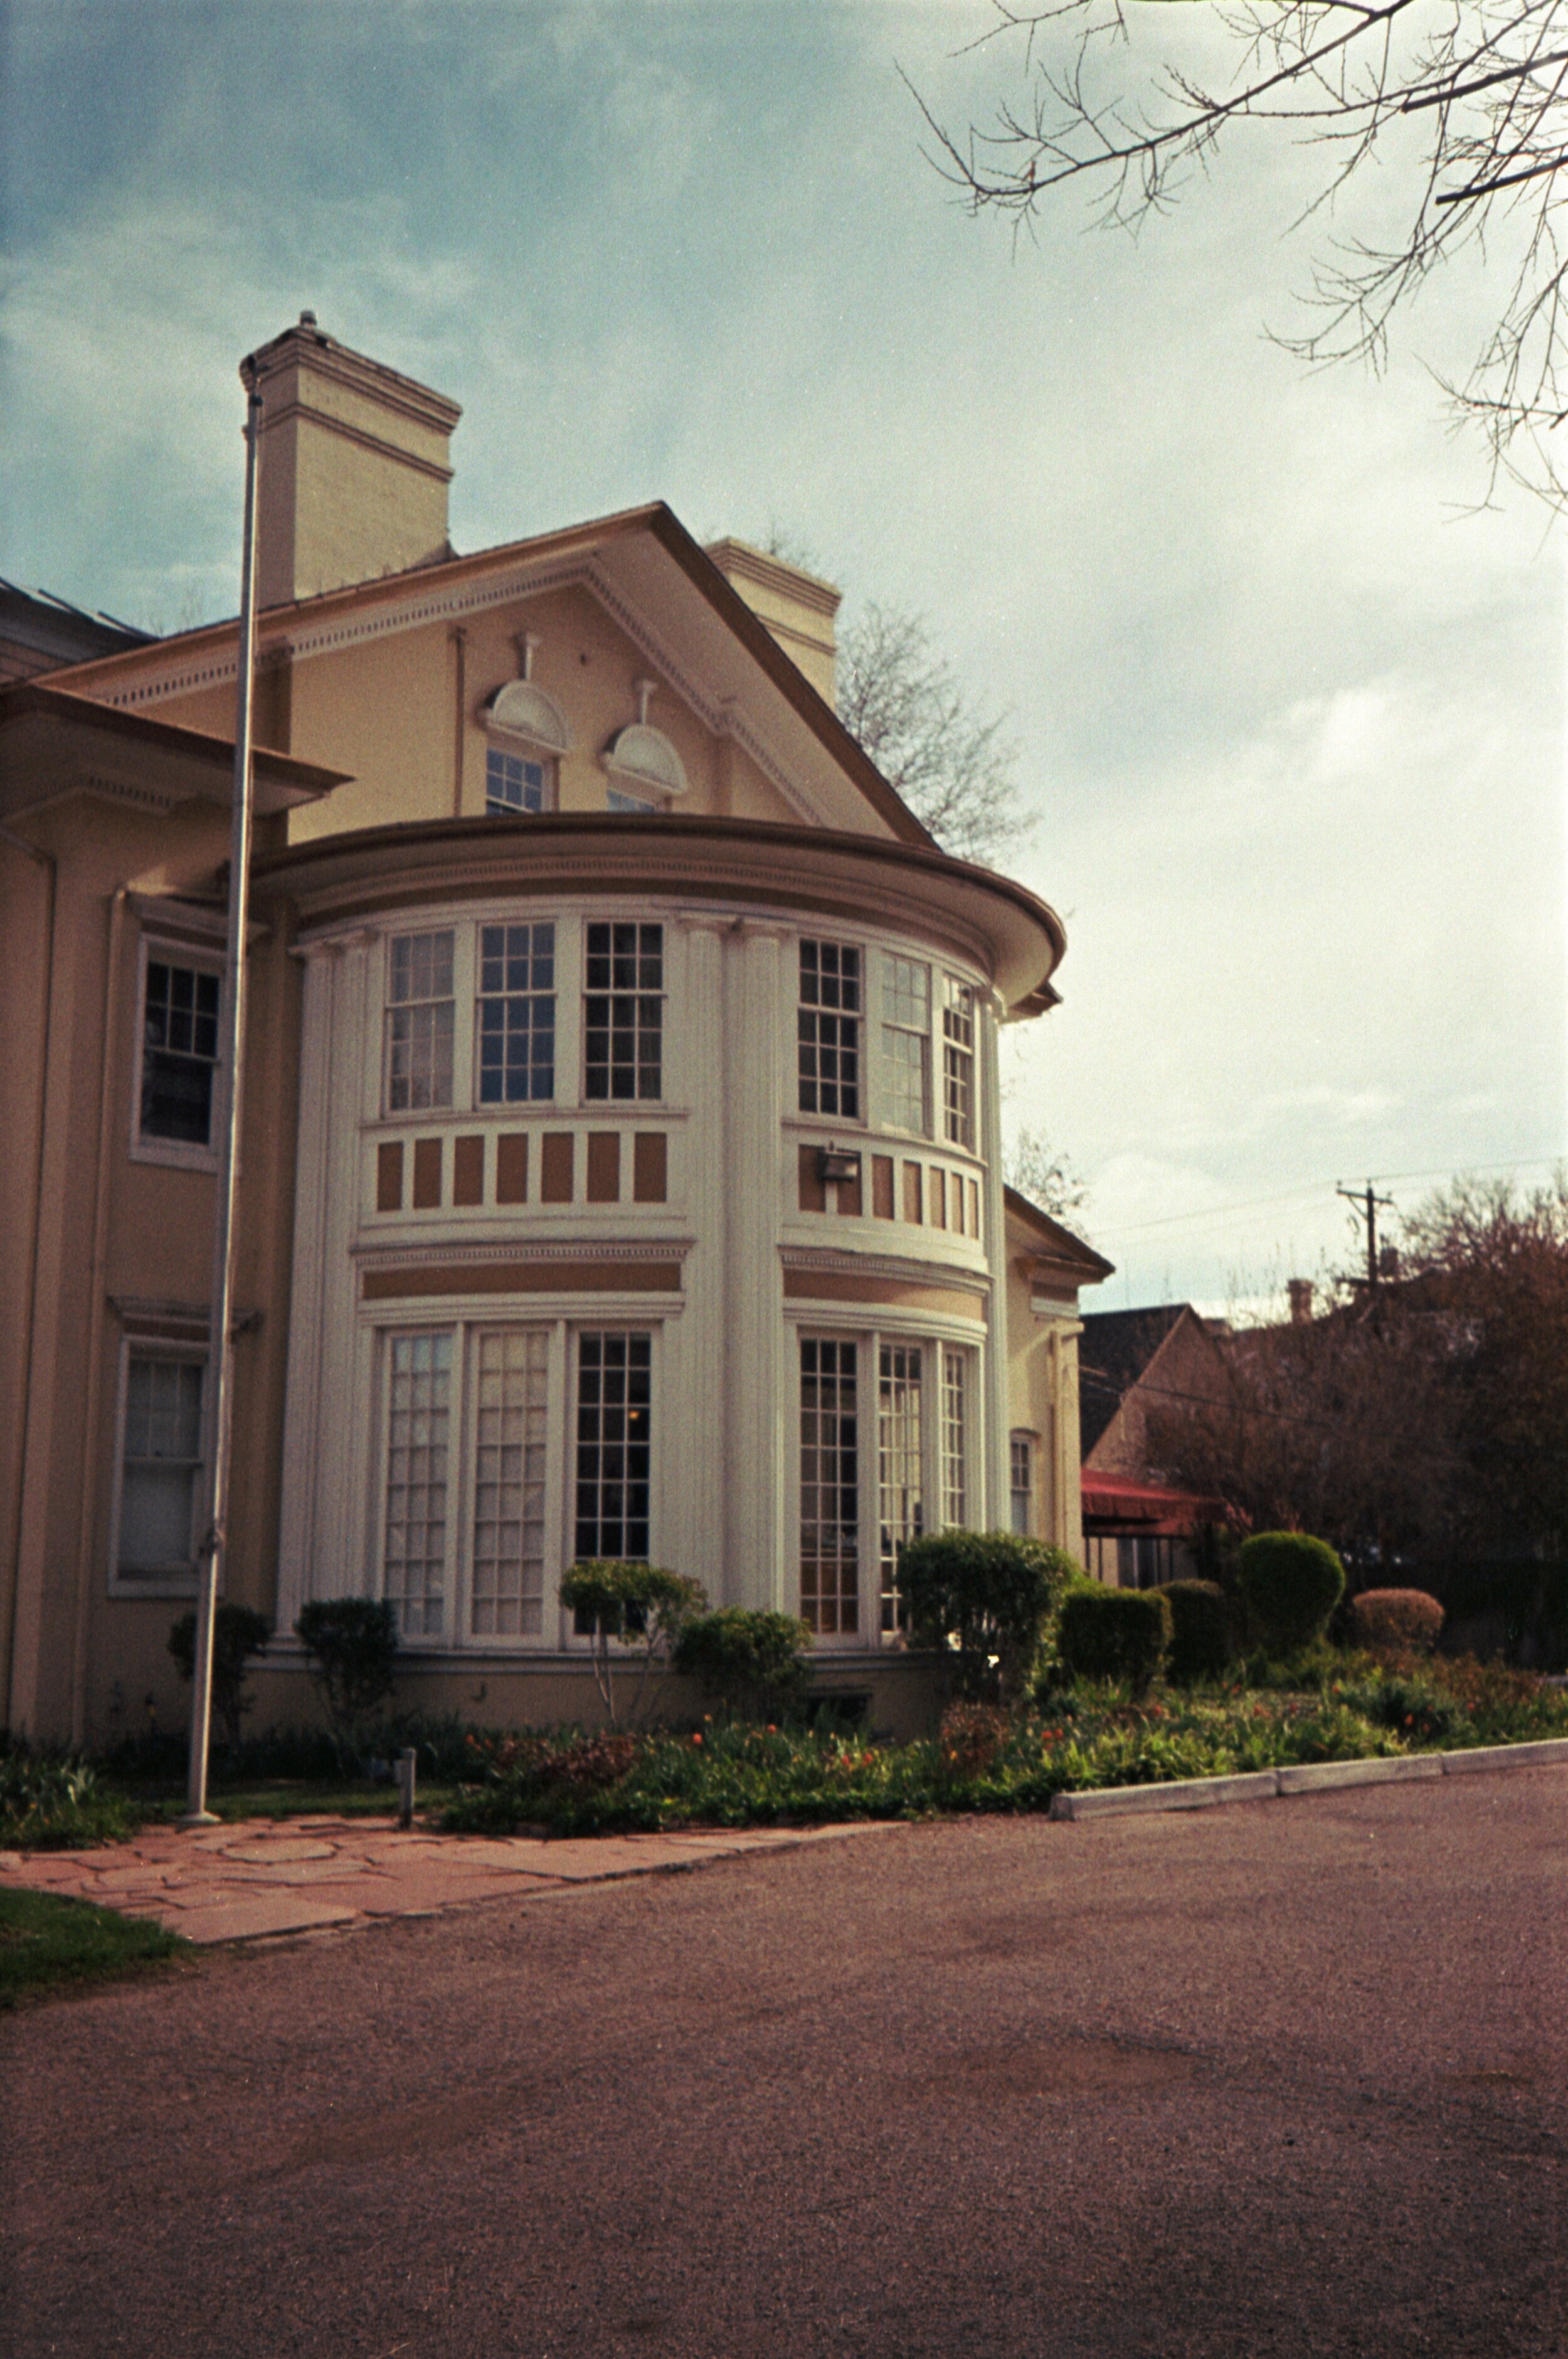
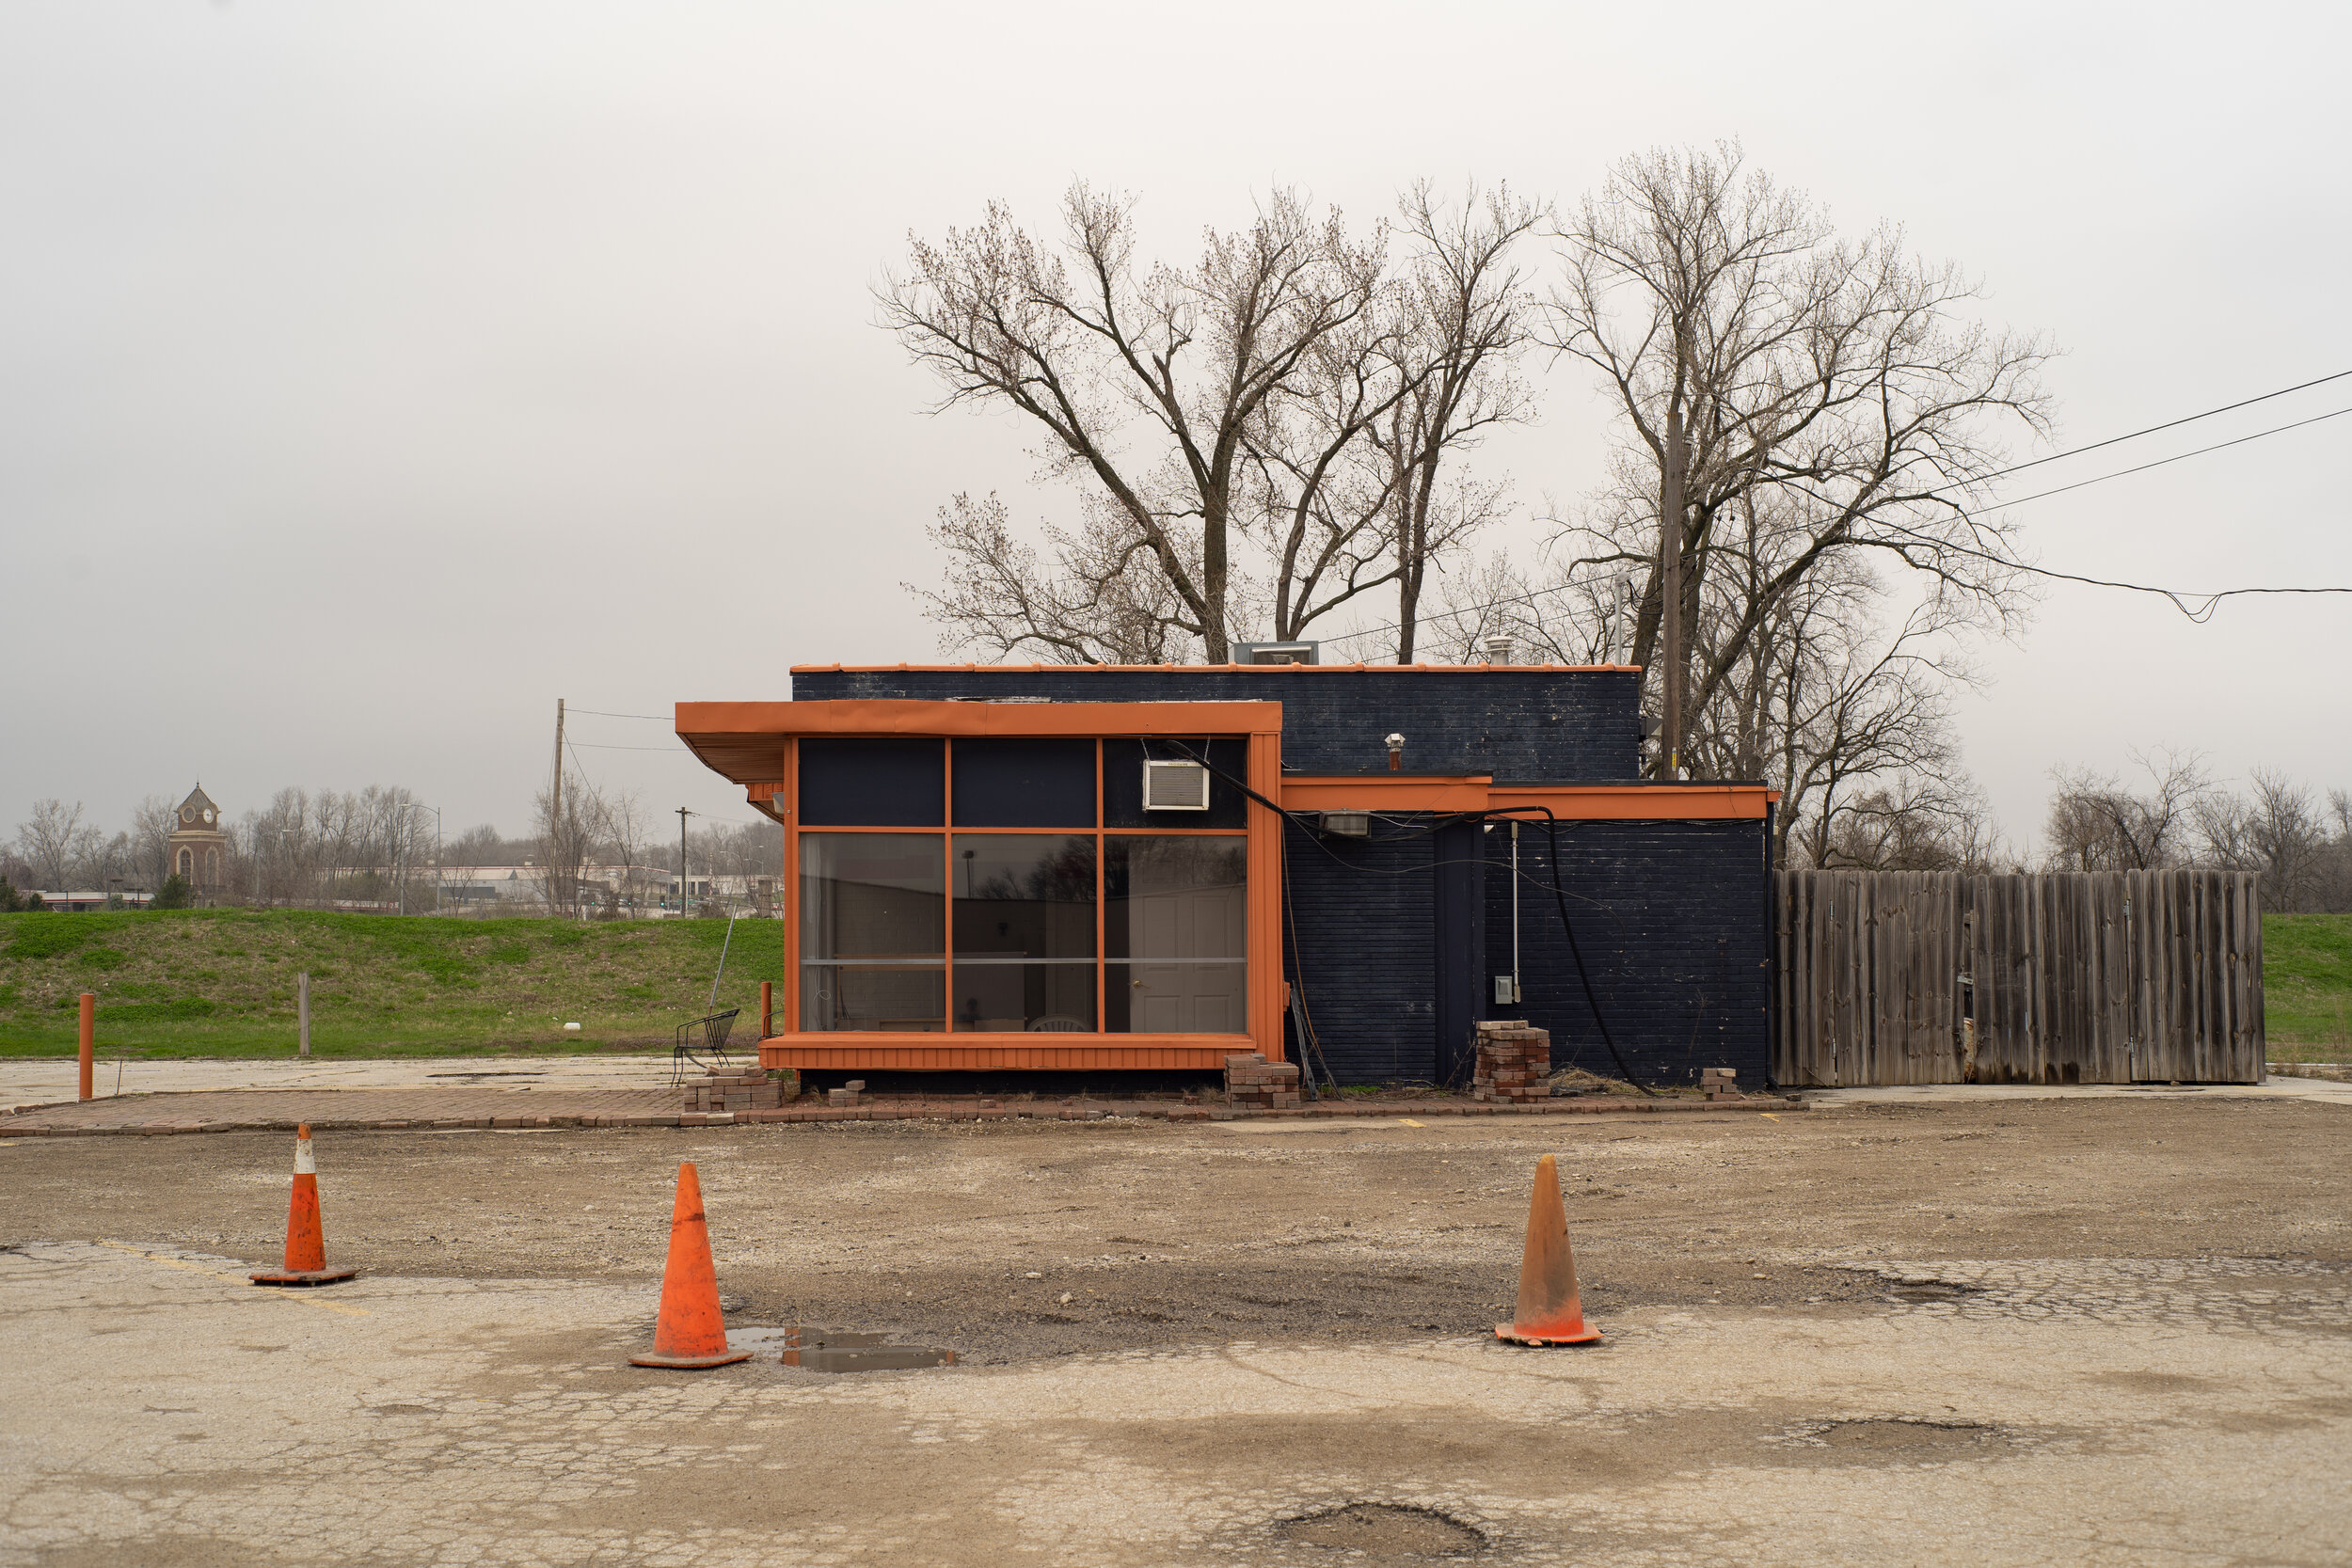
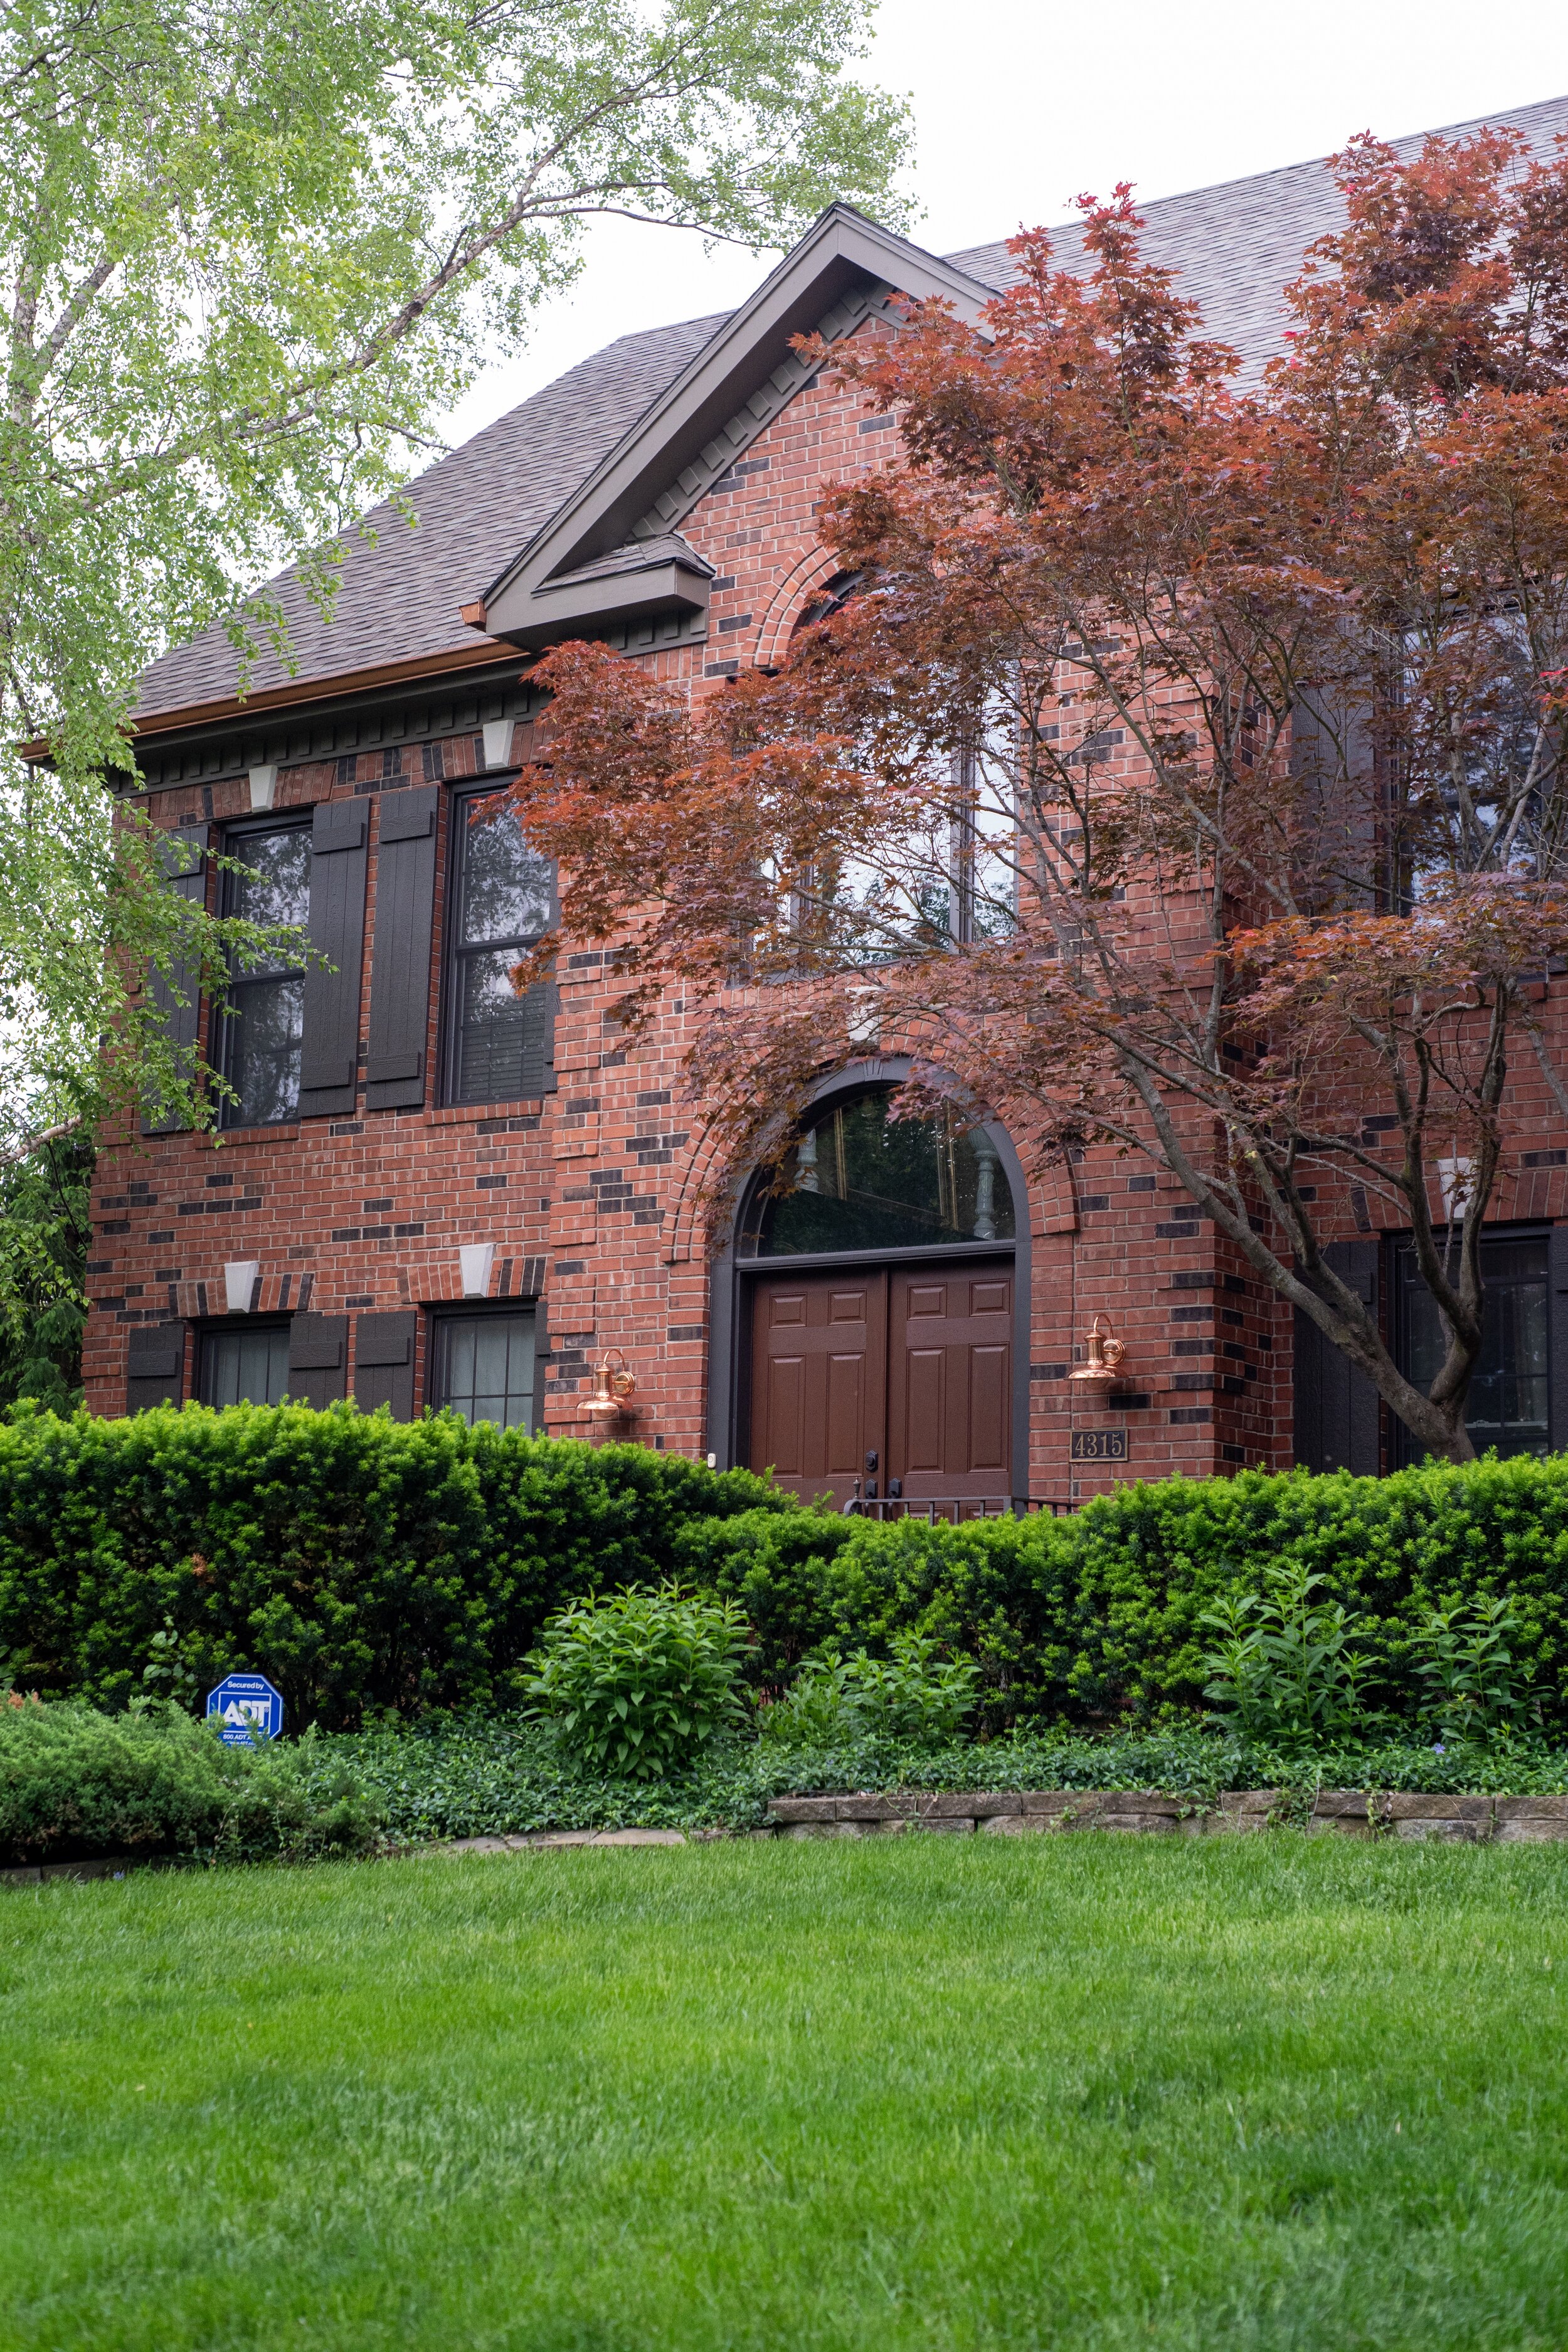
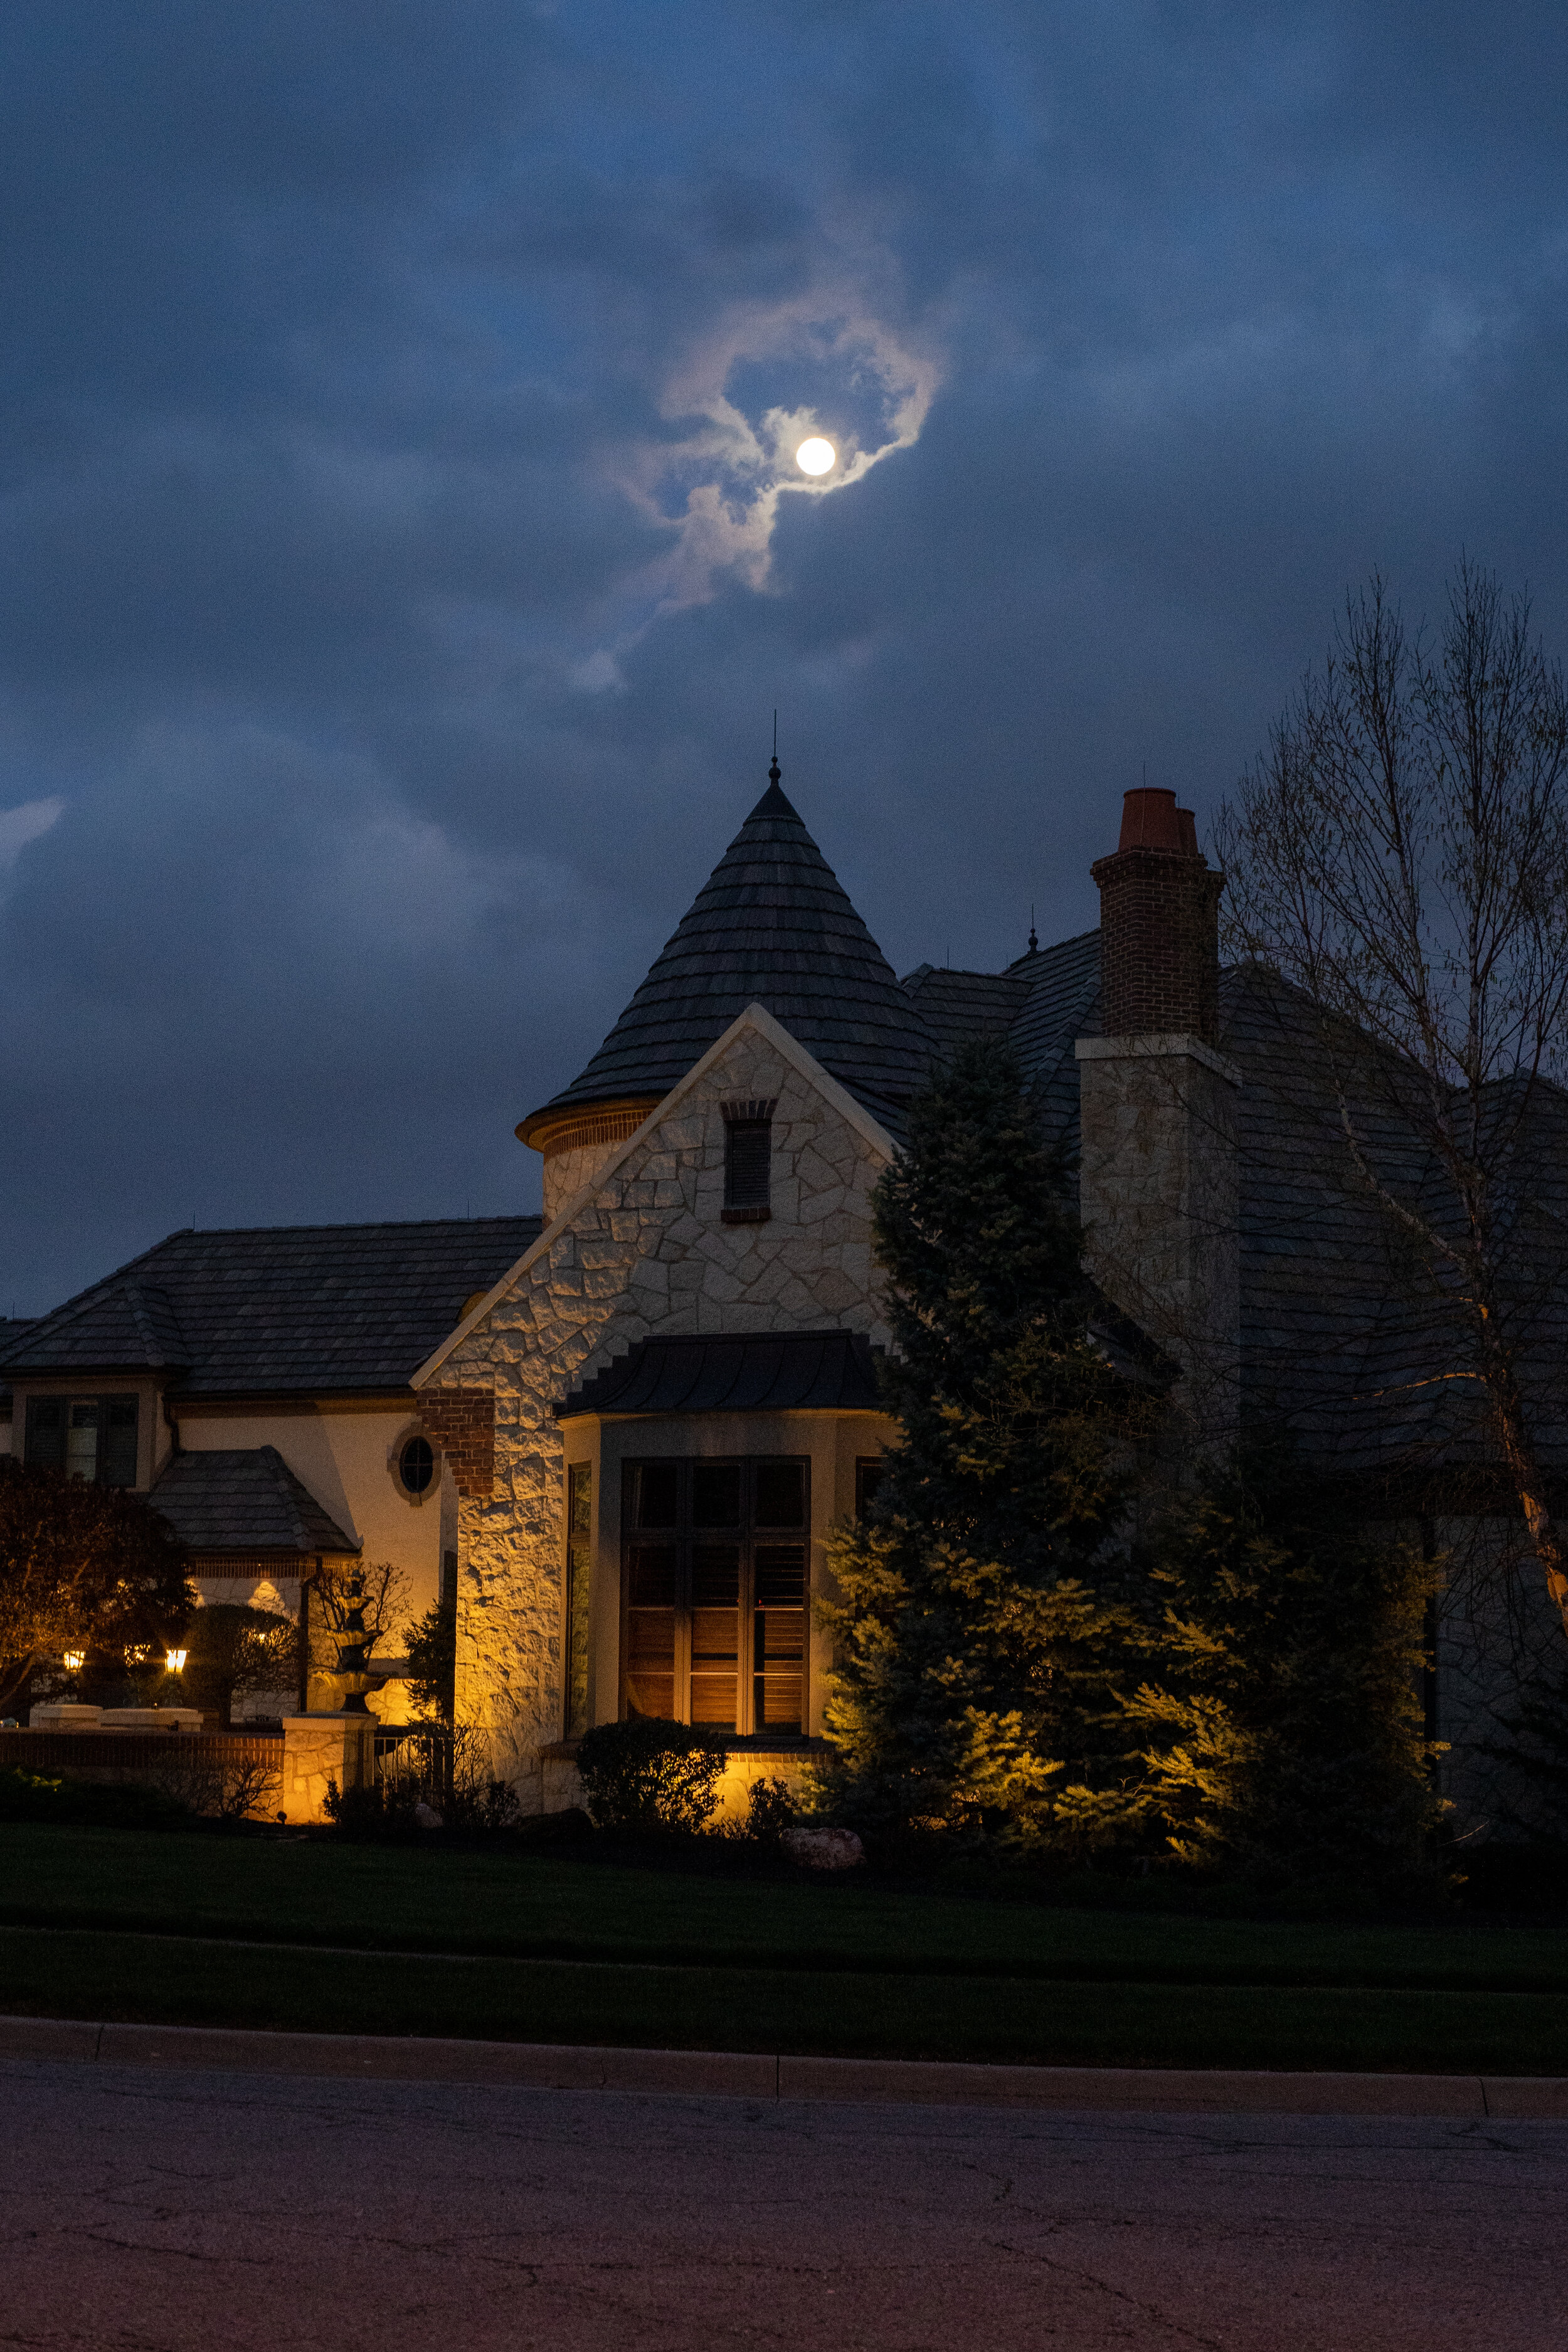
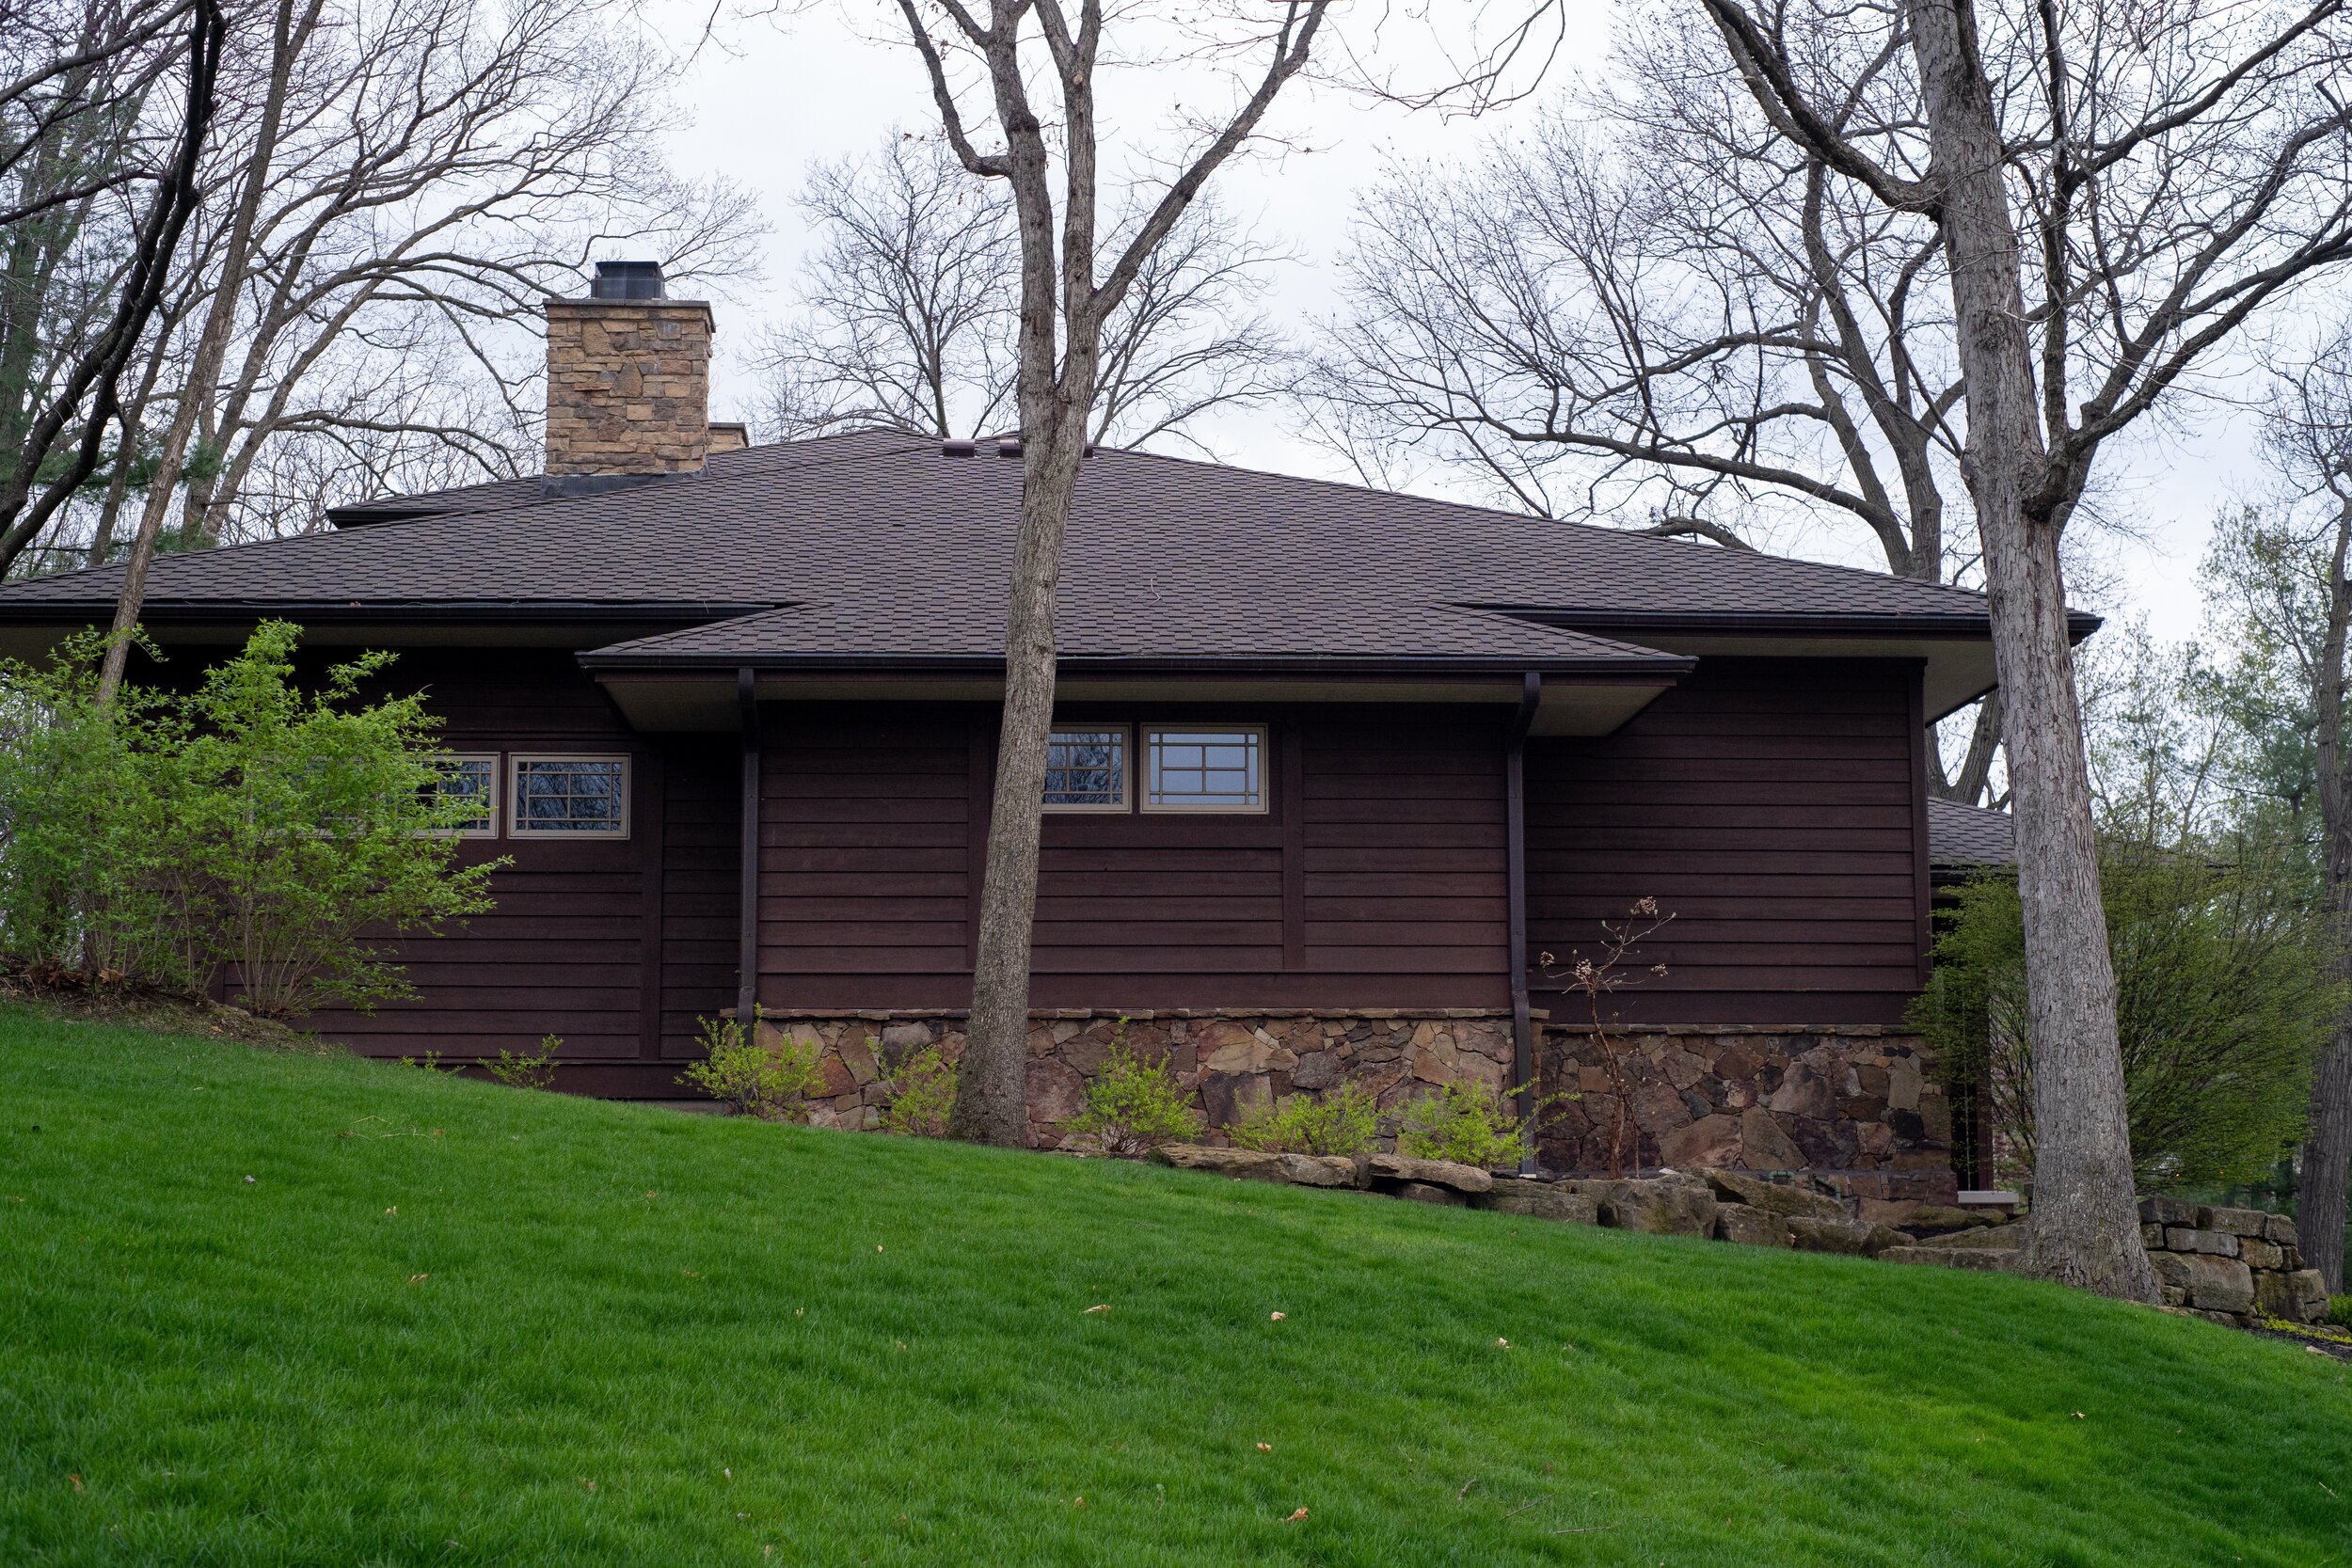
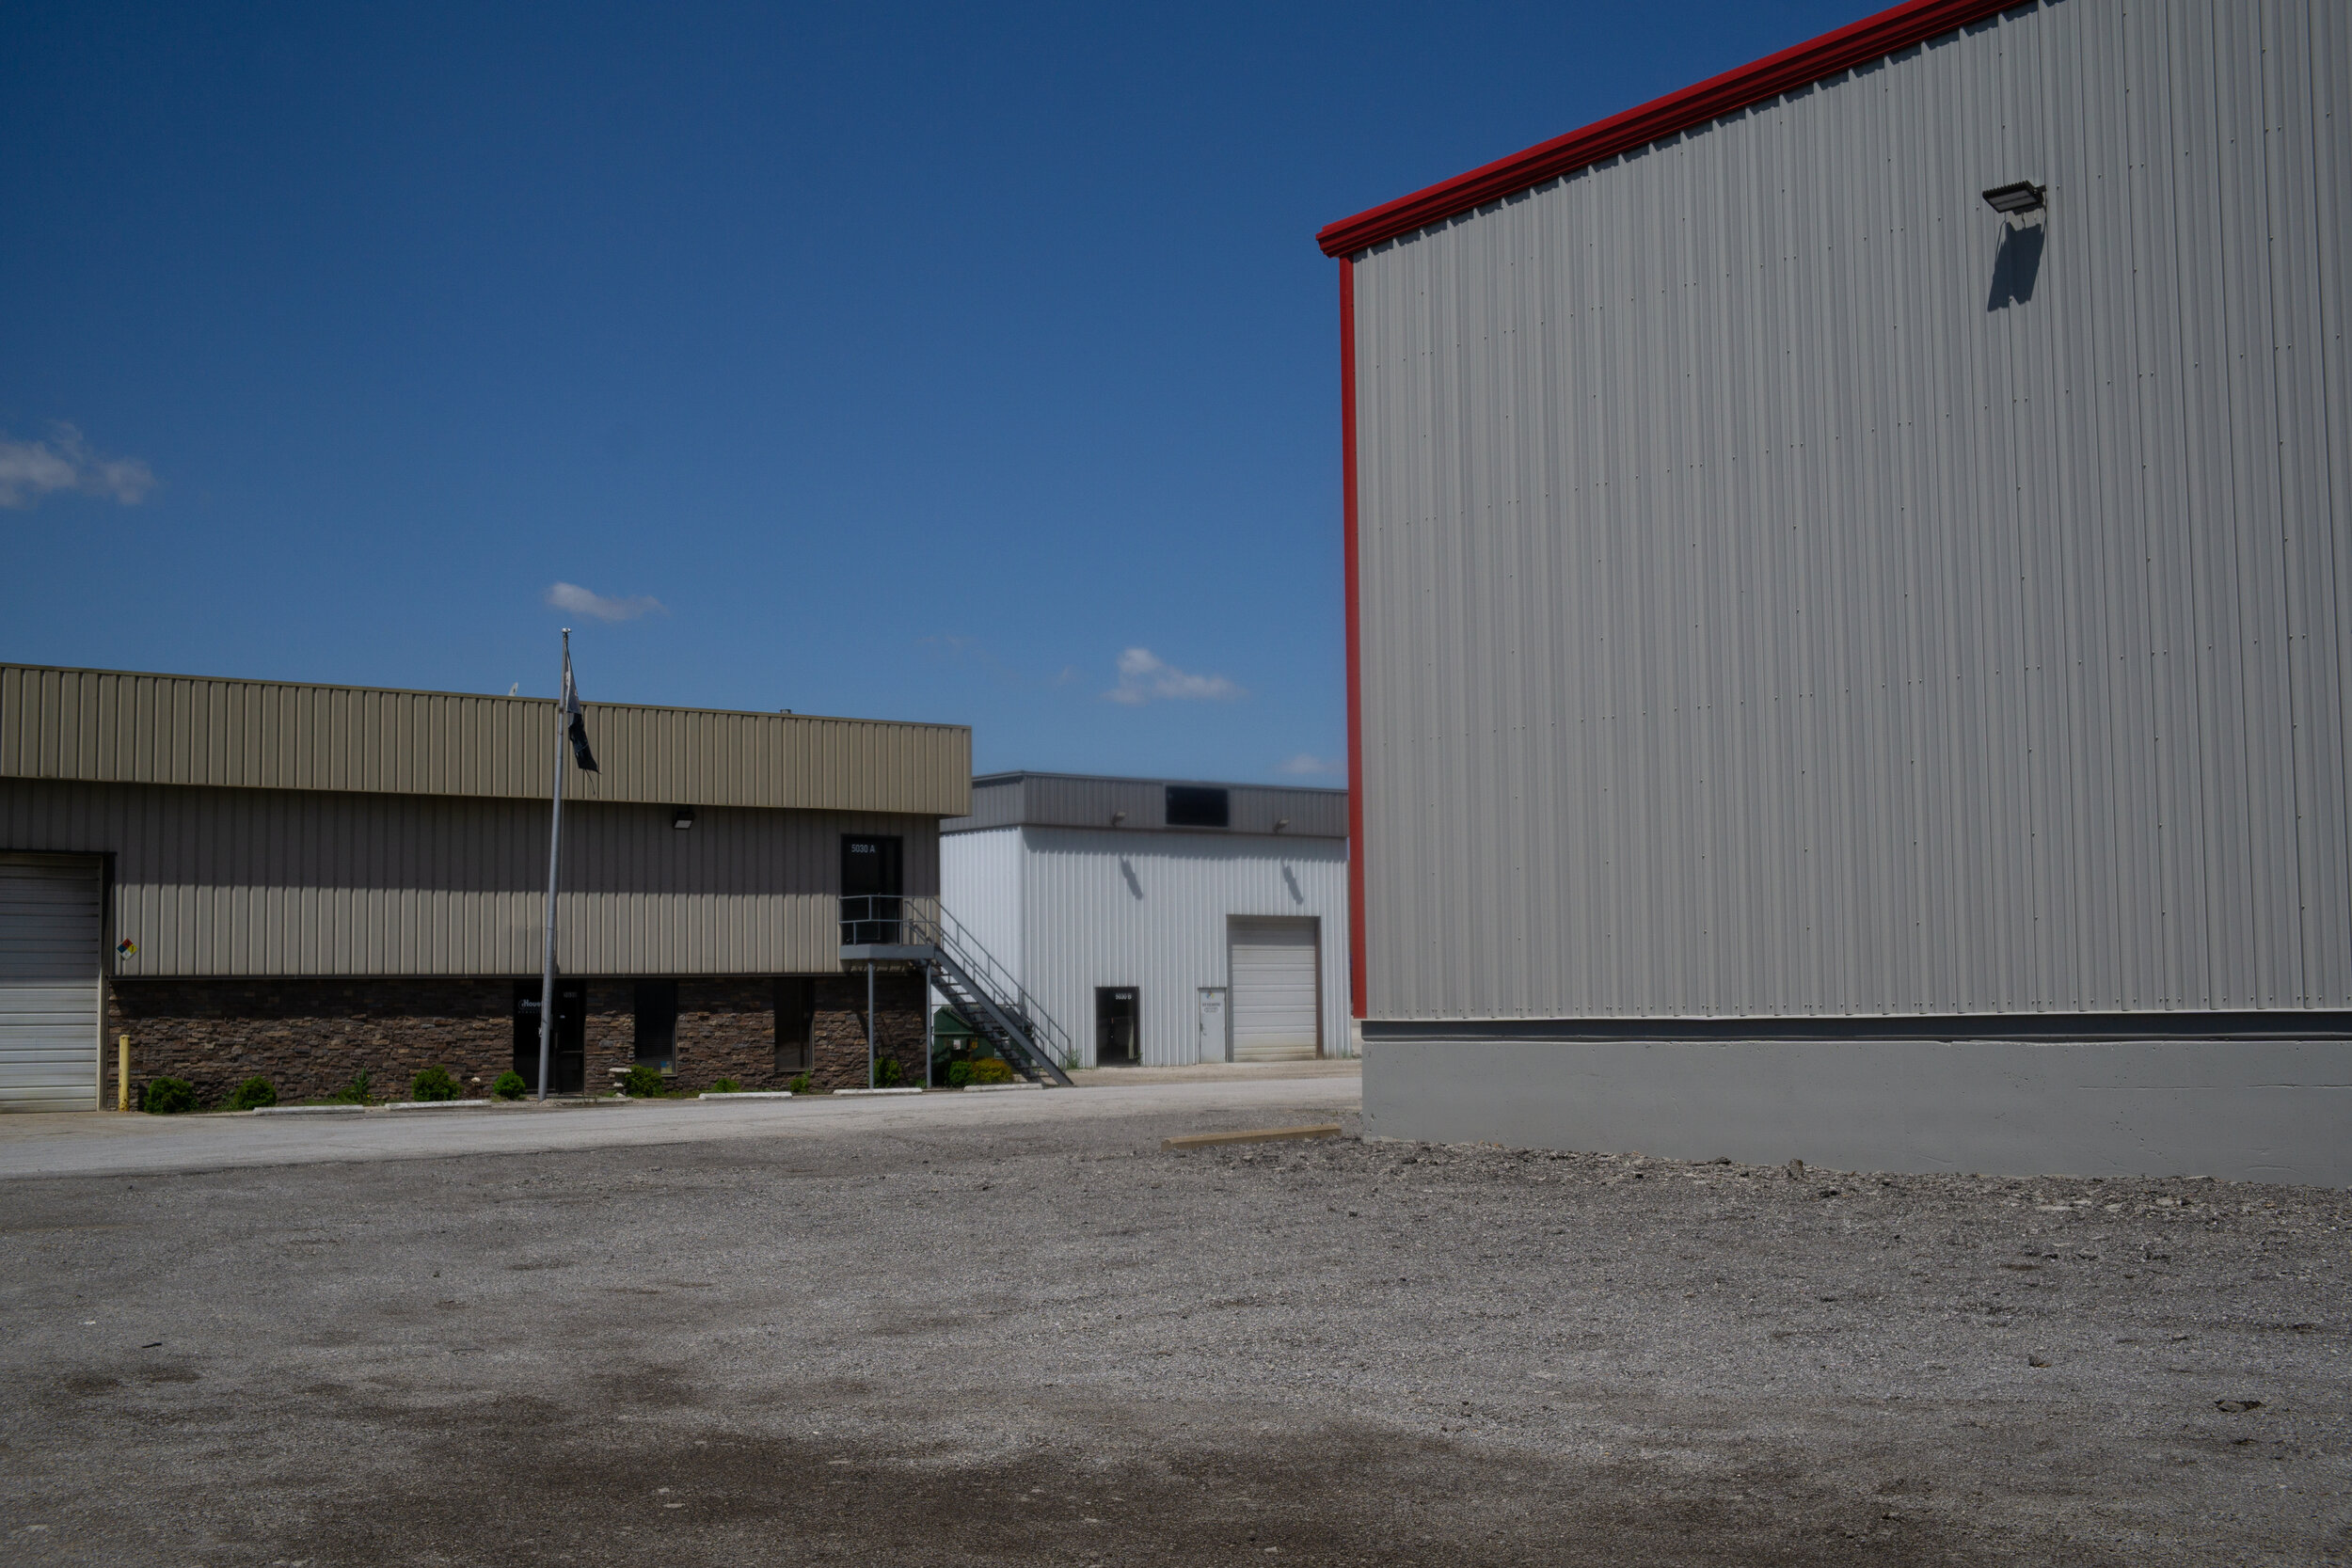
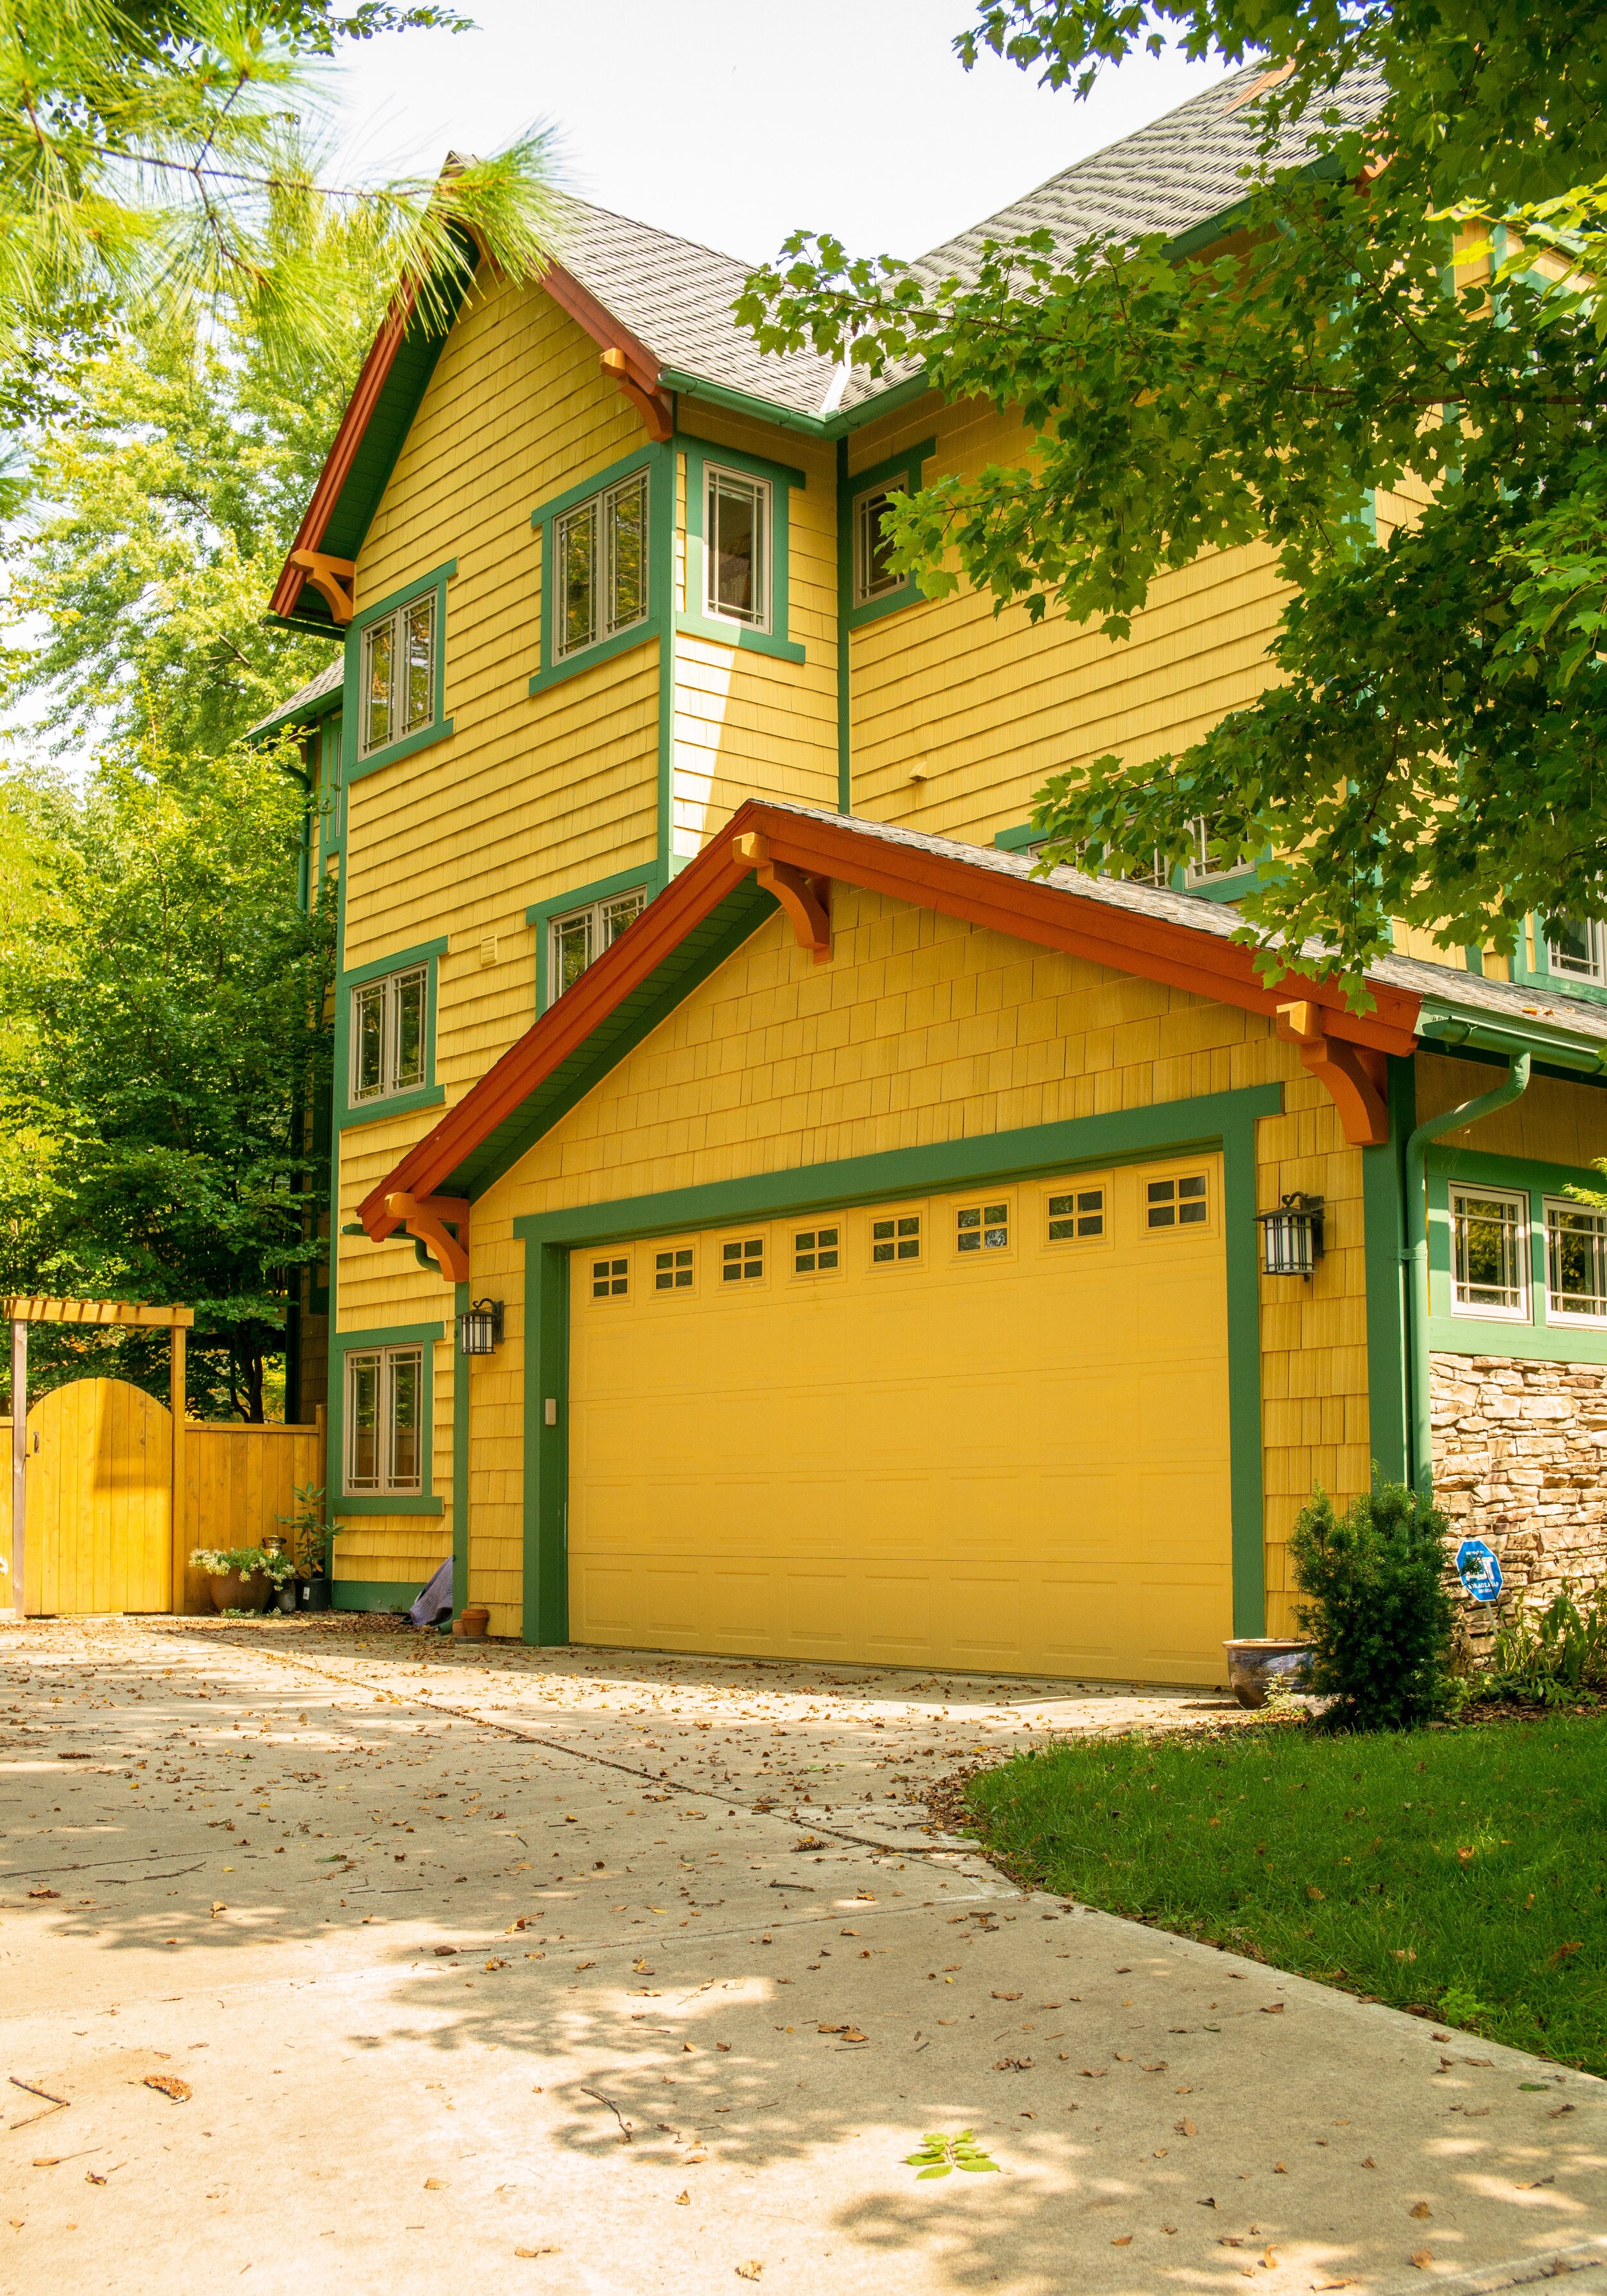
I absolutely love the colors and contrast that this lens produced while shooting on the M 240. I didn’t notice any focus shift during my use, always a plus for us Leica users. When shooting at f/1.4-f/2.8, I noticed some chromatic aberration and color fringing. I also noticed some distortion when shooting towards buildings or straight lines. This can easily be corrected in Lightroom. I also noticed flare when I was shooting towards the sun.

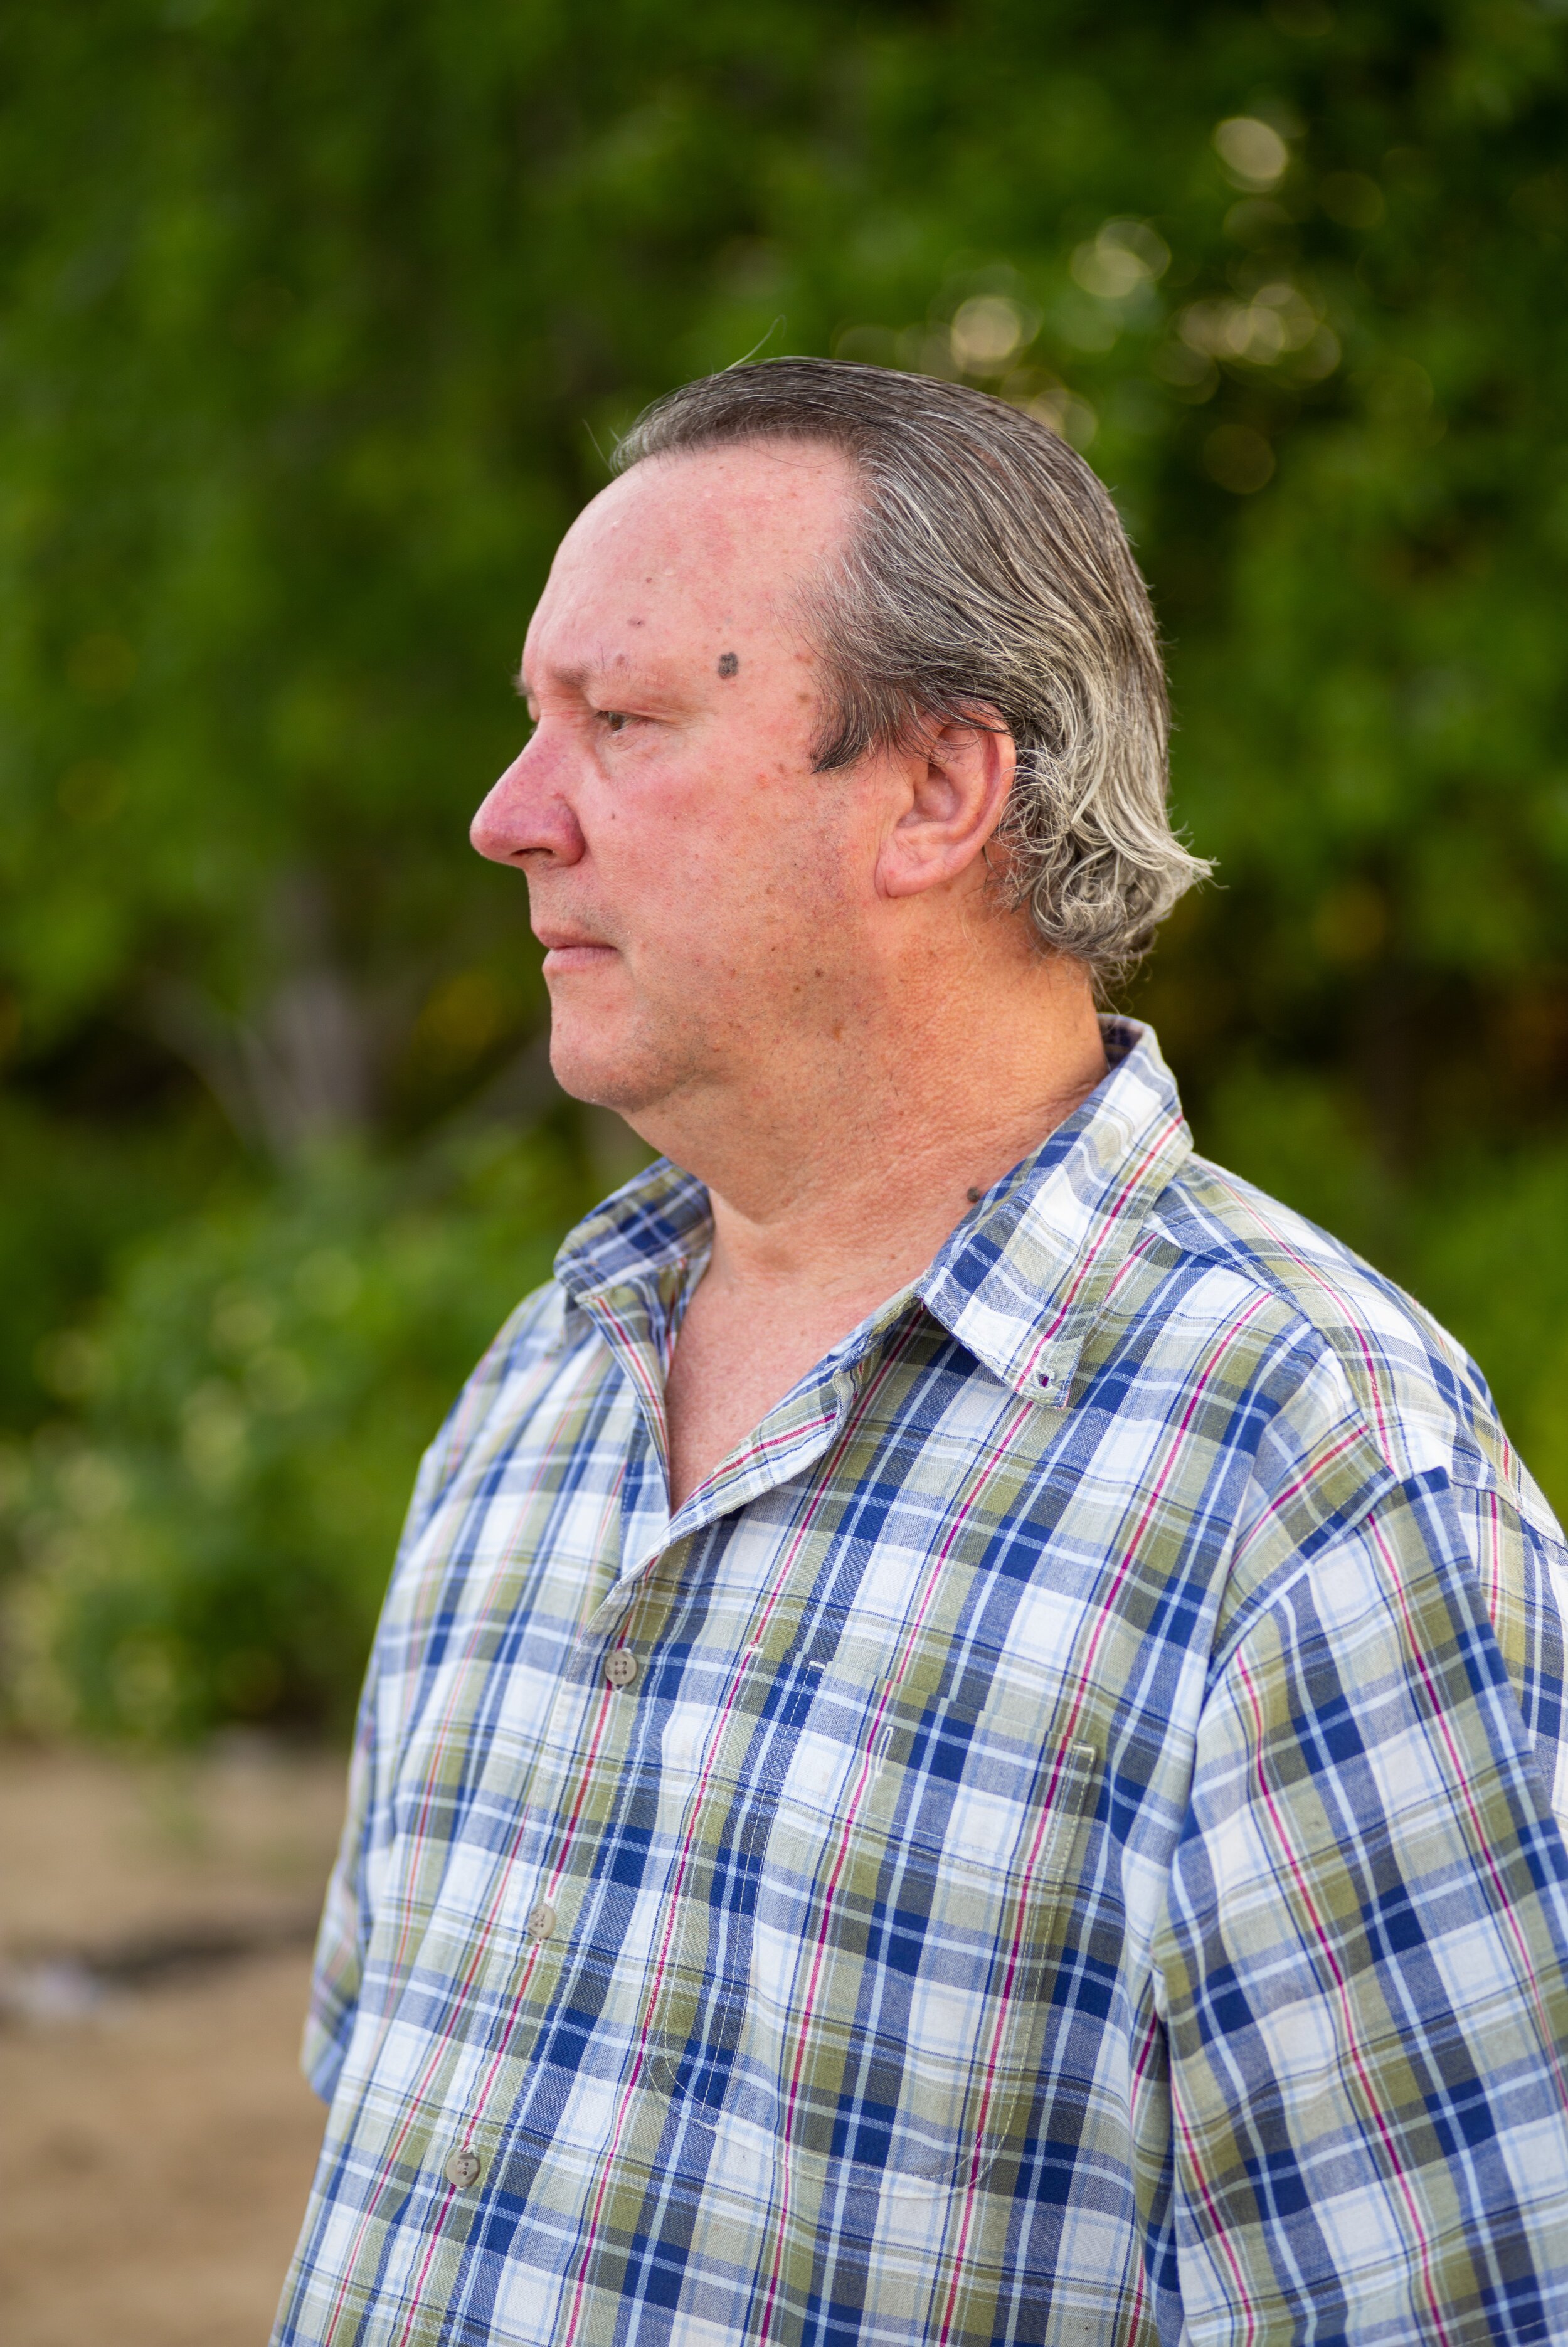
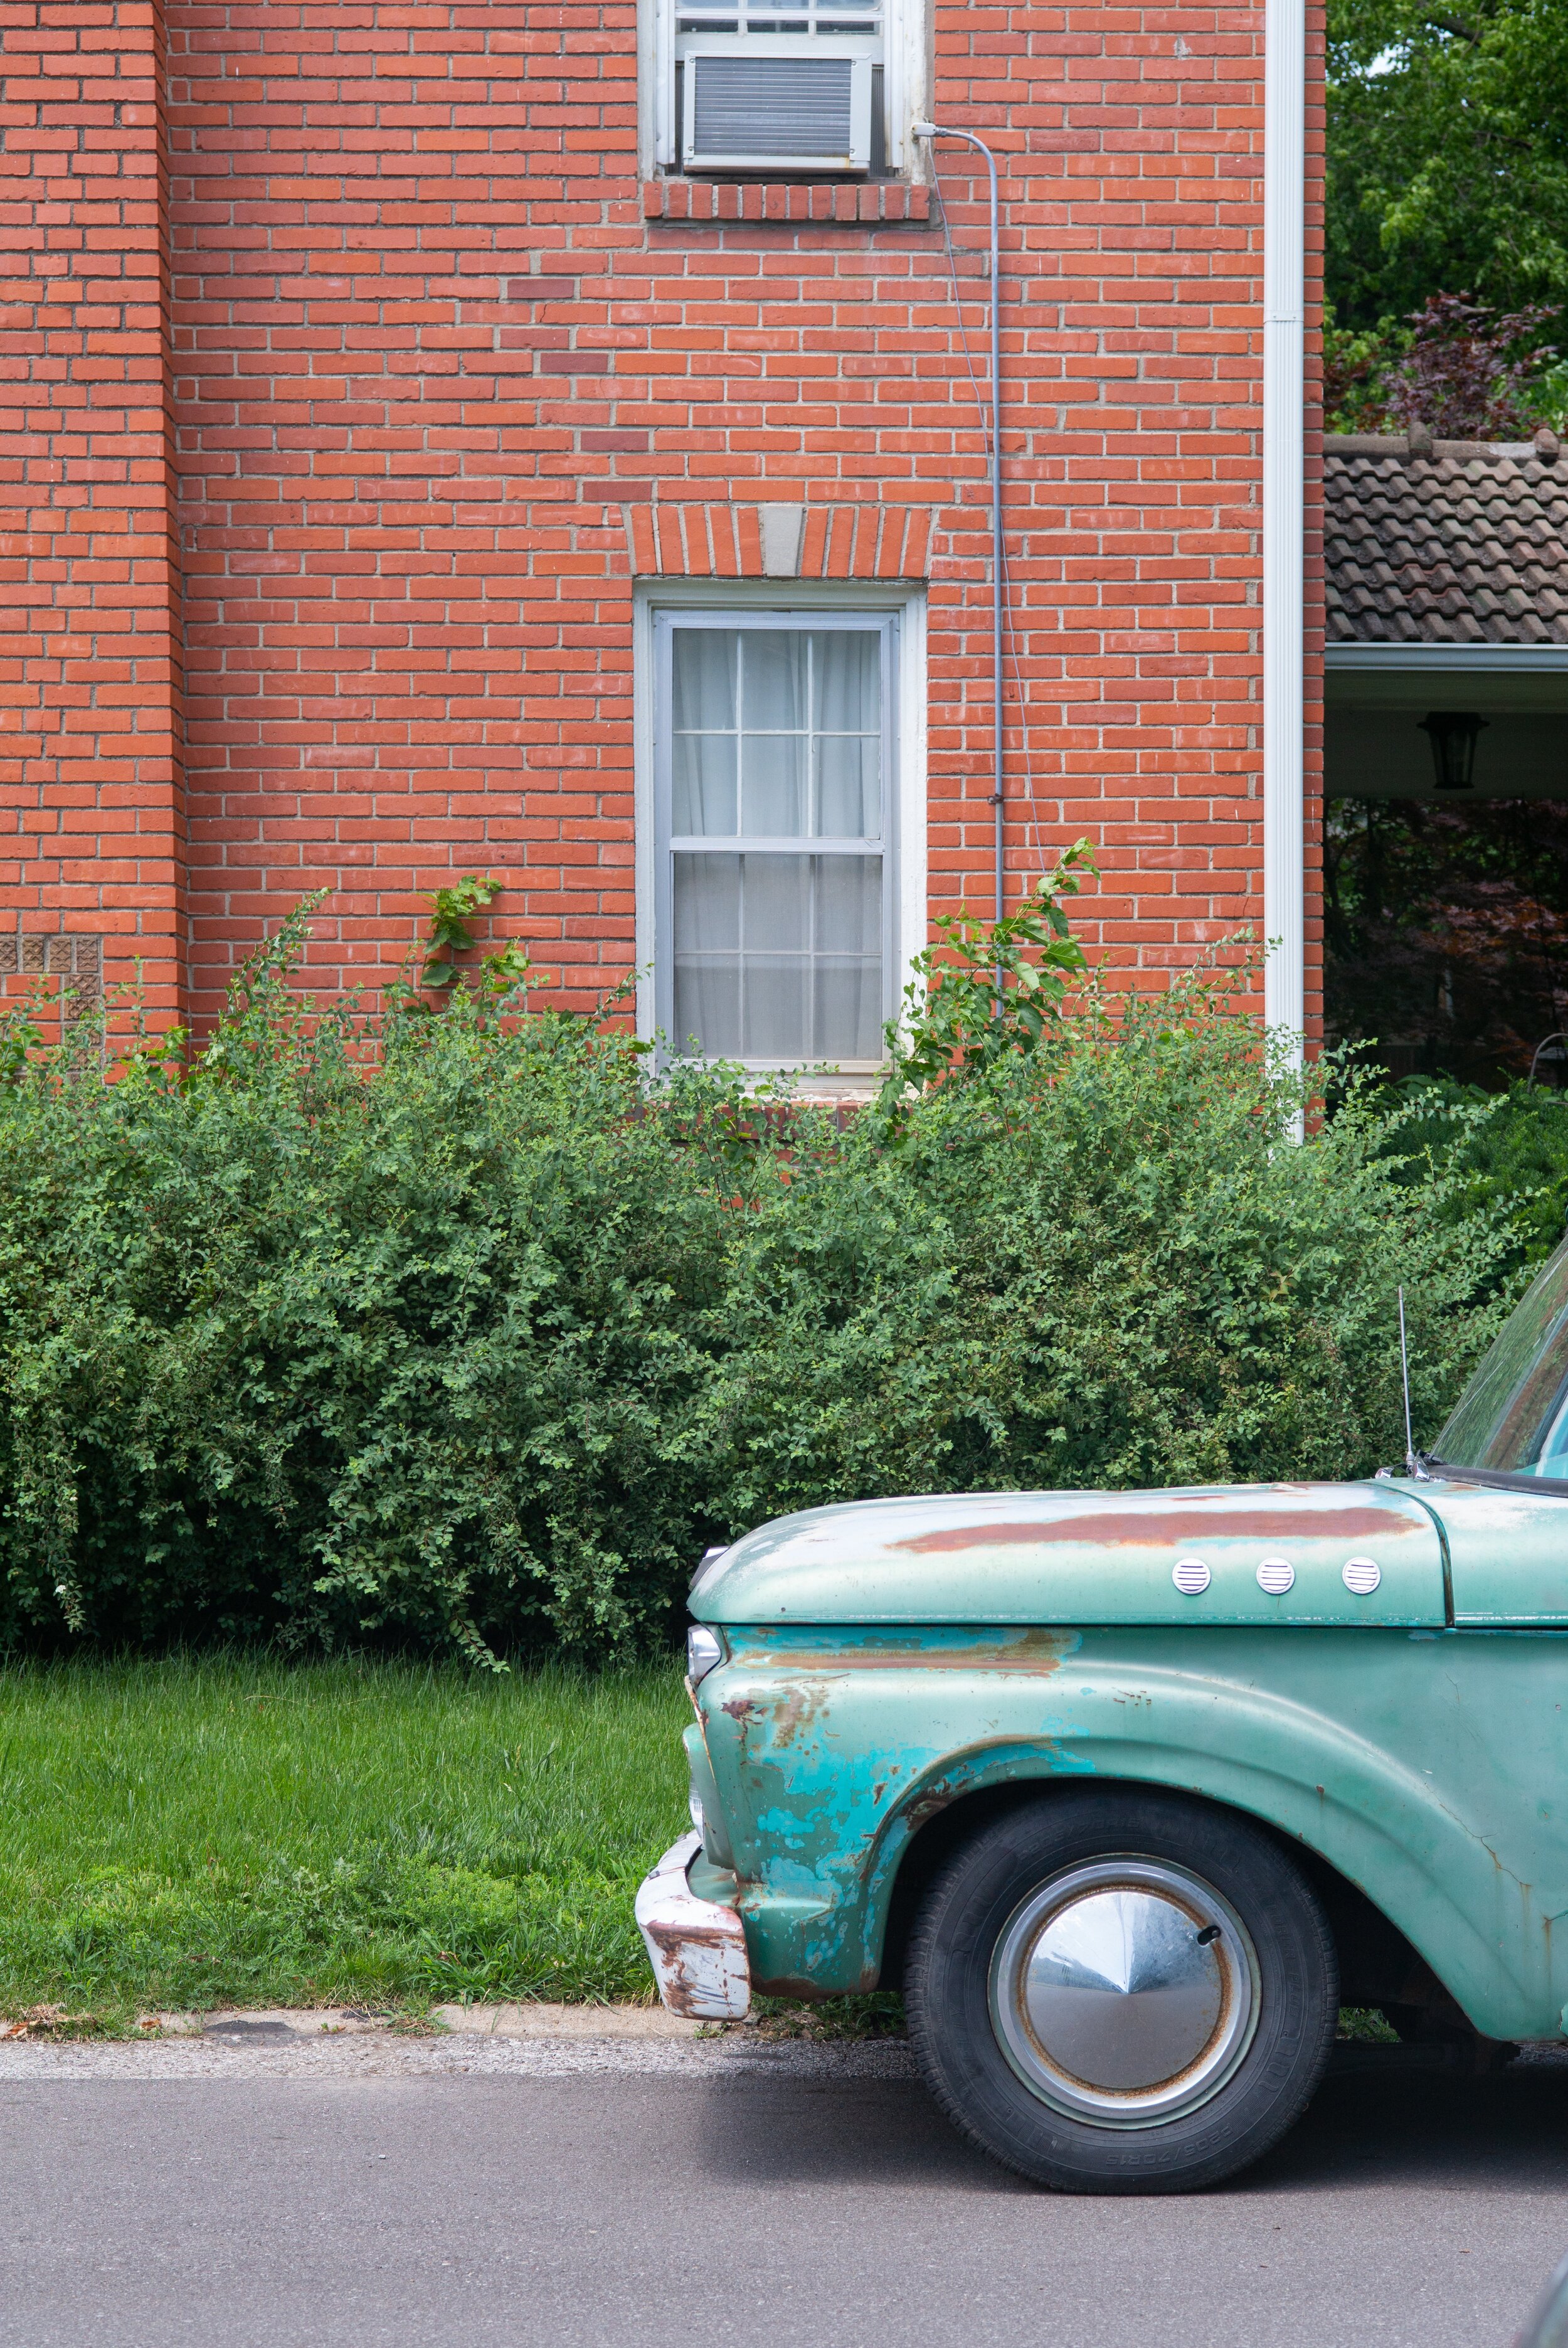
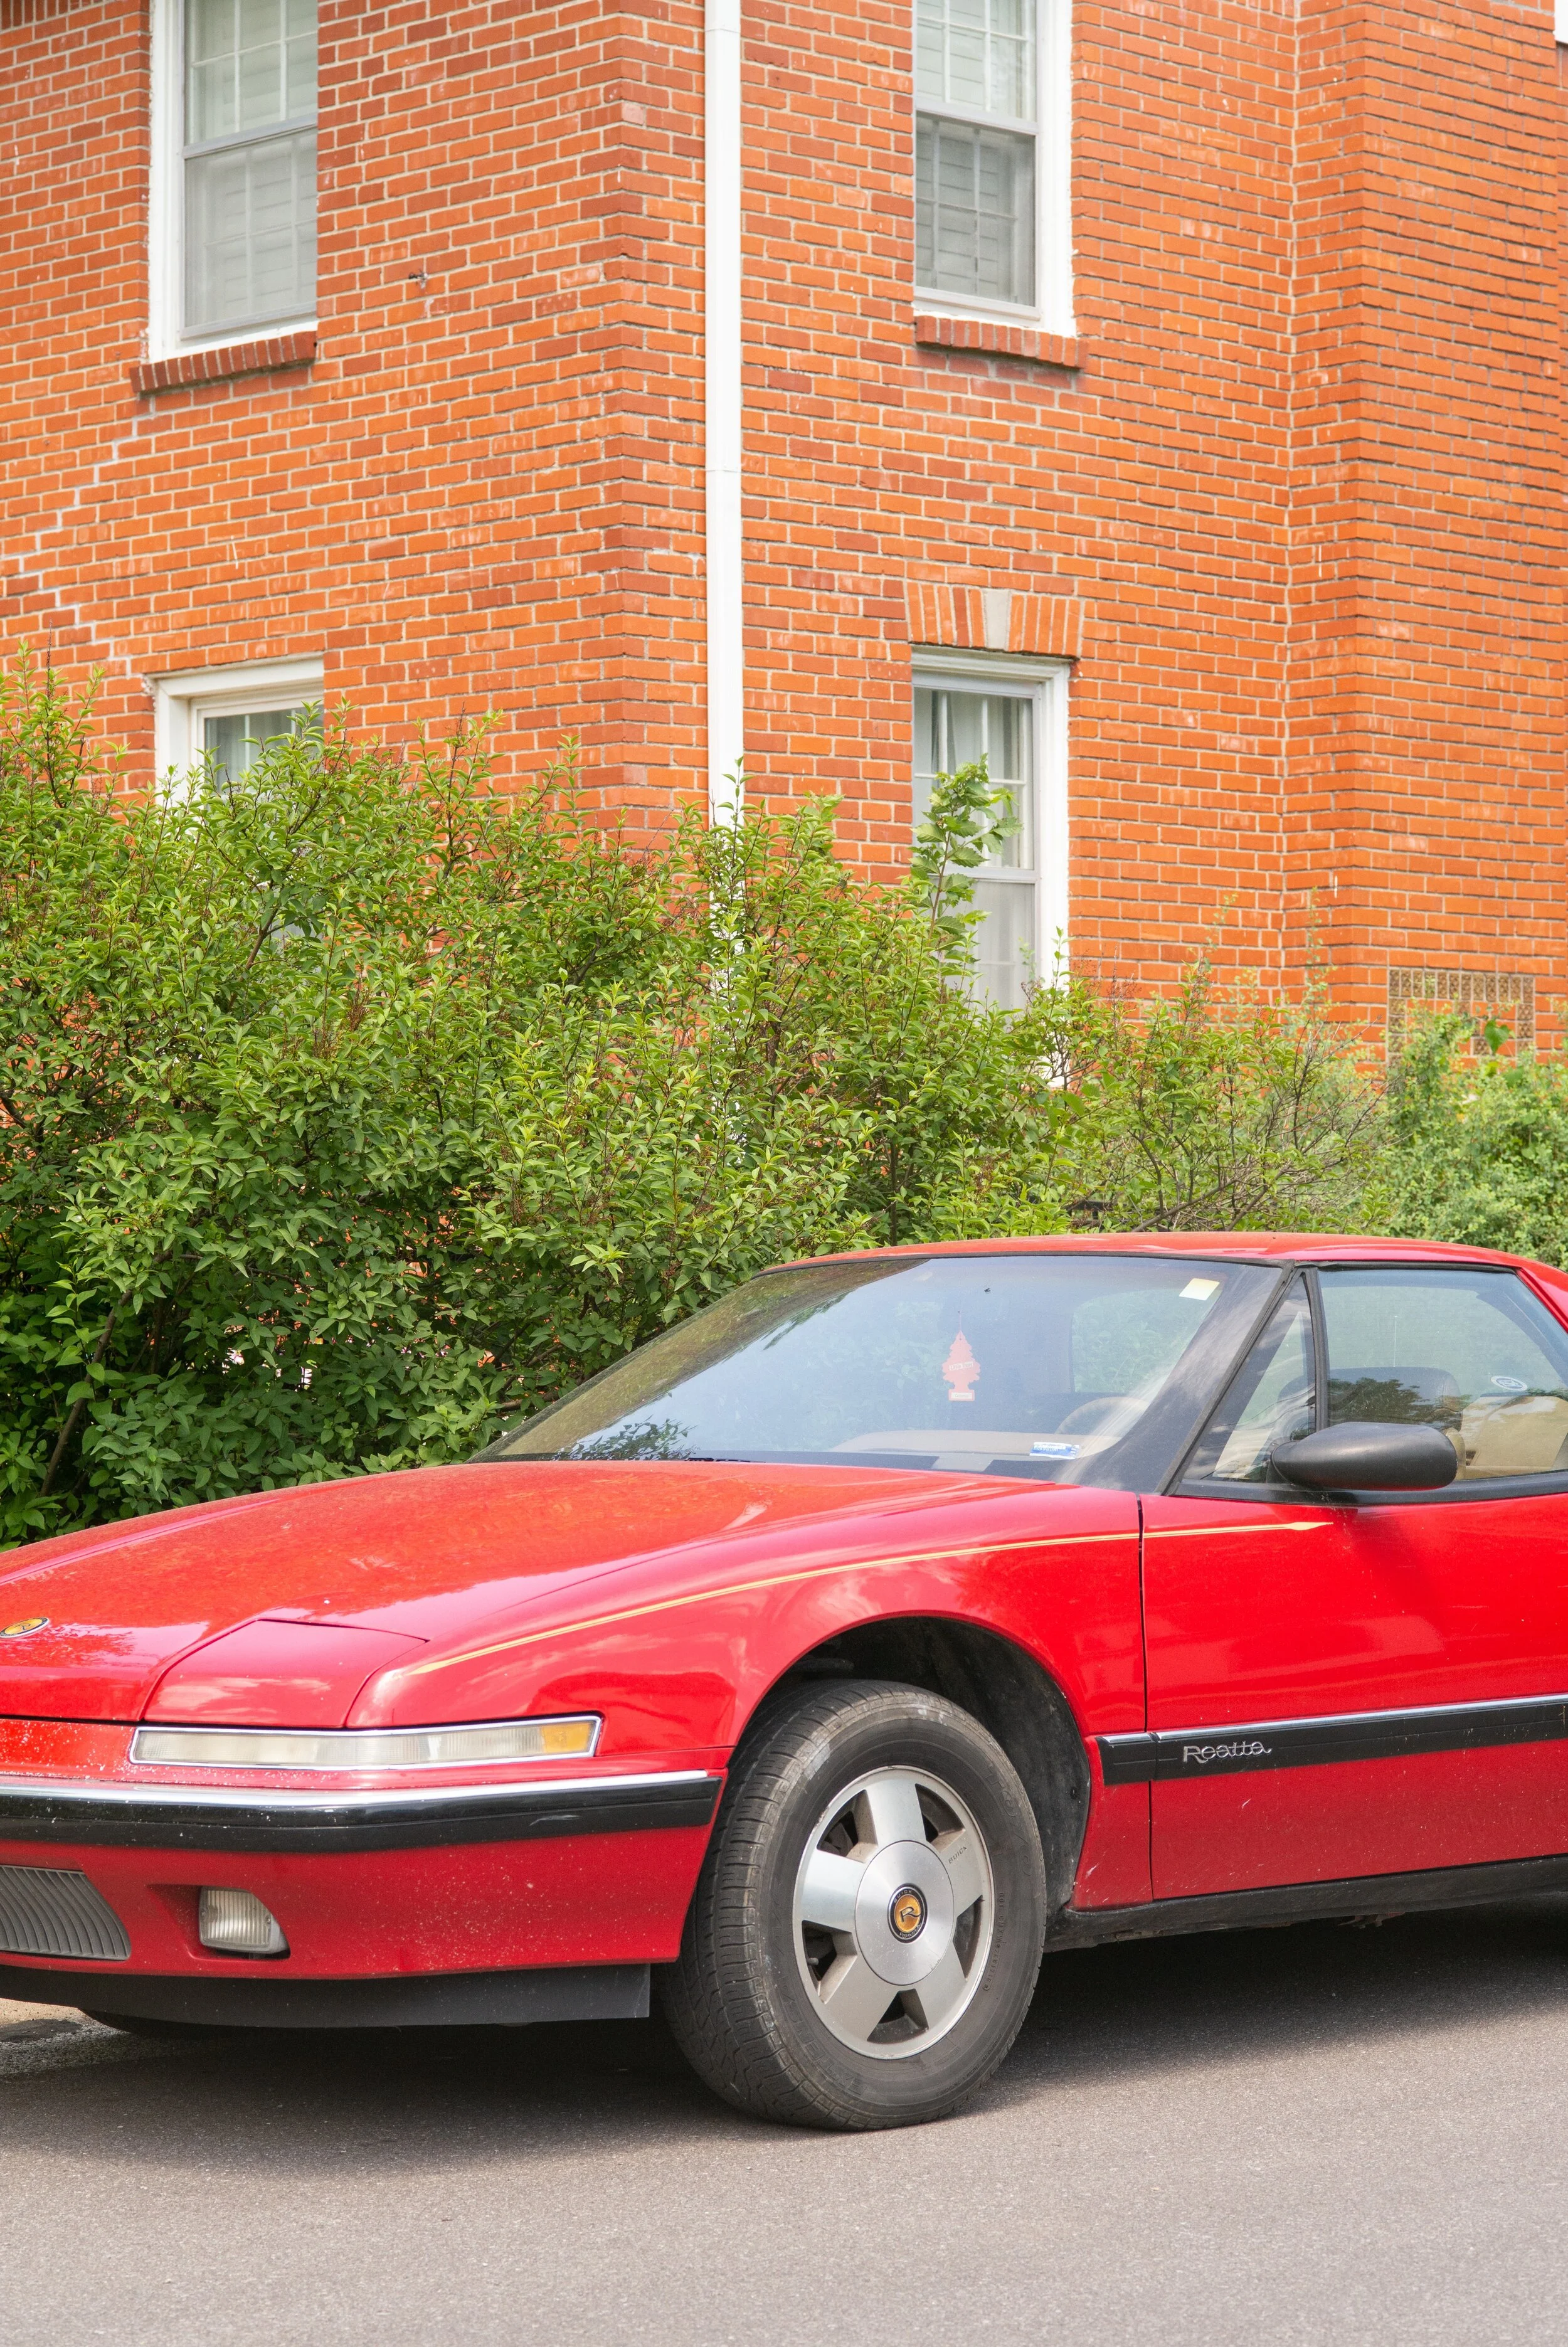
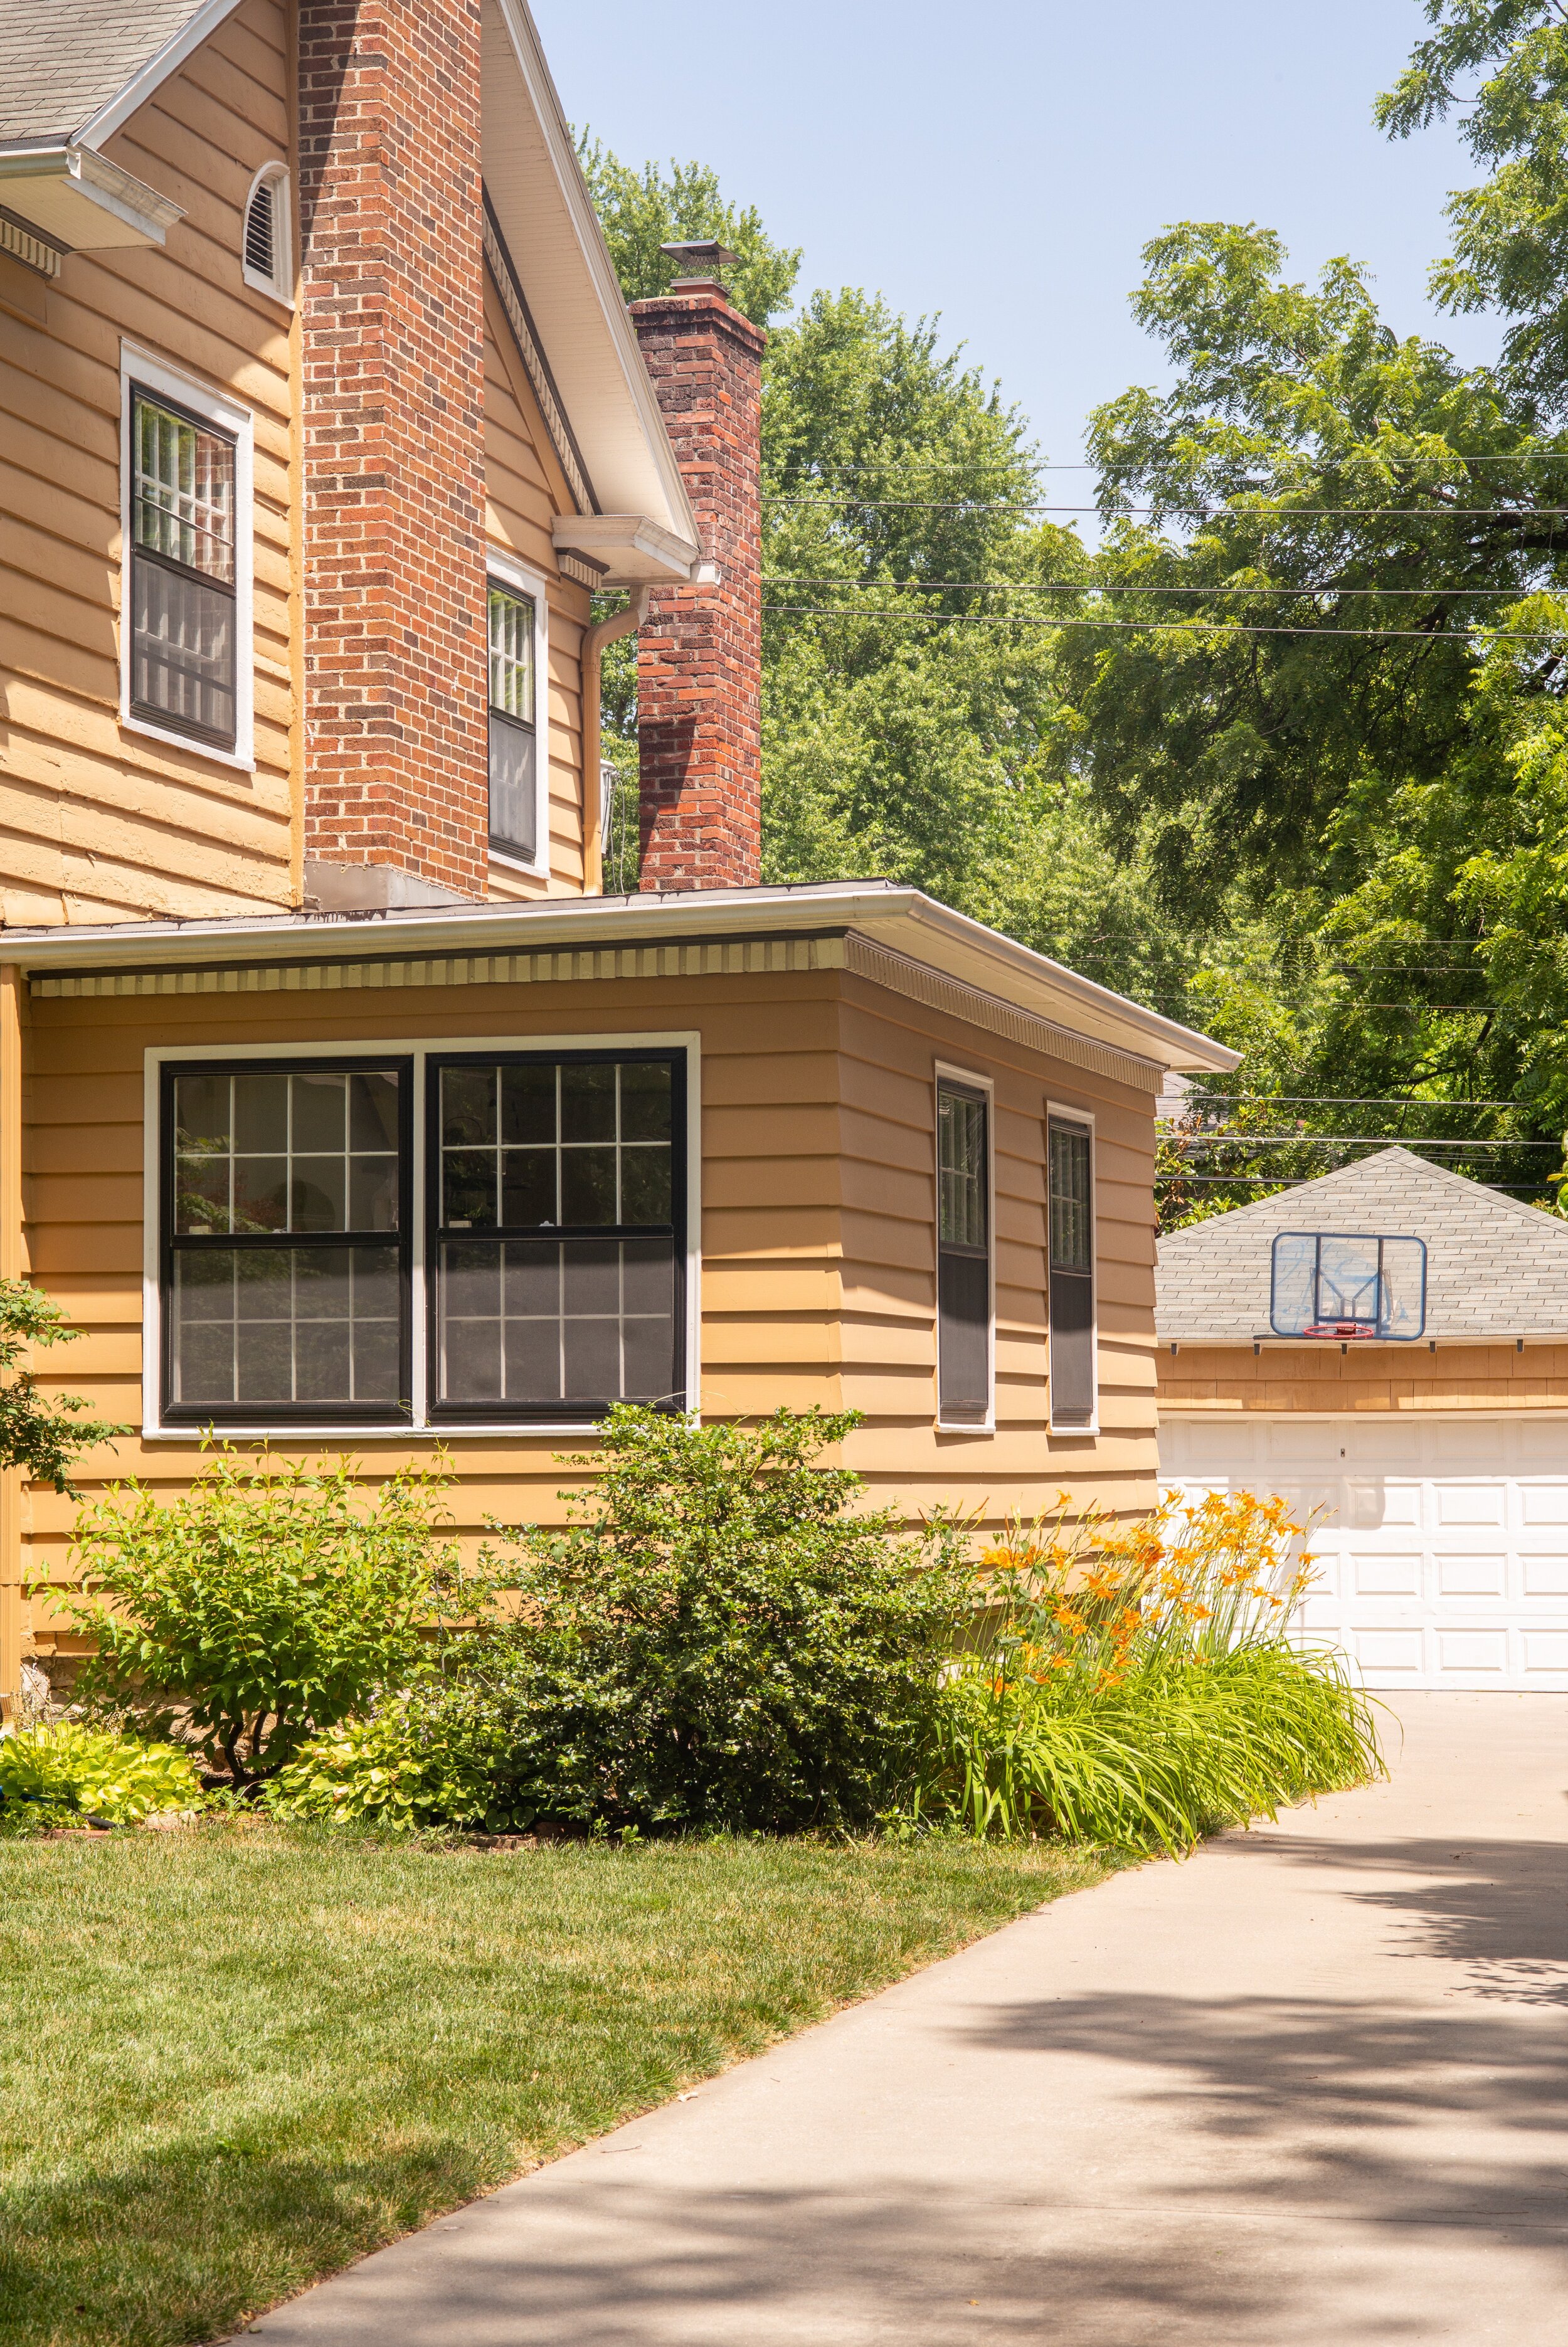
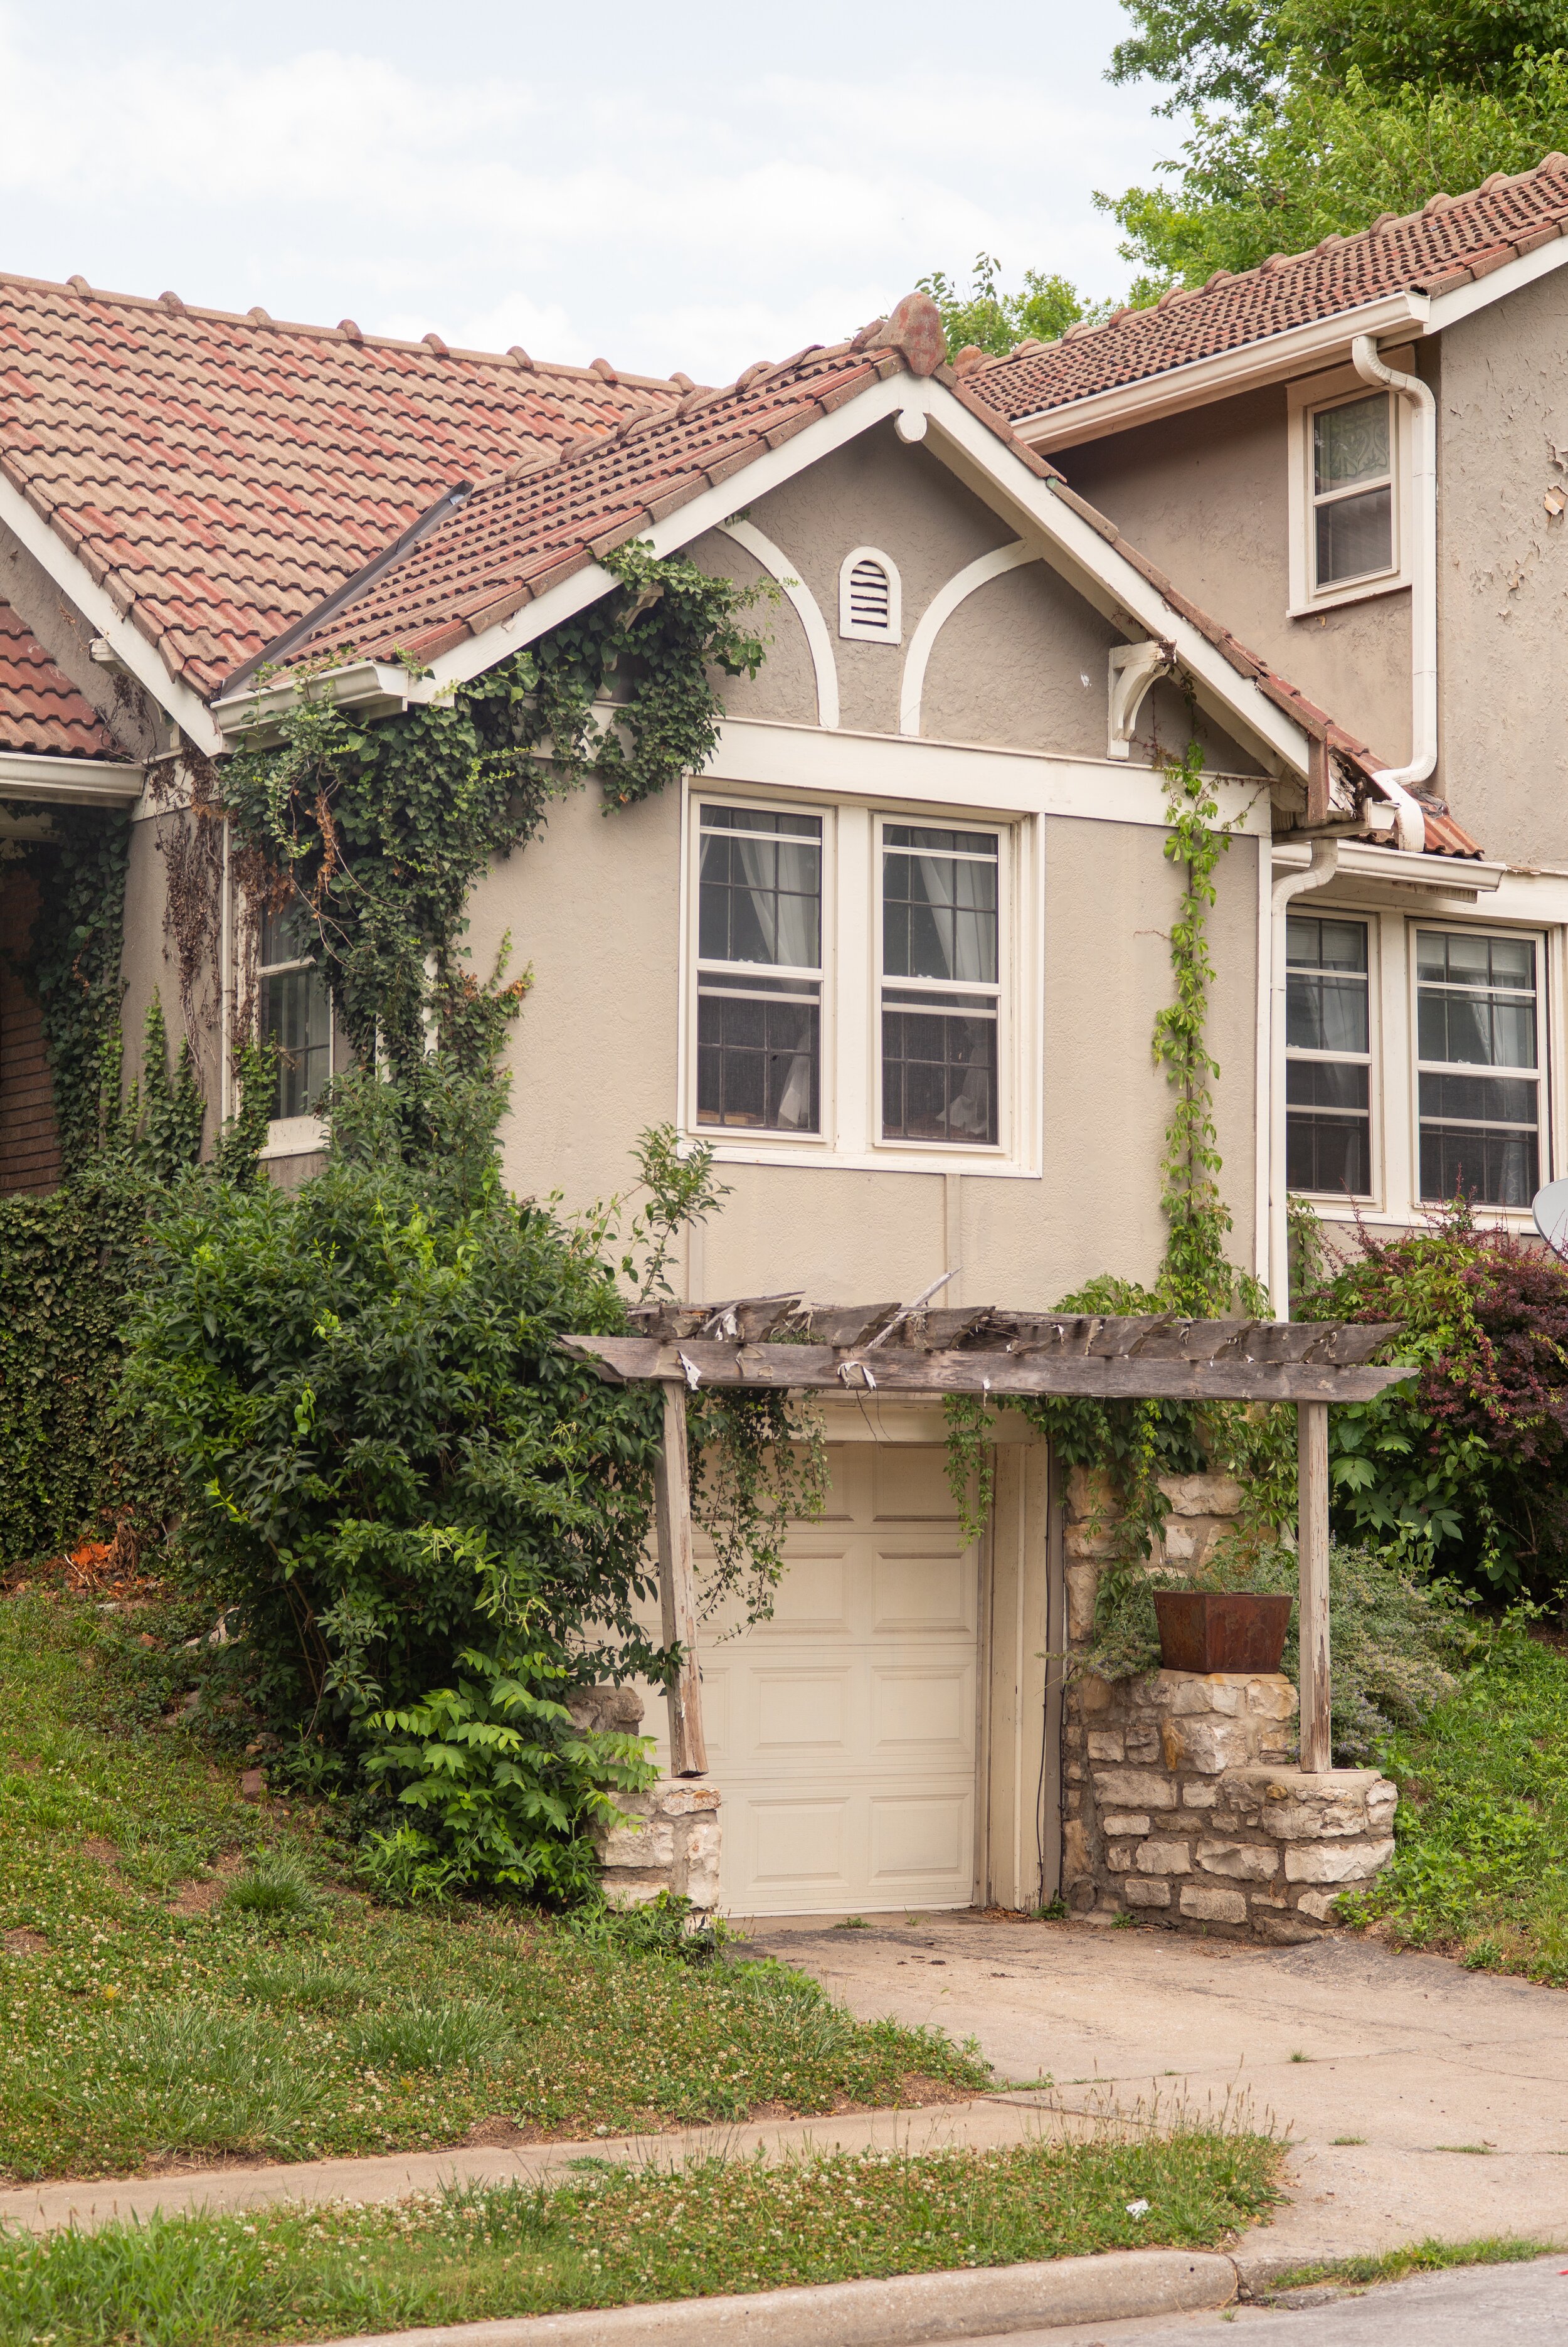
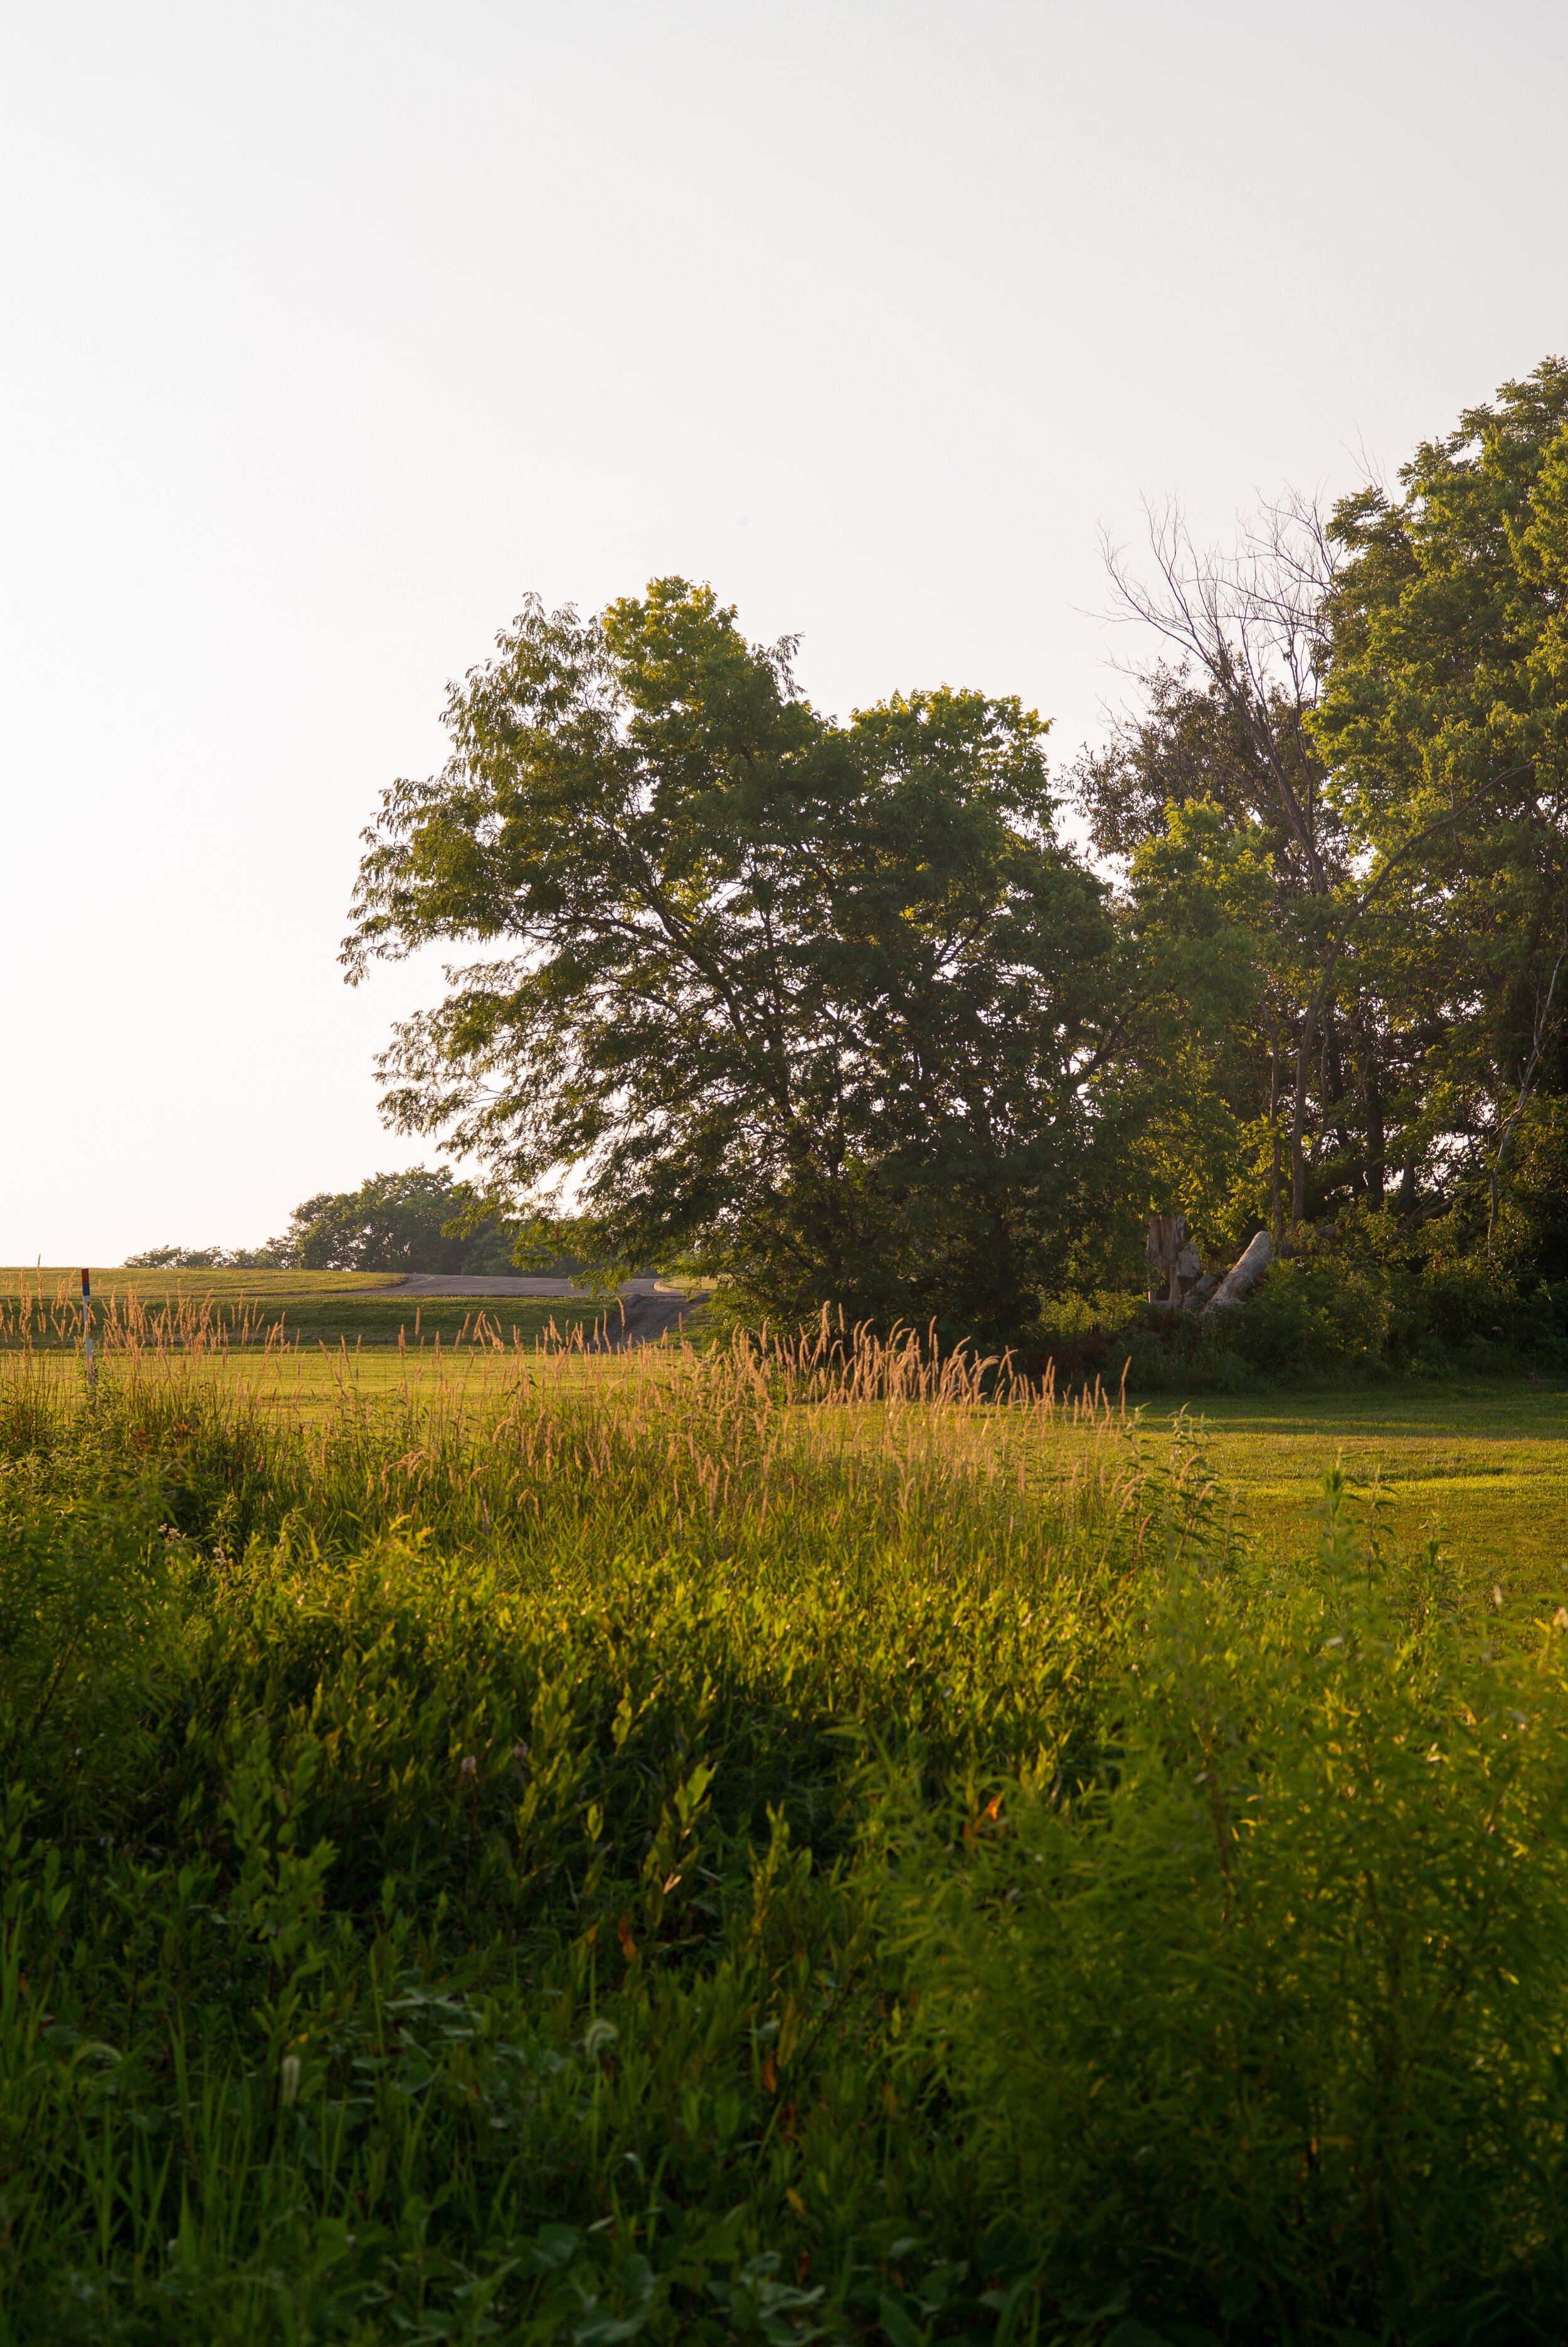
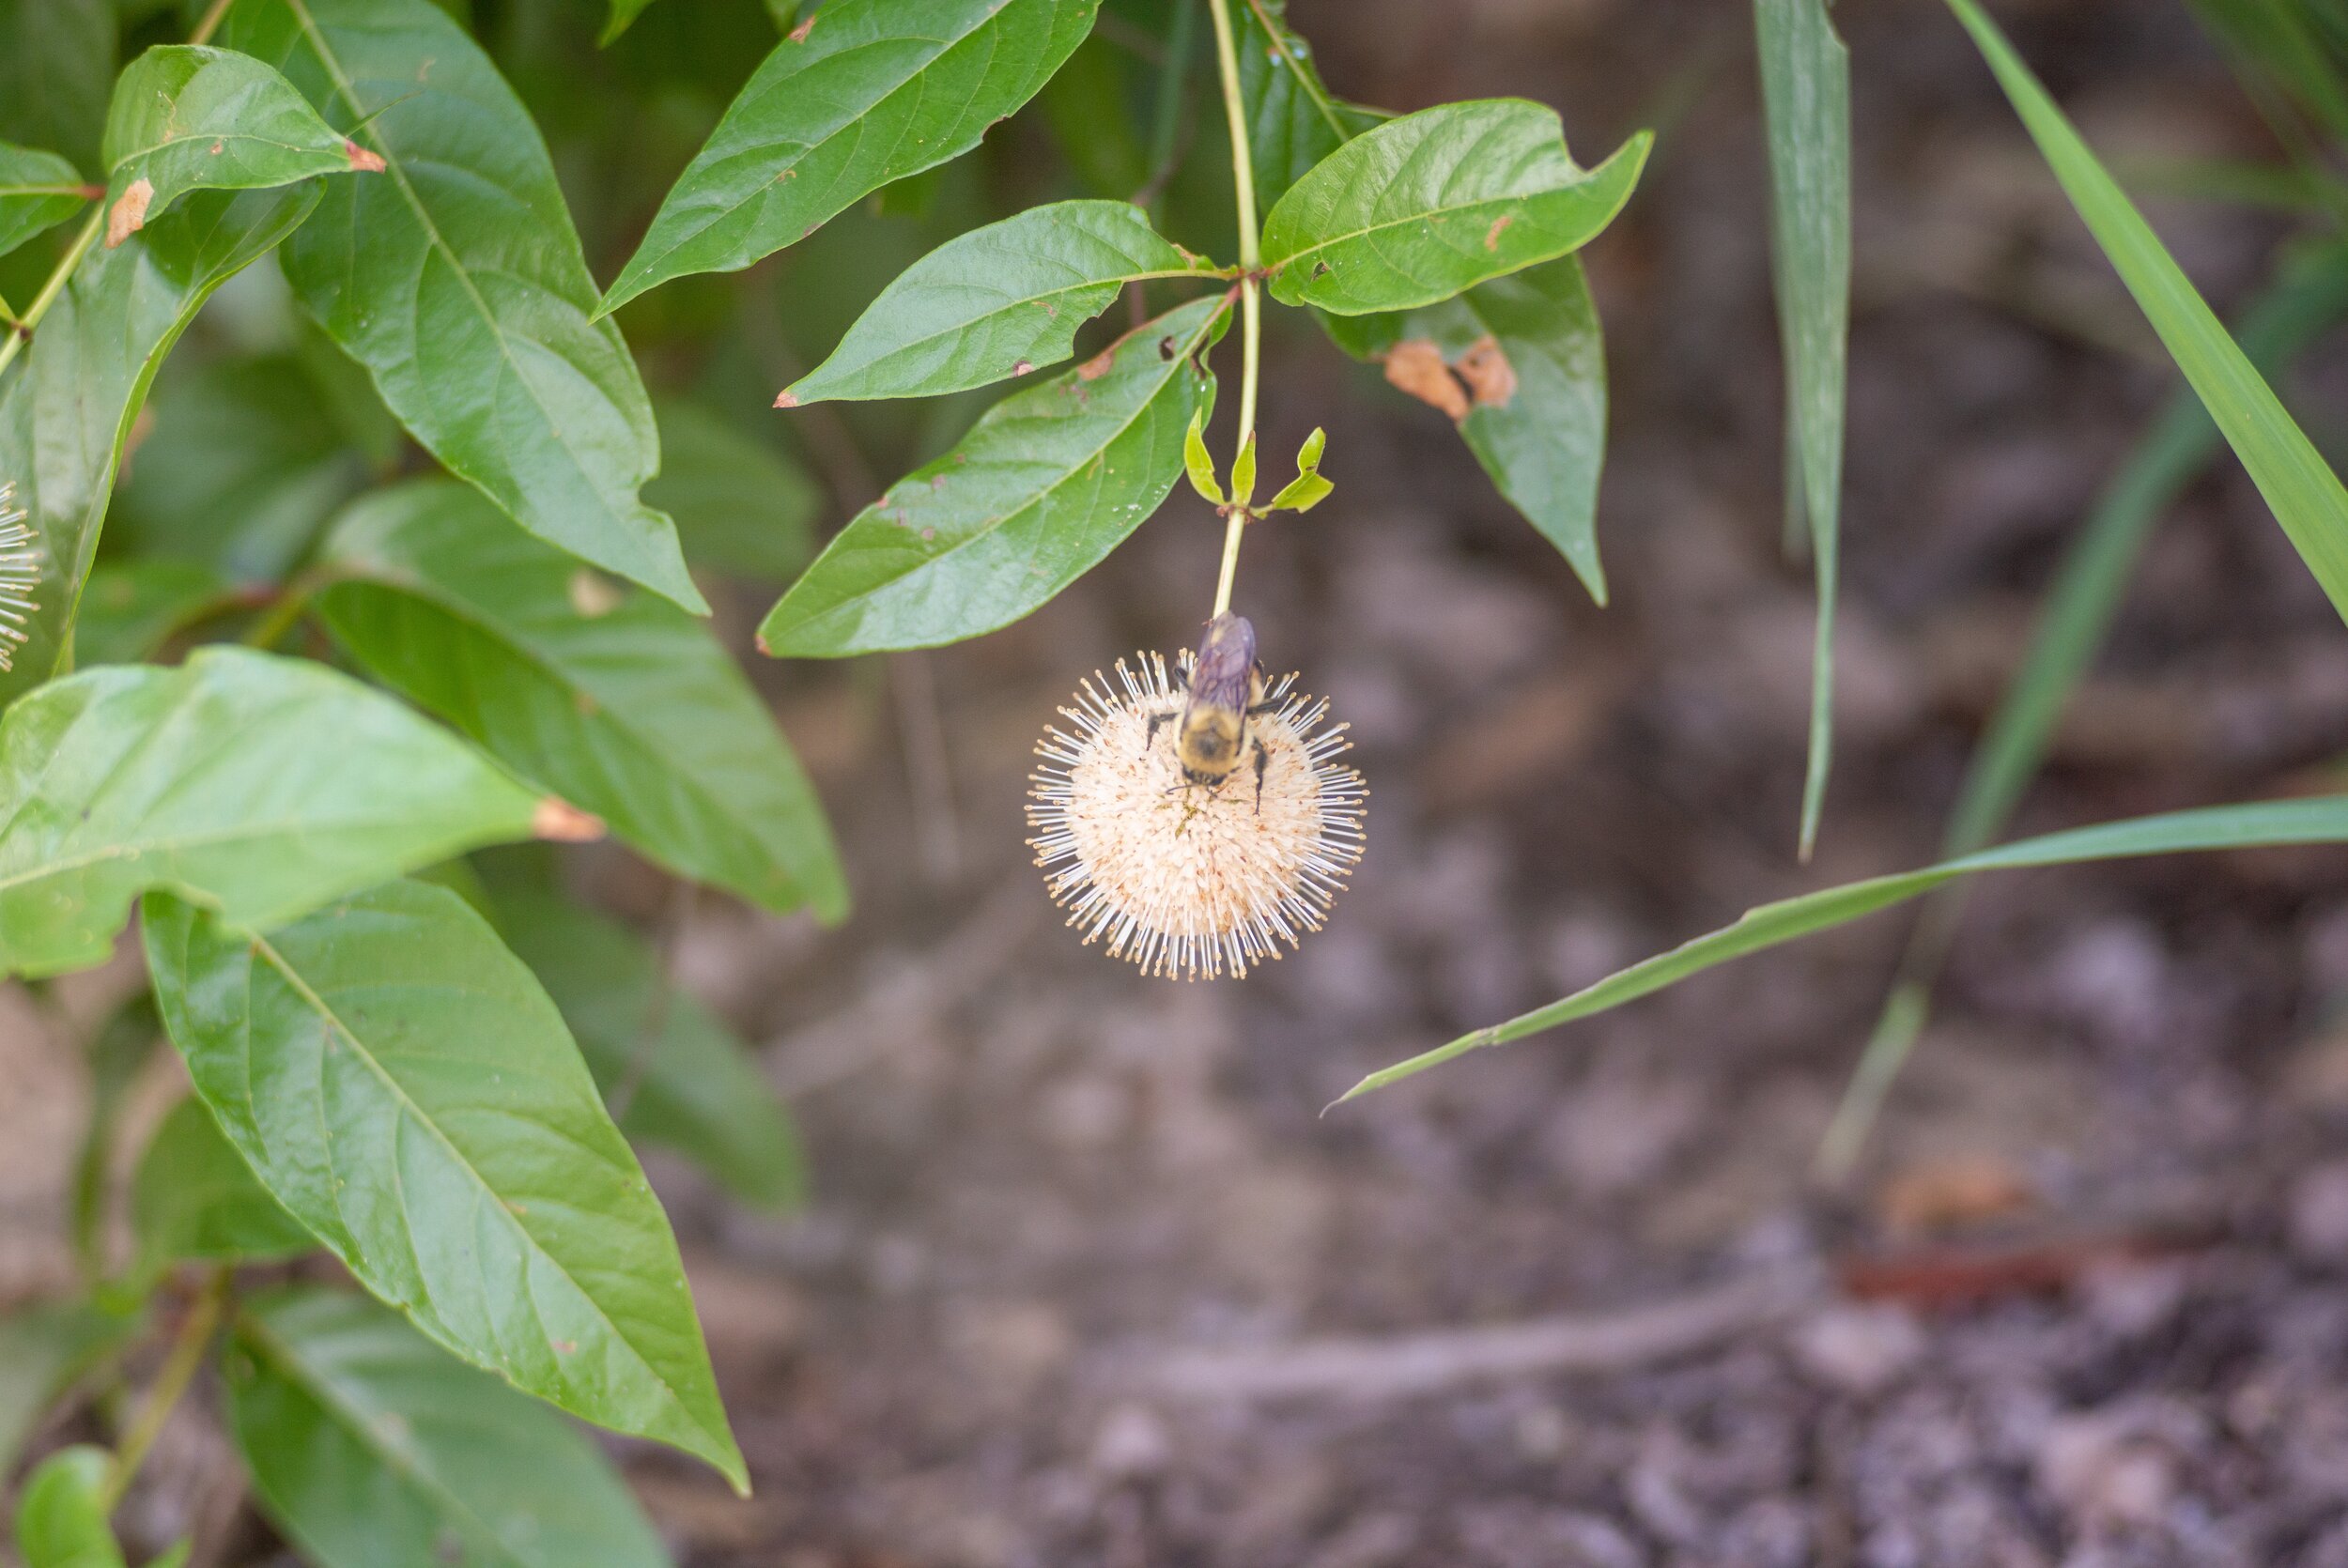
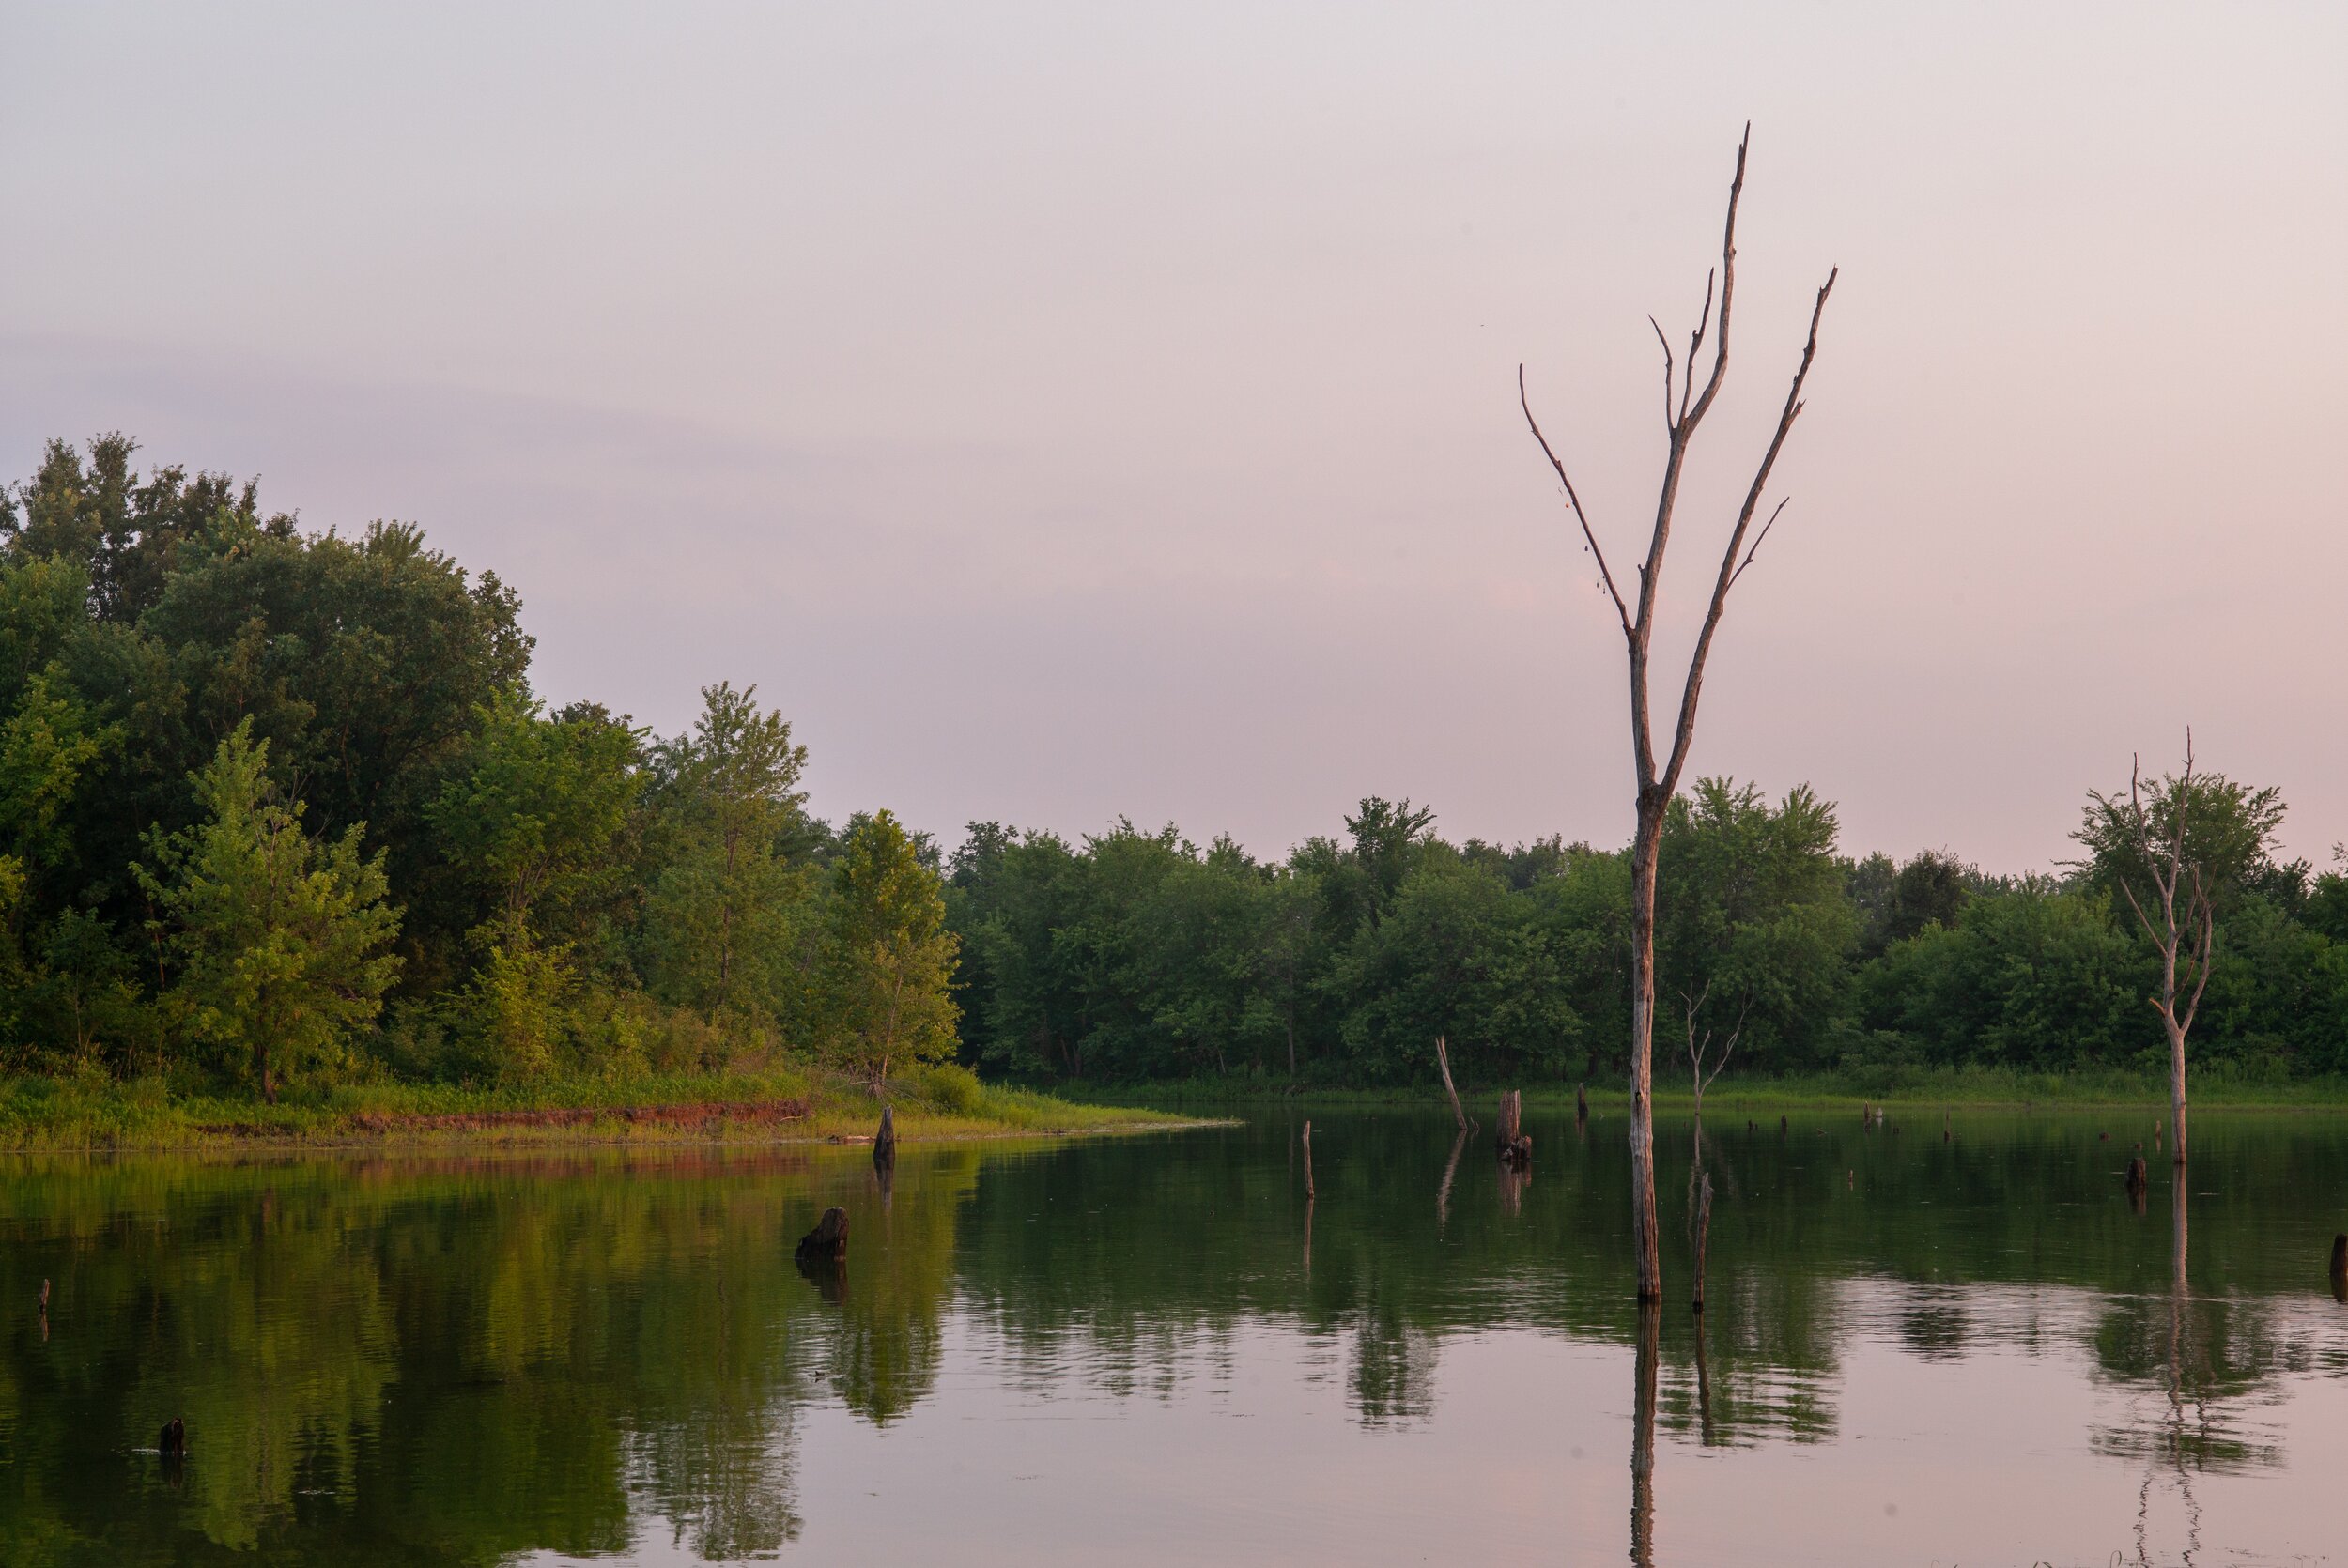
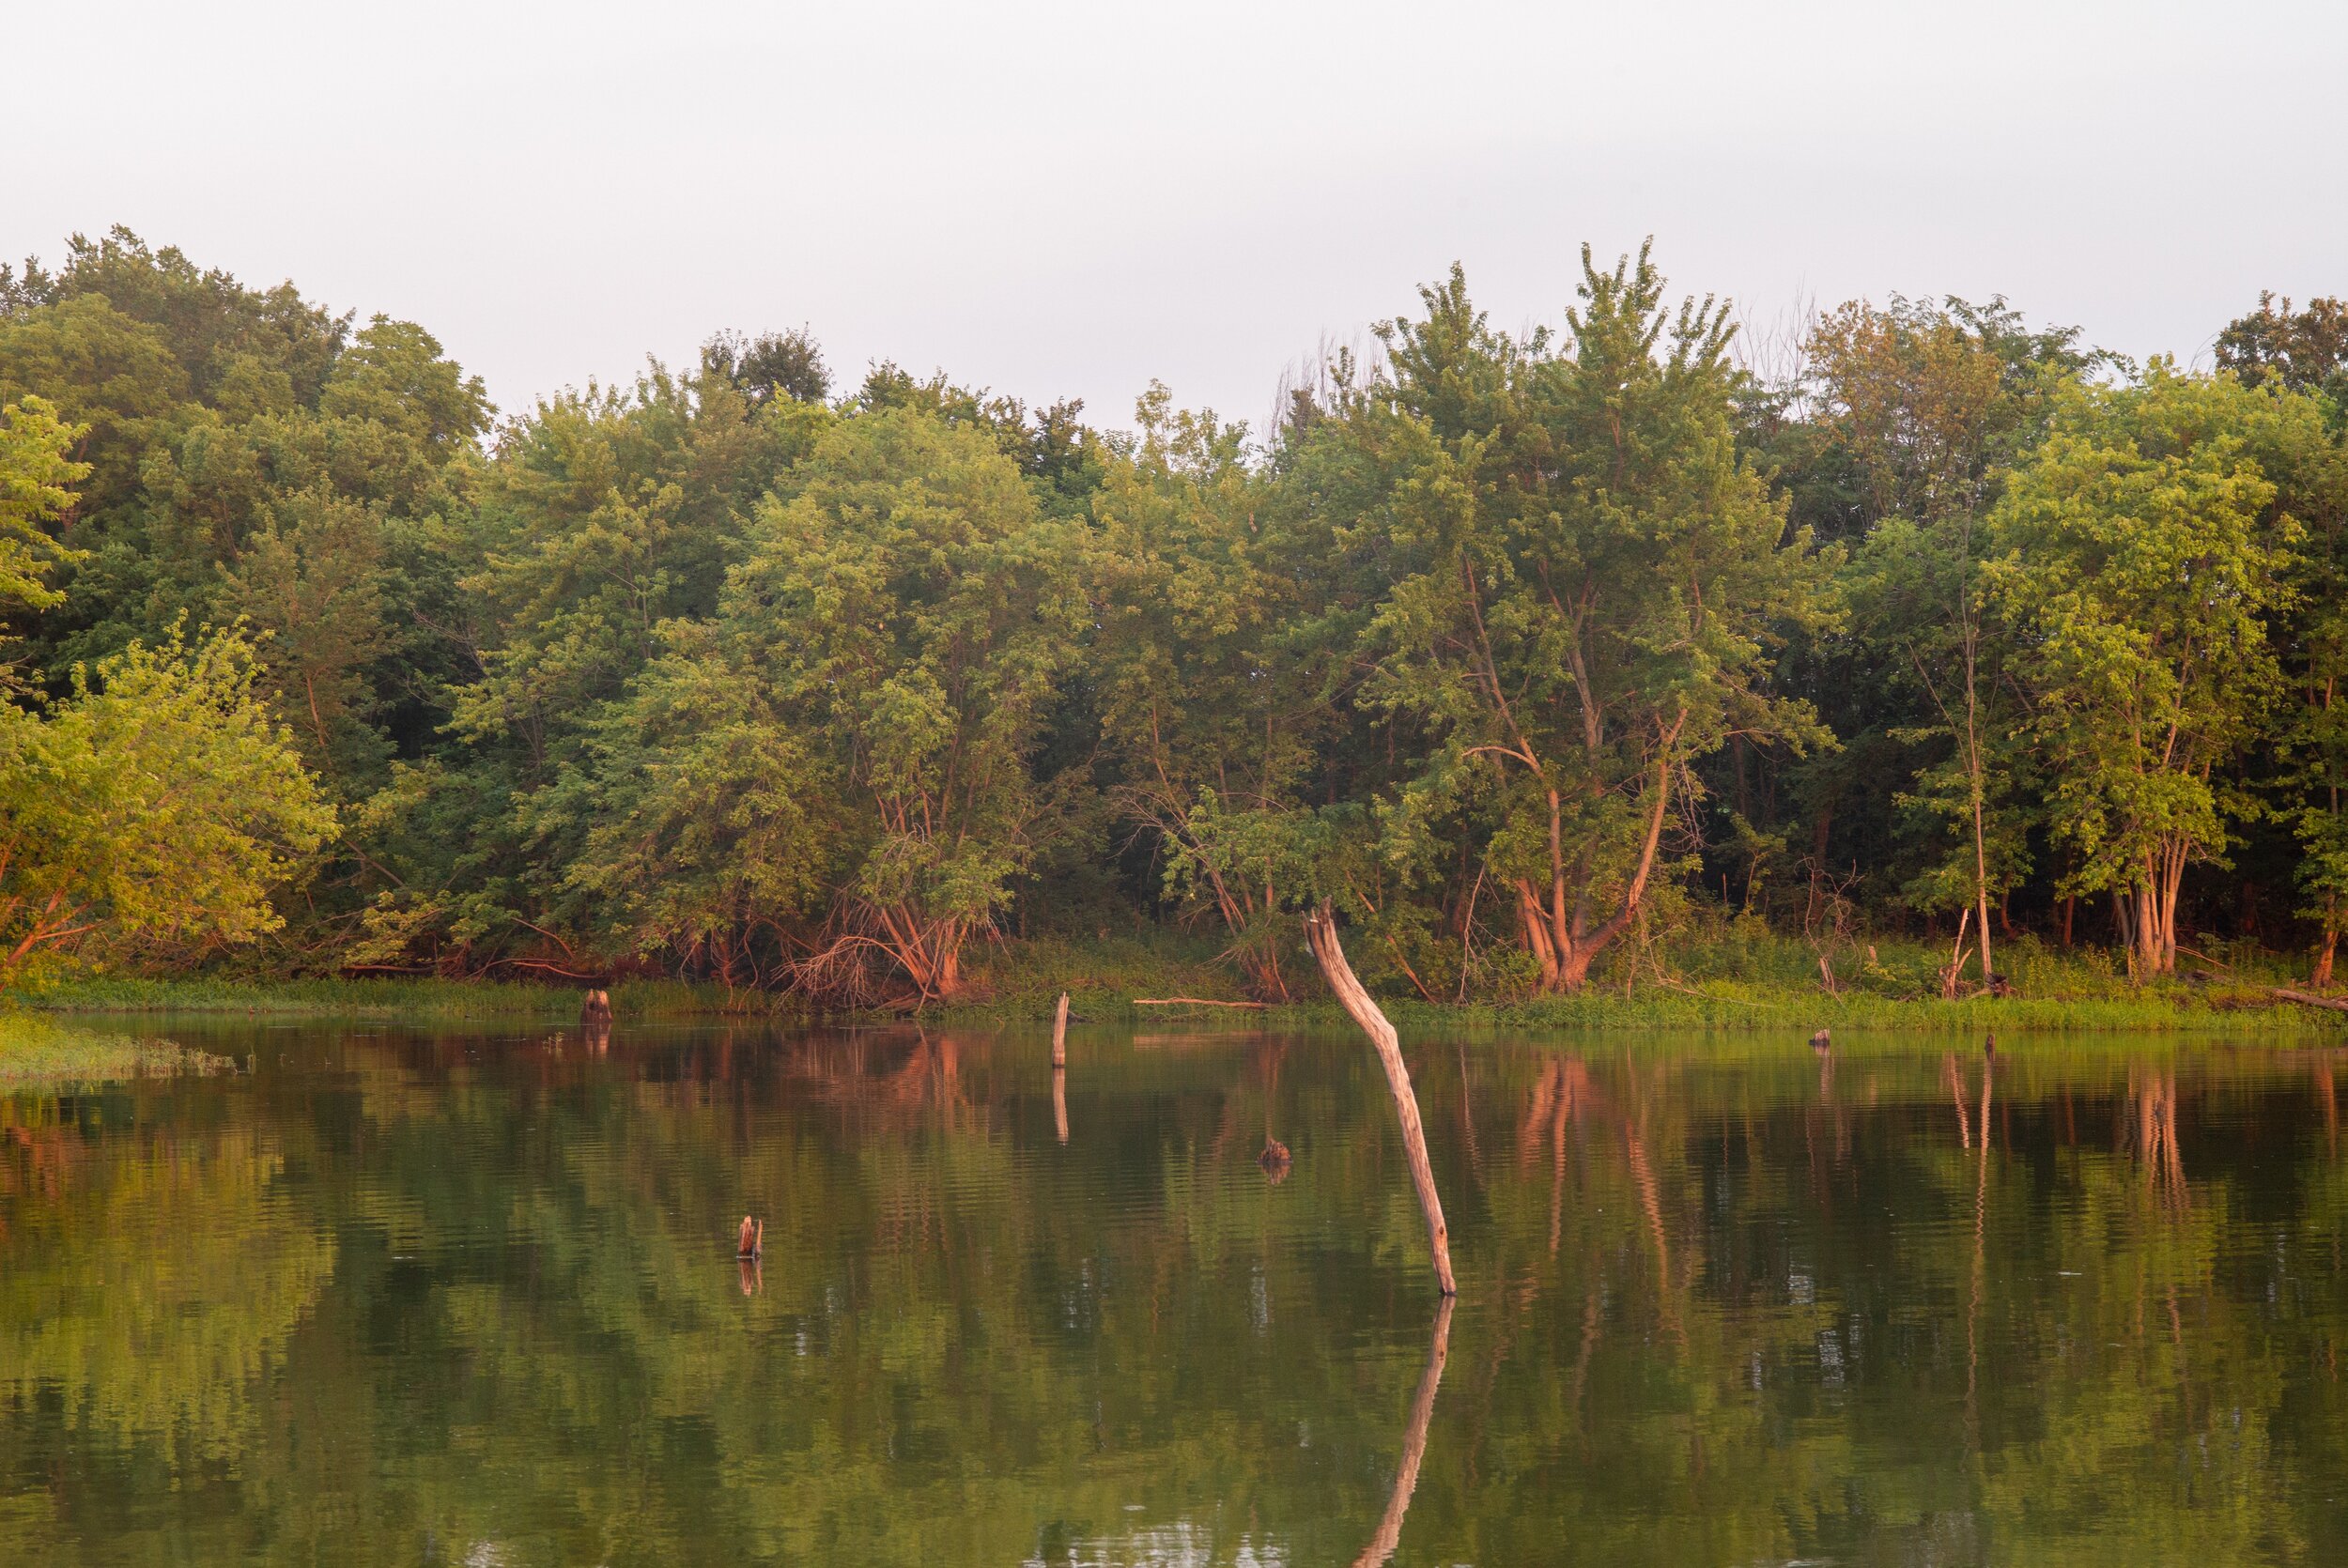
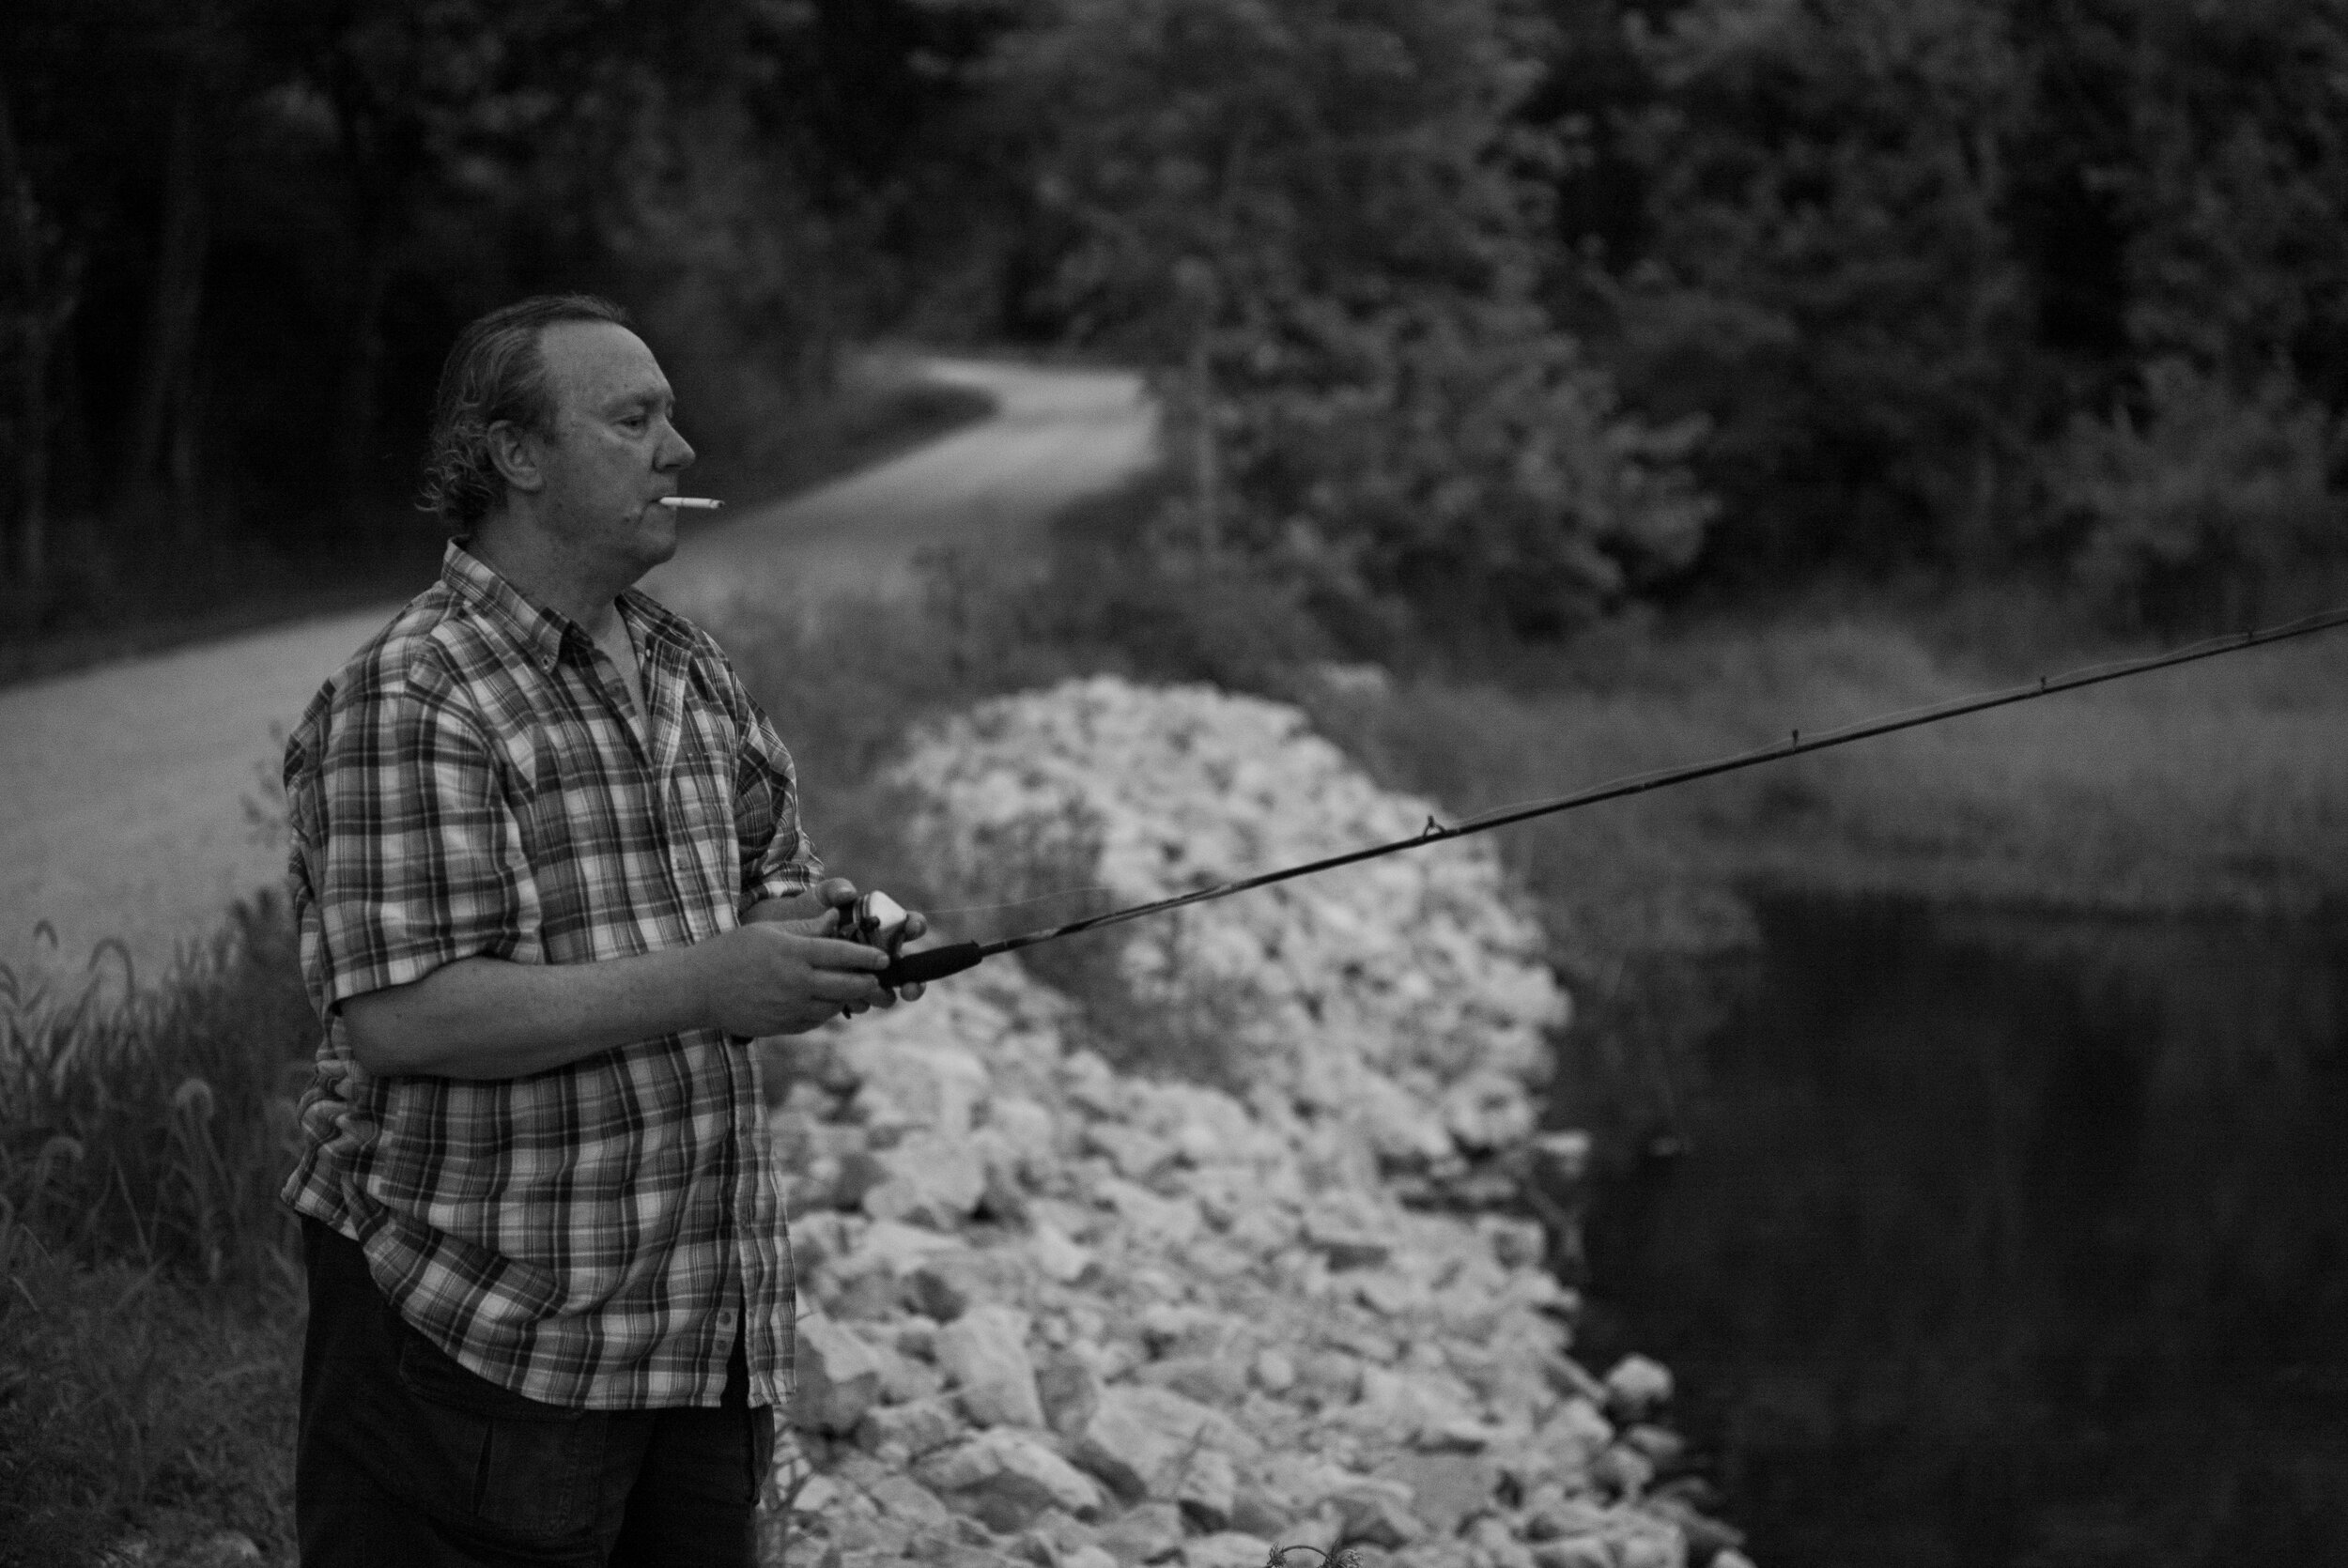
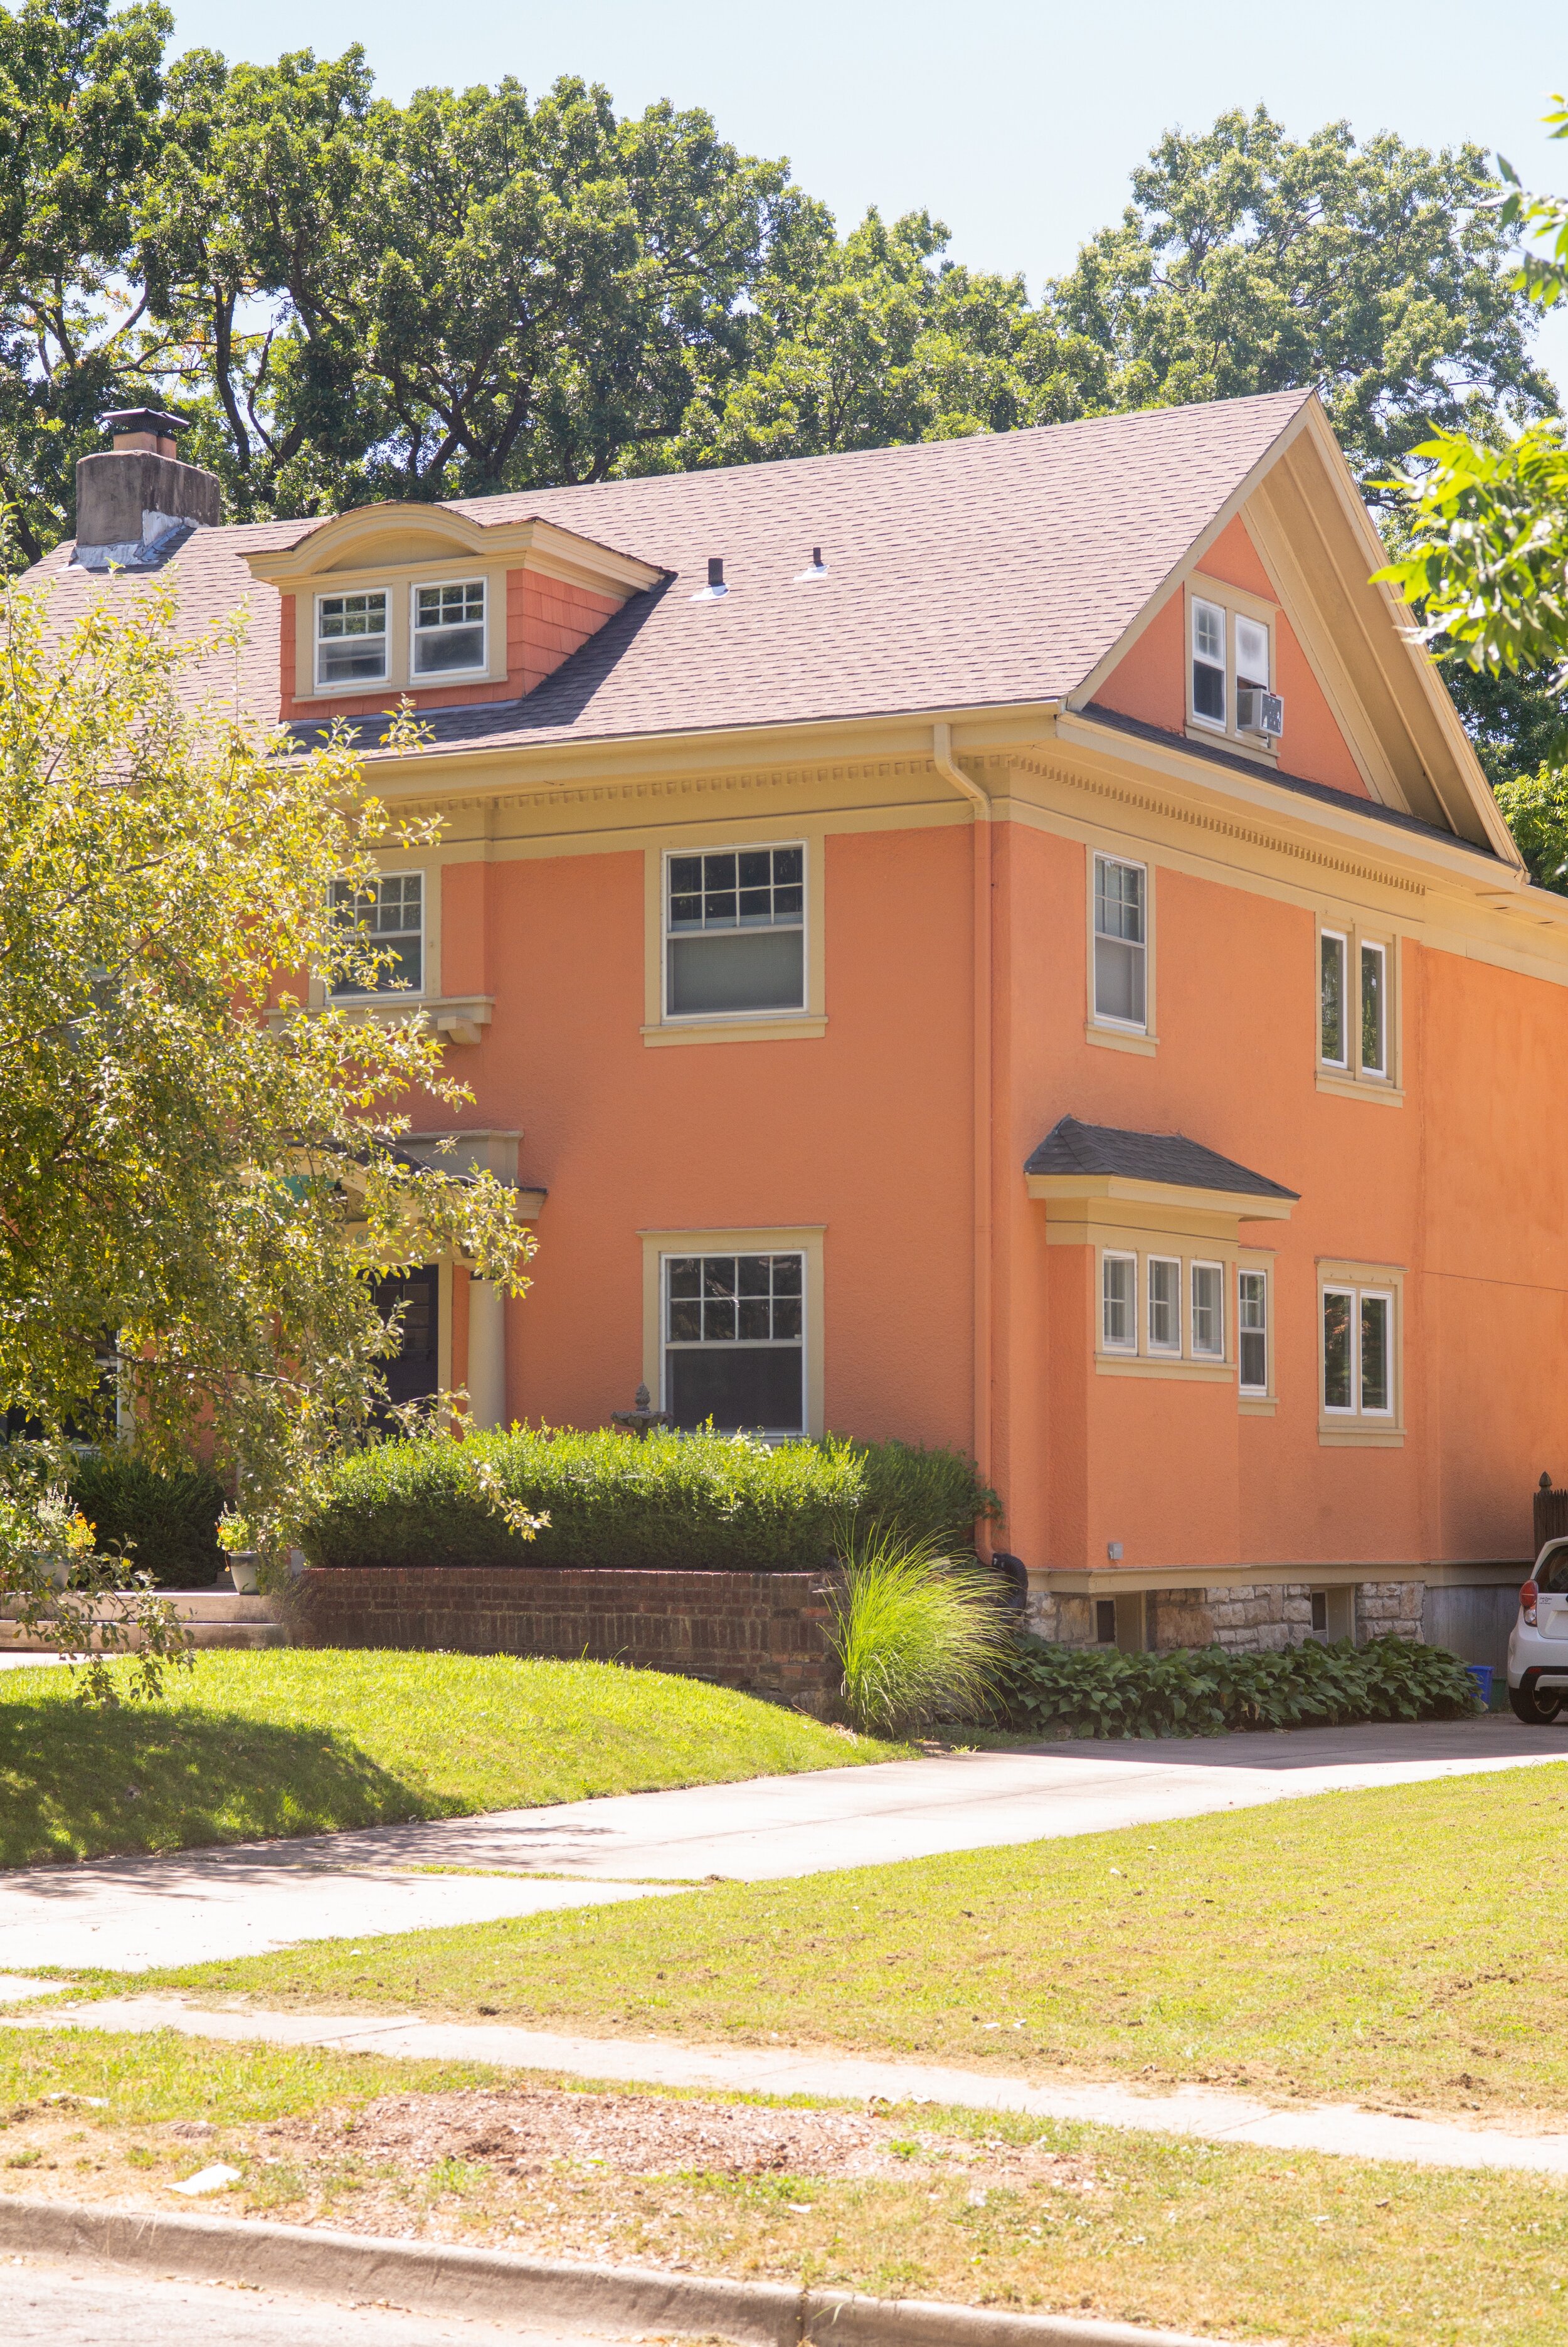
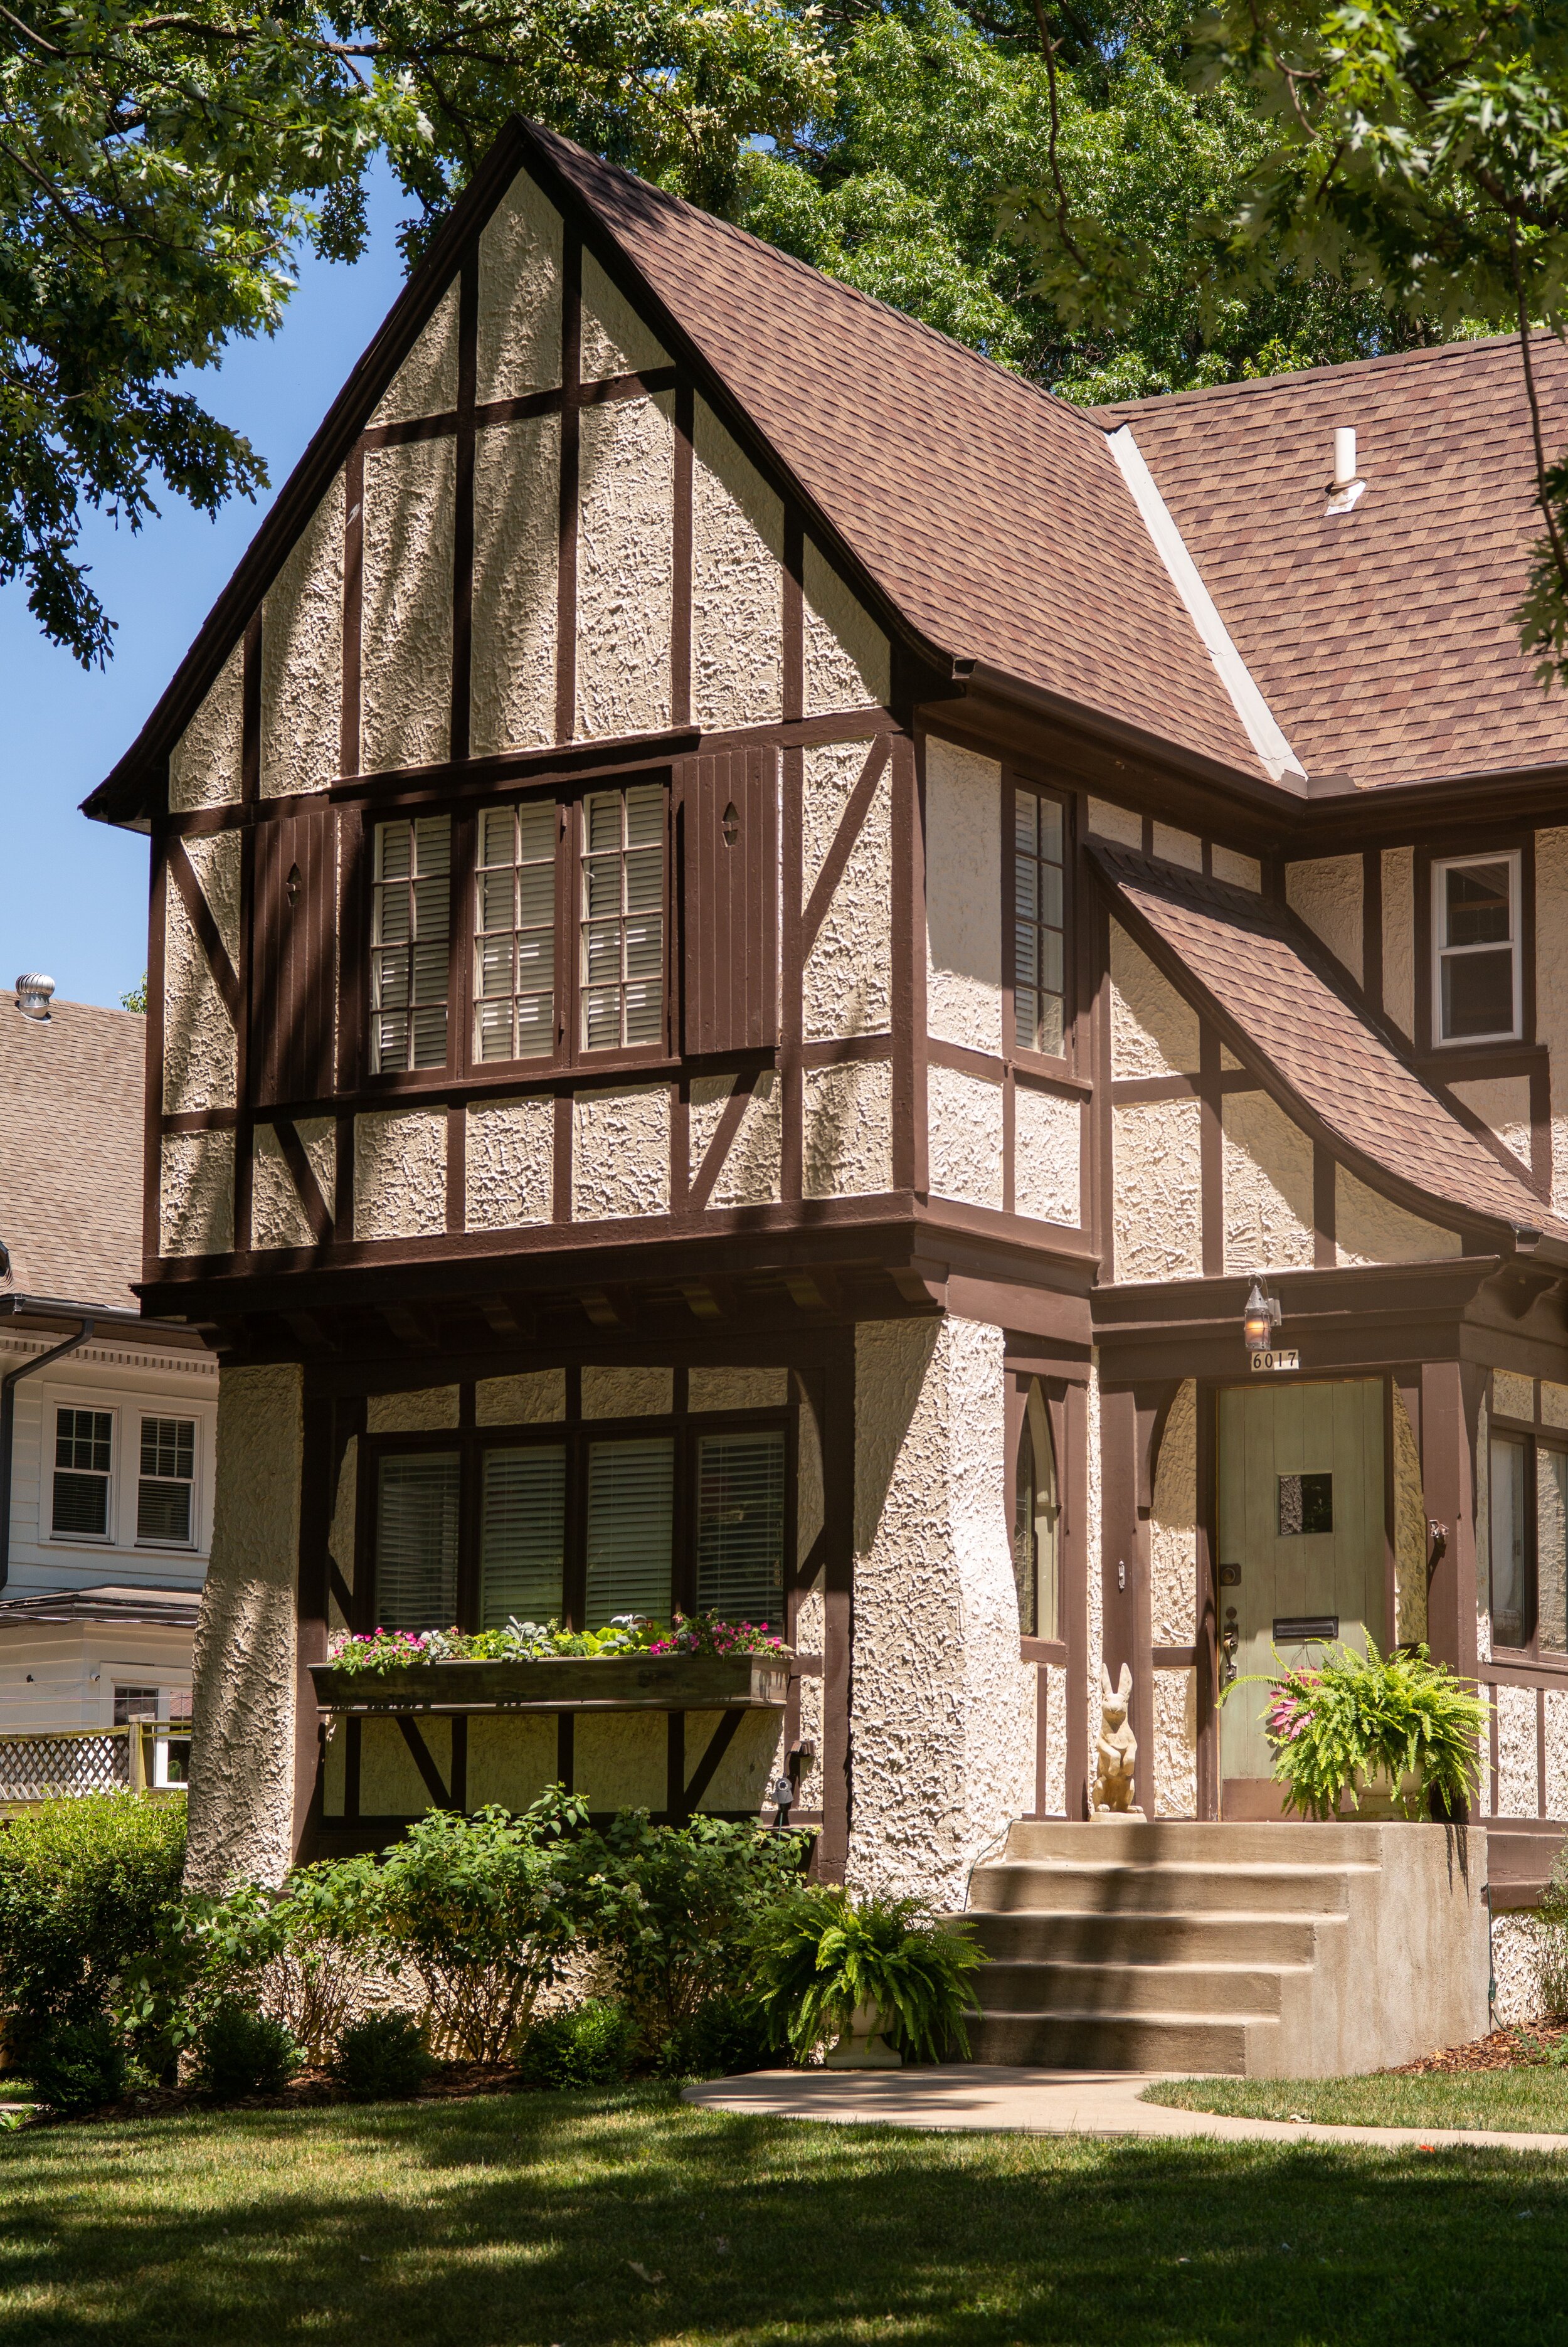
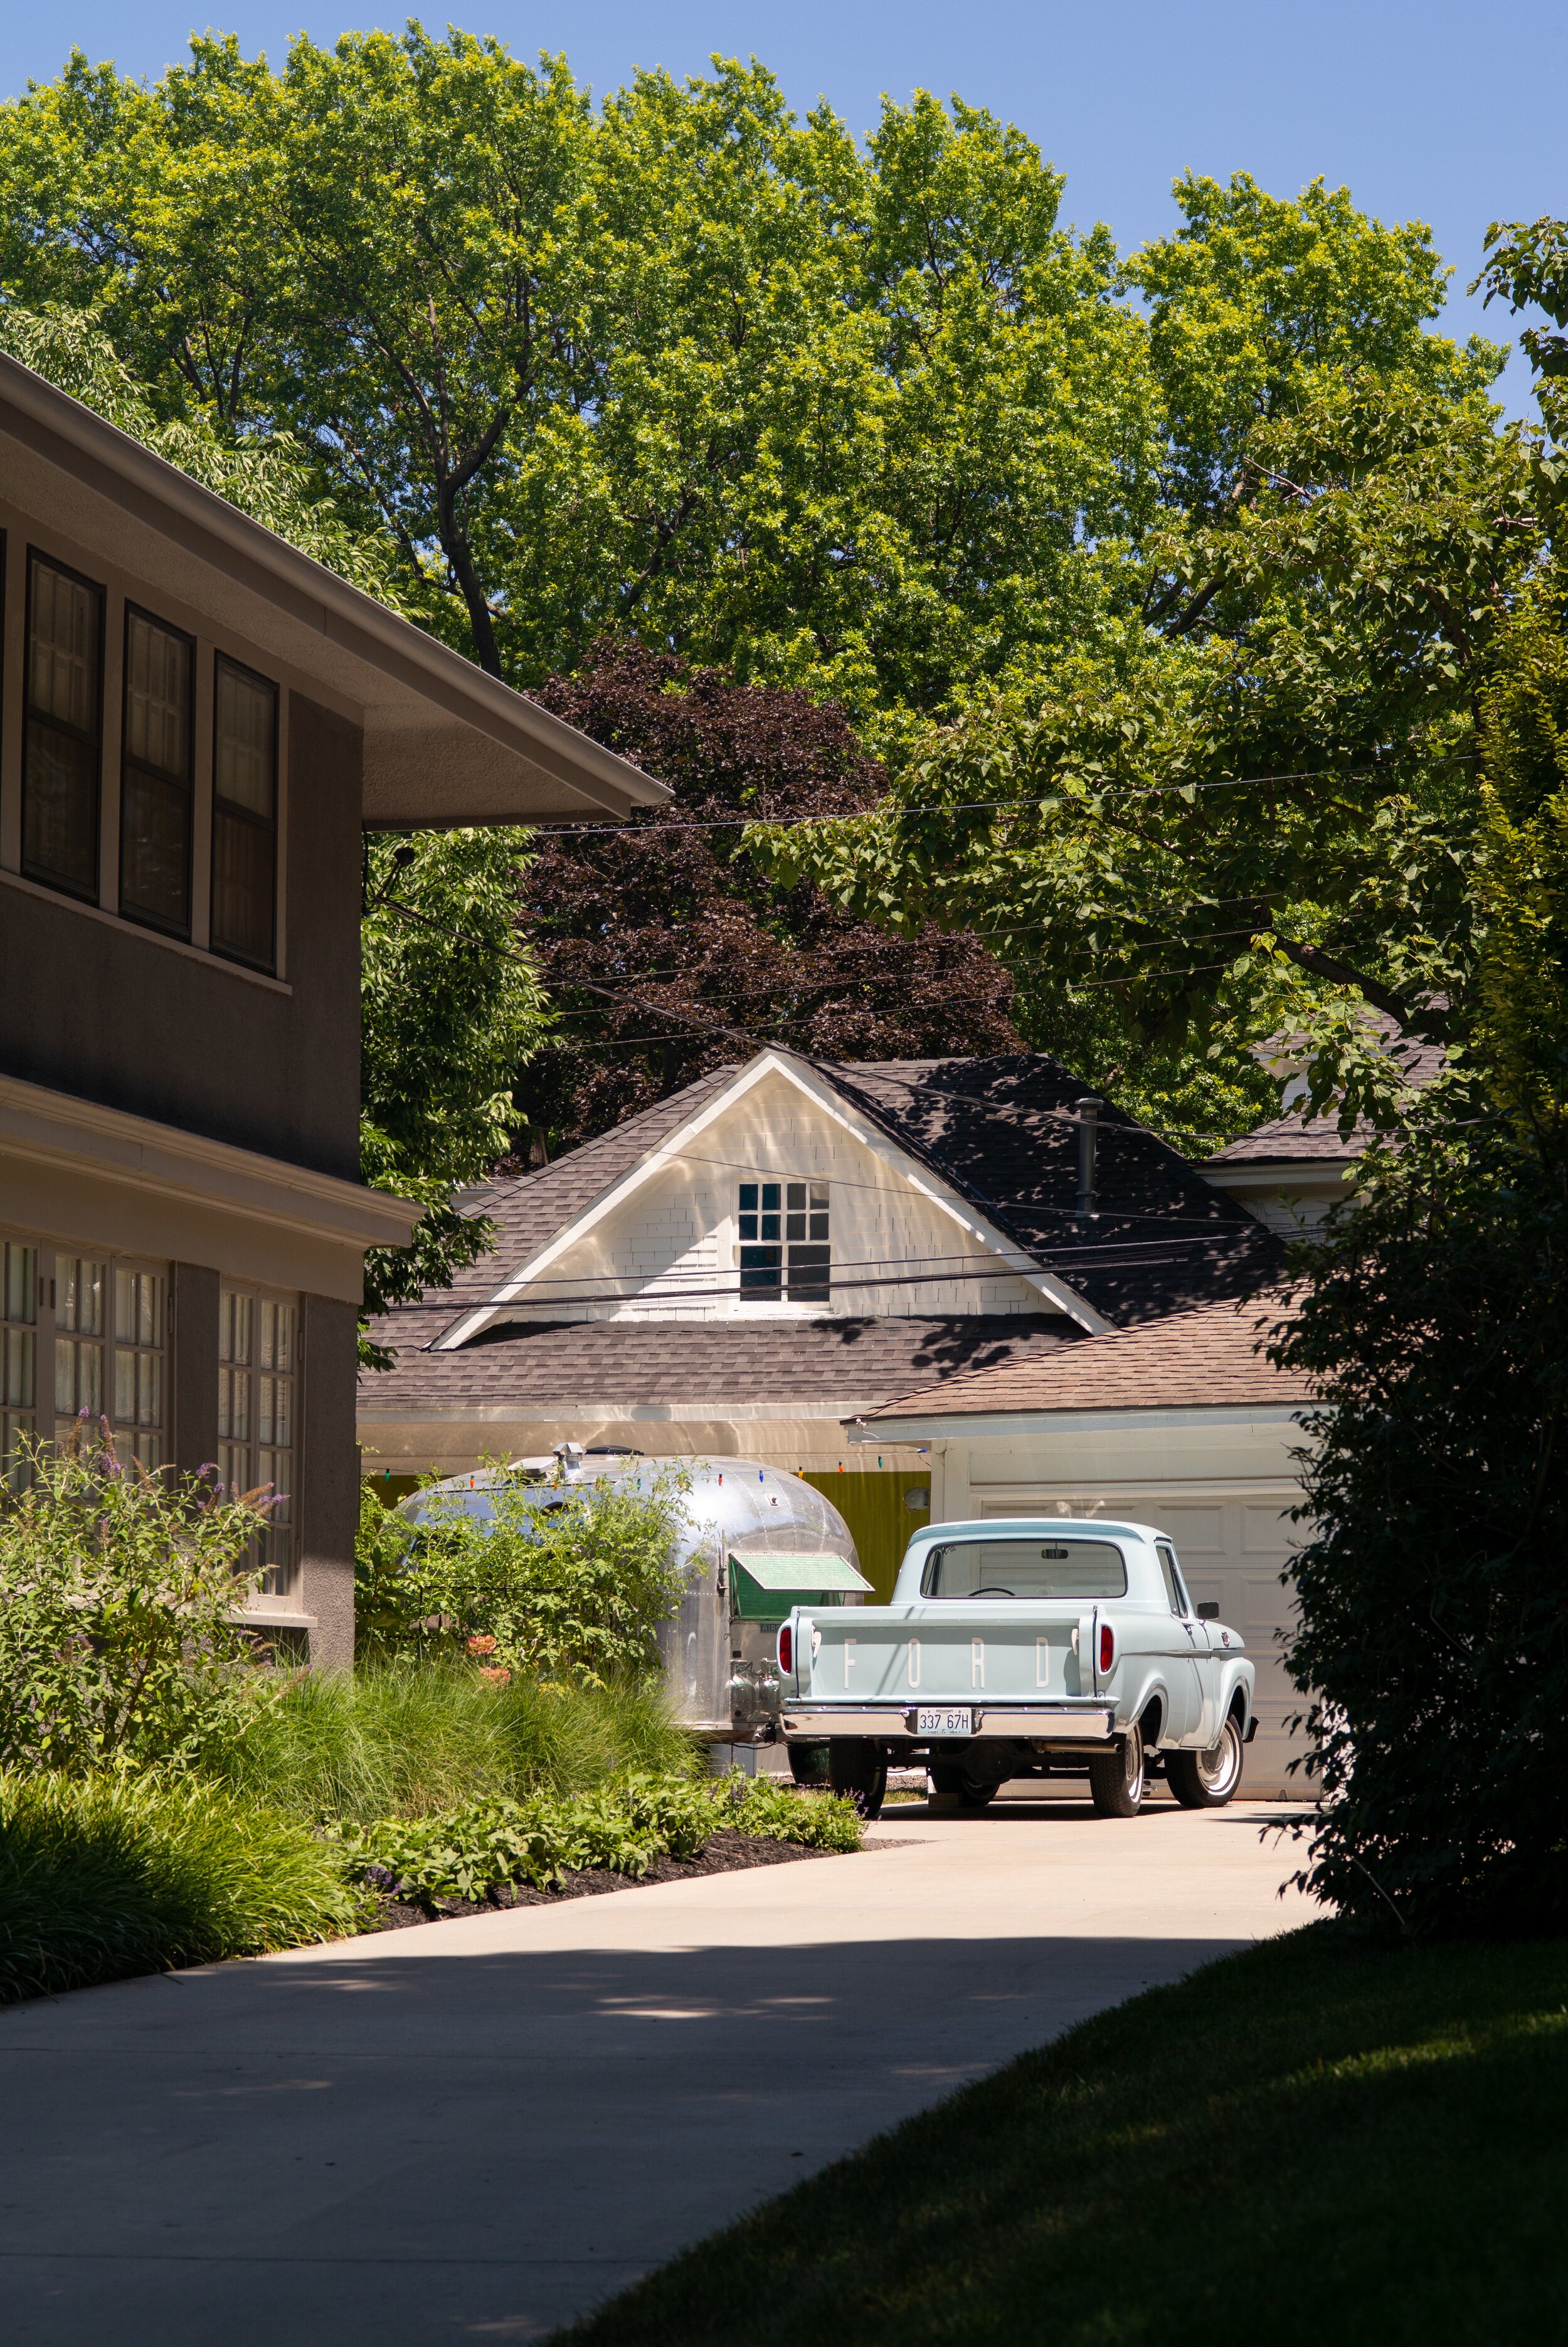
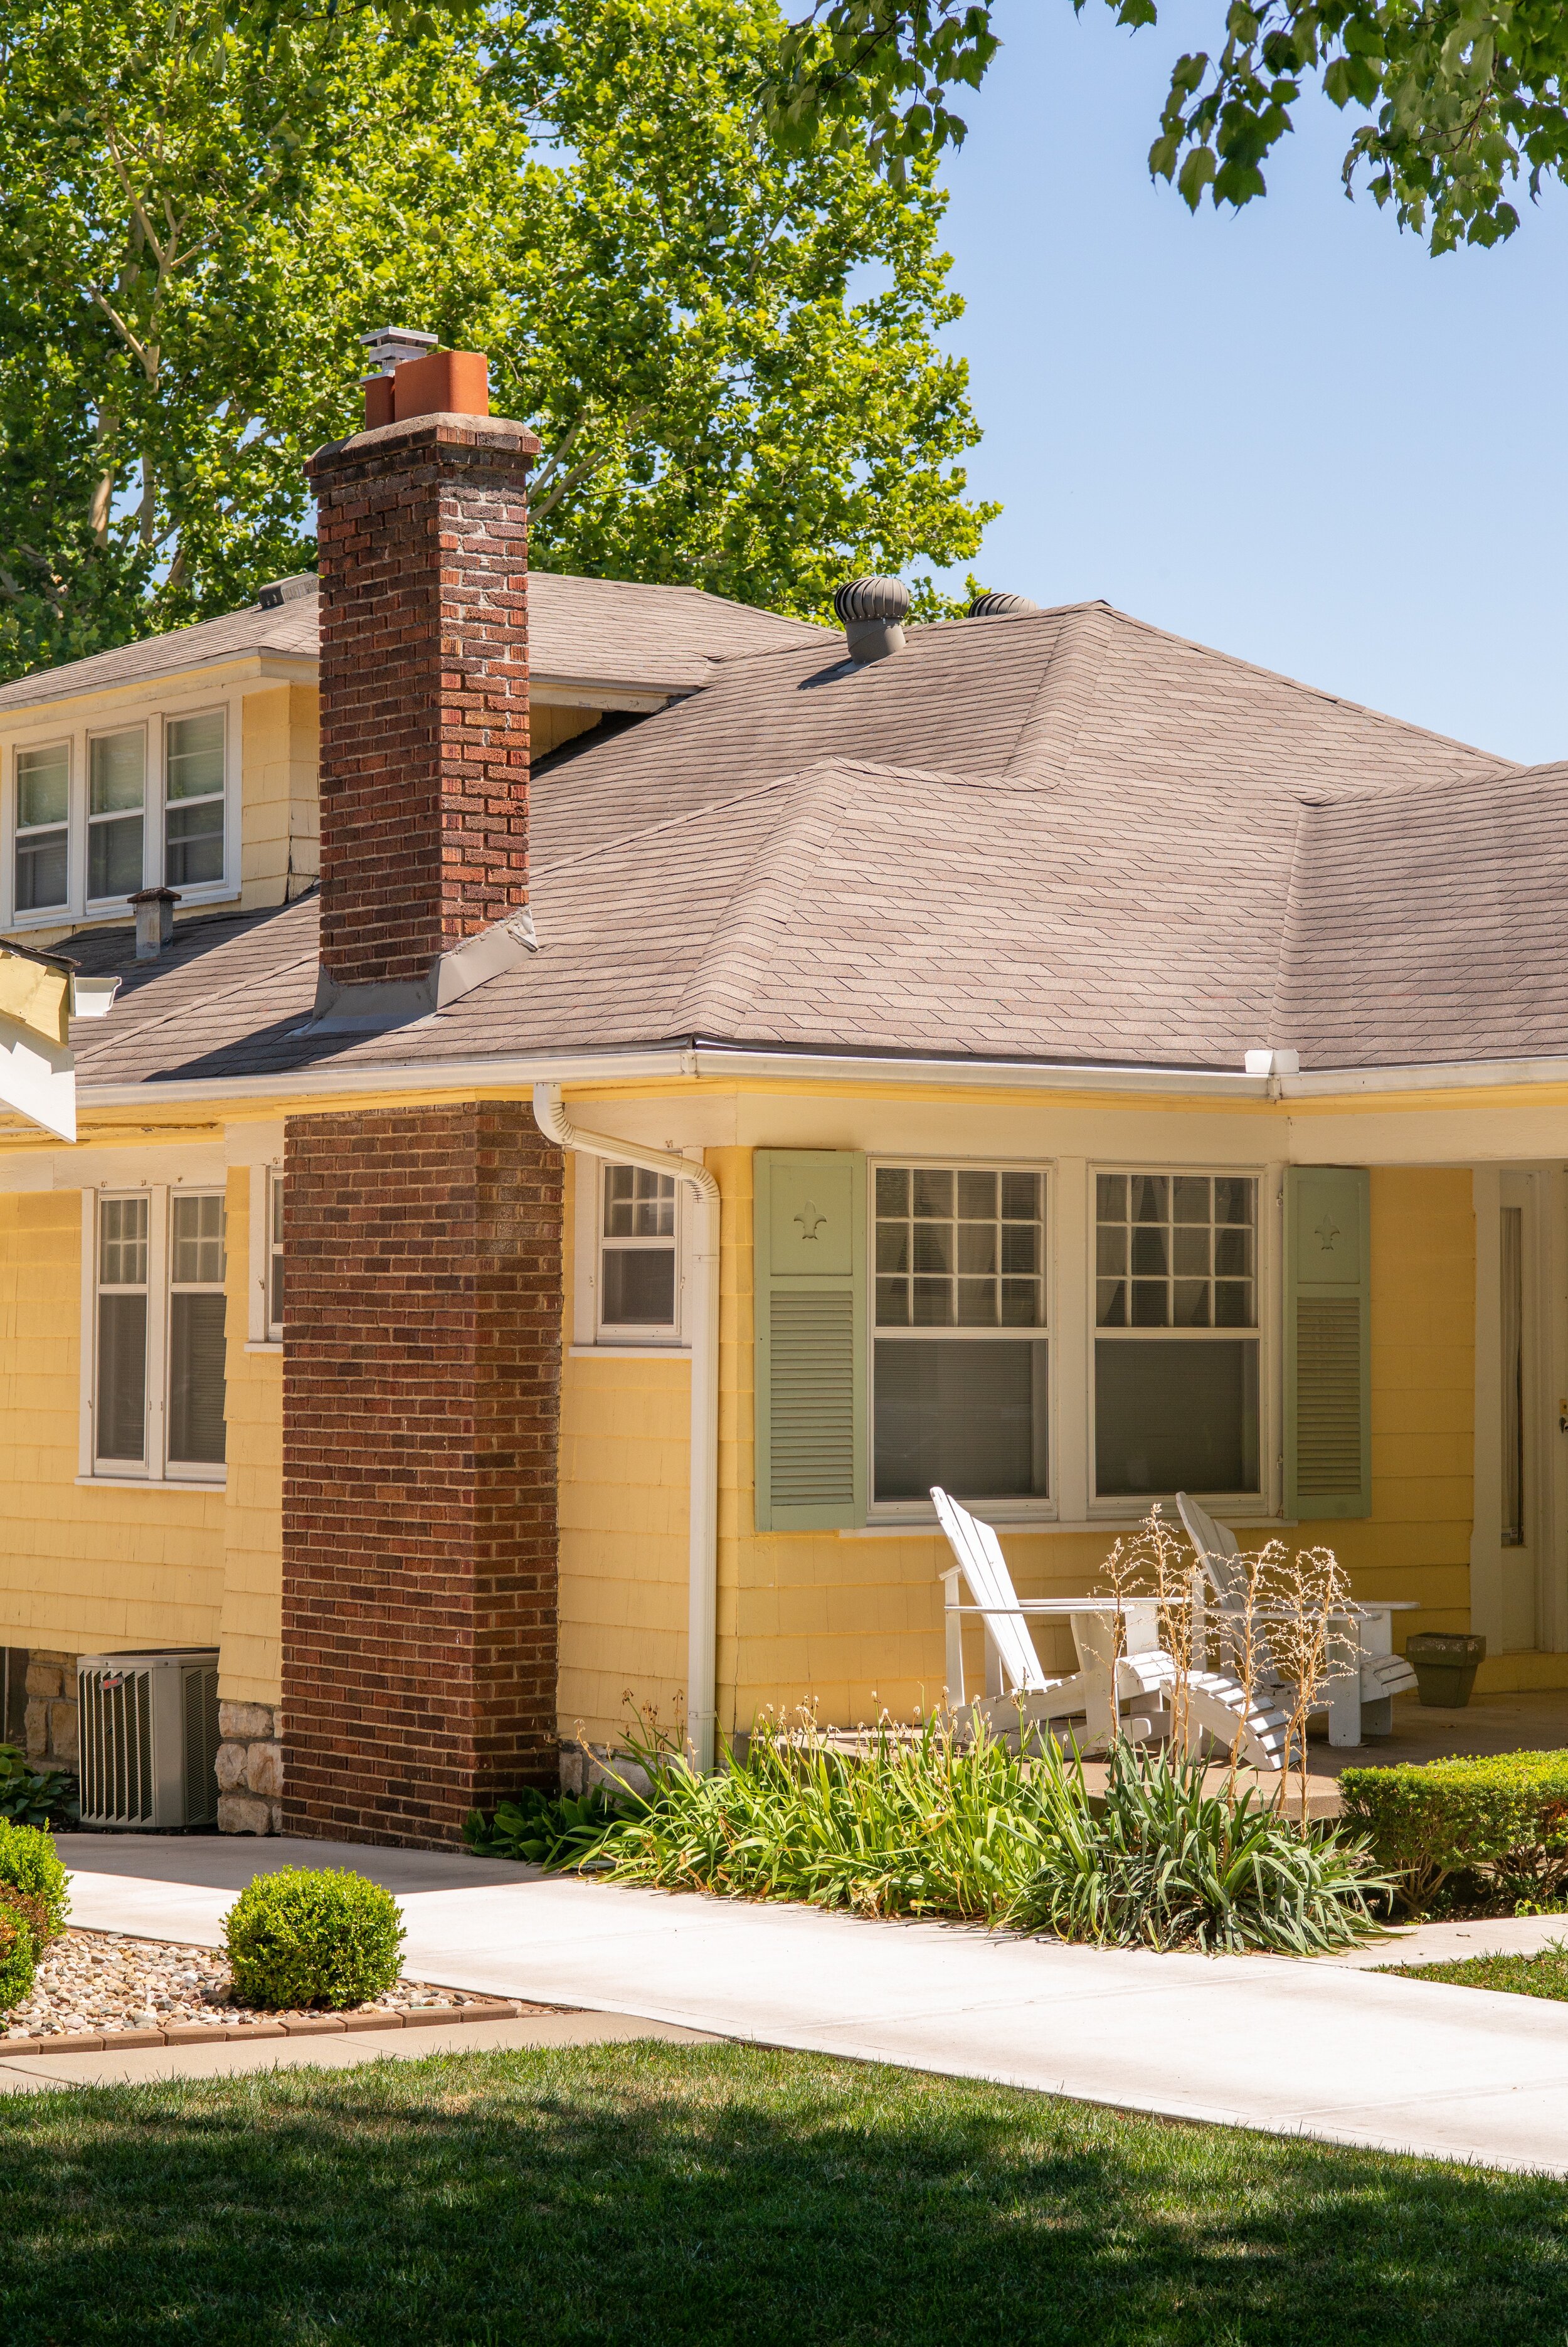
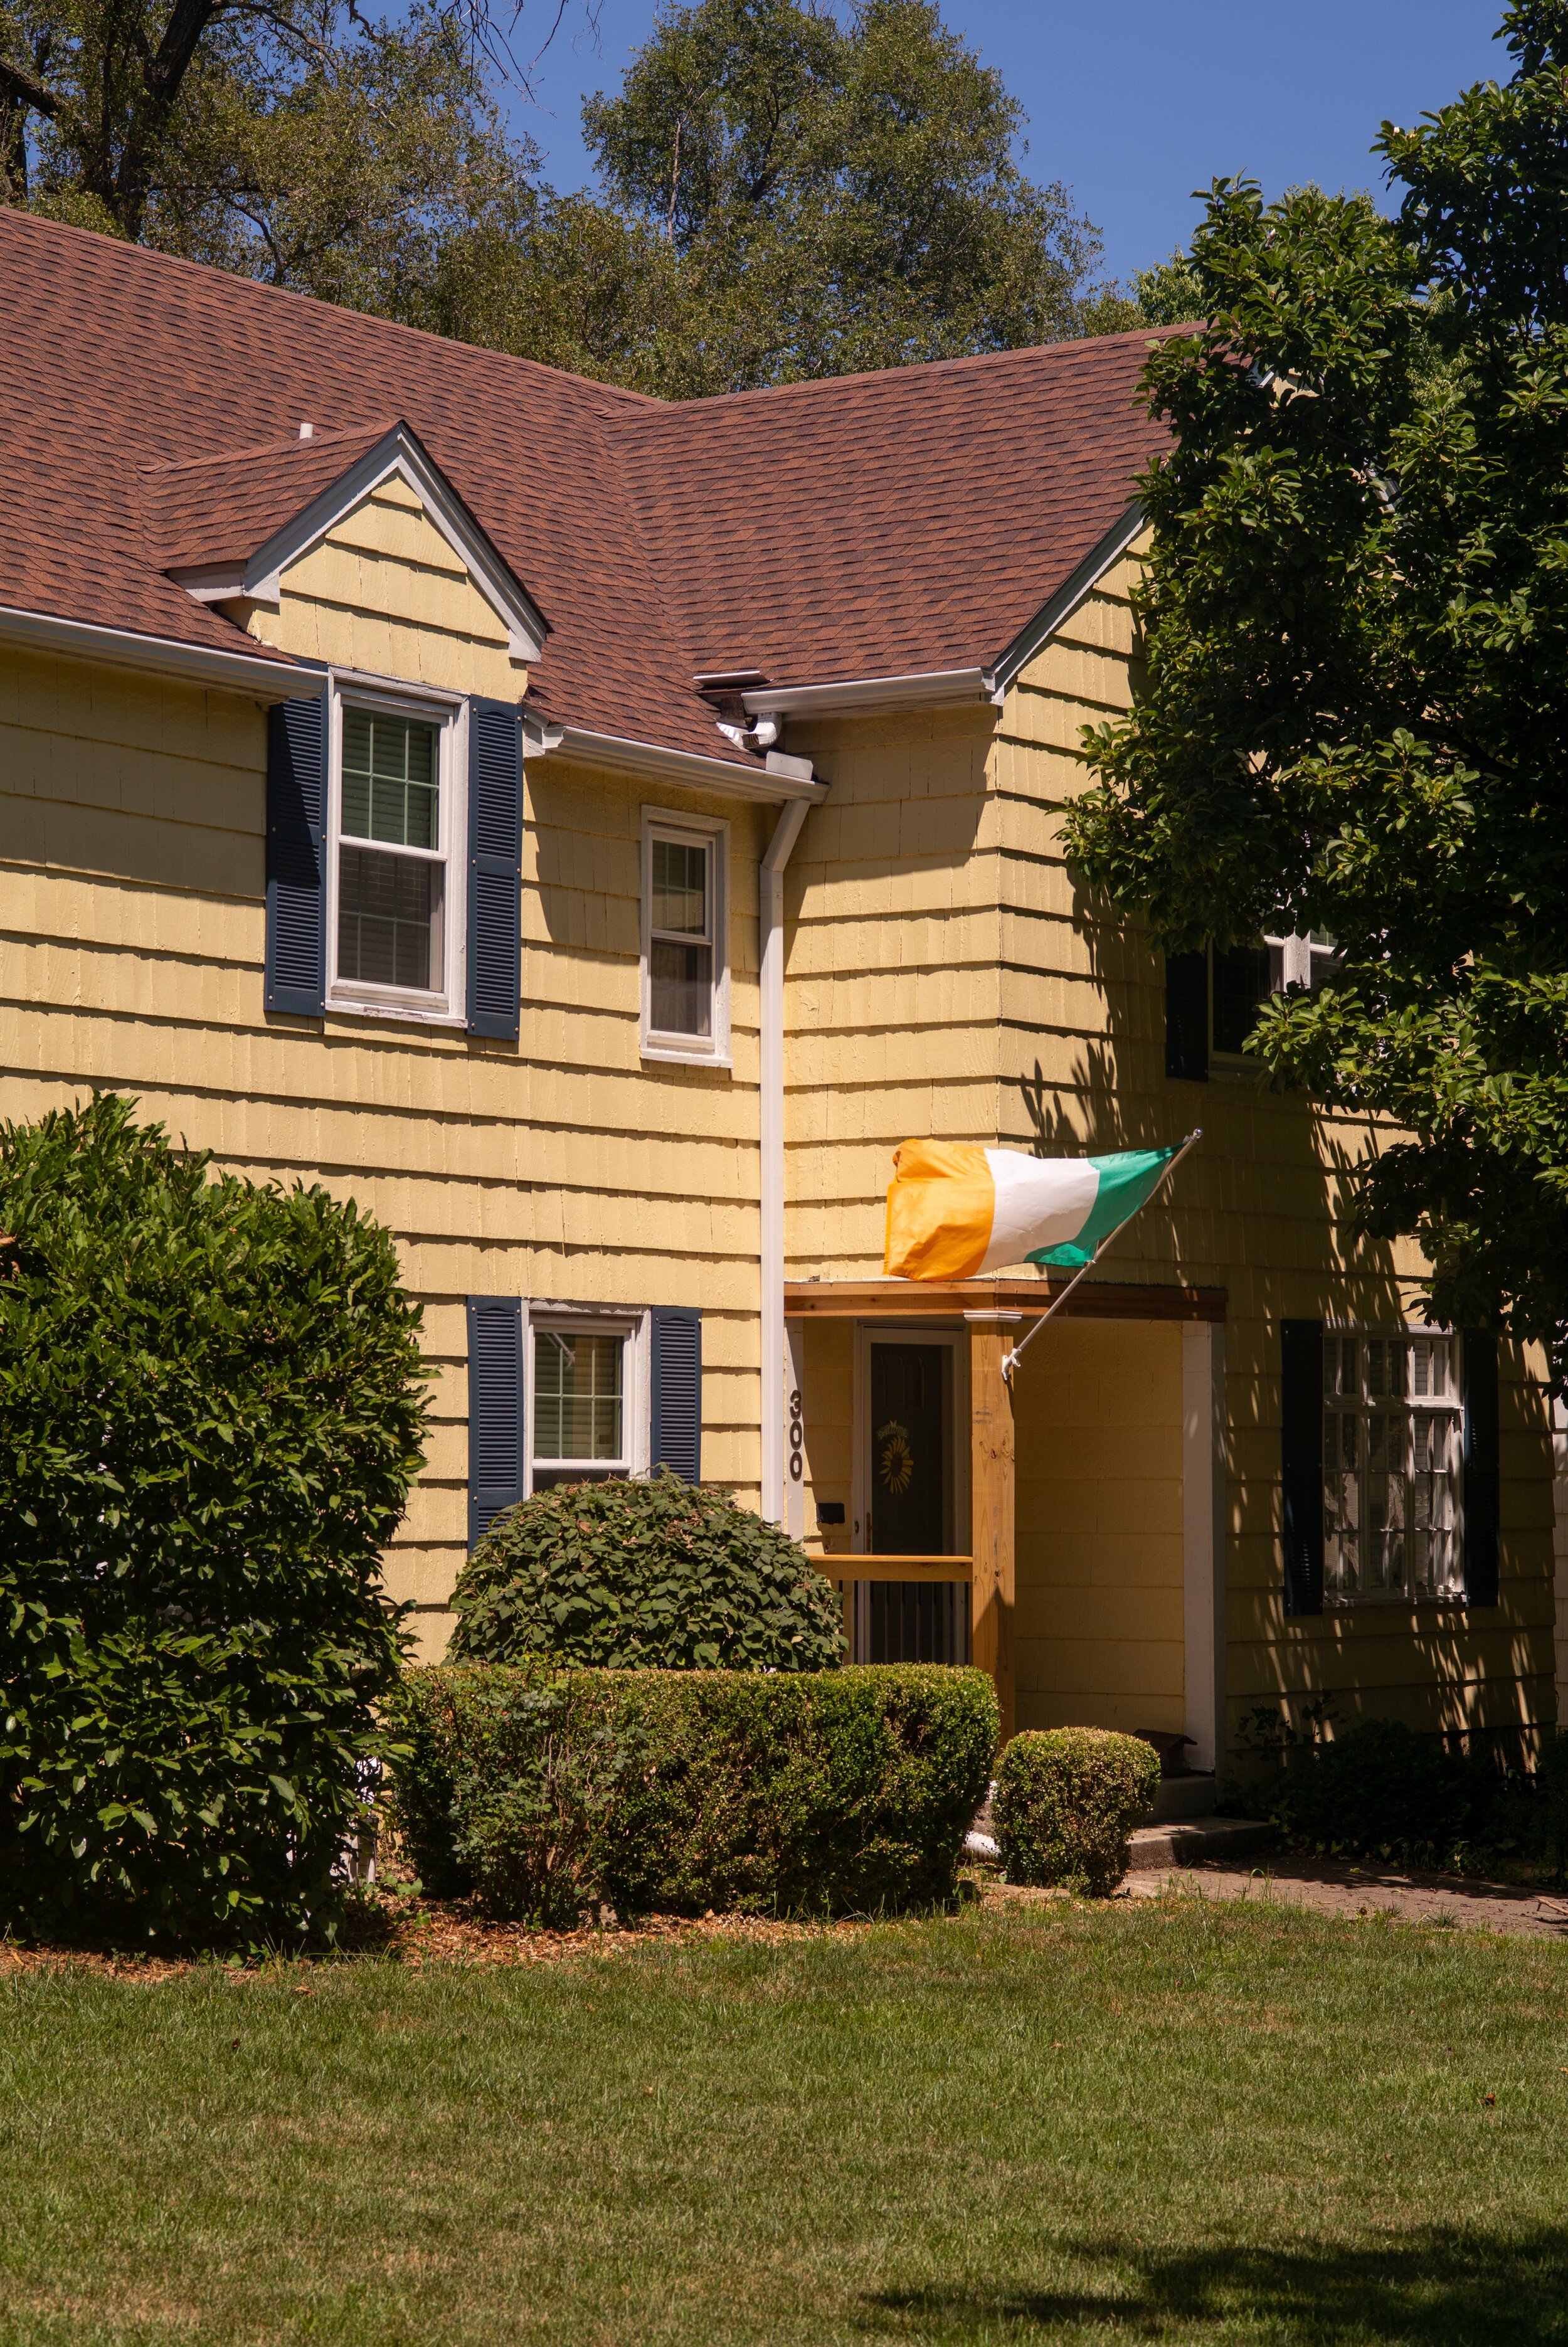
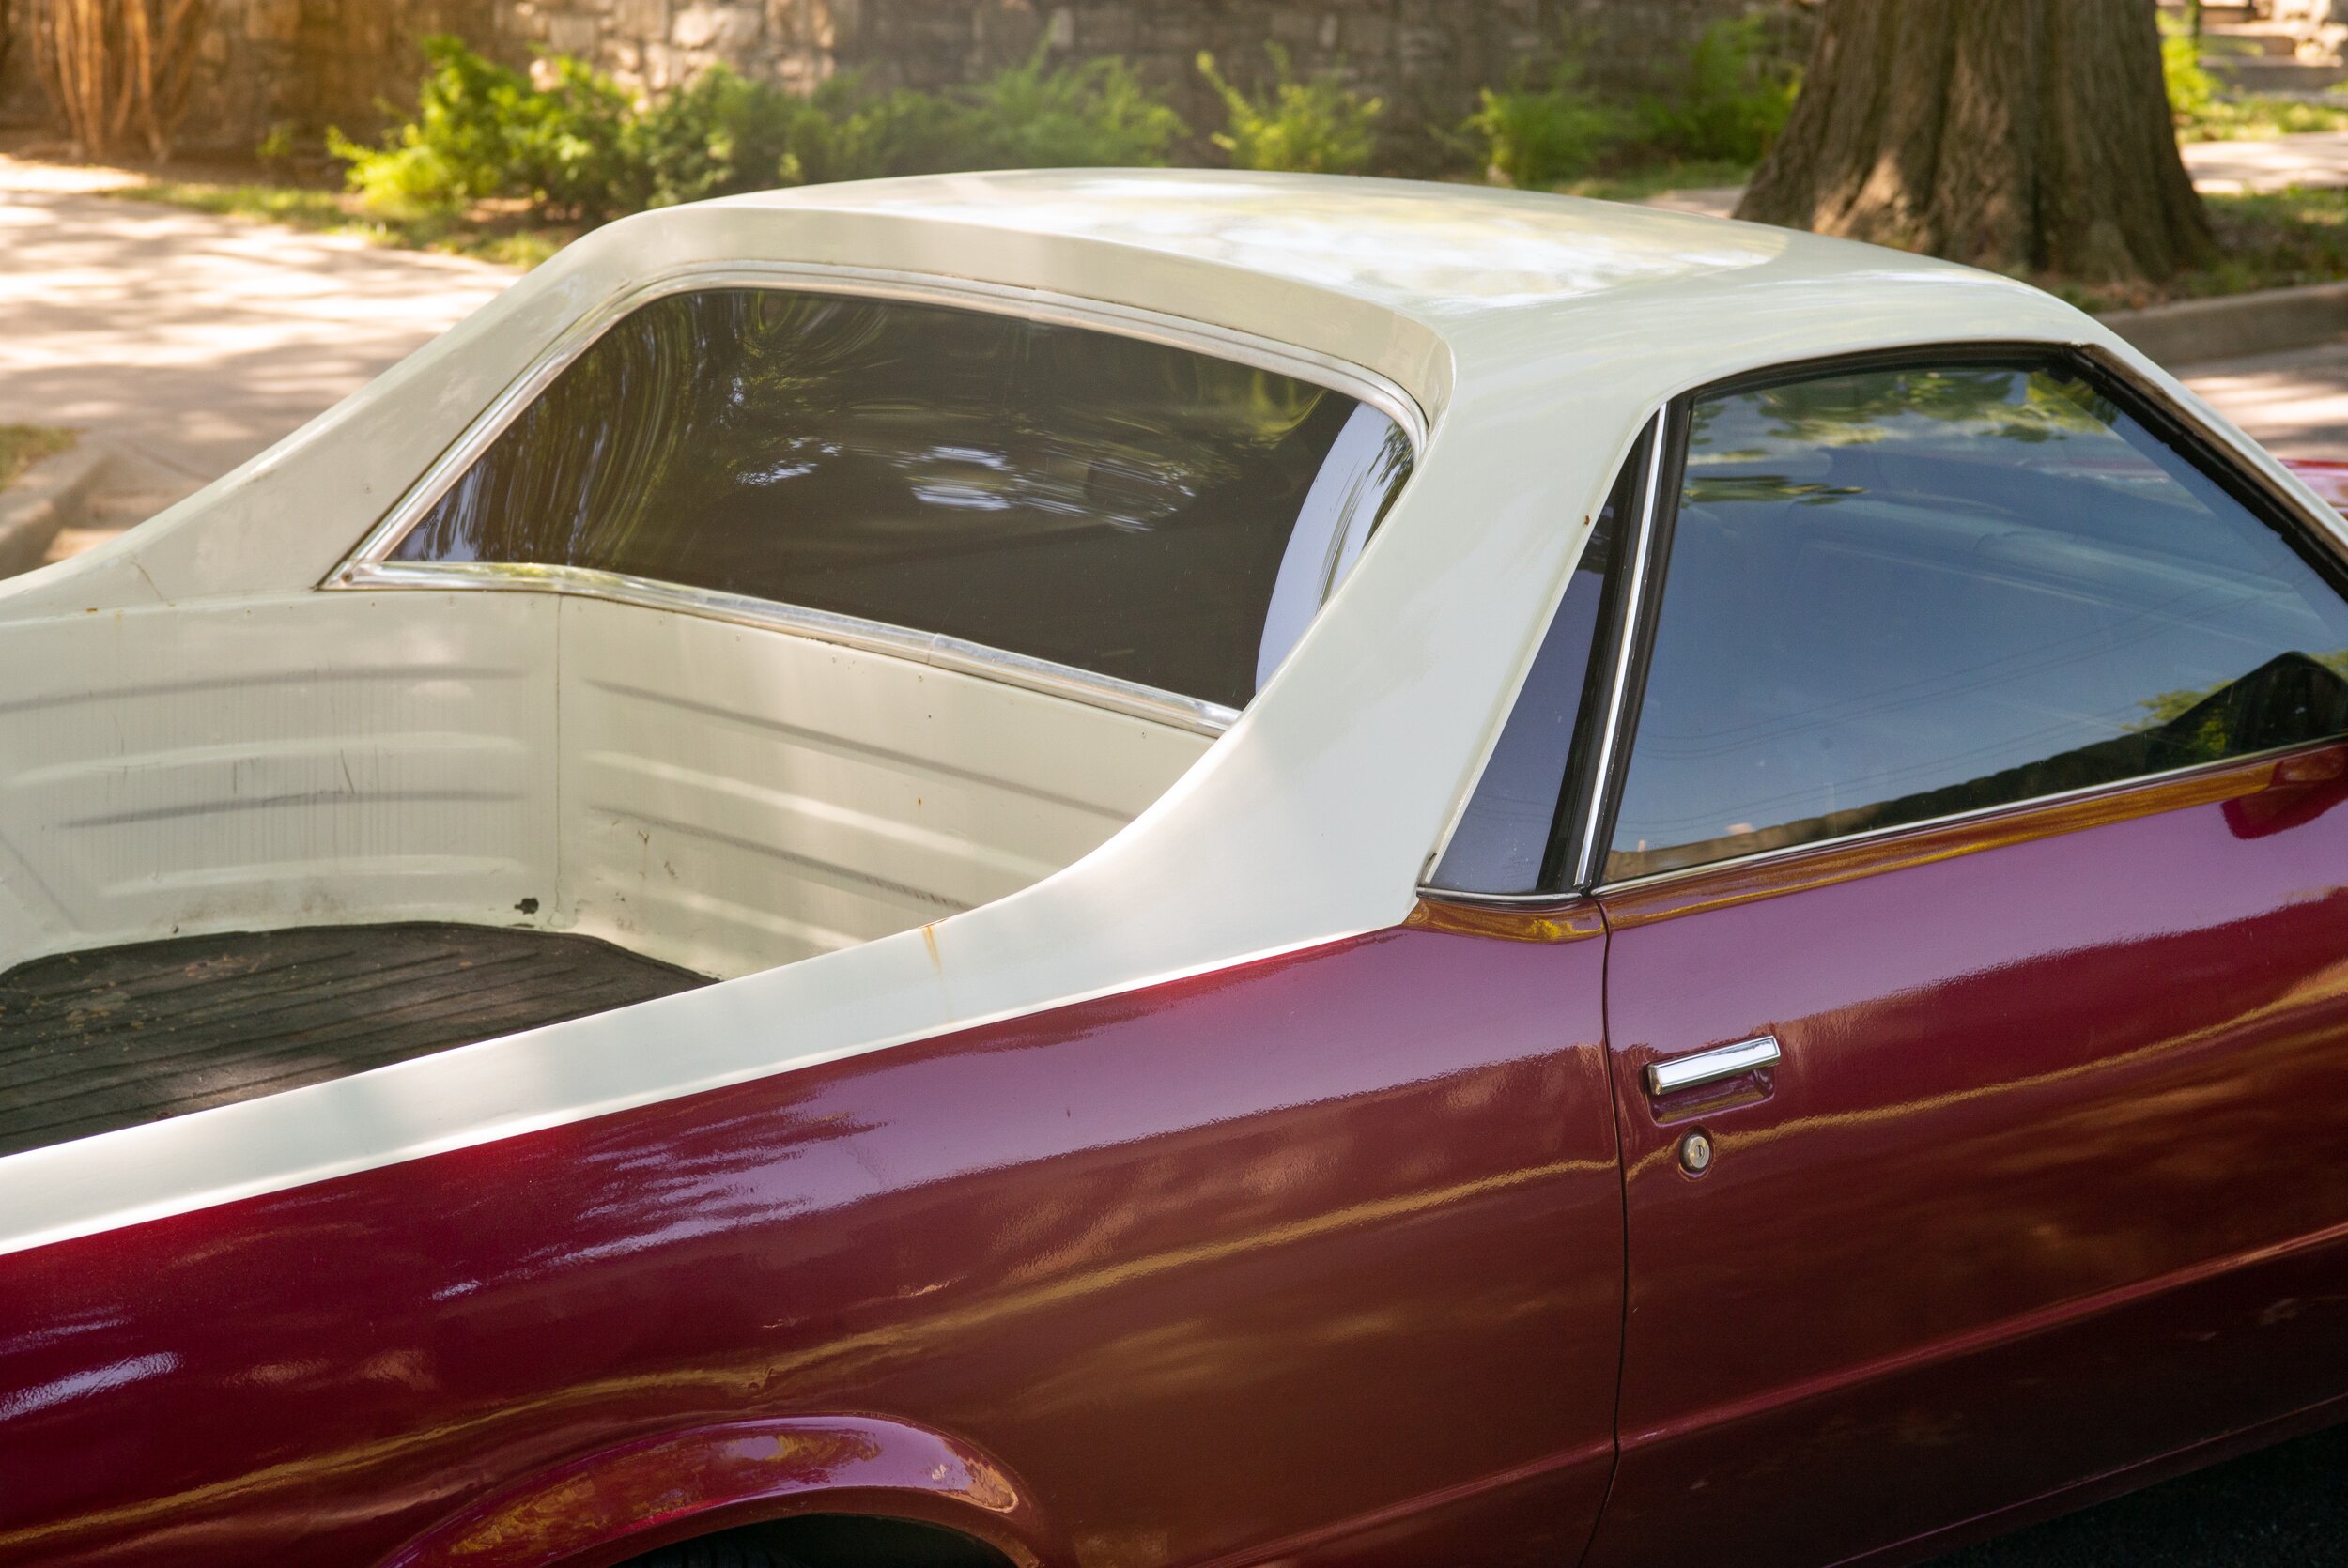
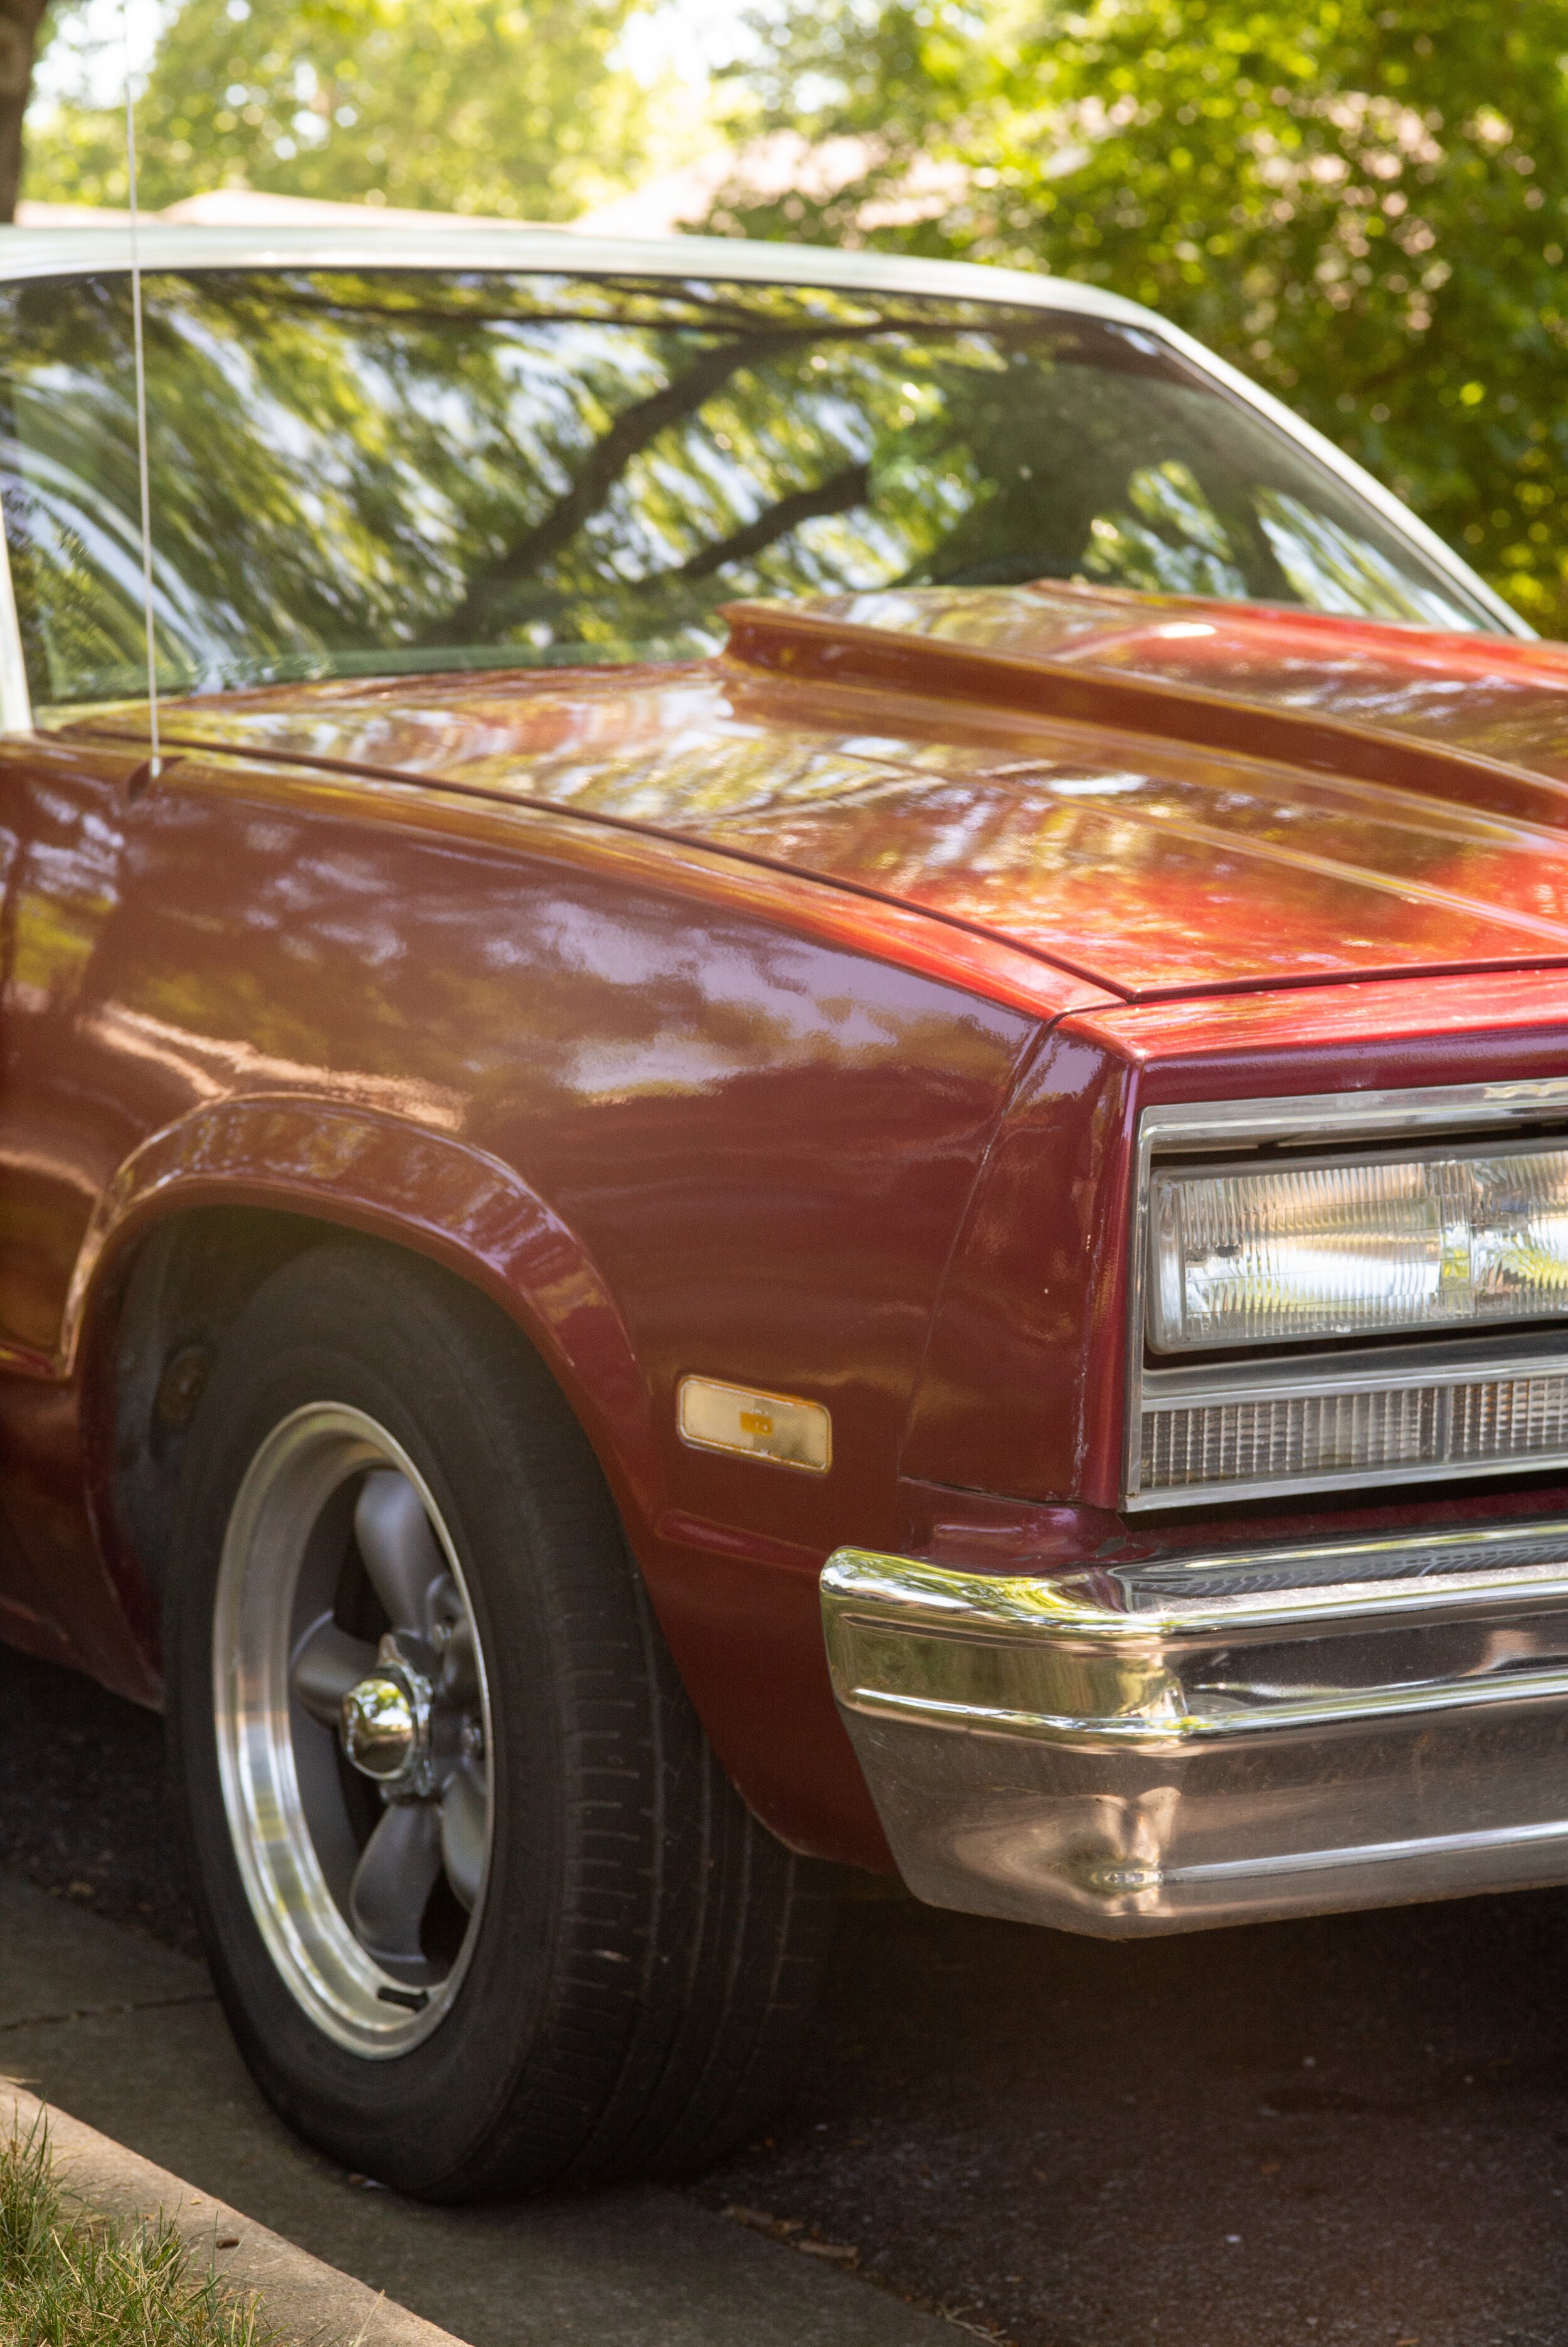
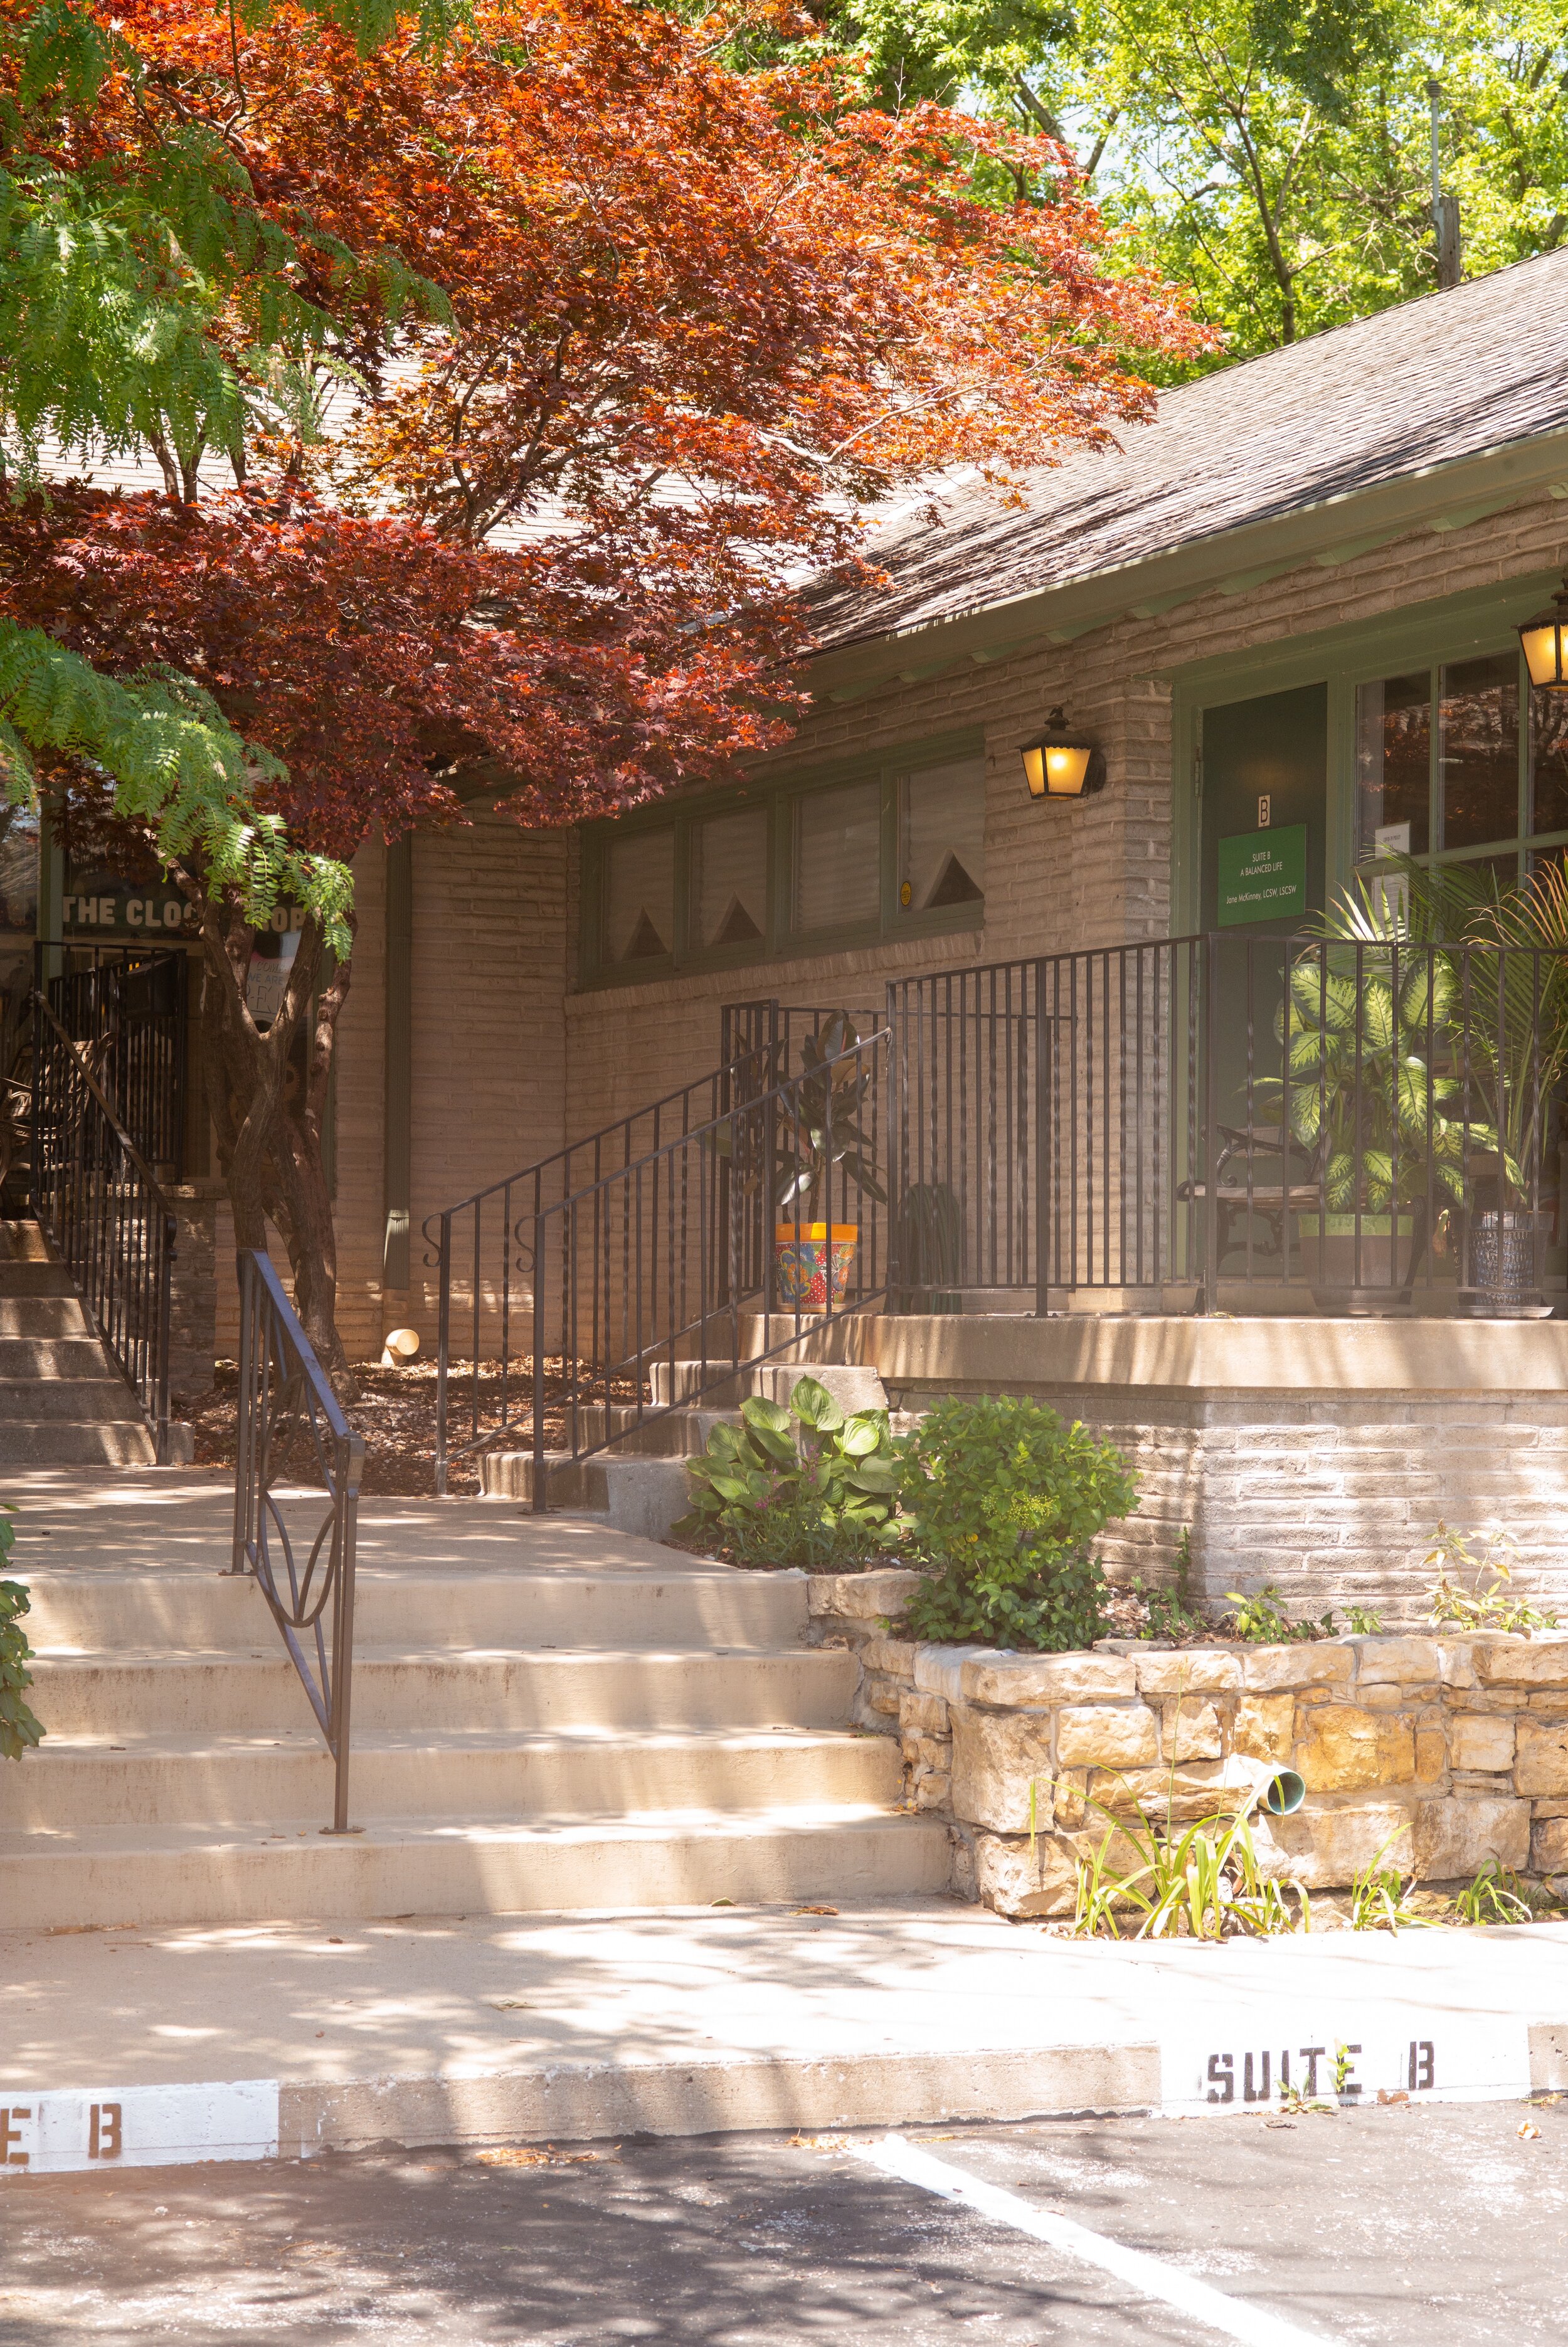
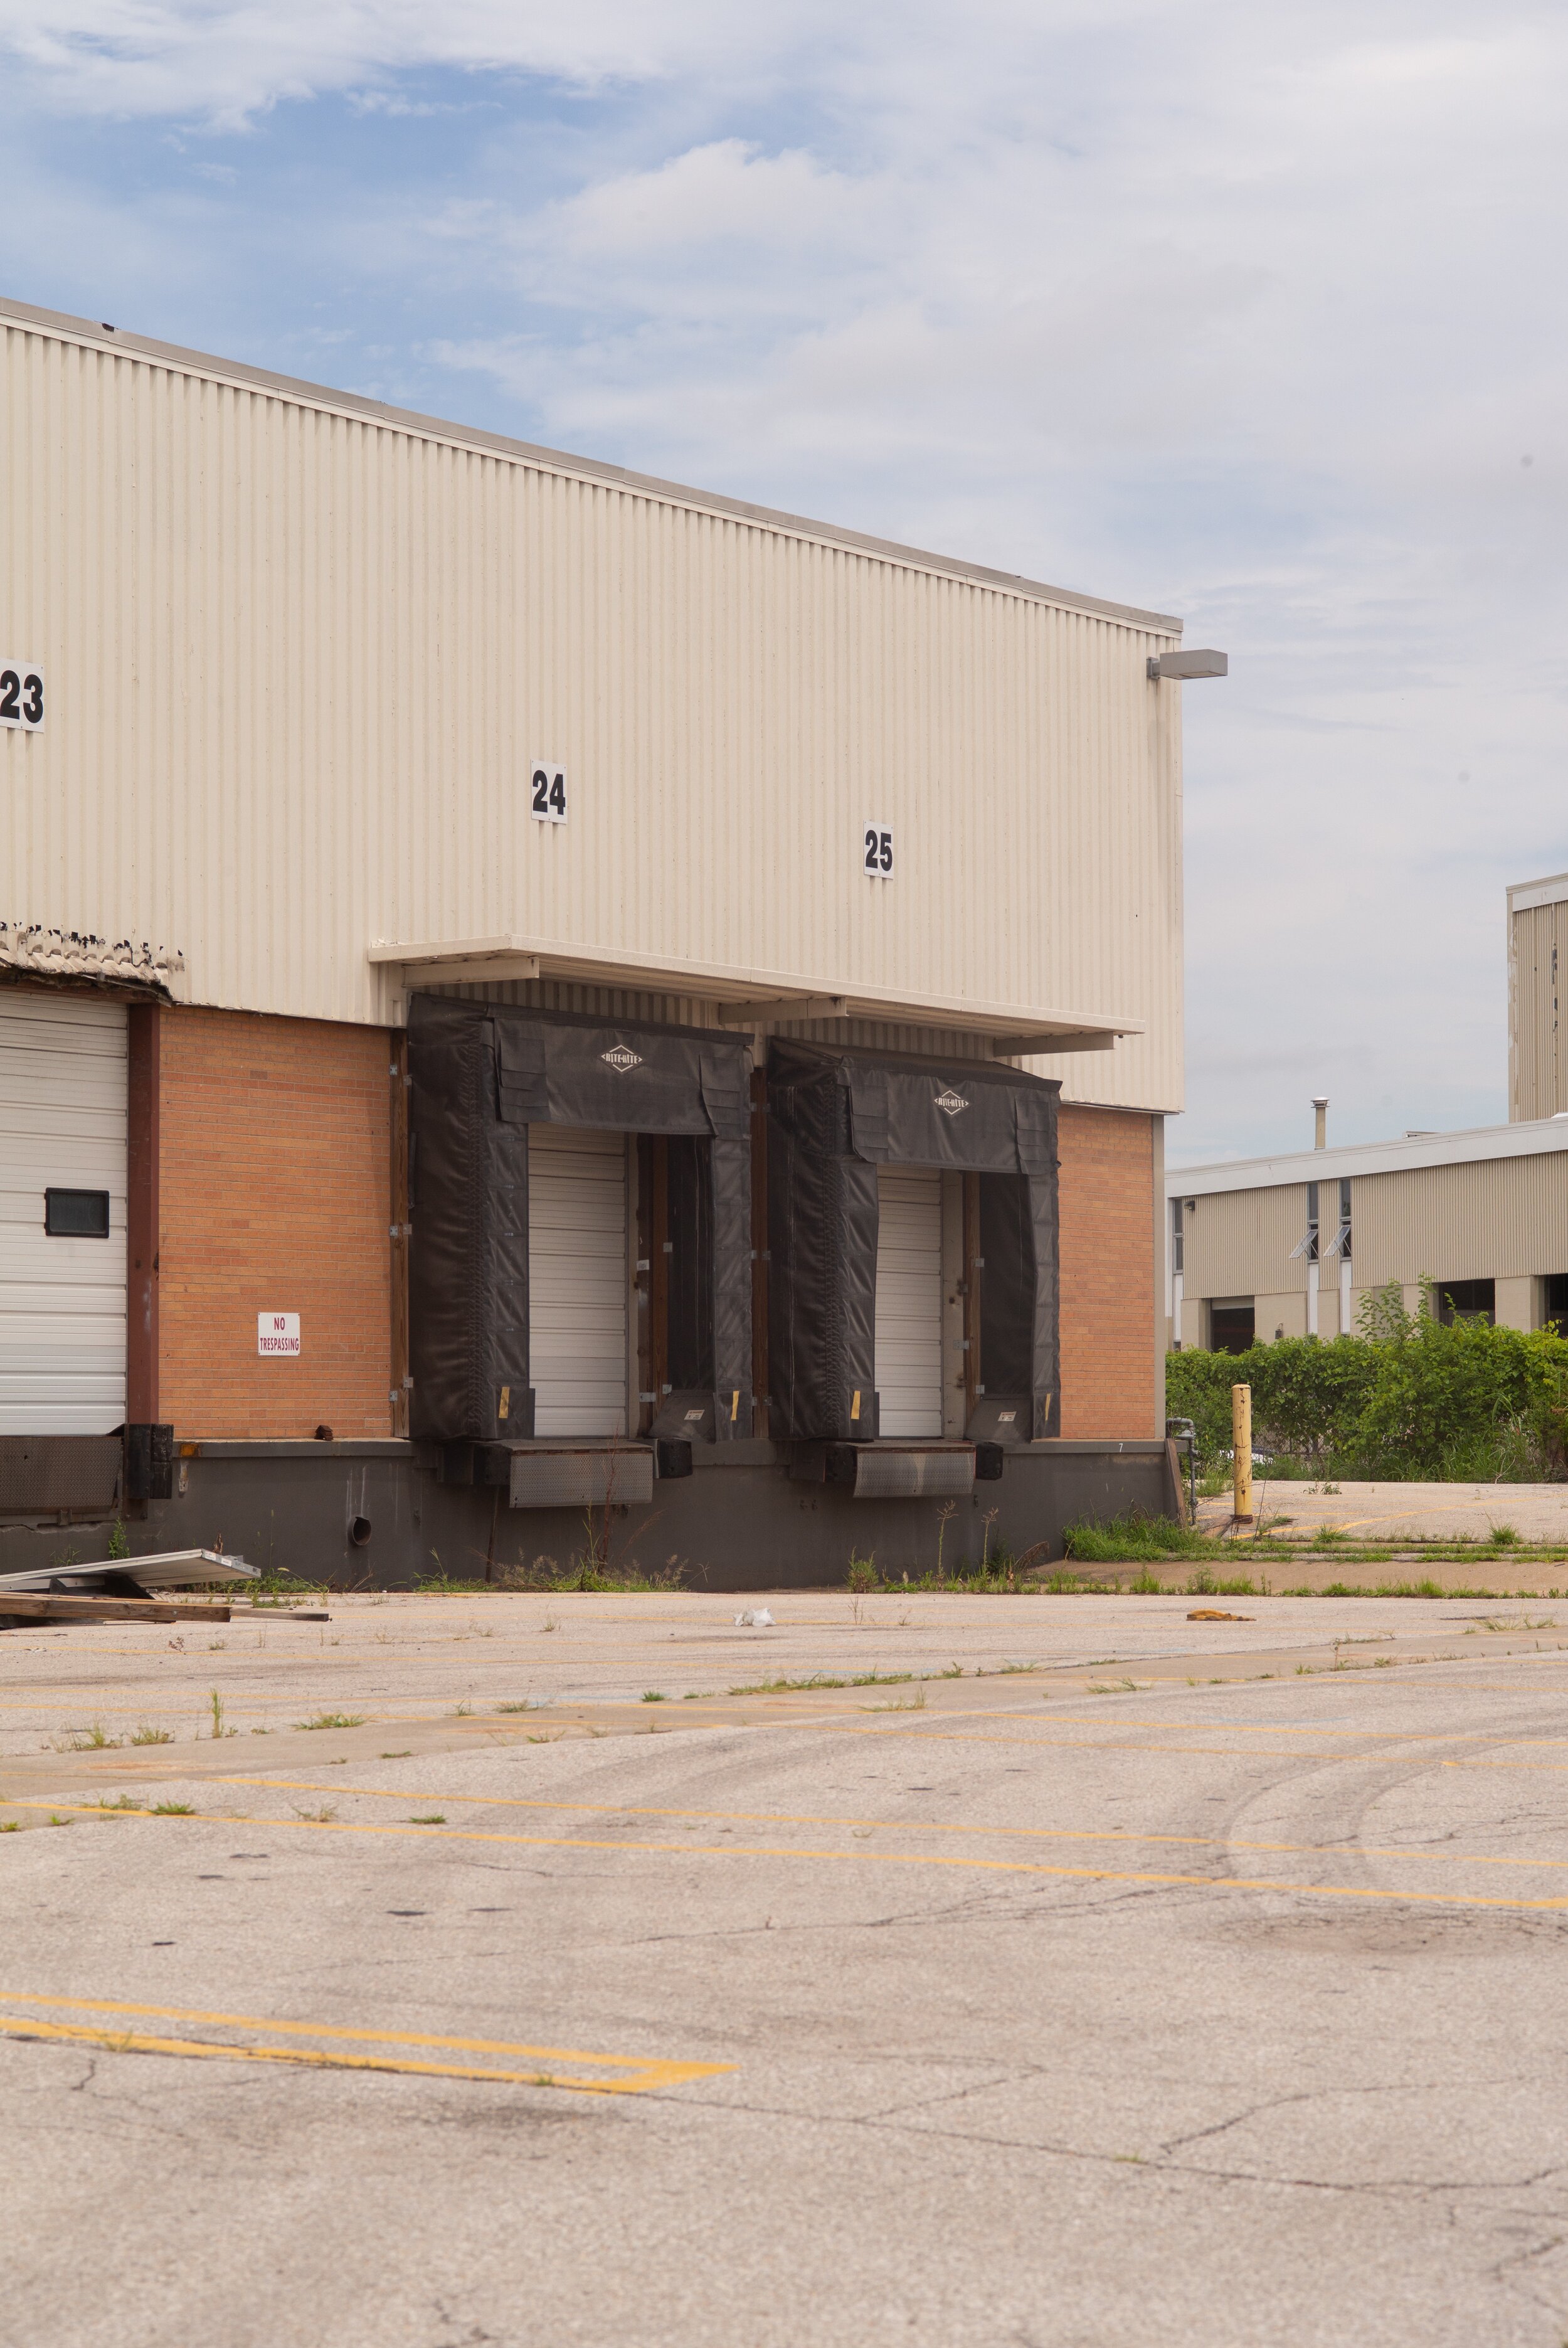
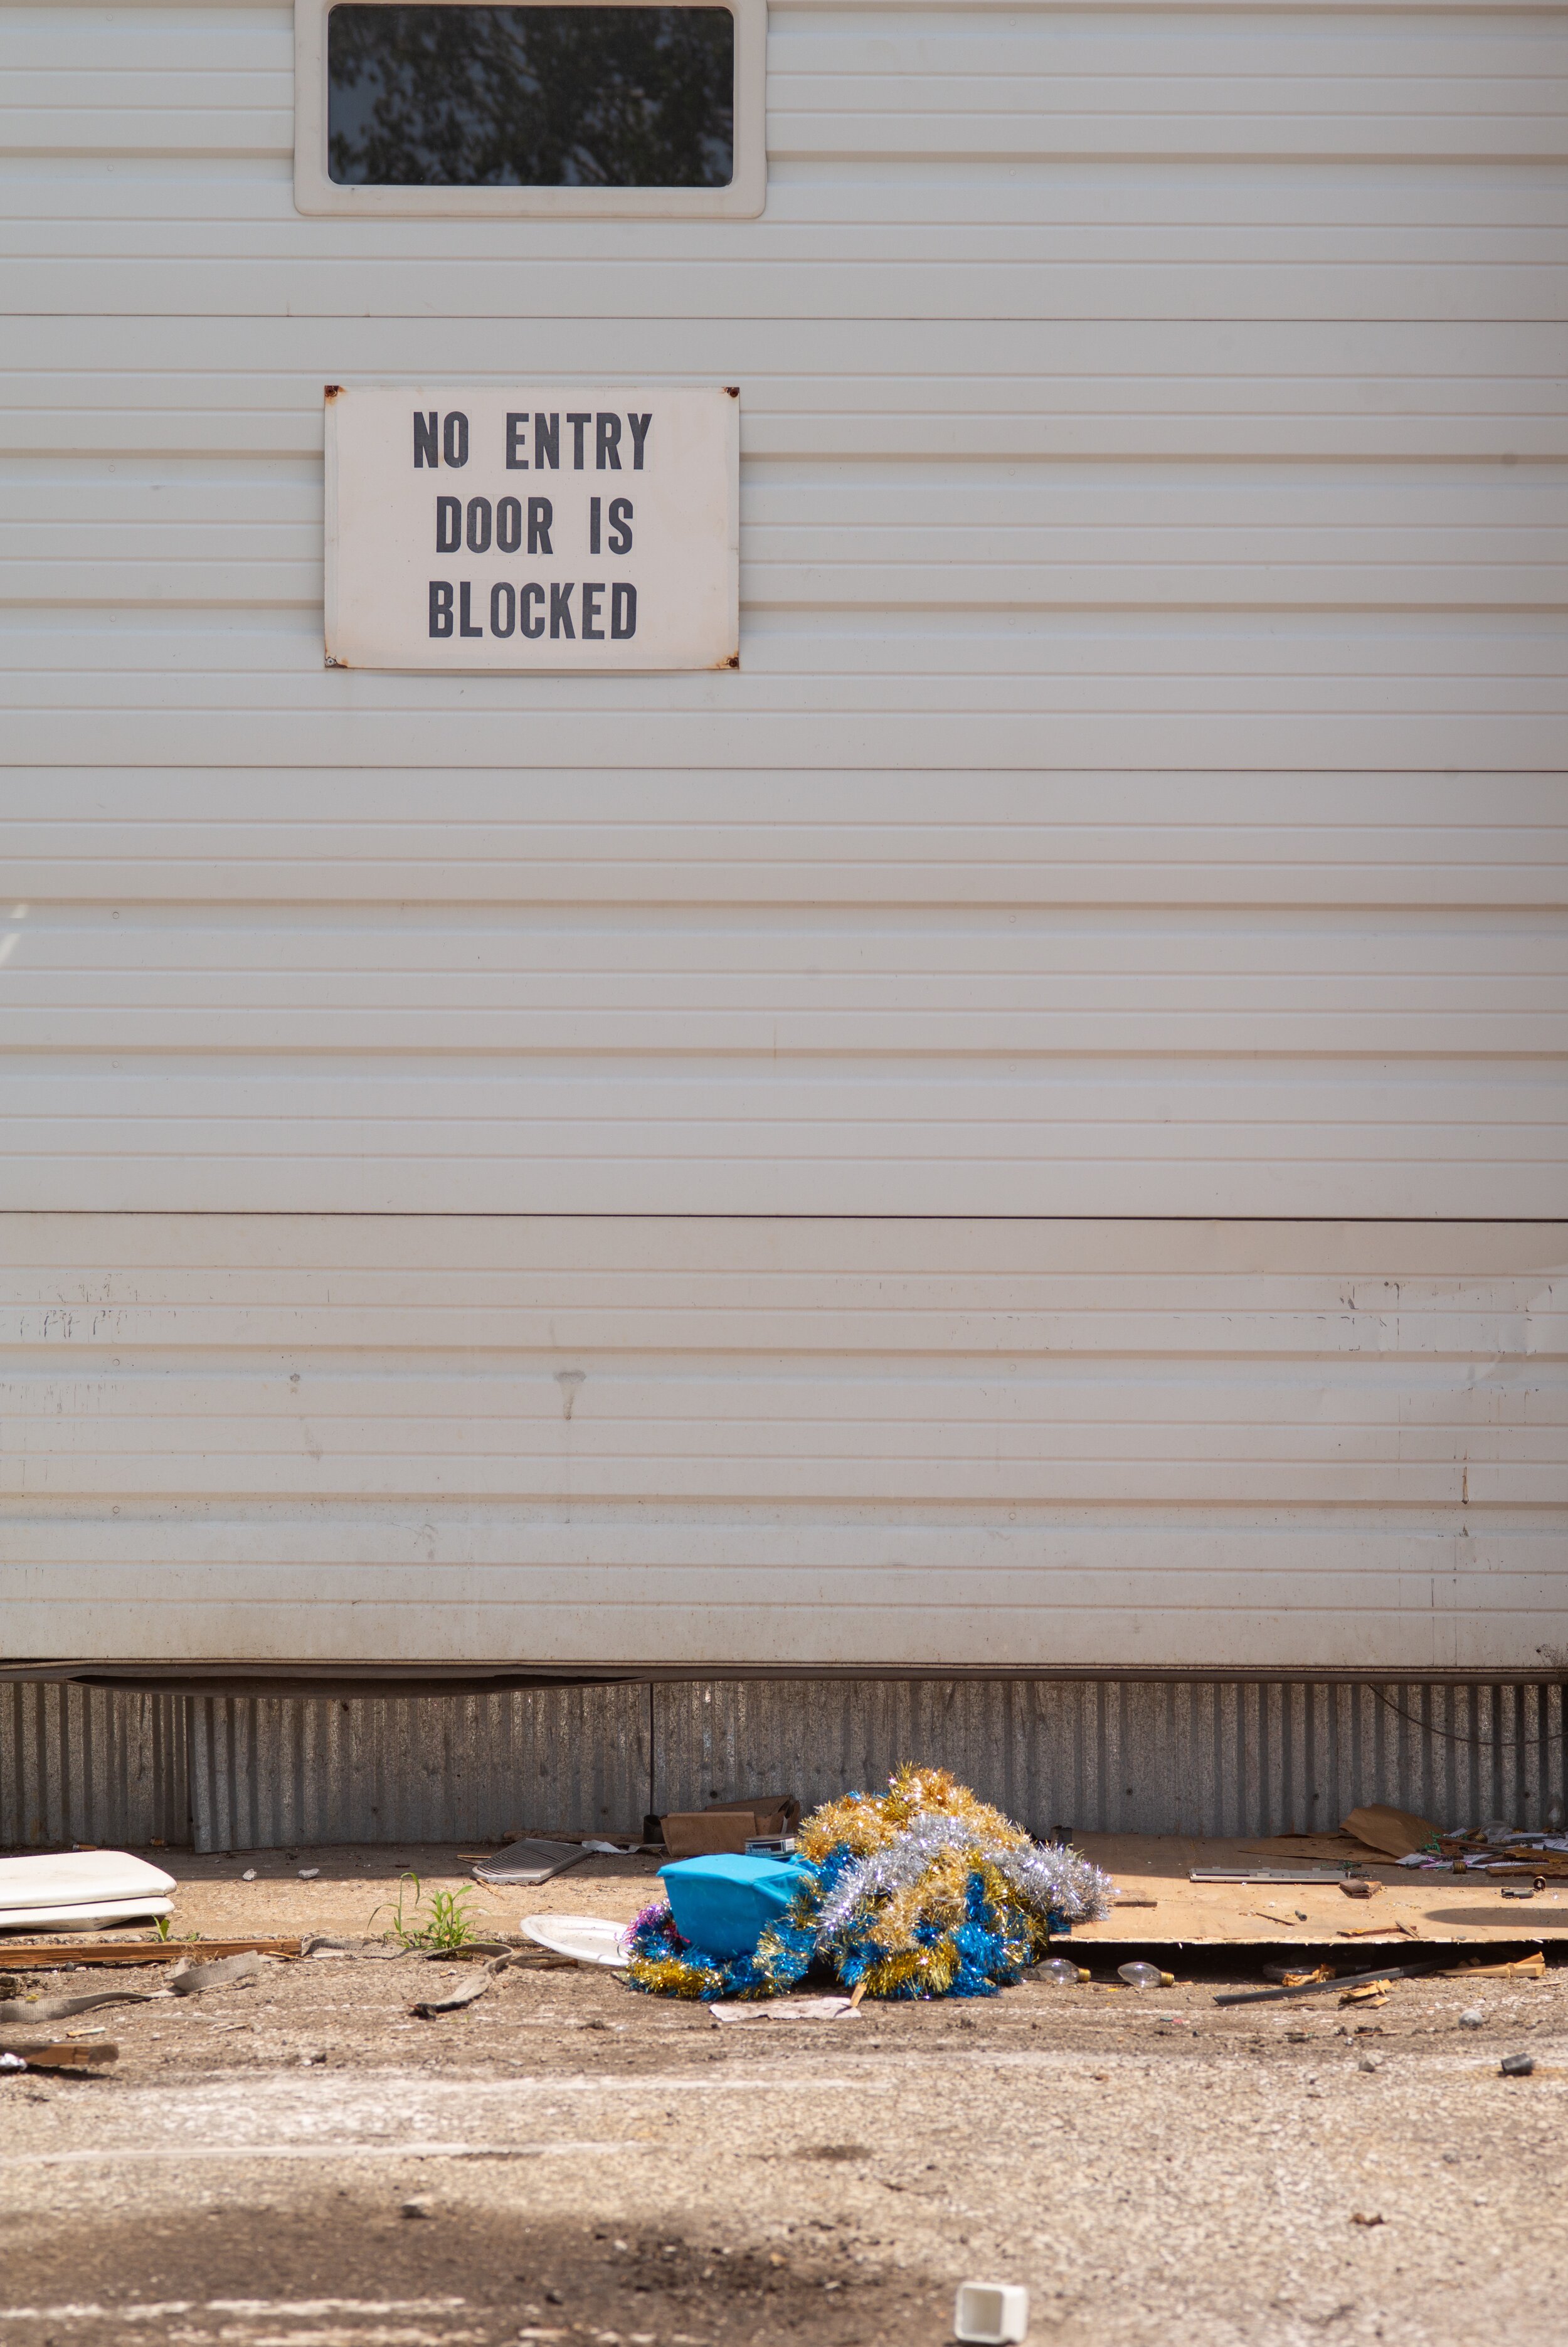
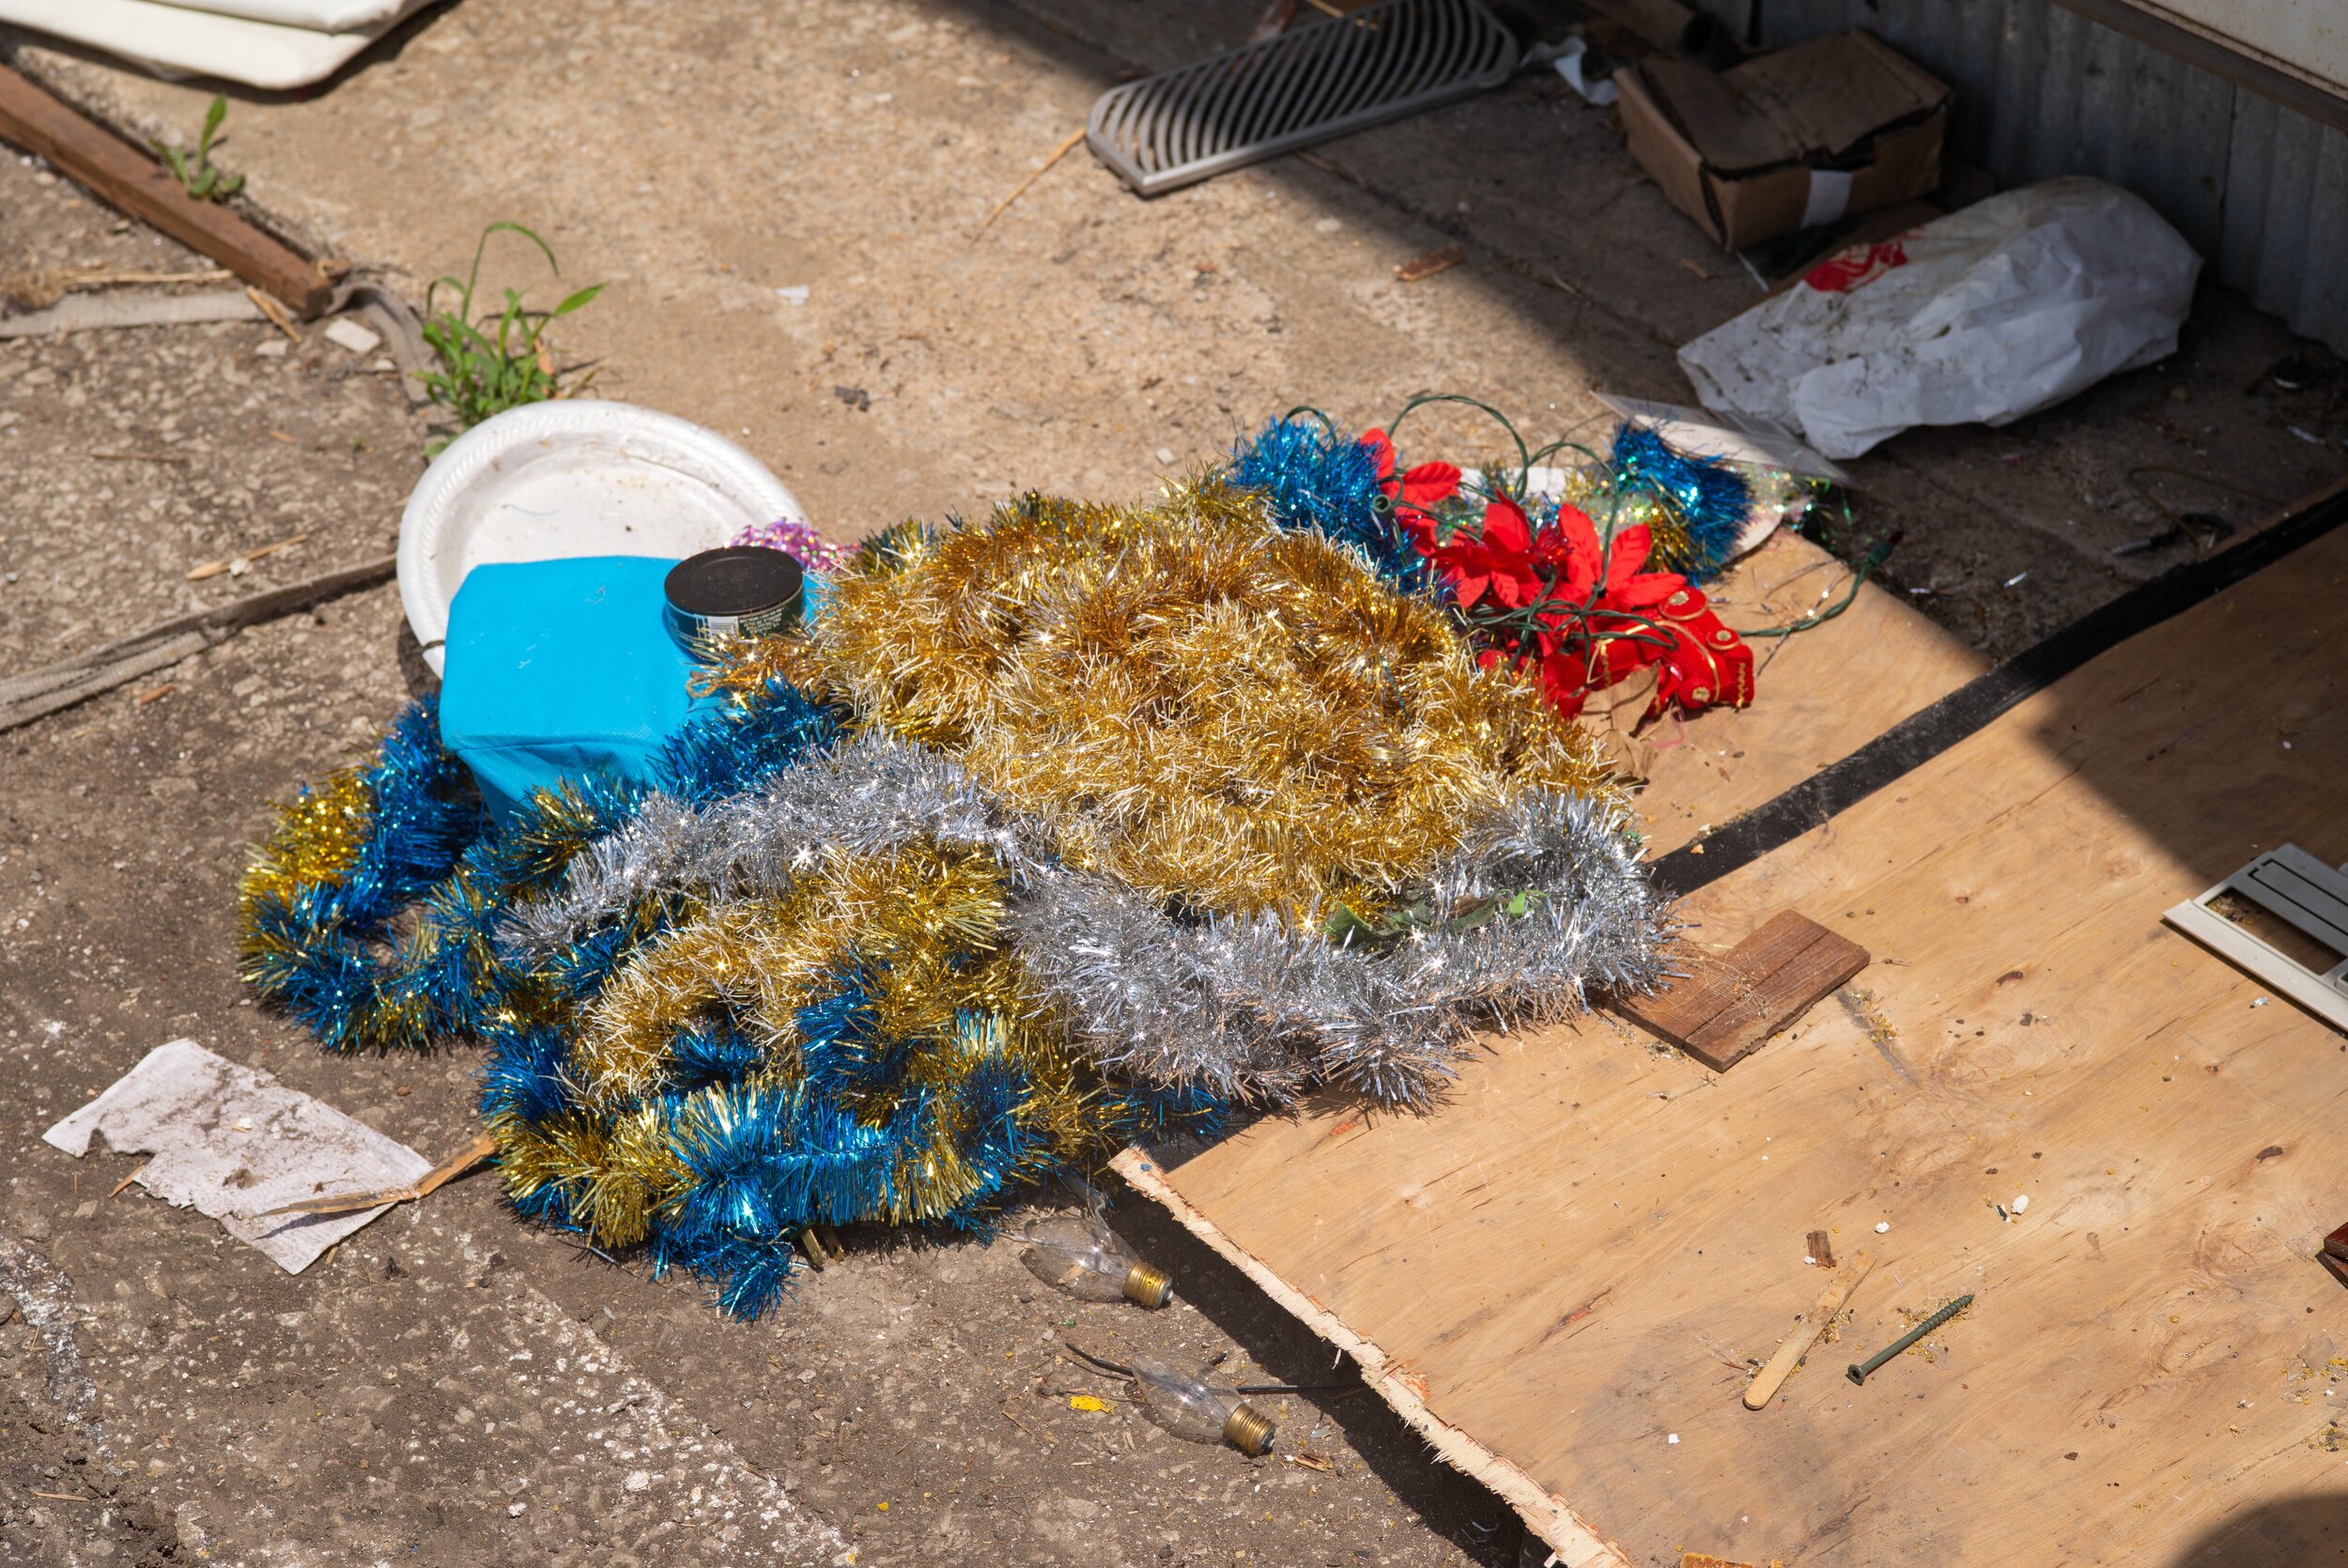
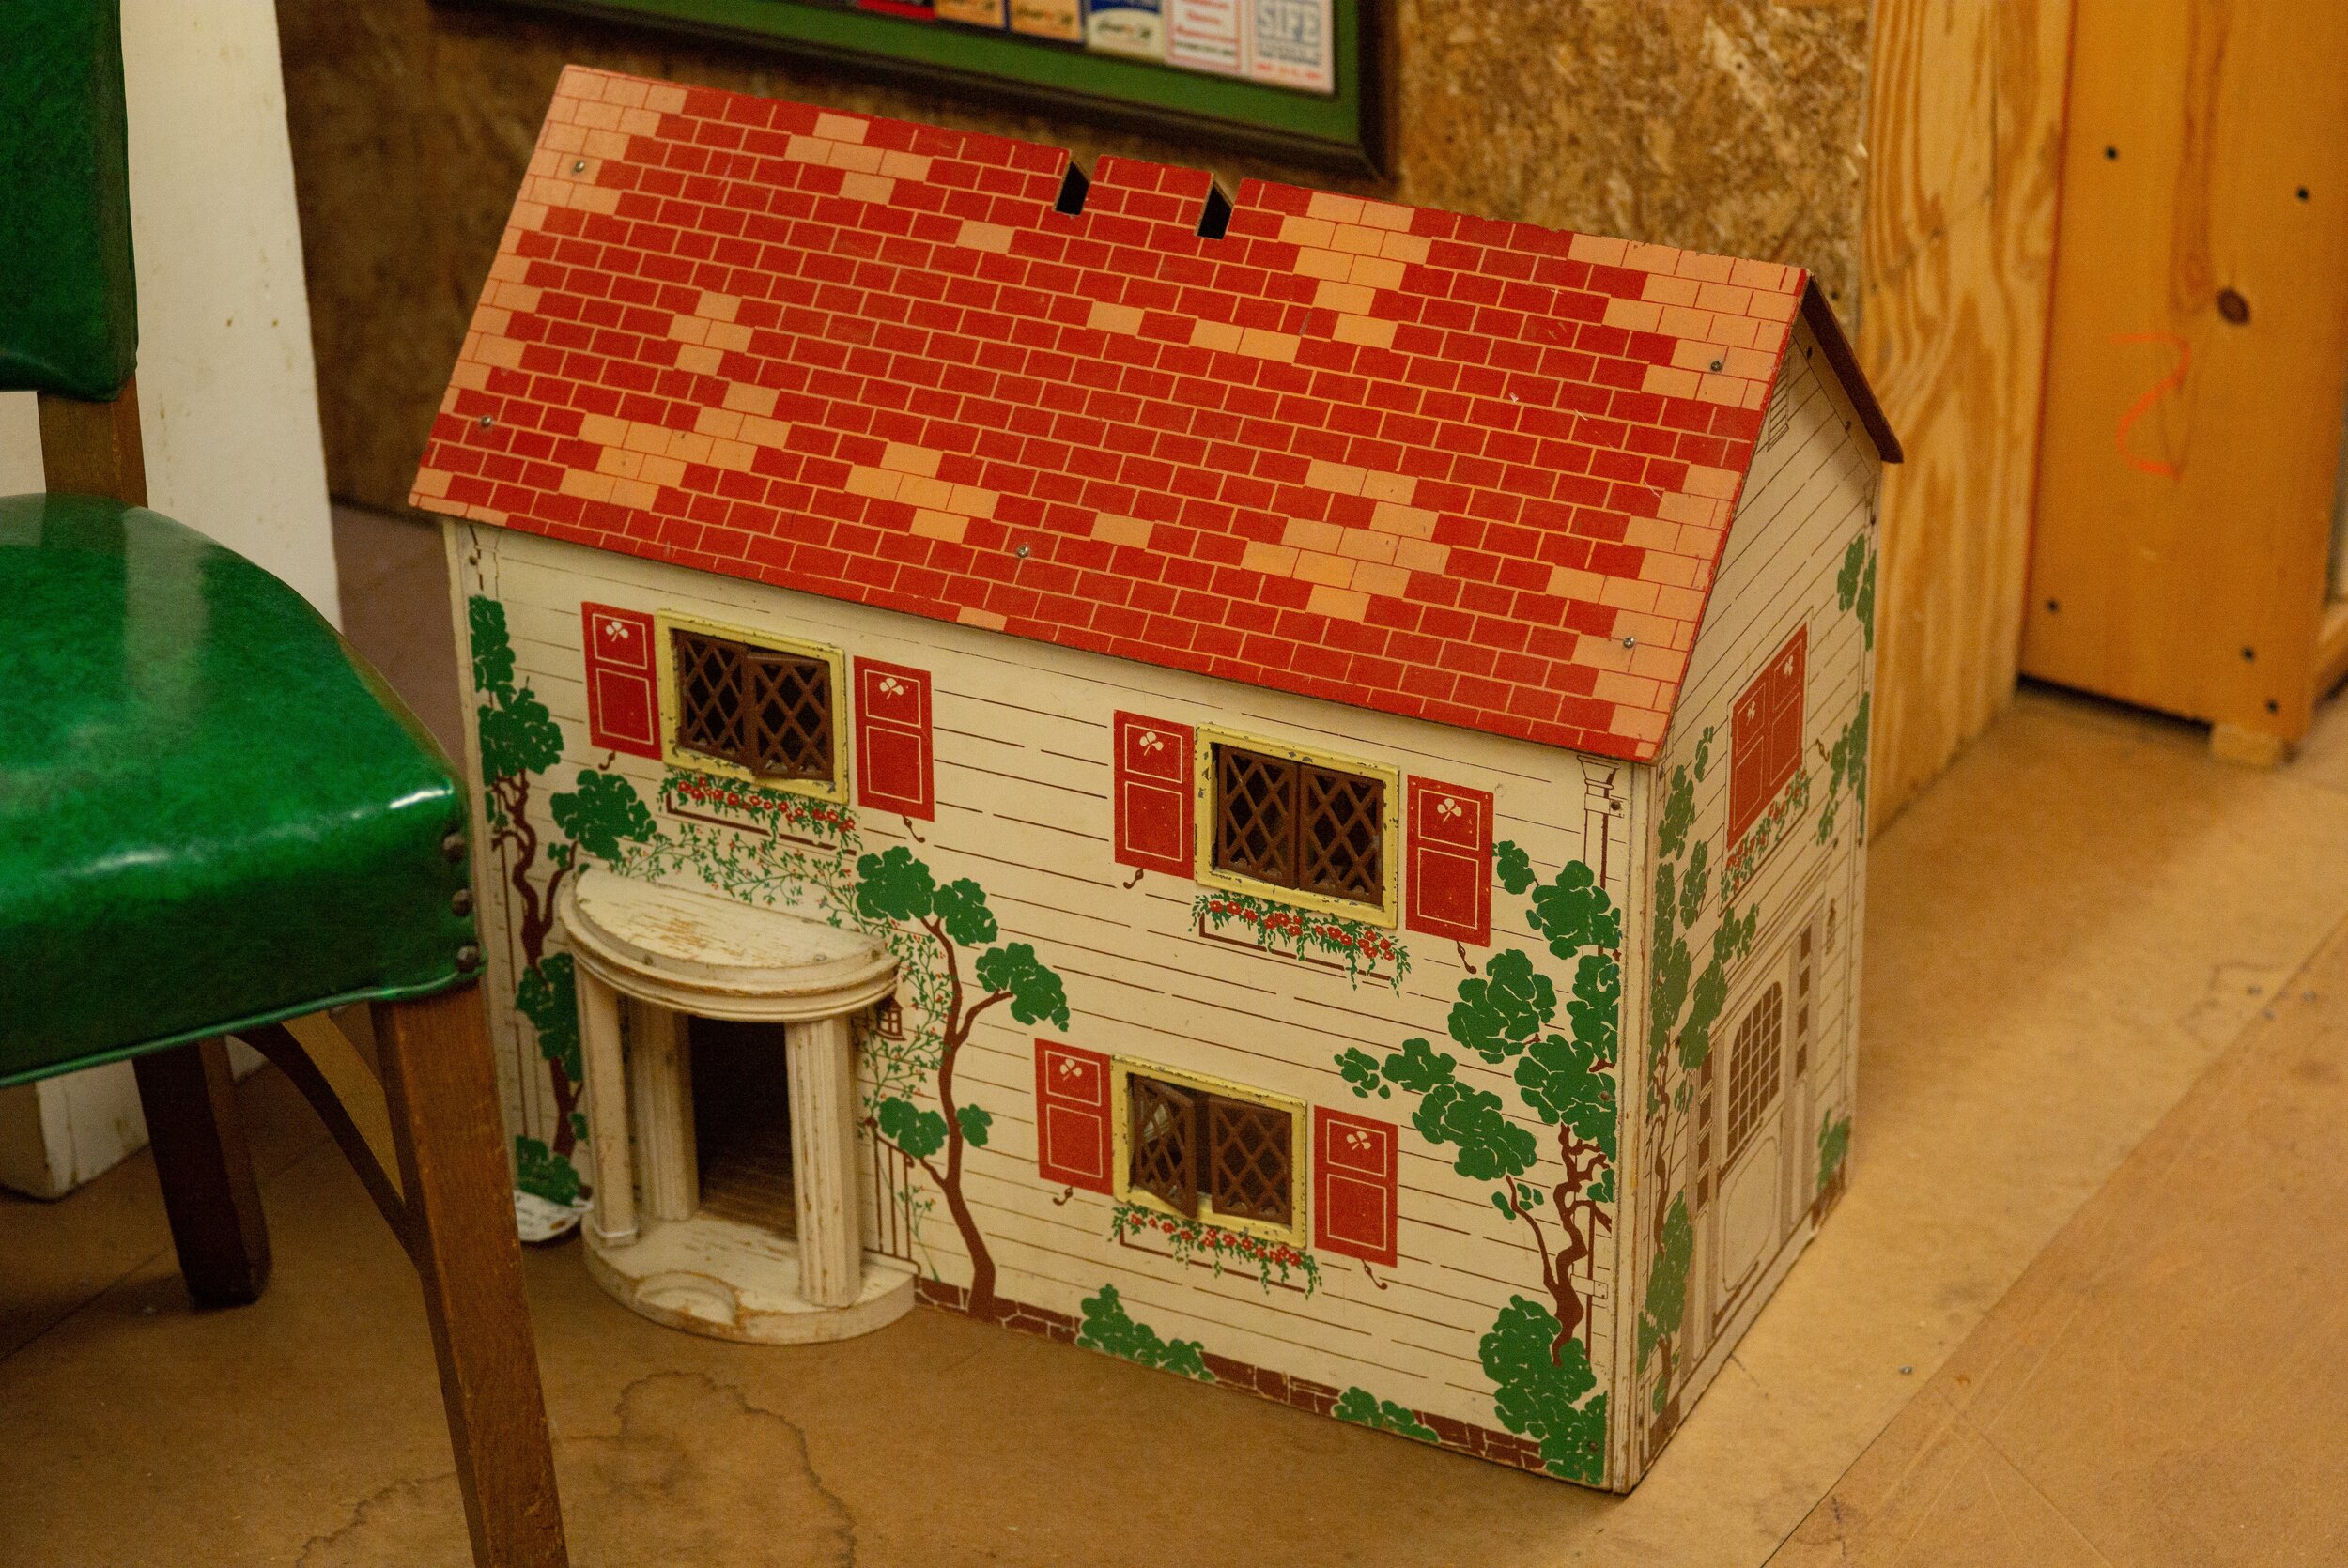
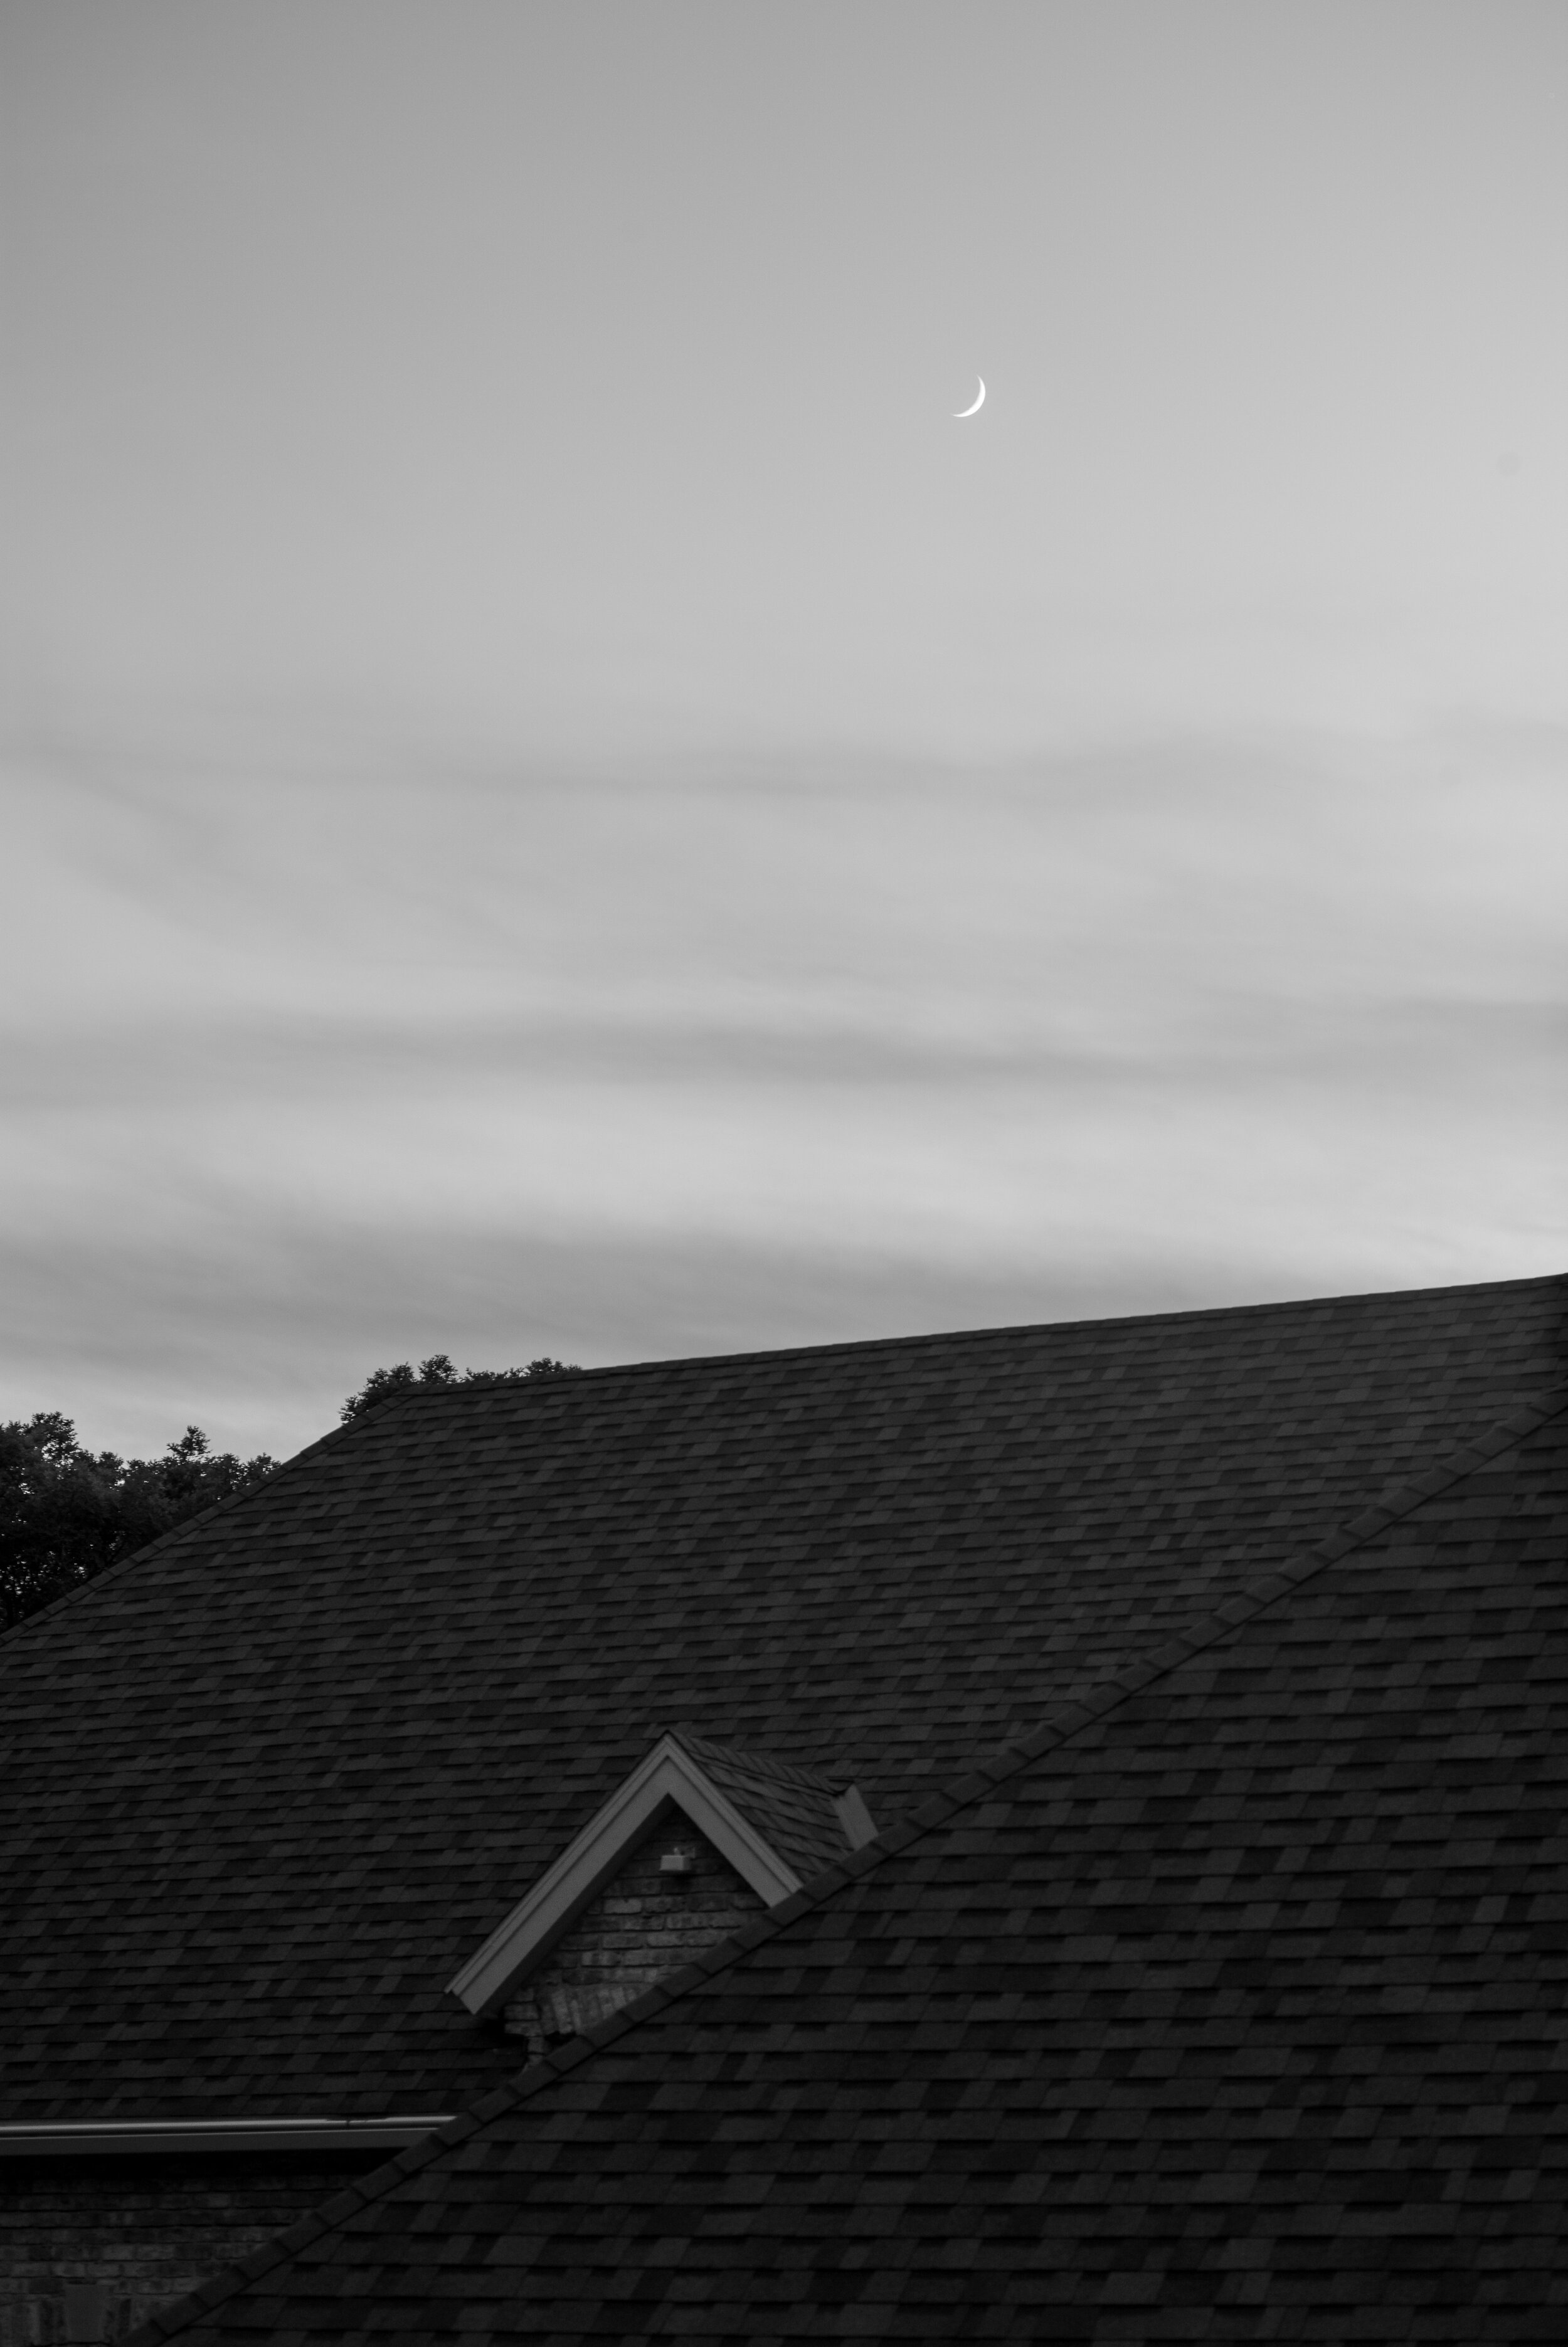
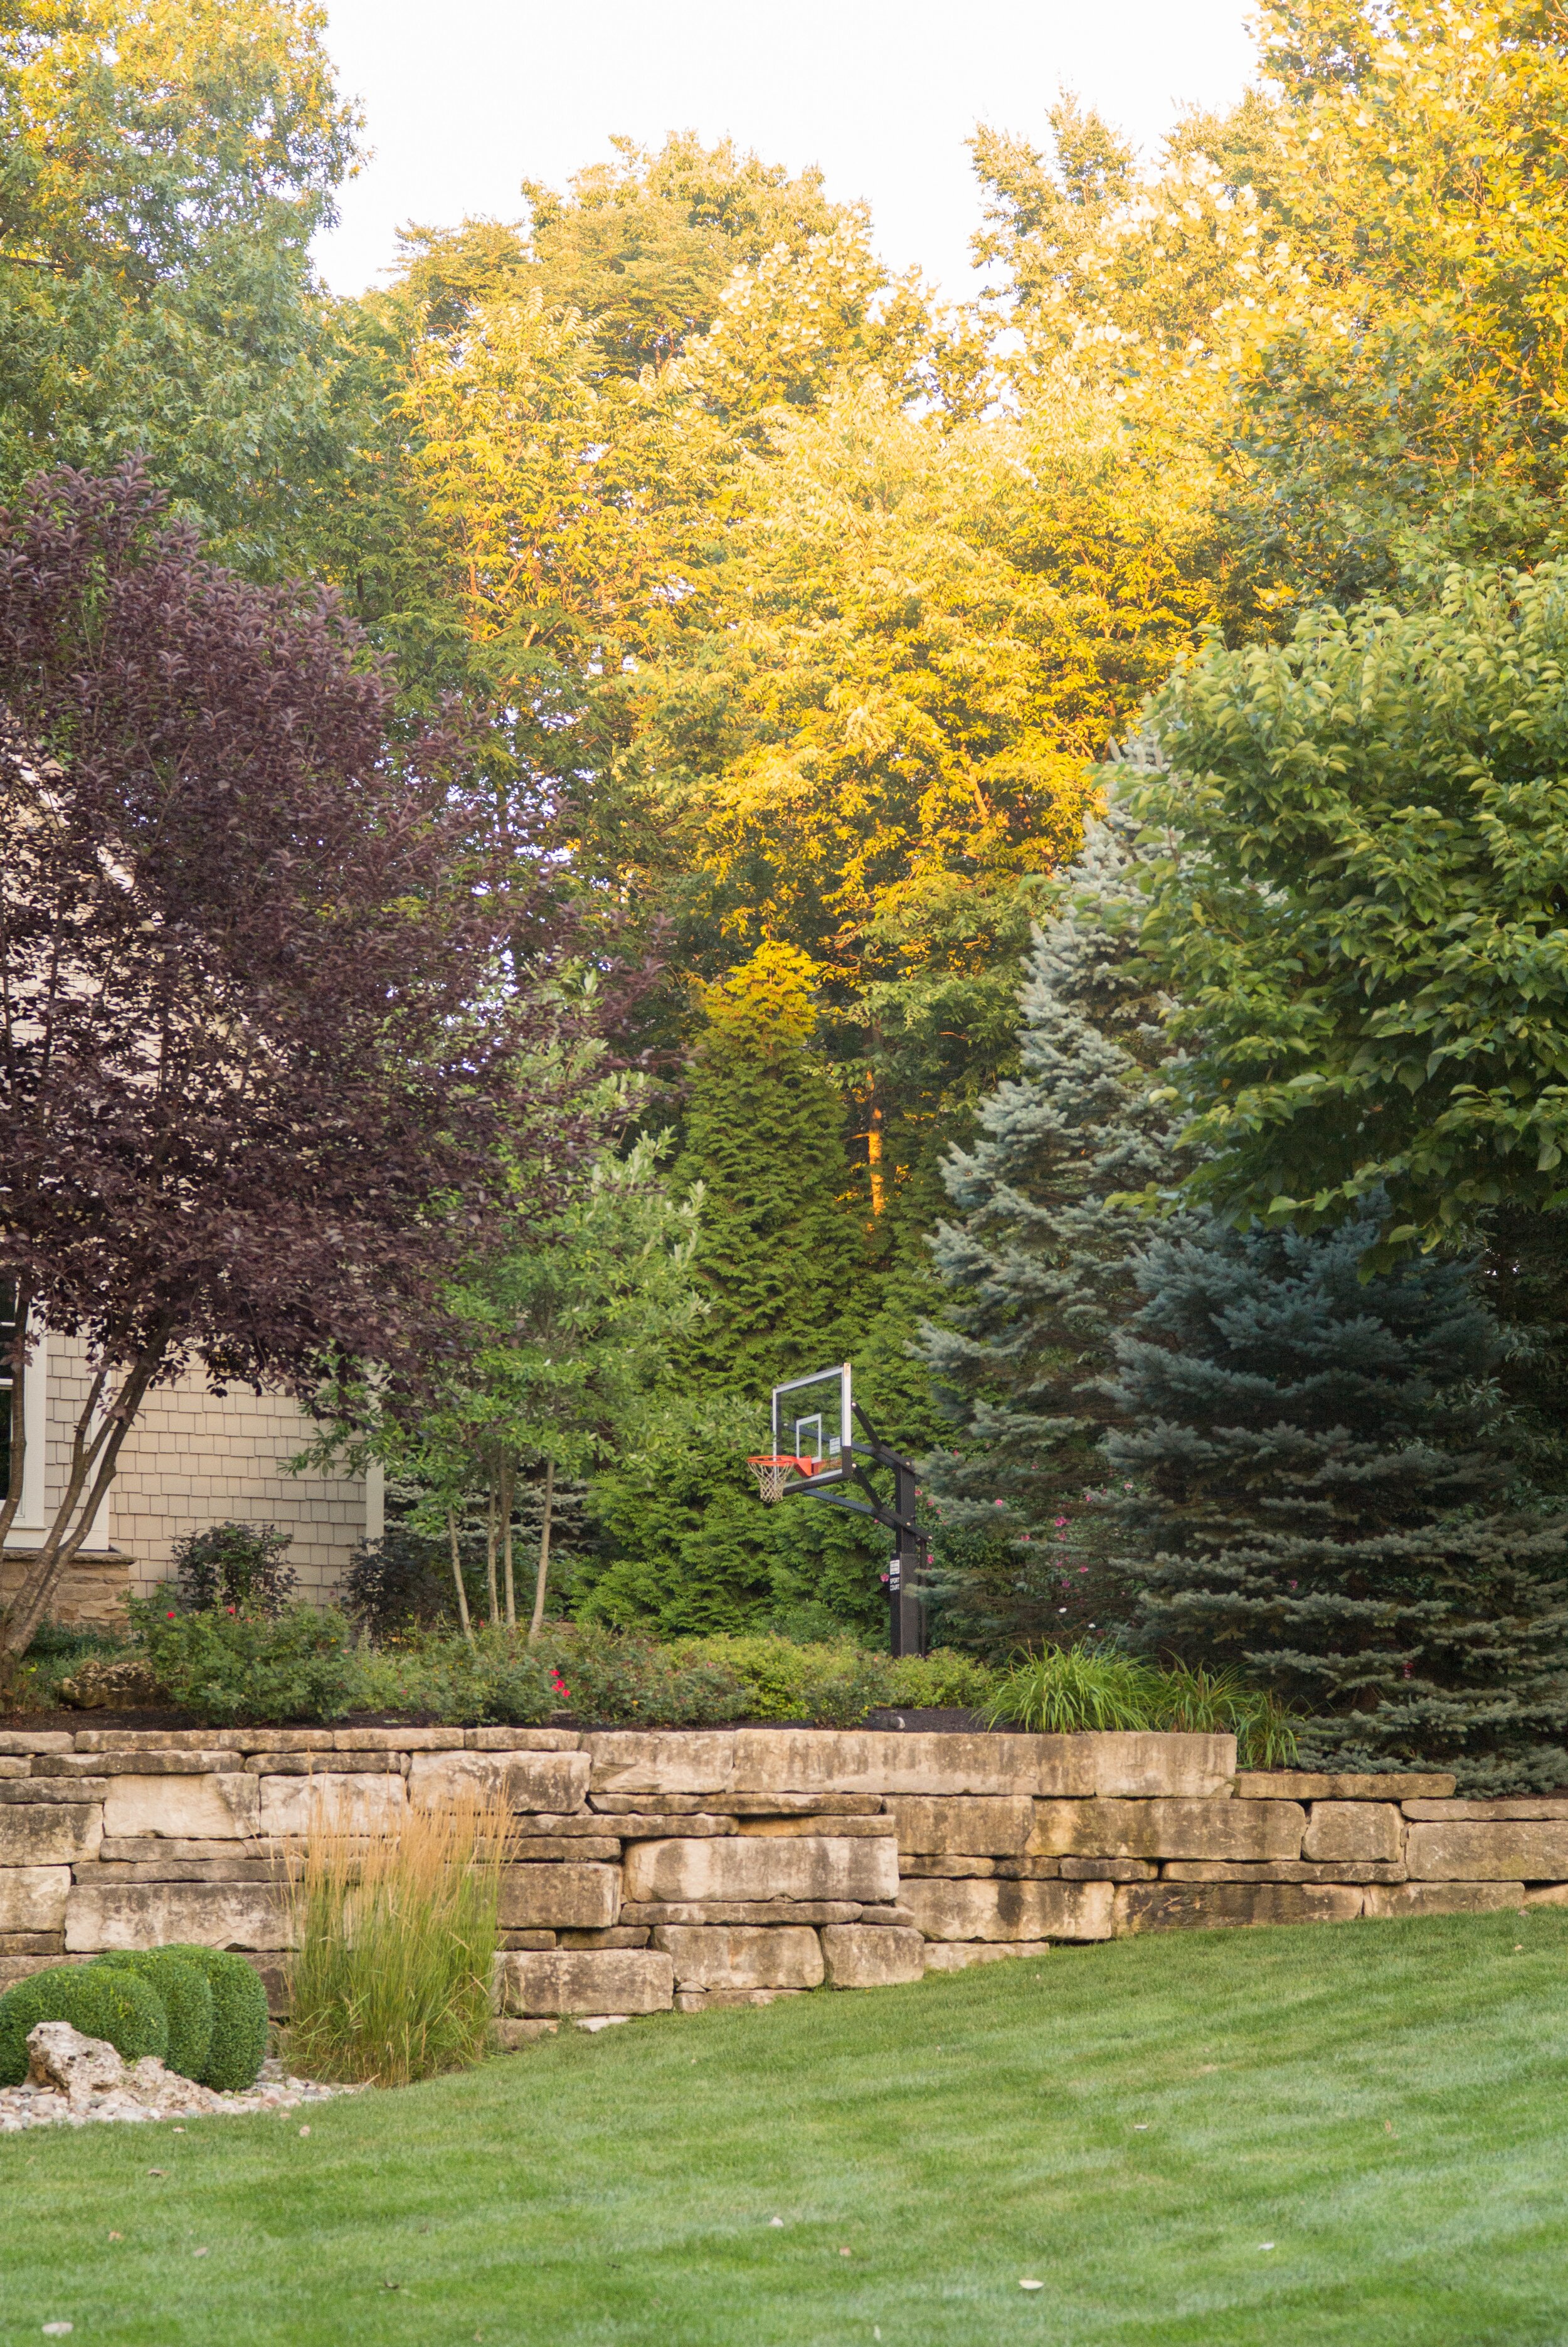
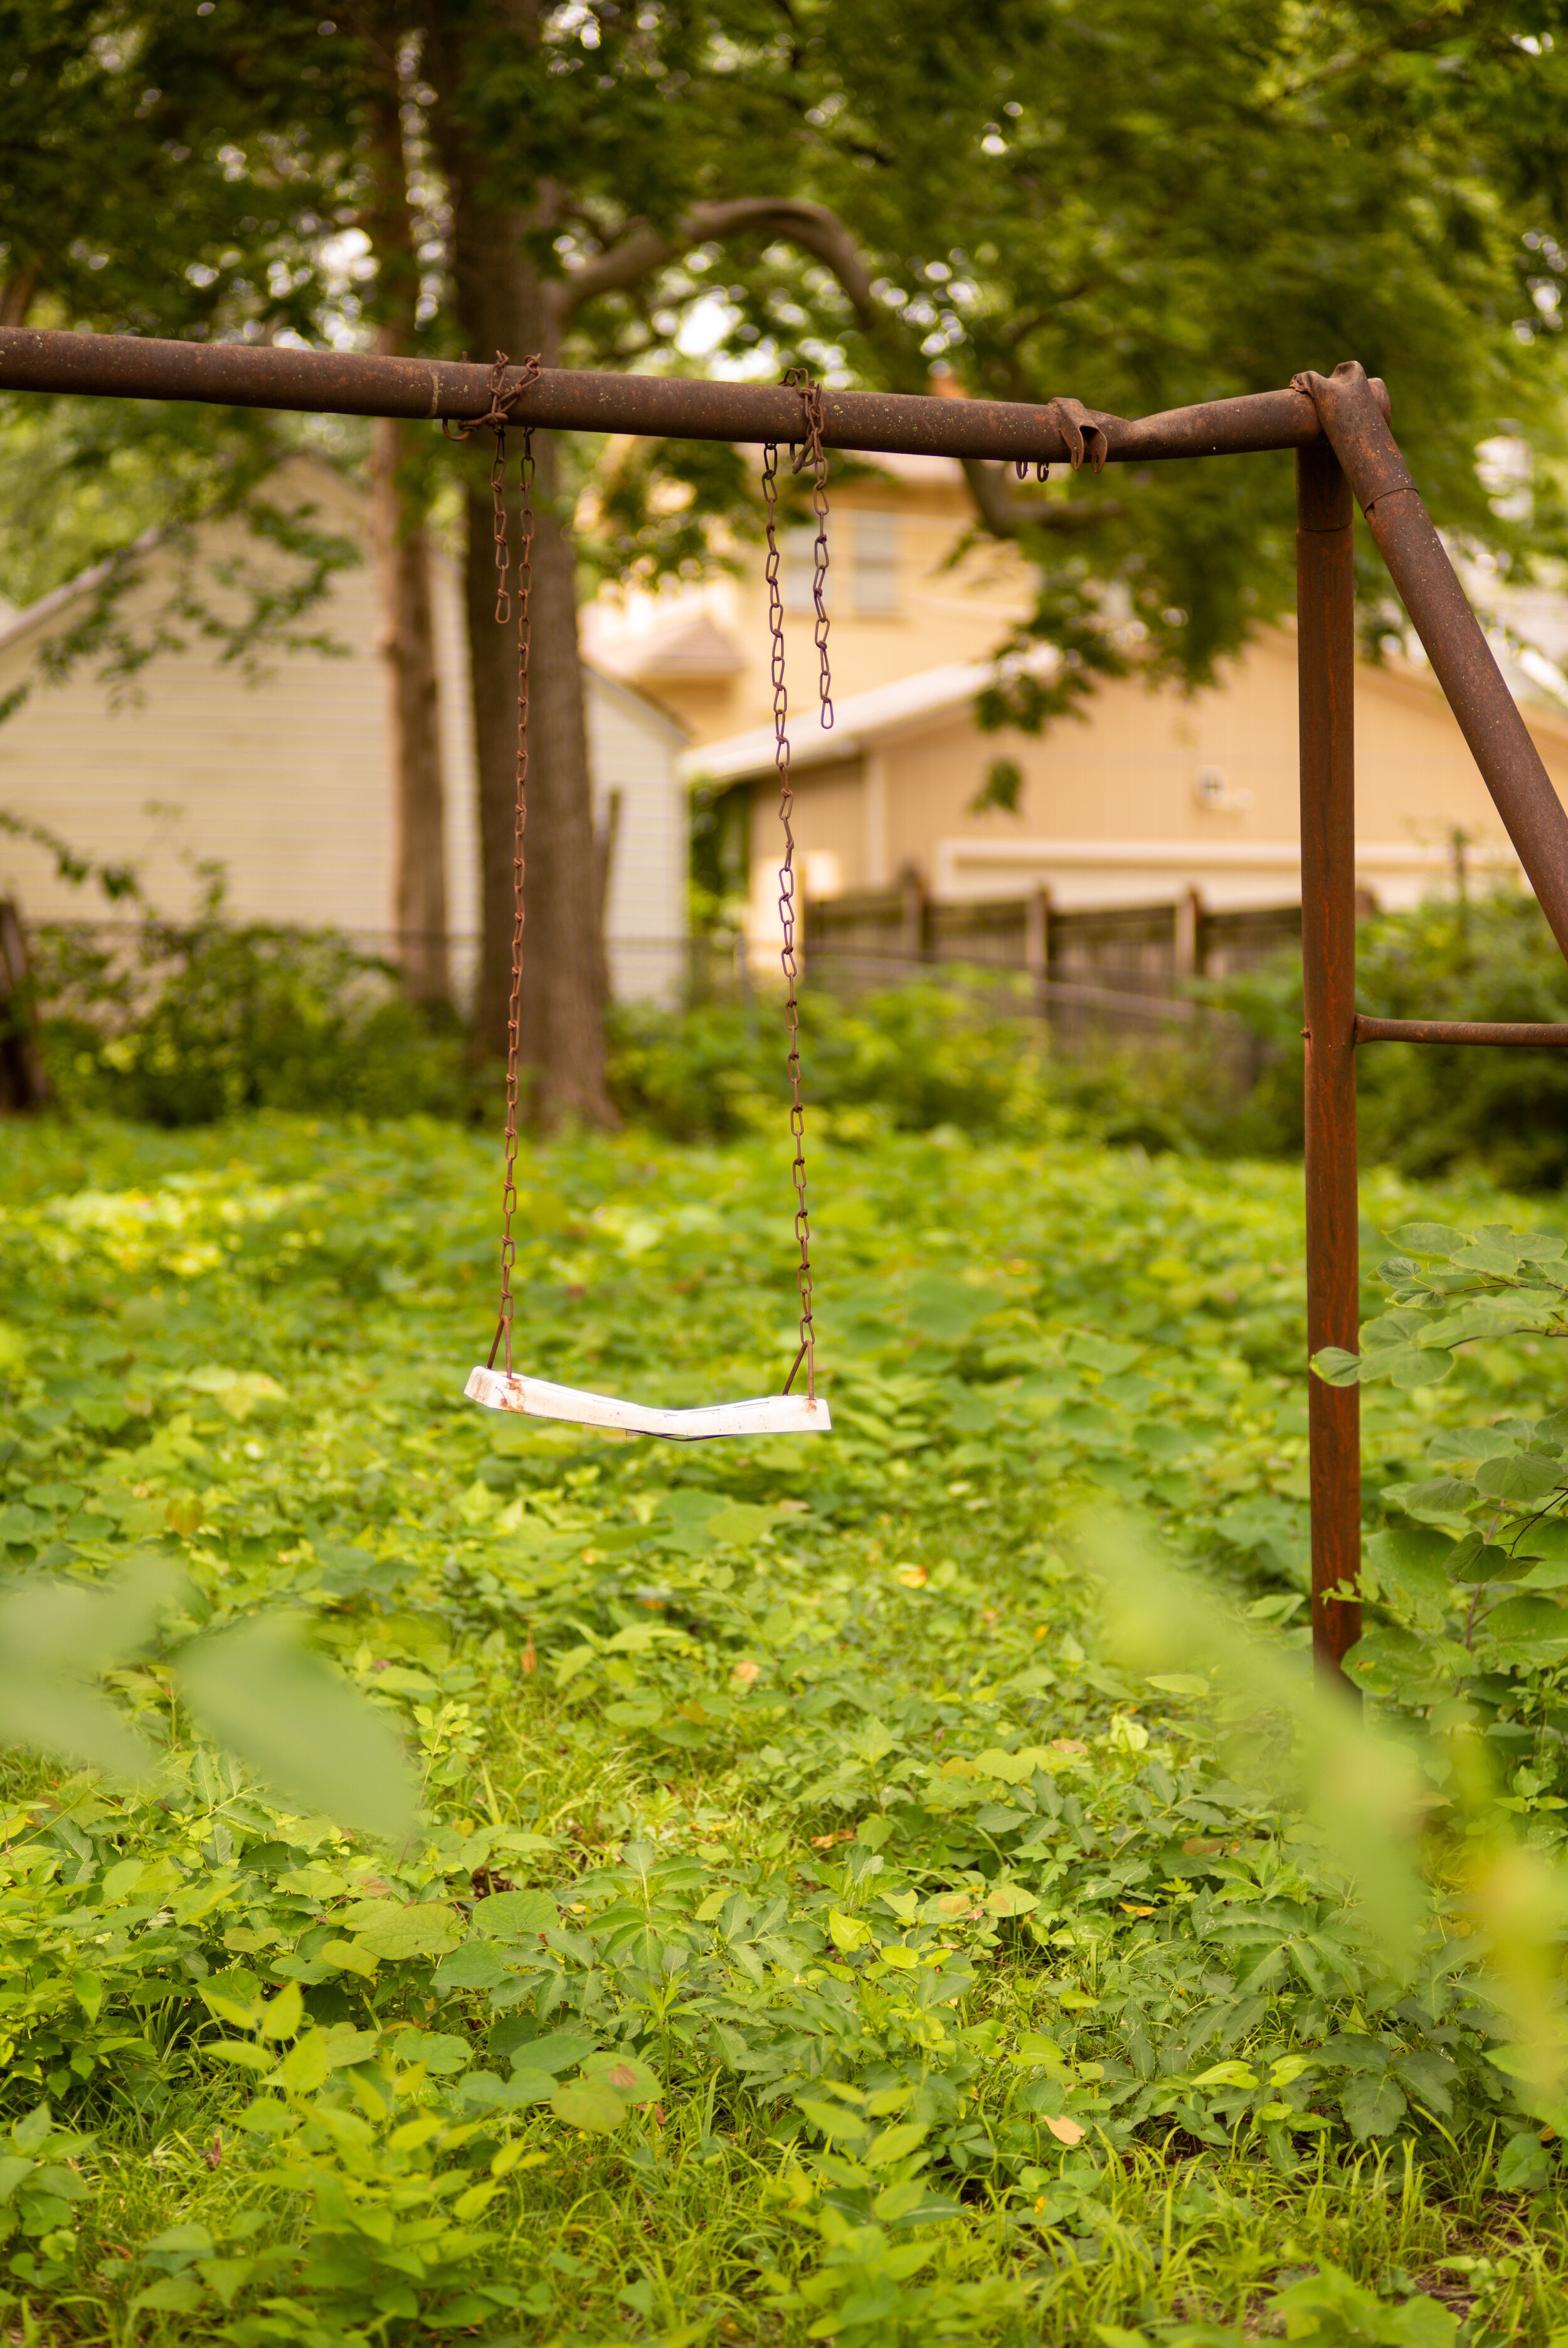
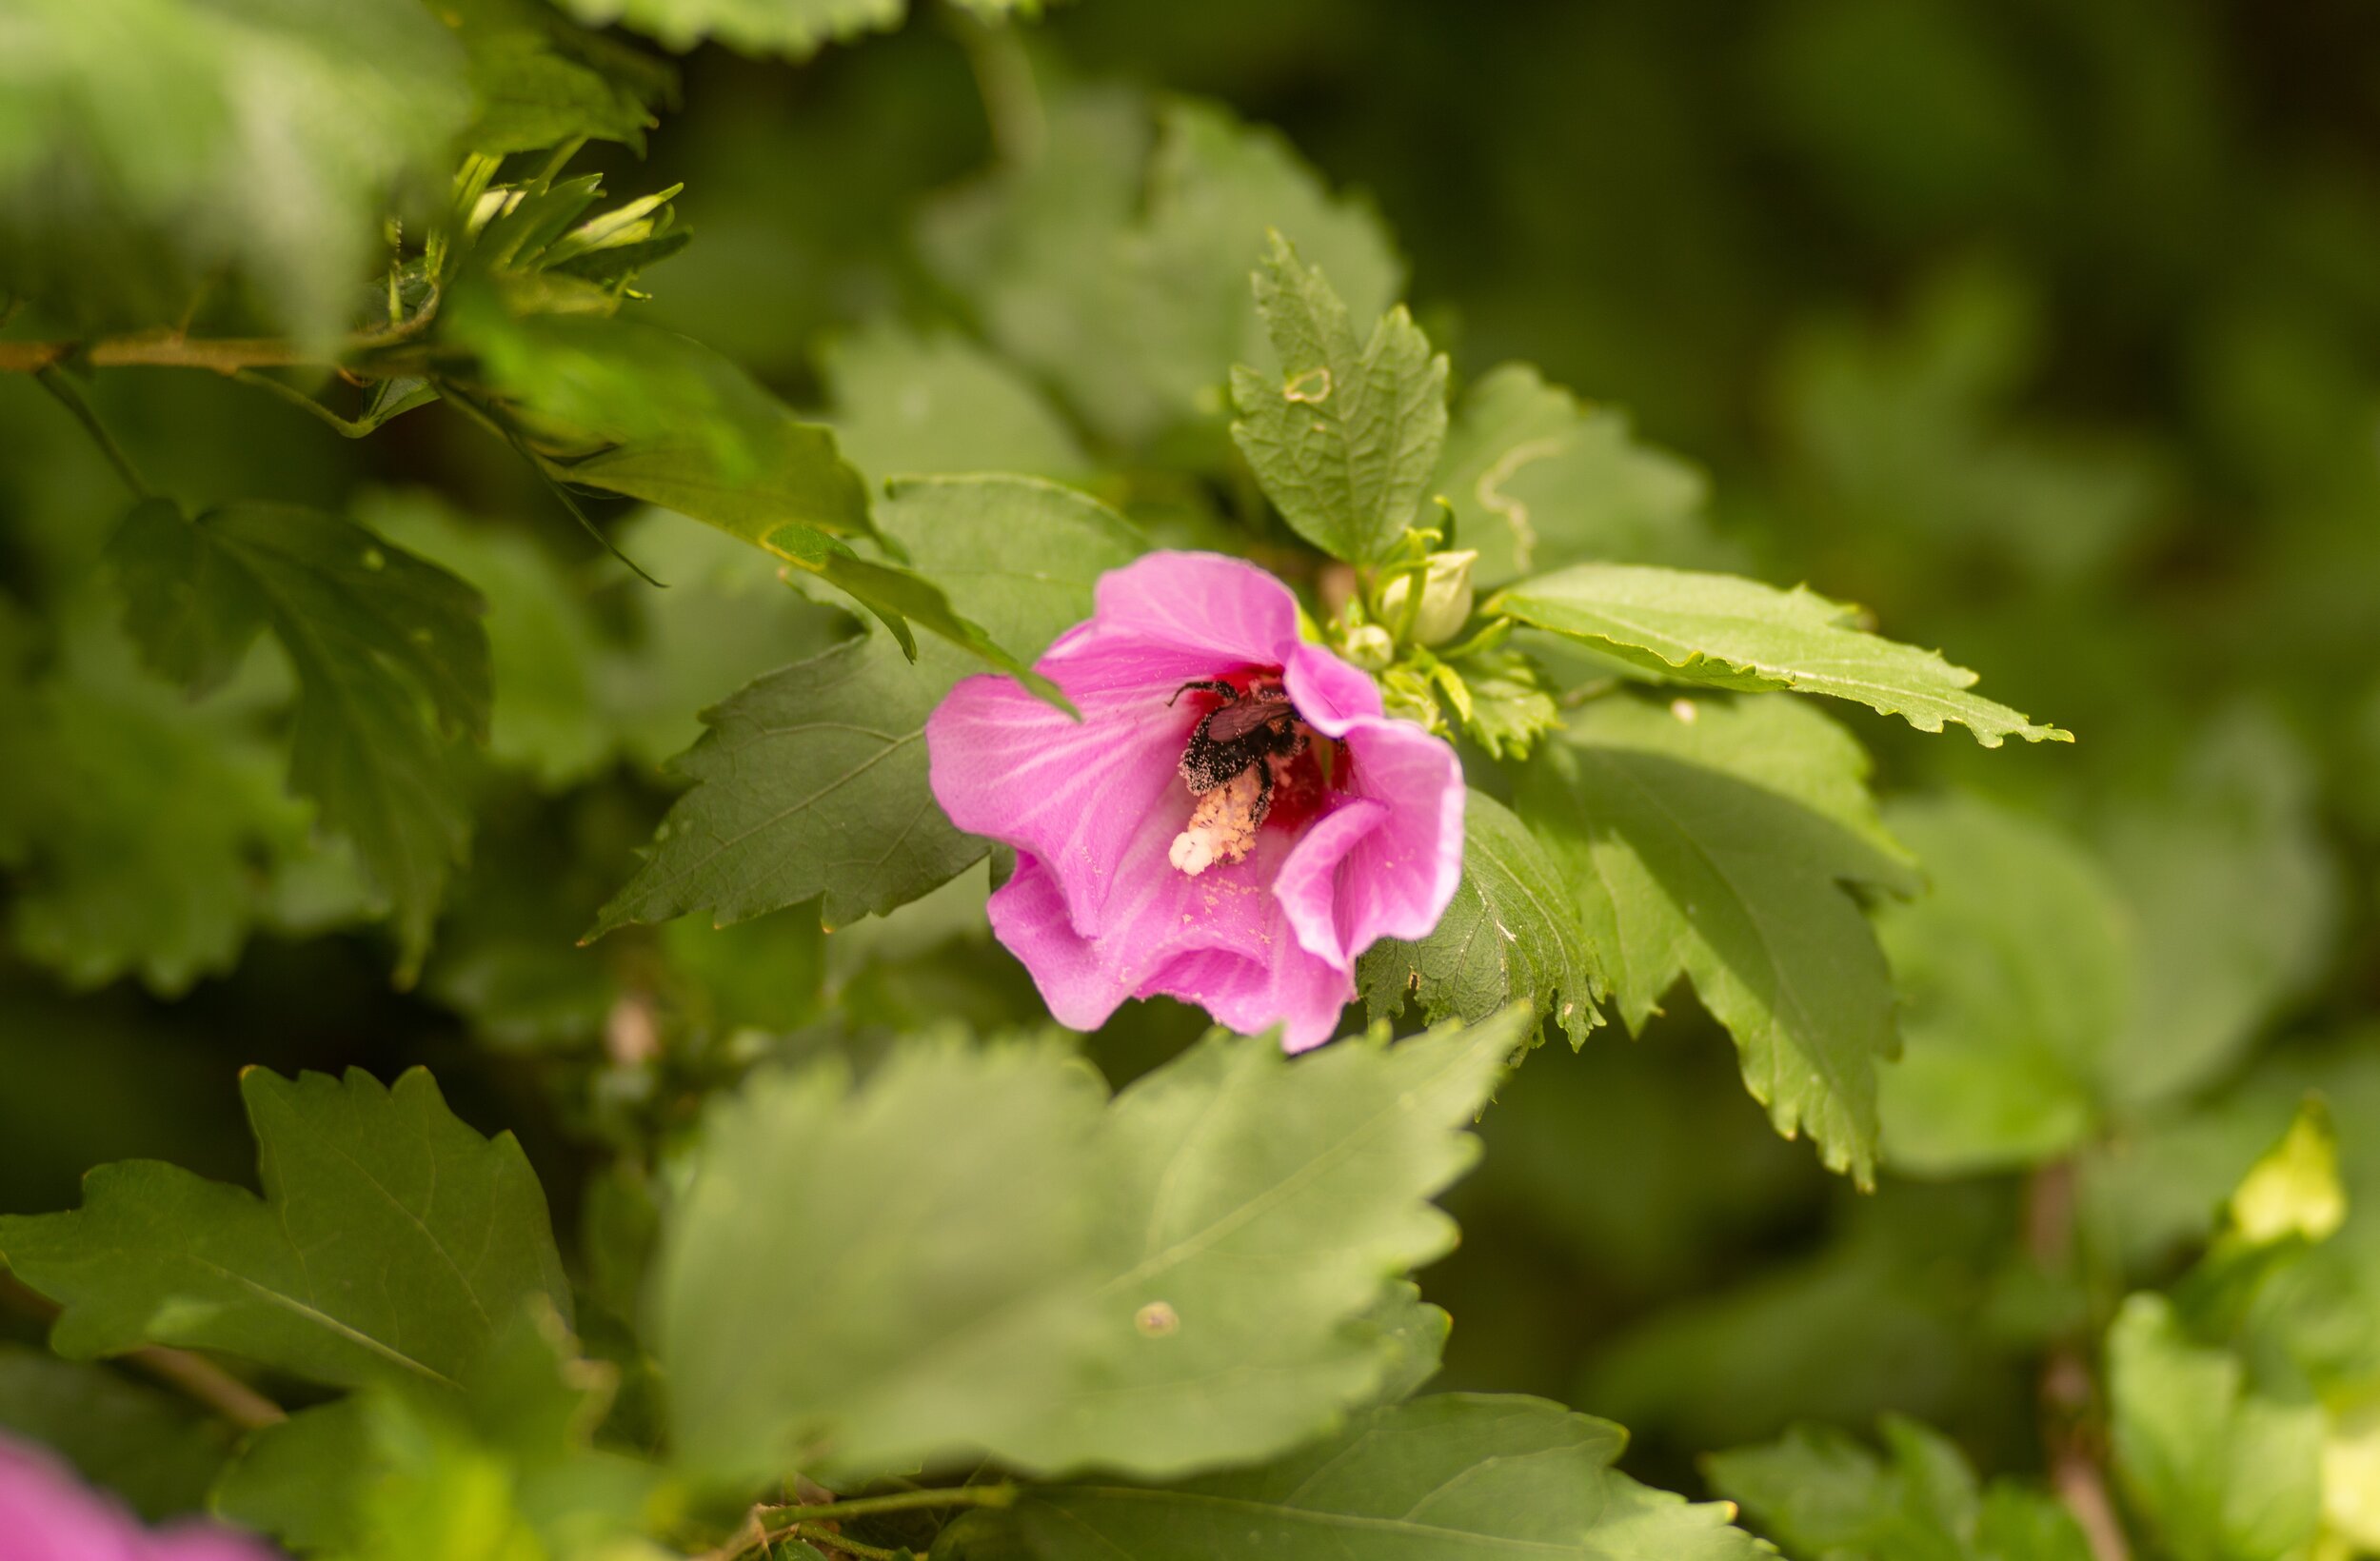
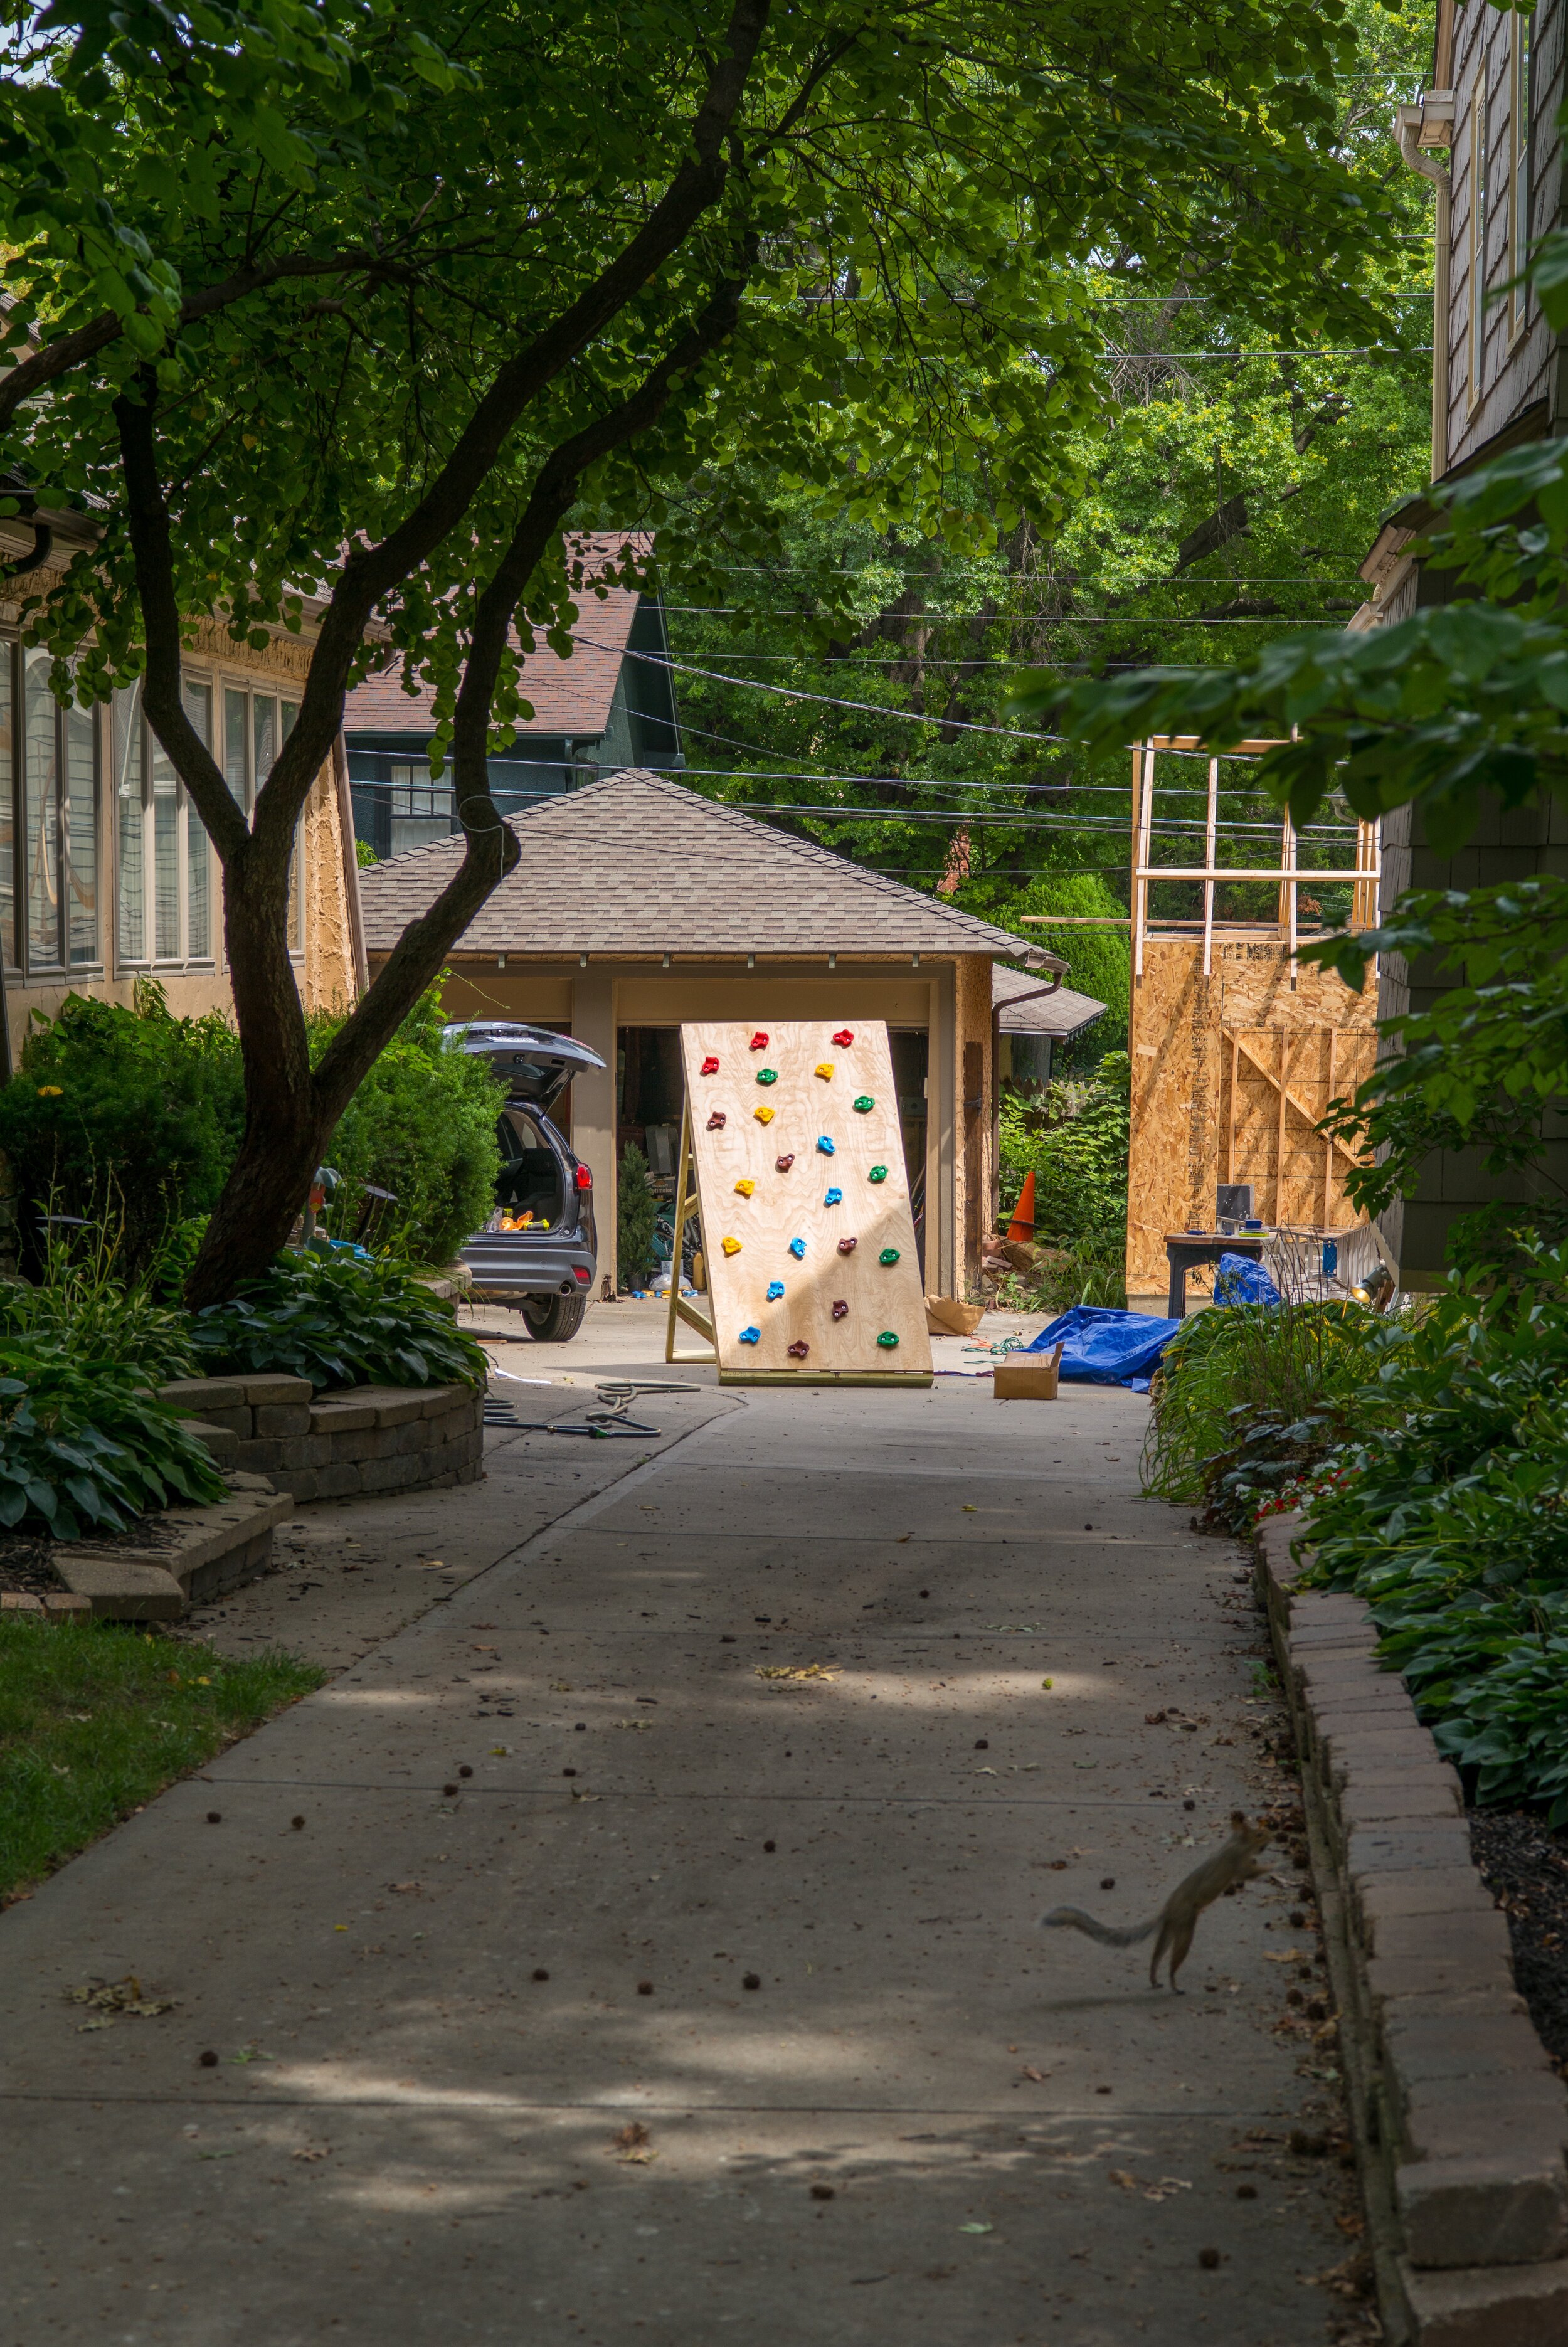
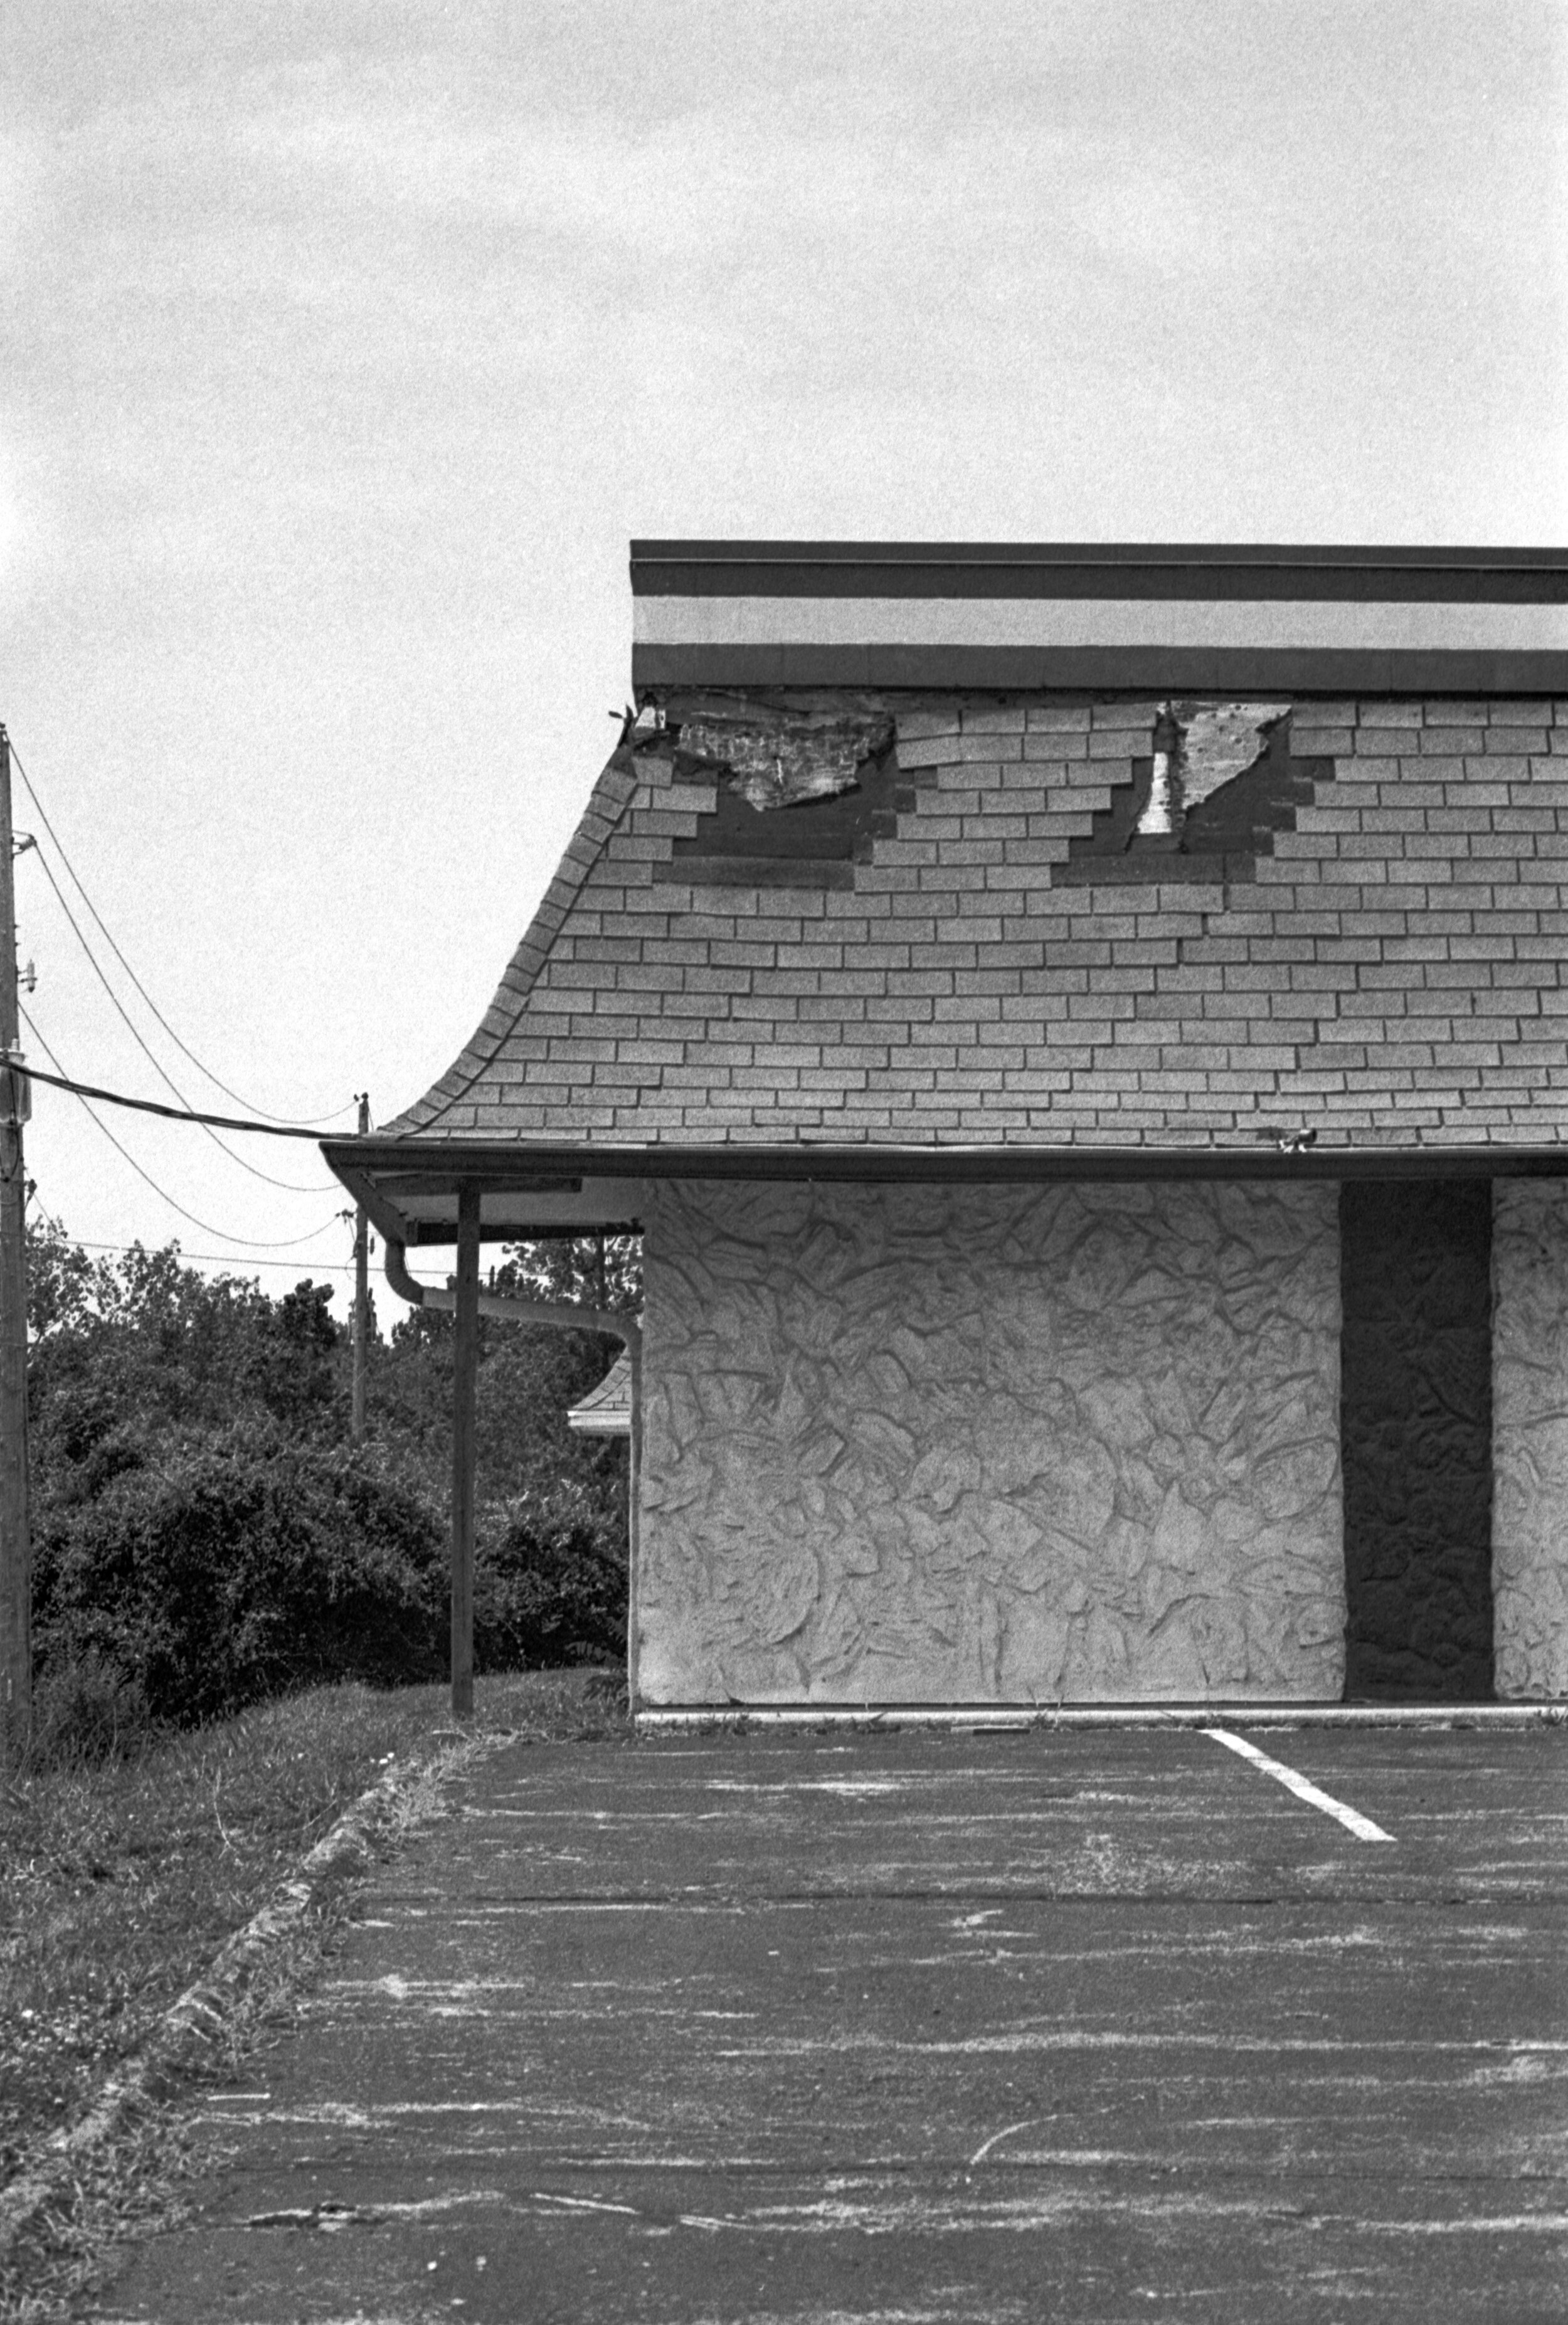
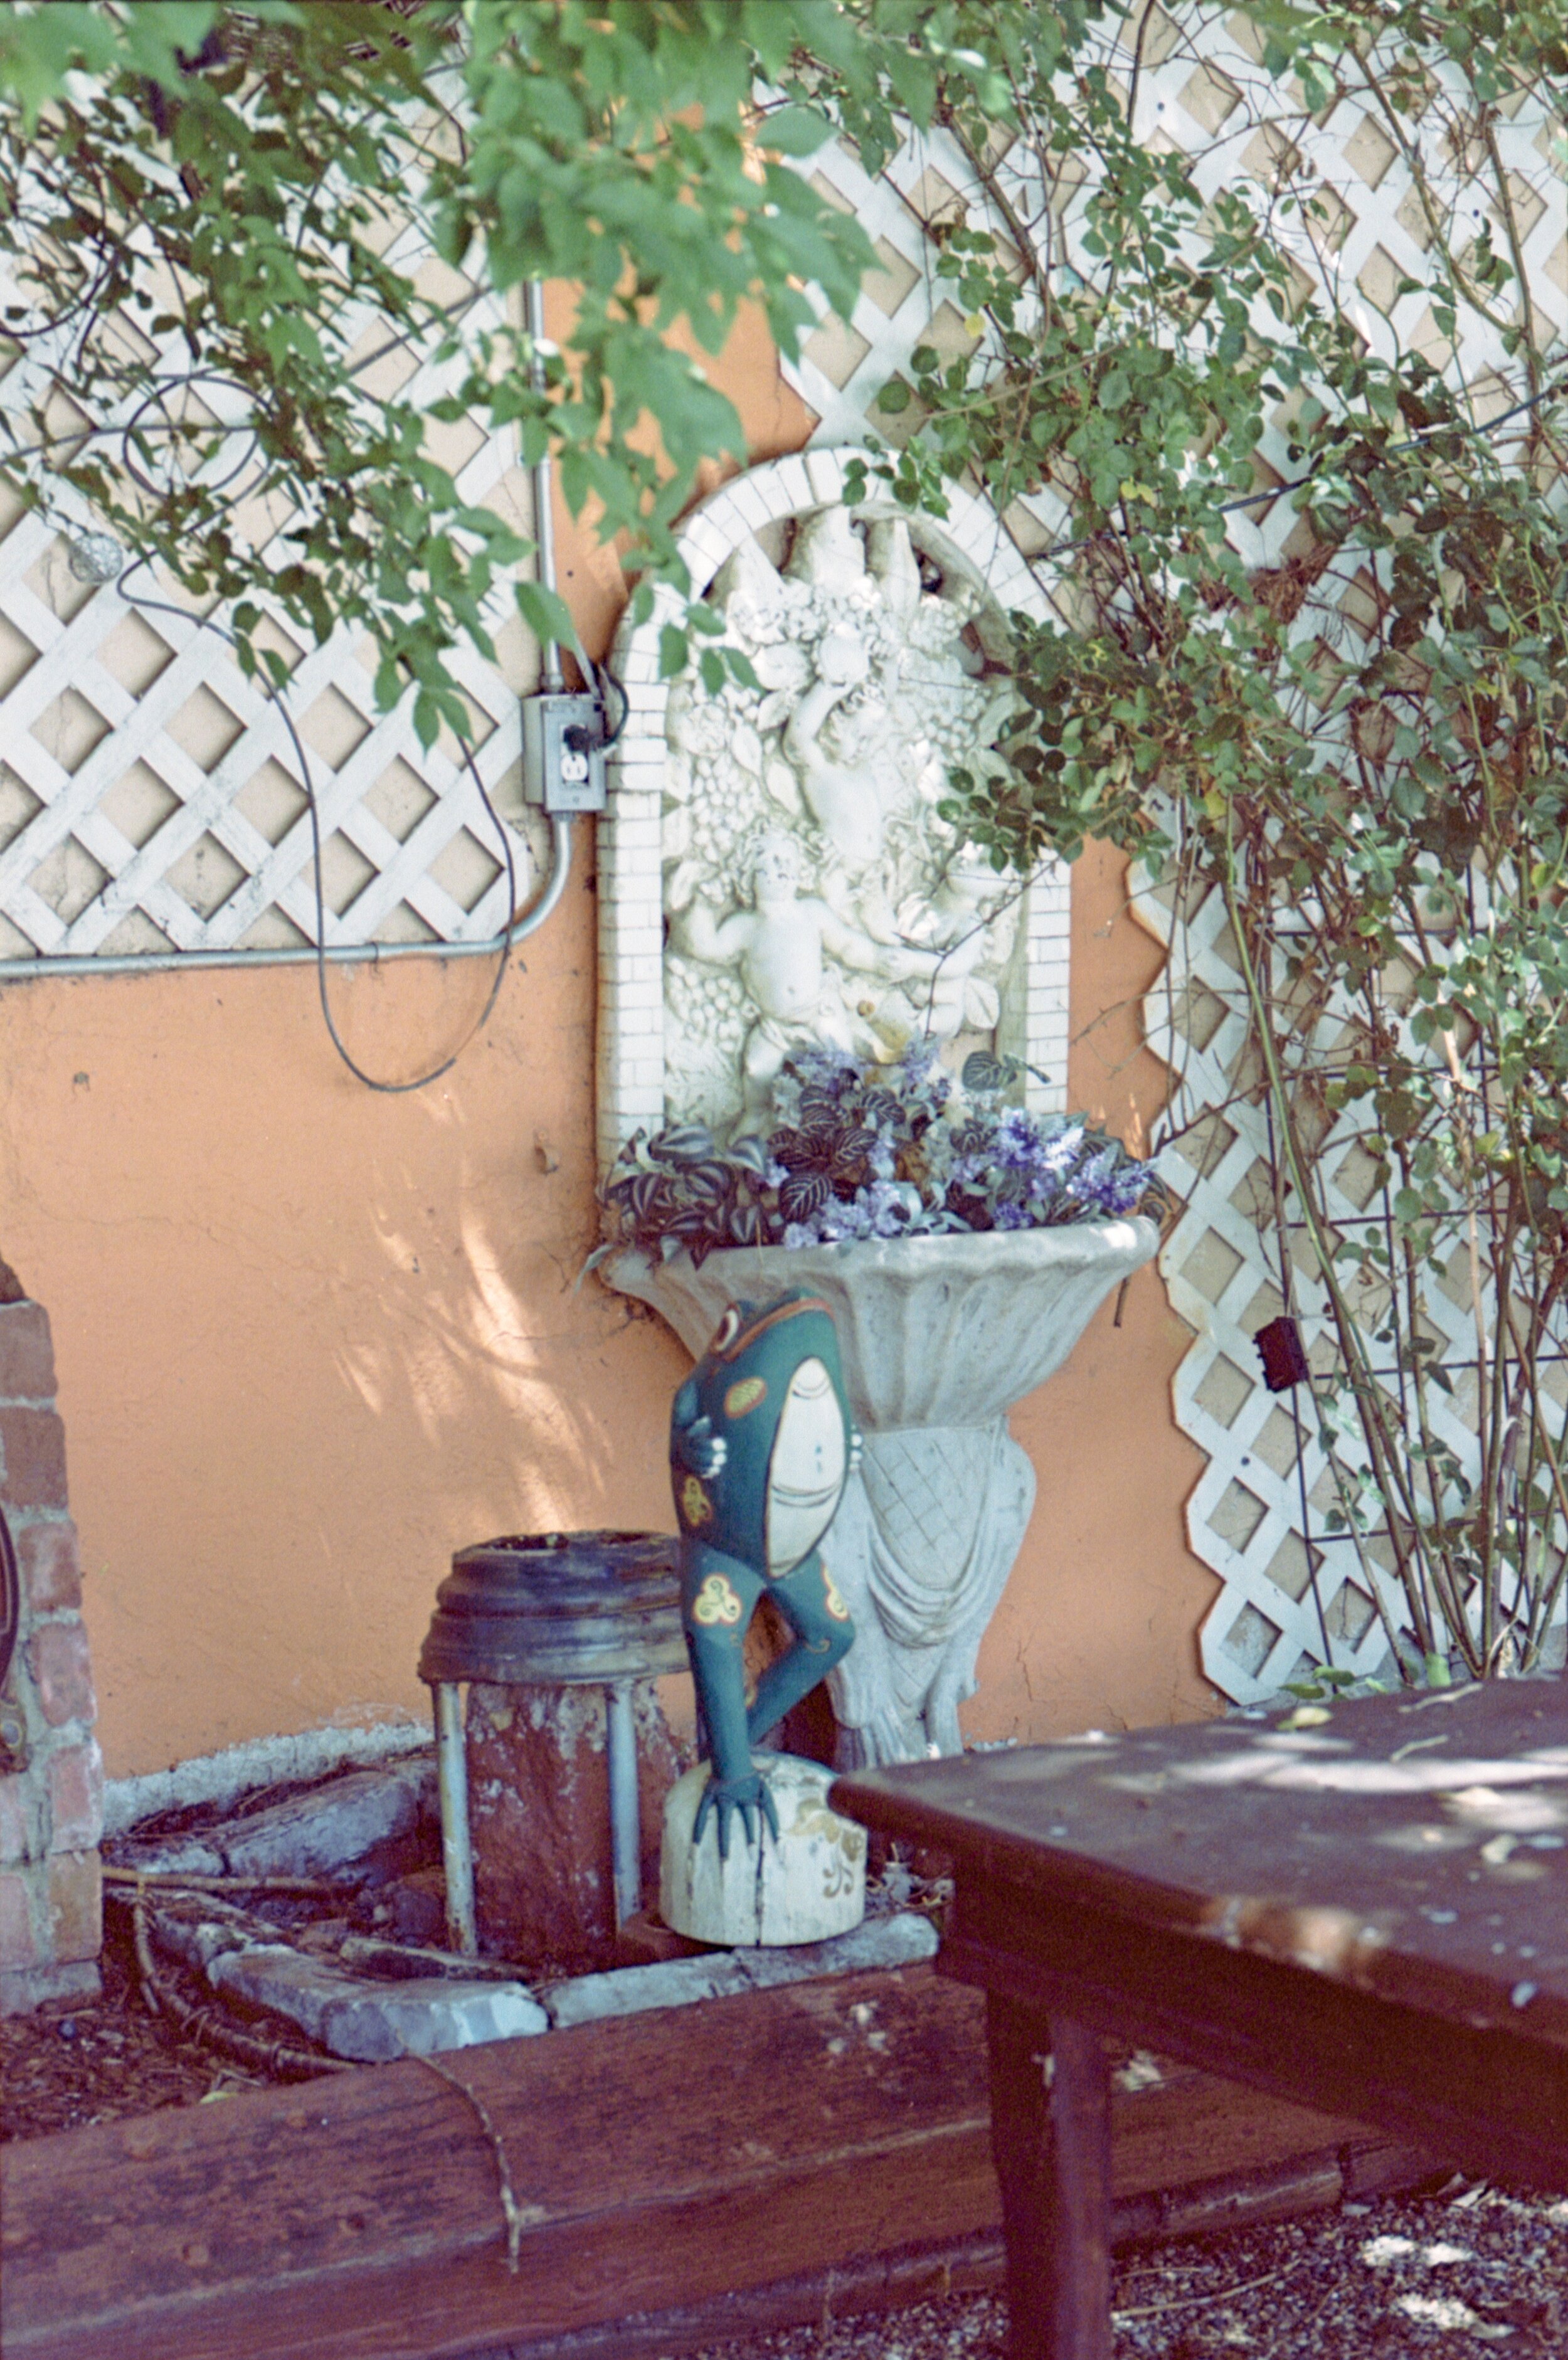
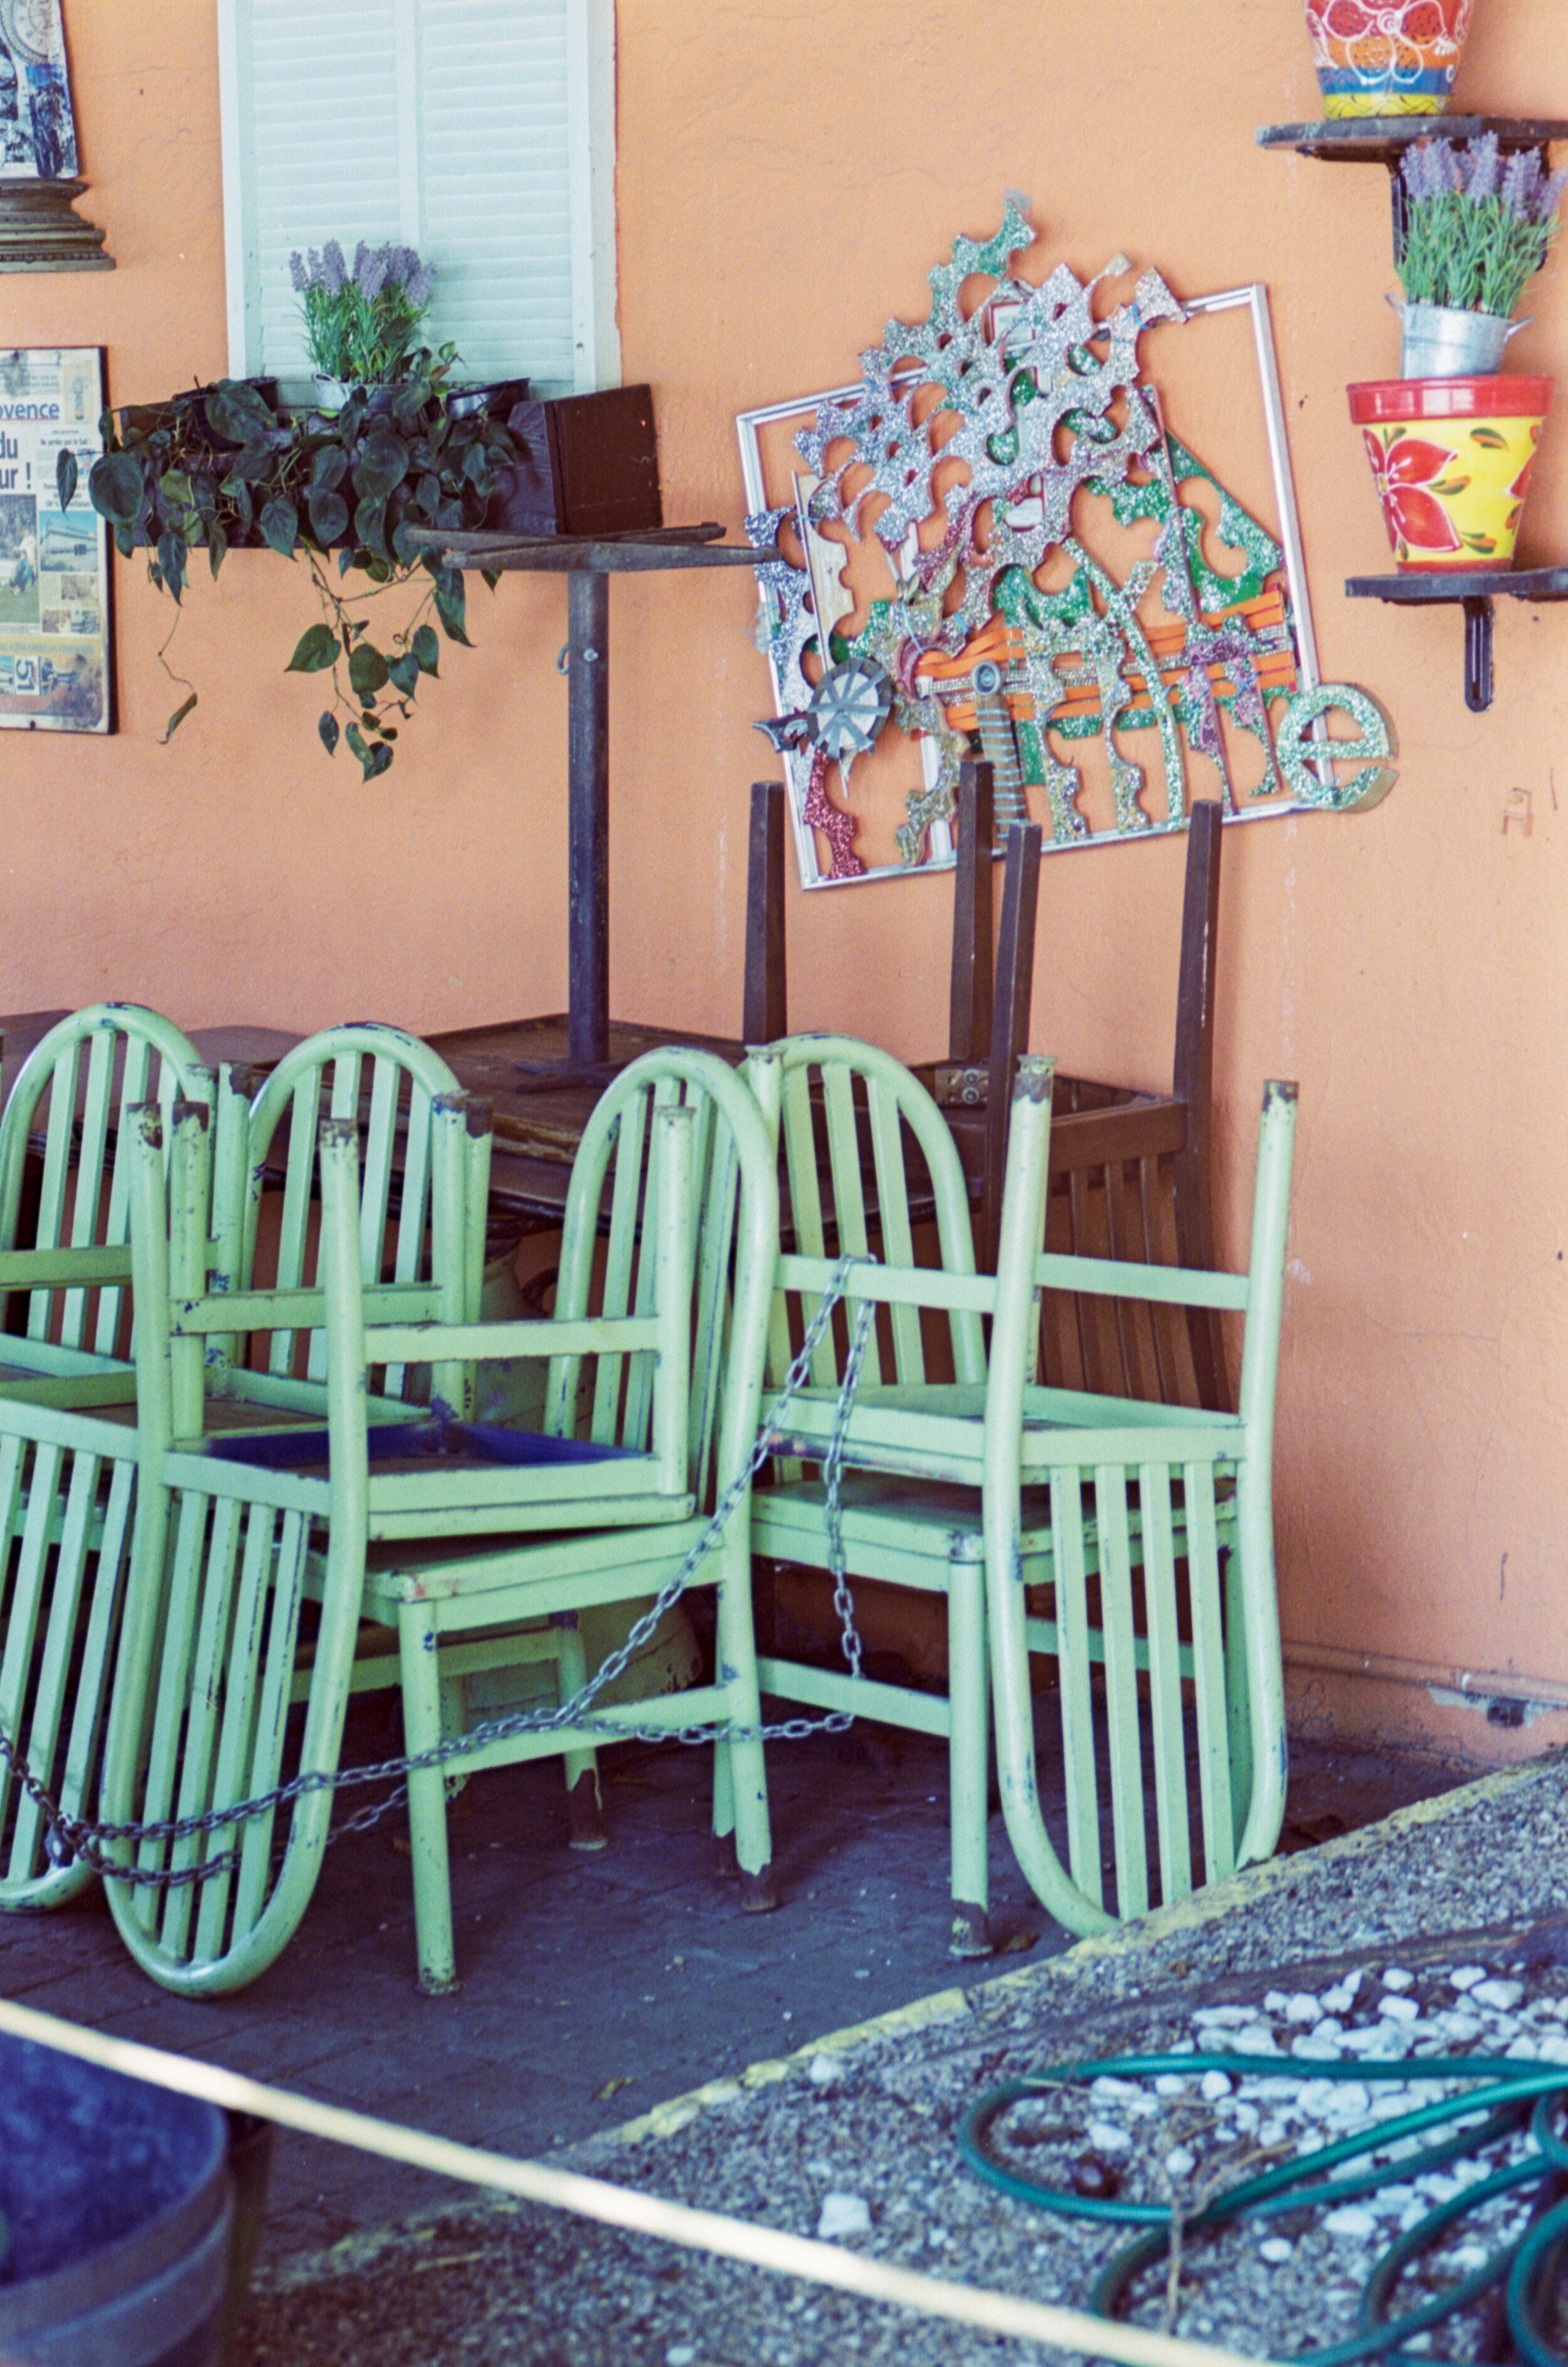
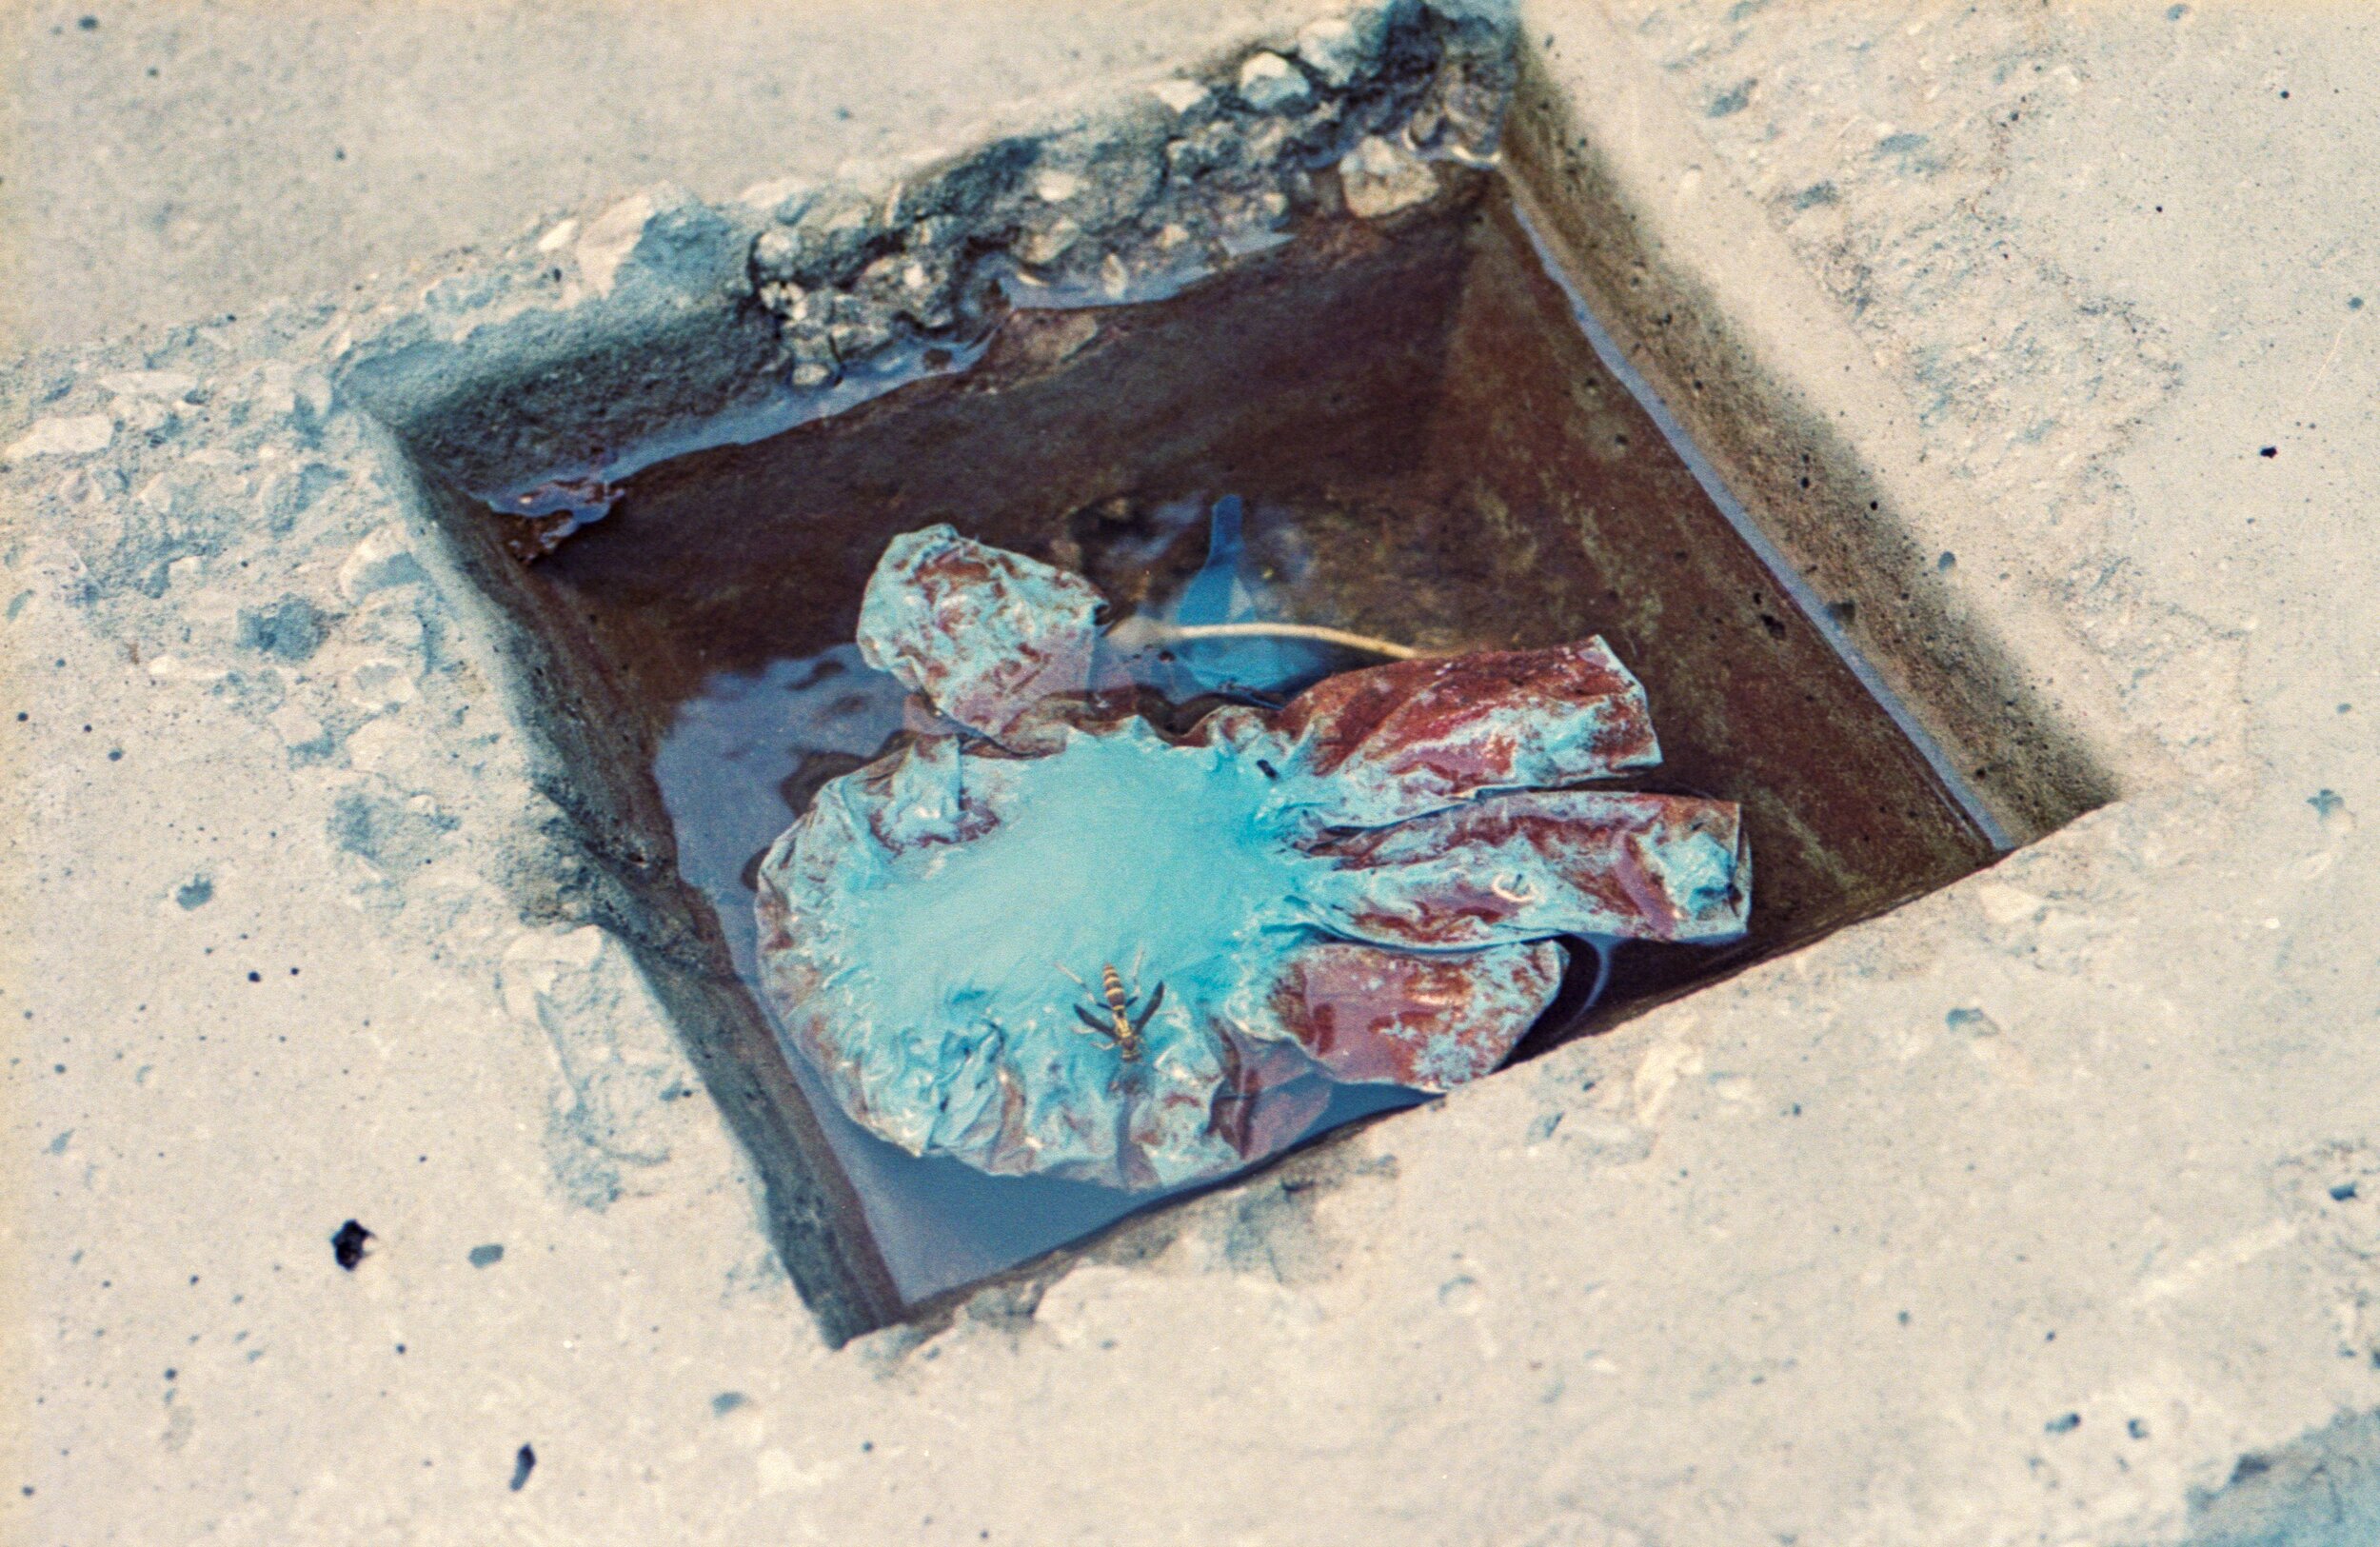
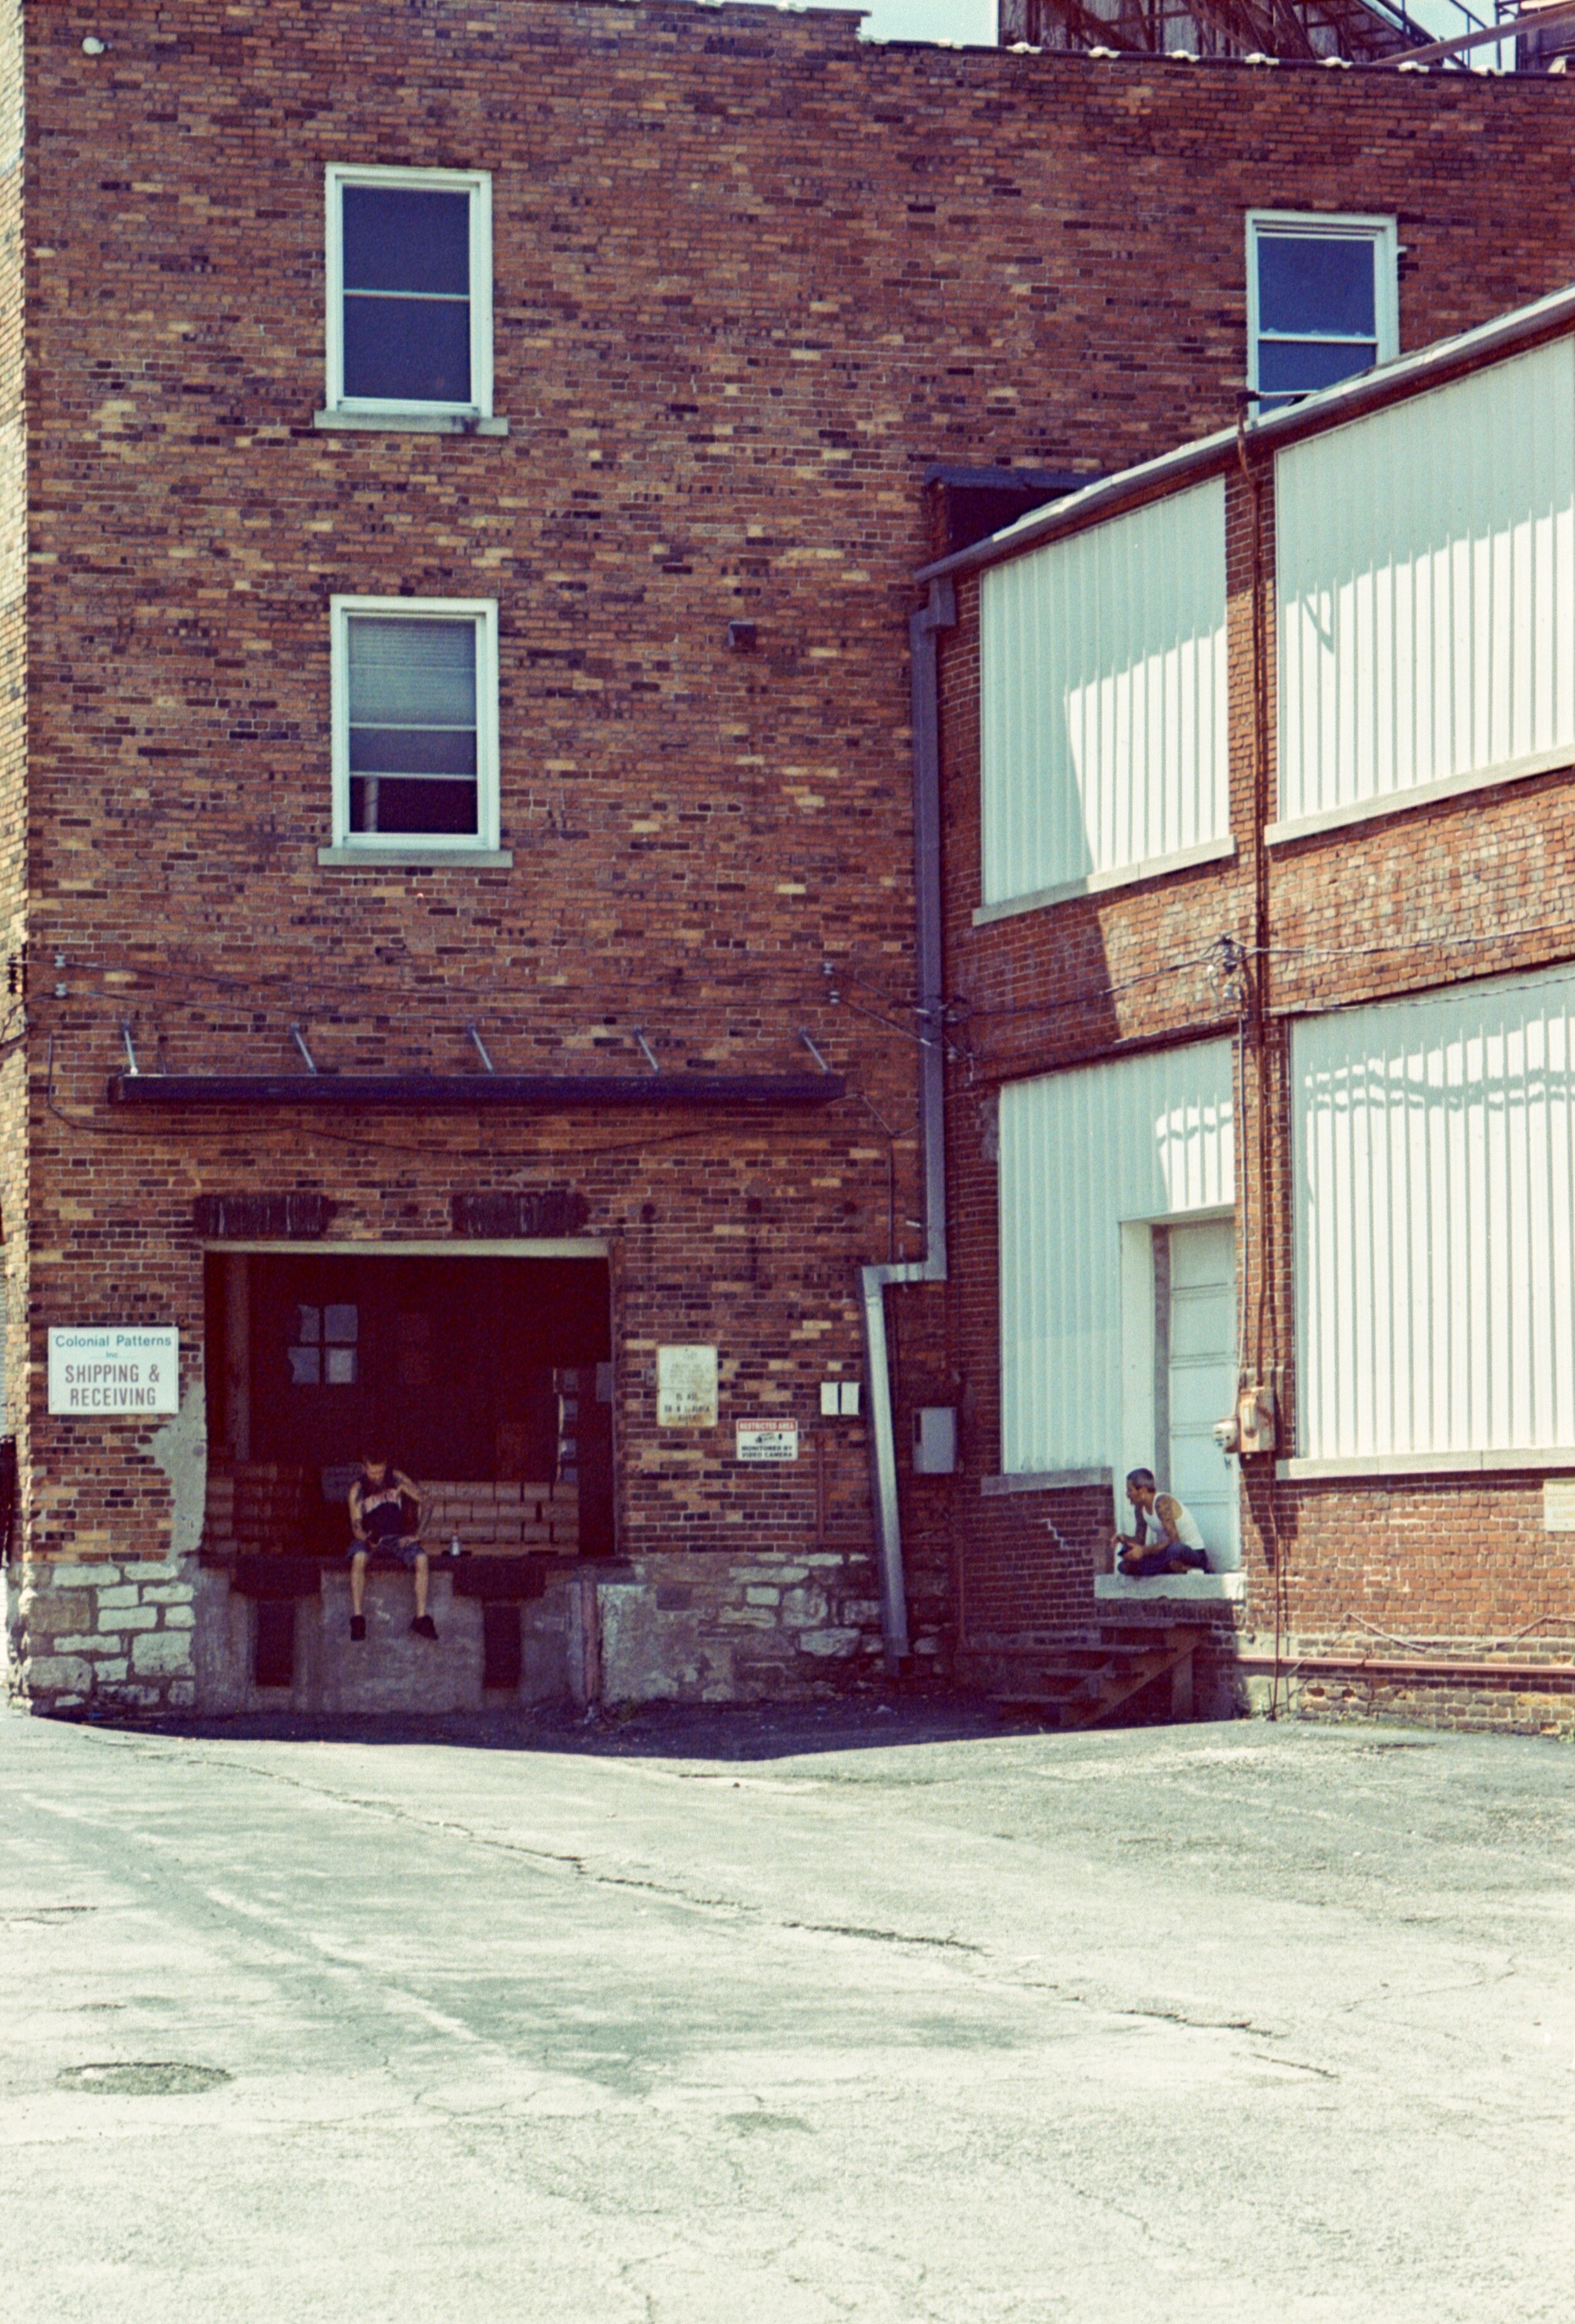
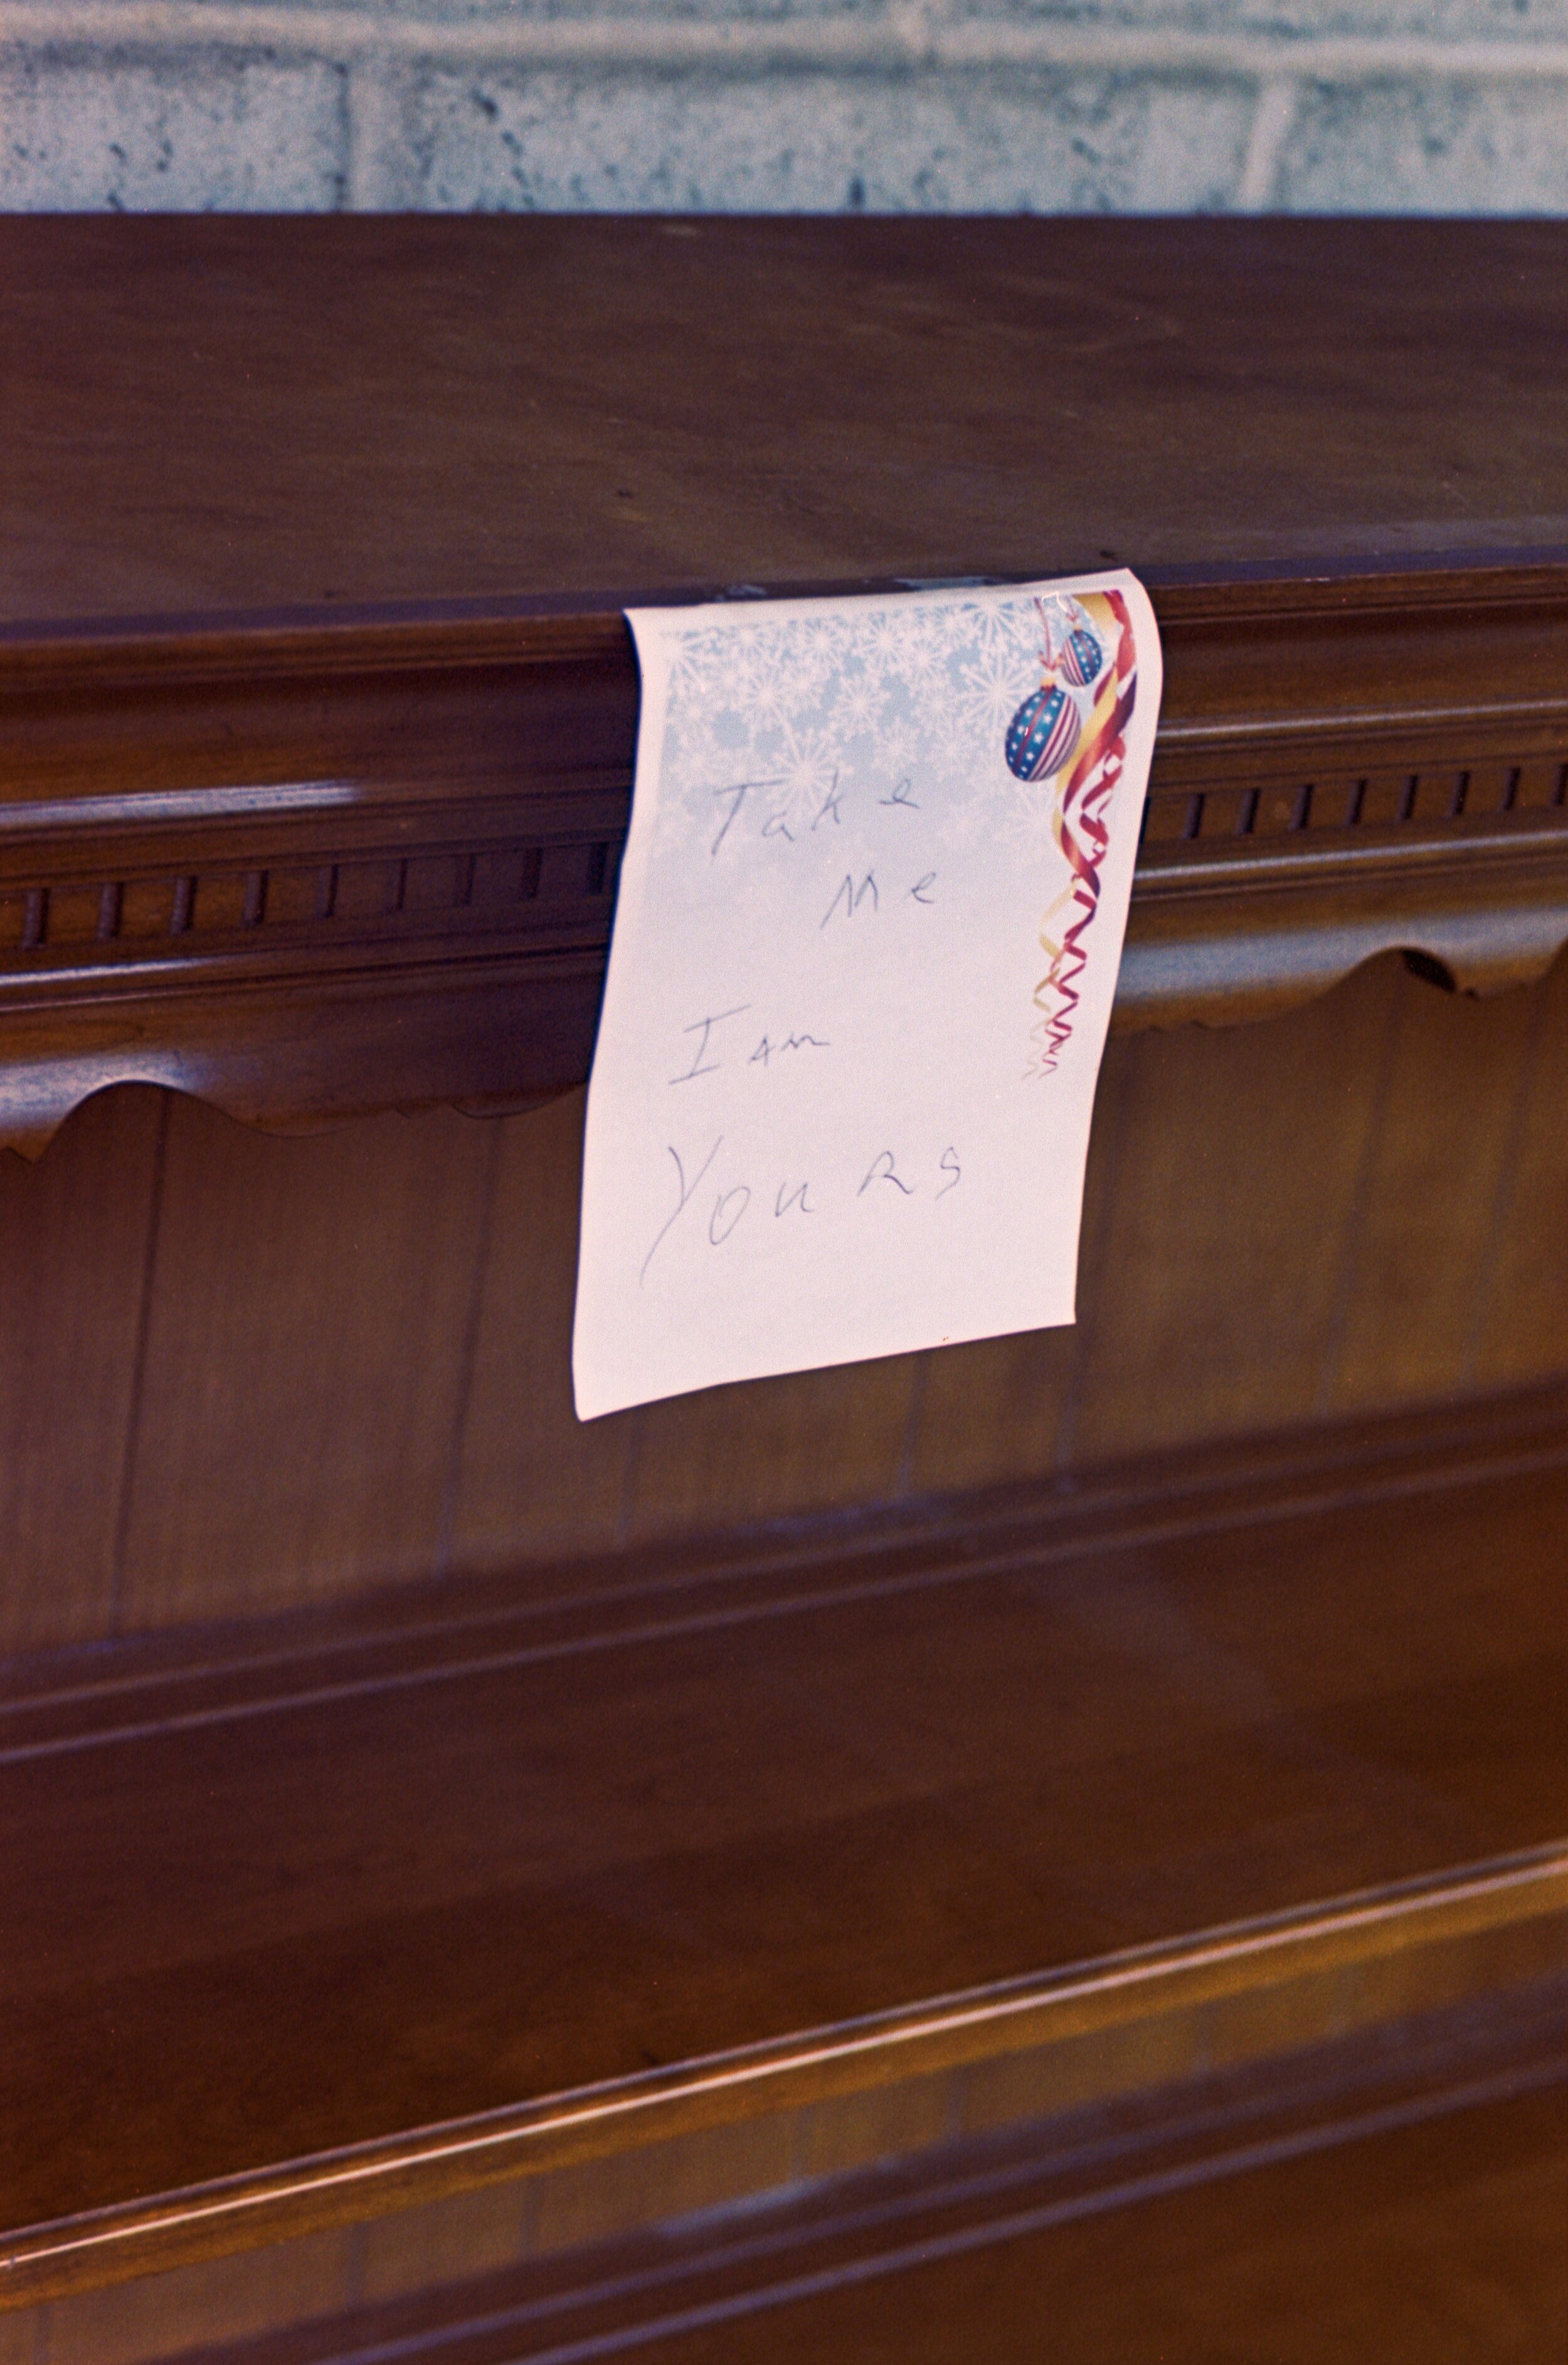
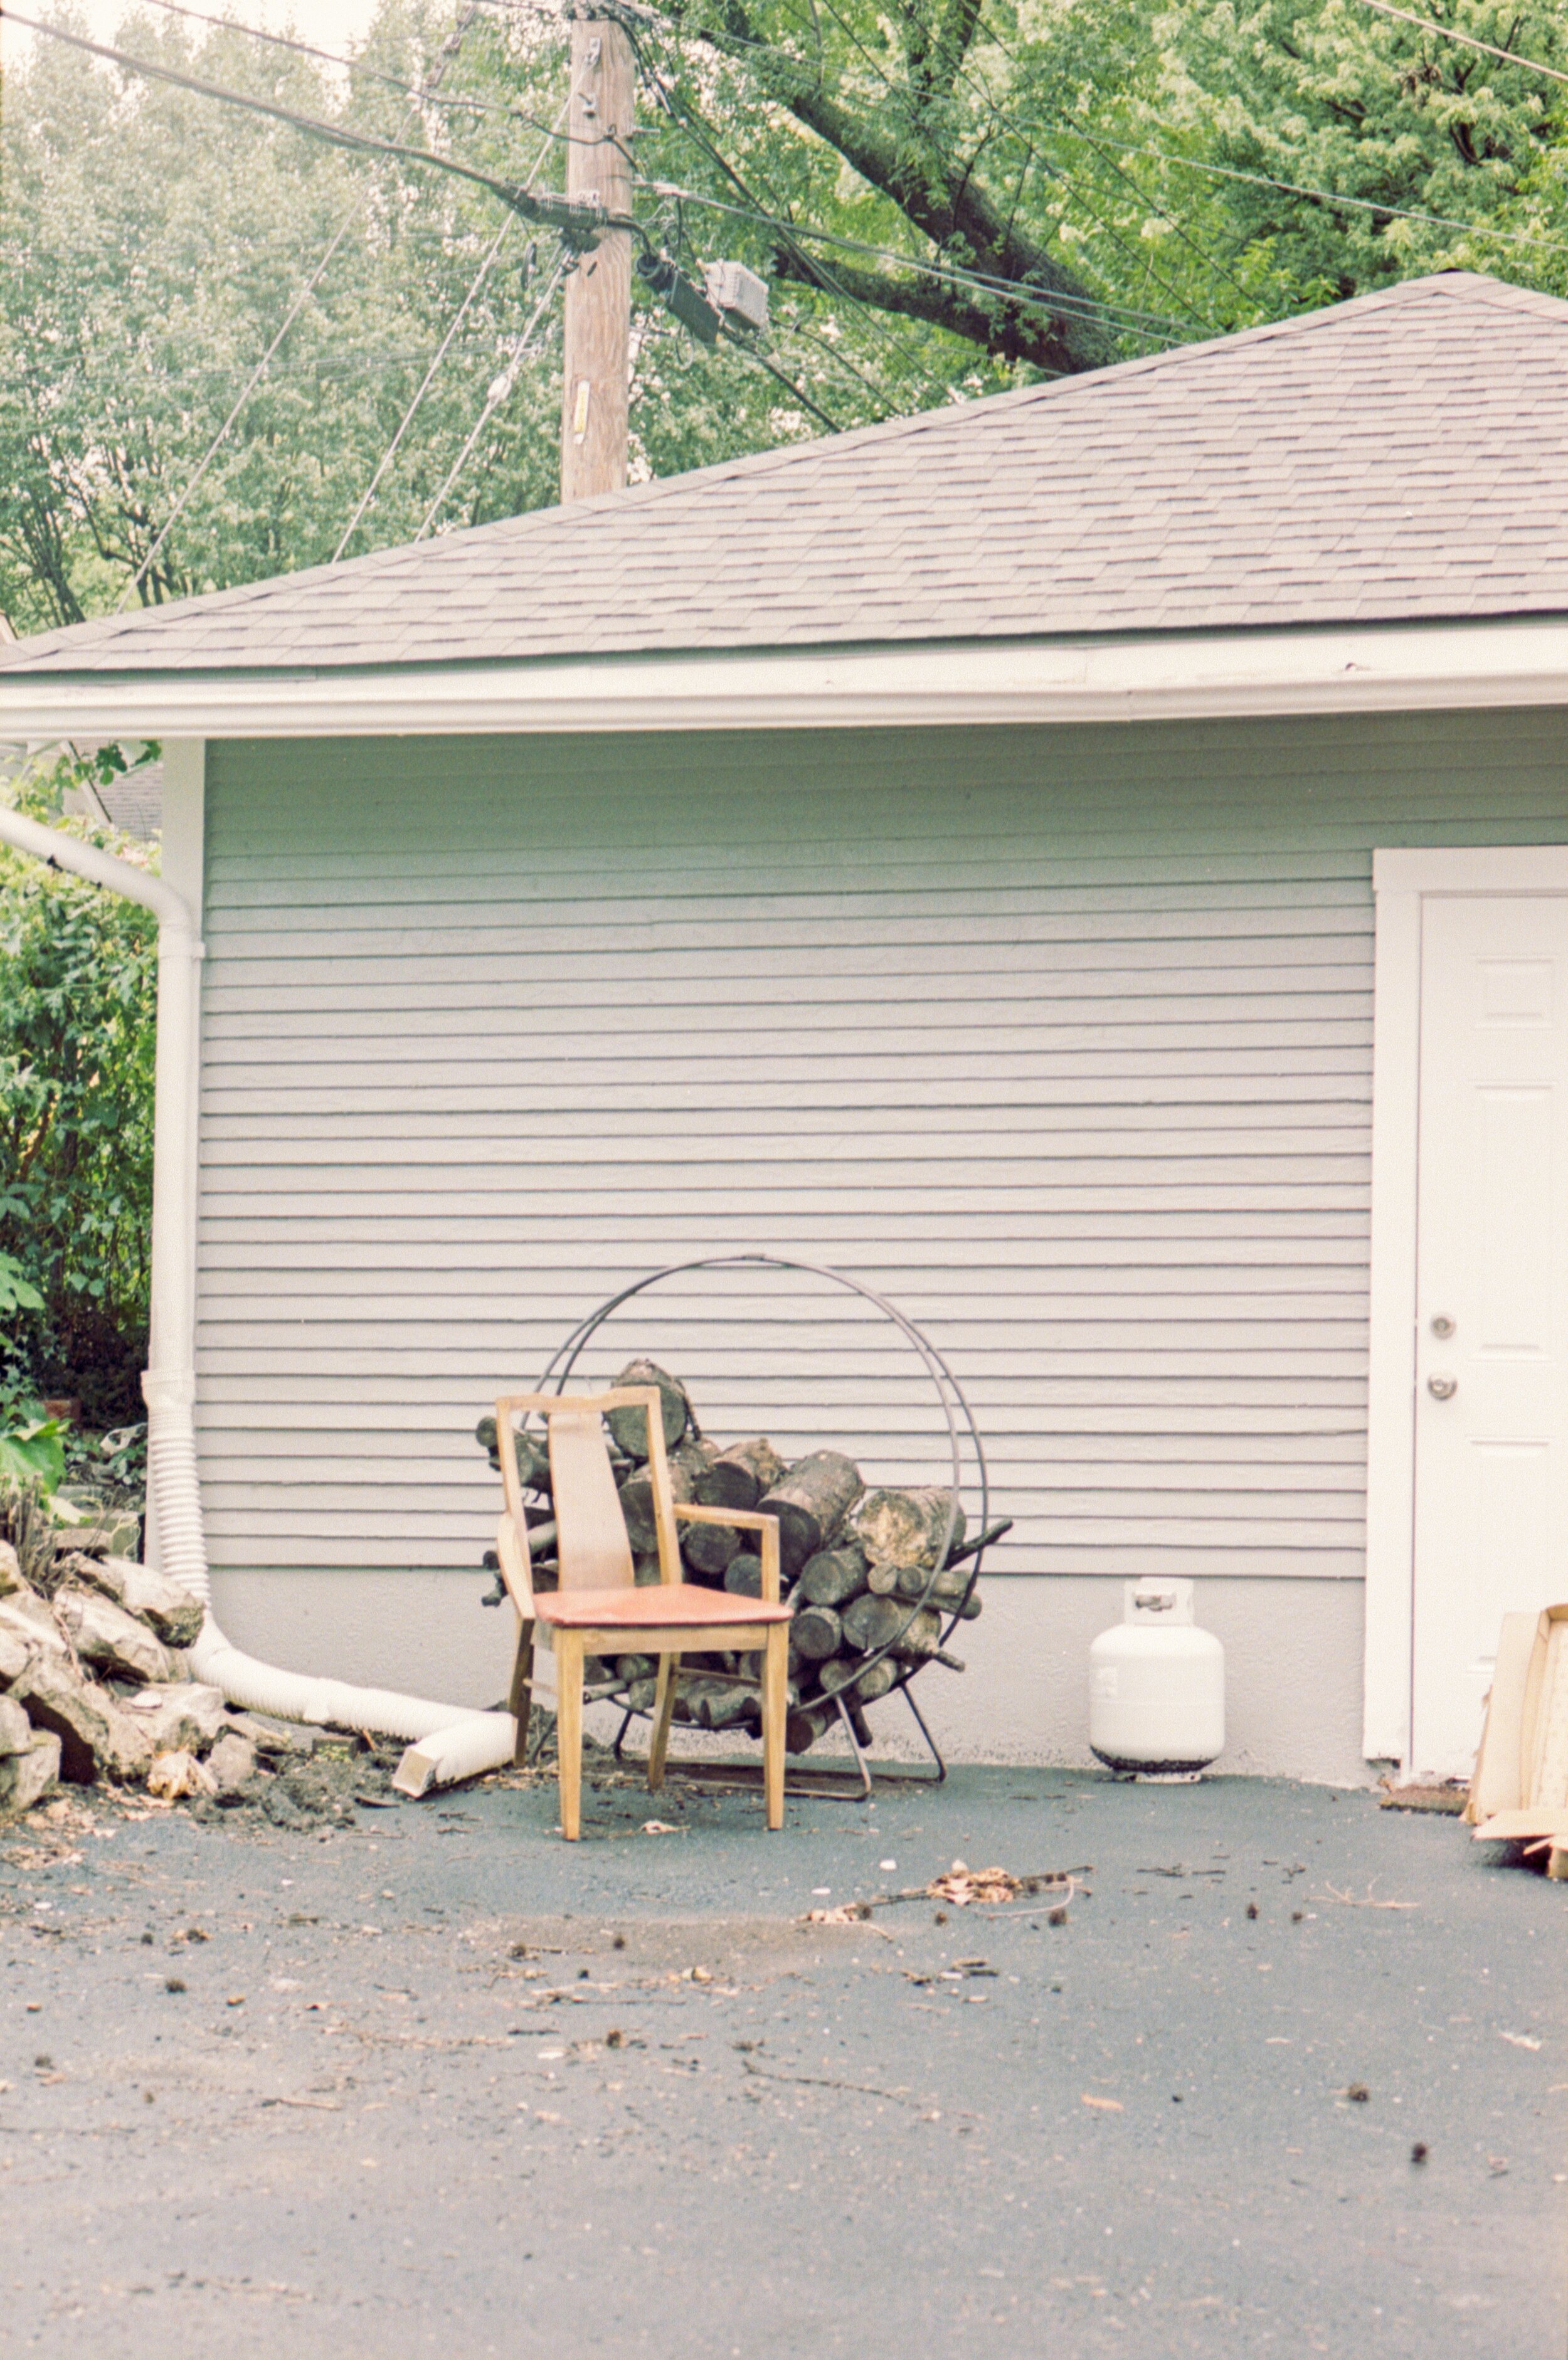
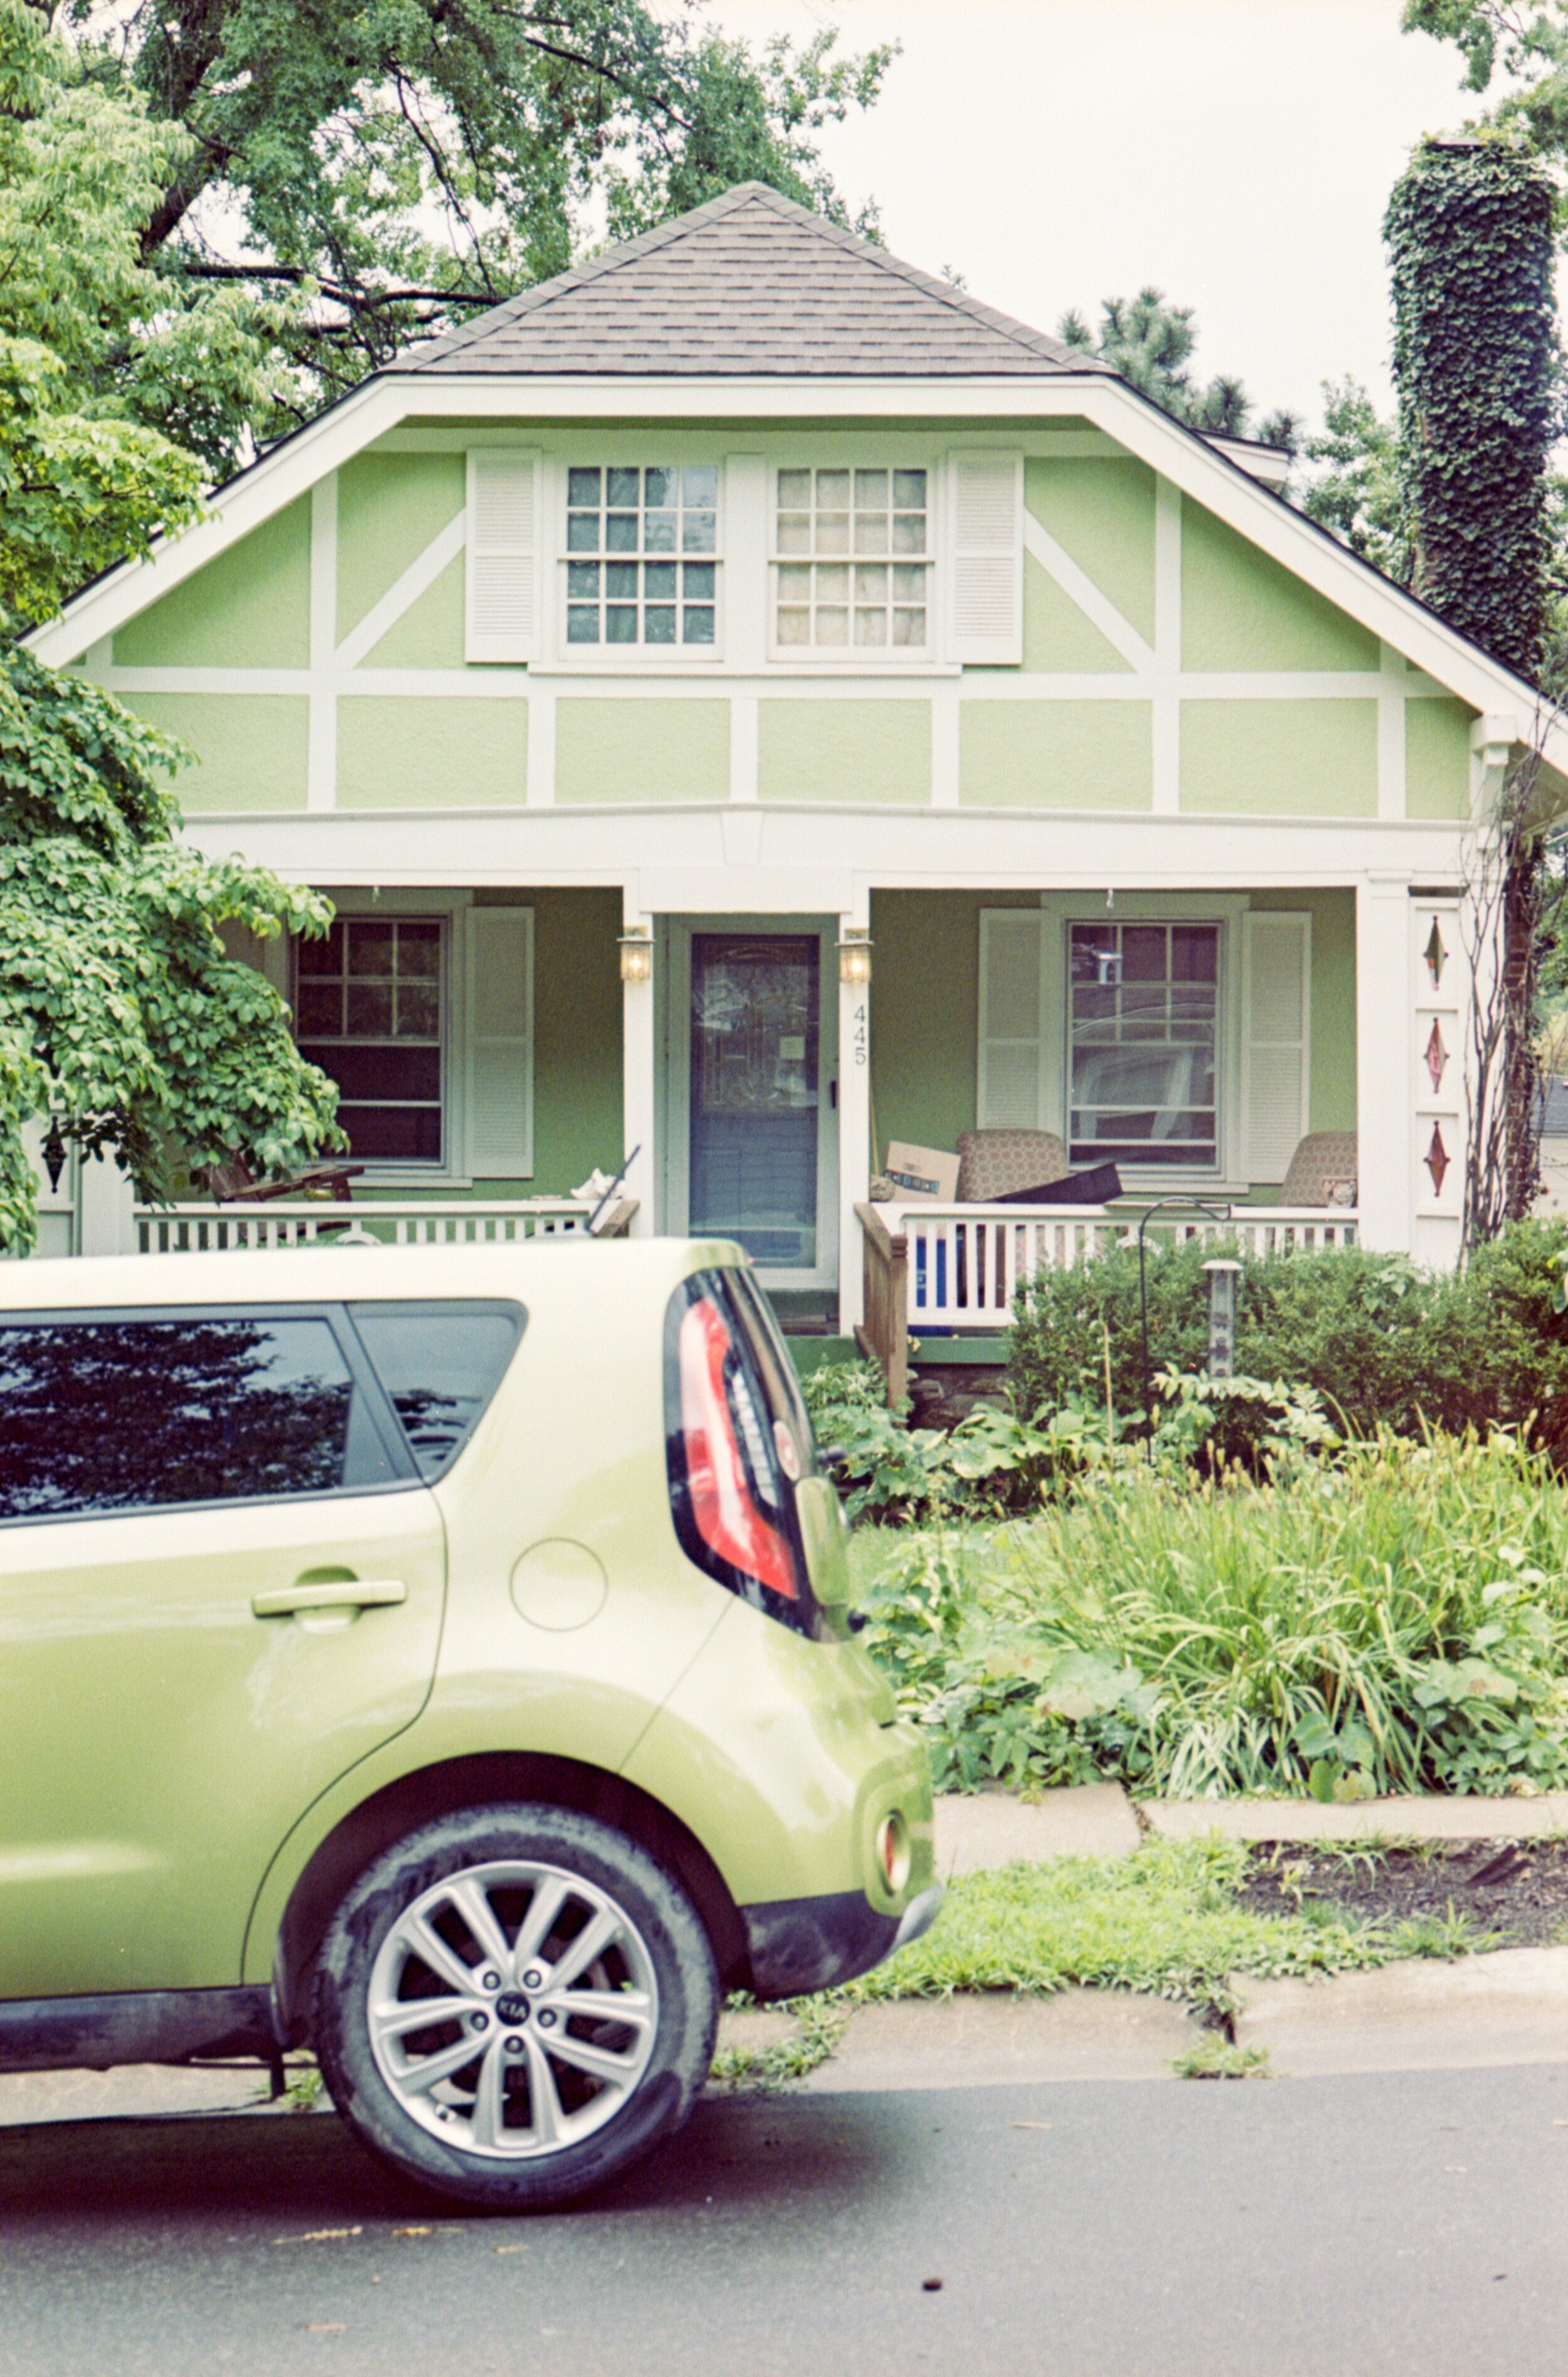
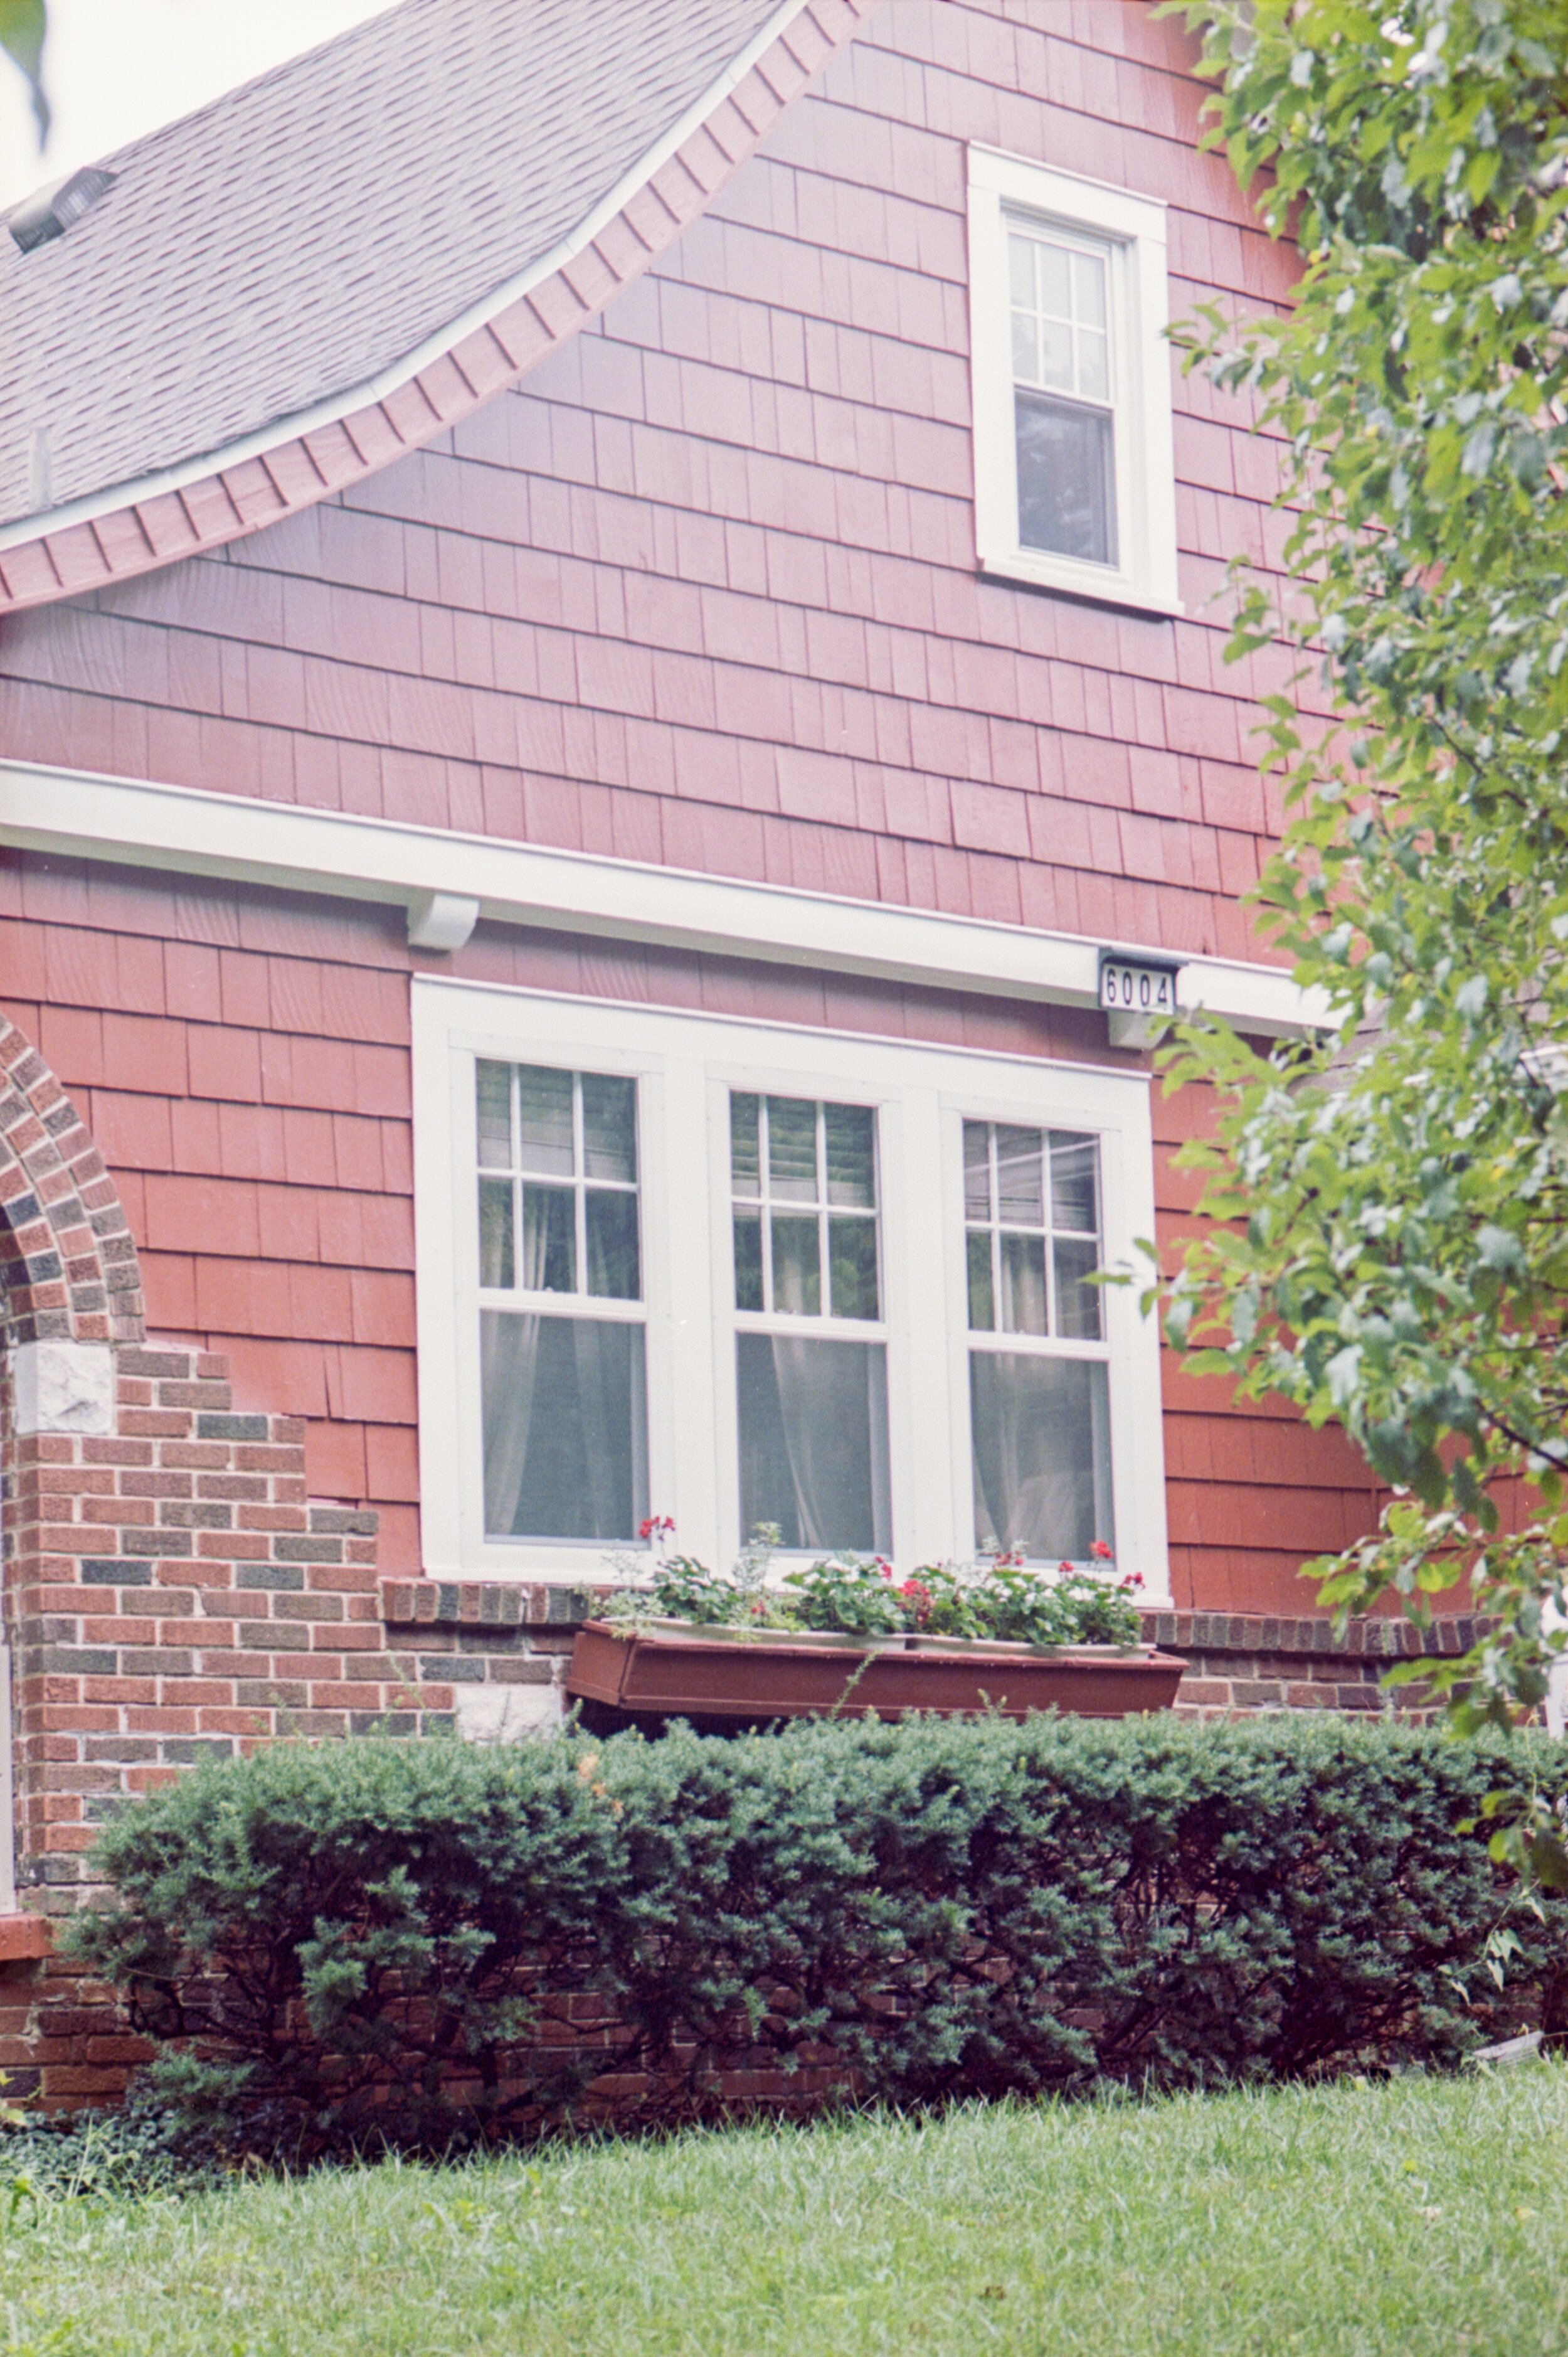
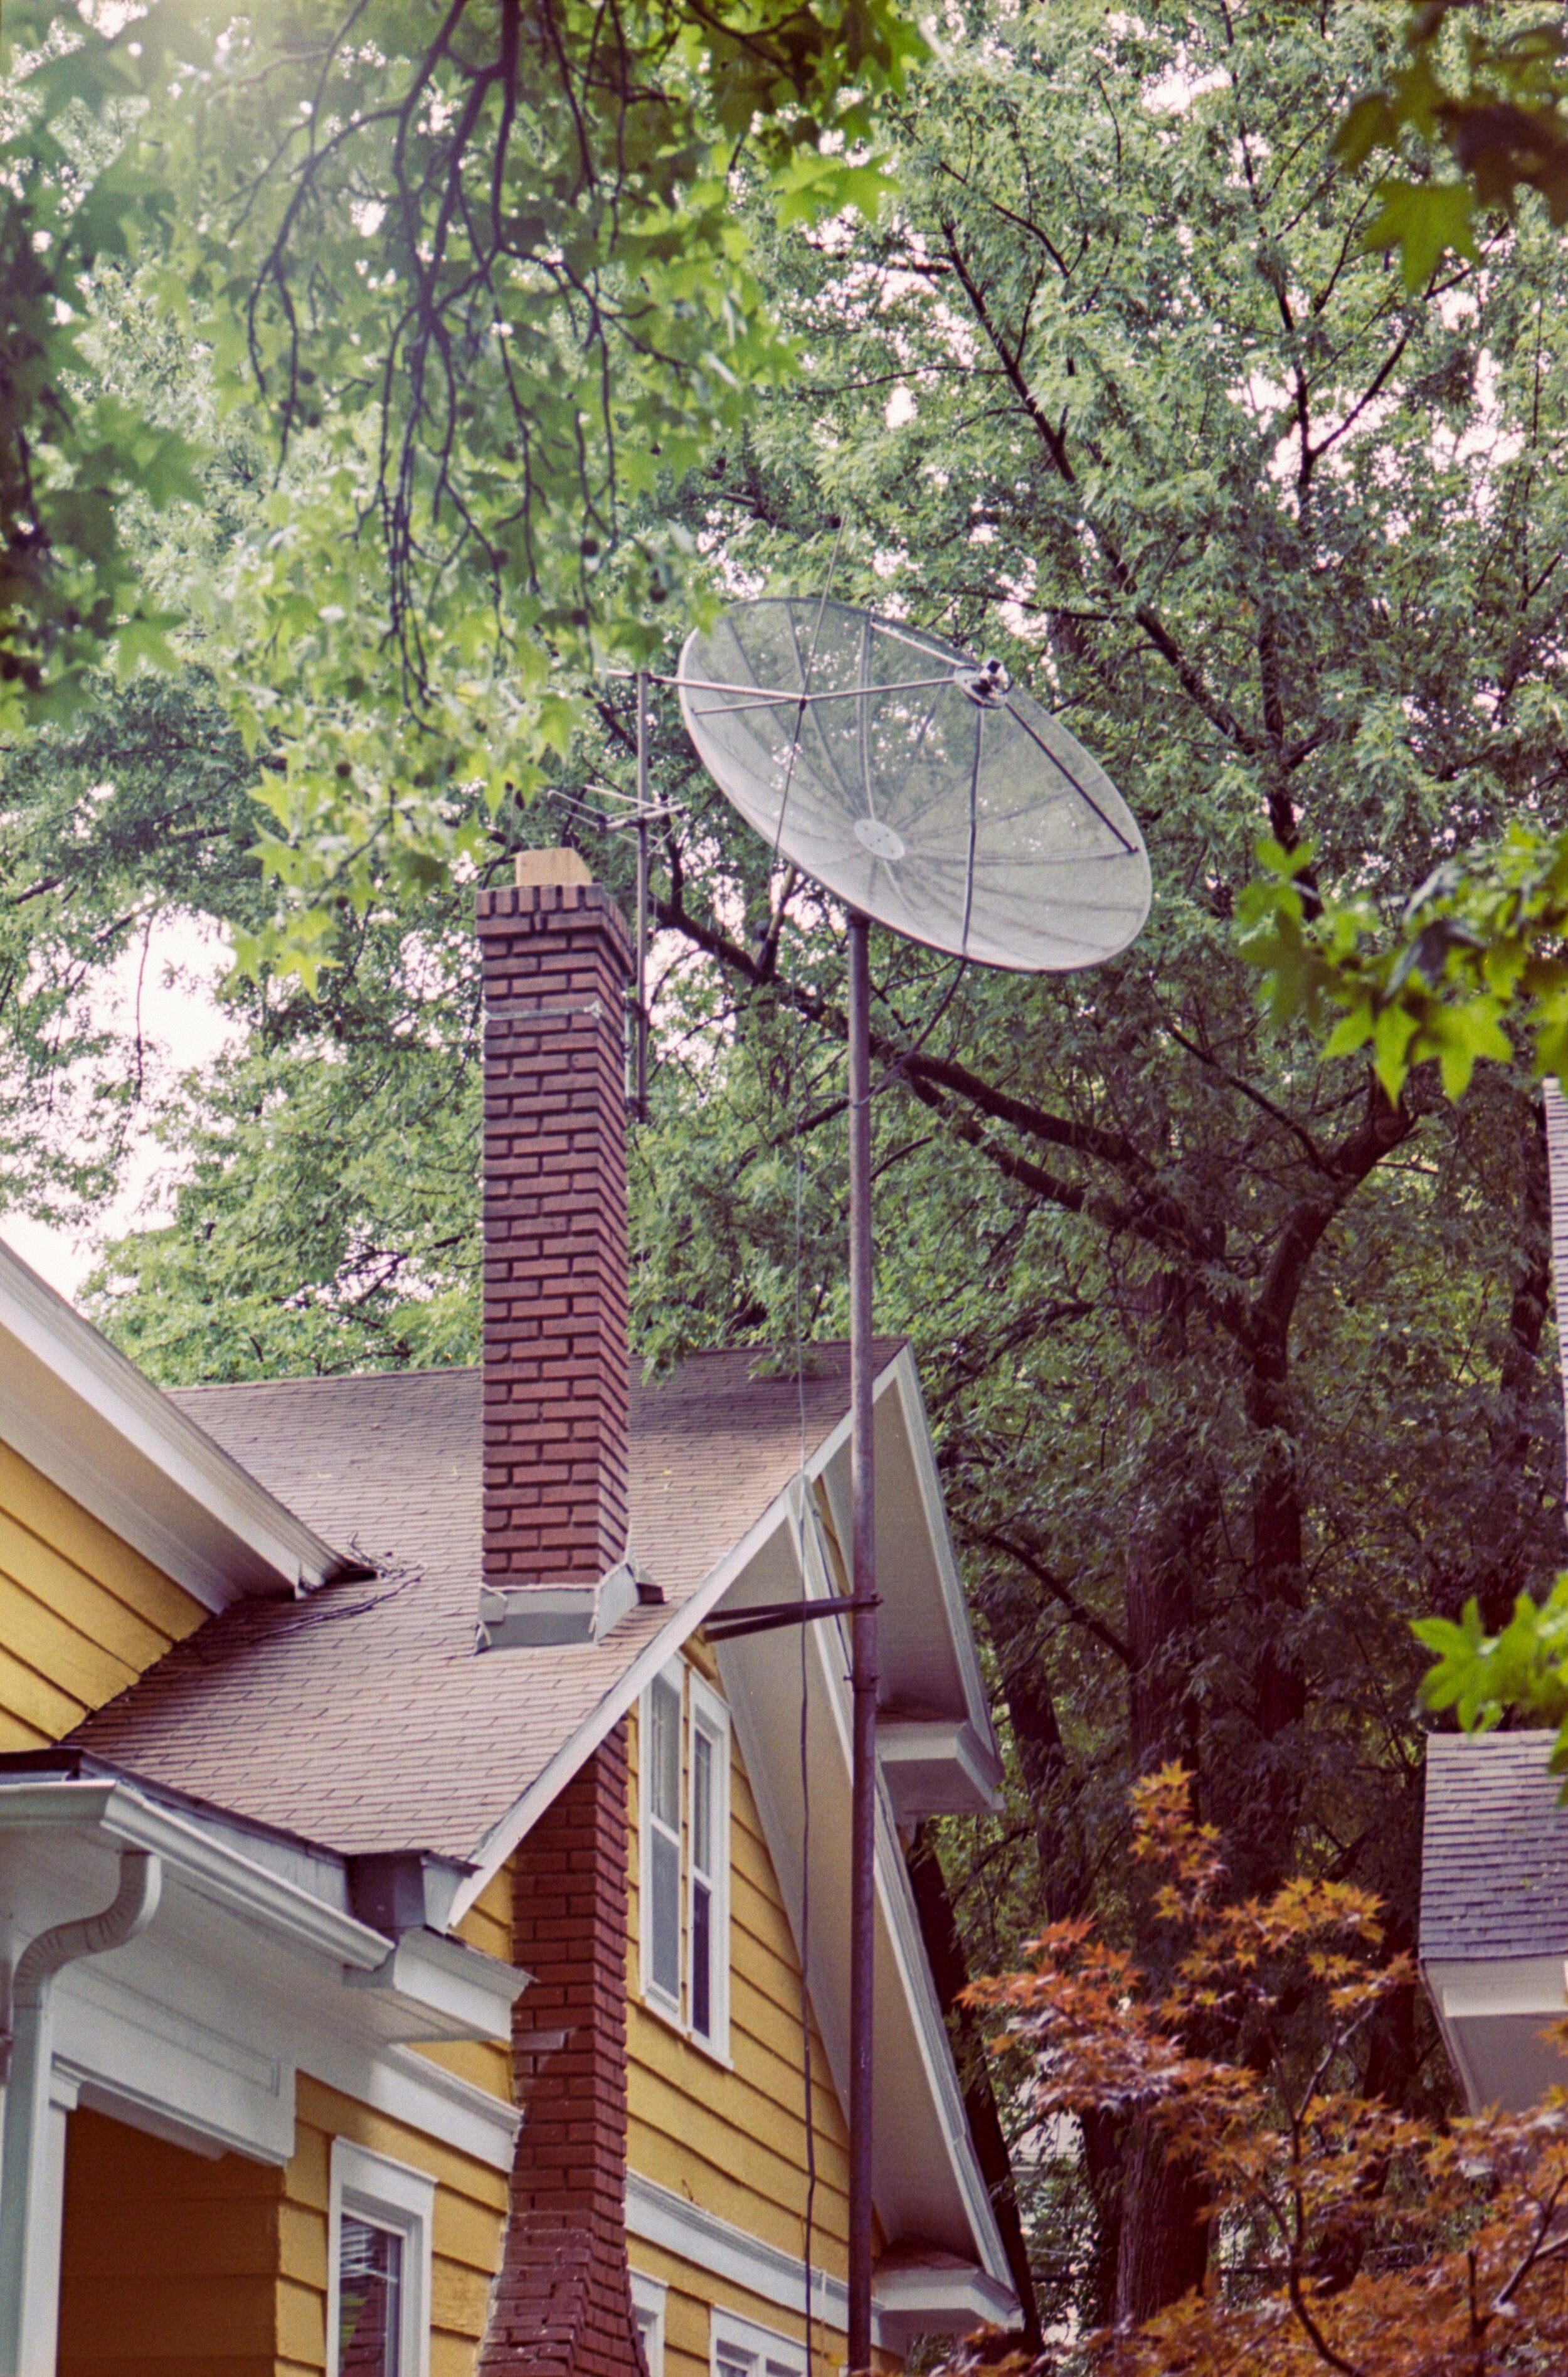
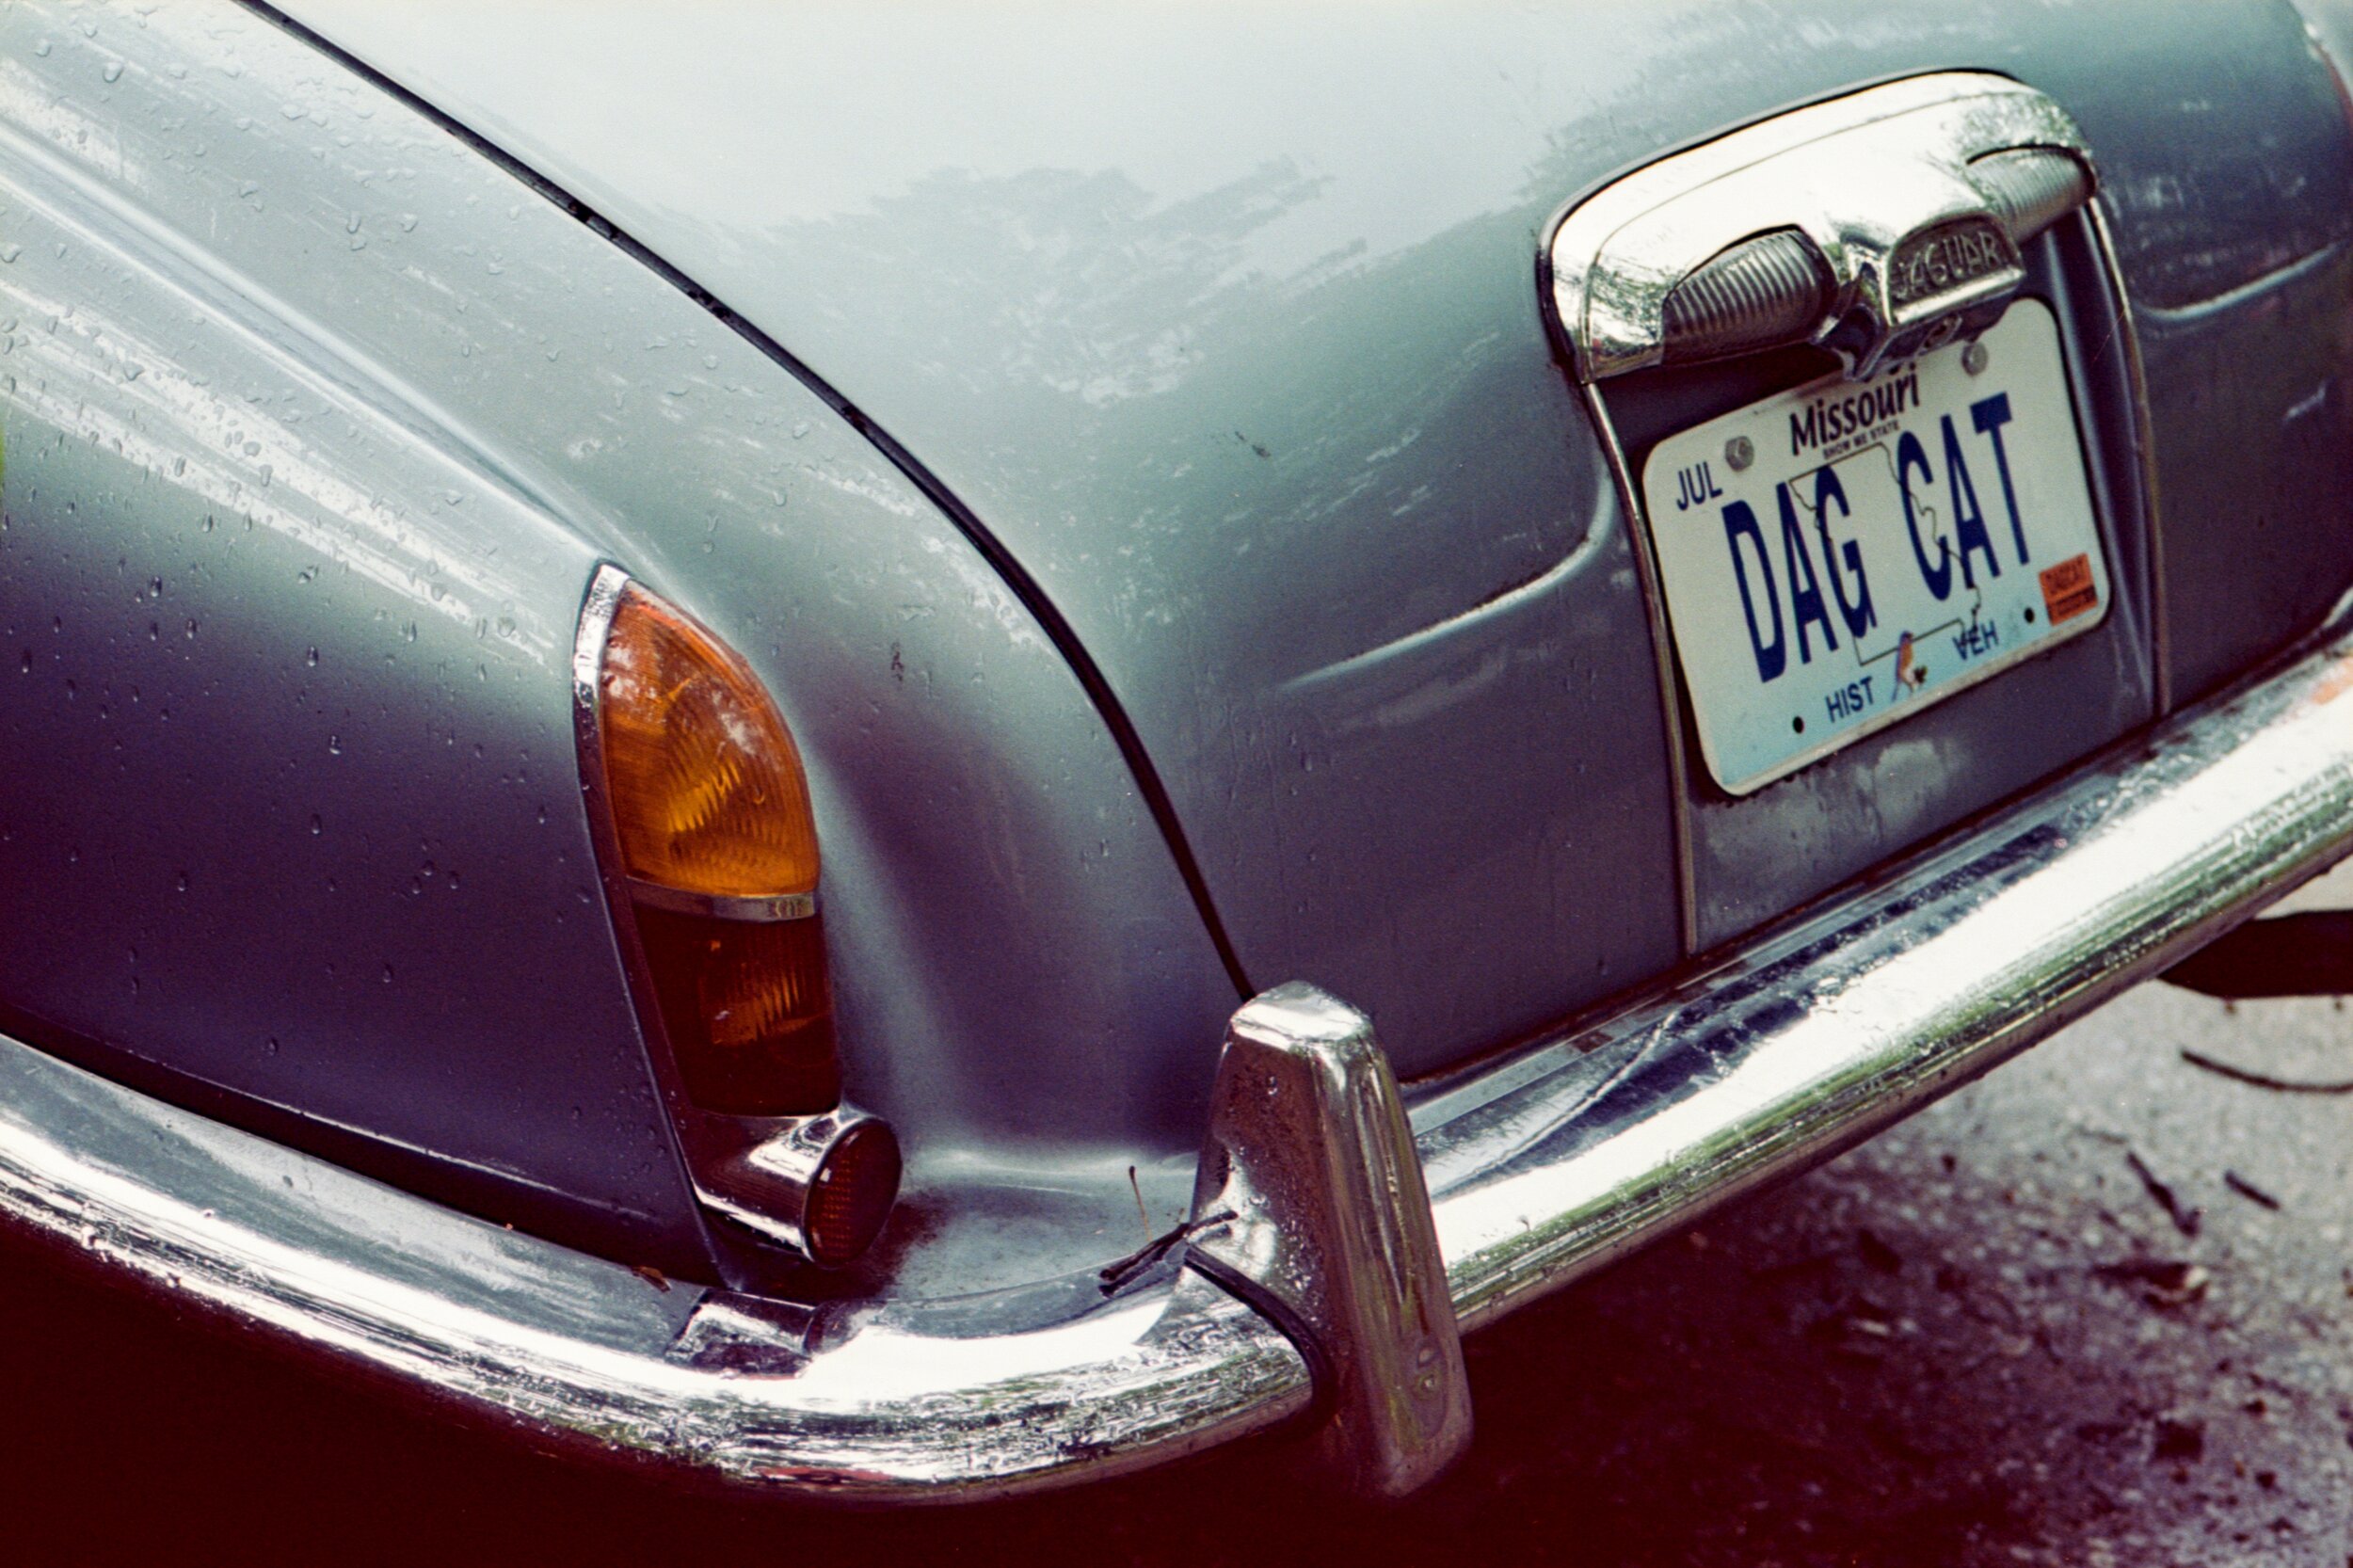
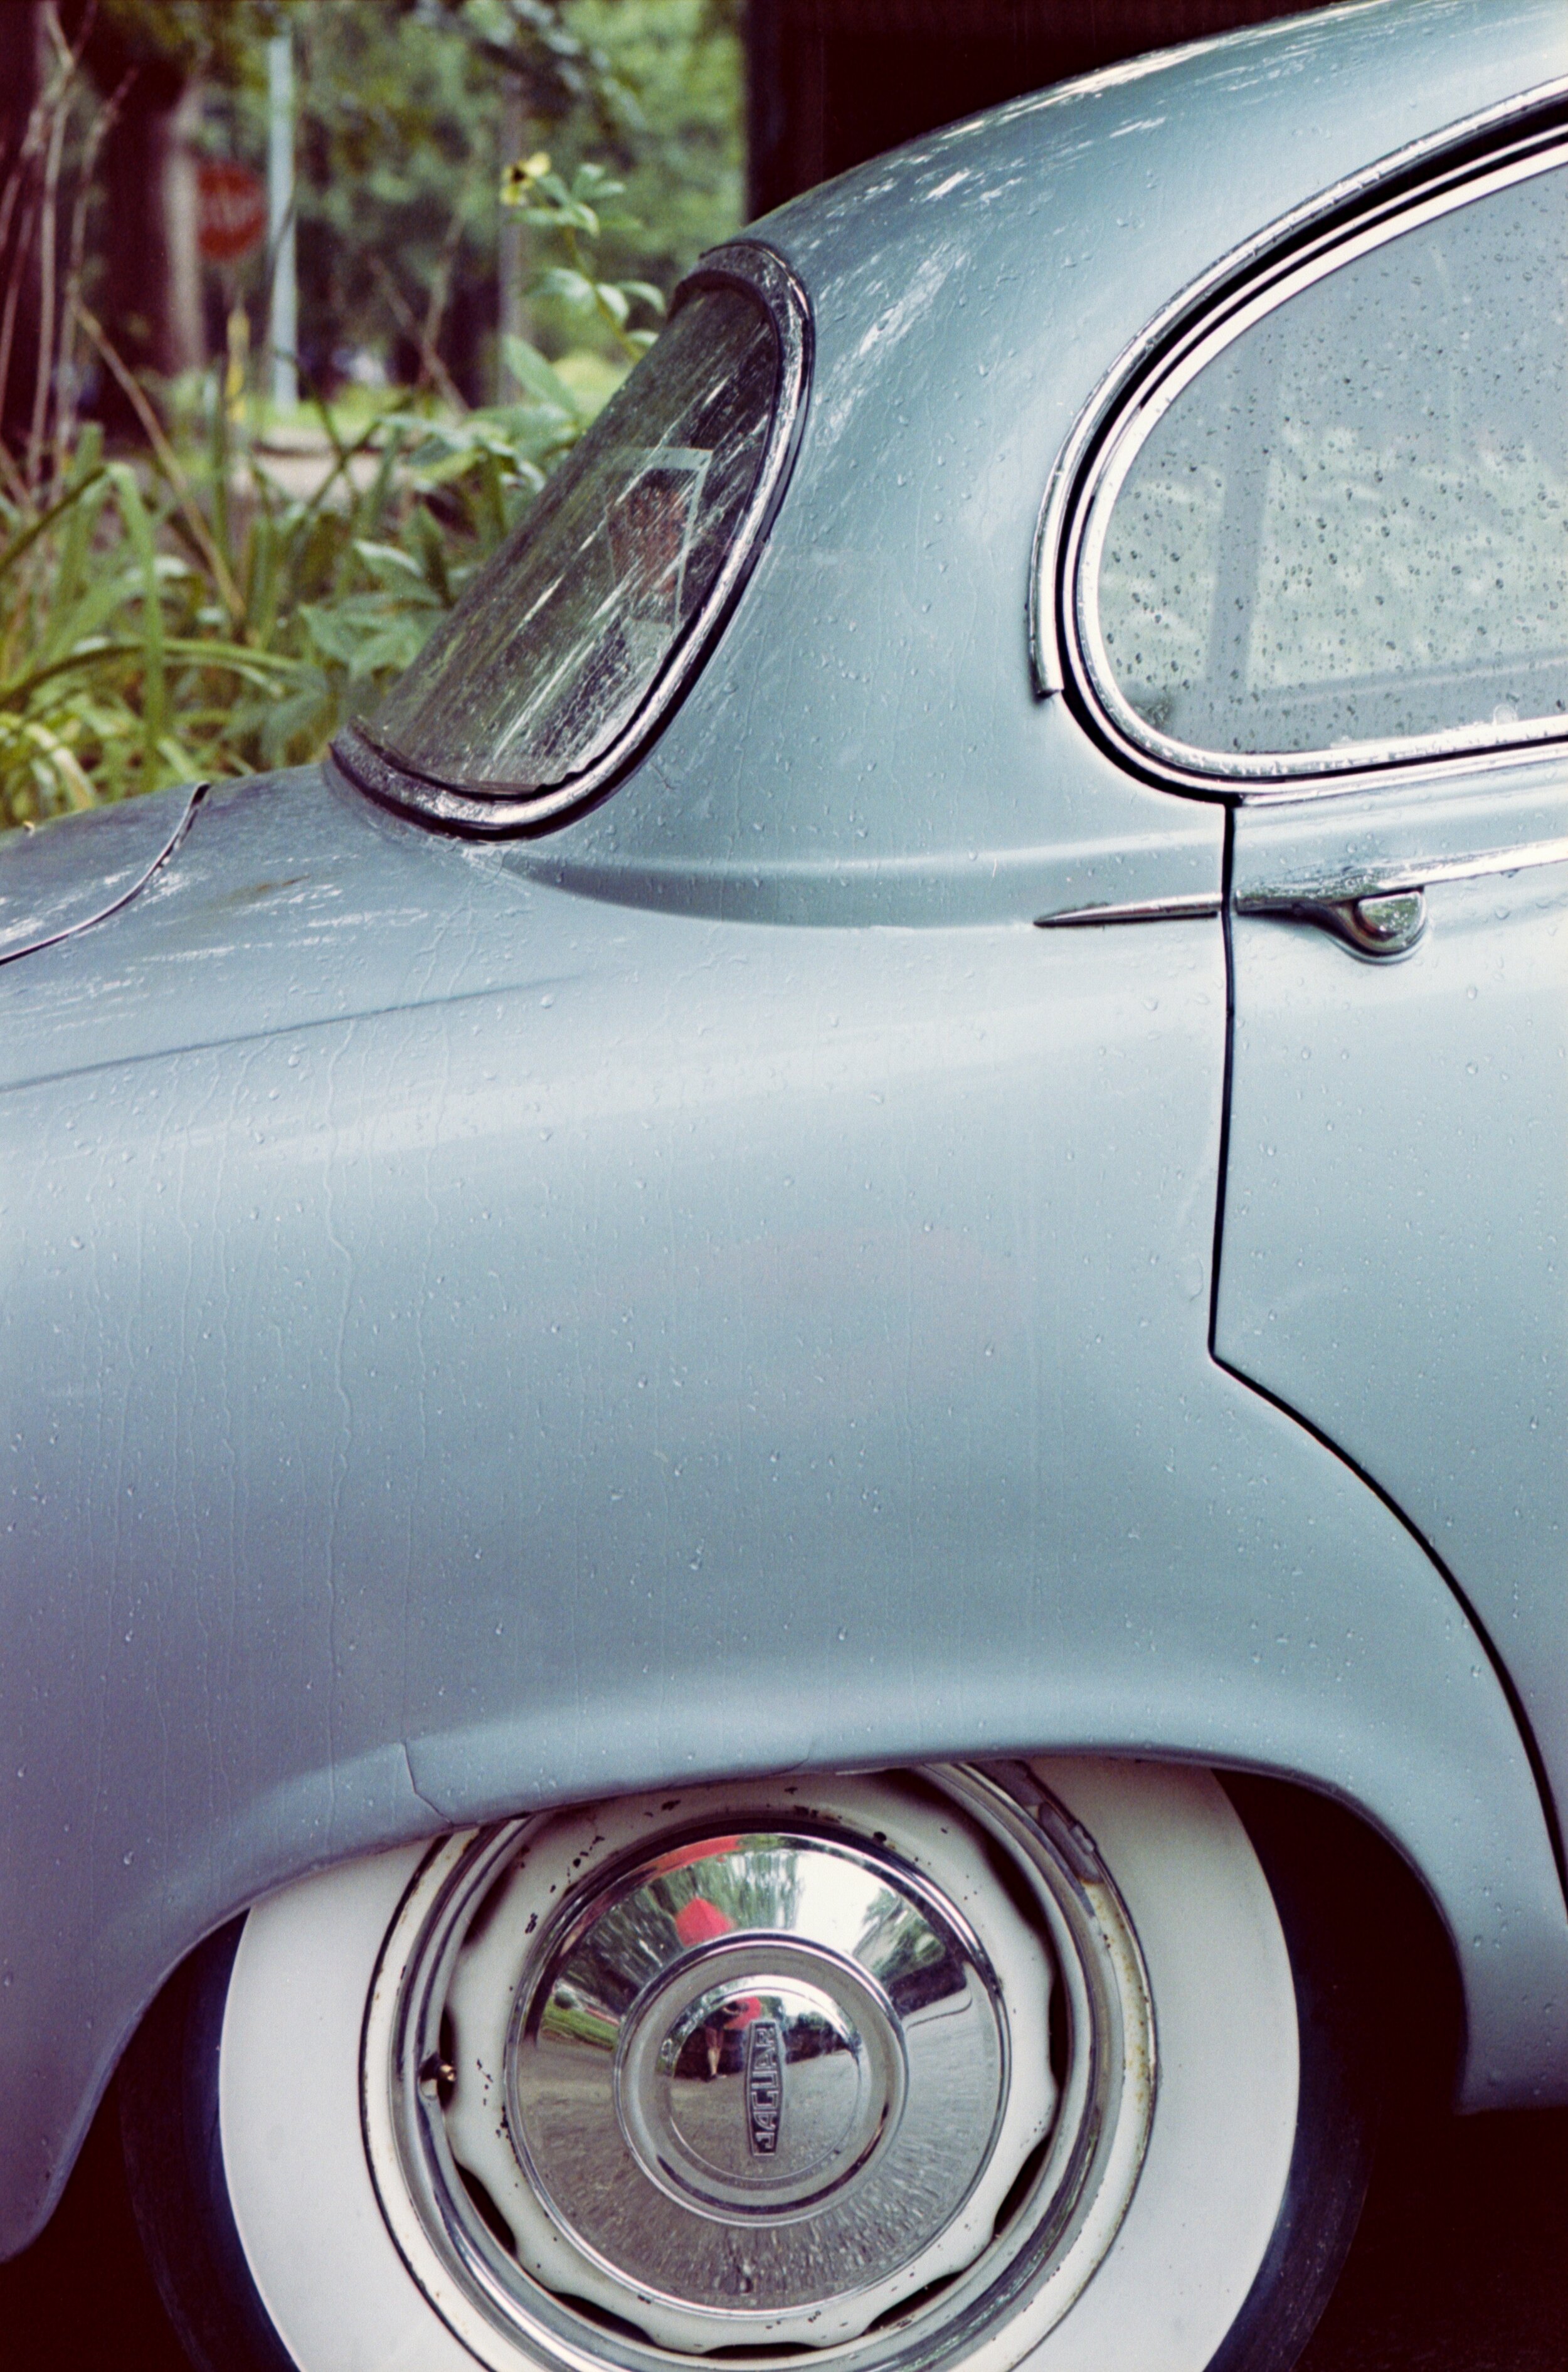
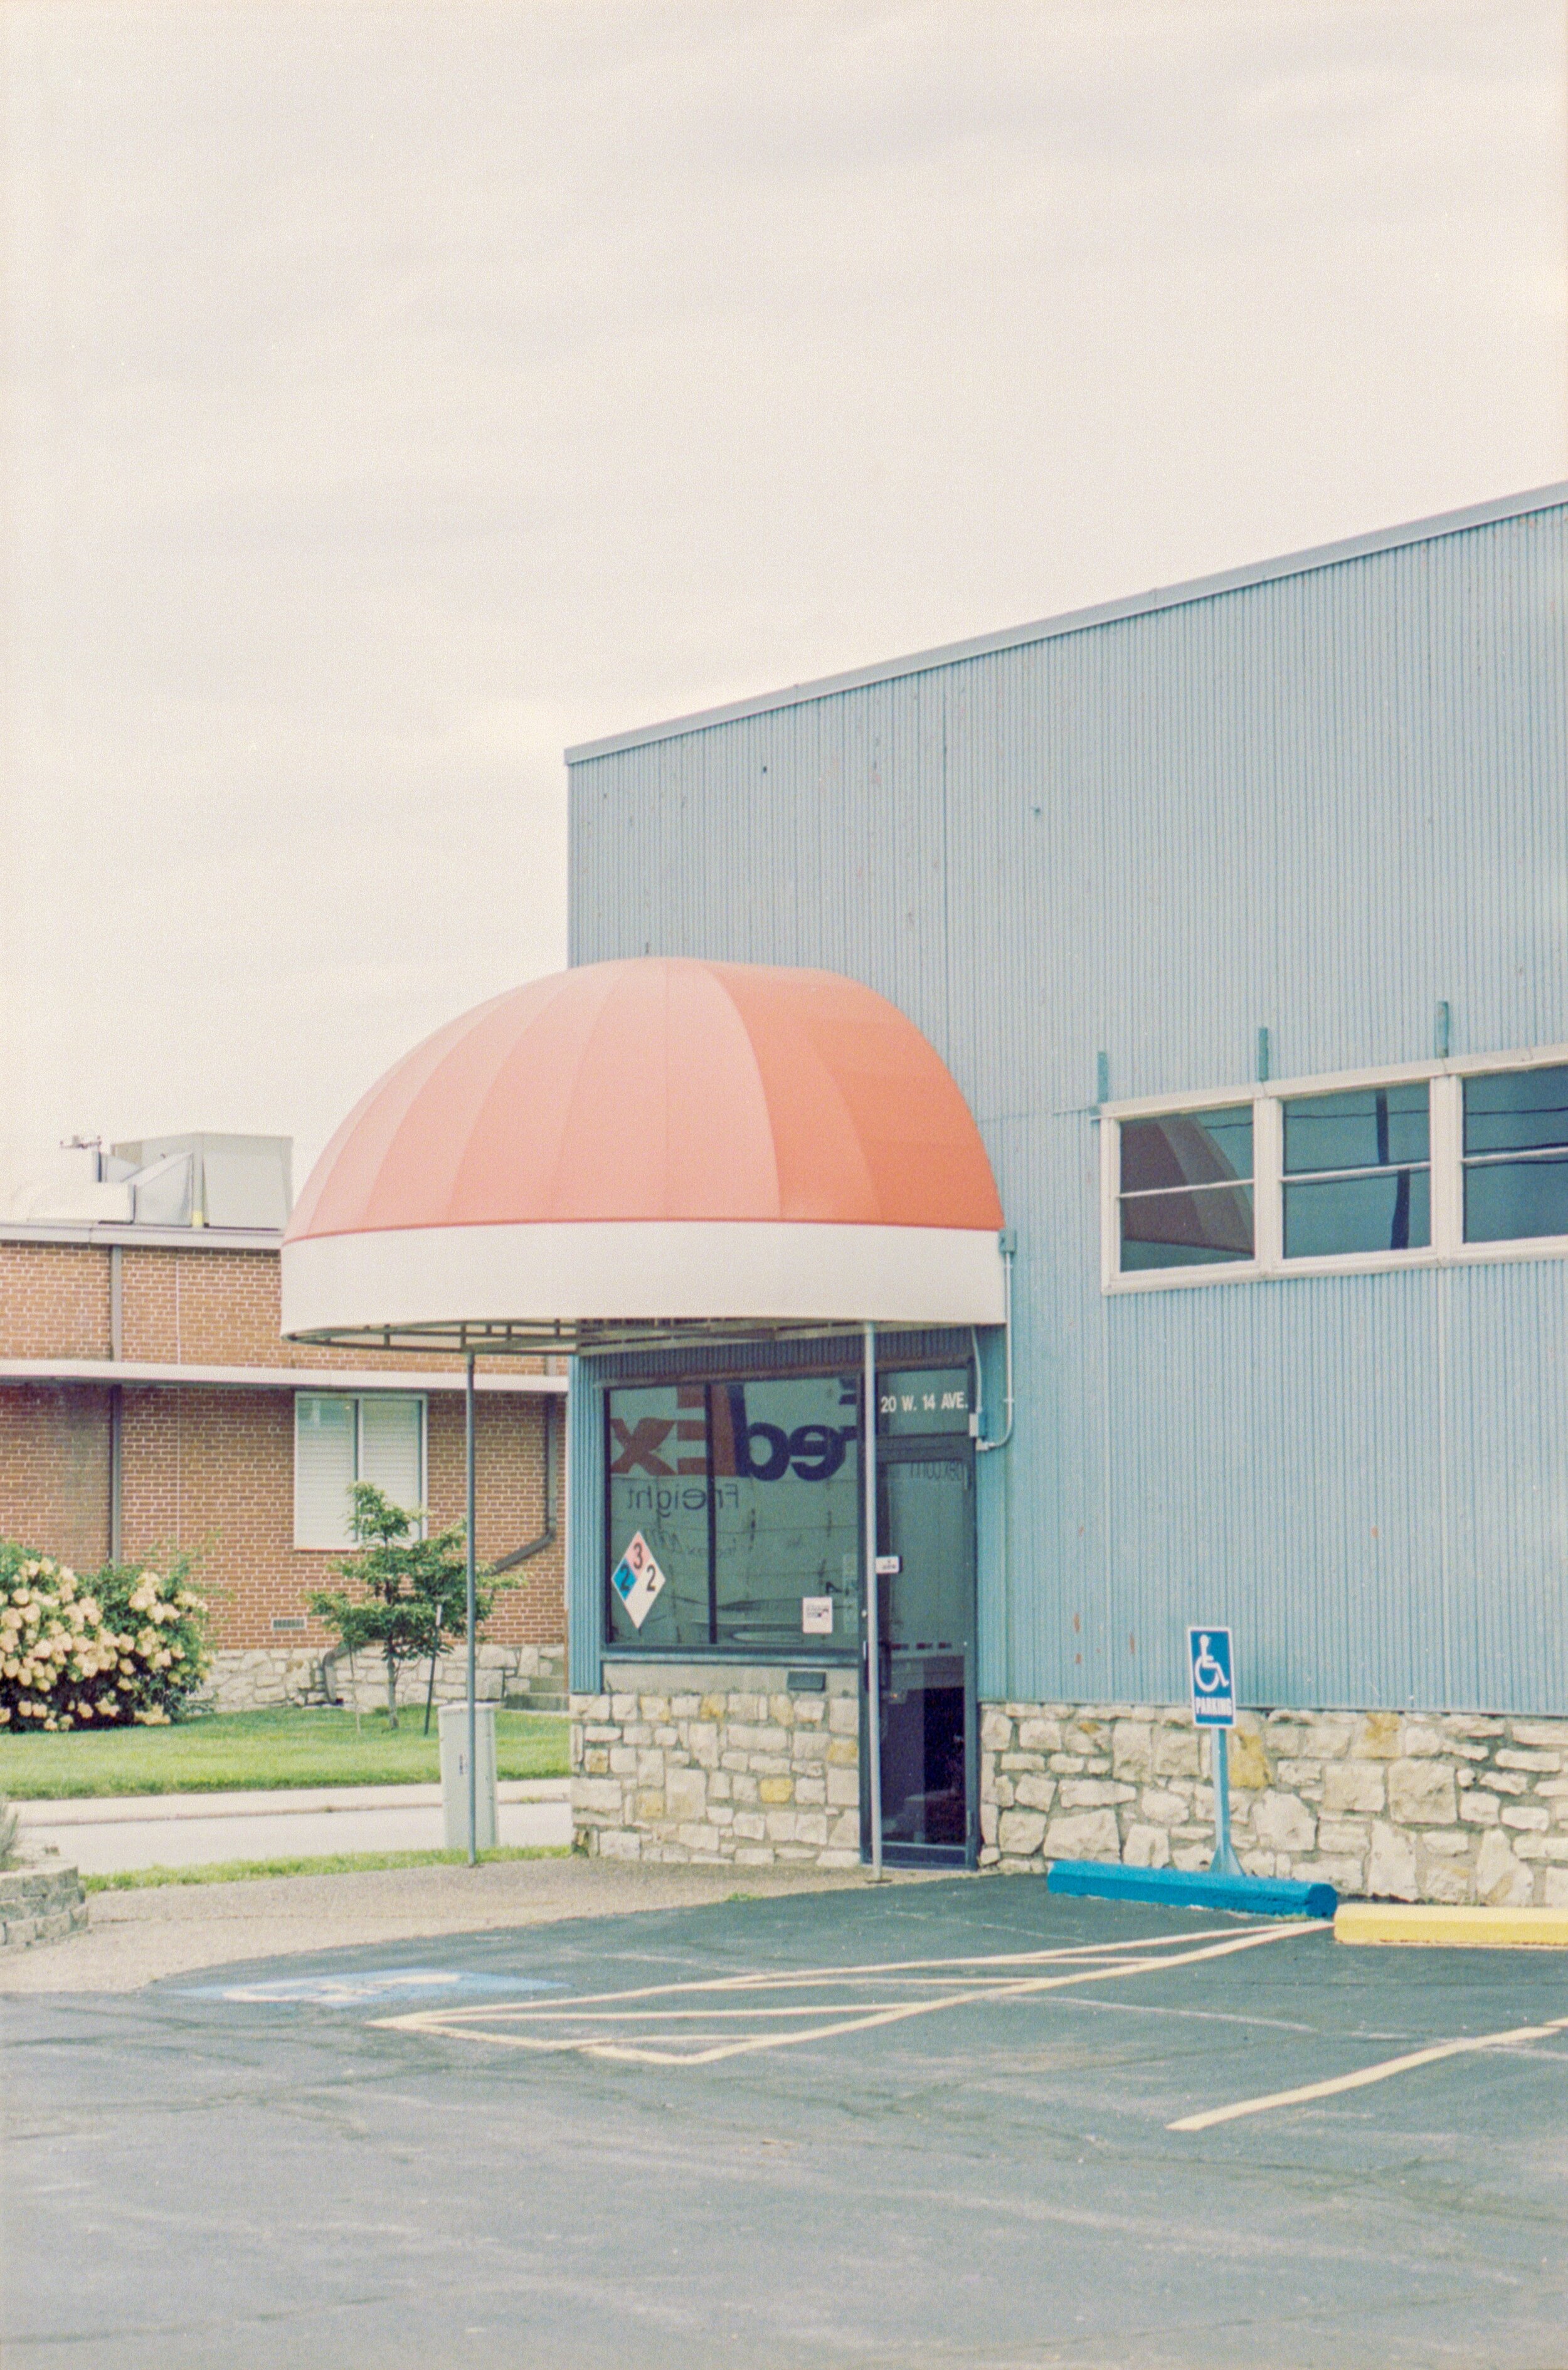
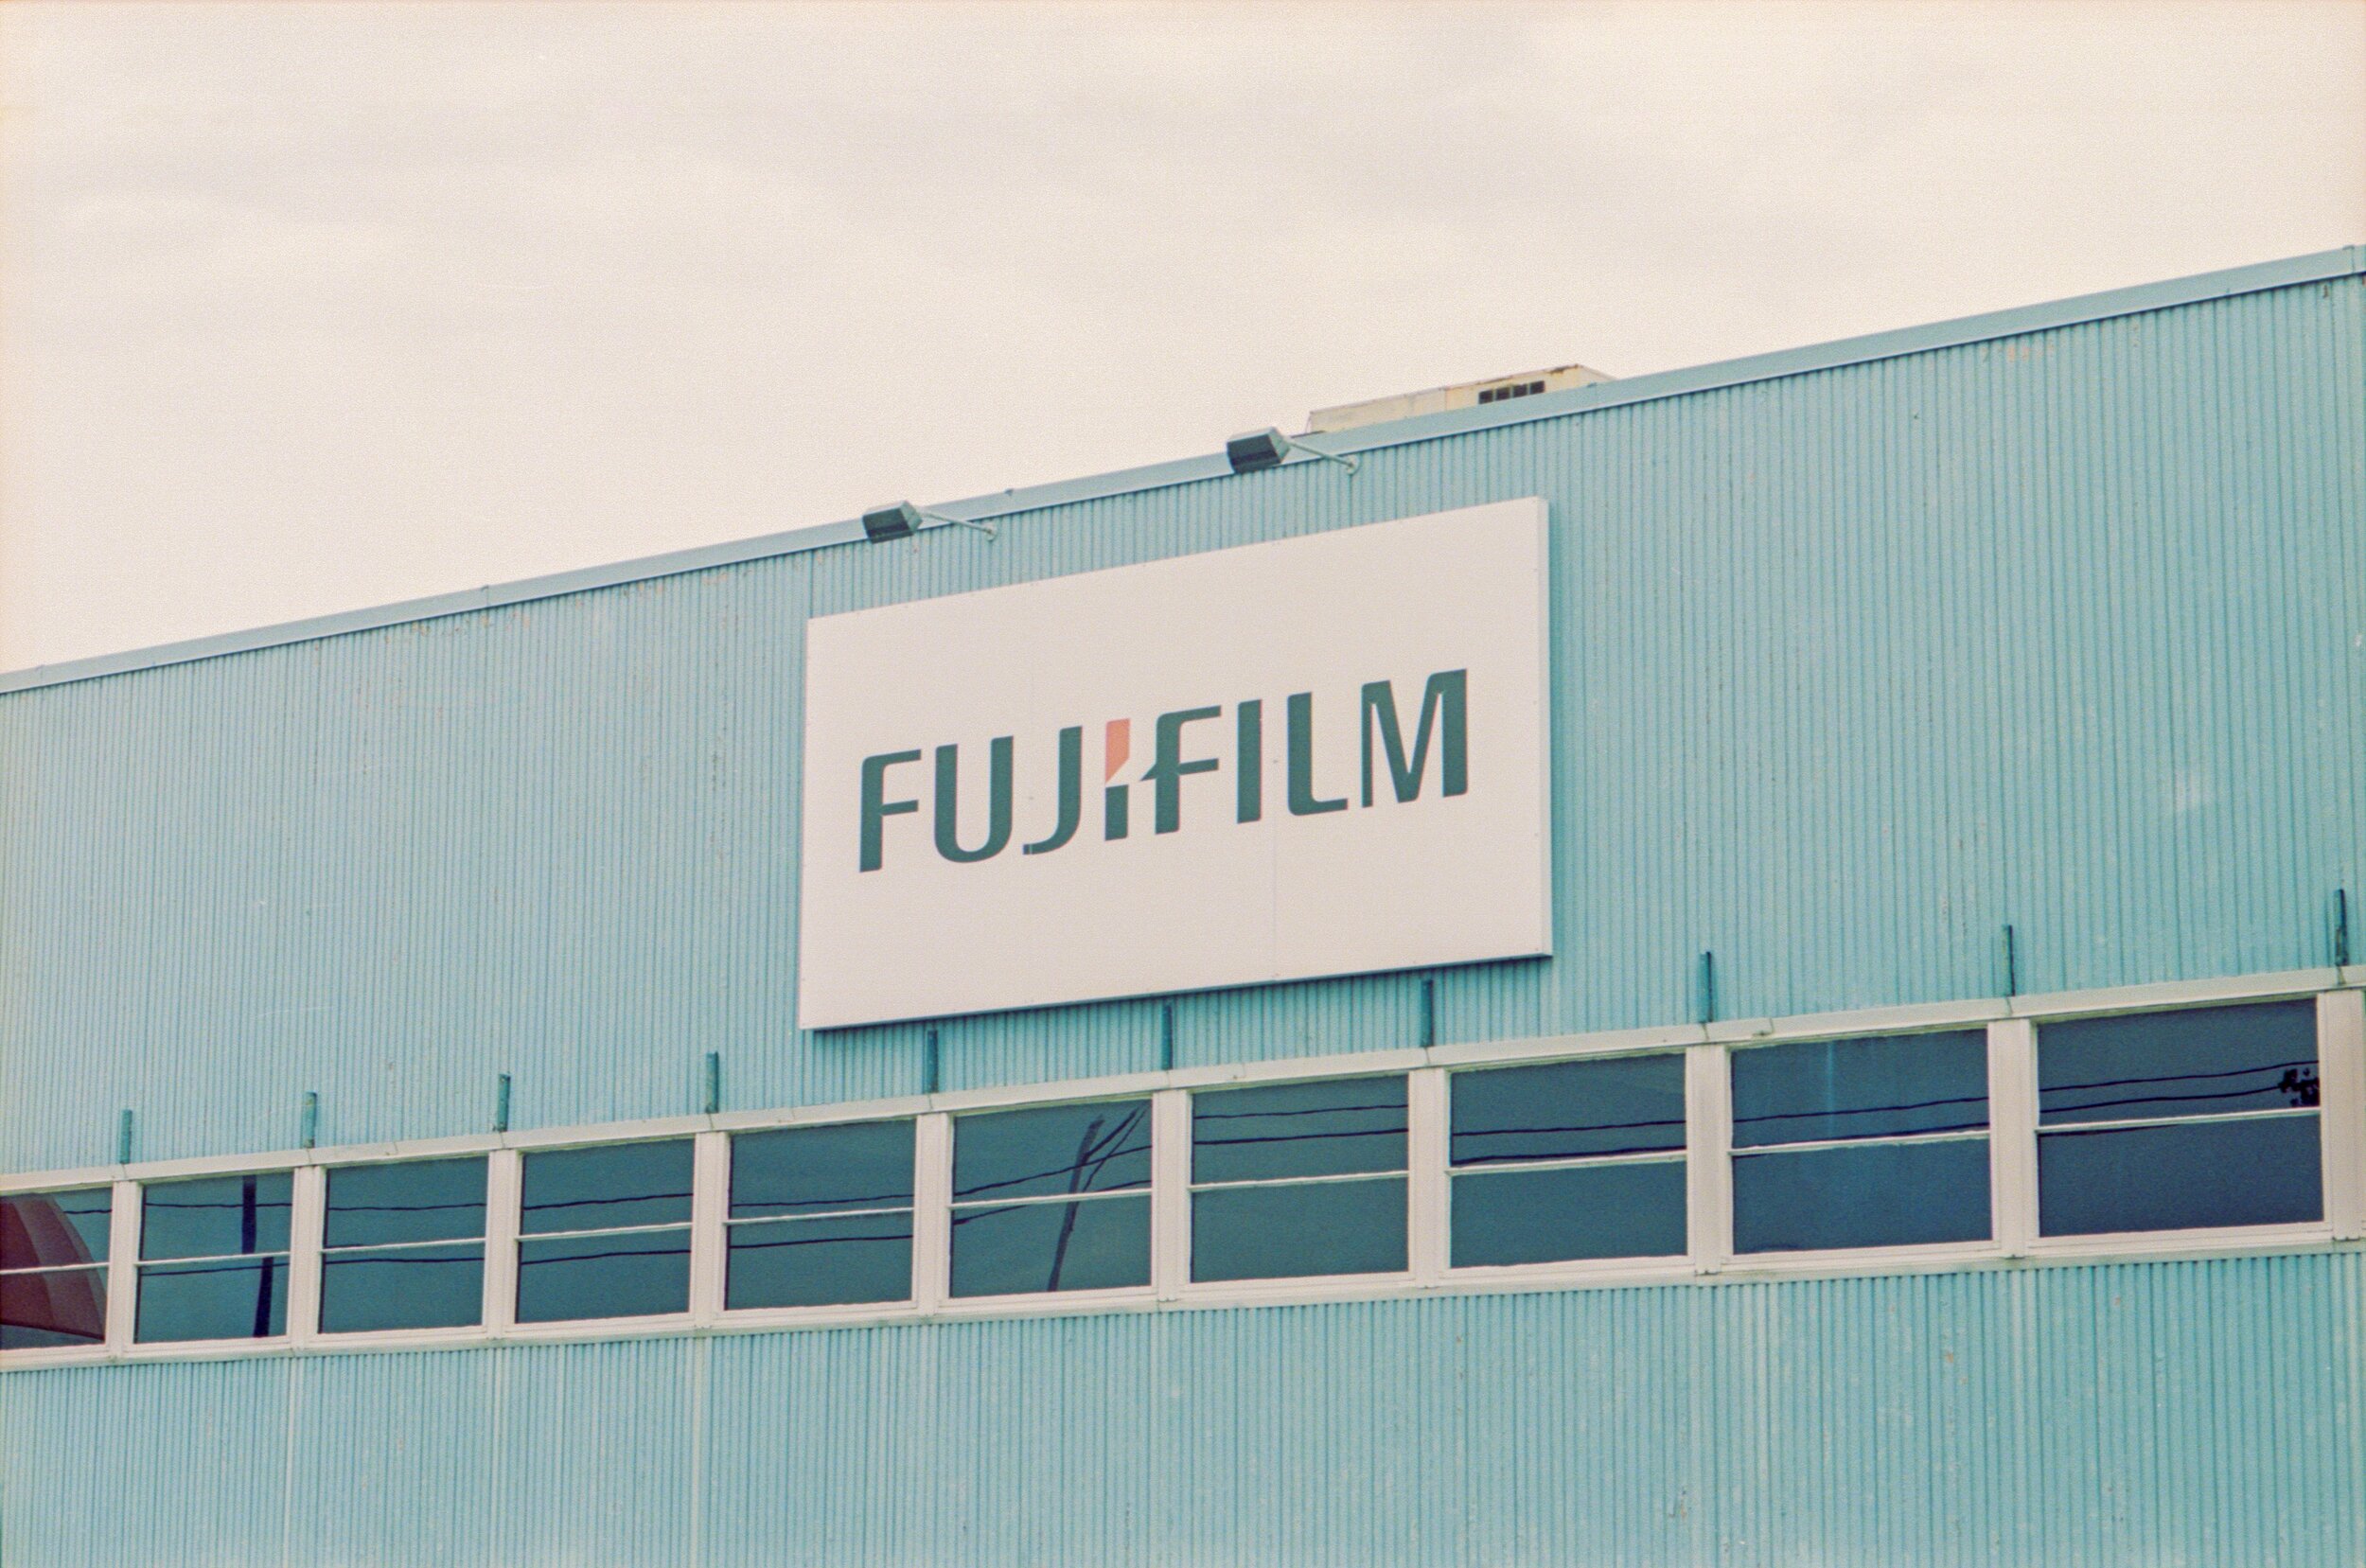
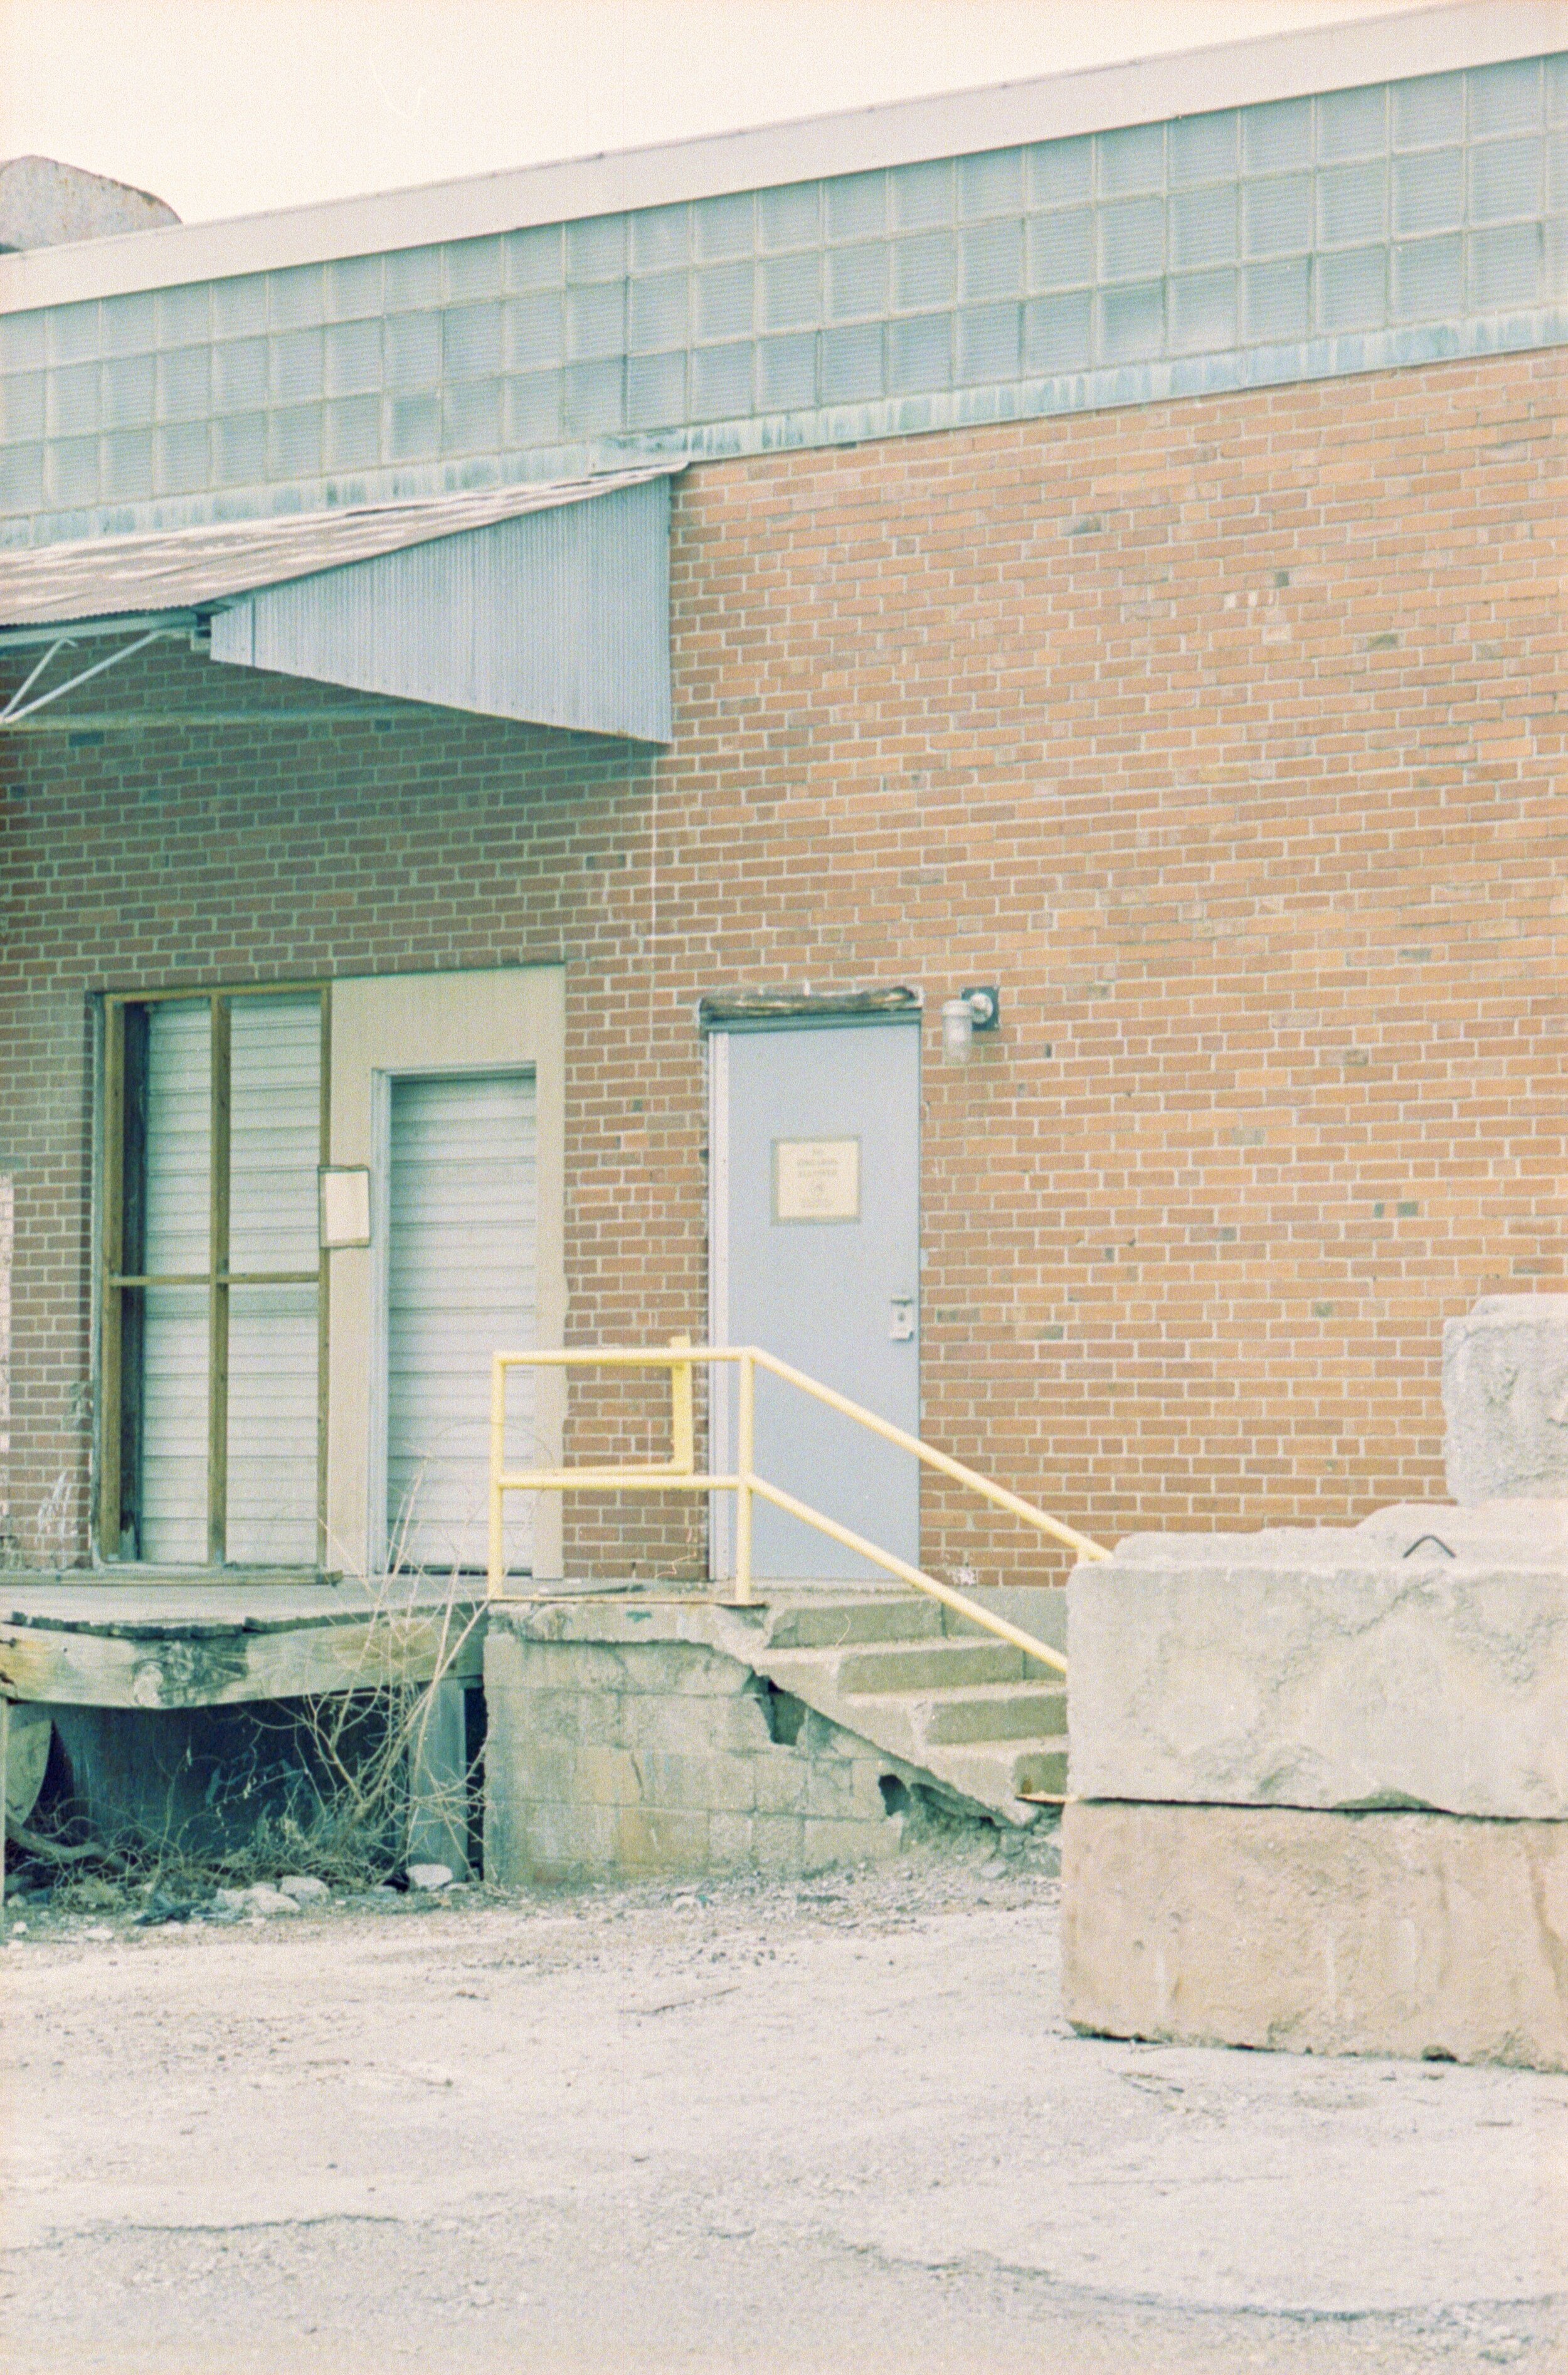
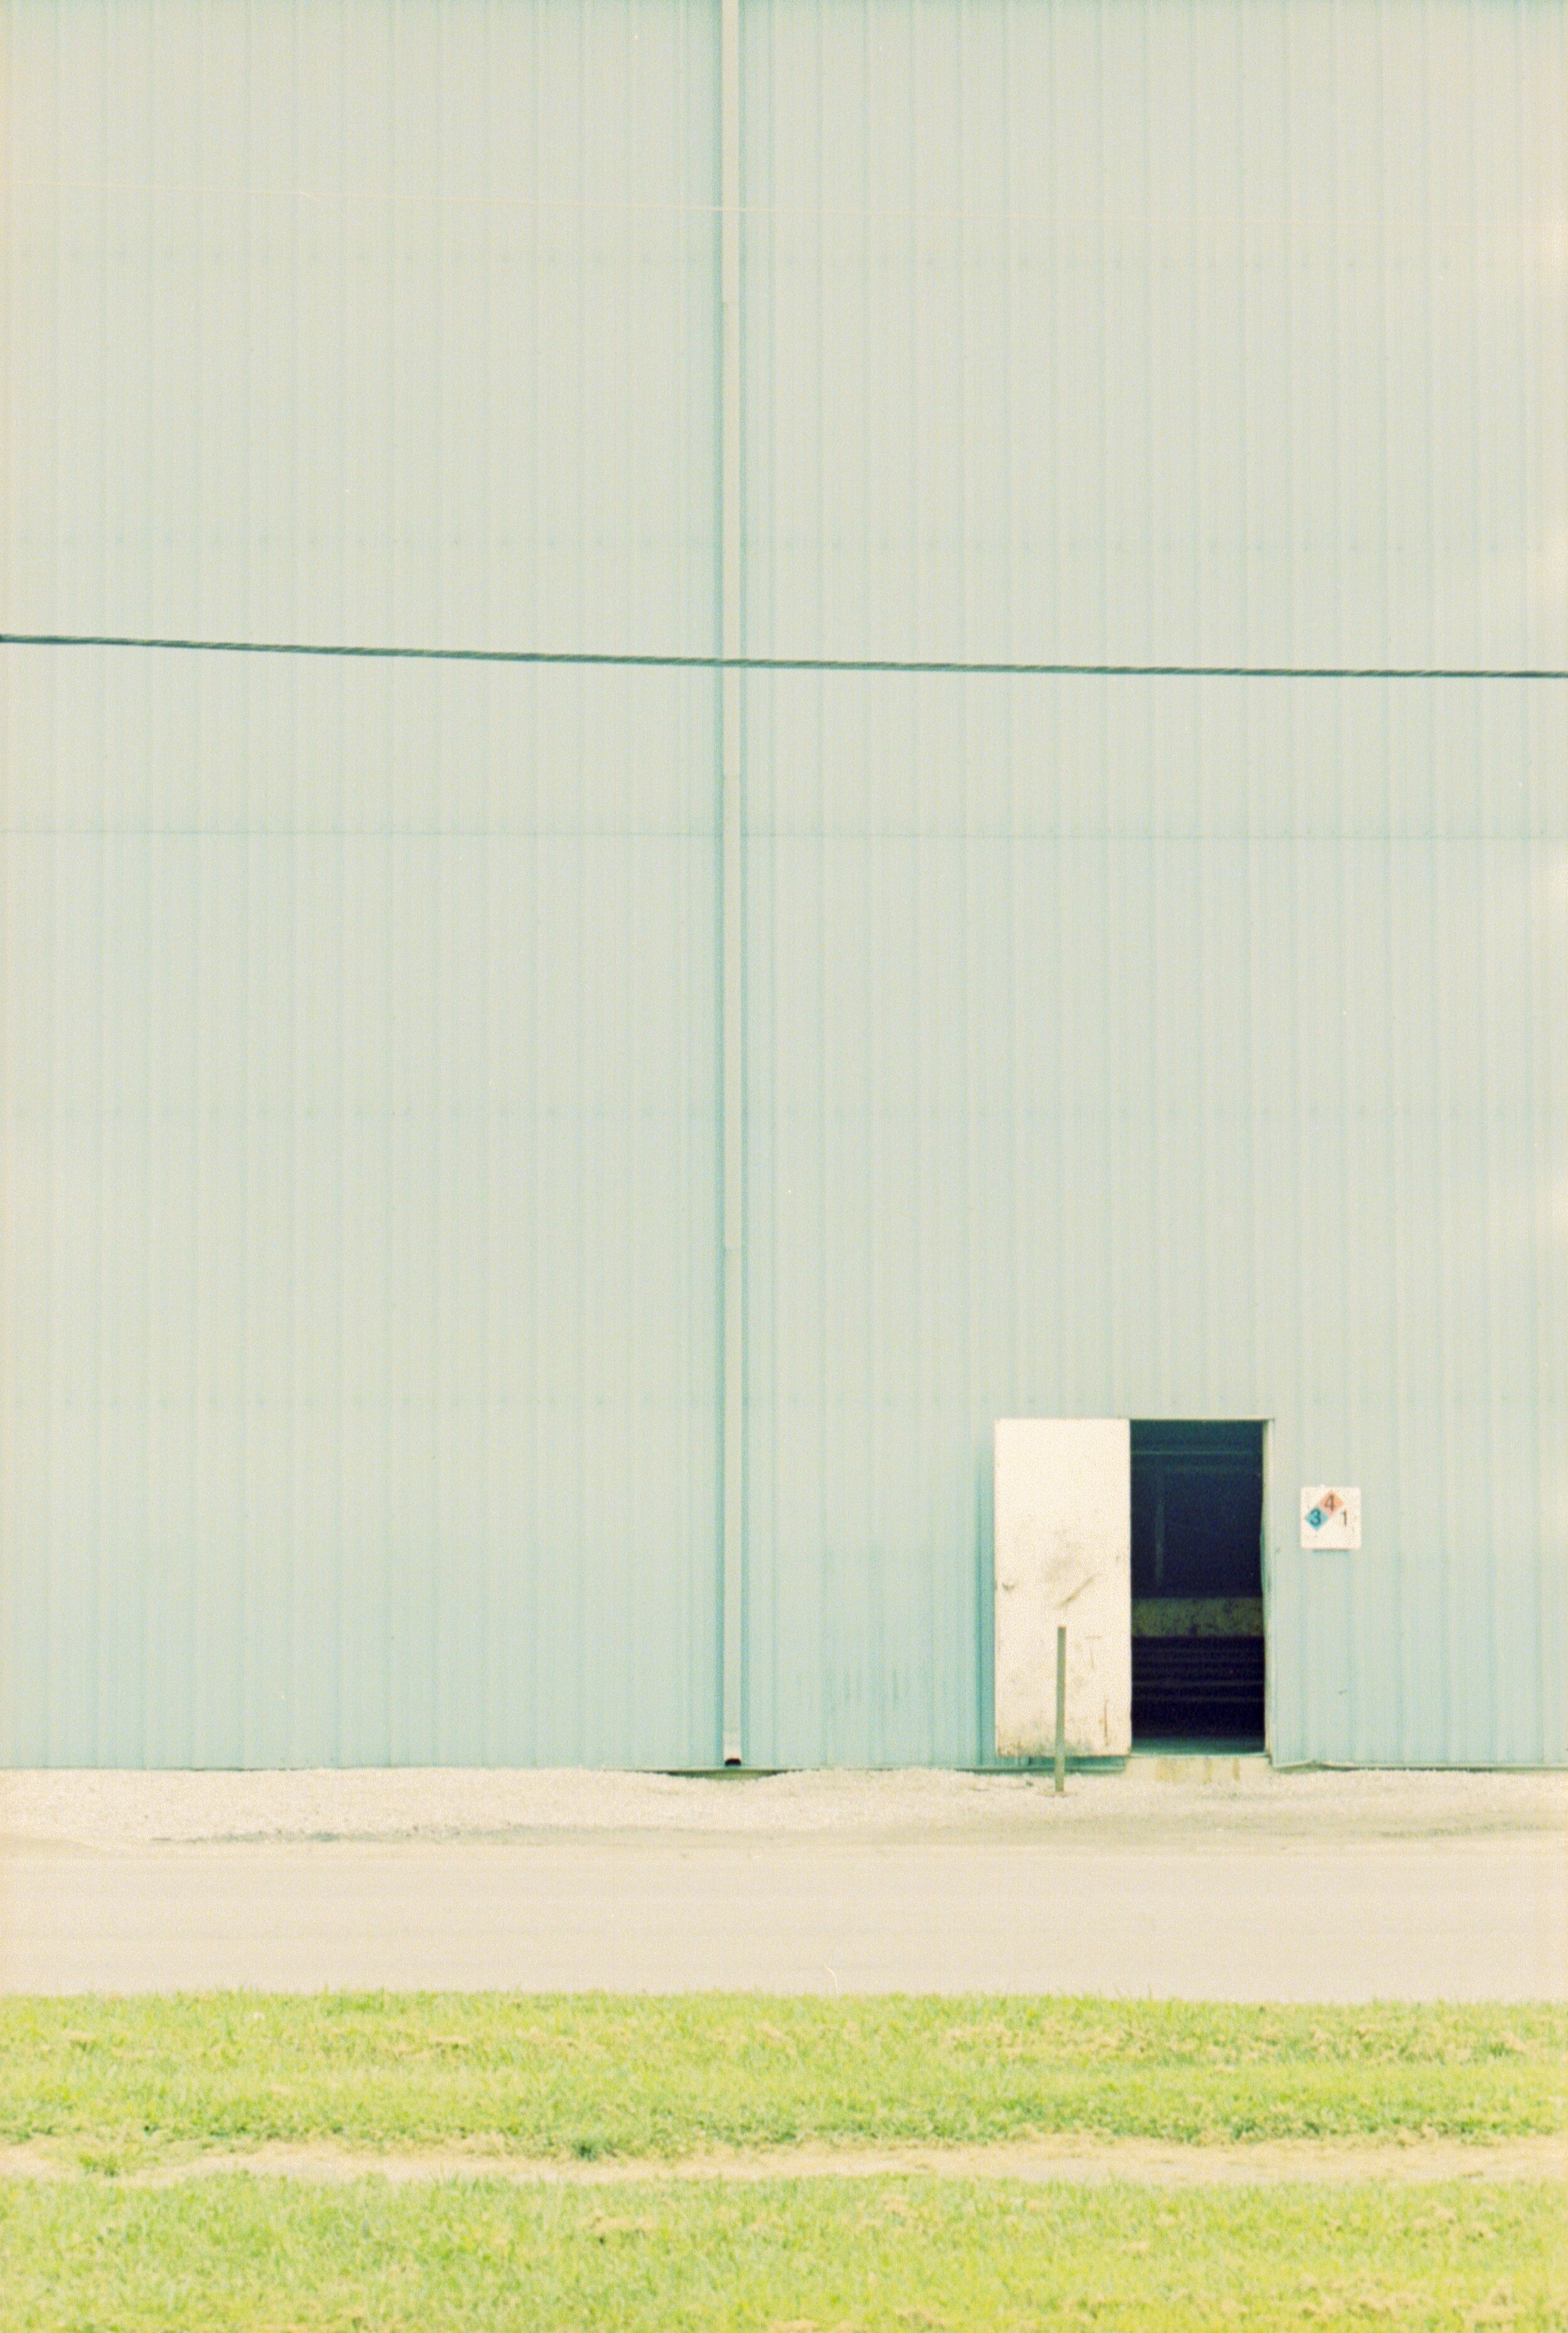
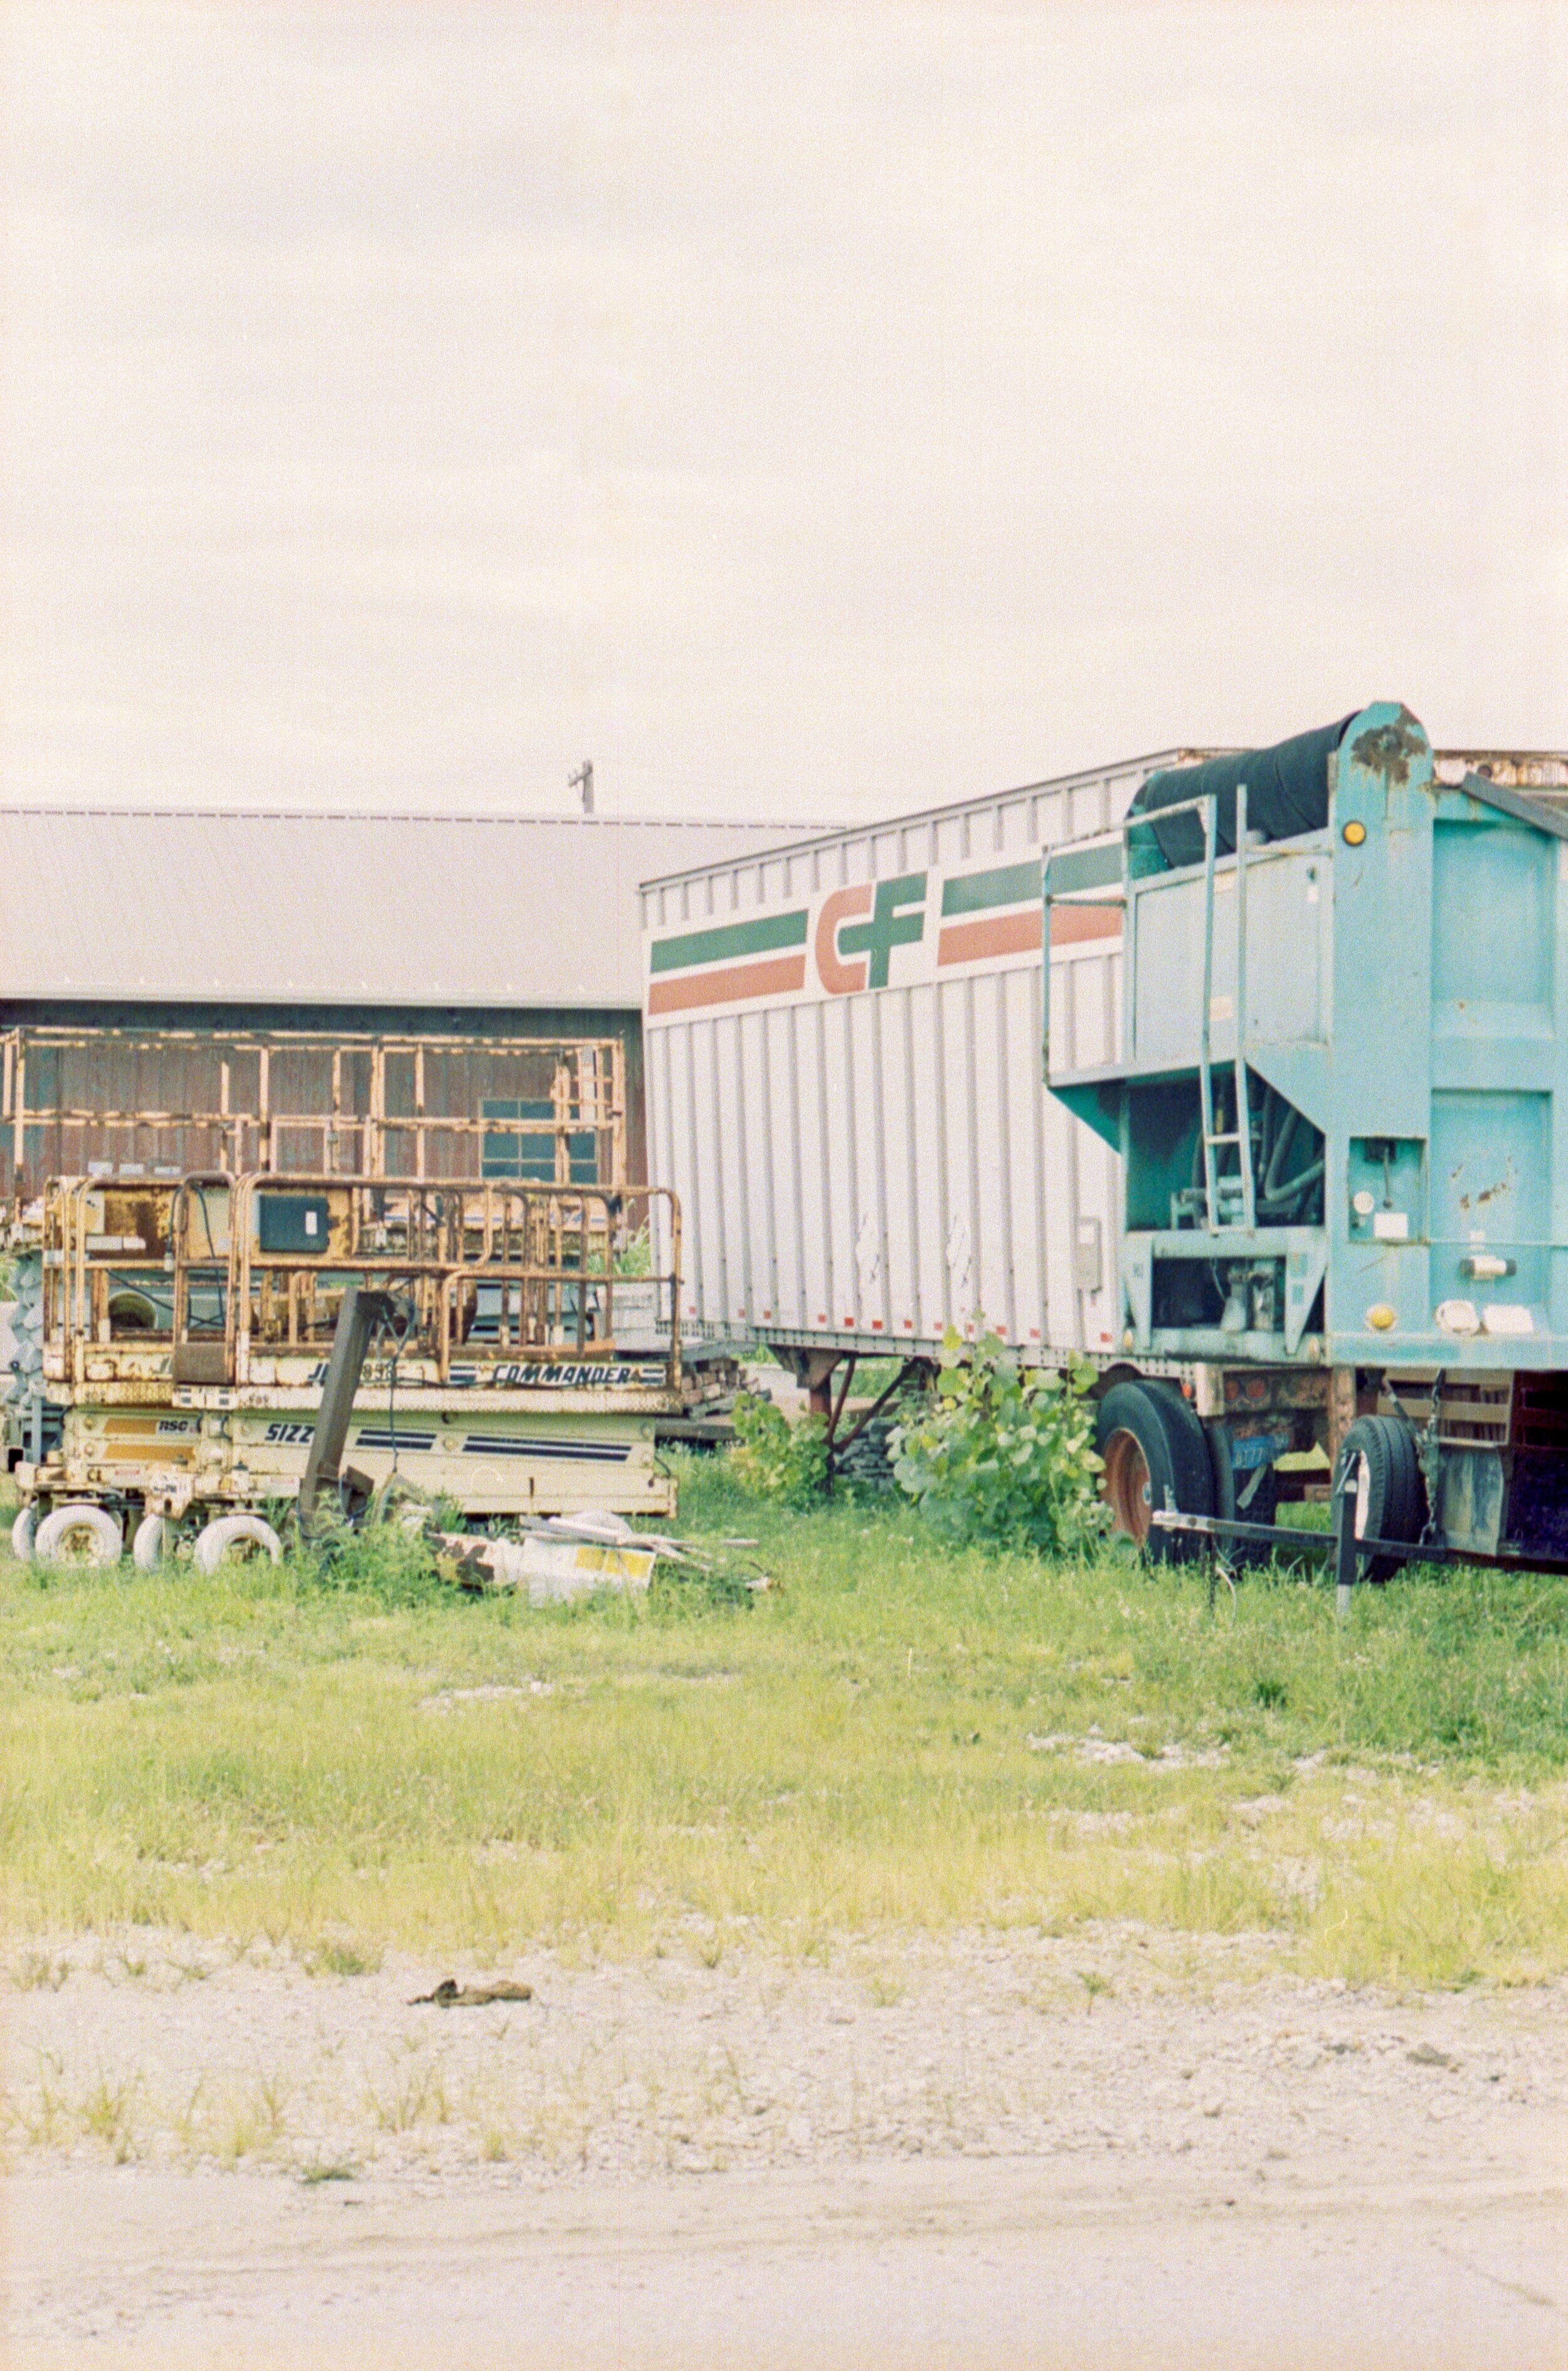
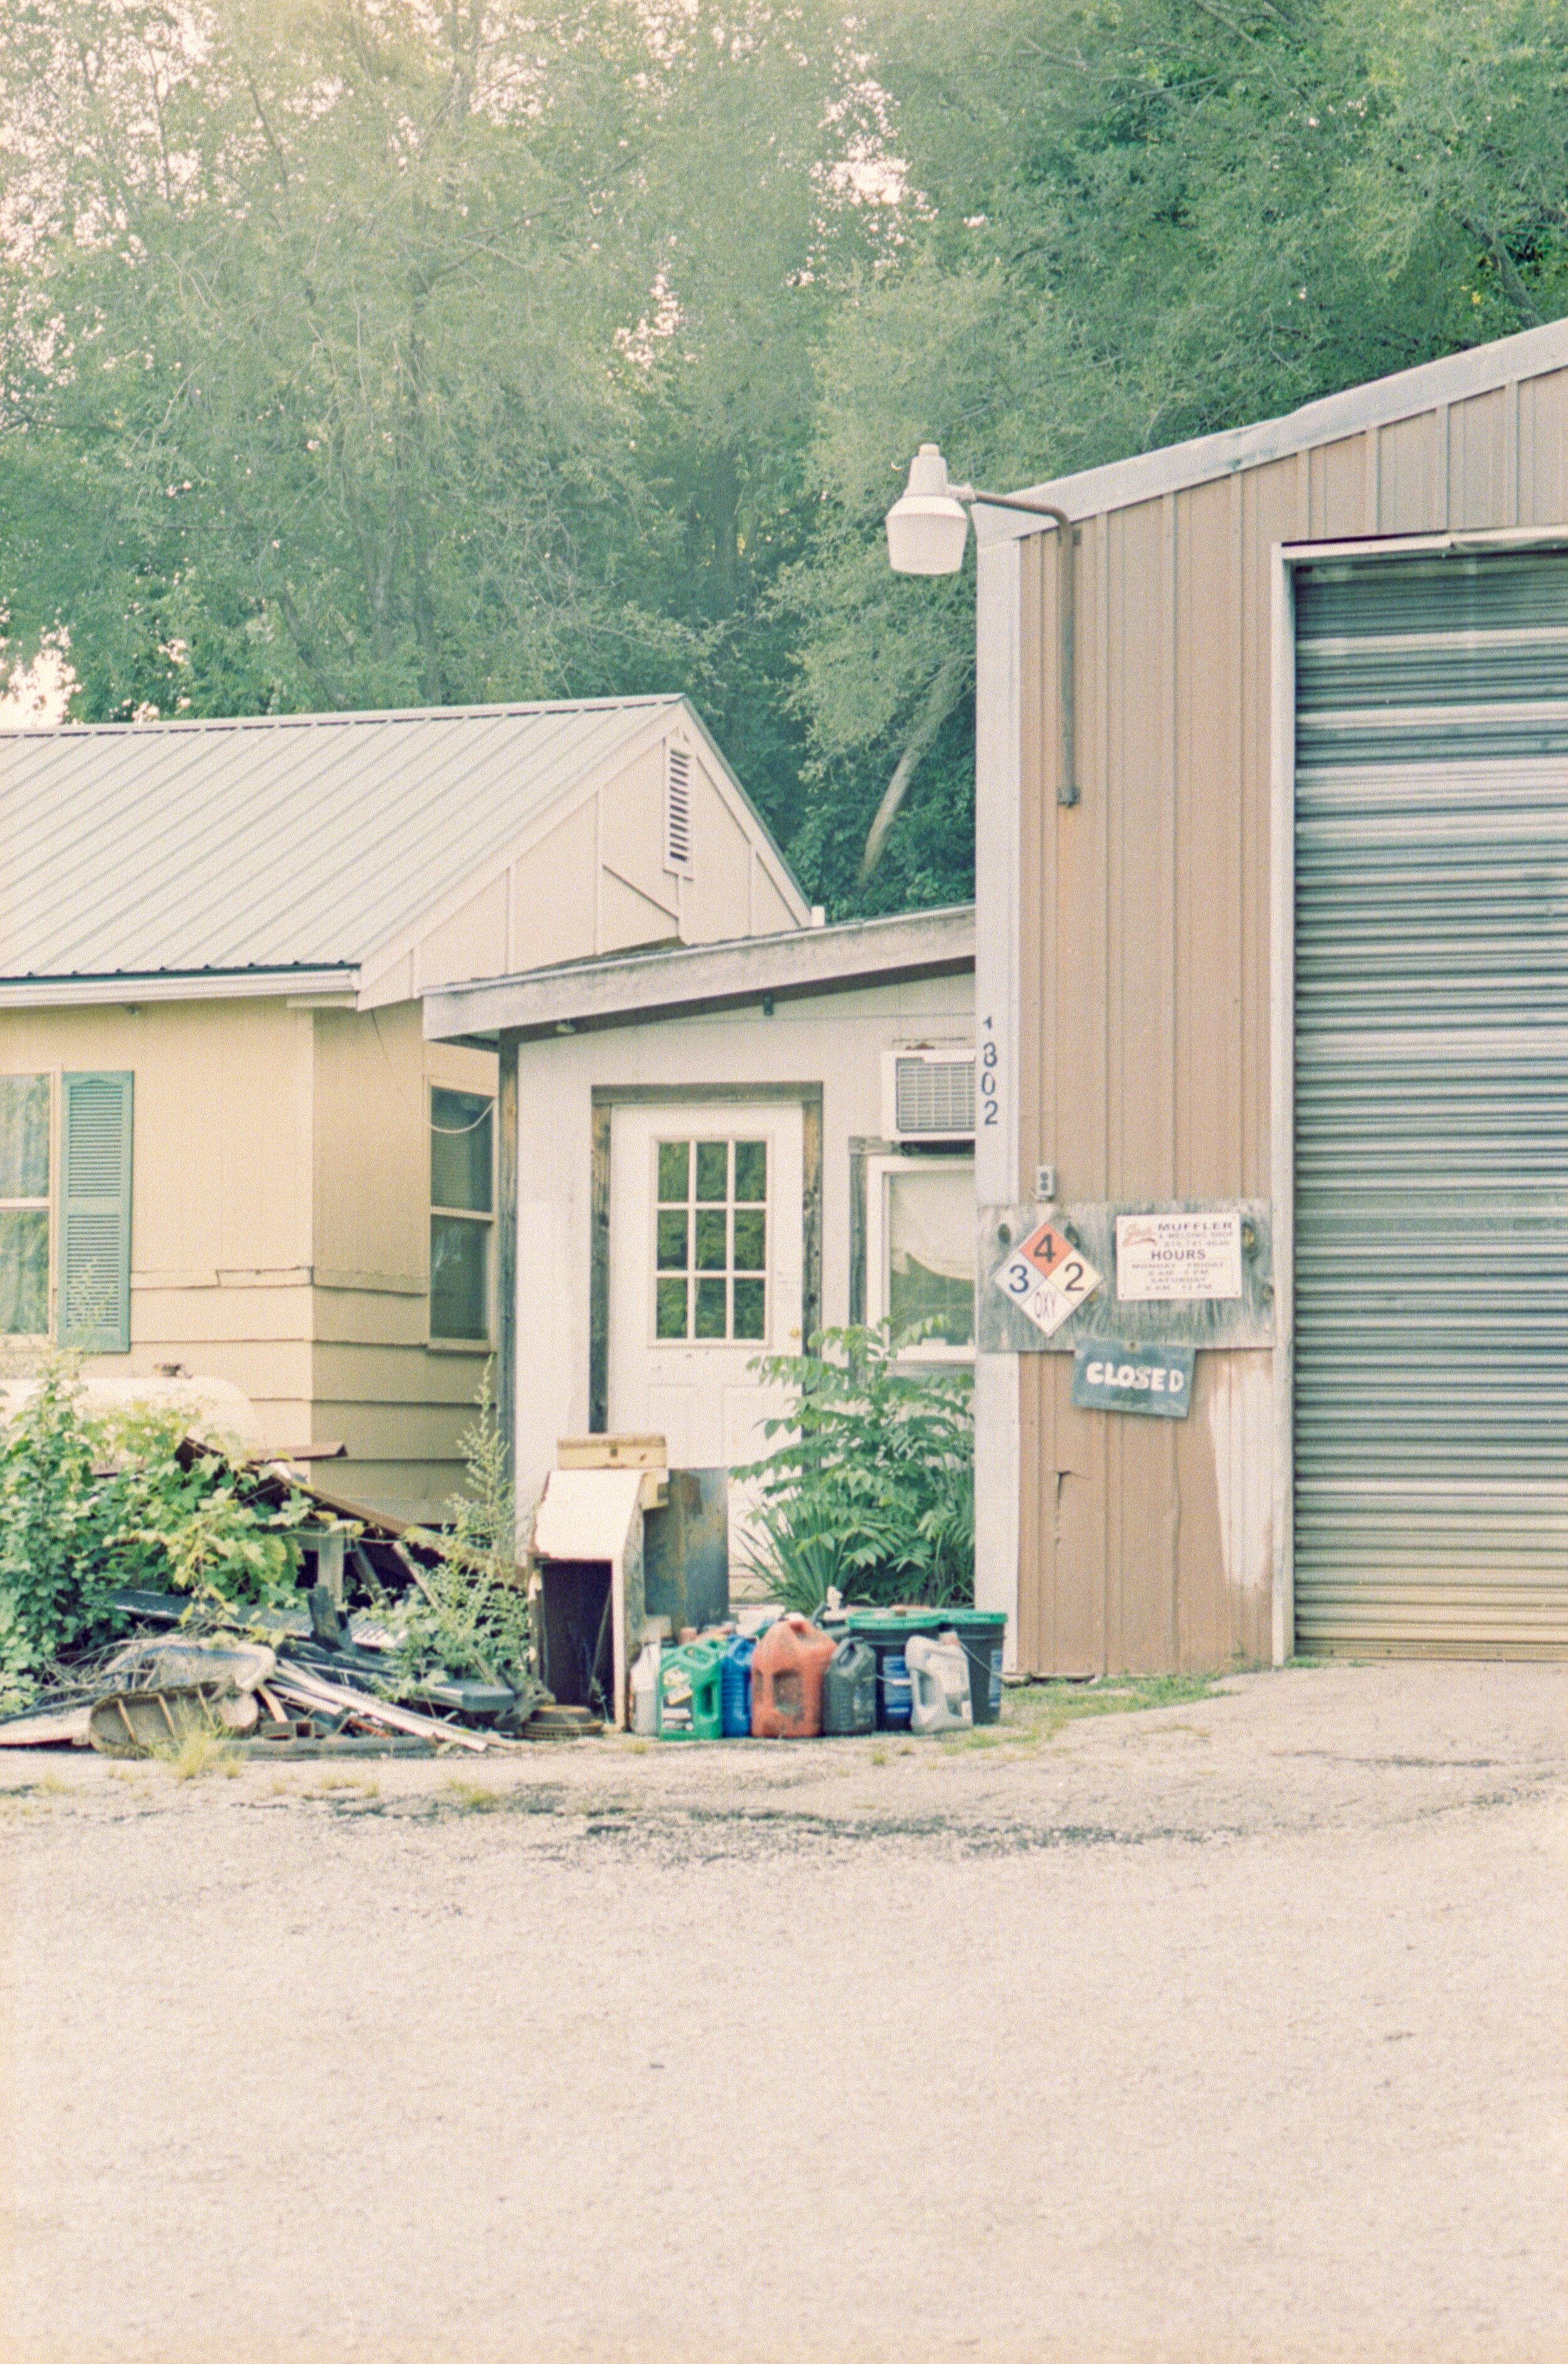
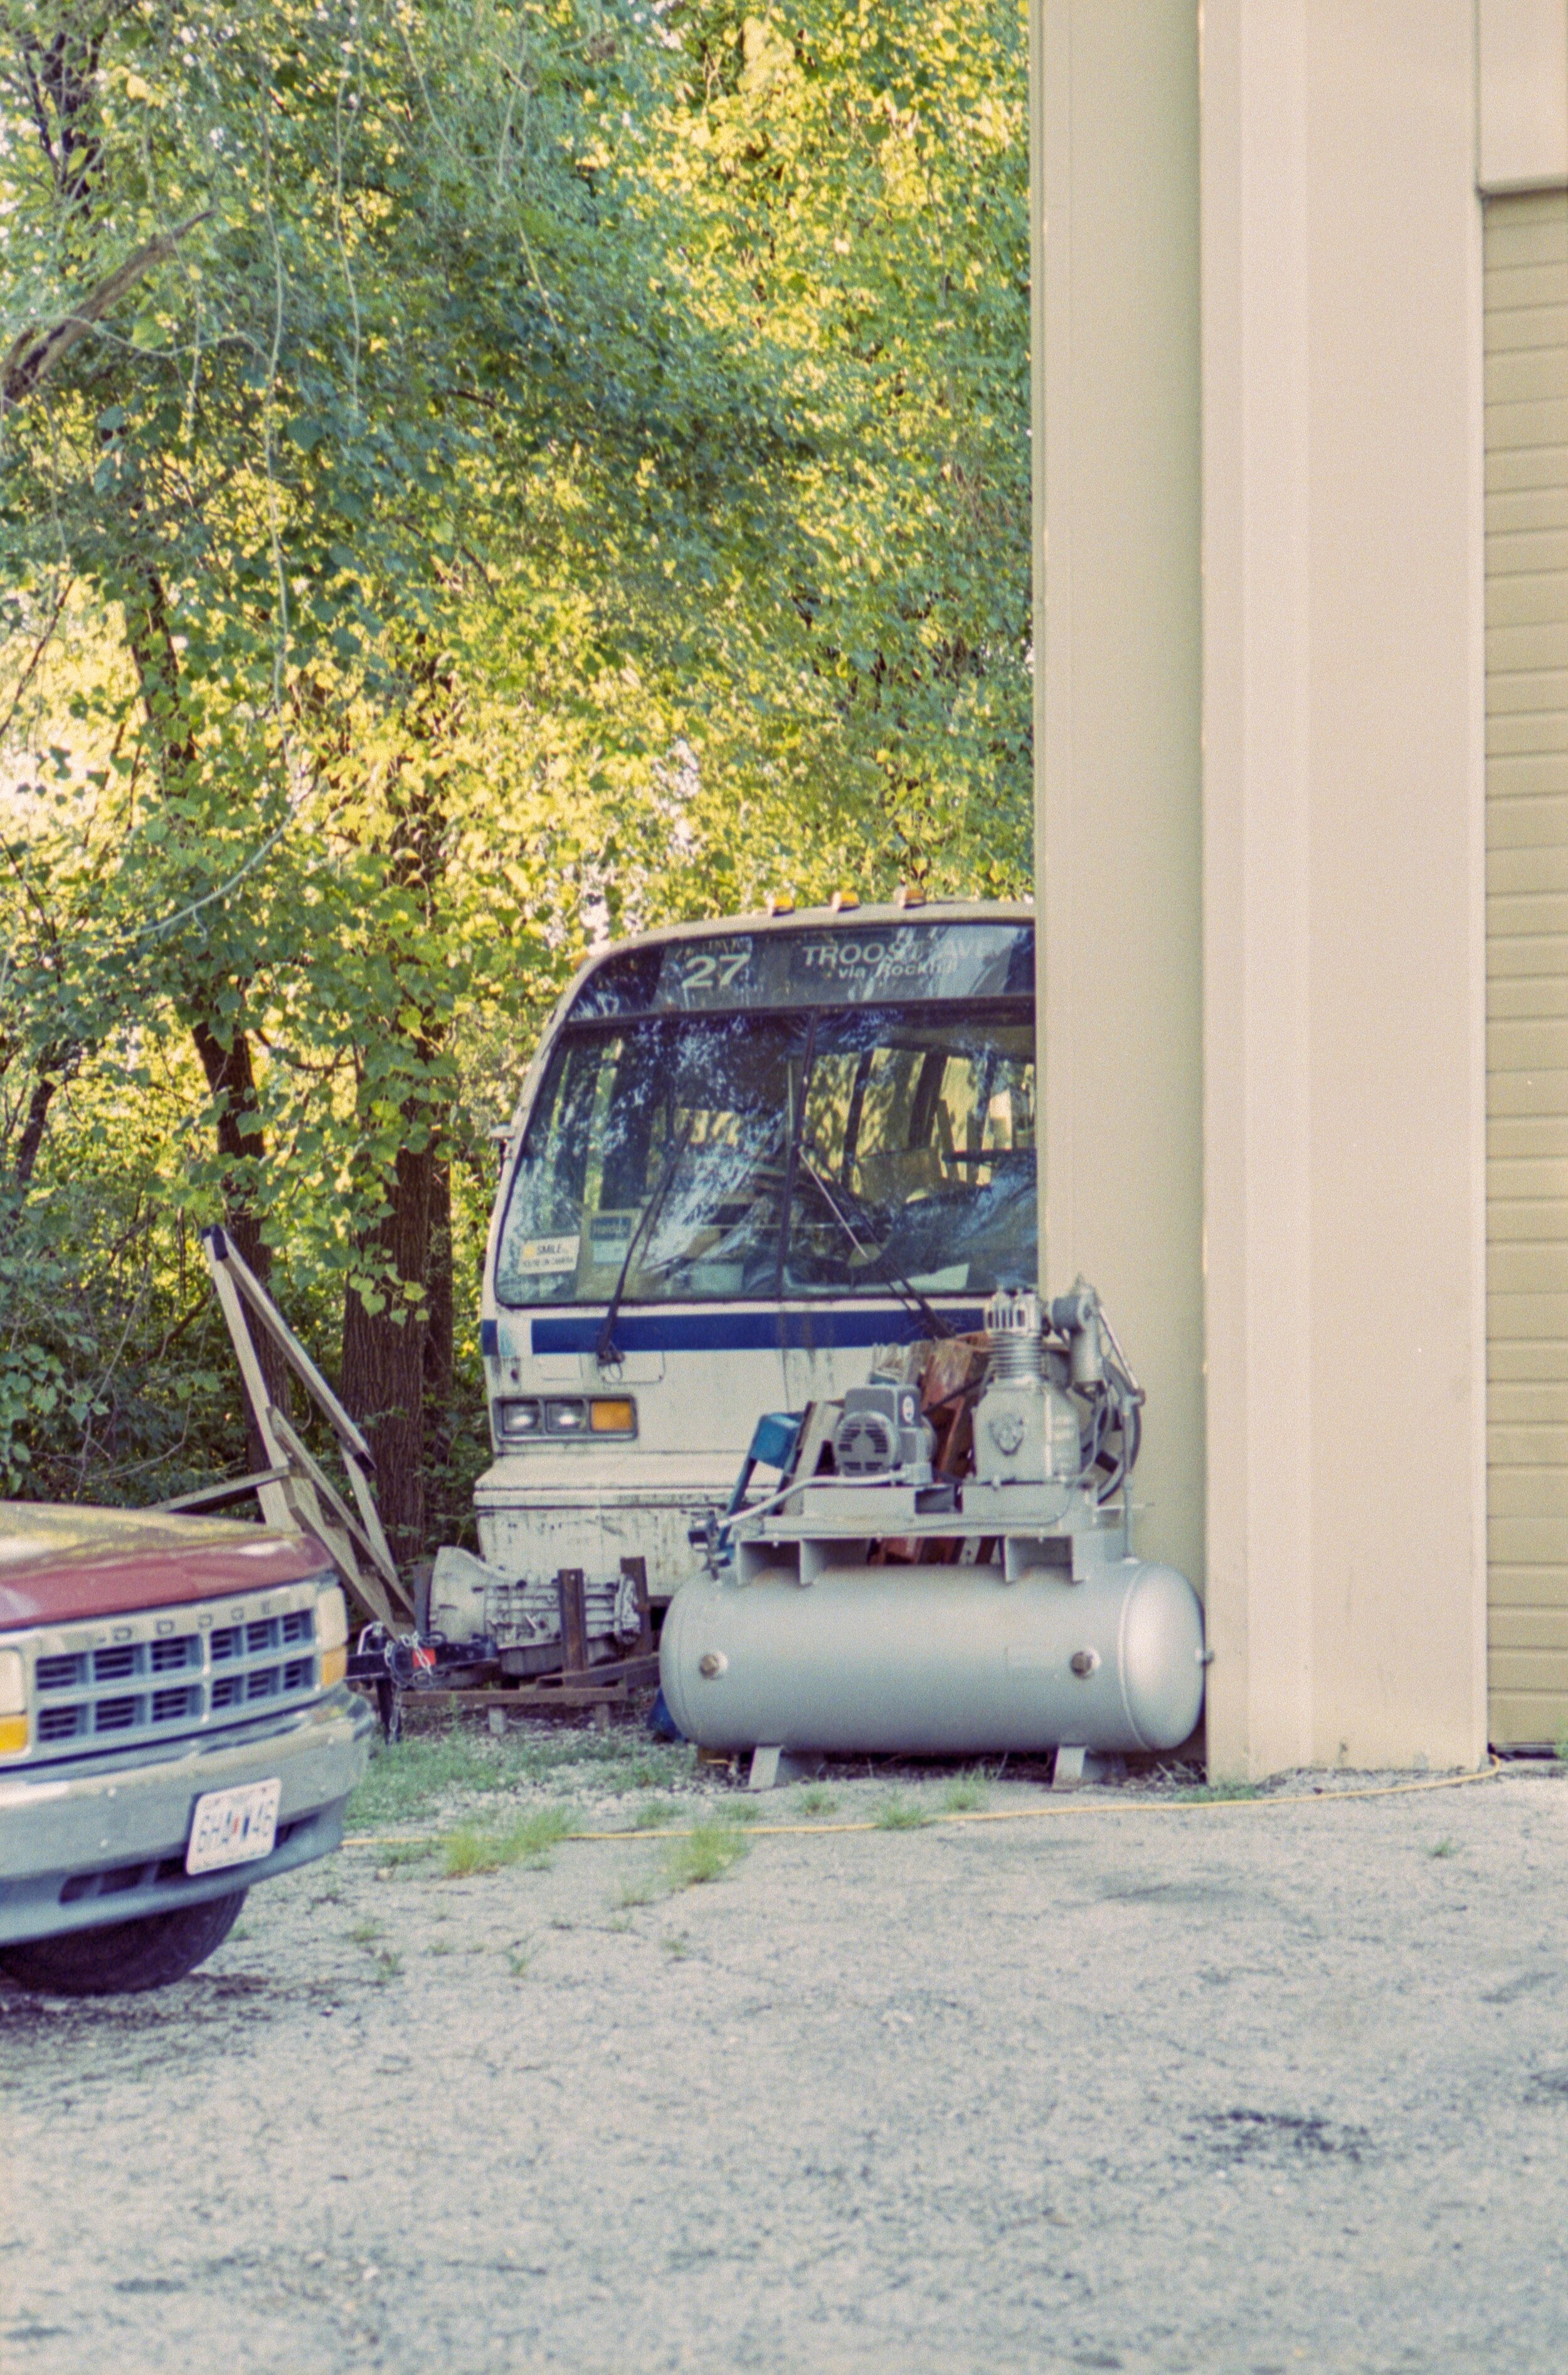
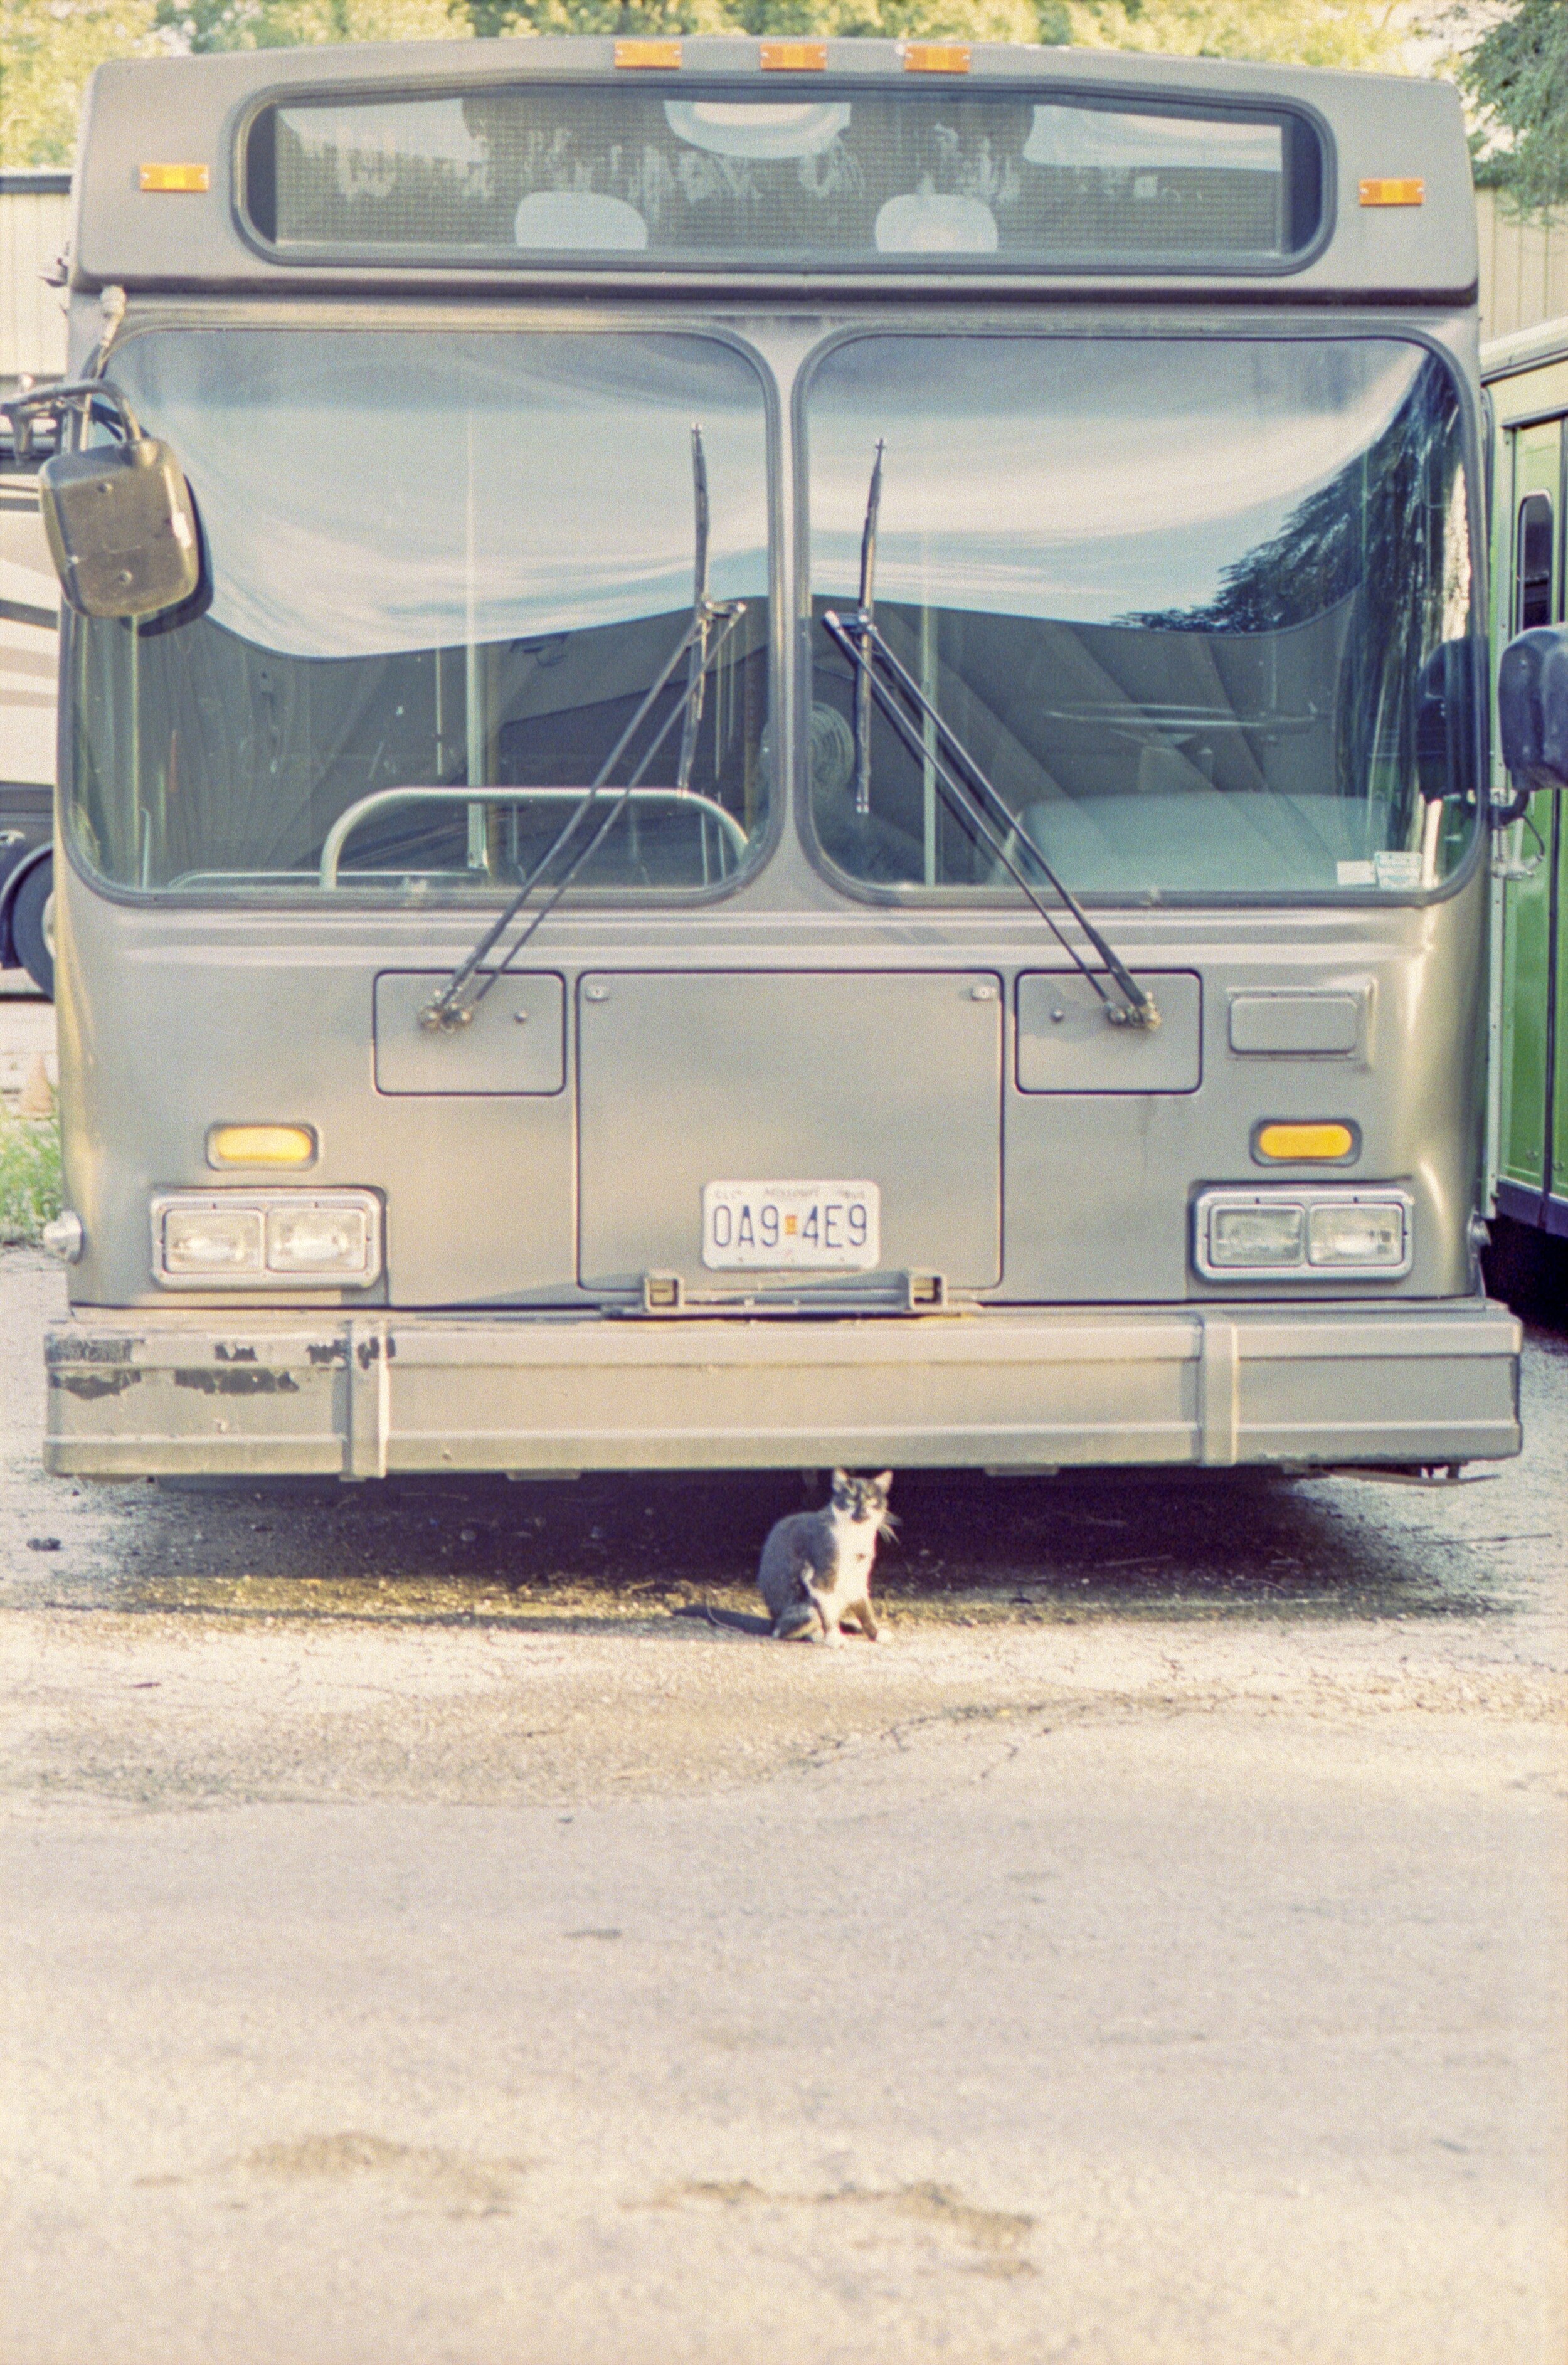
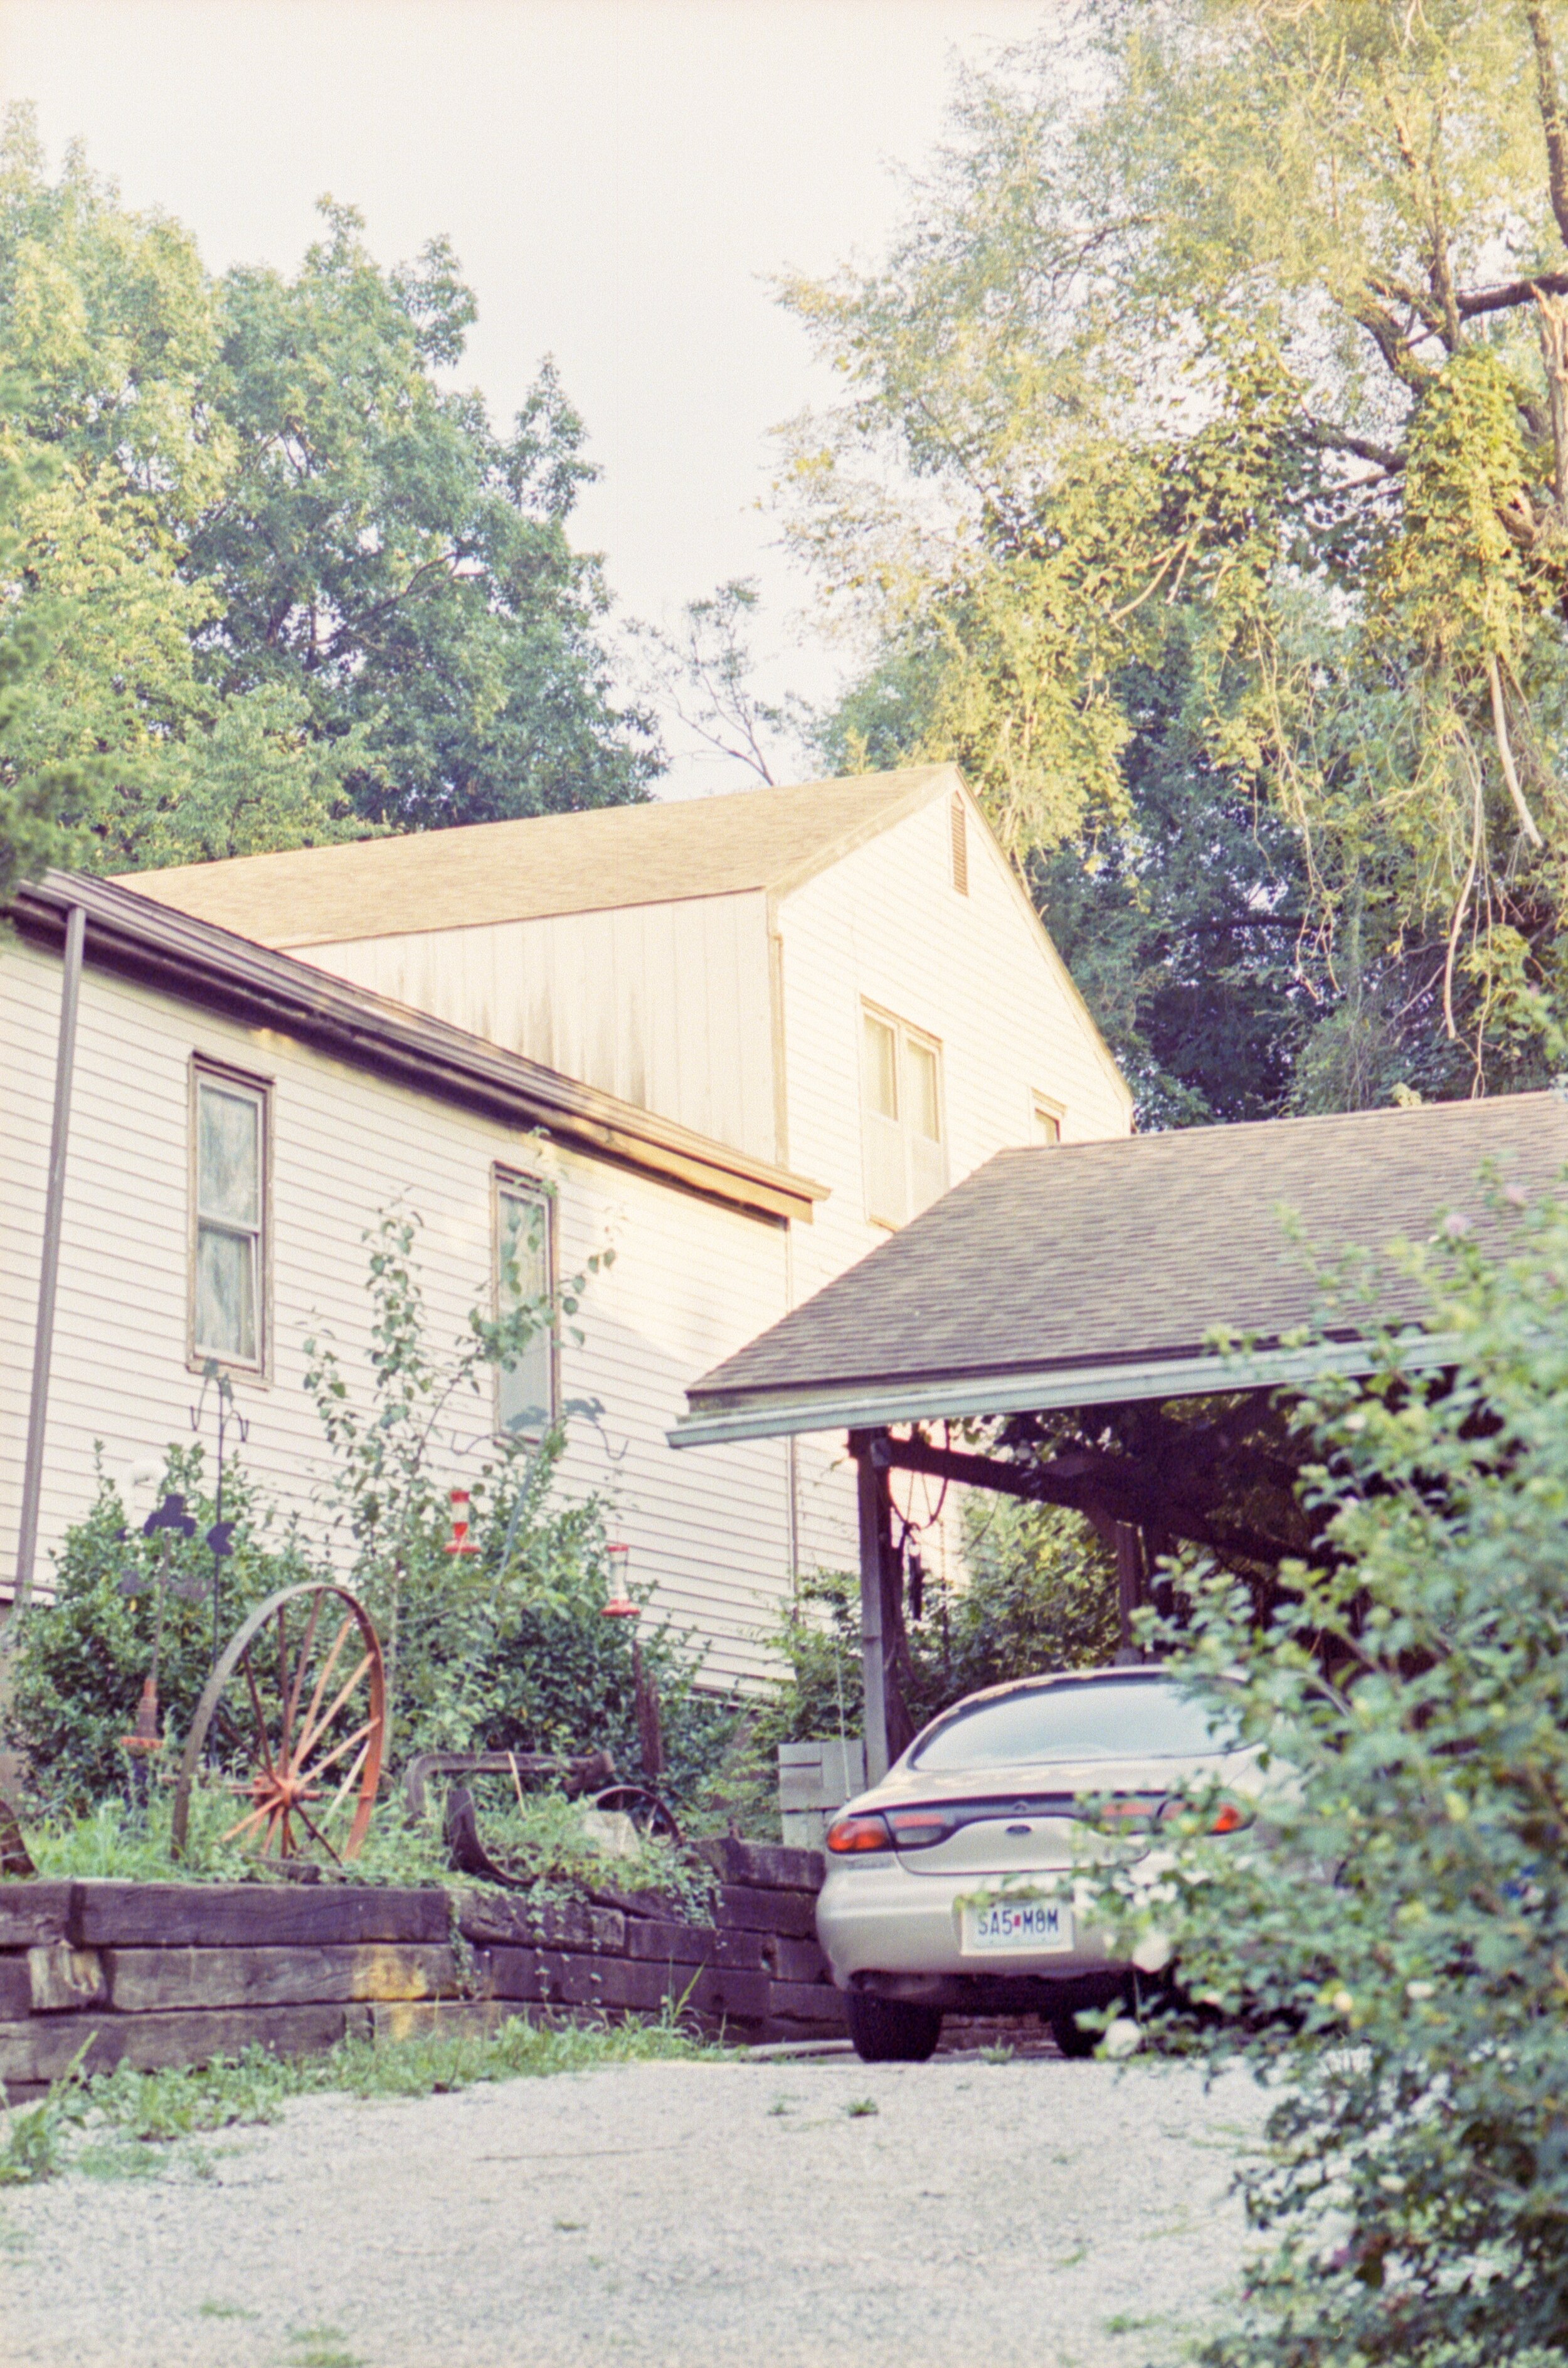
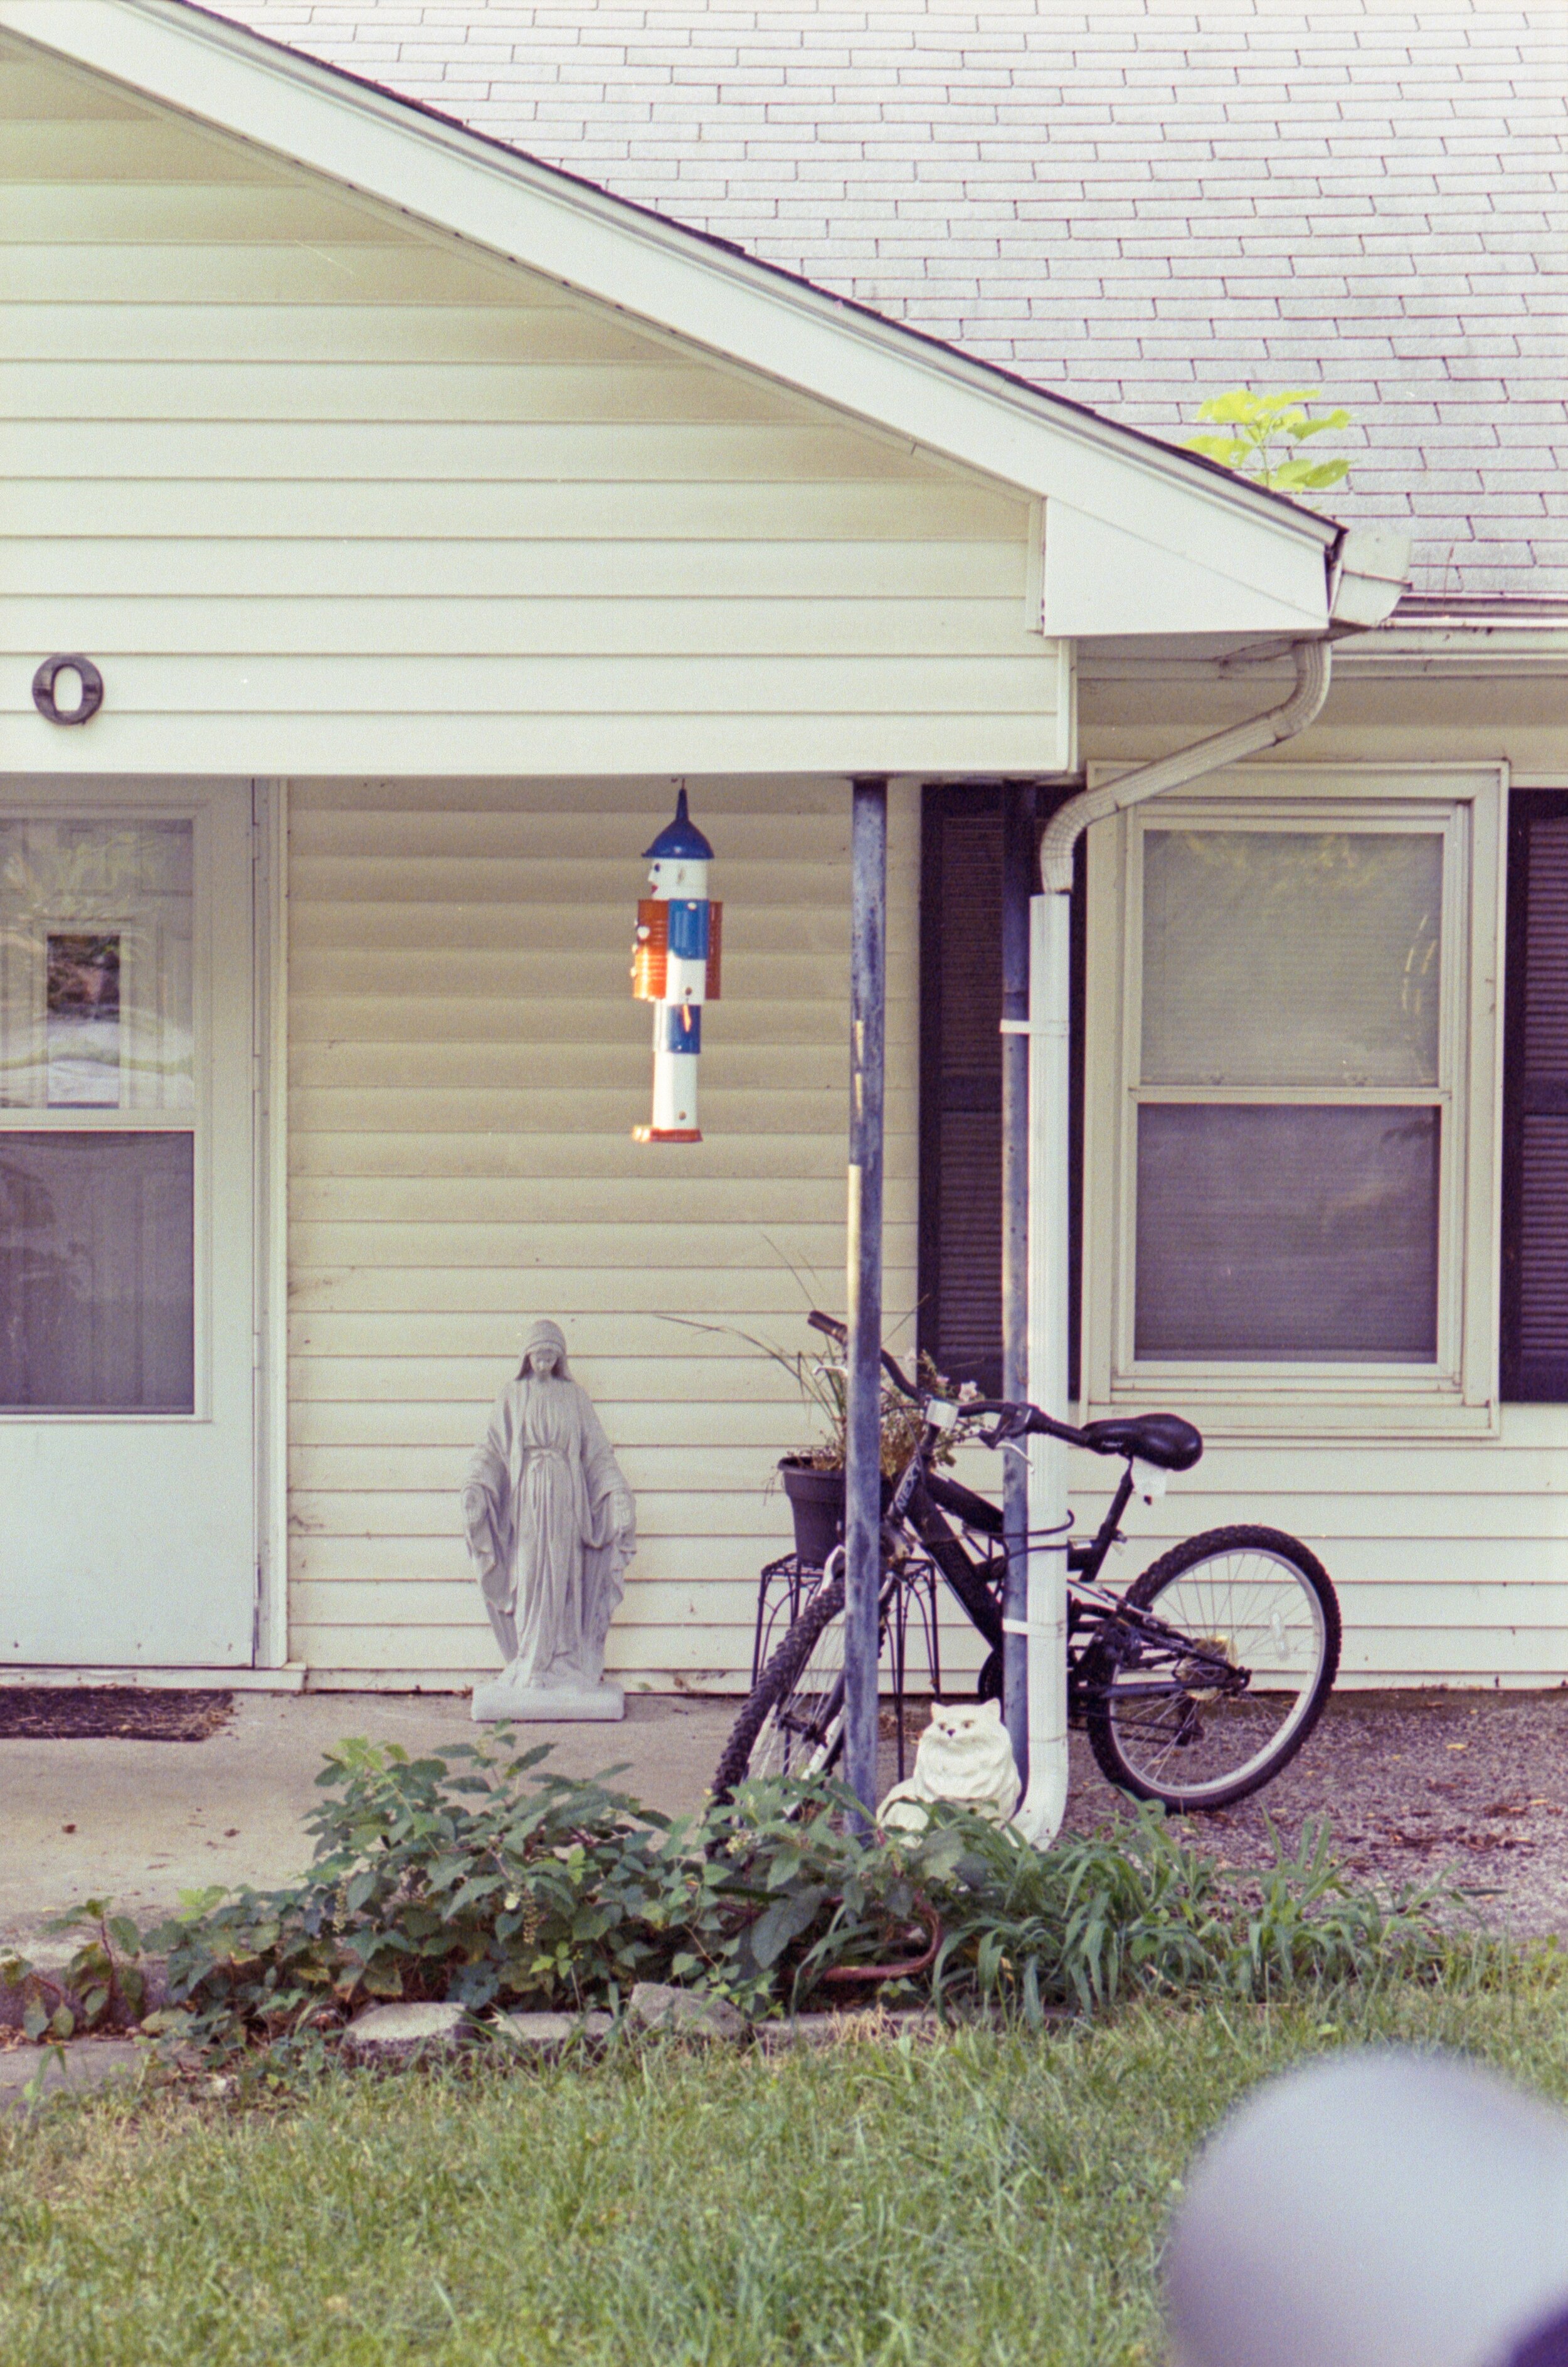
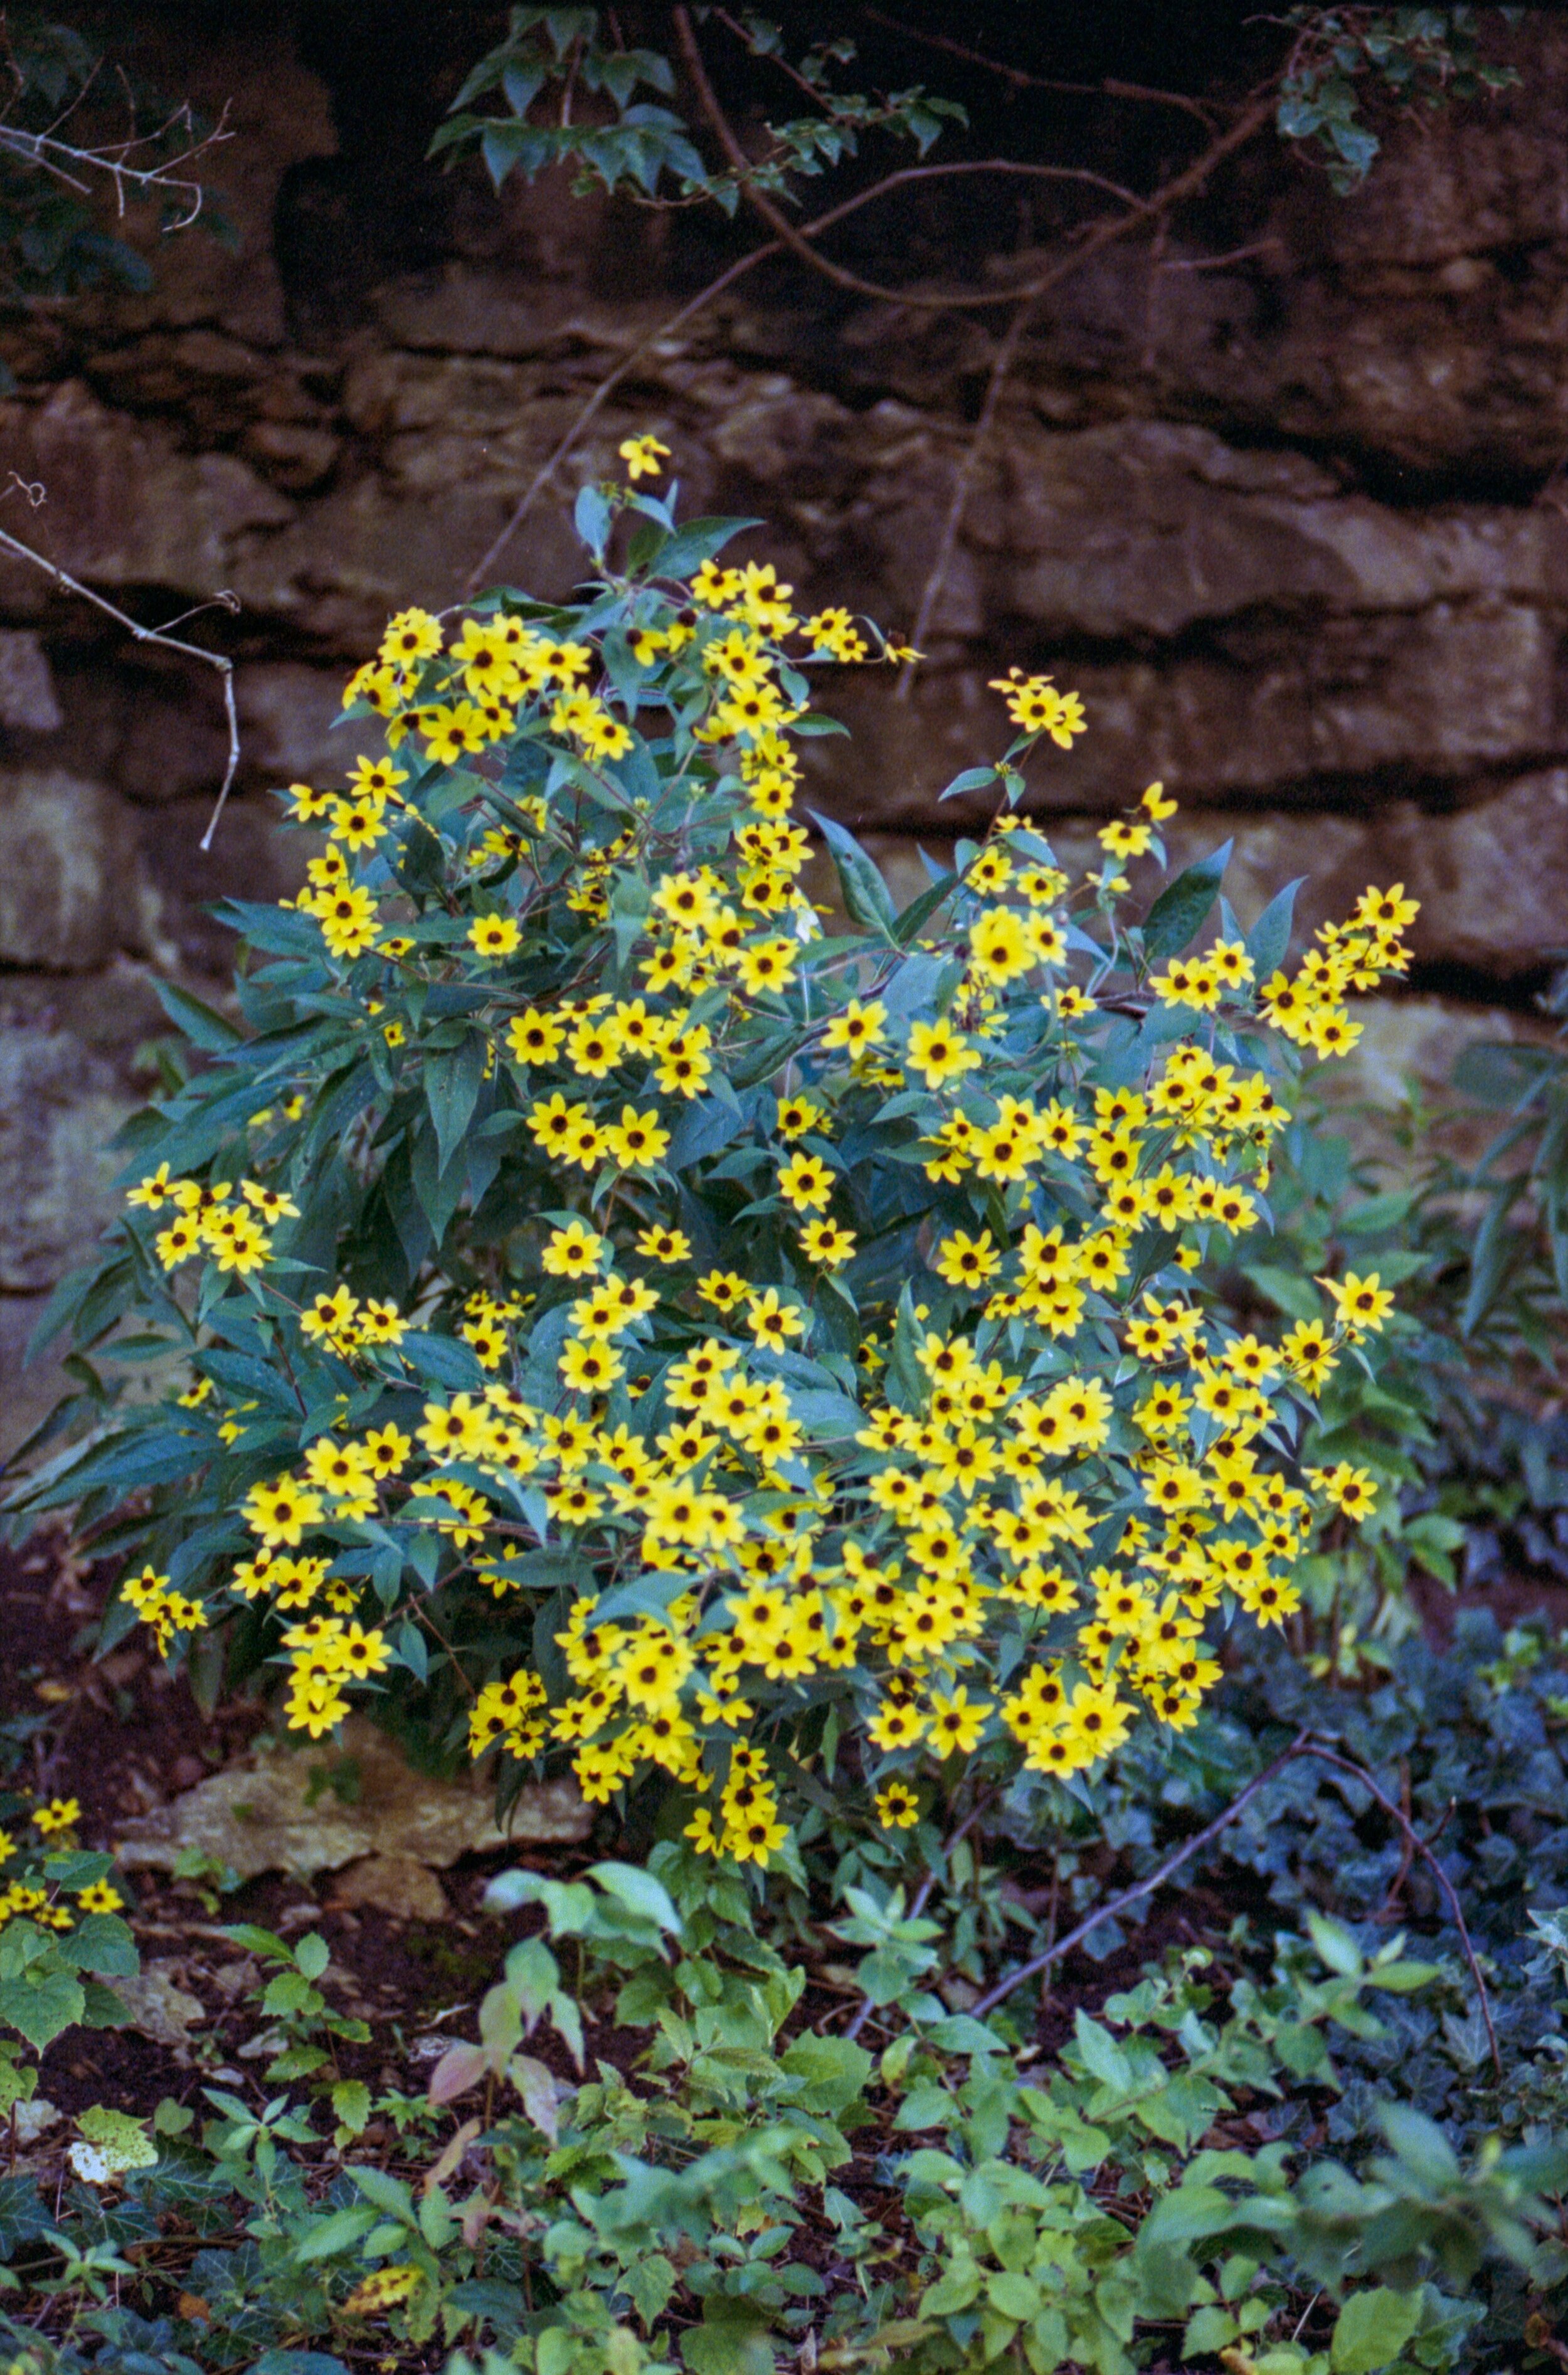
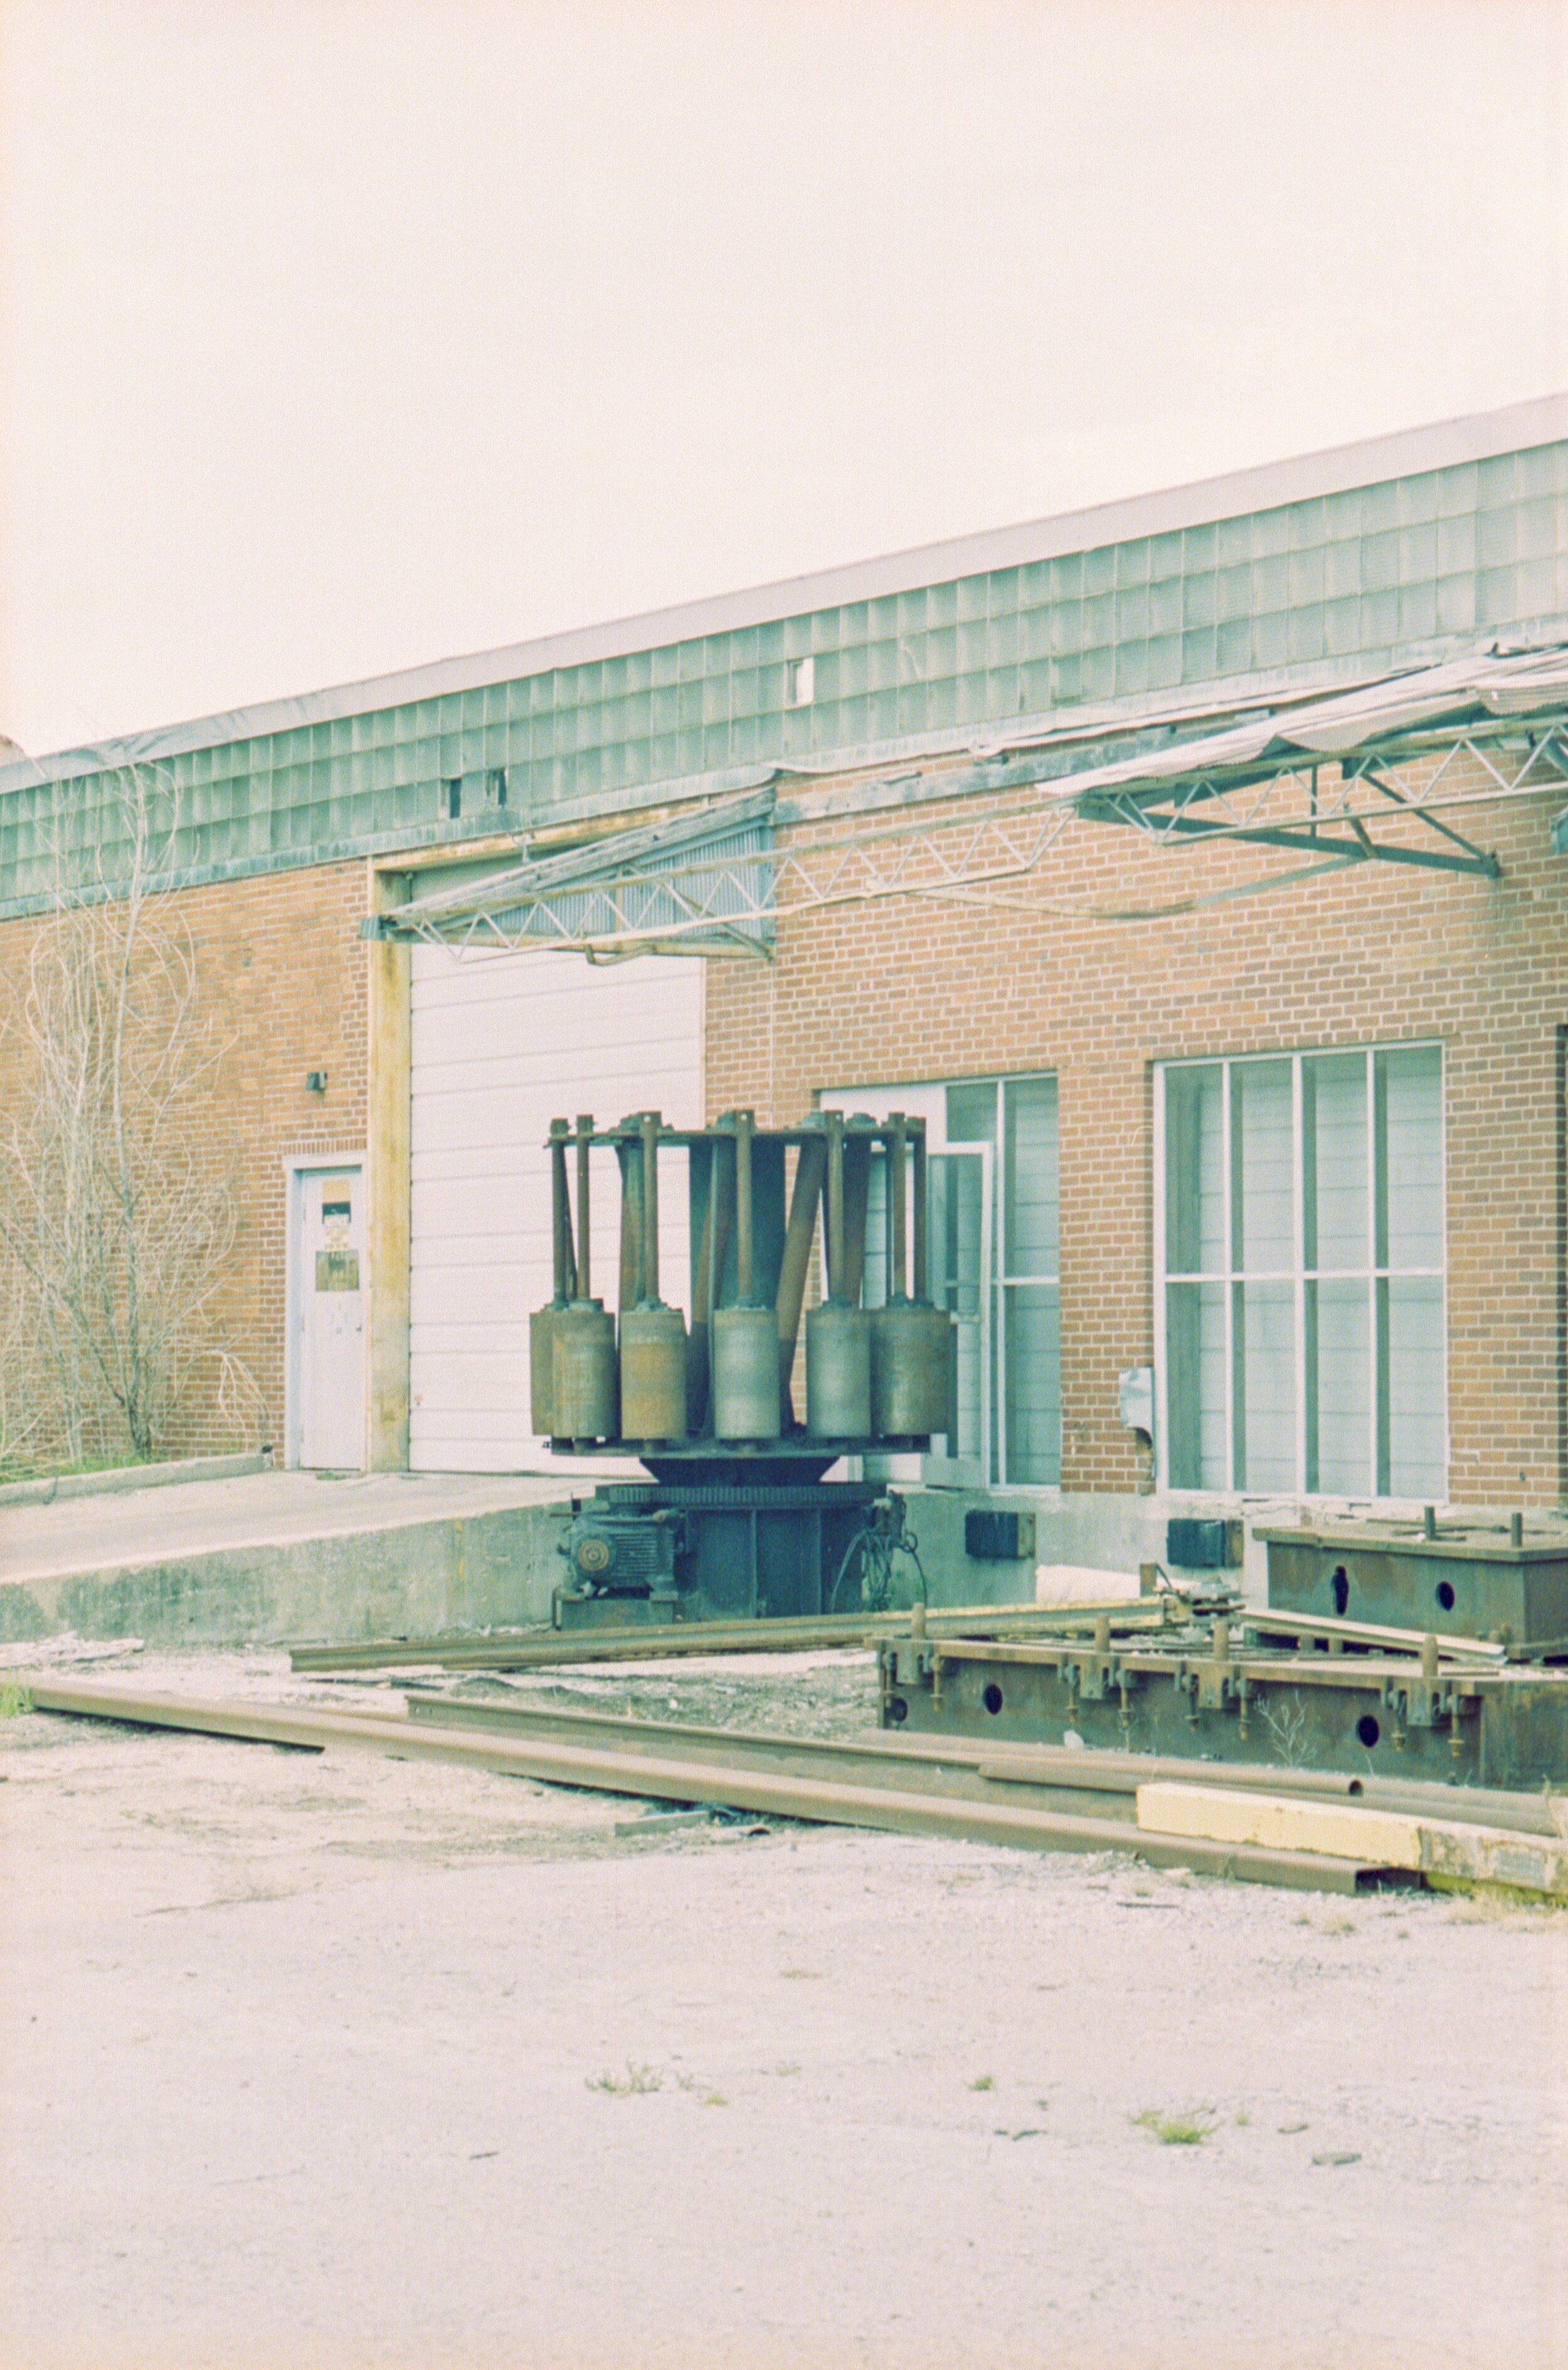
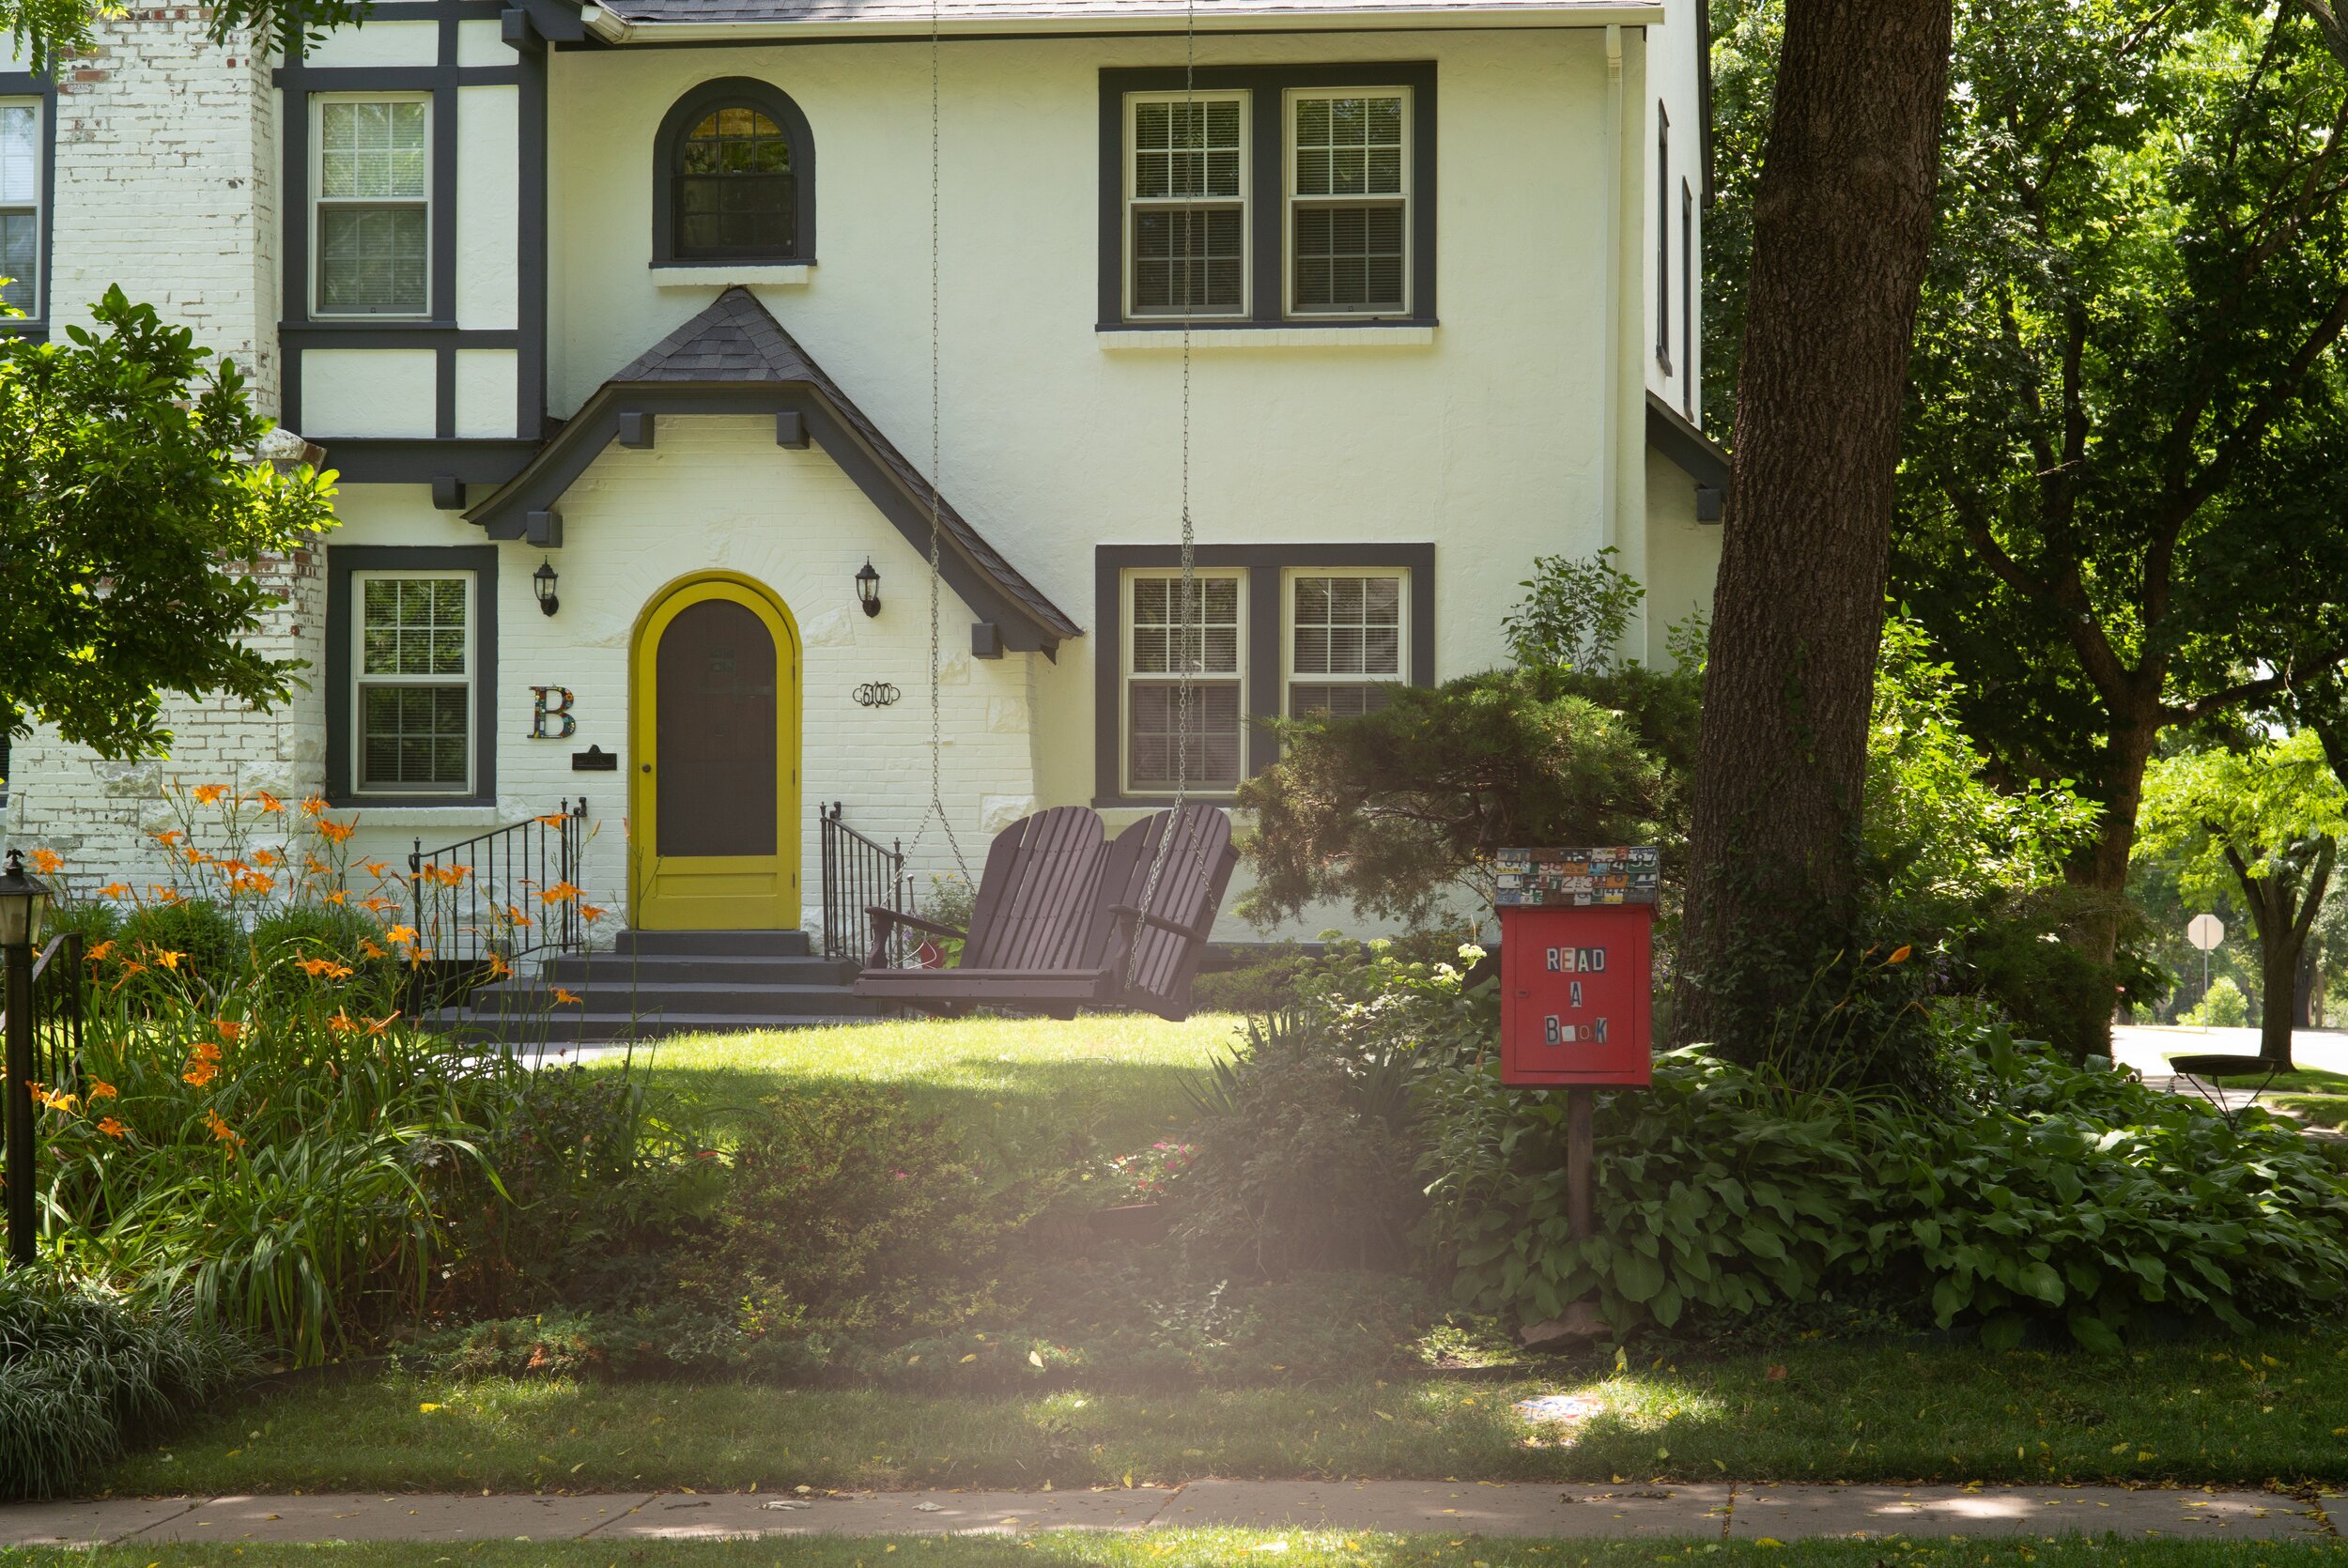
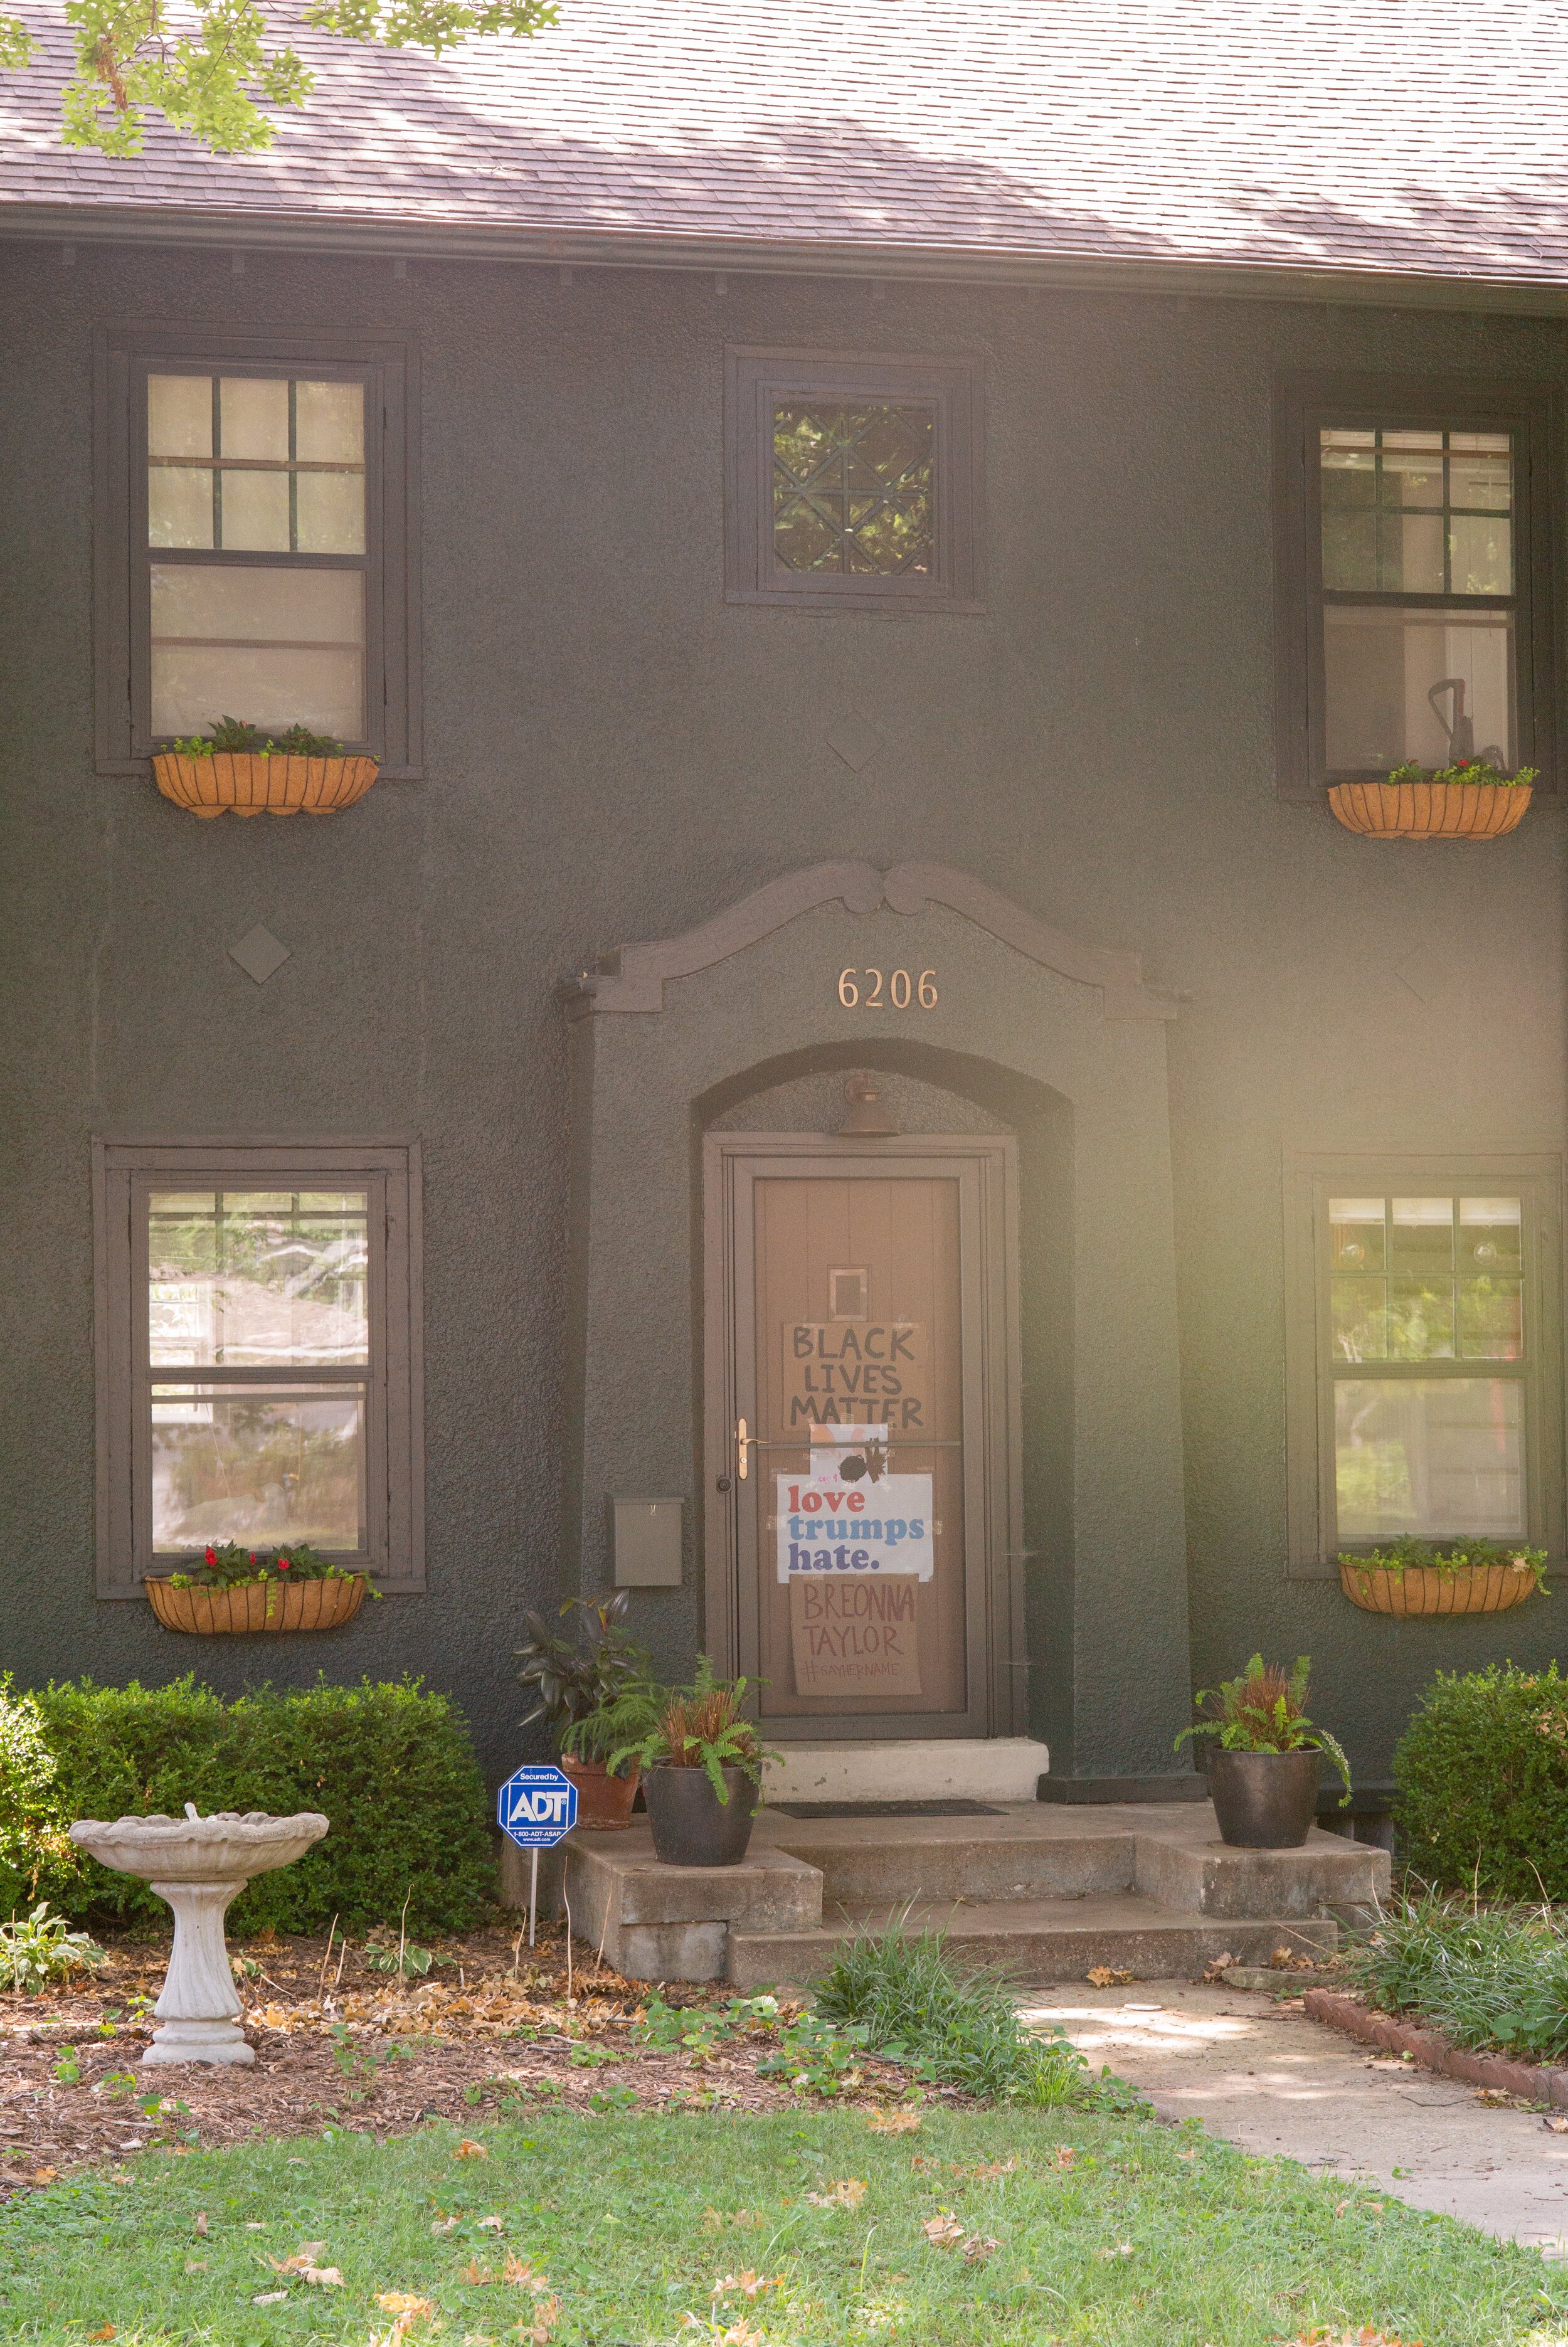
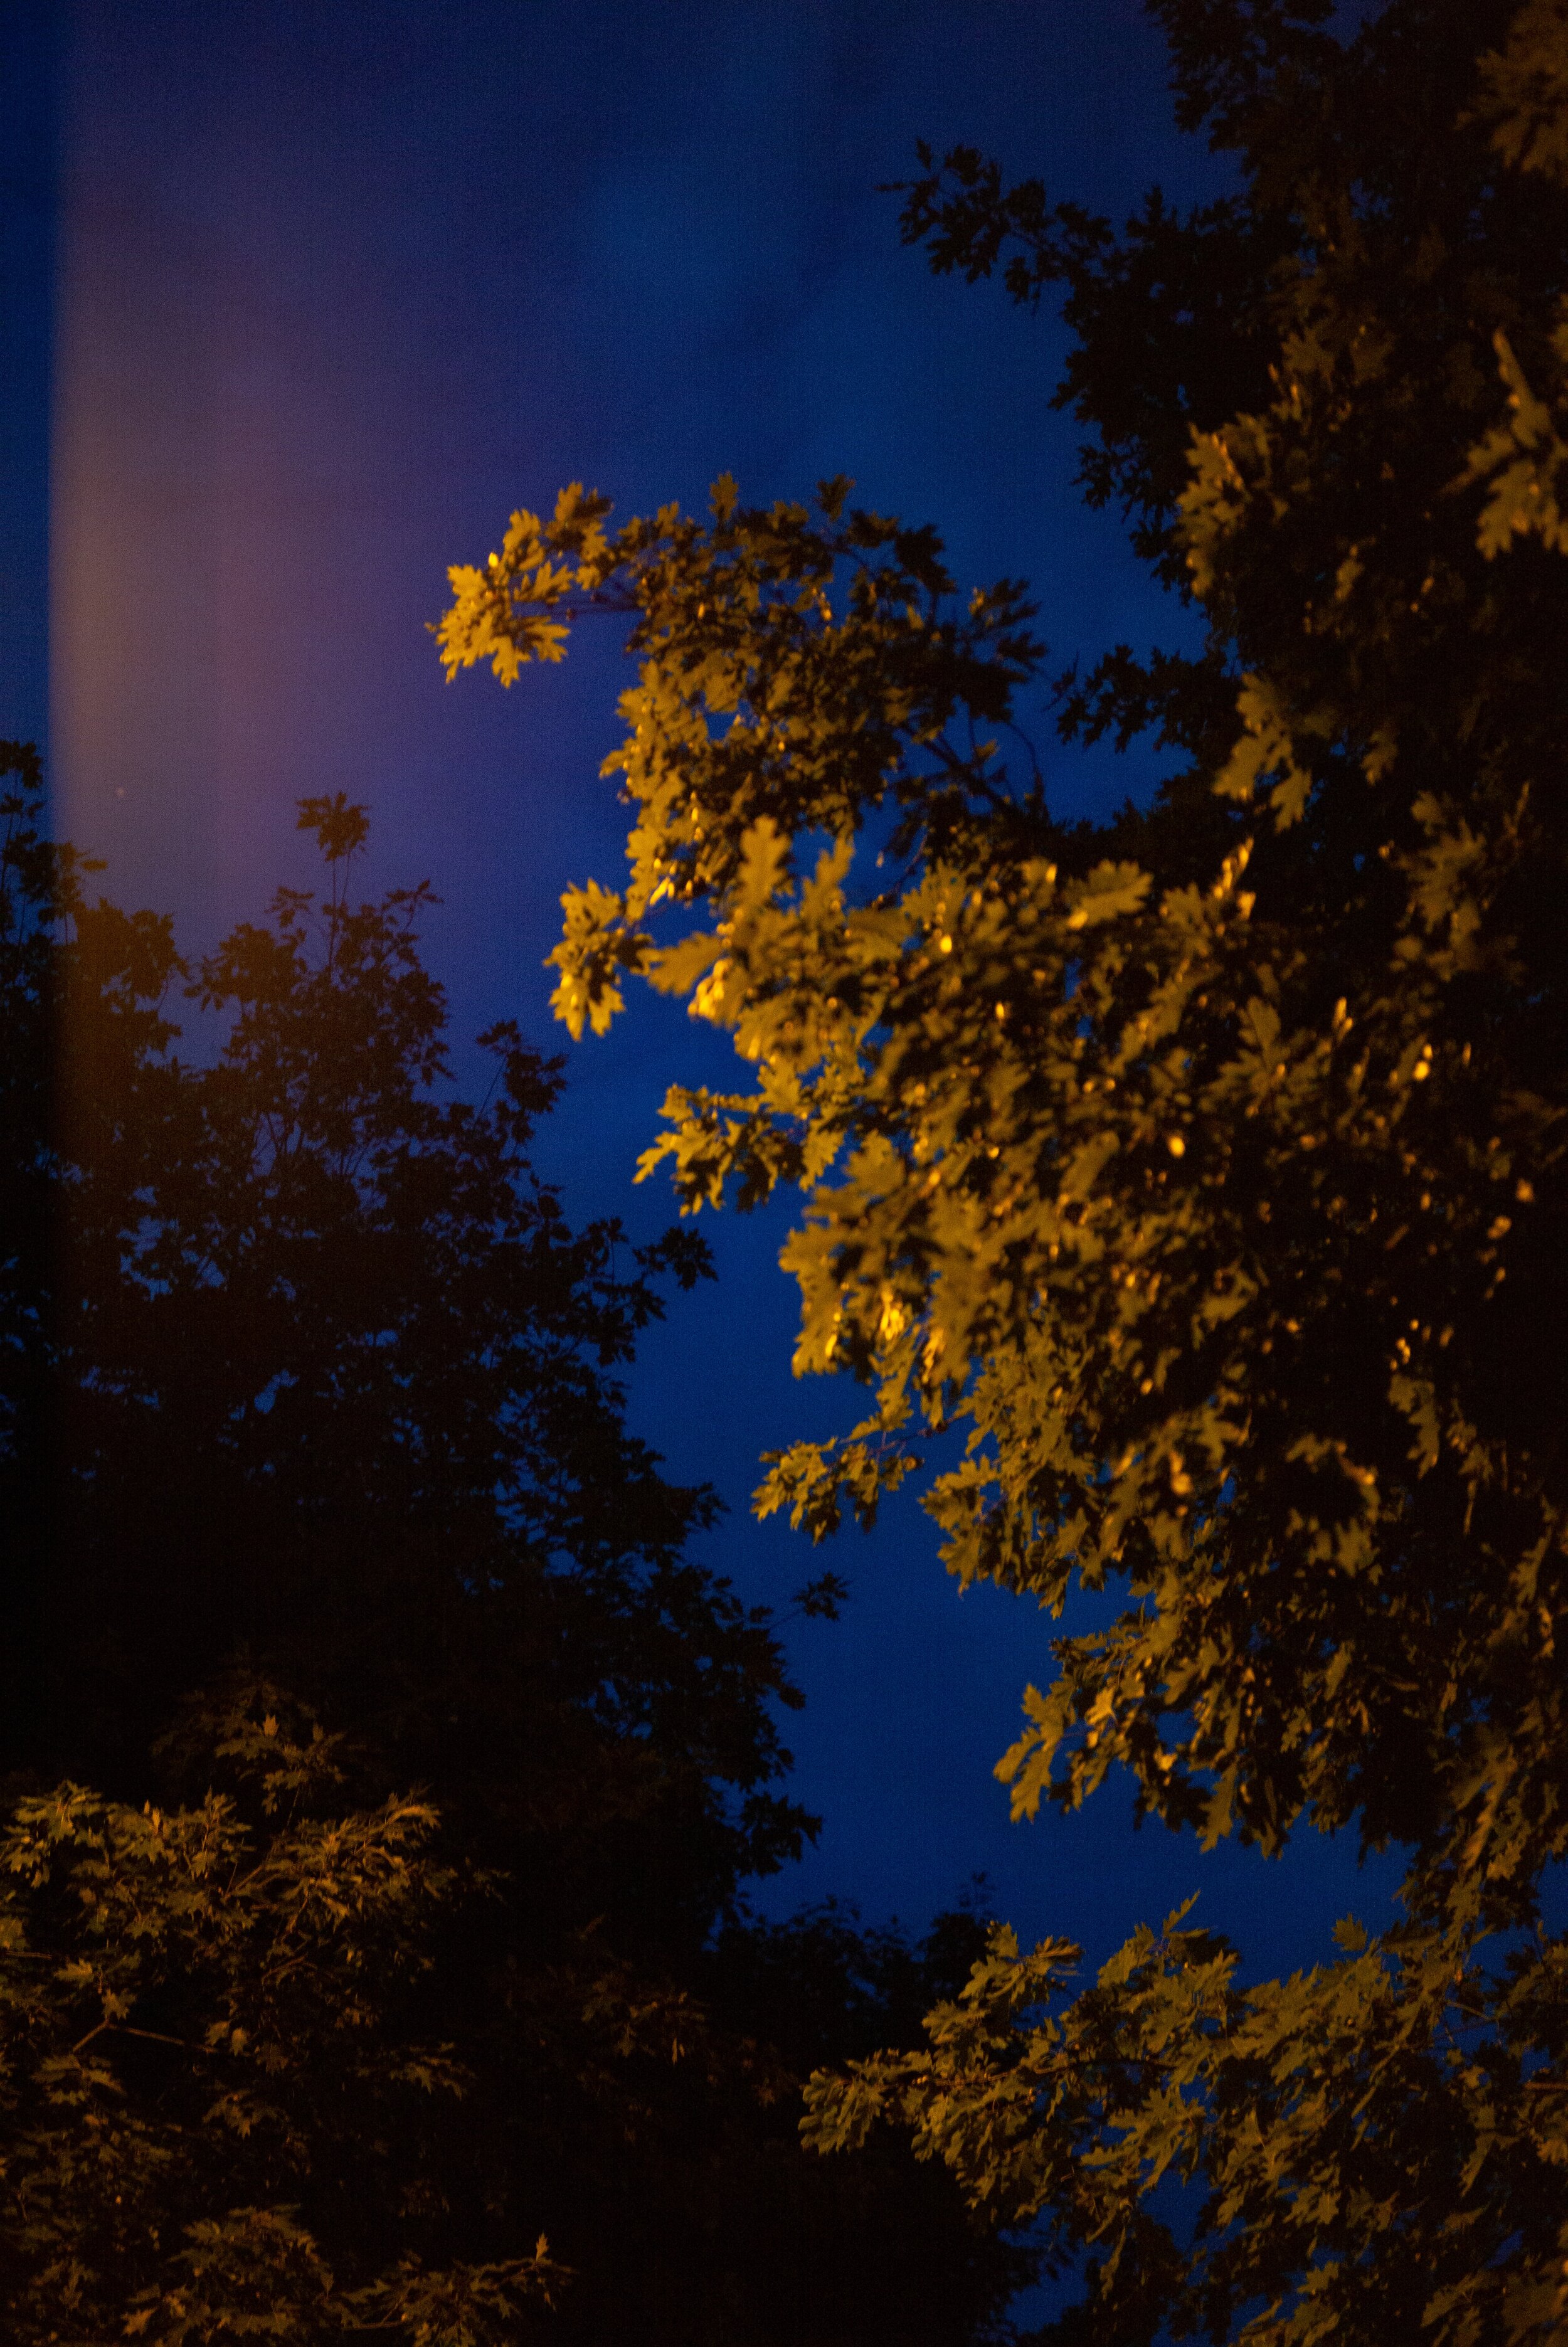
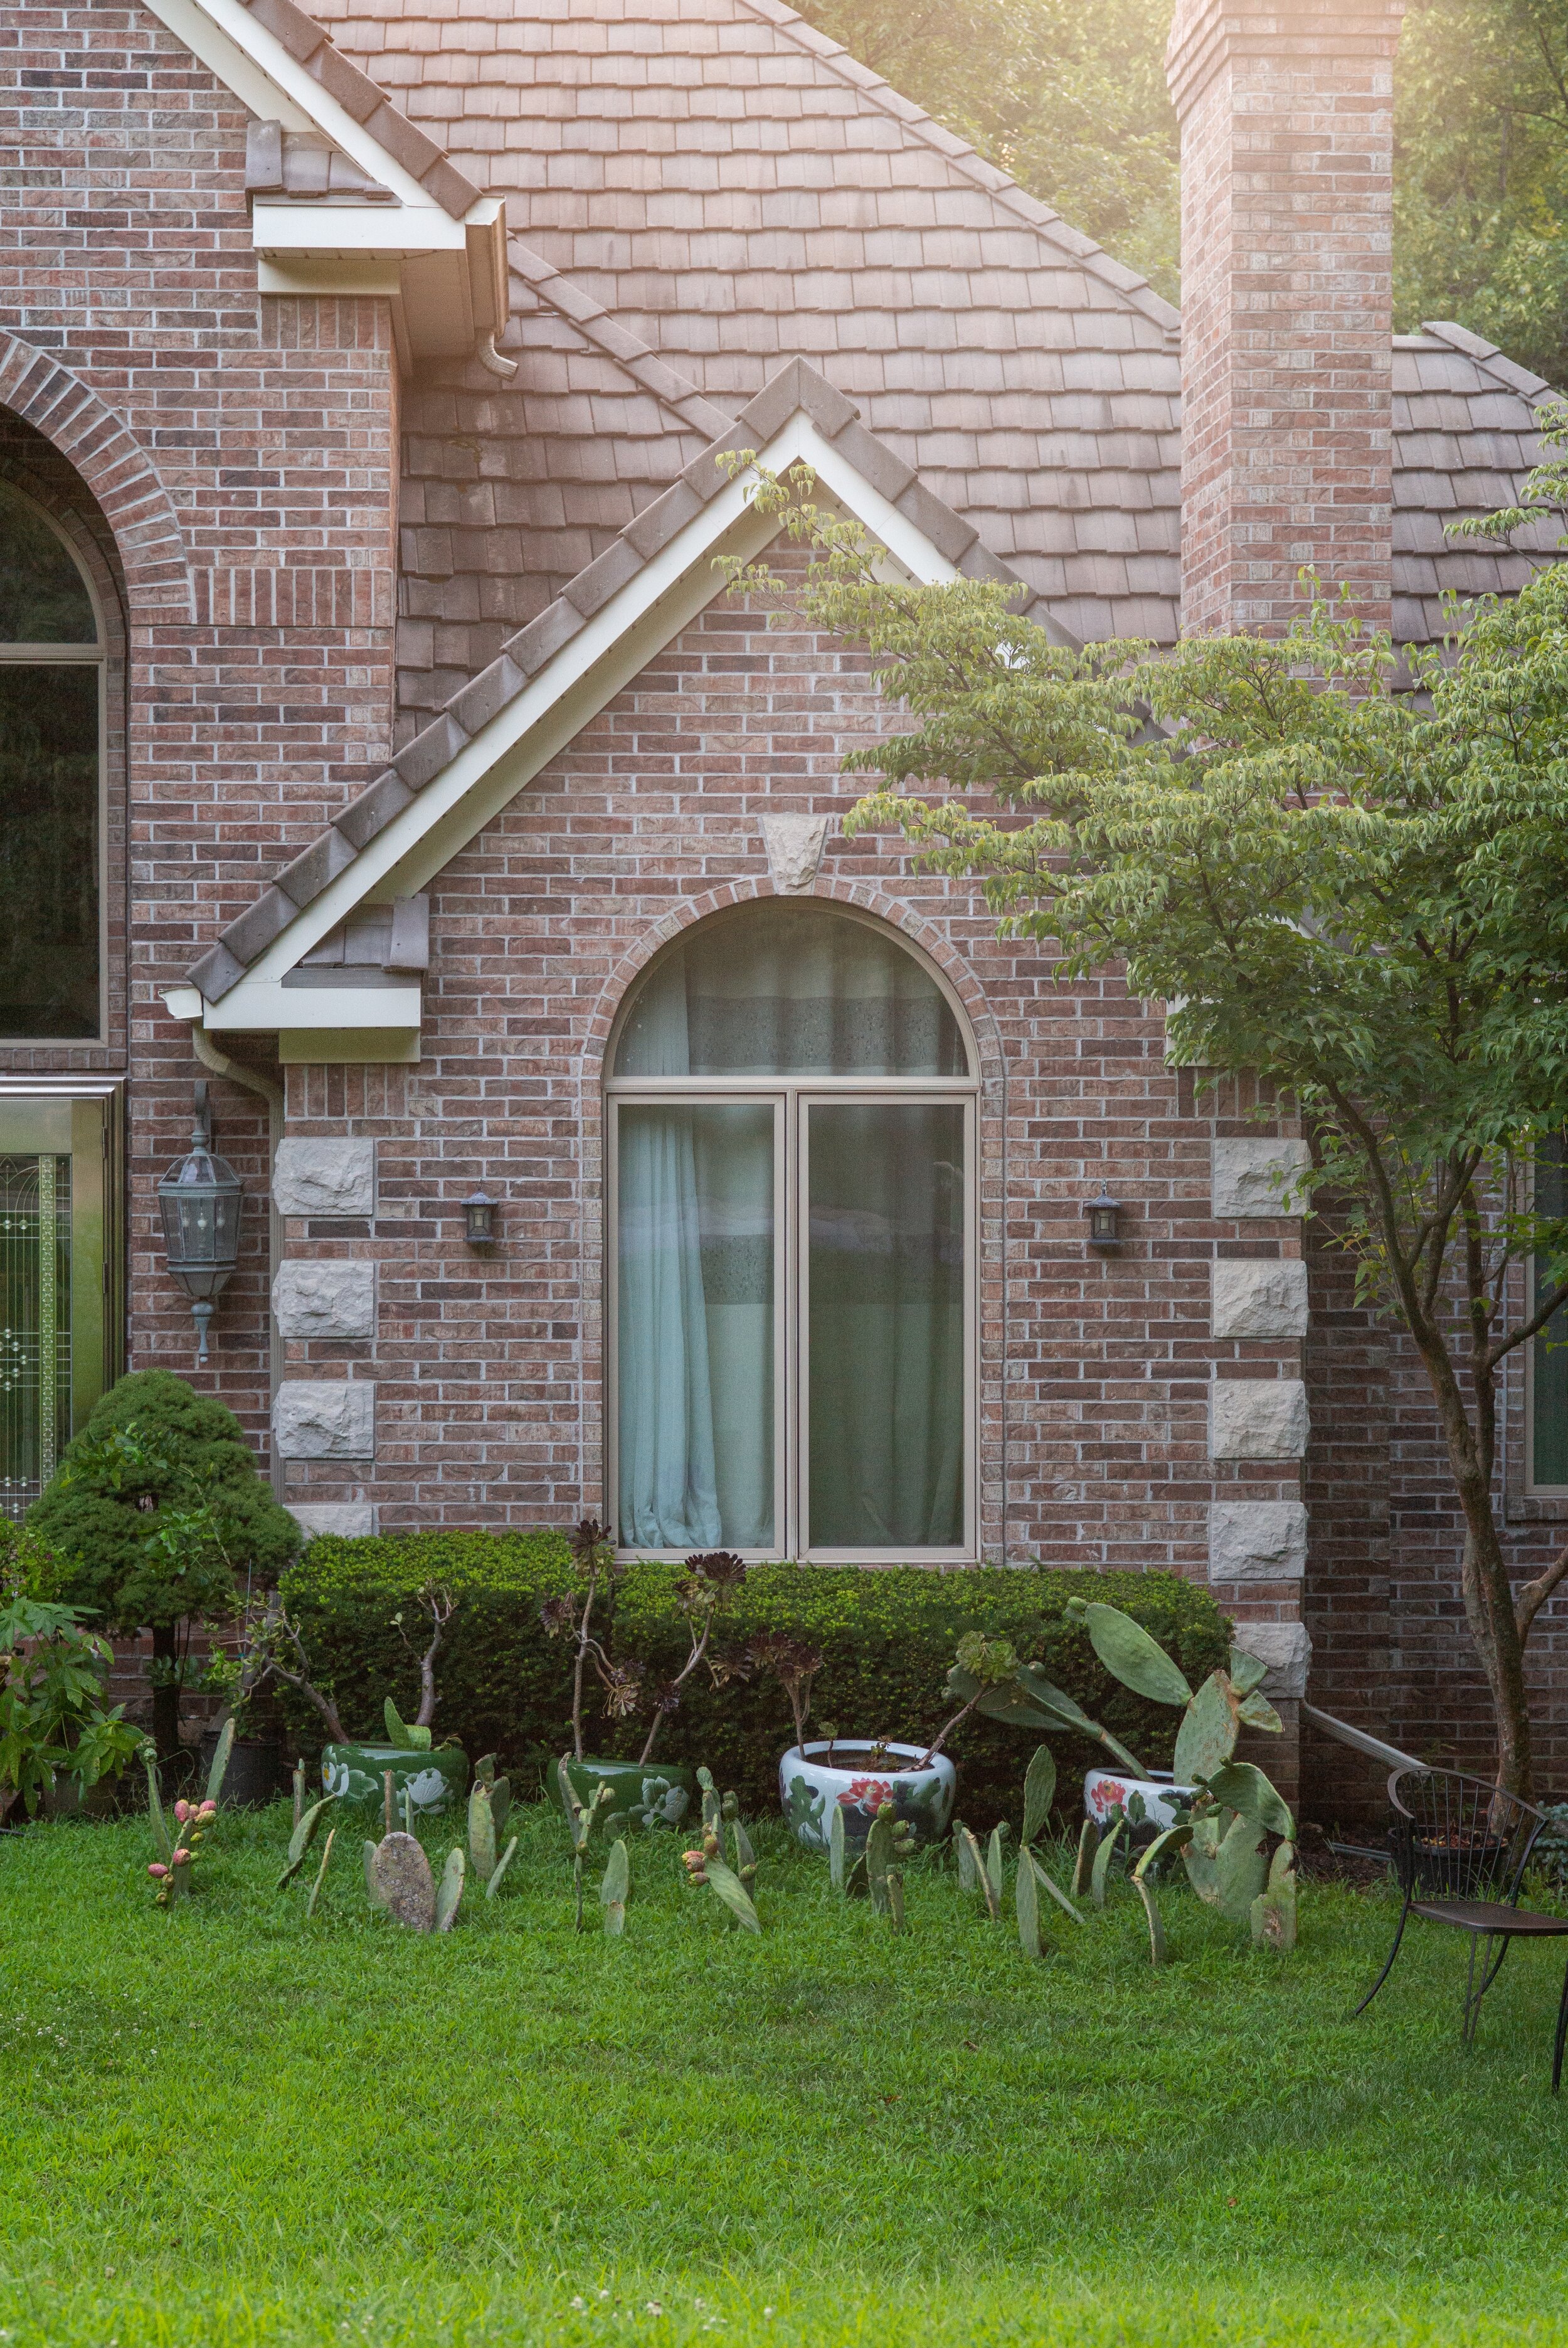
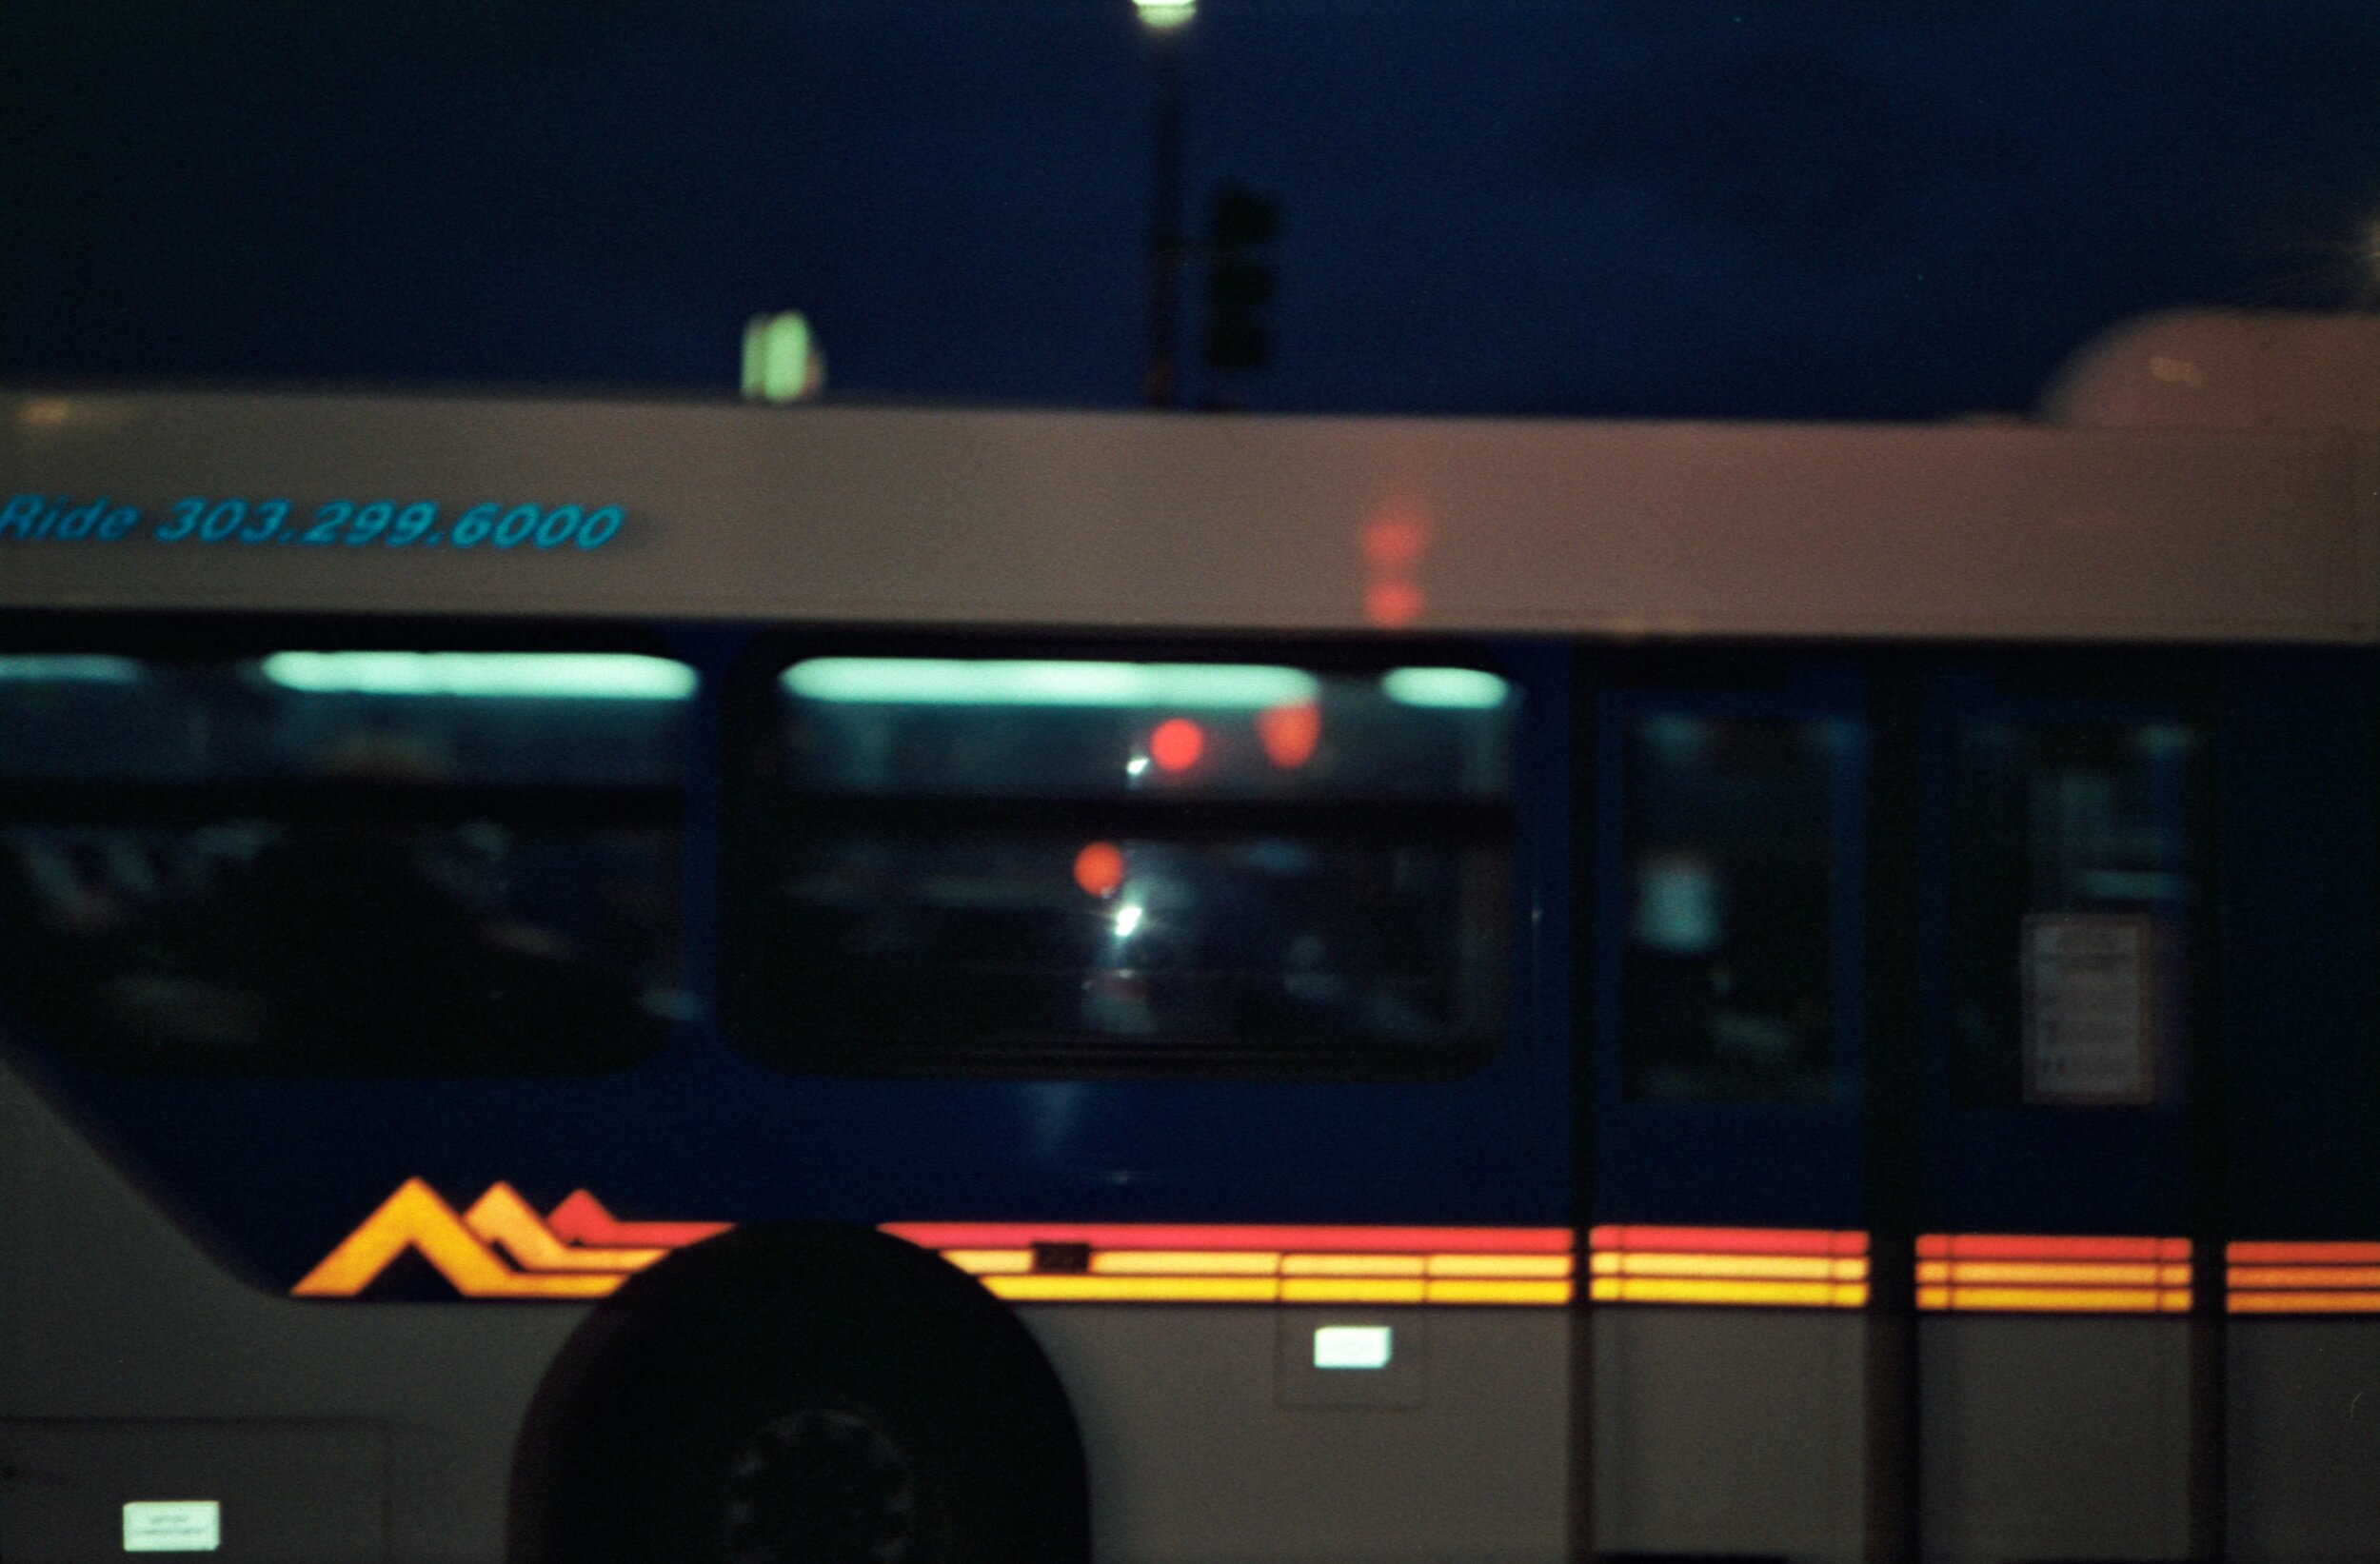
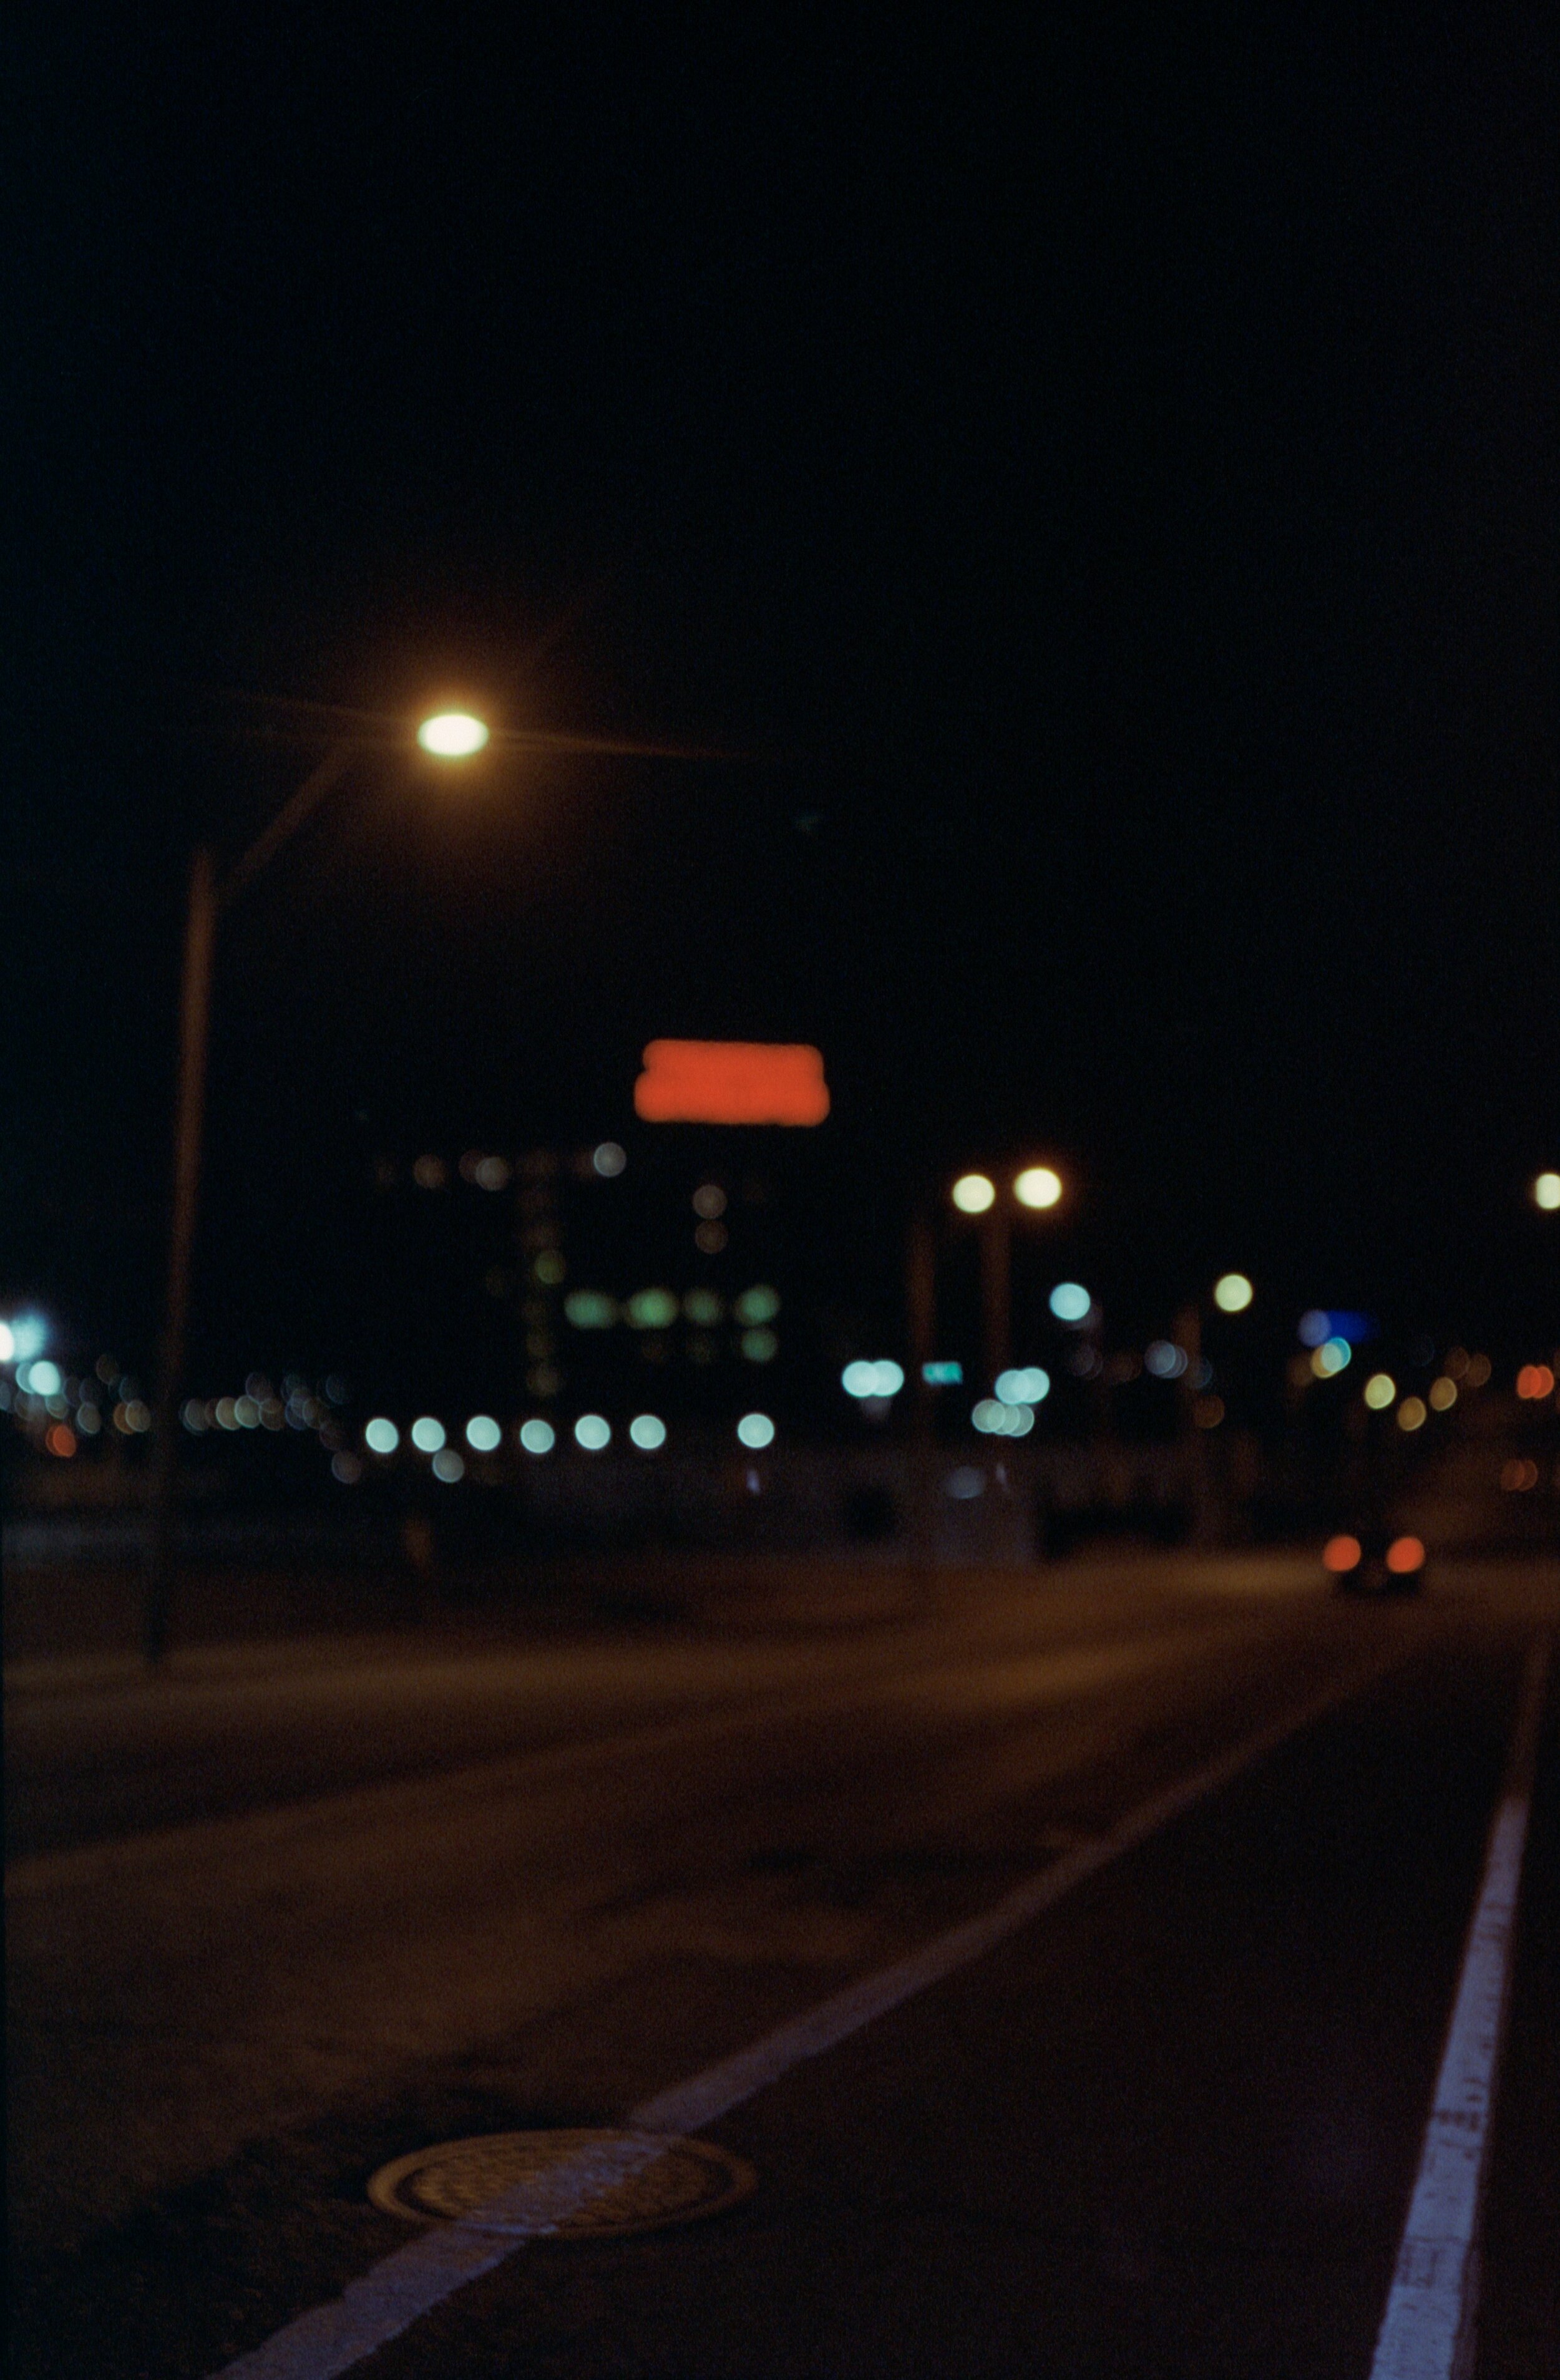
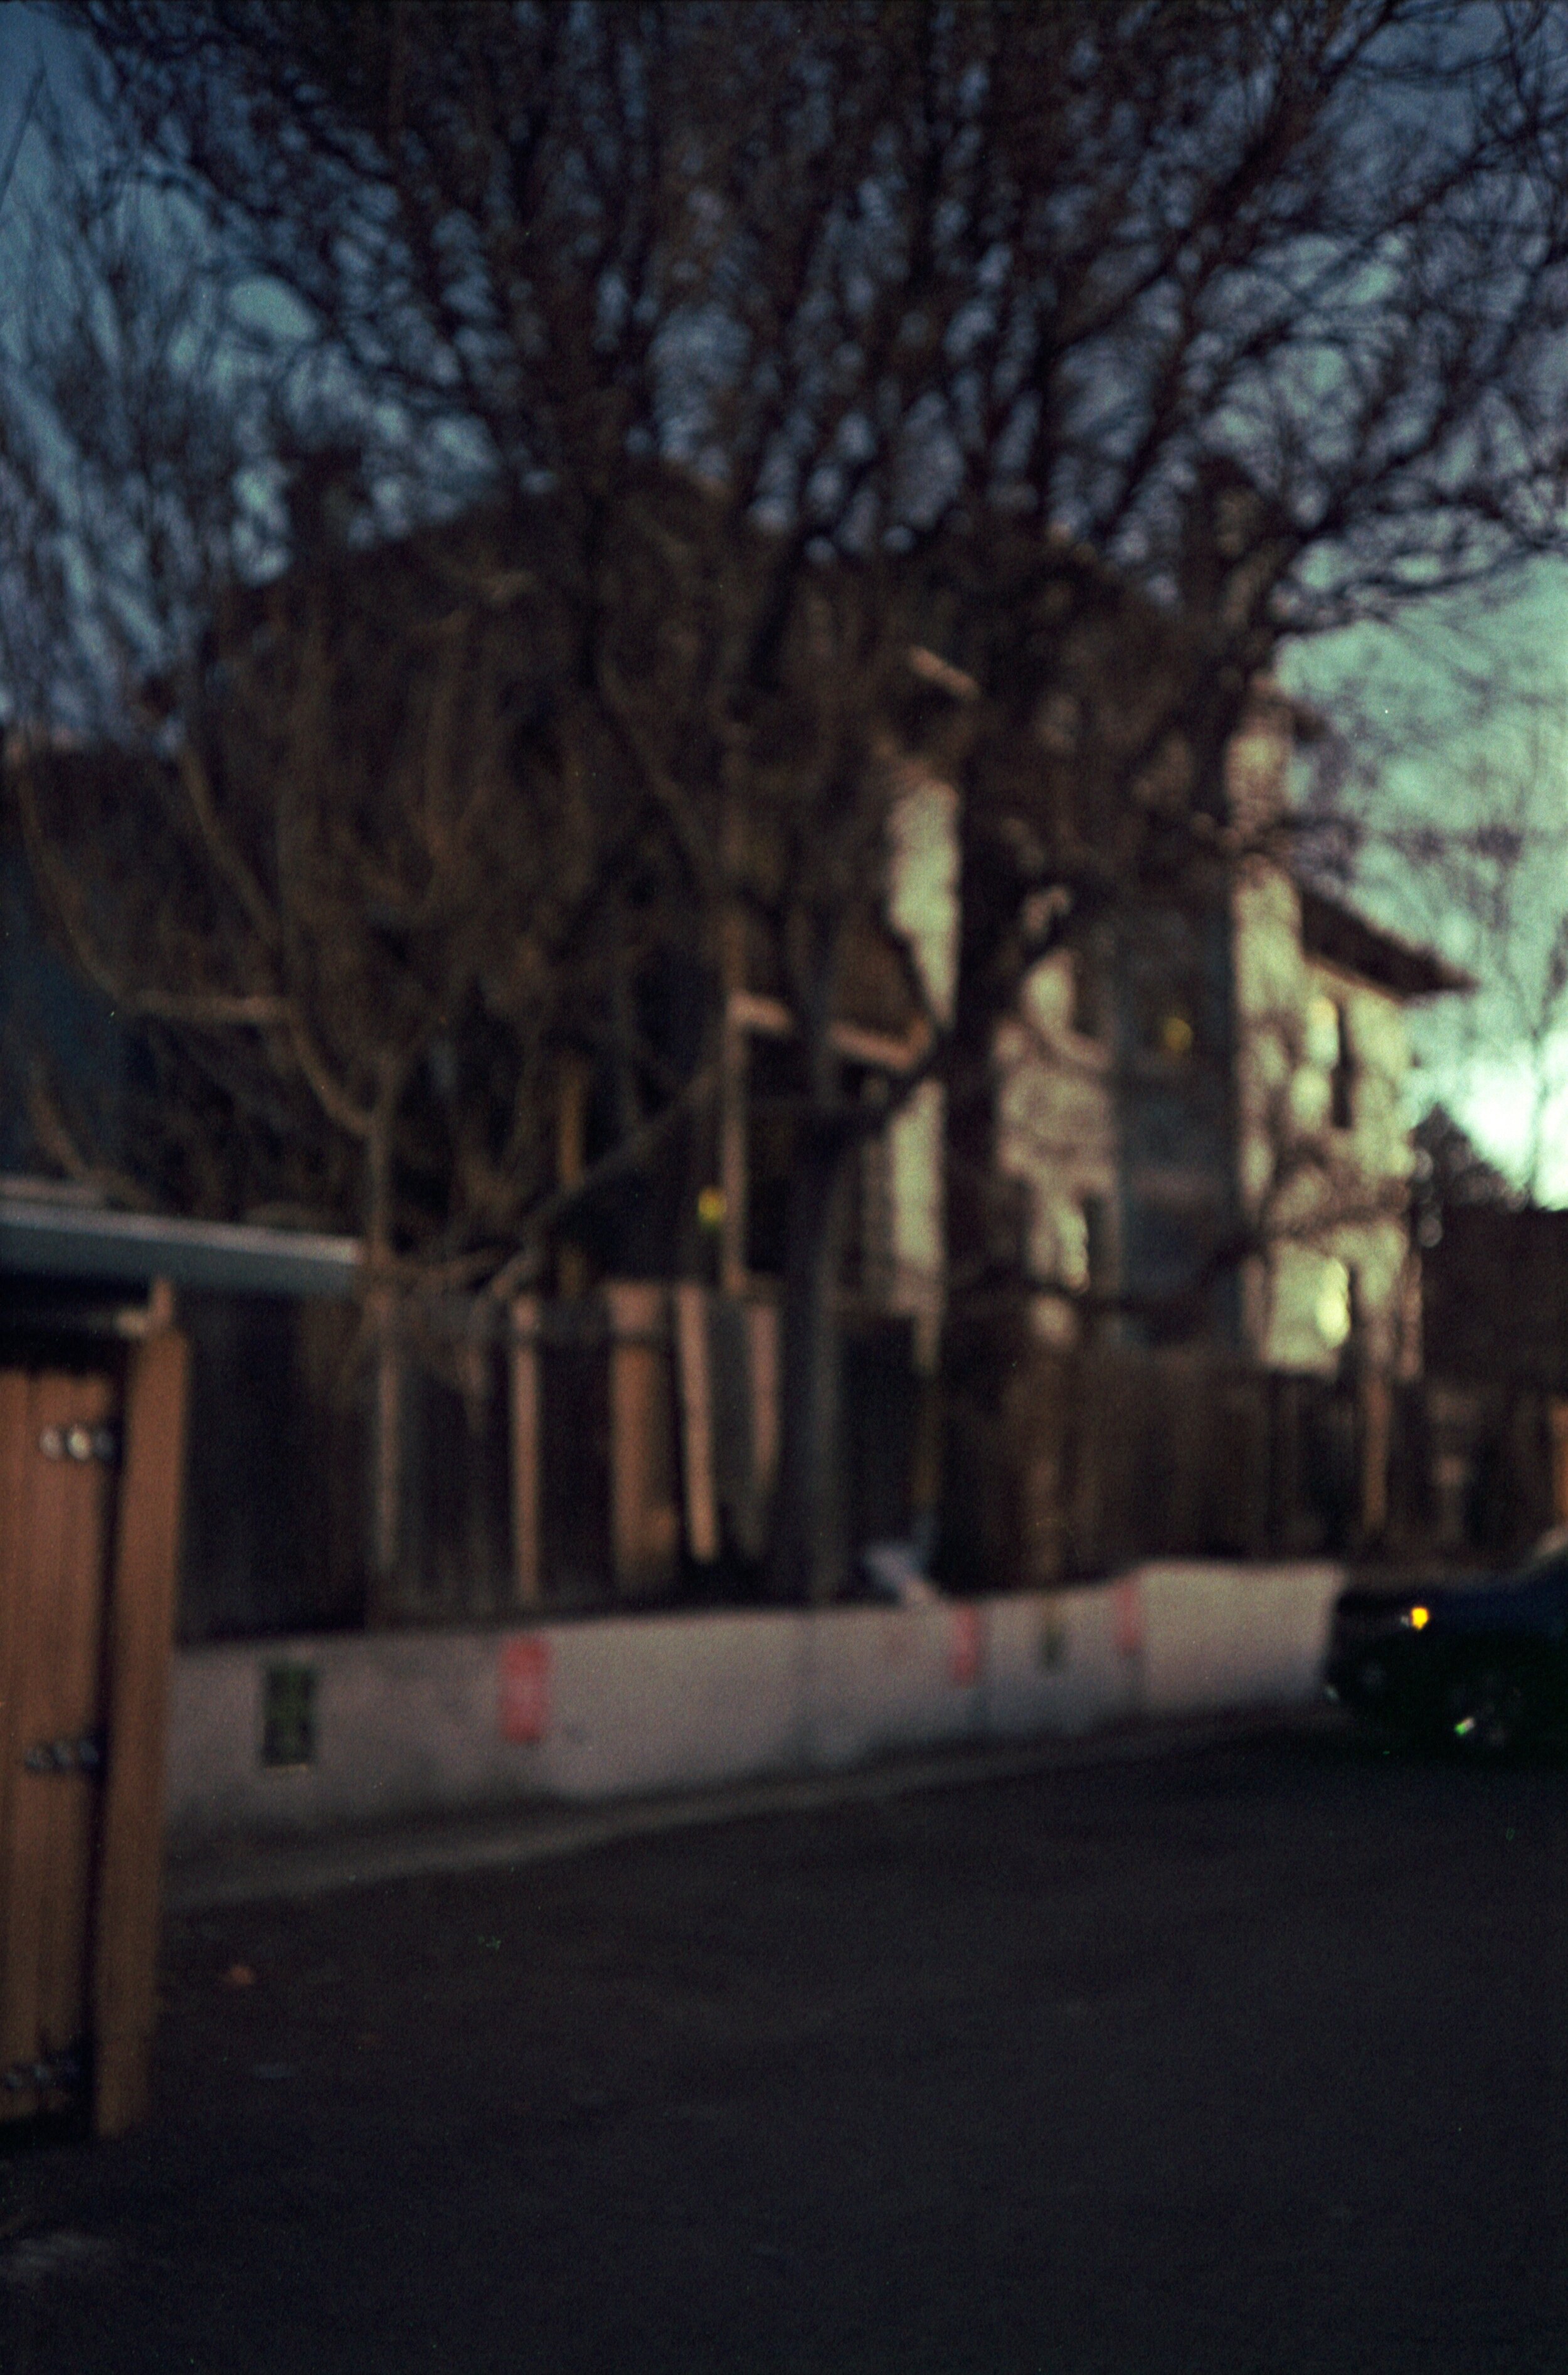
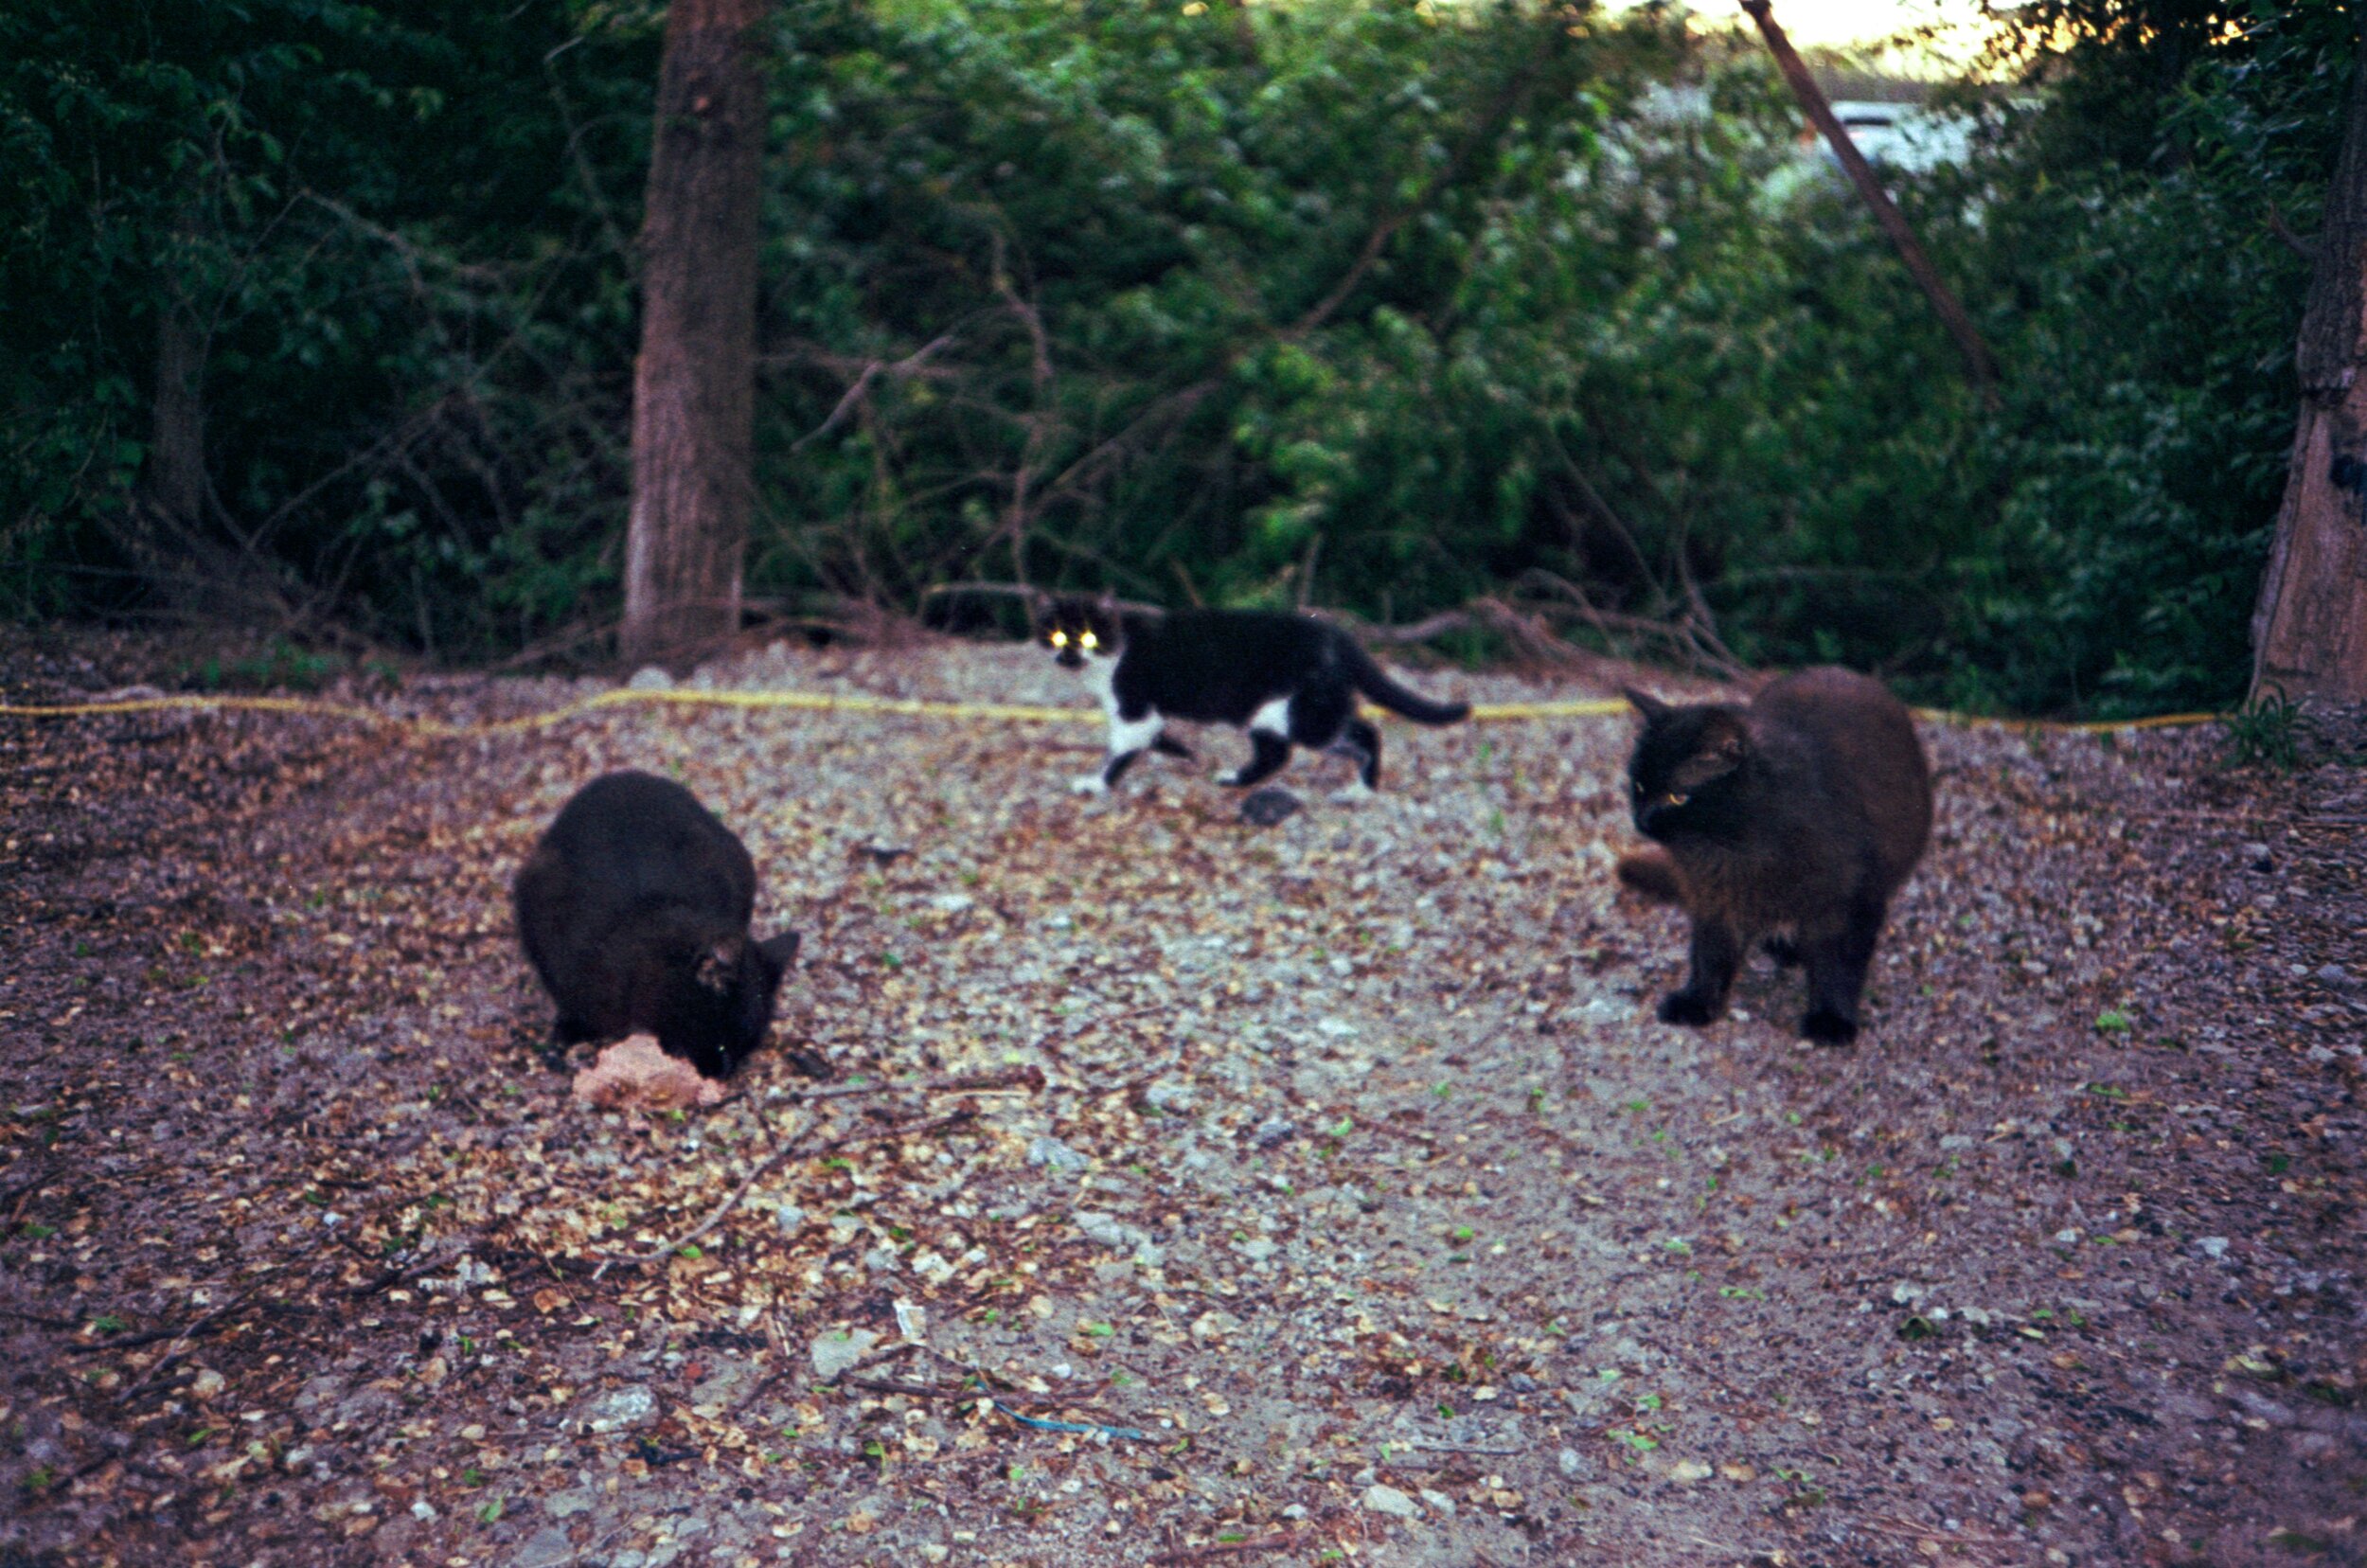
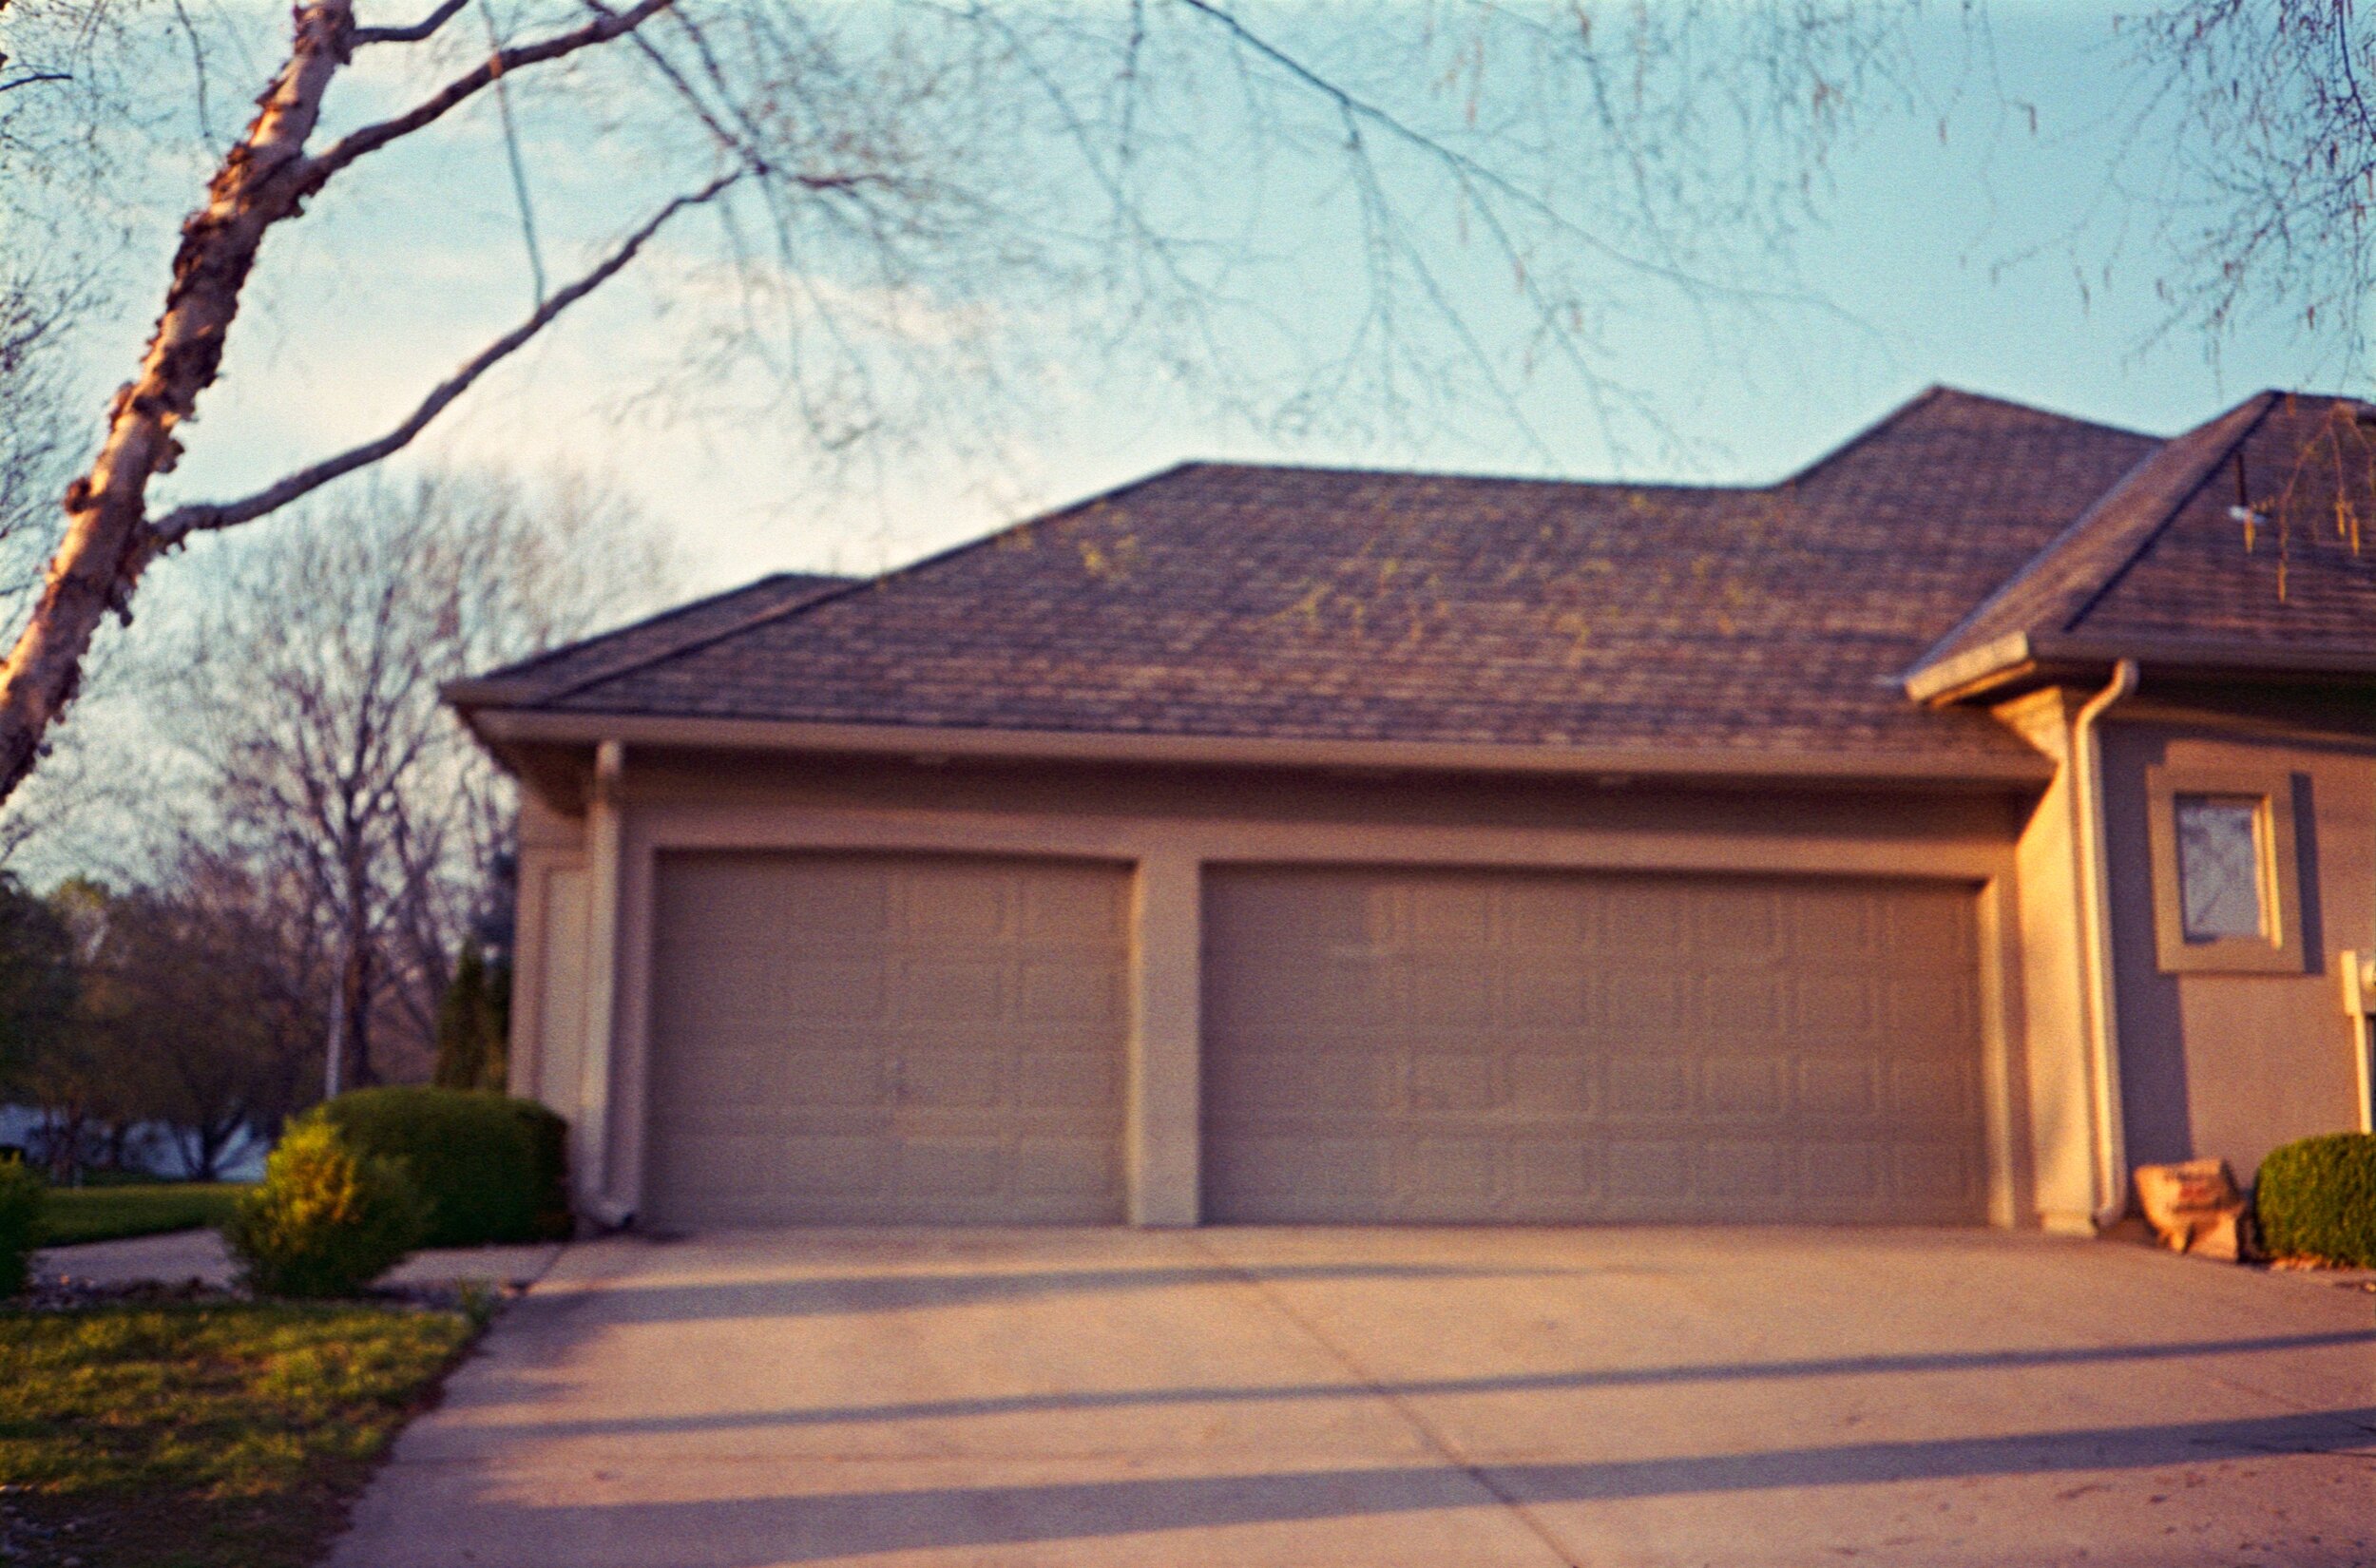
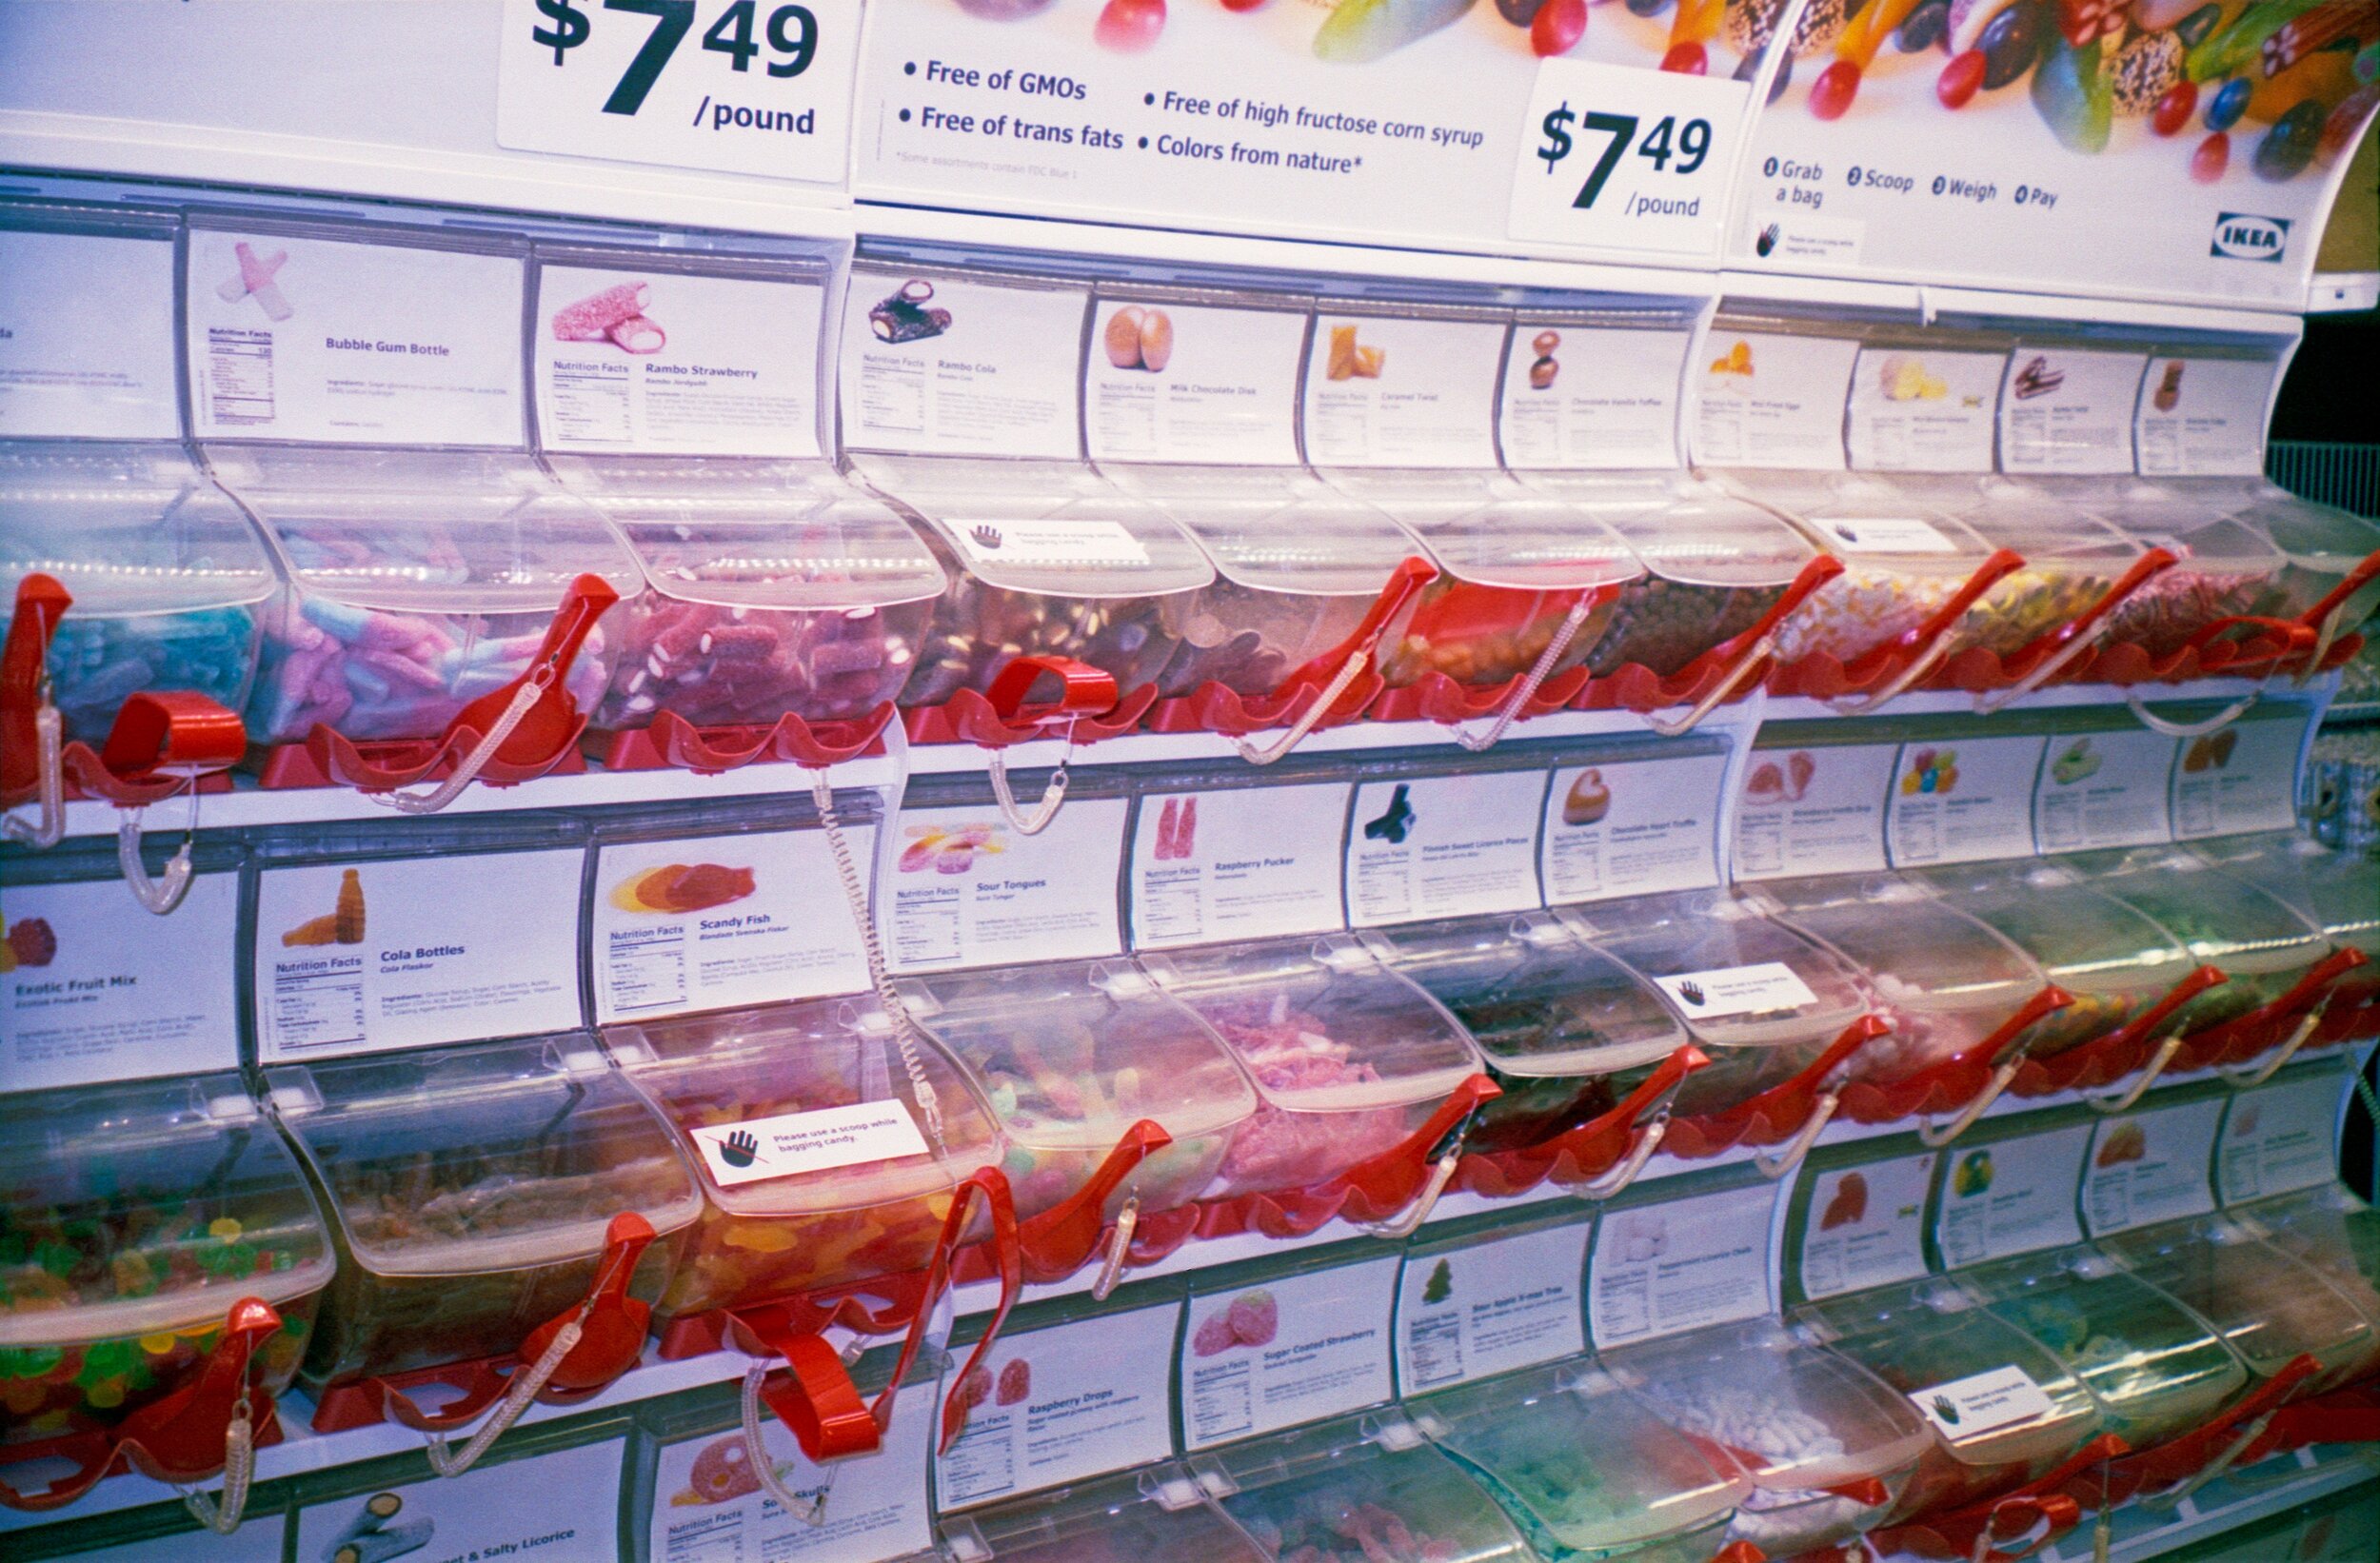
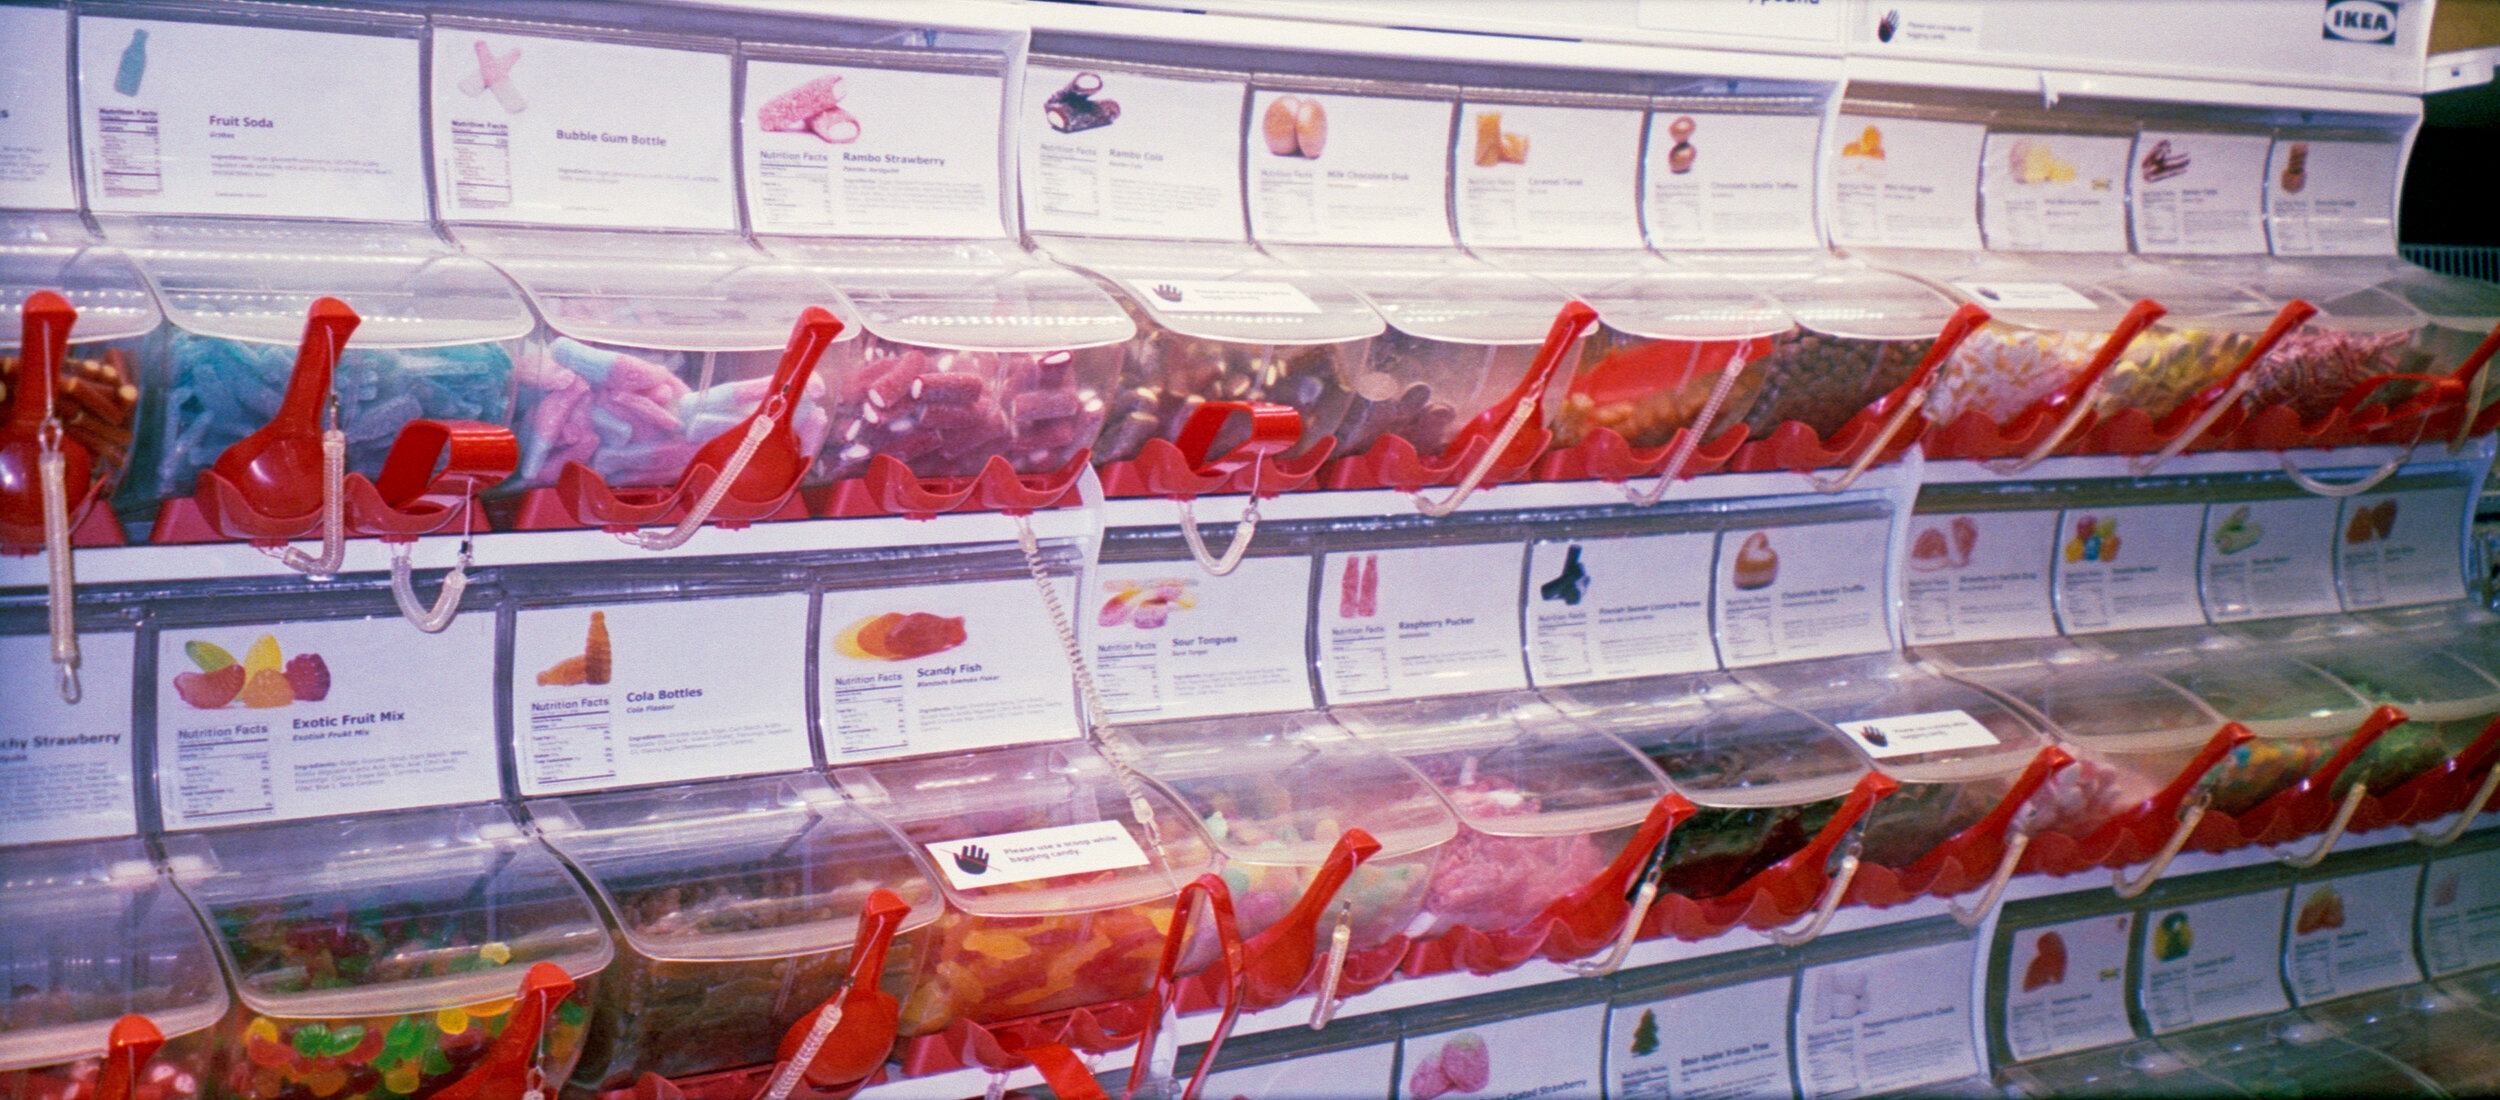
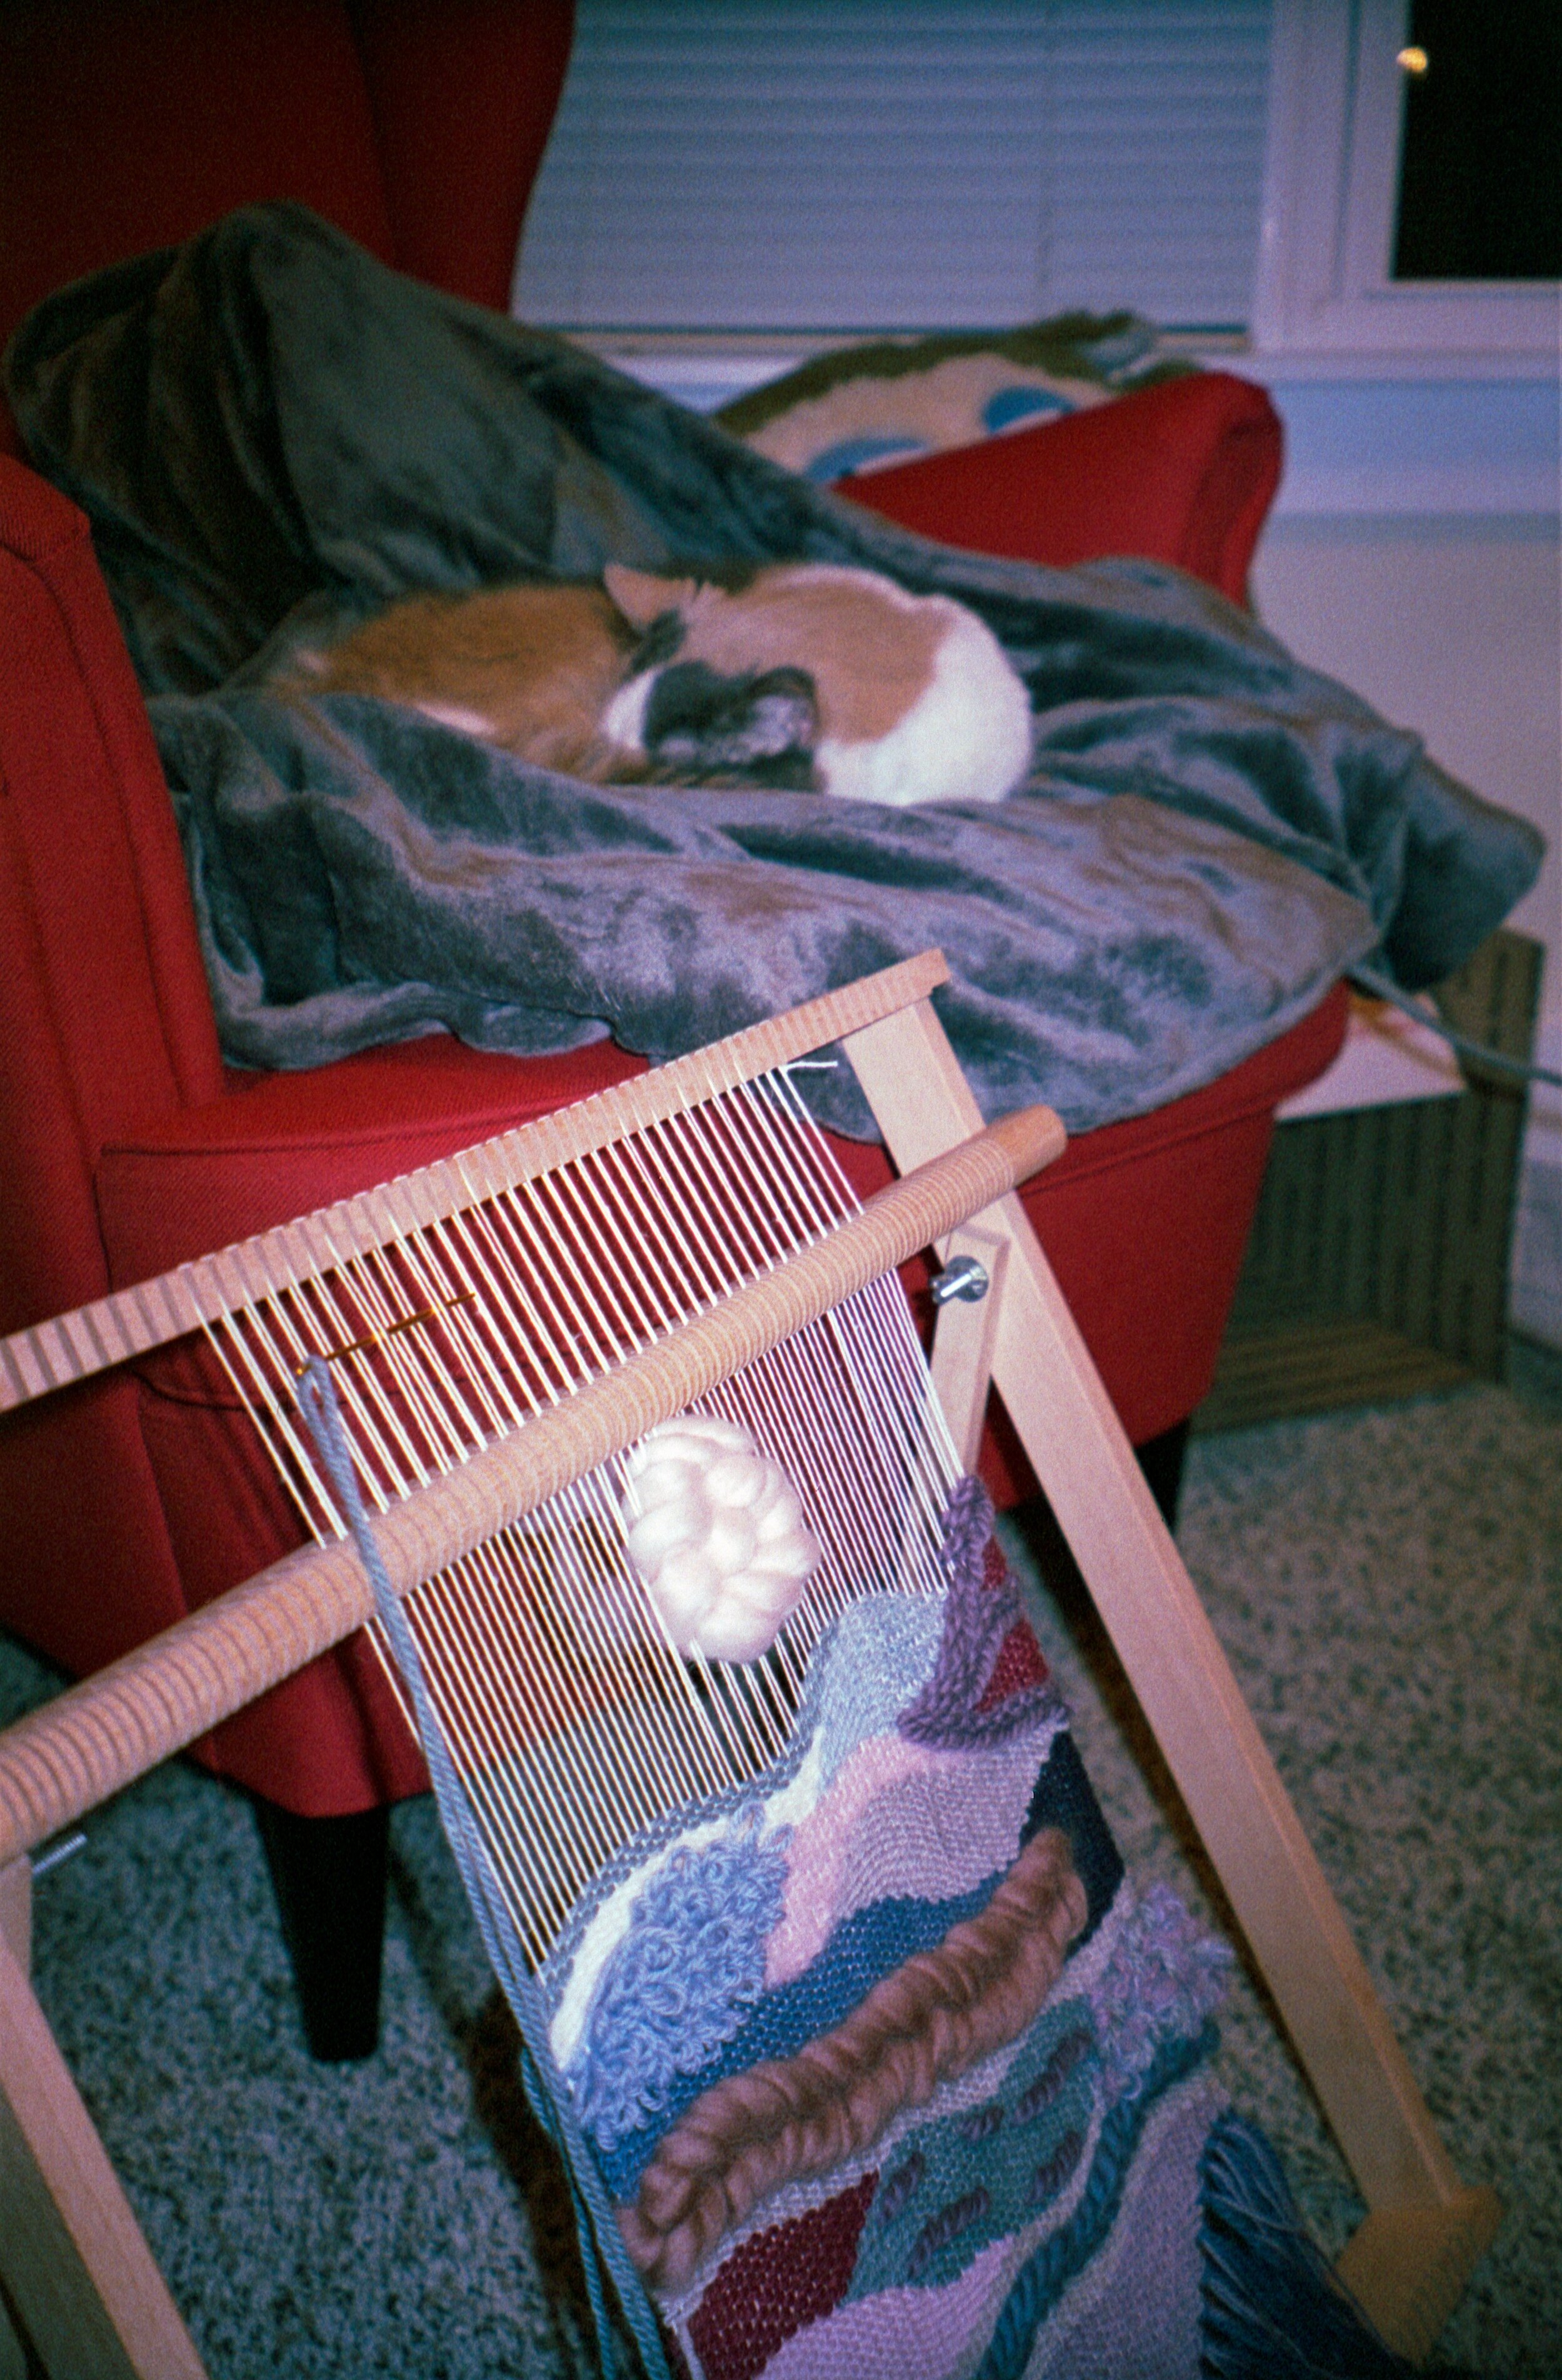
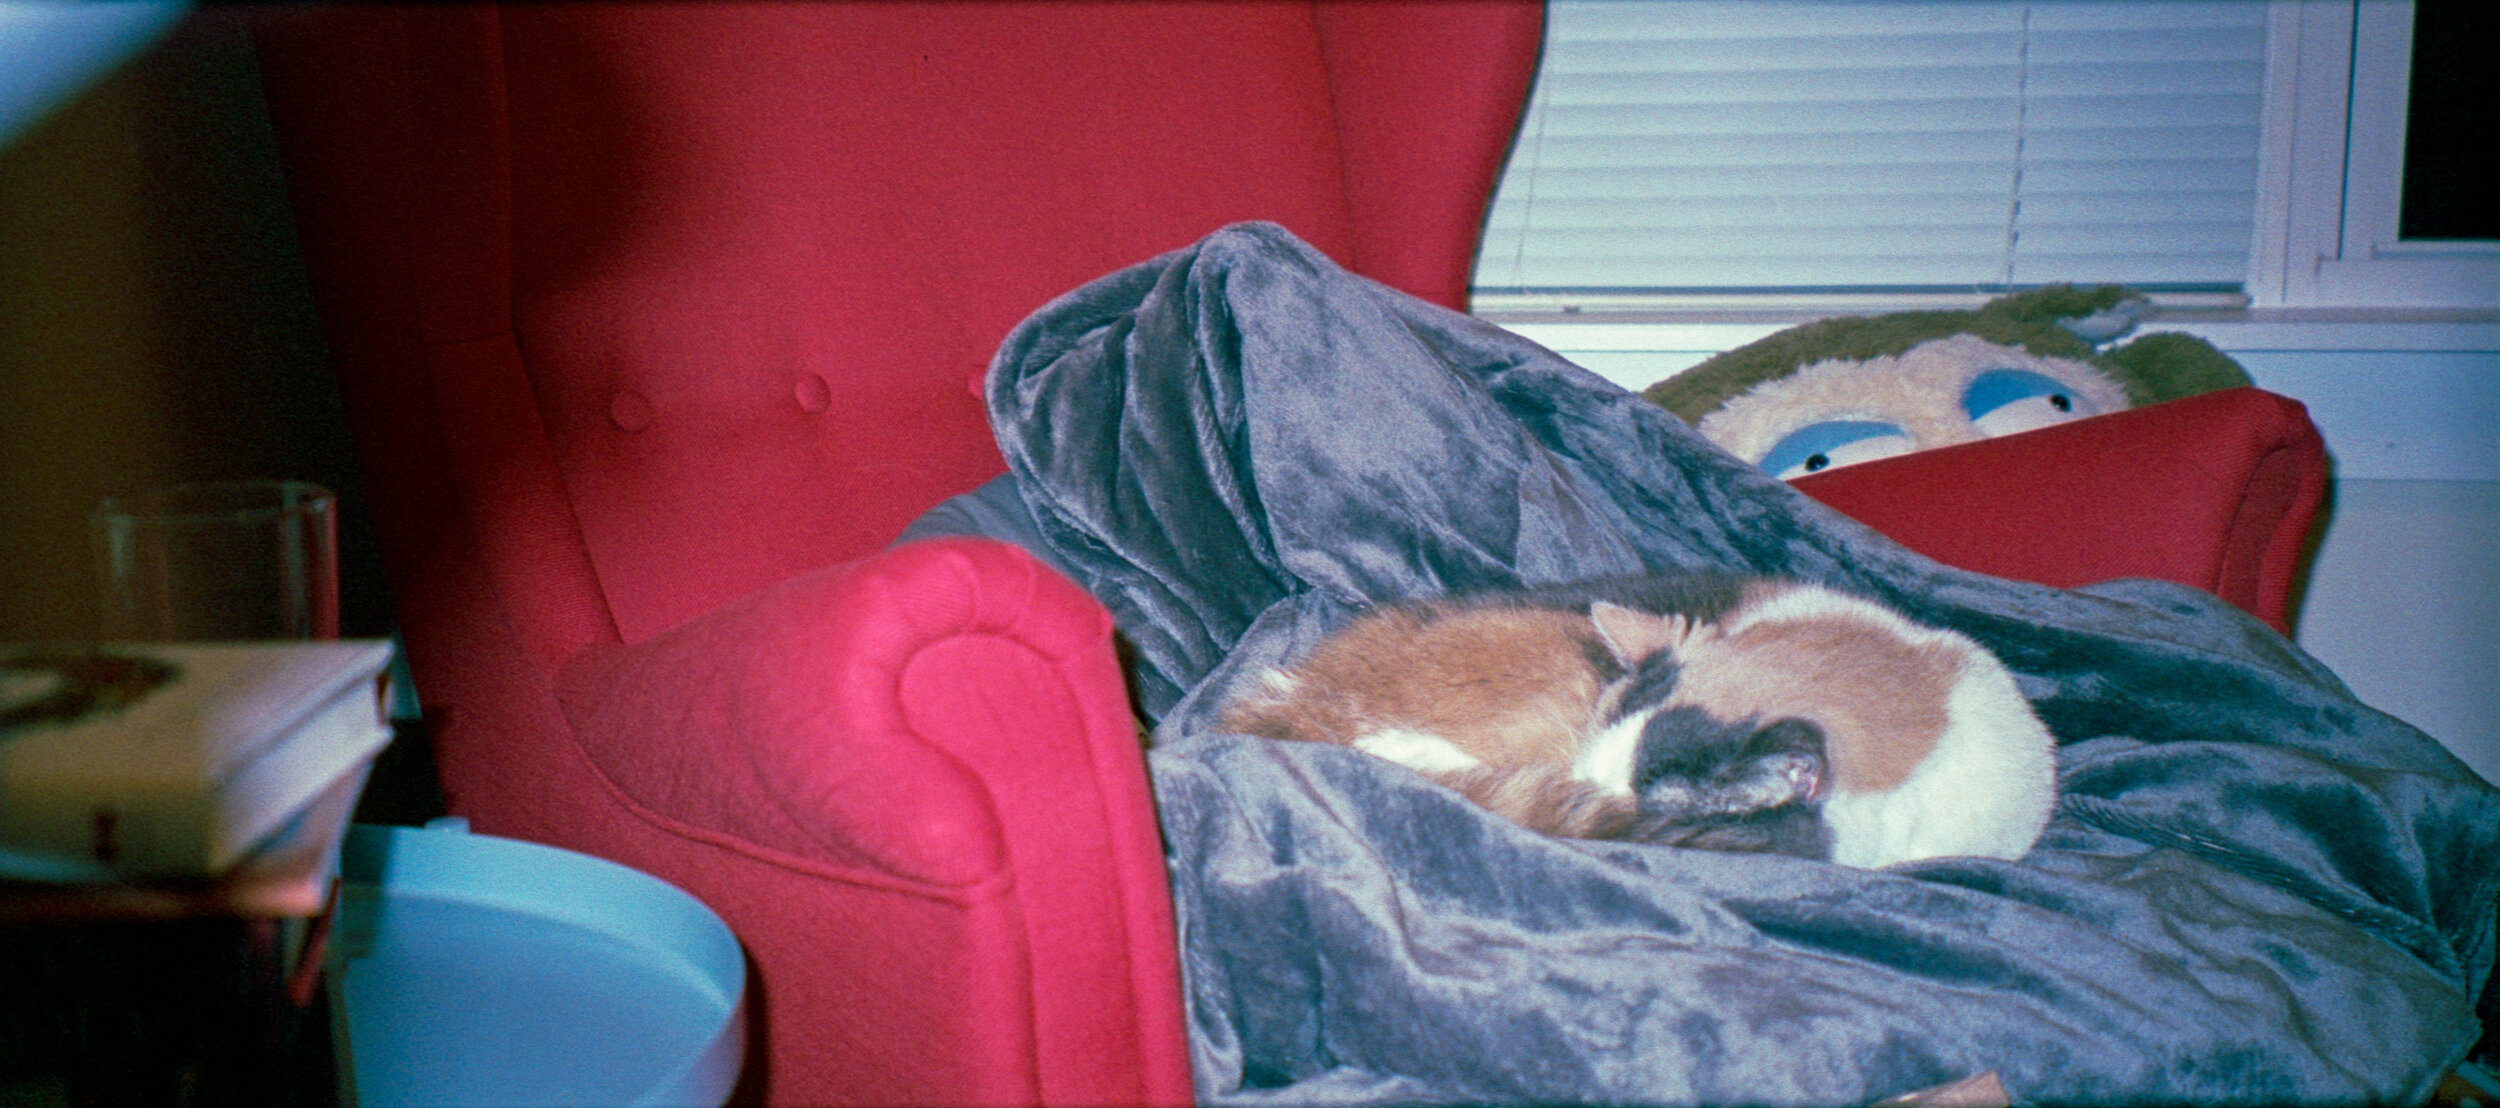
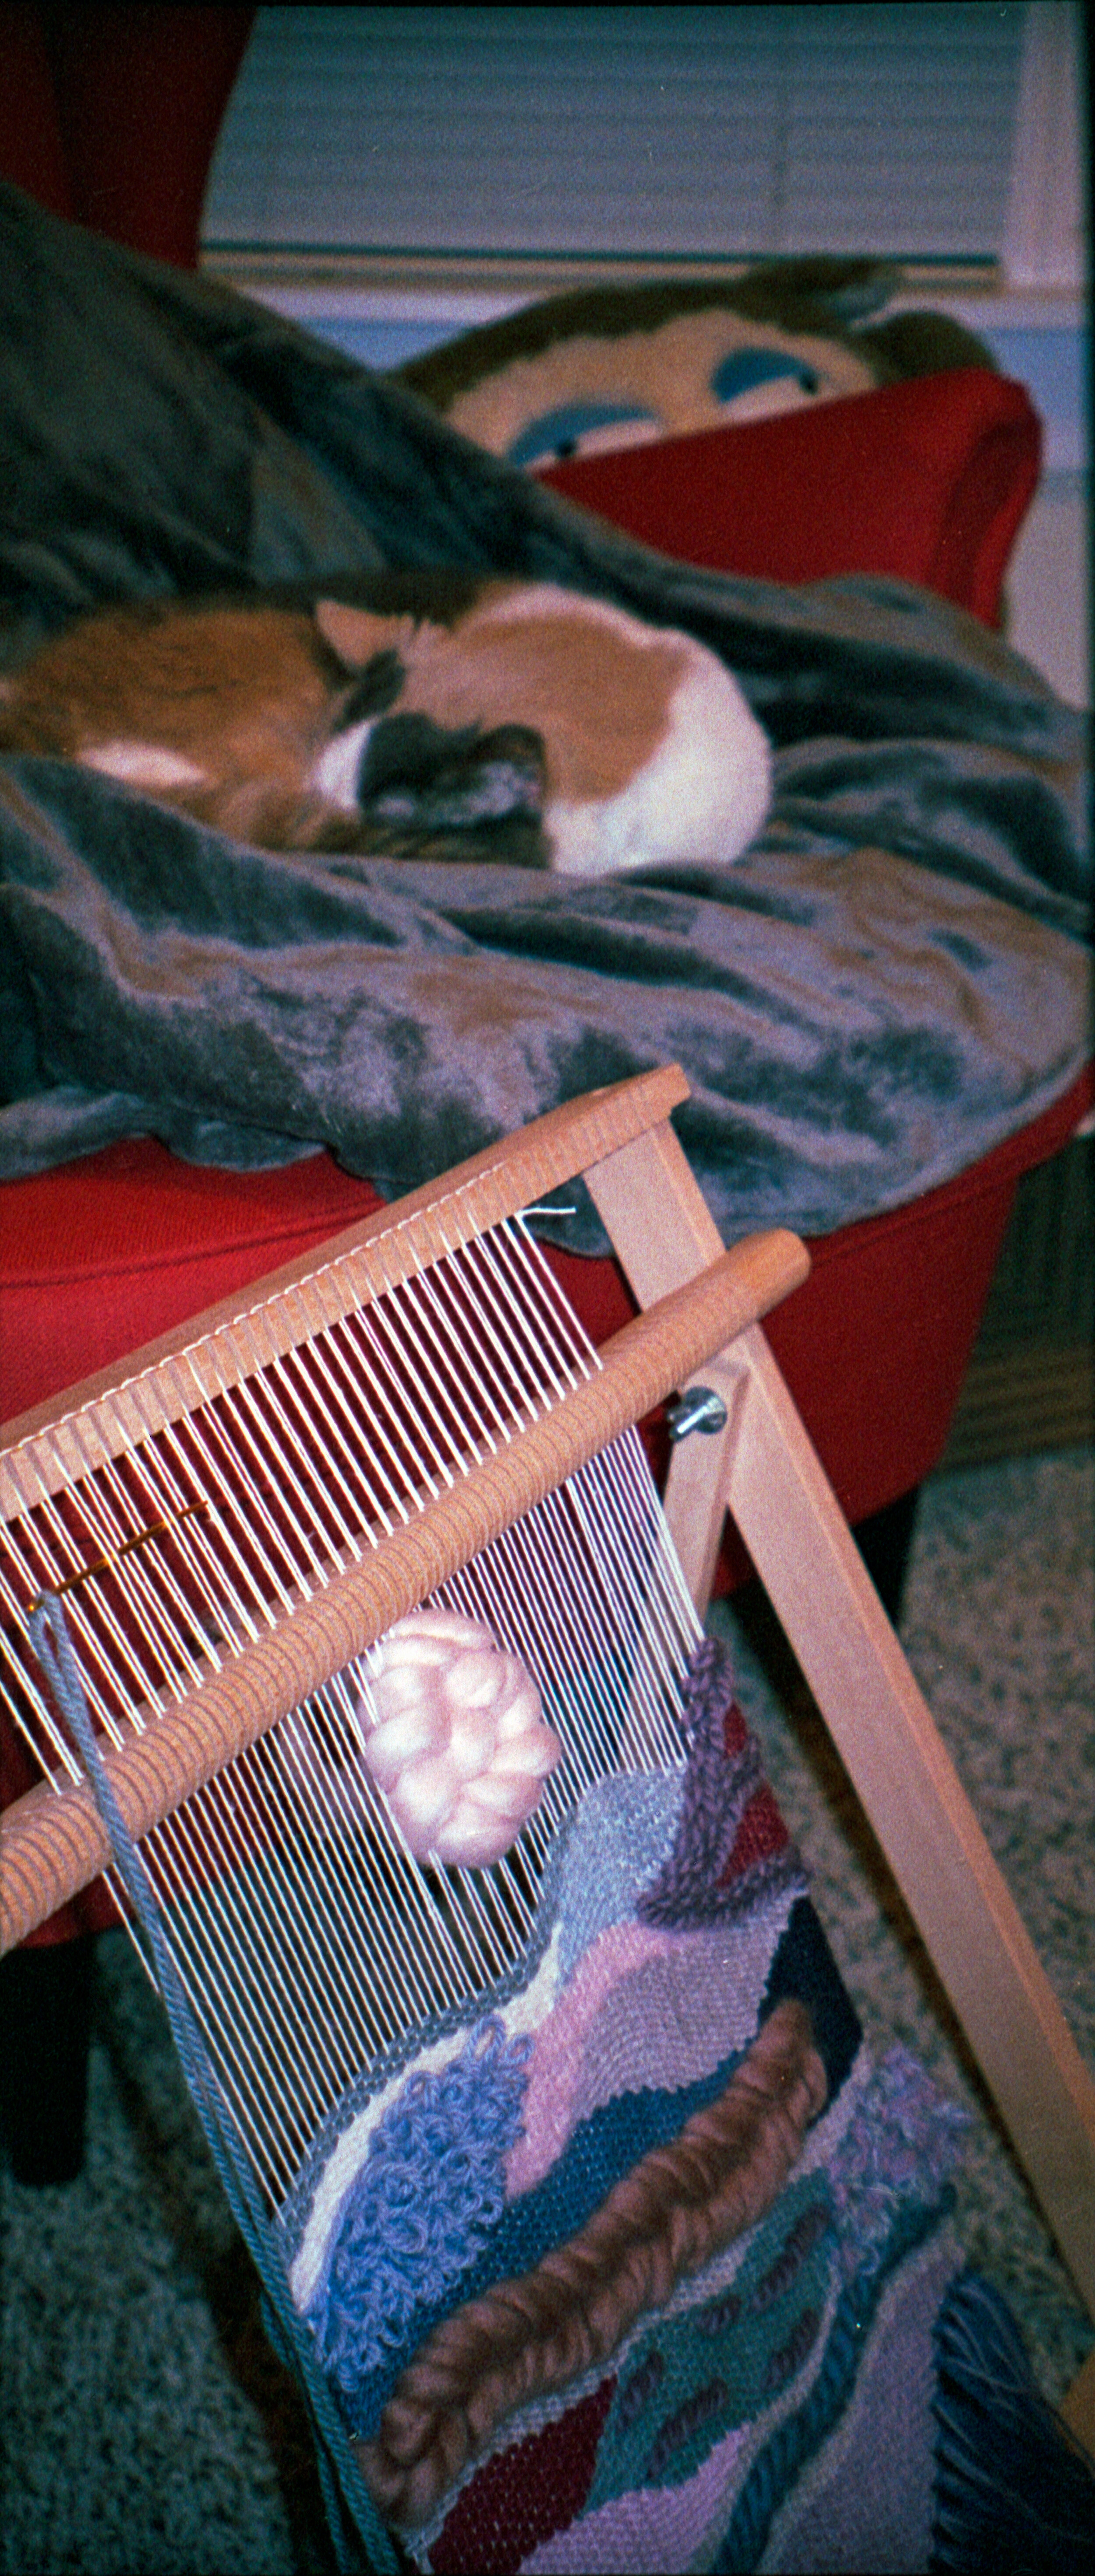
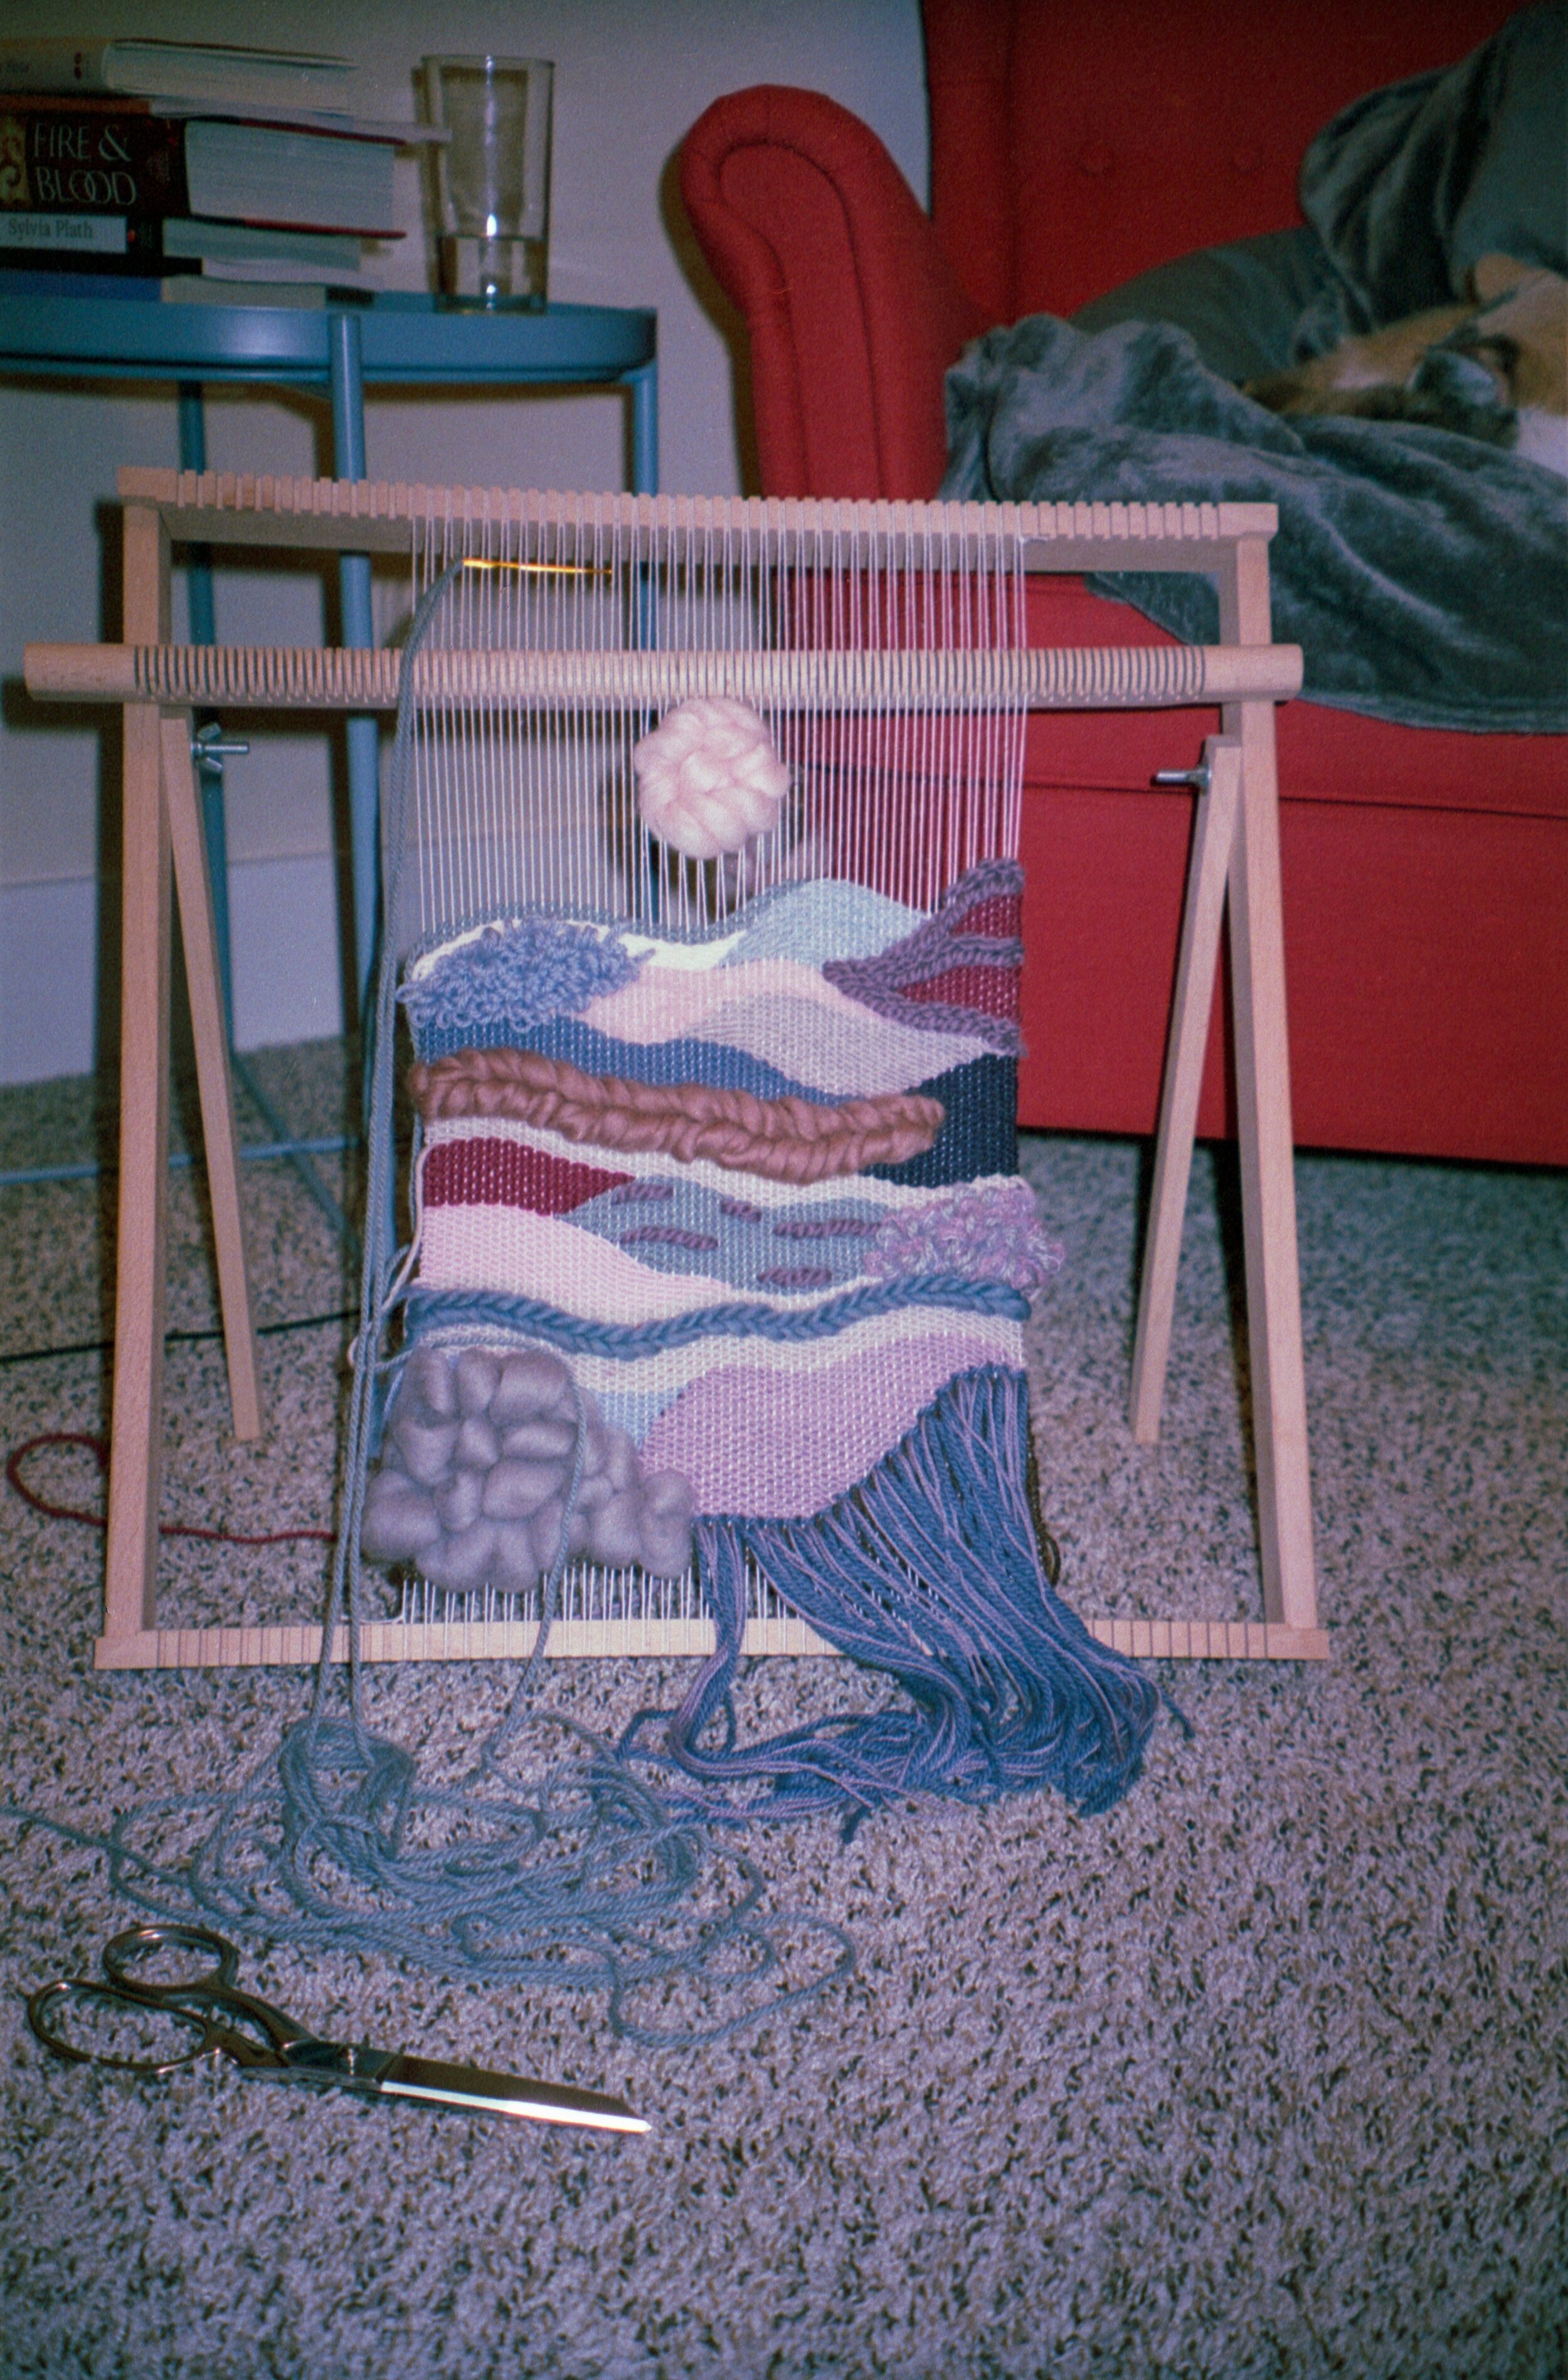
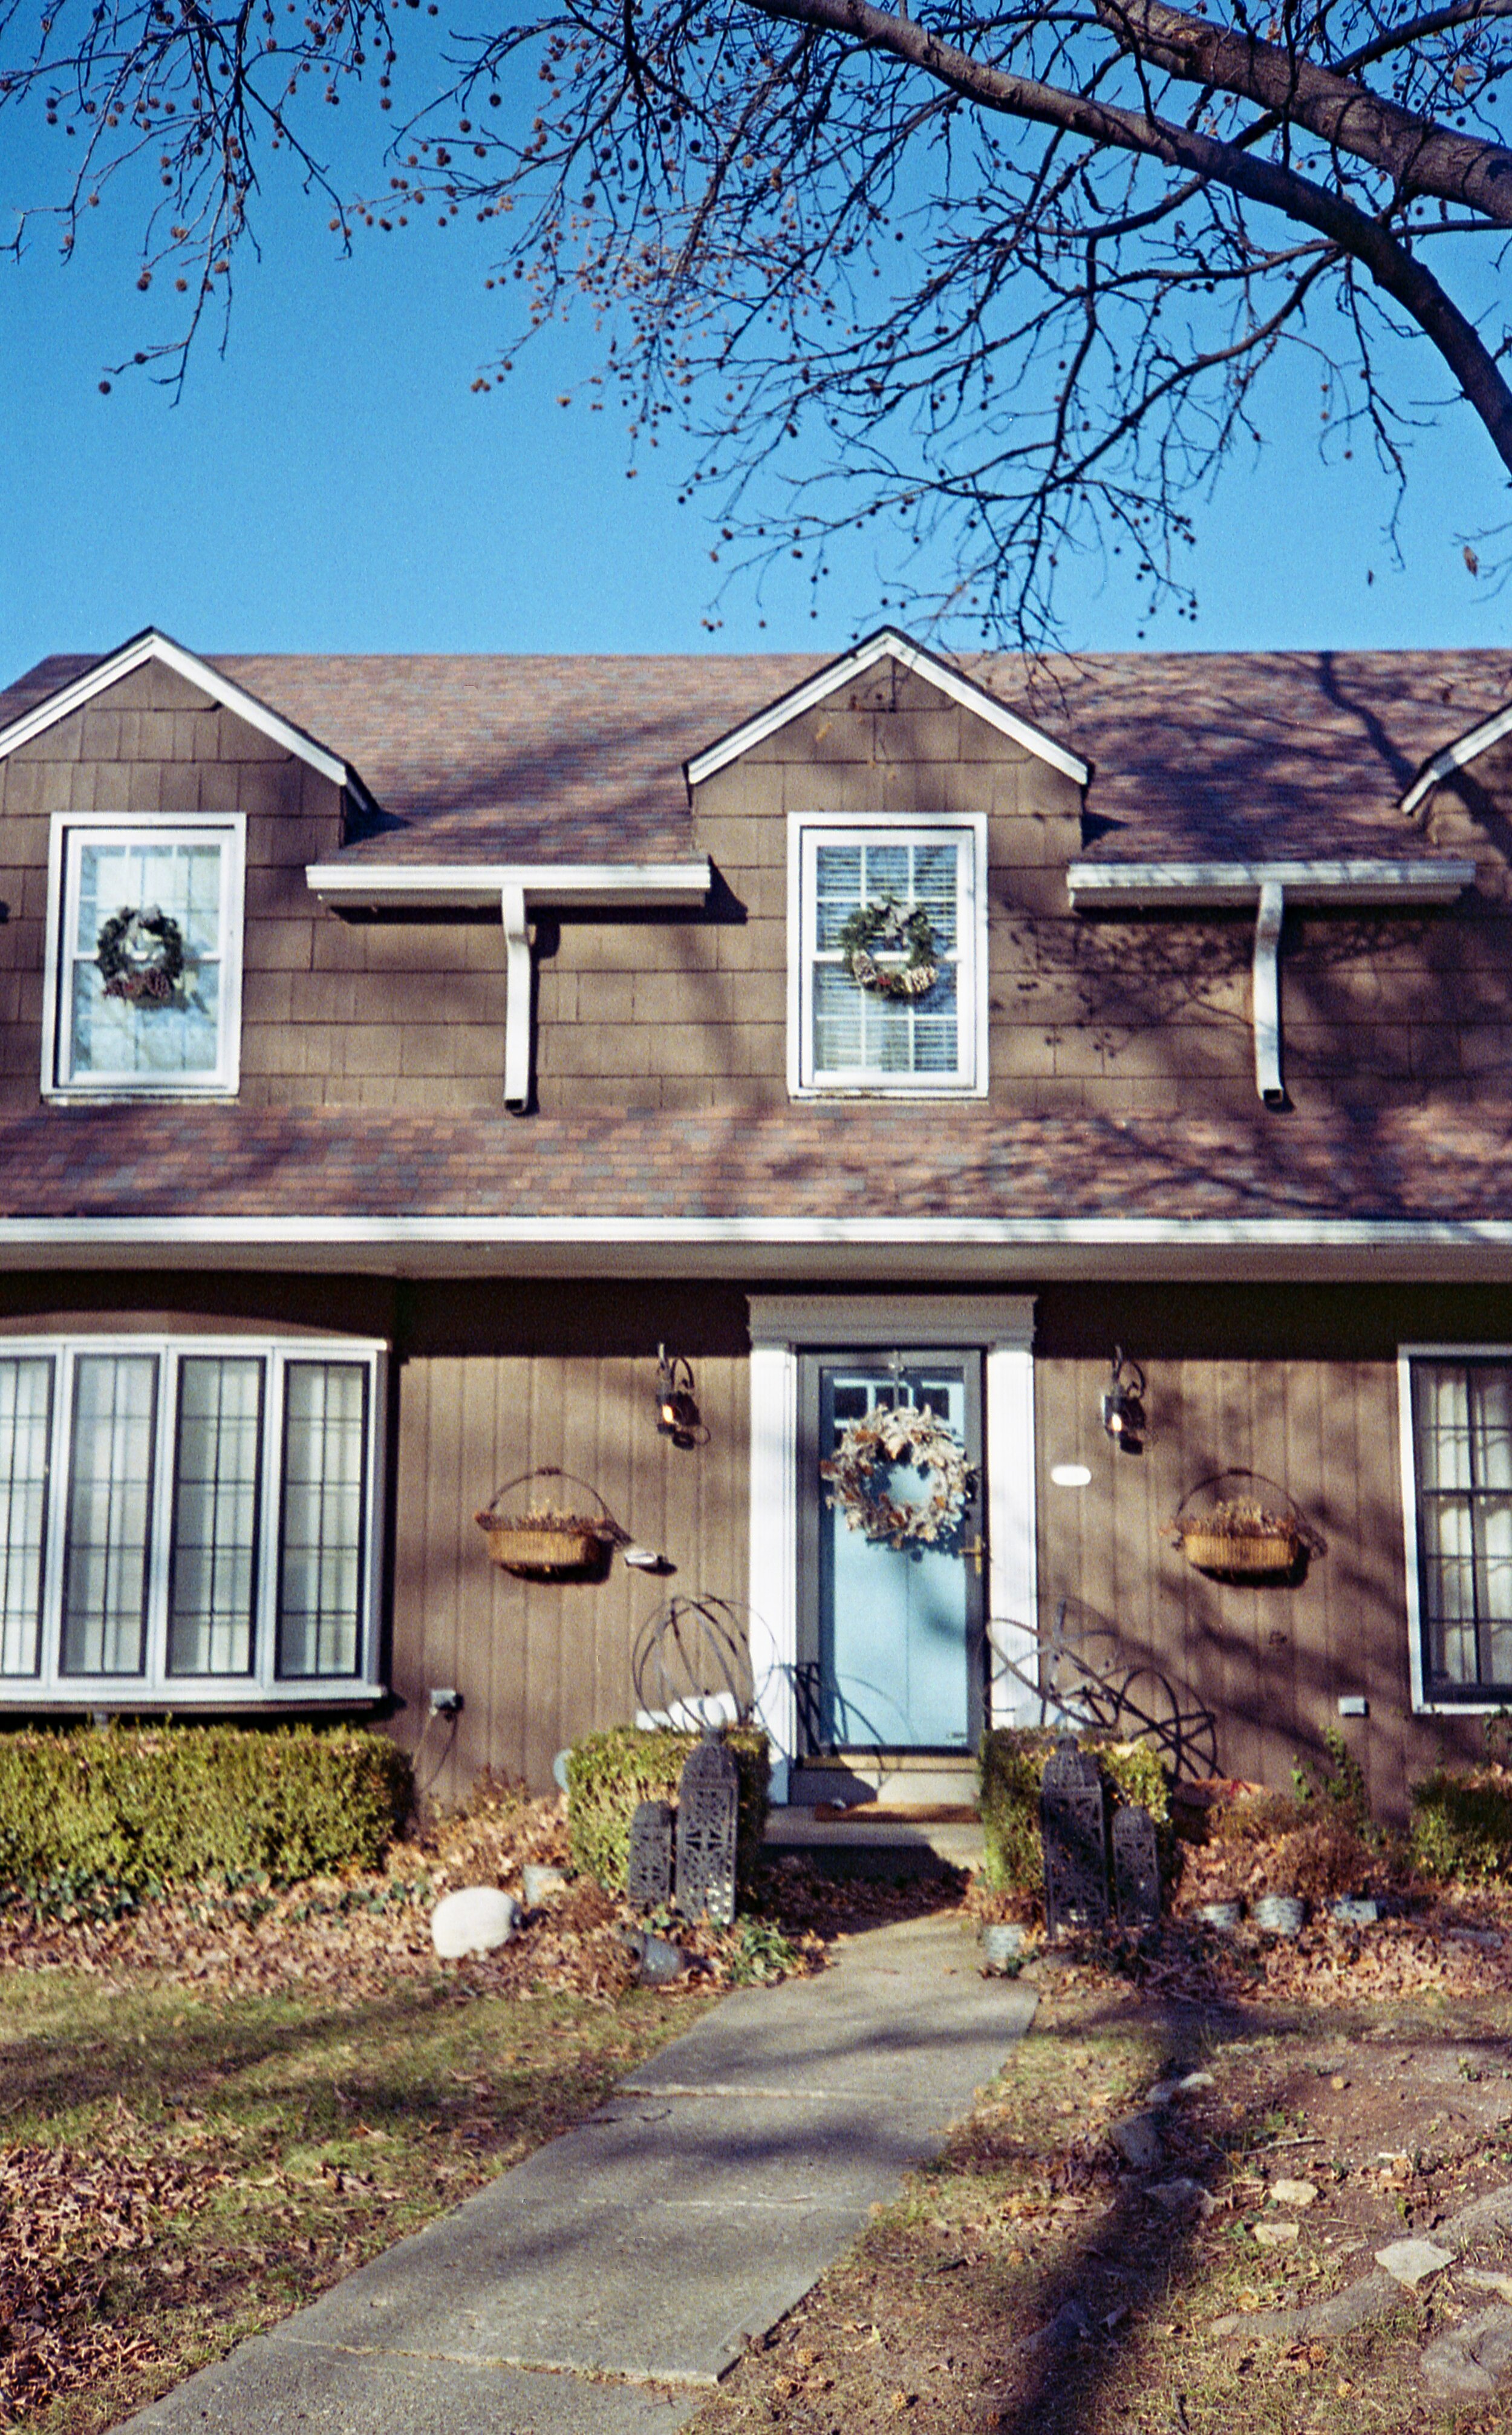
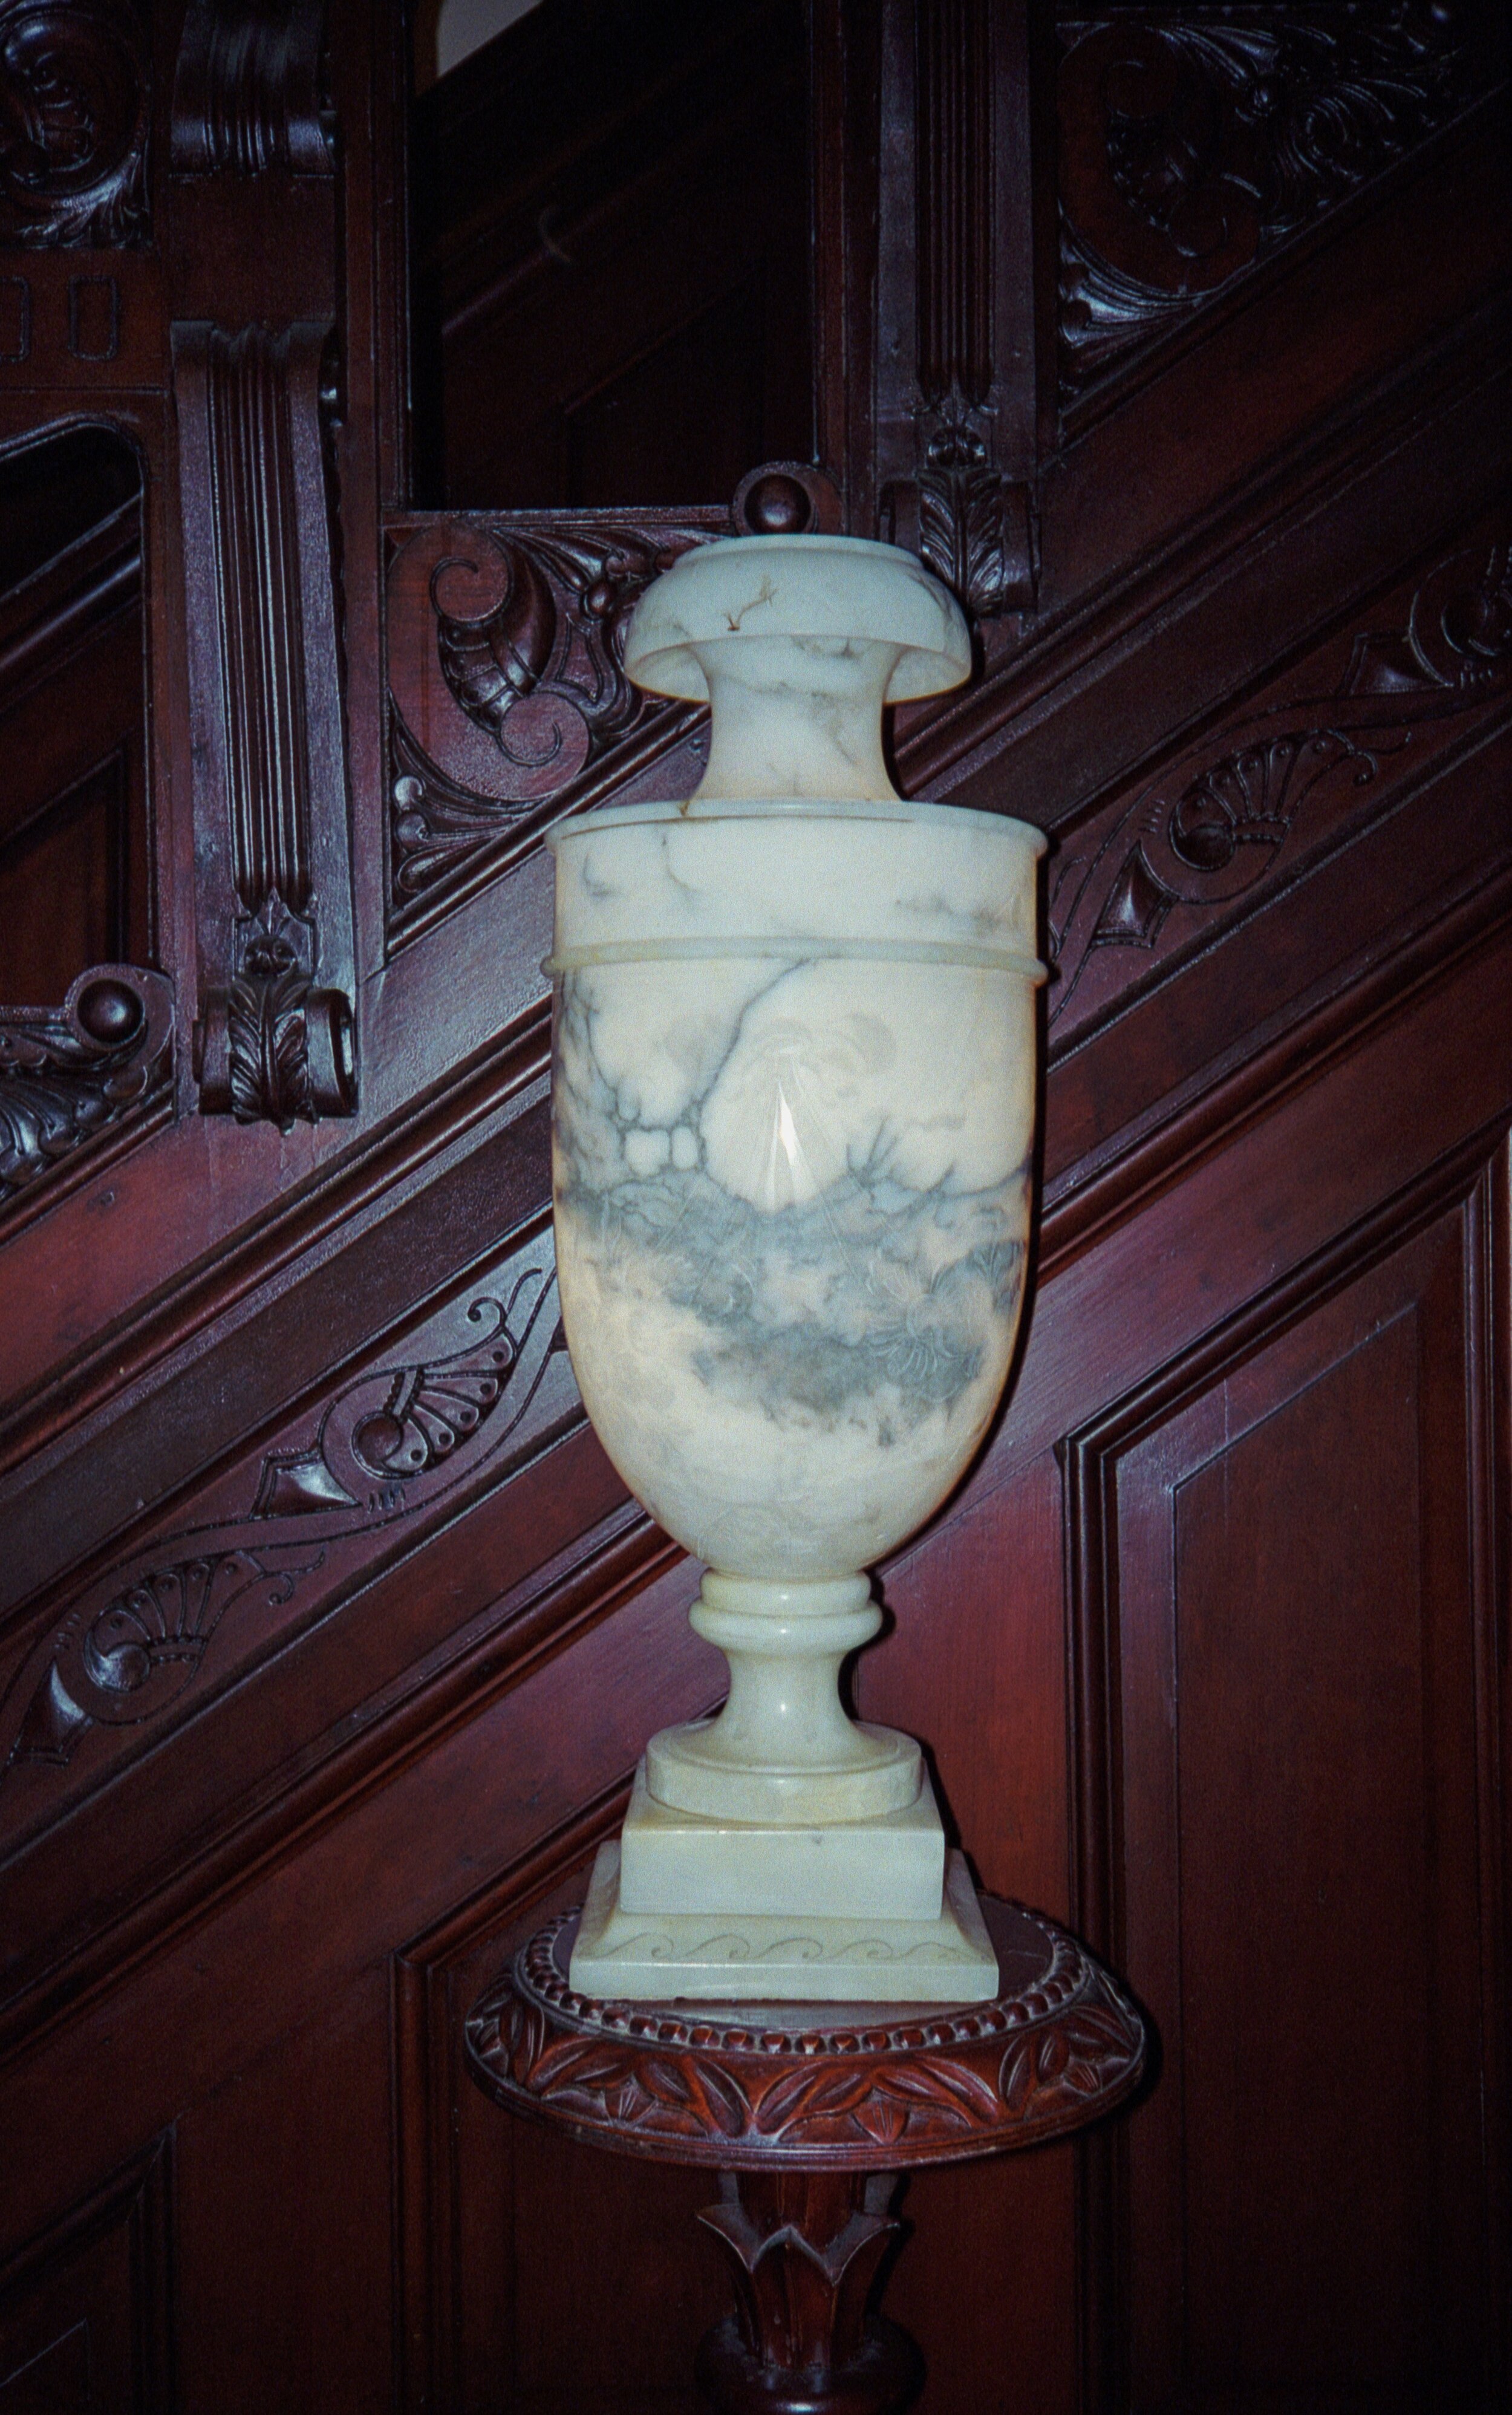
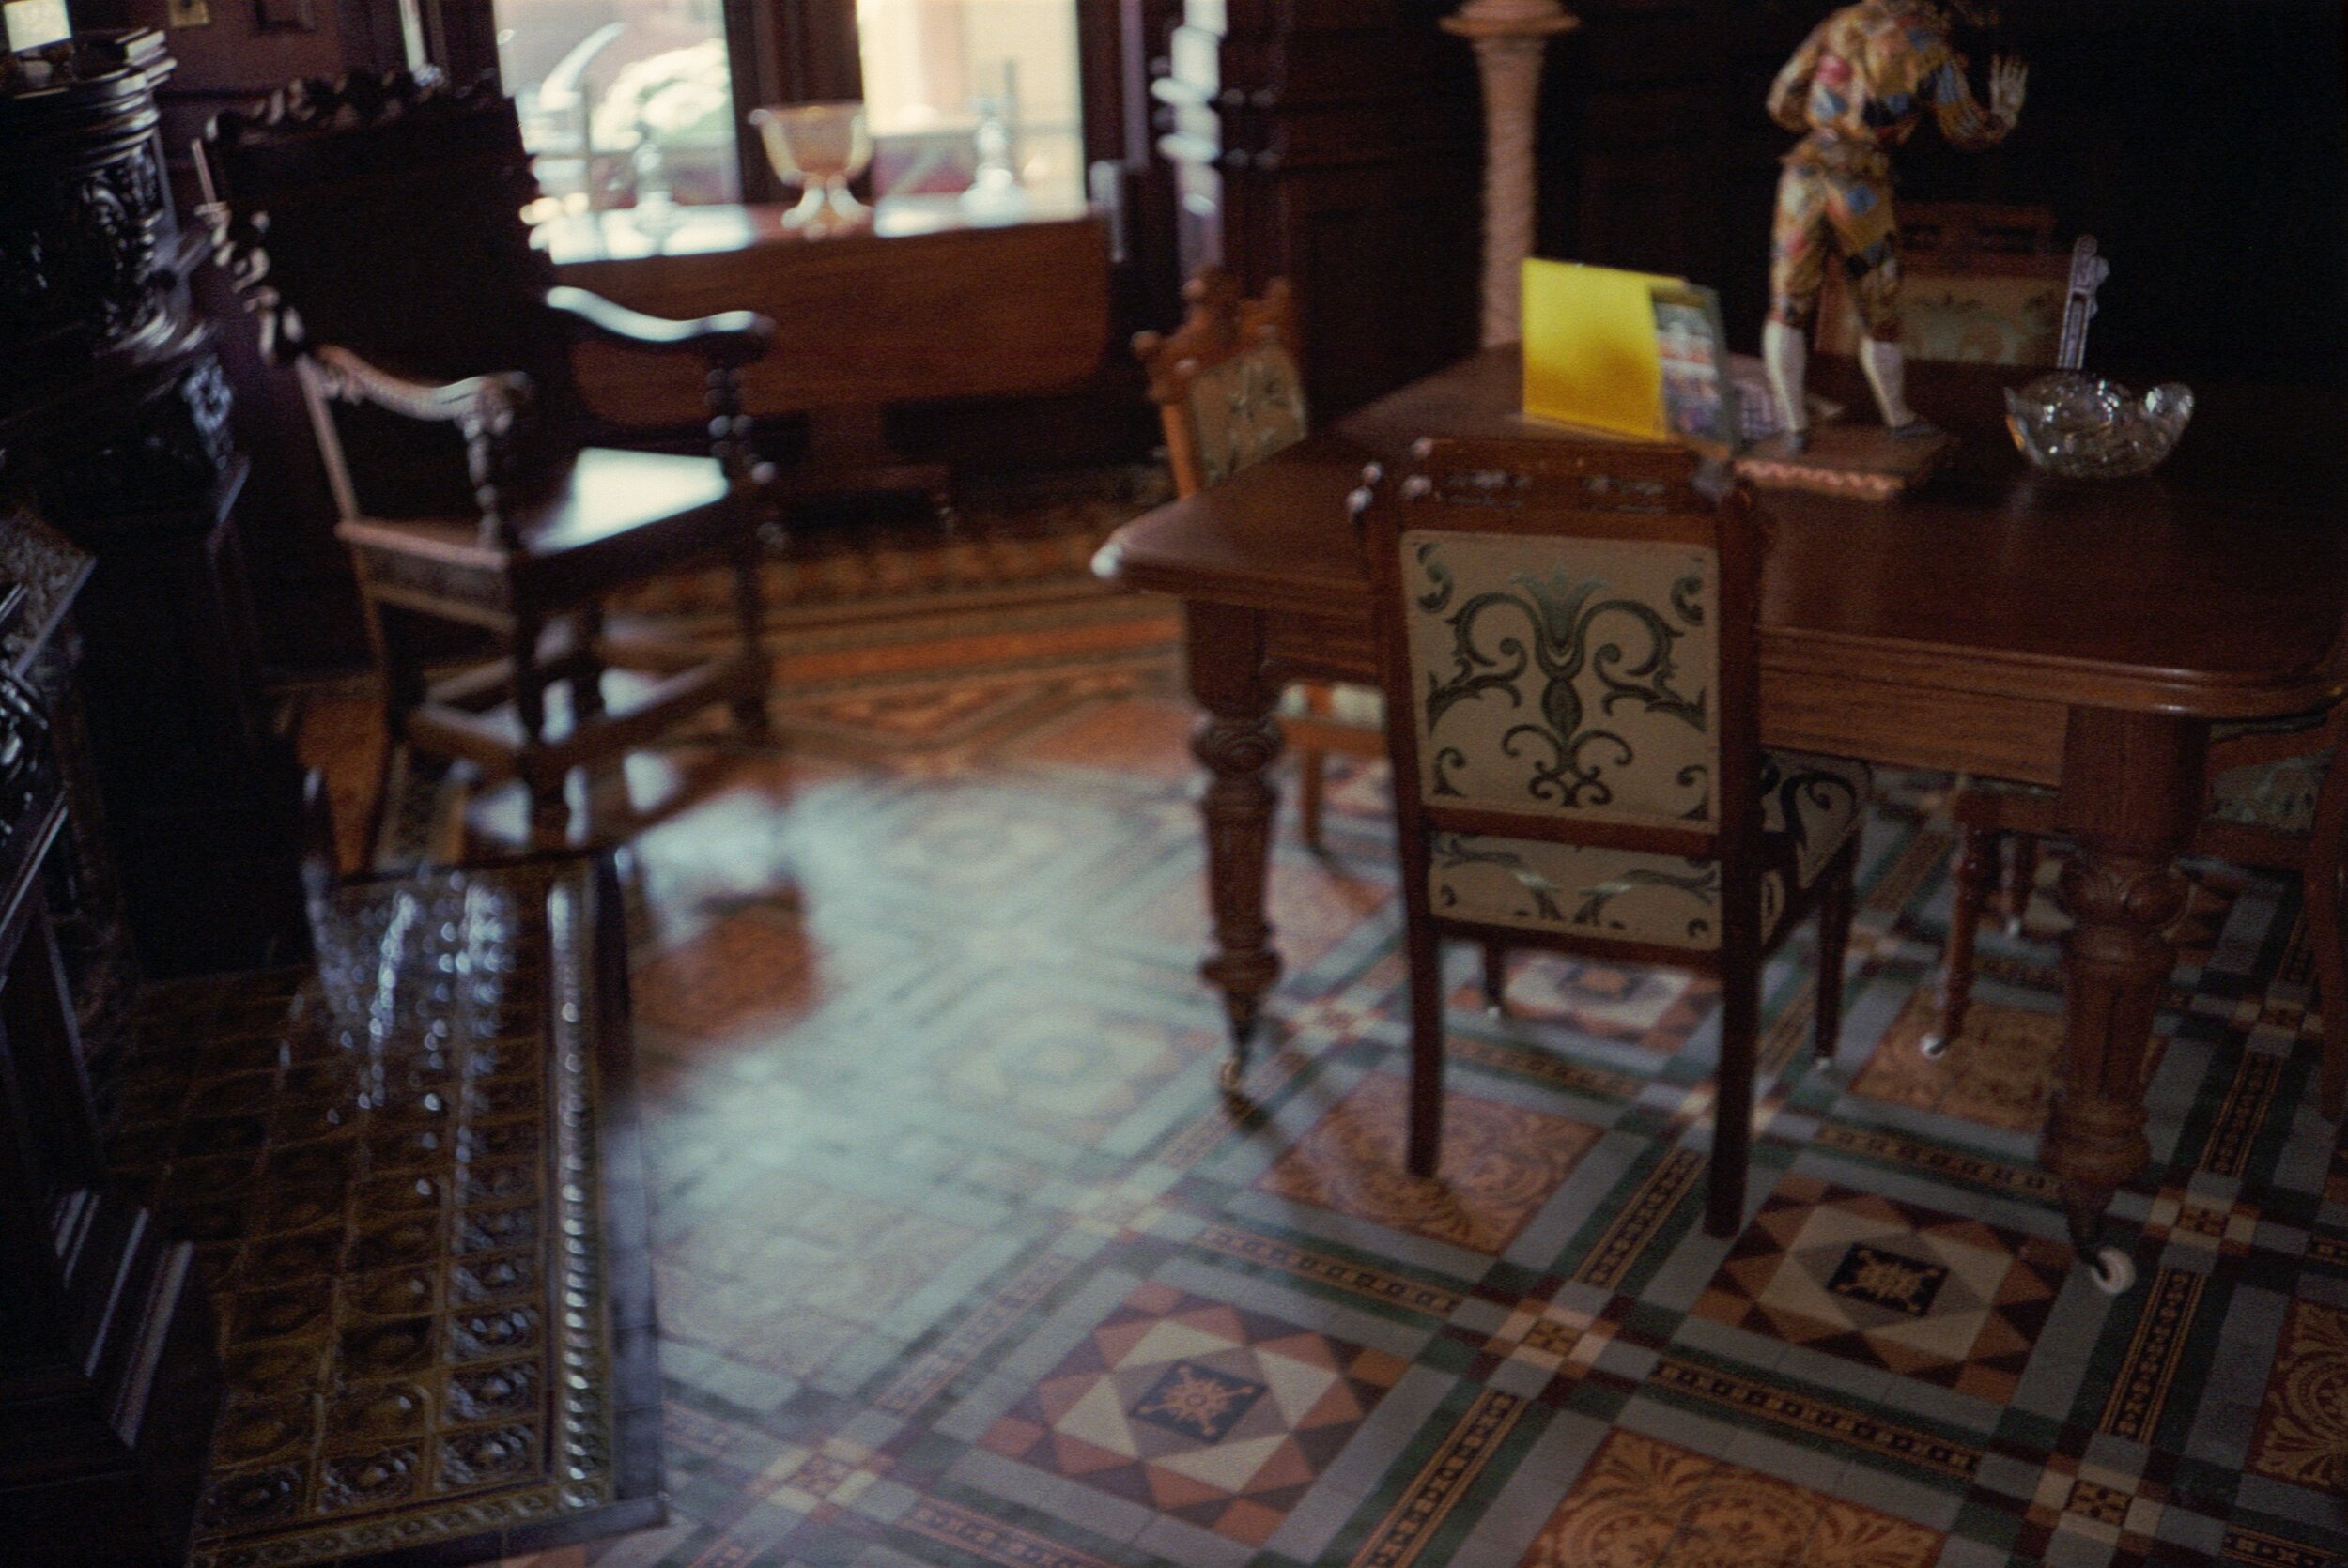
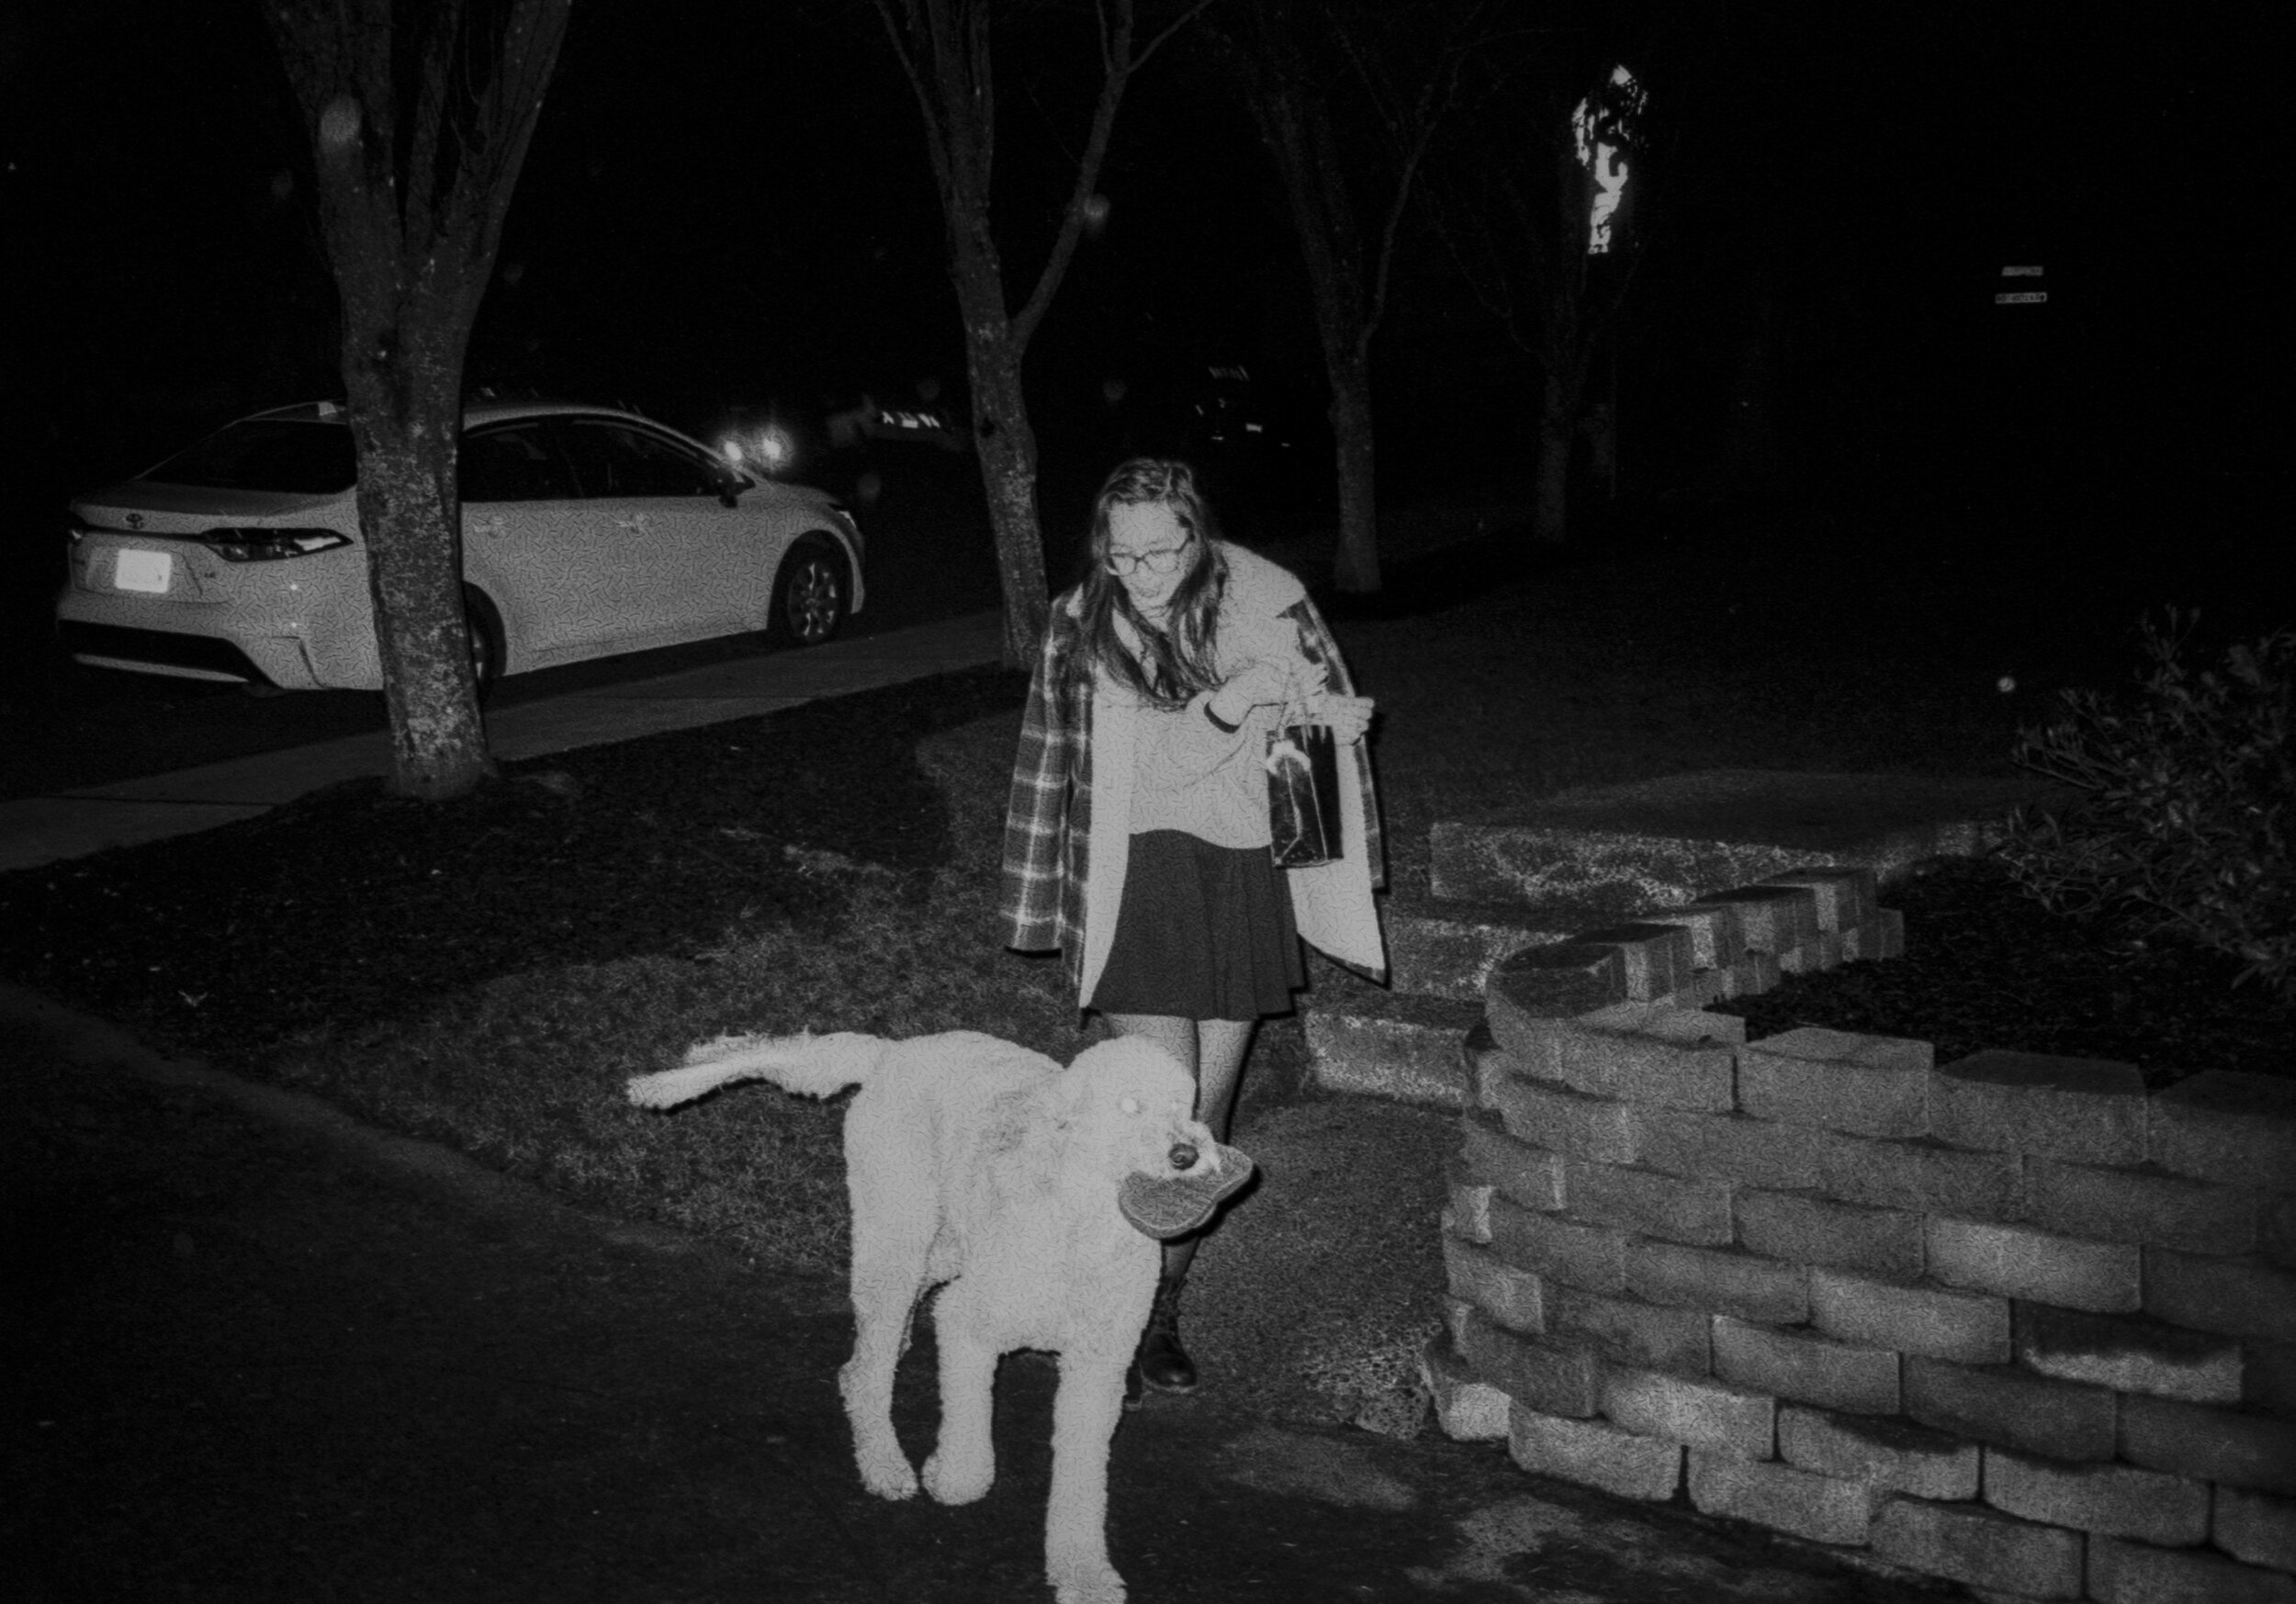
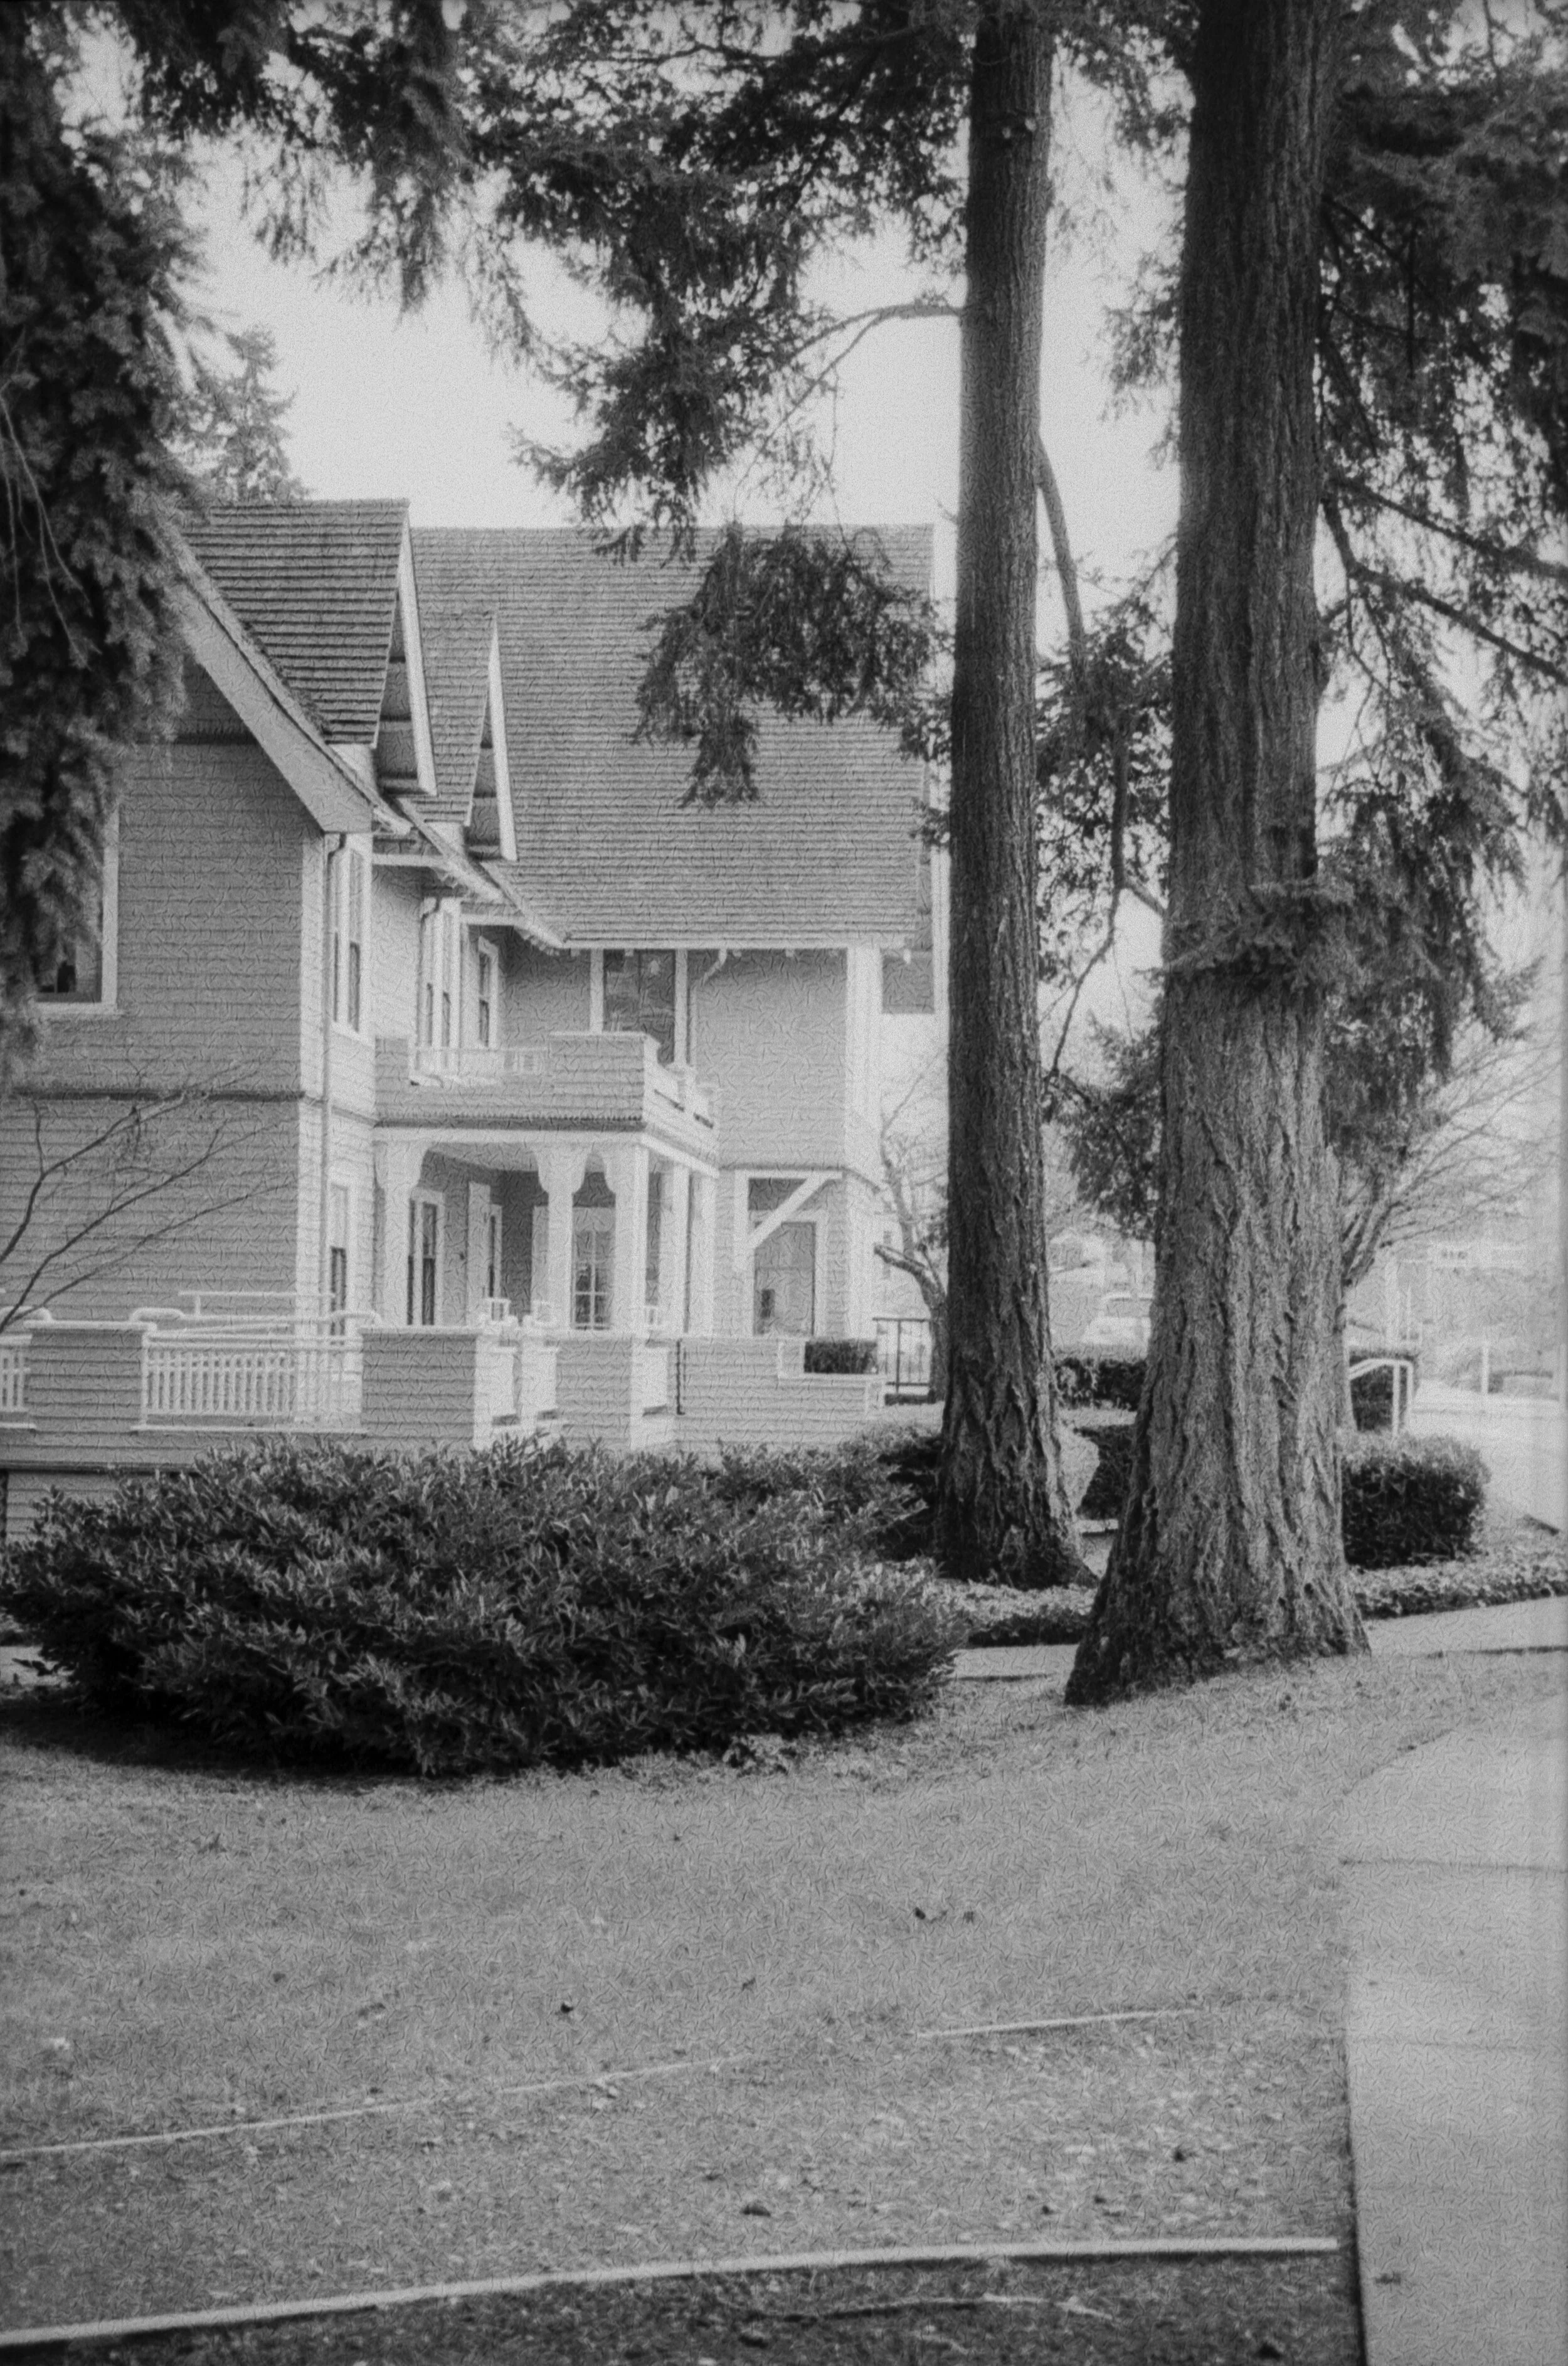
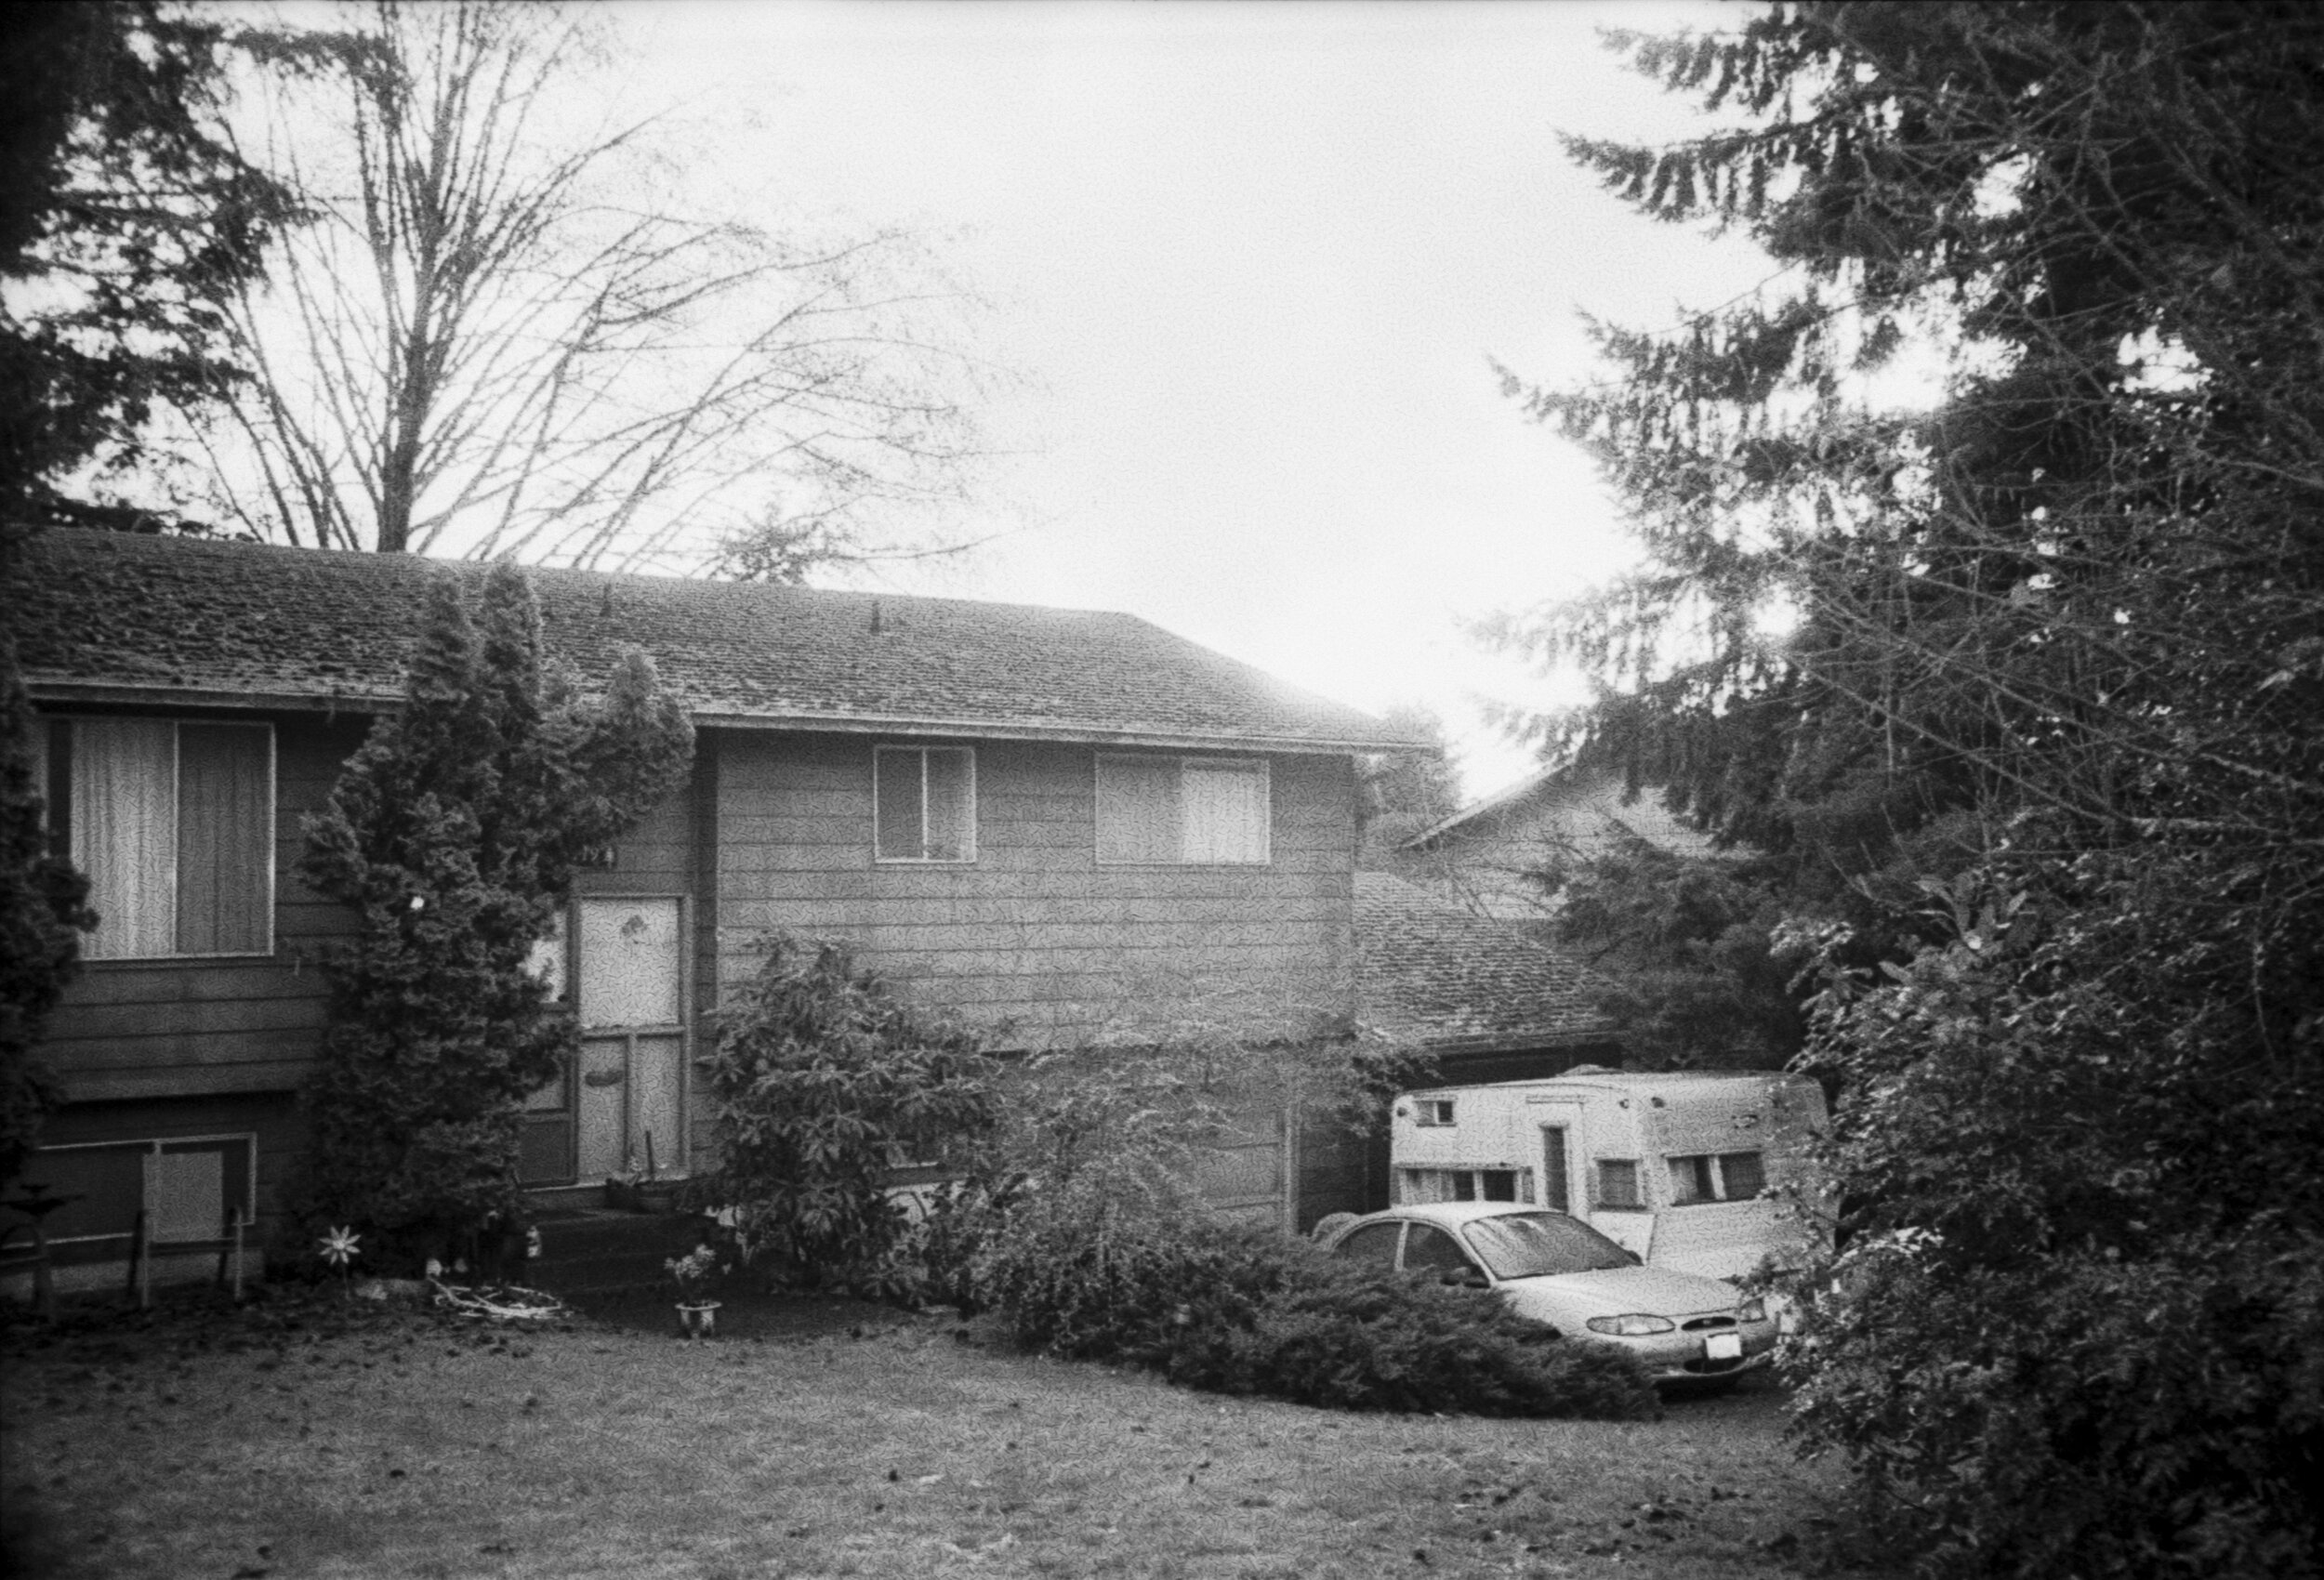
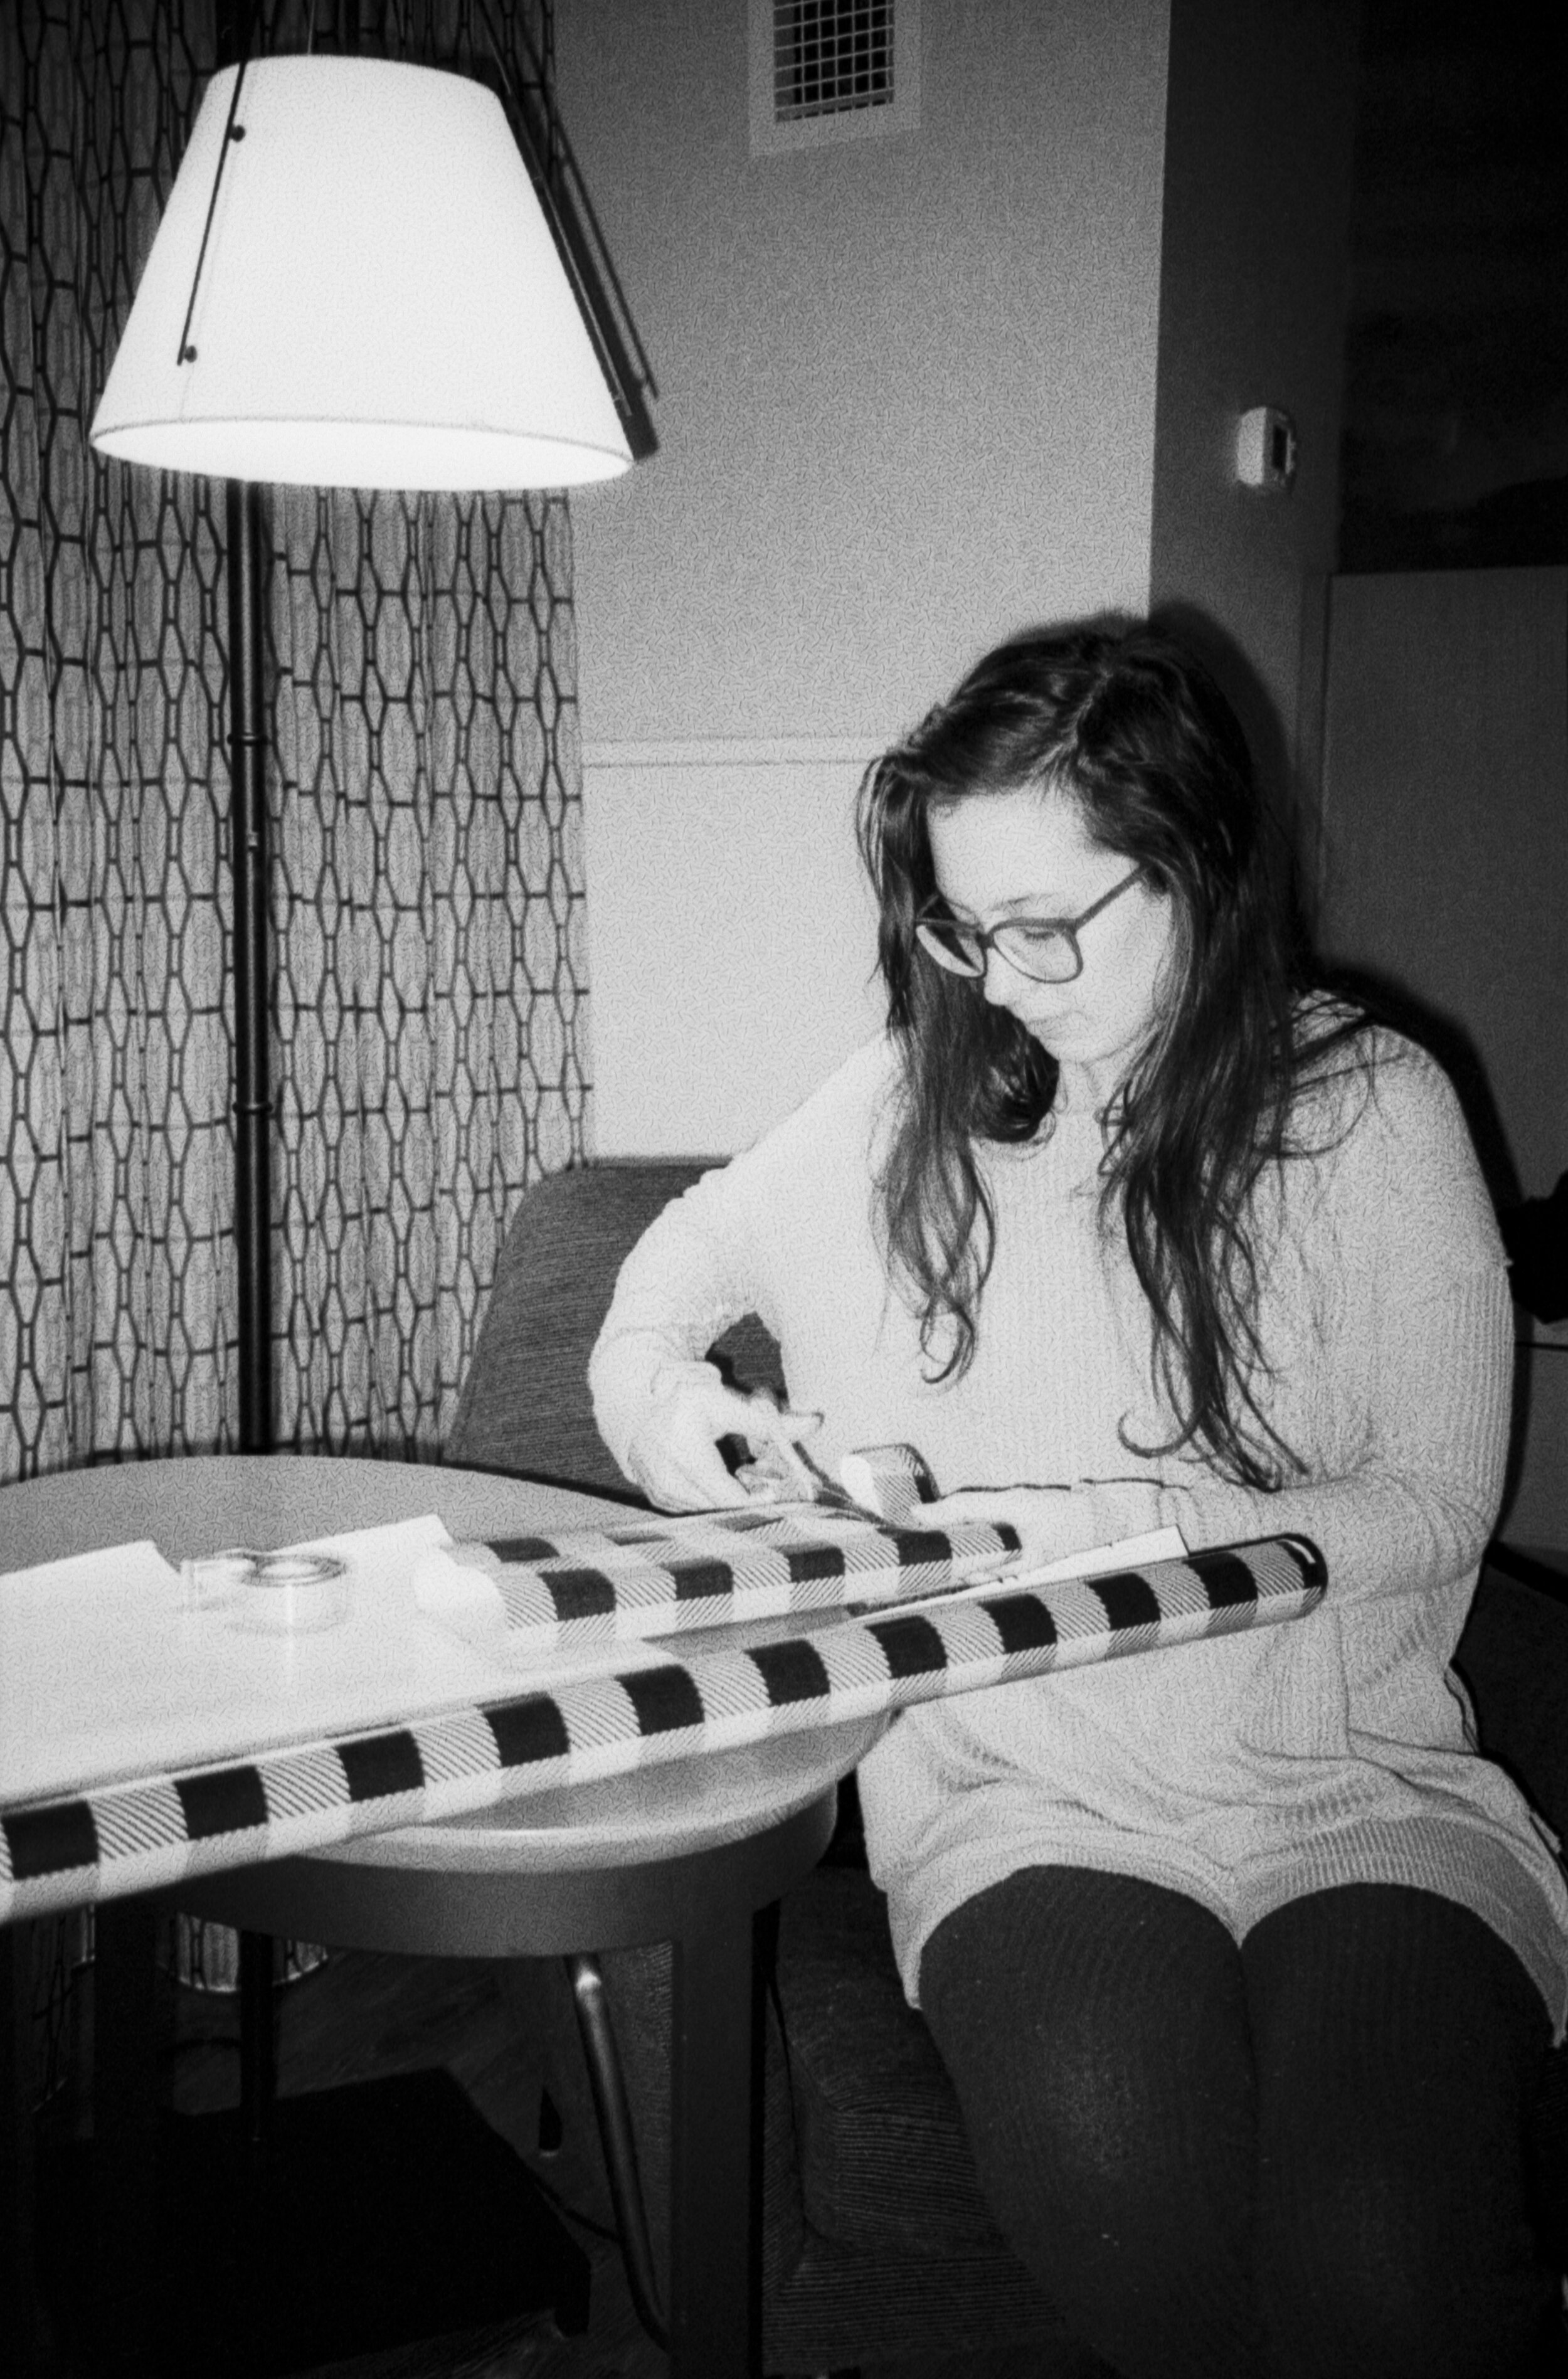
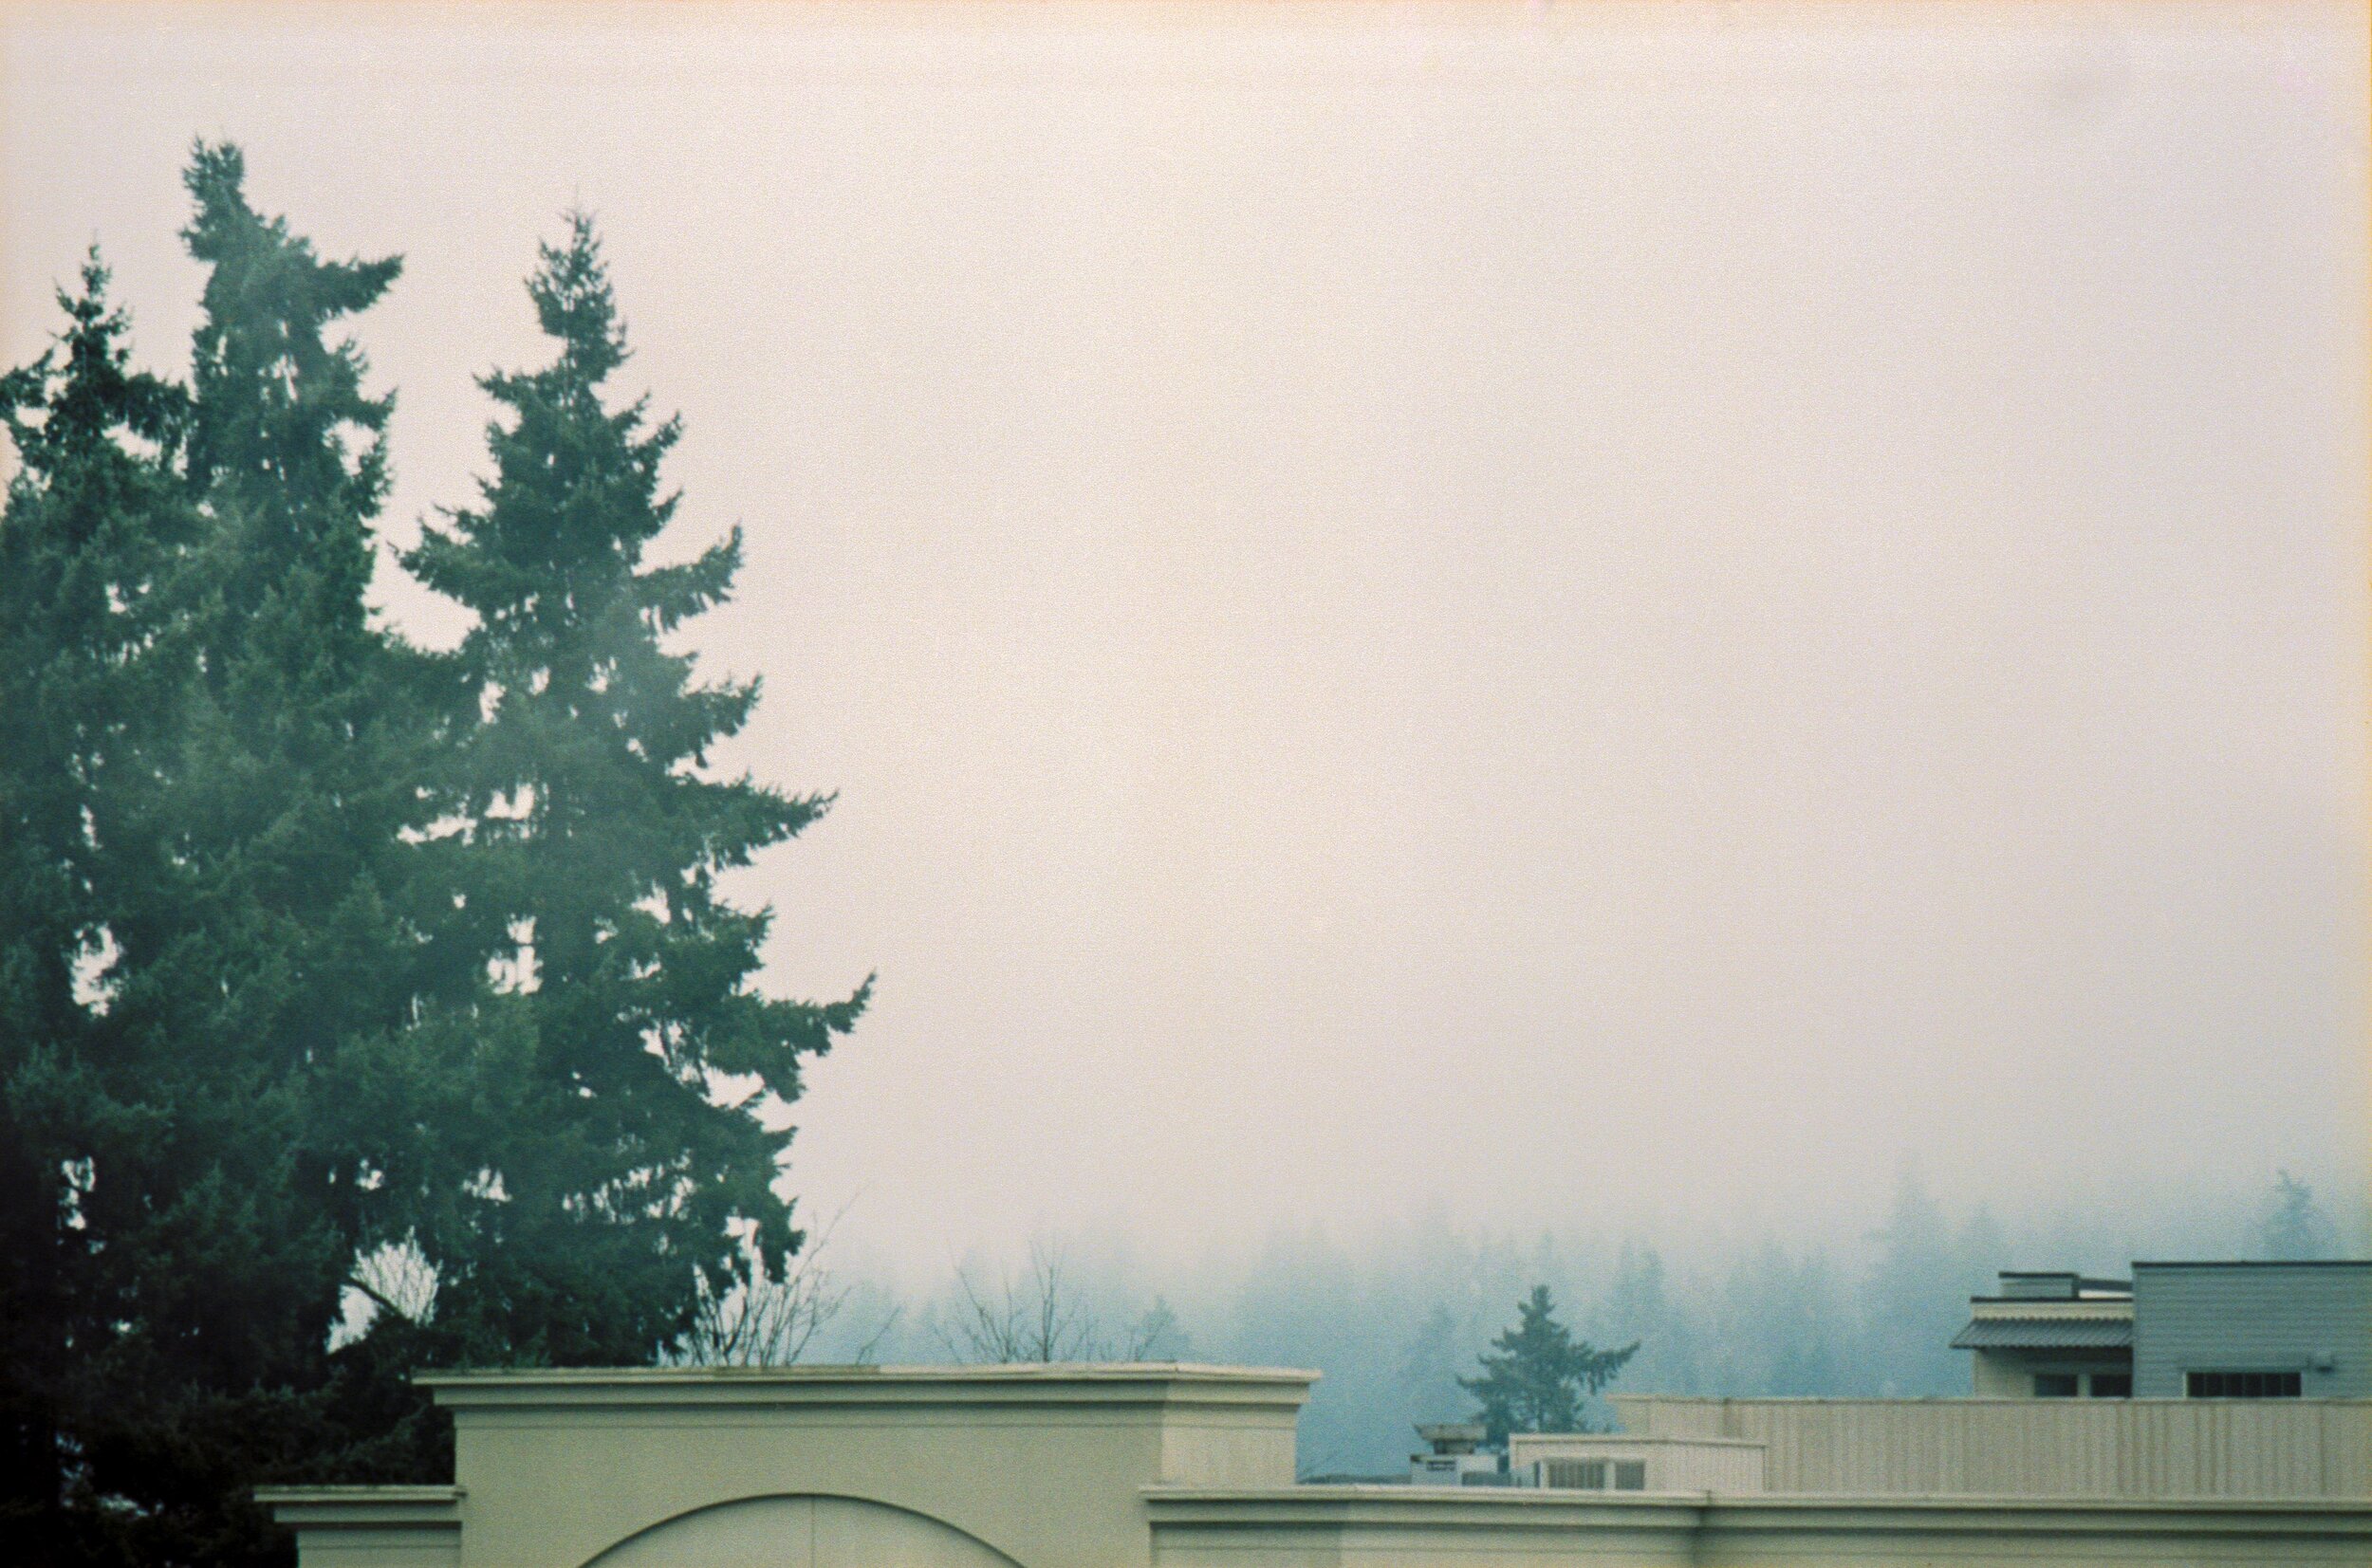
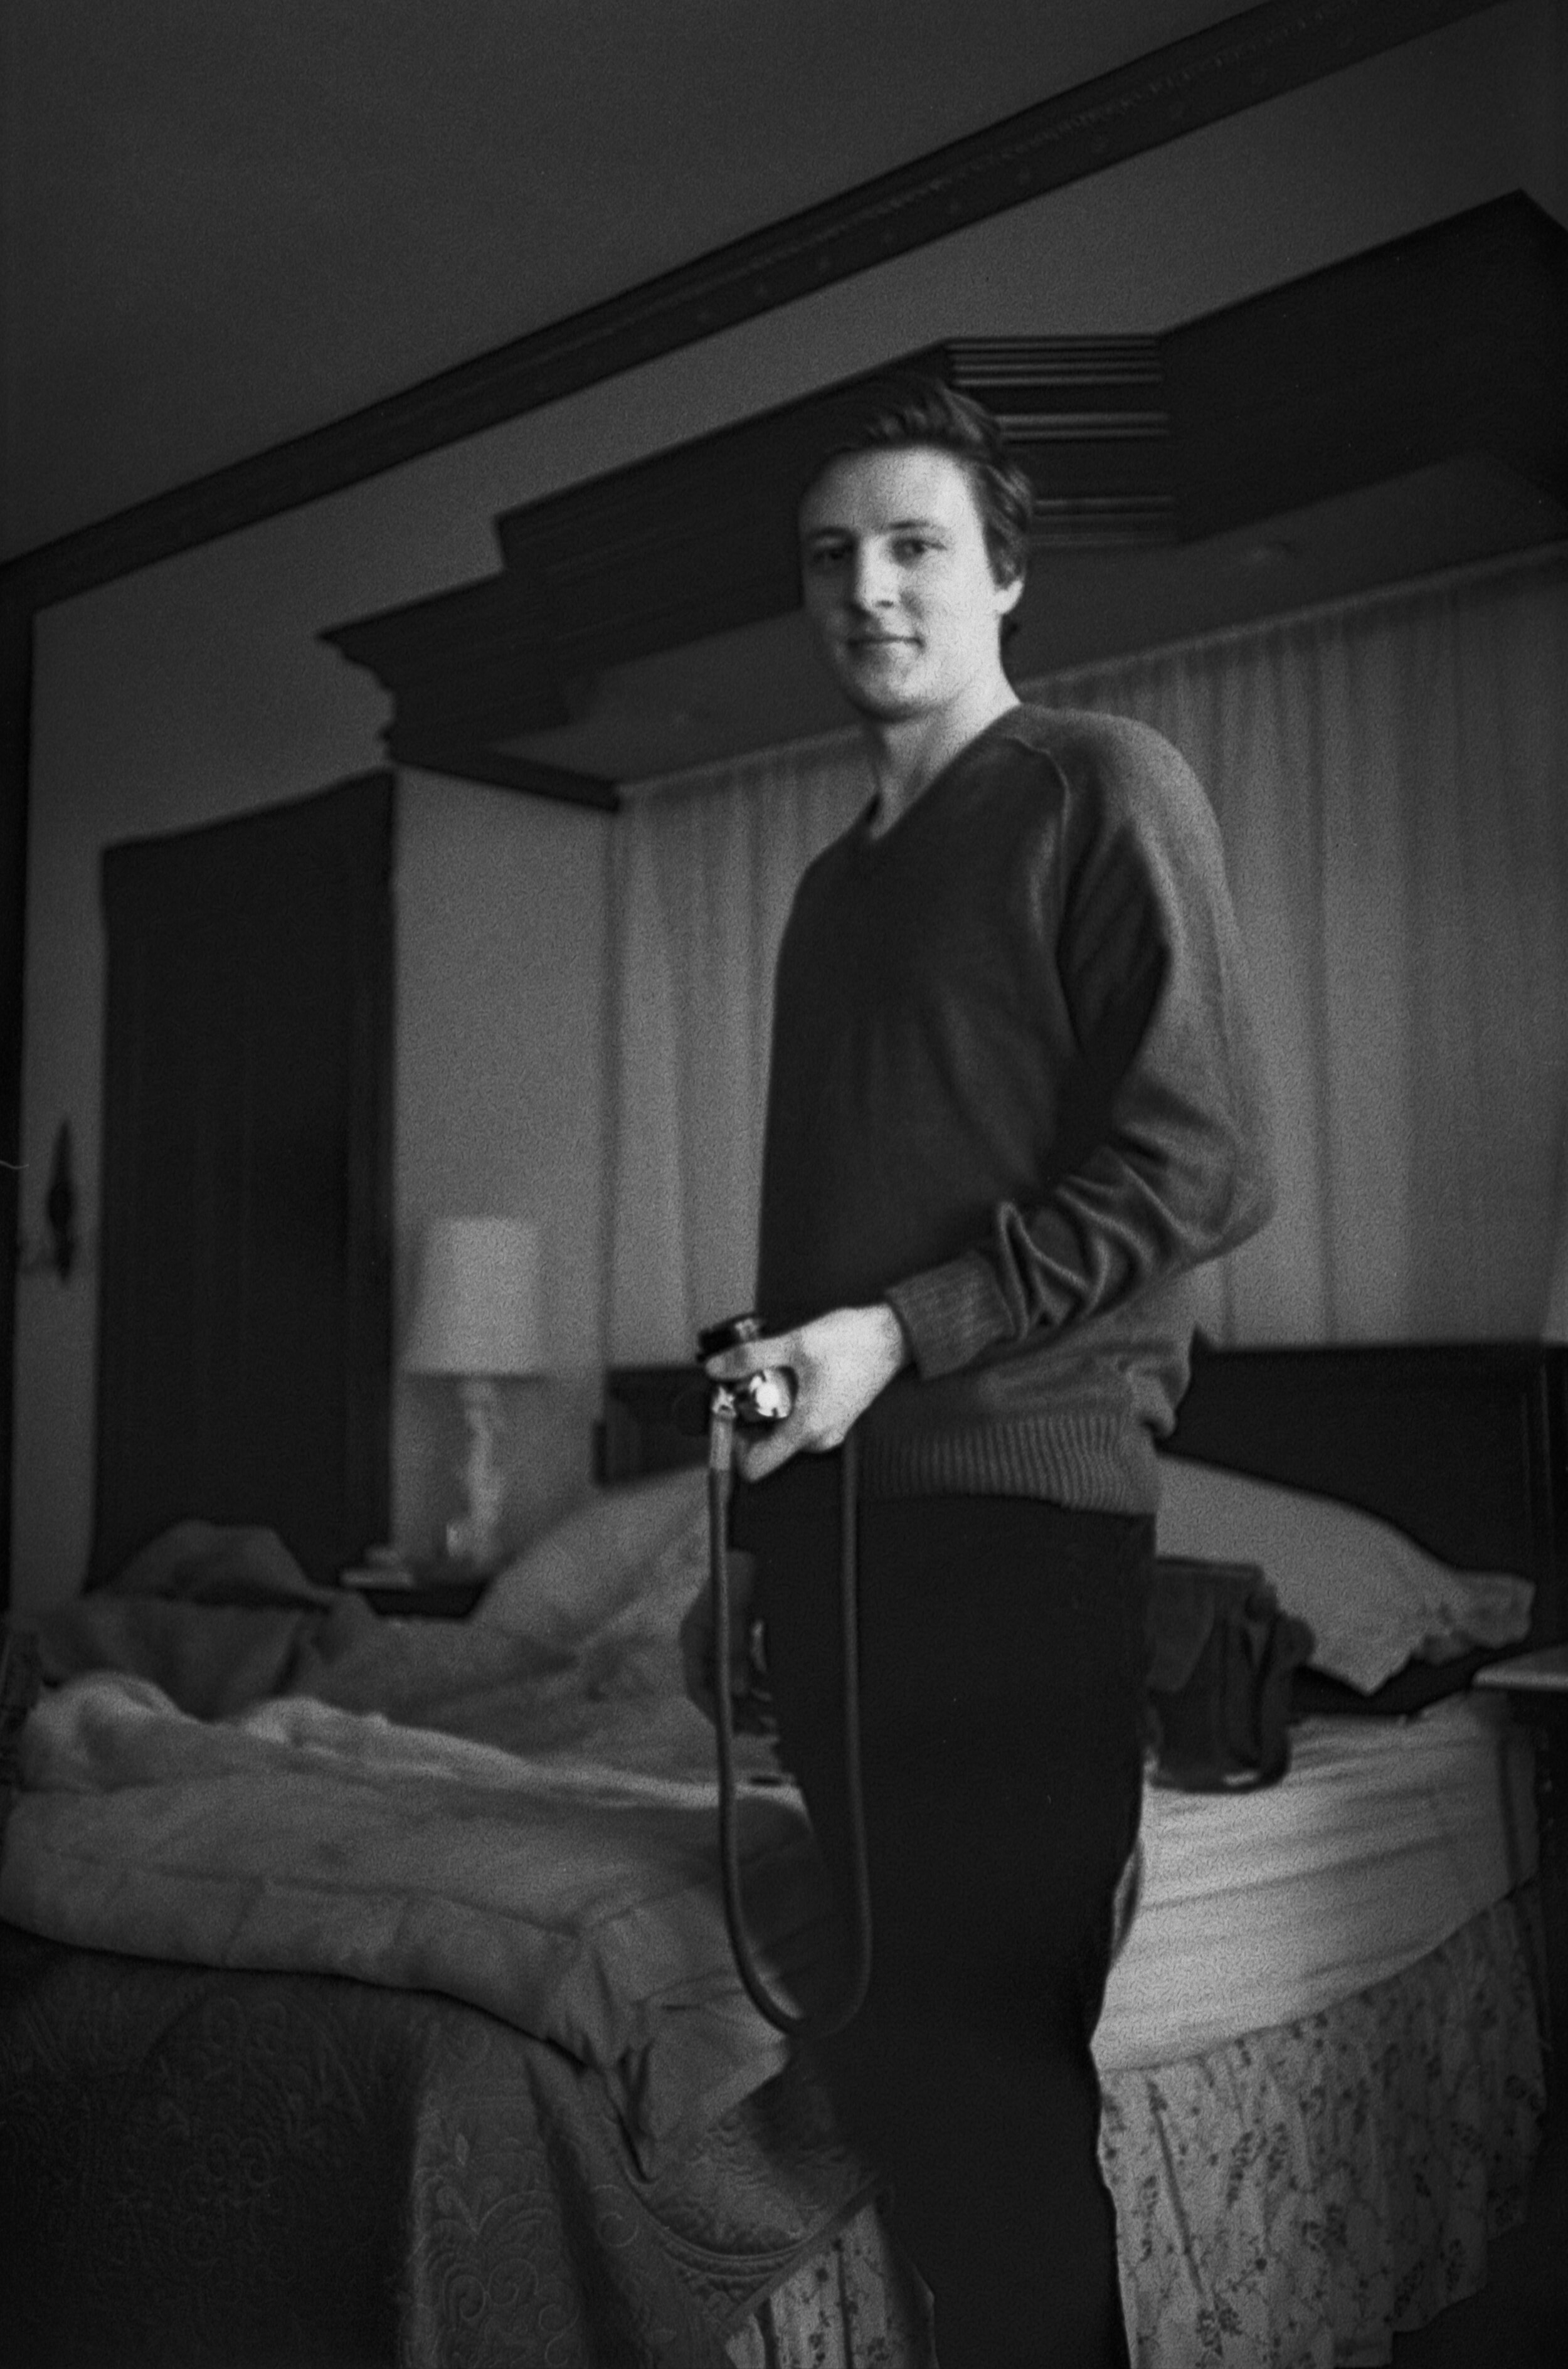
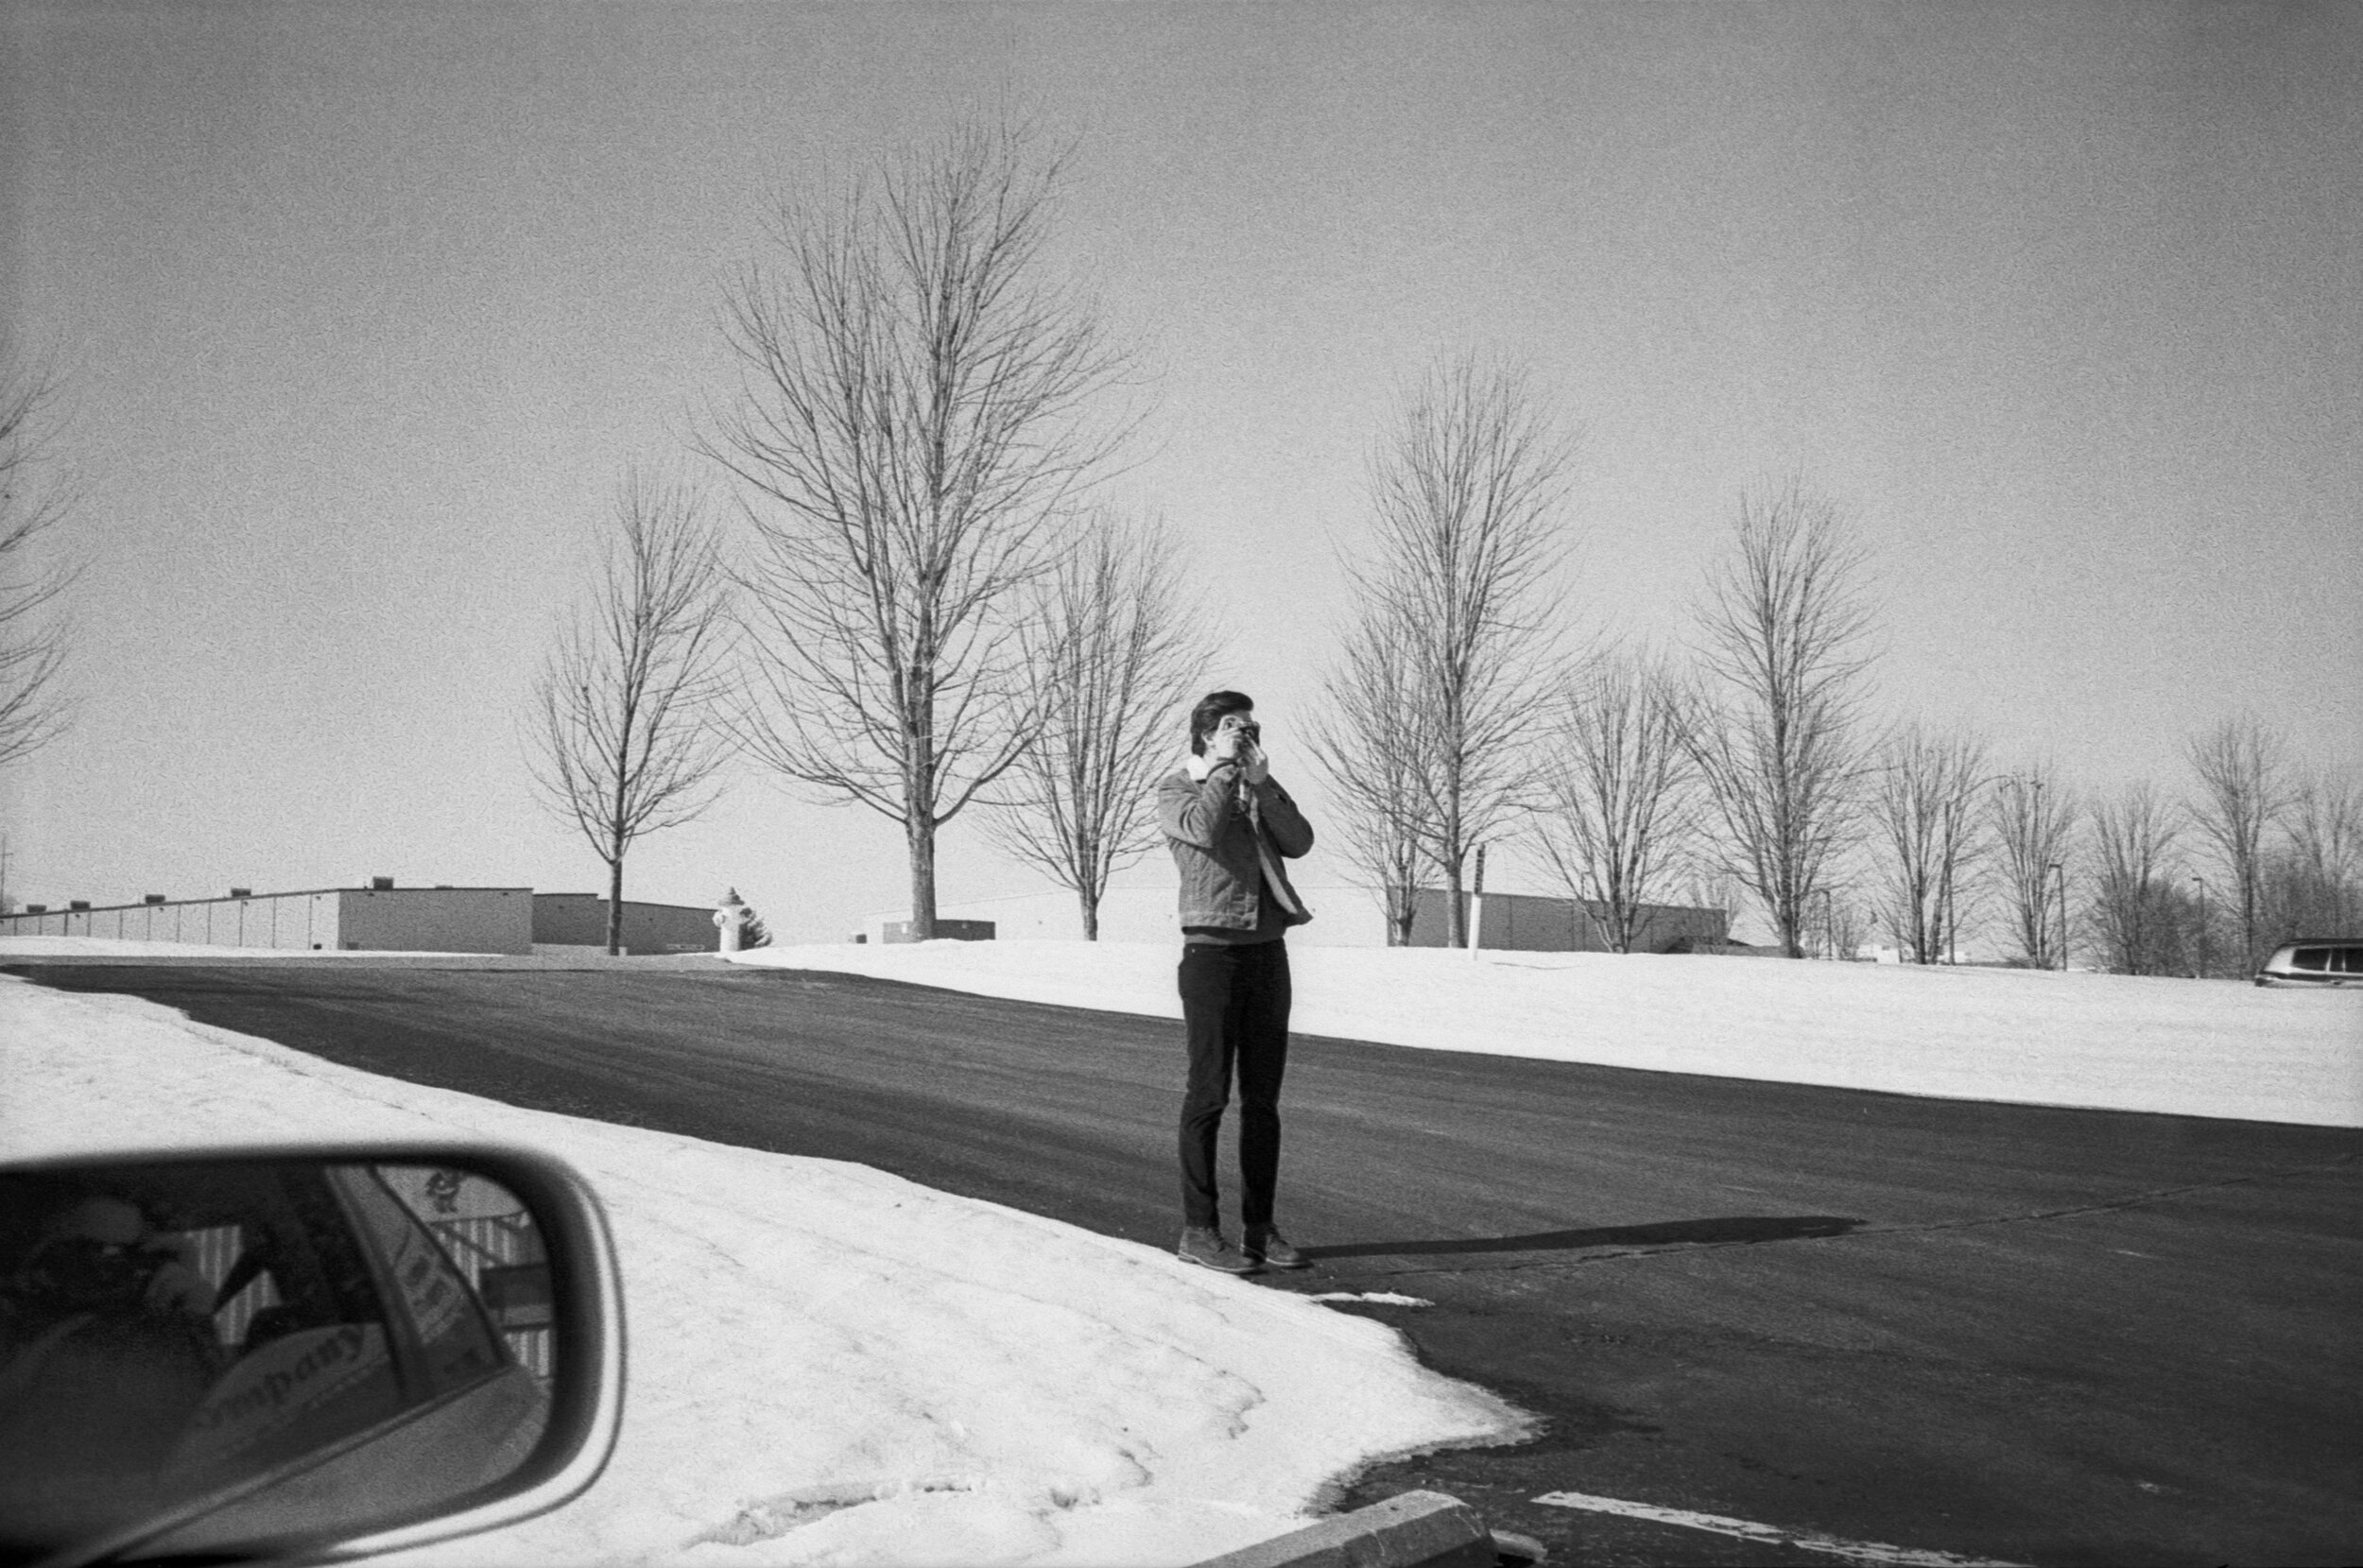
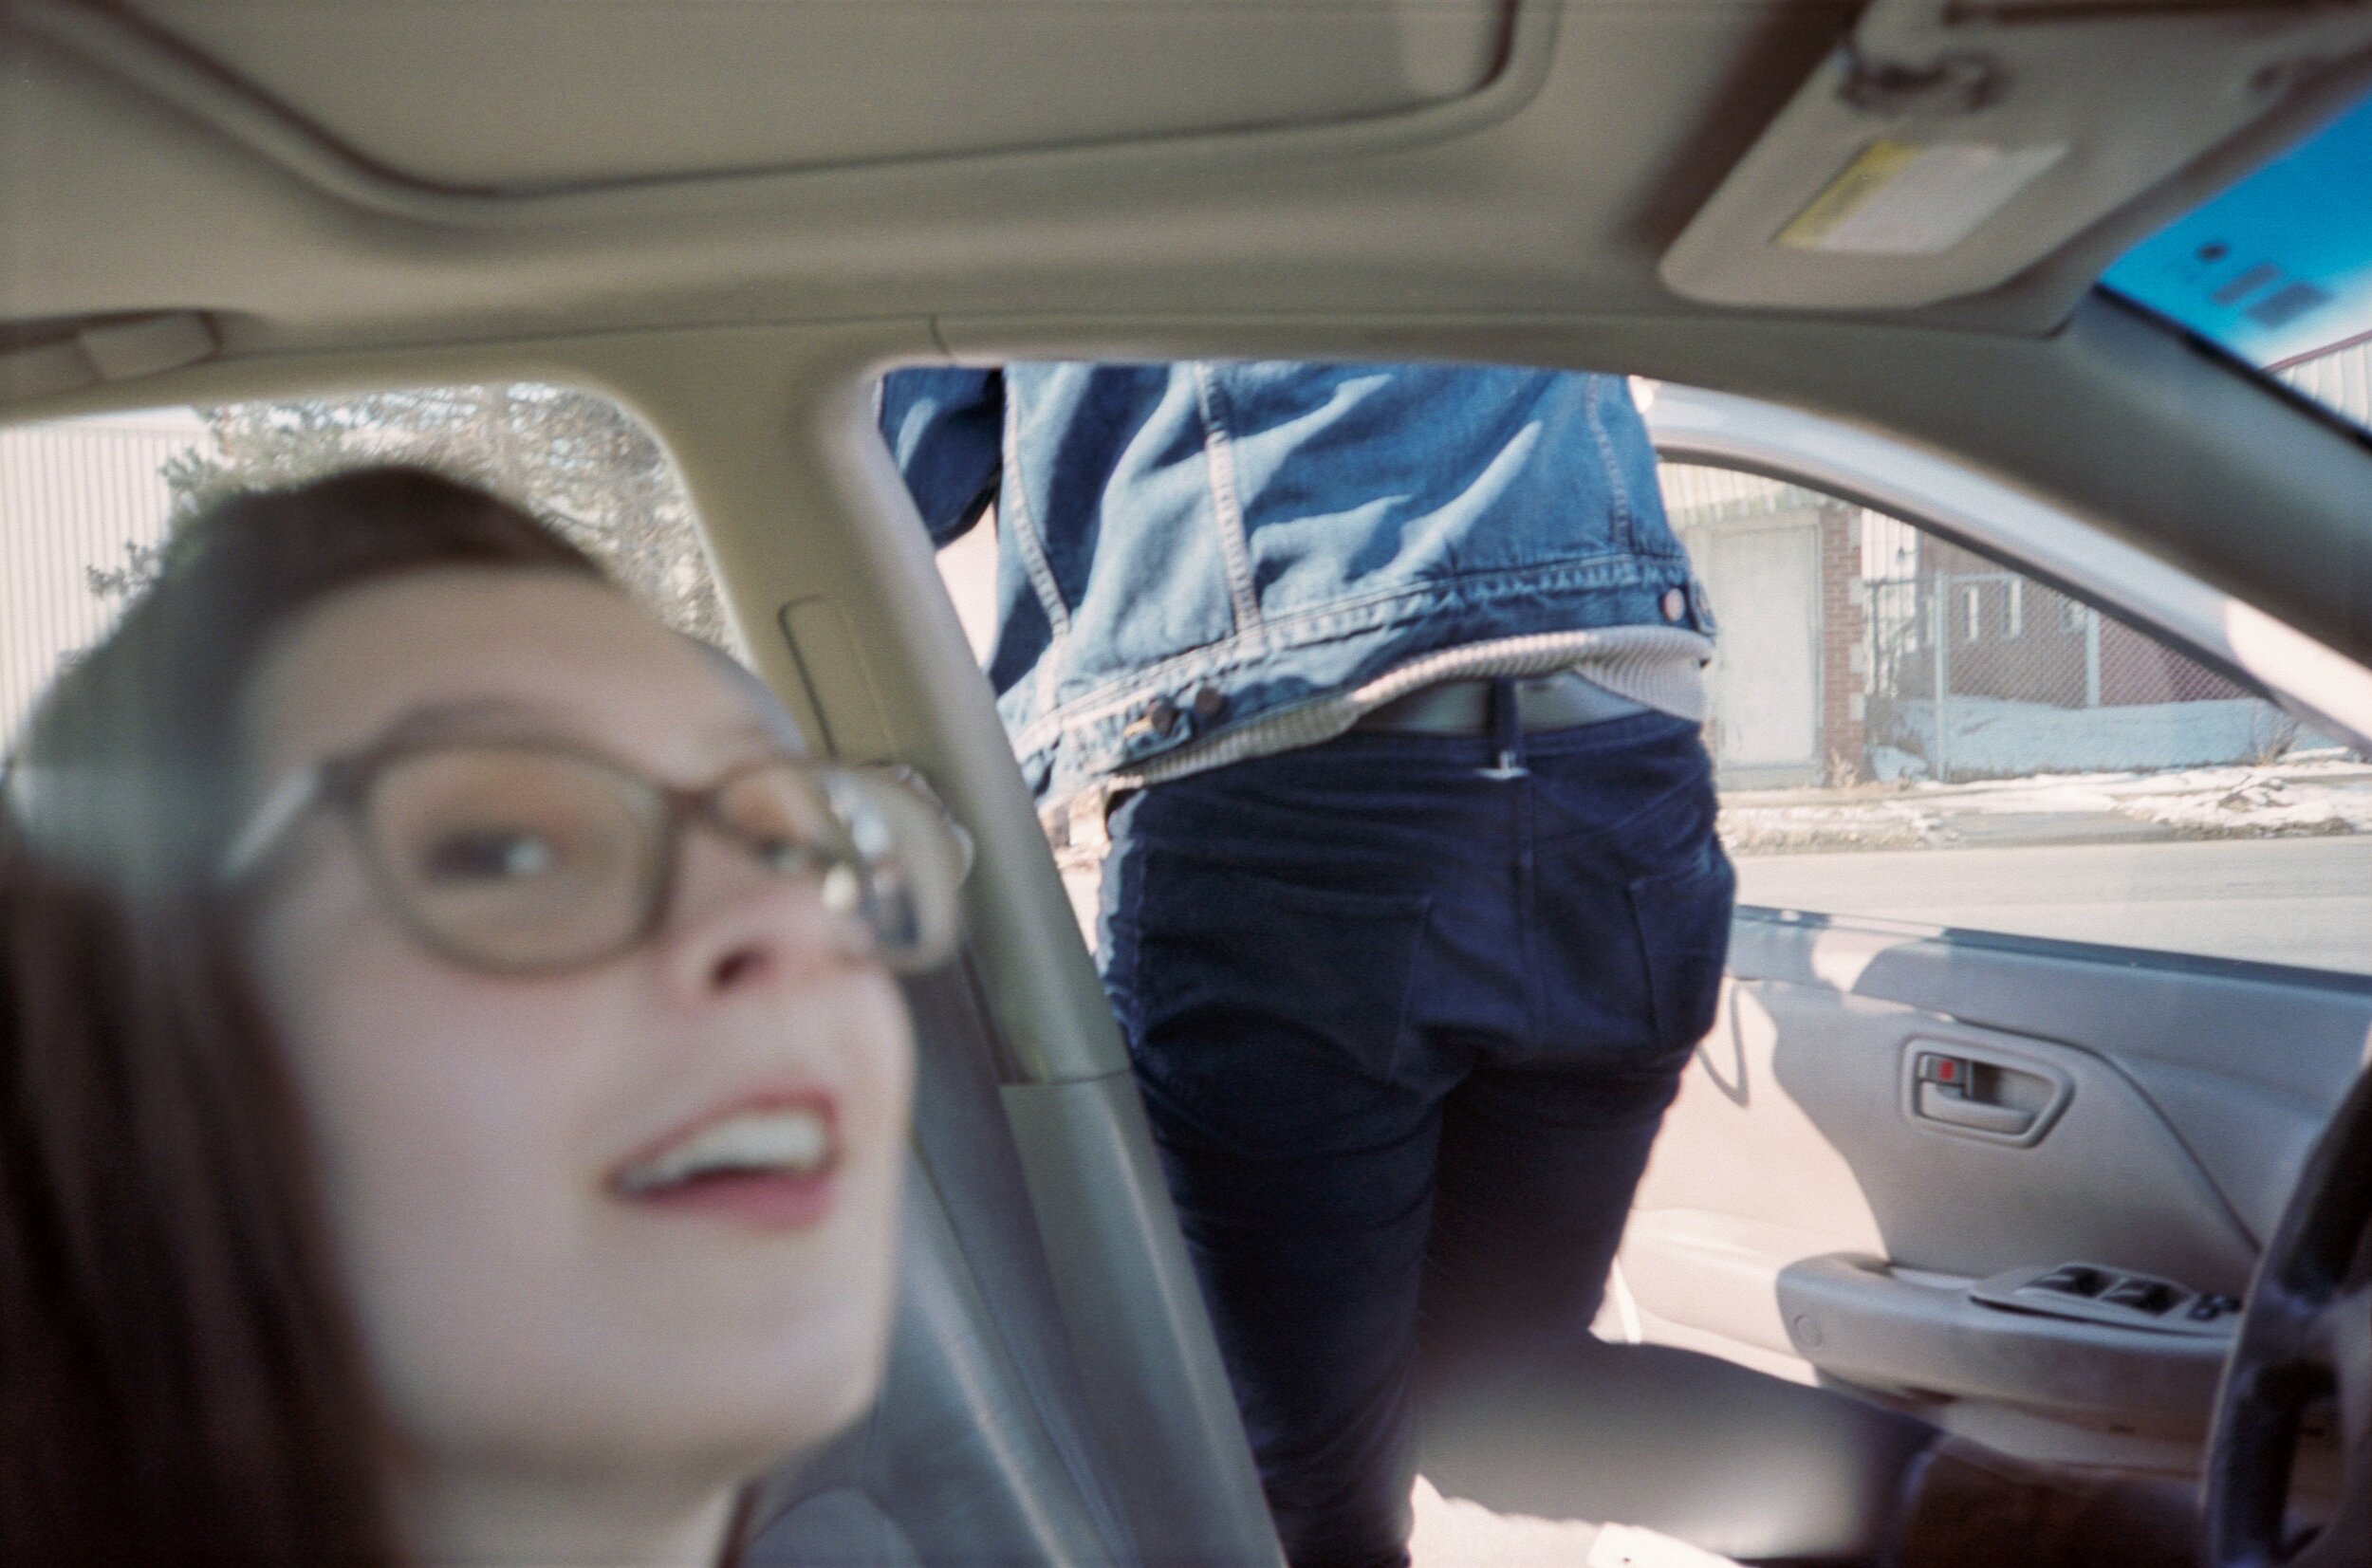
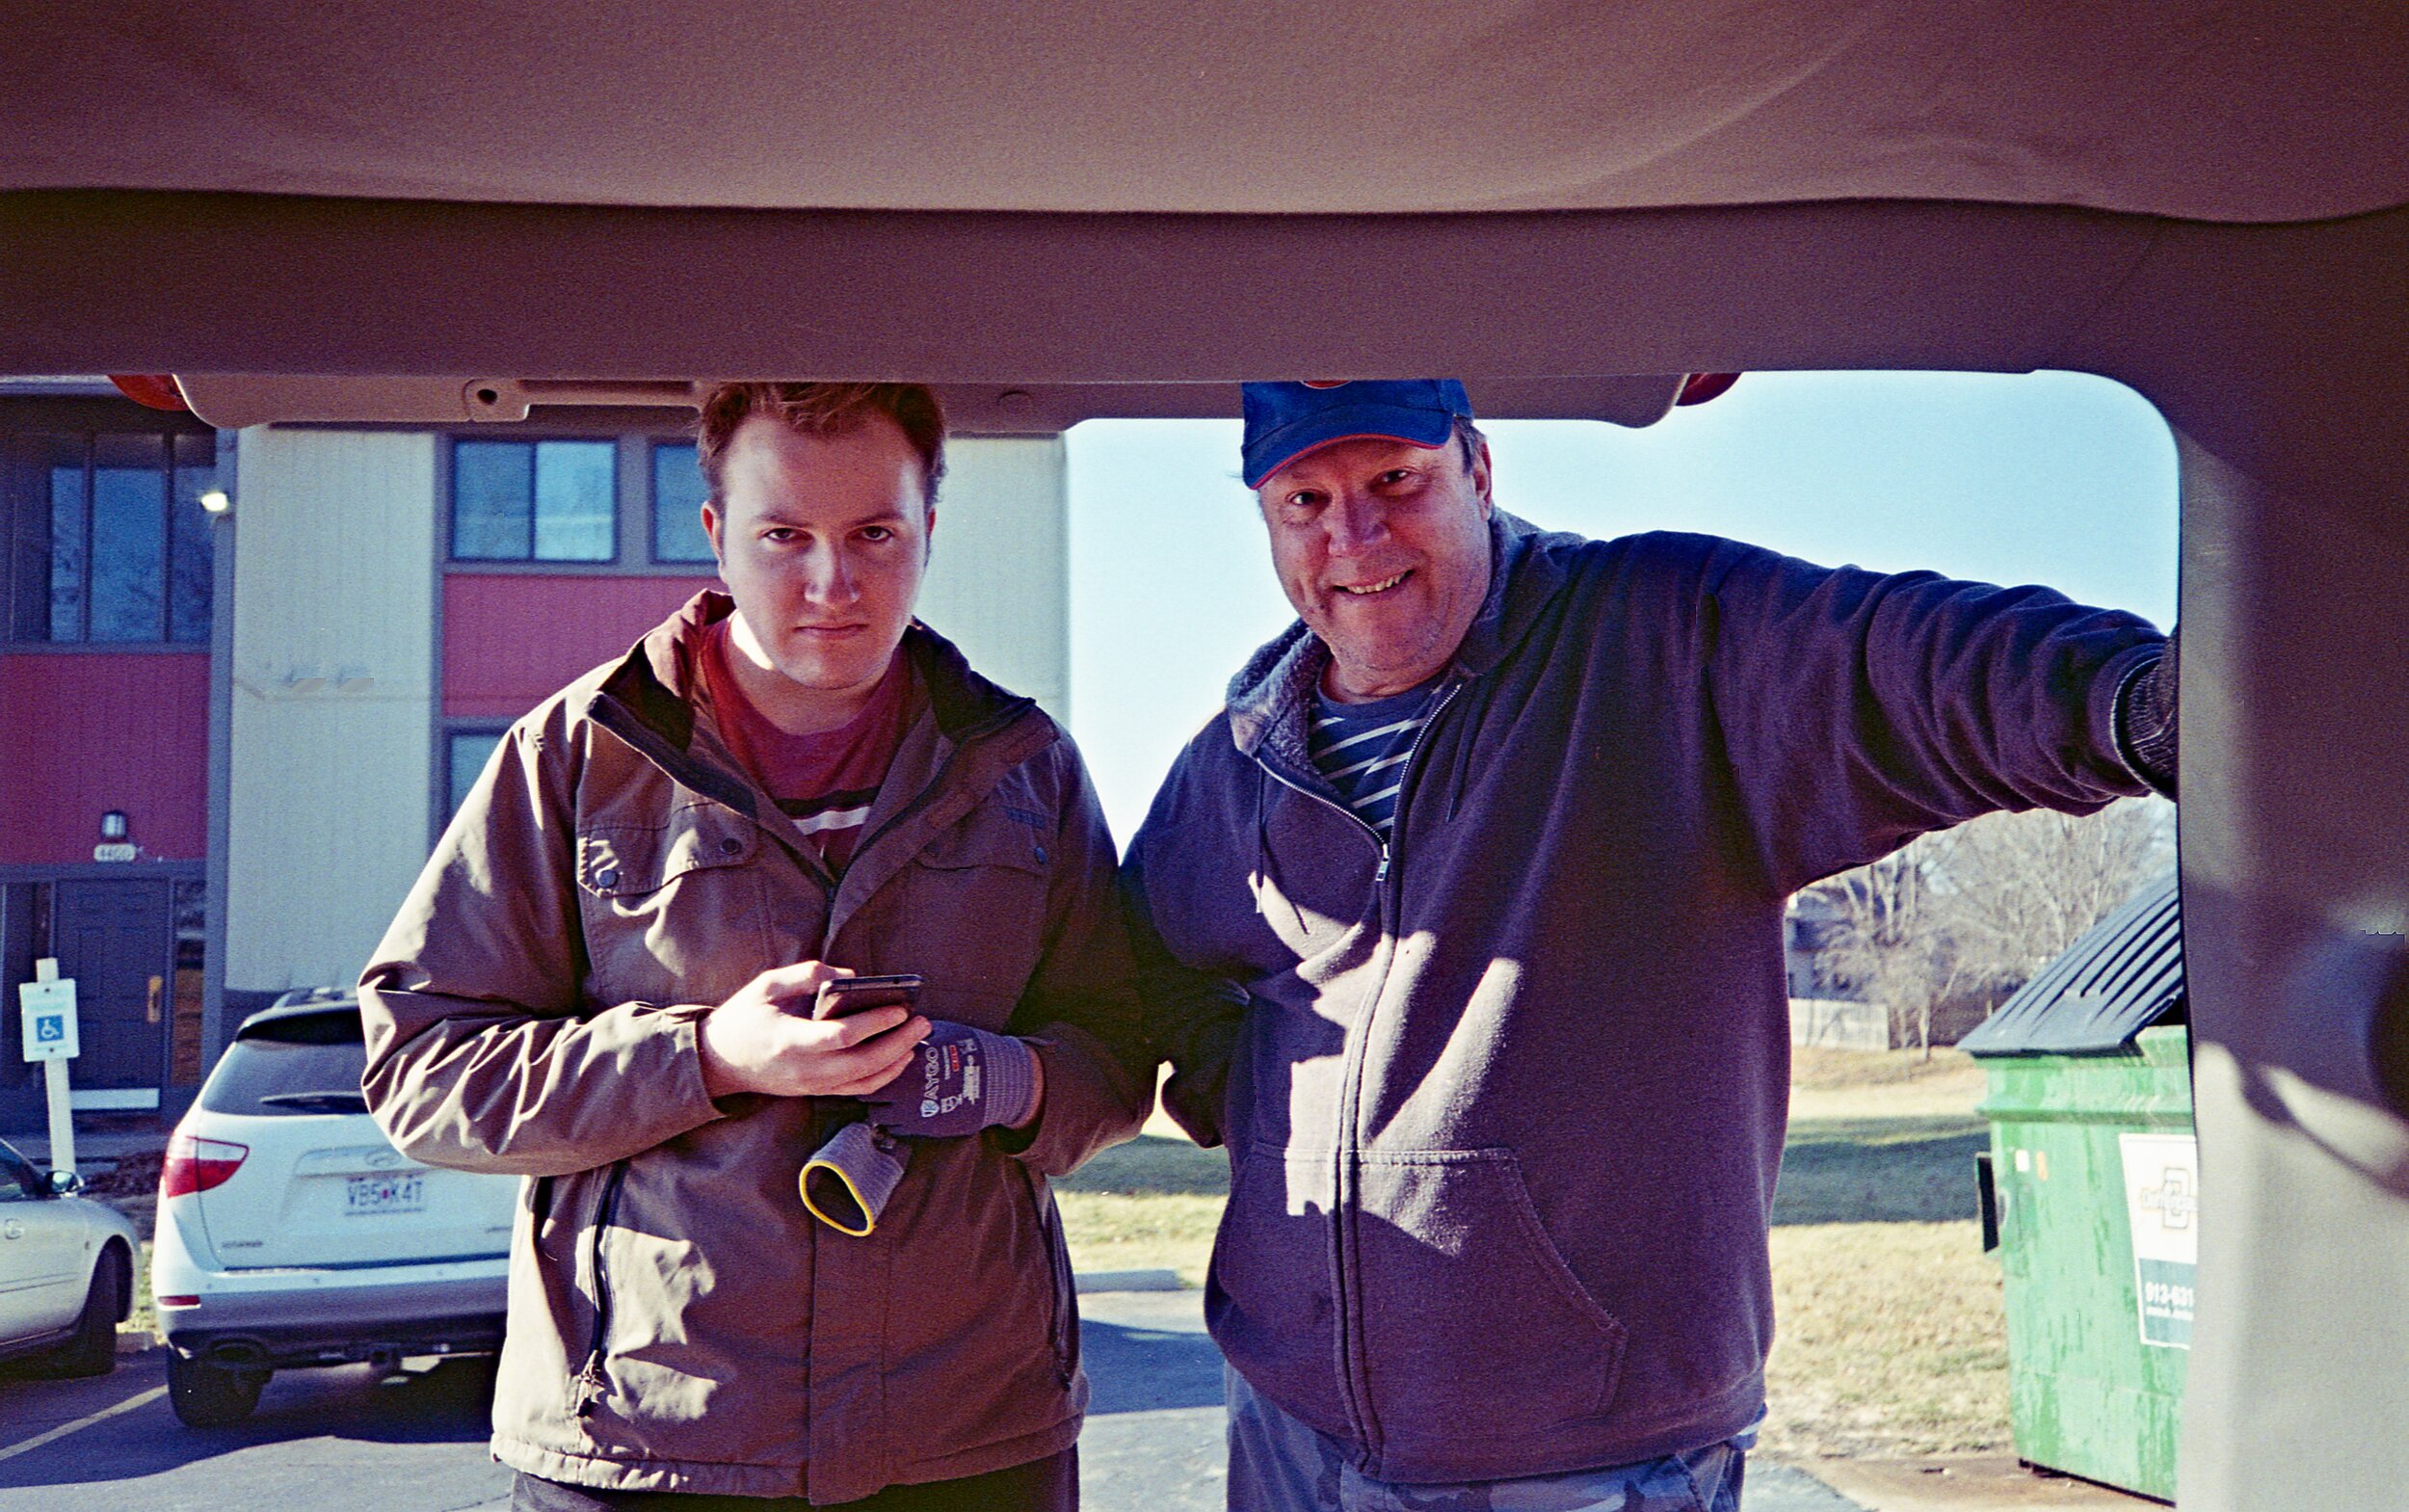
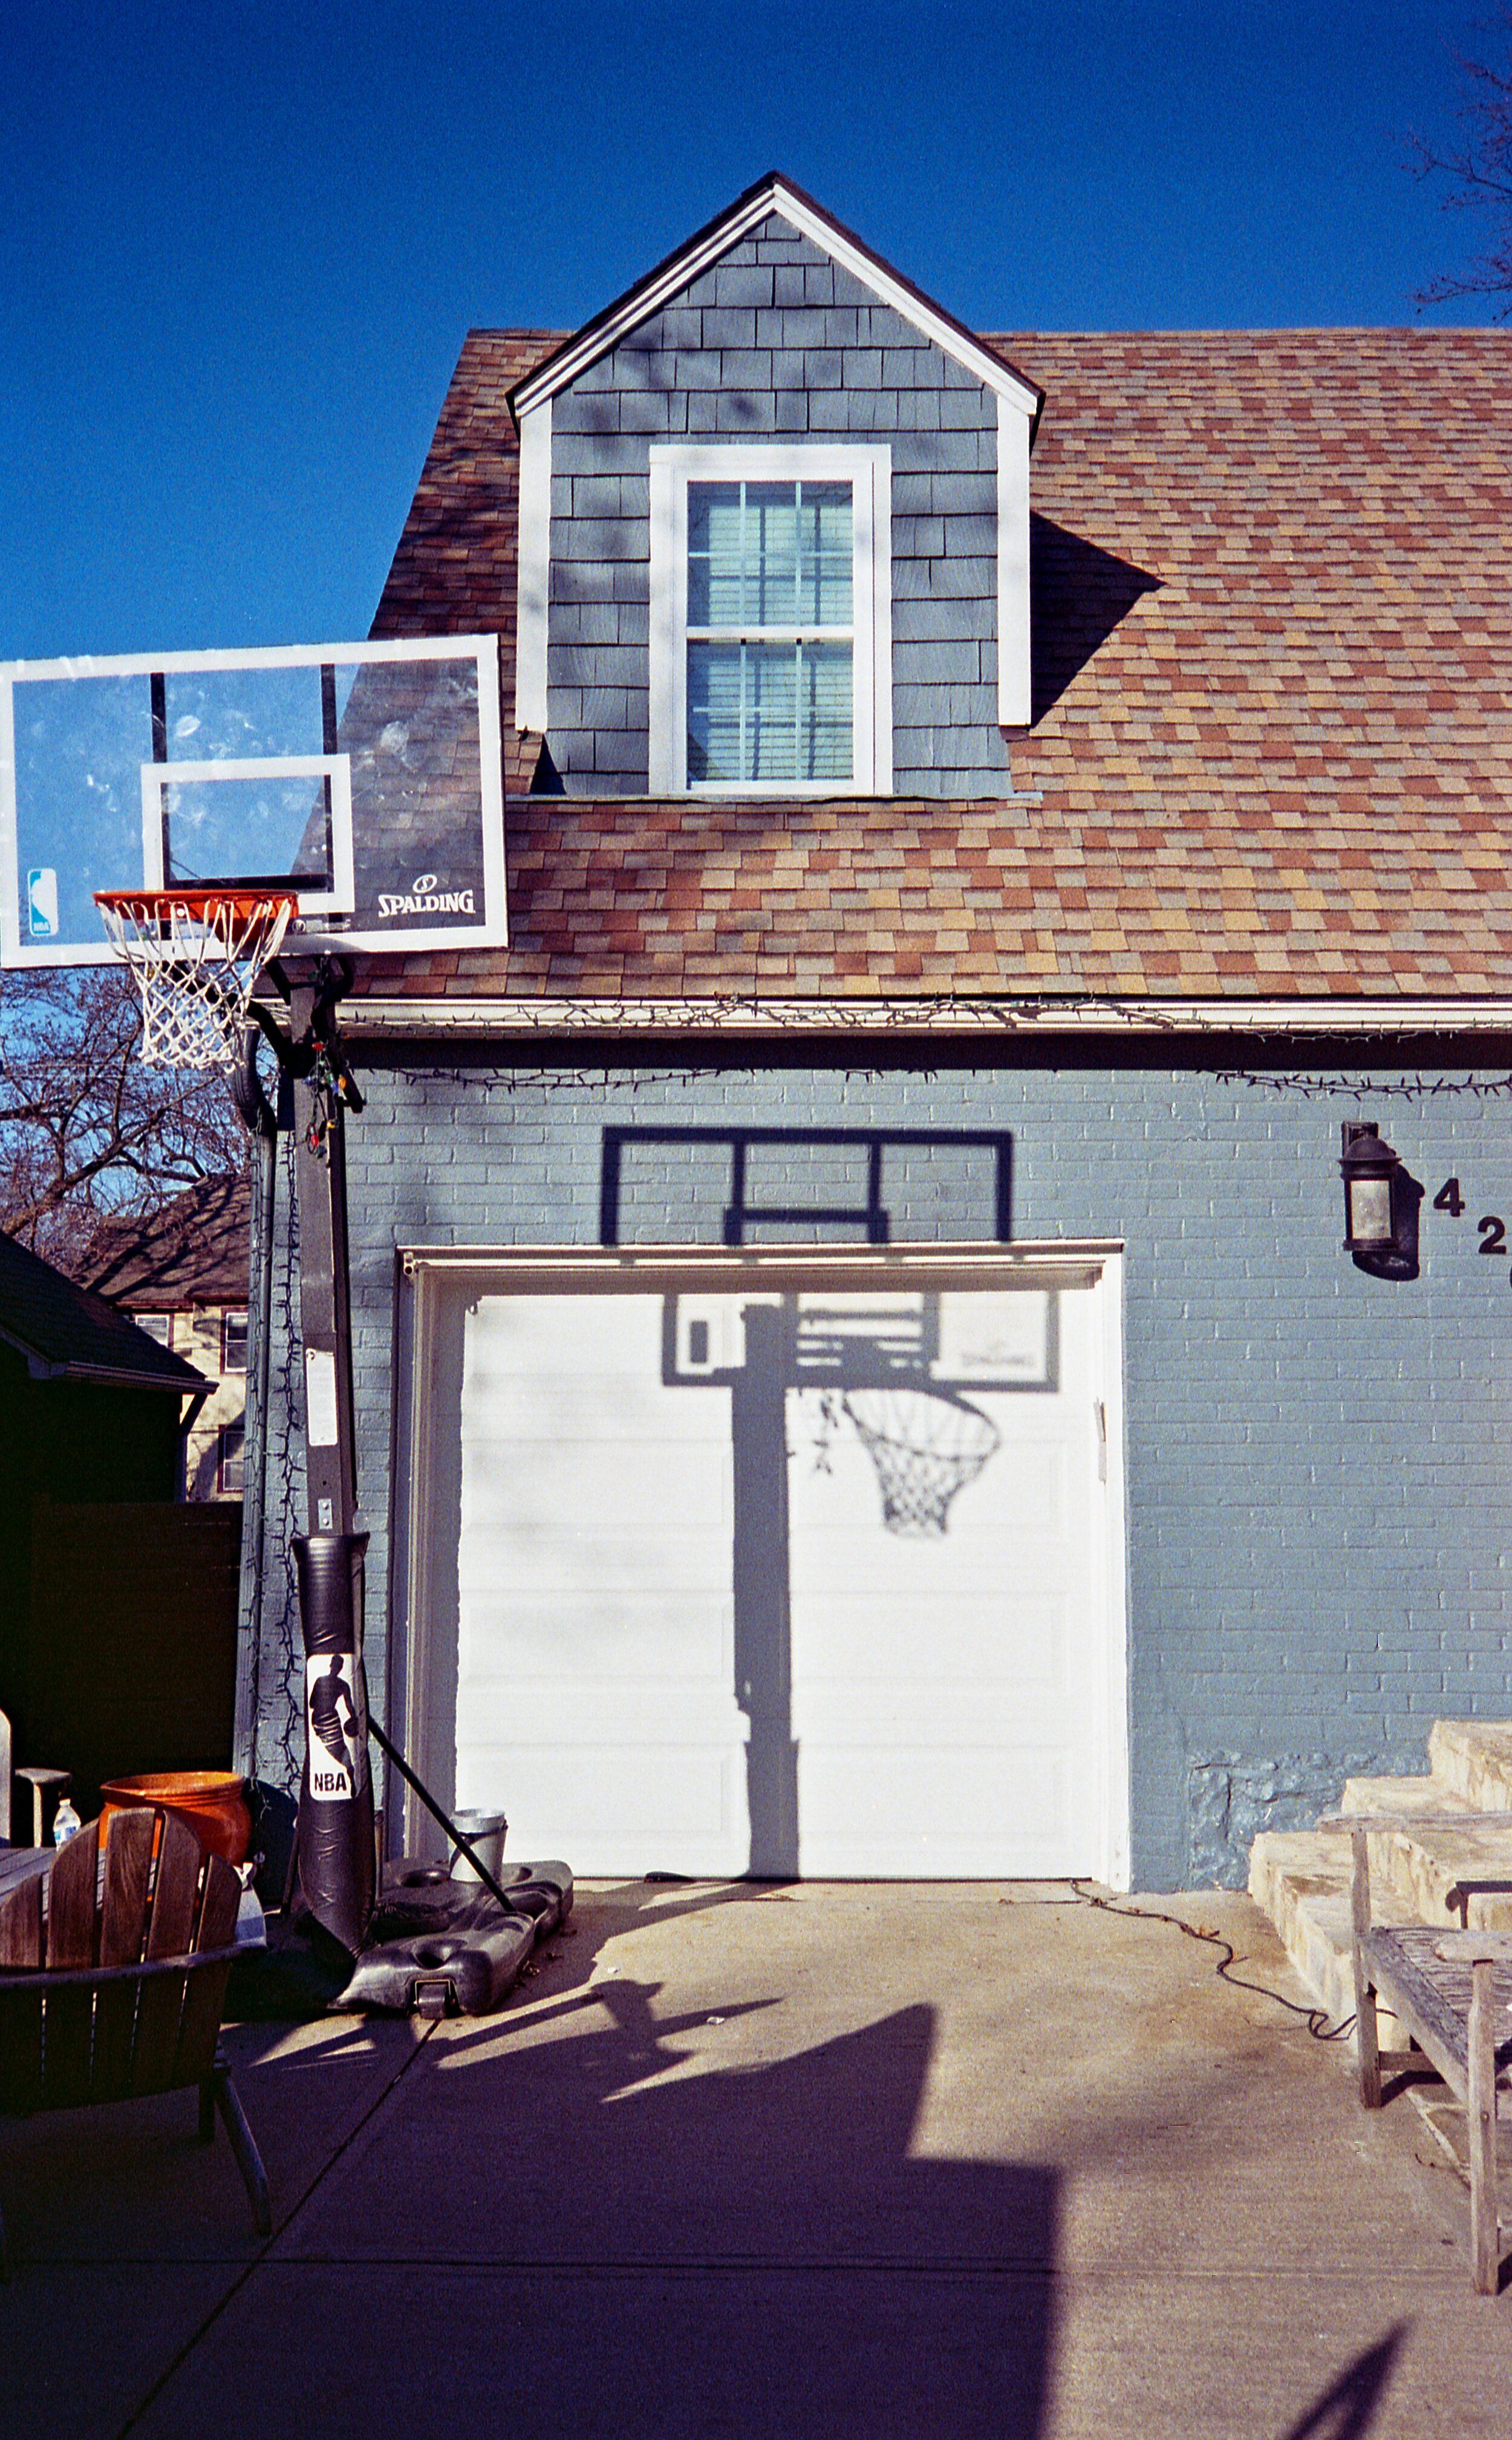
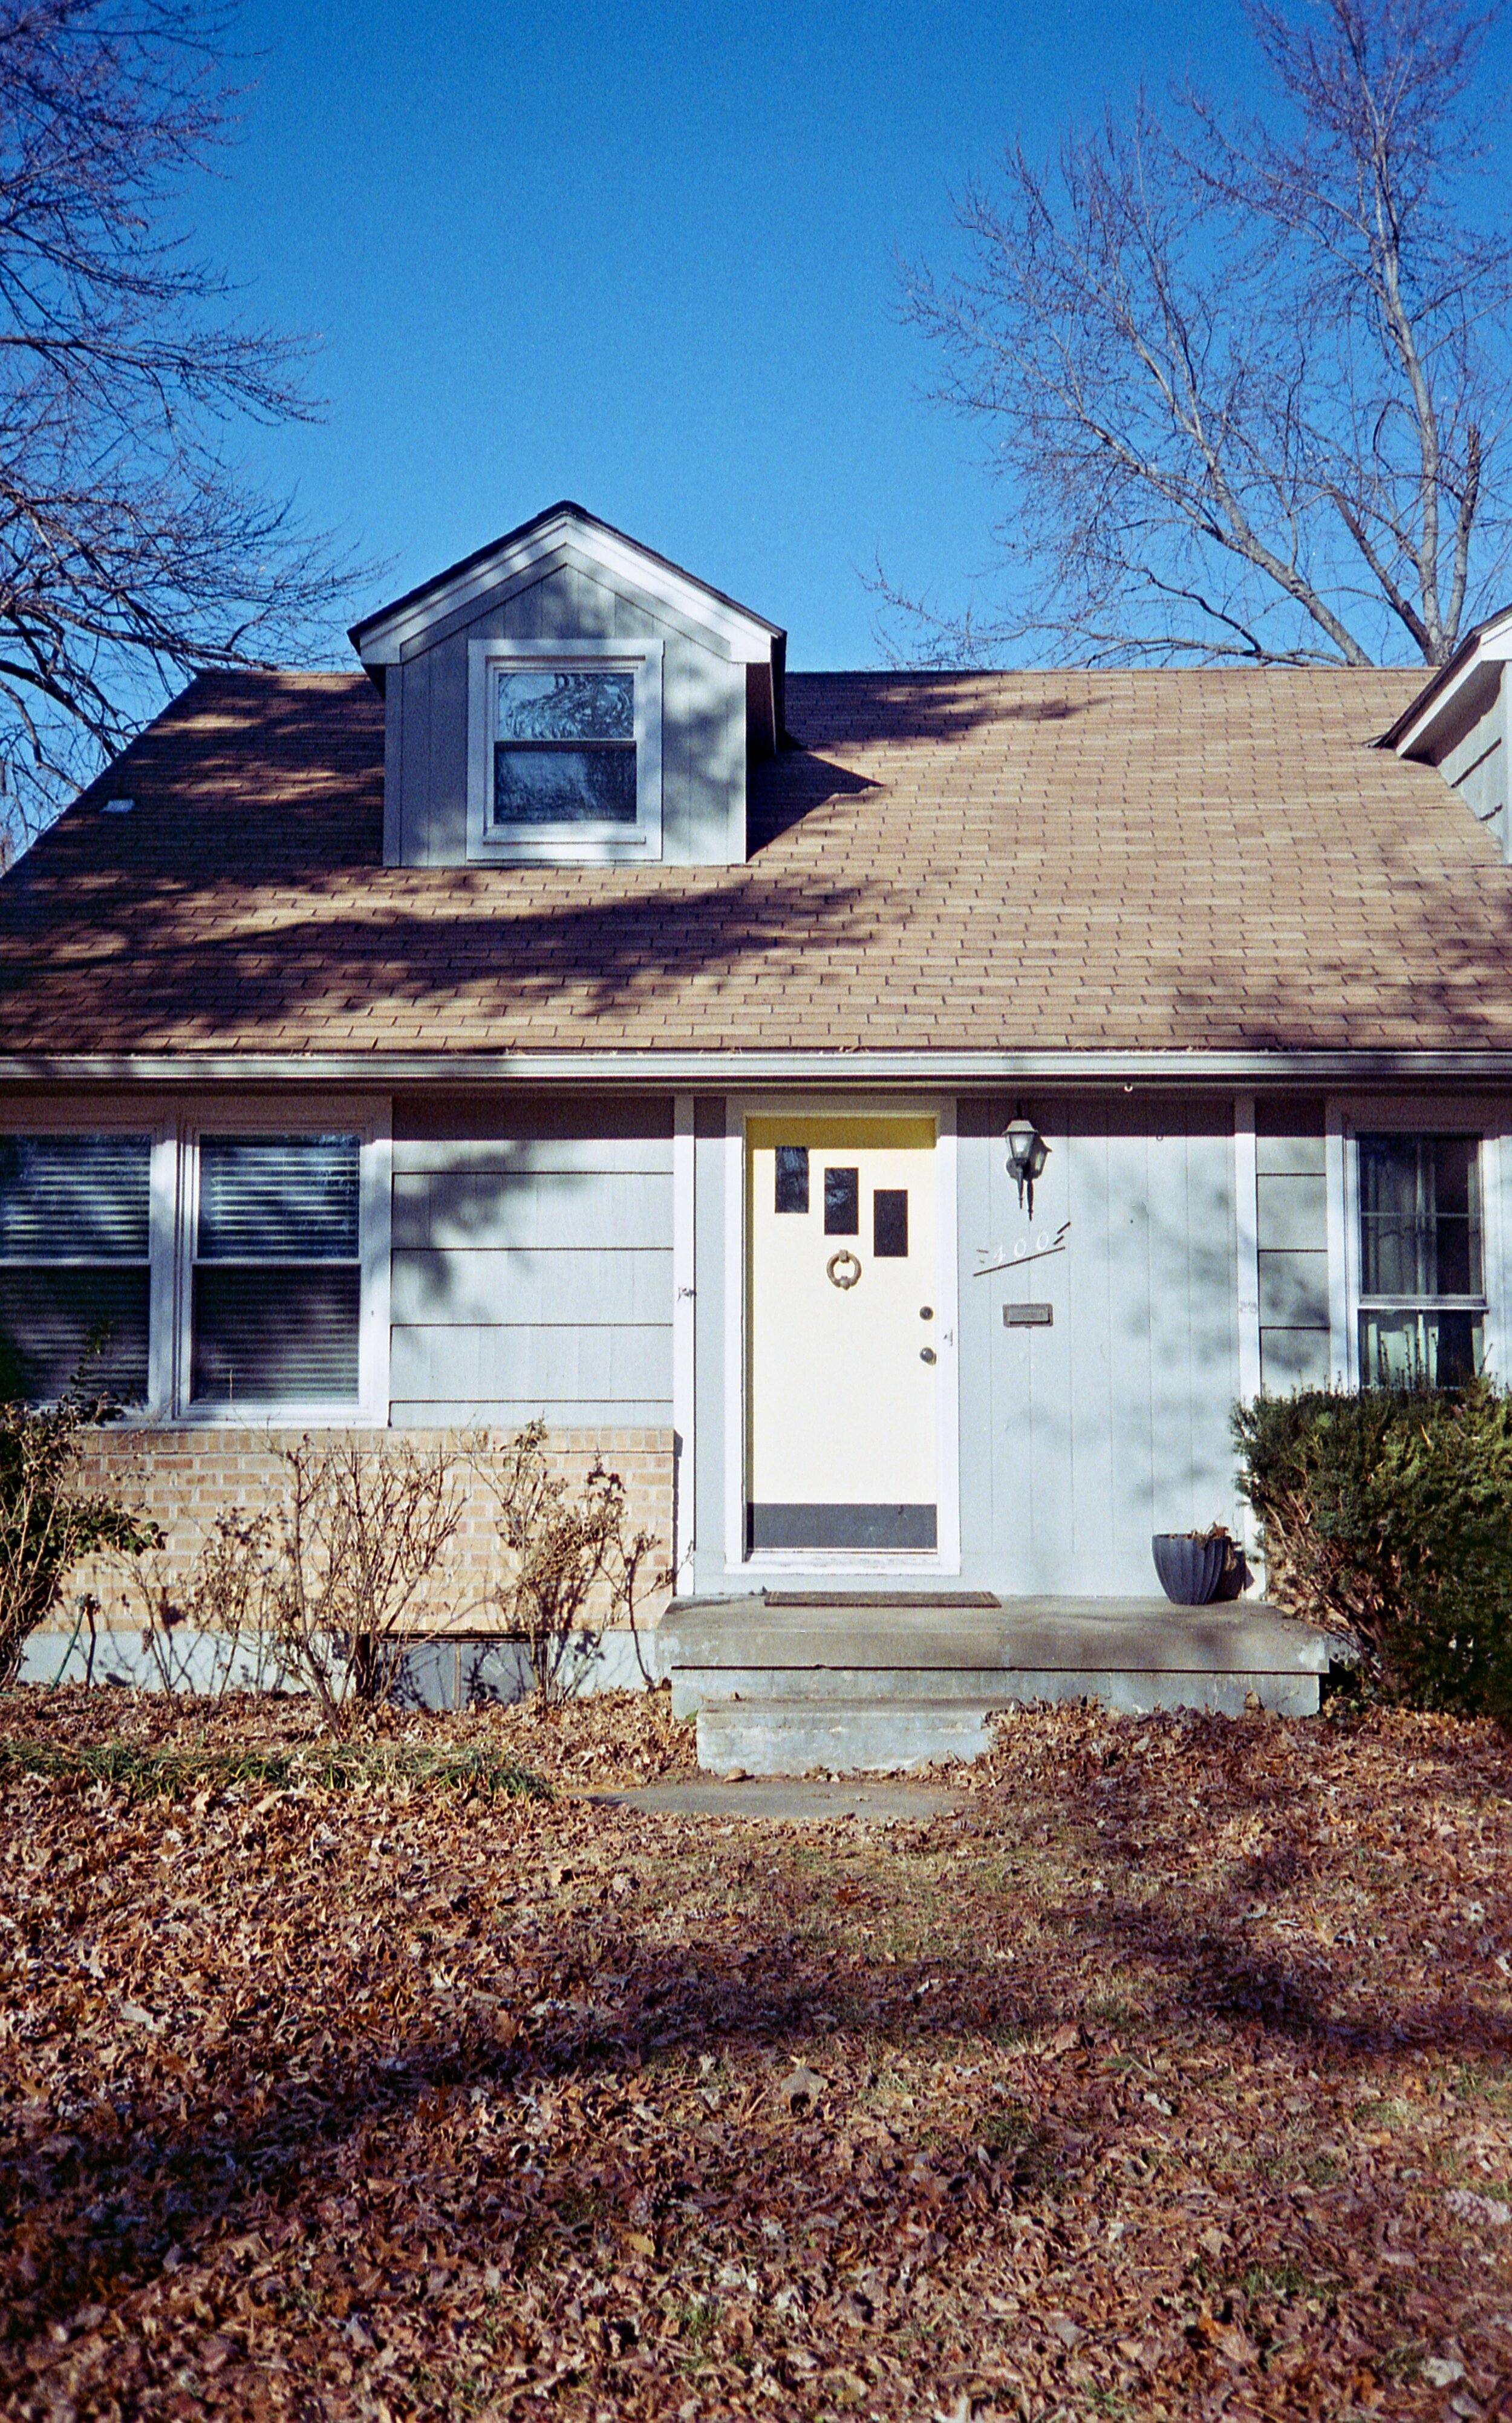
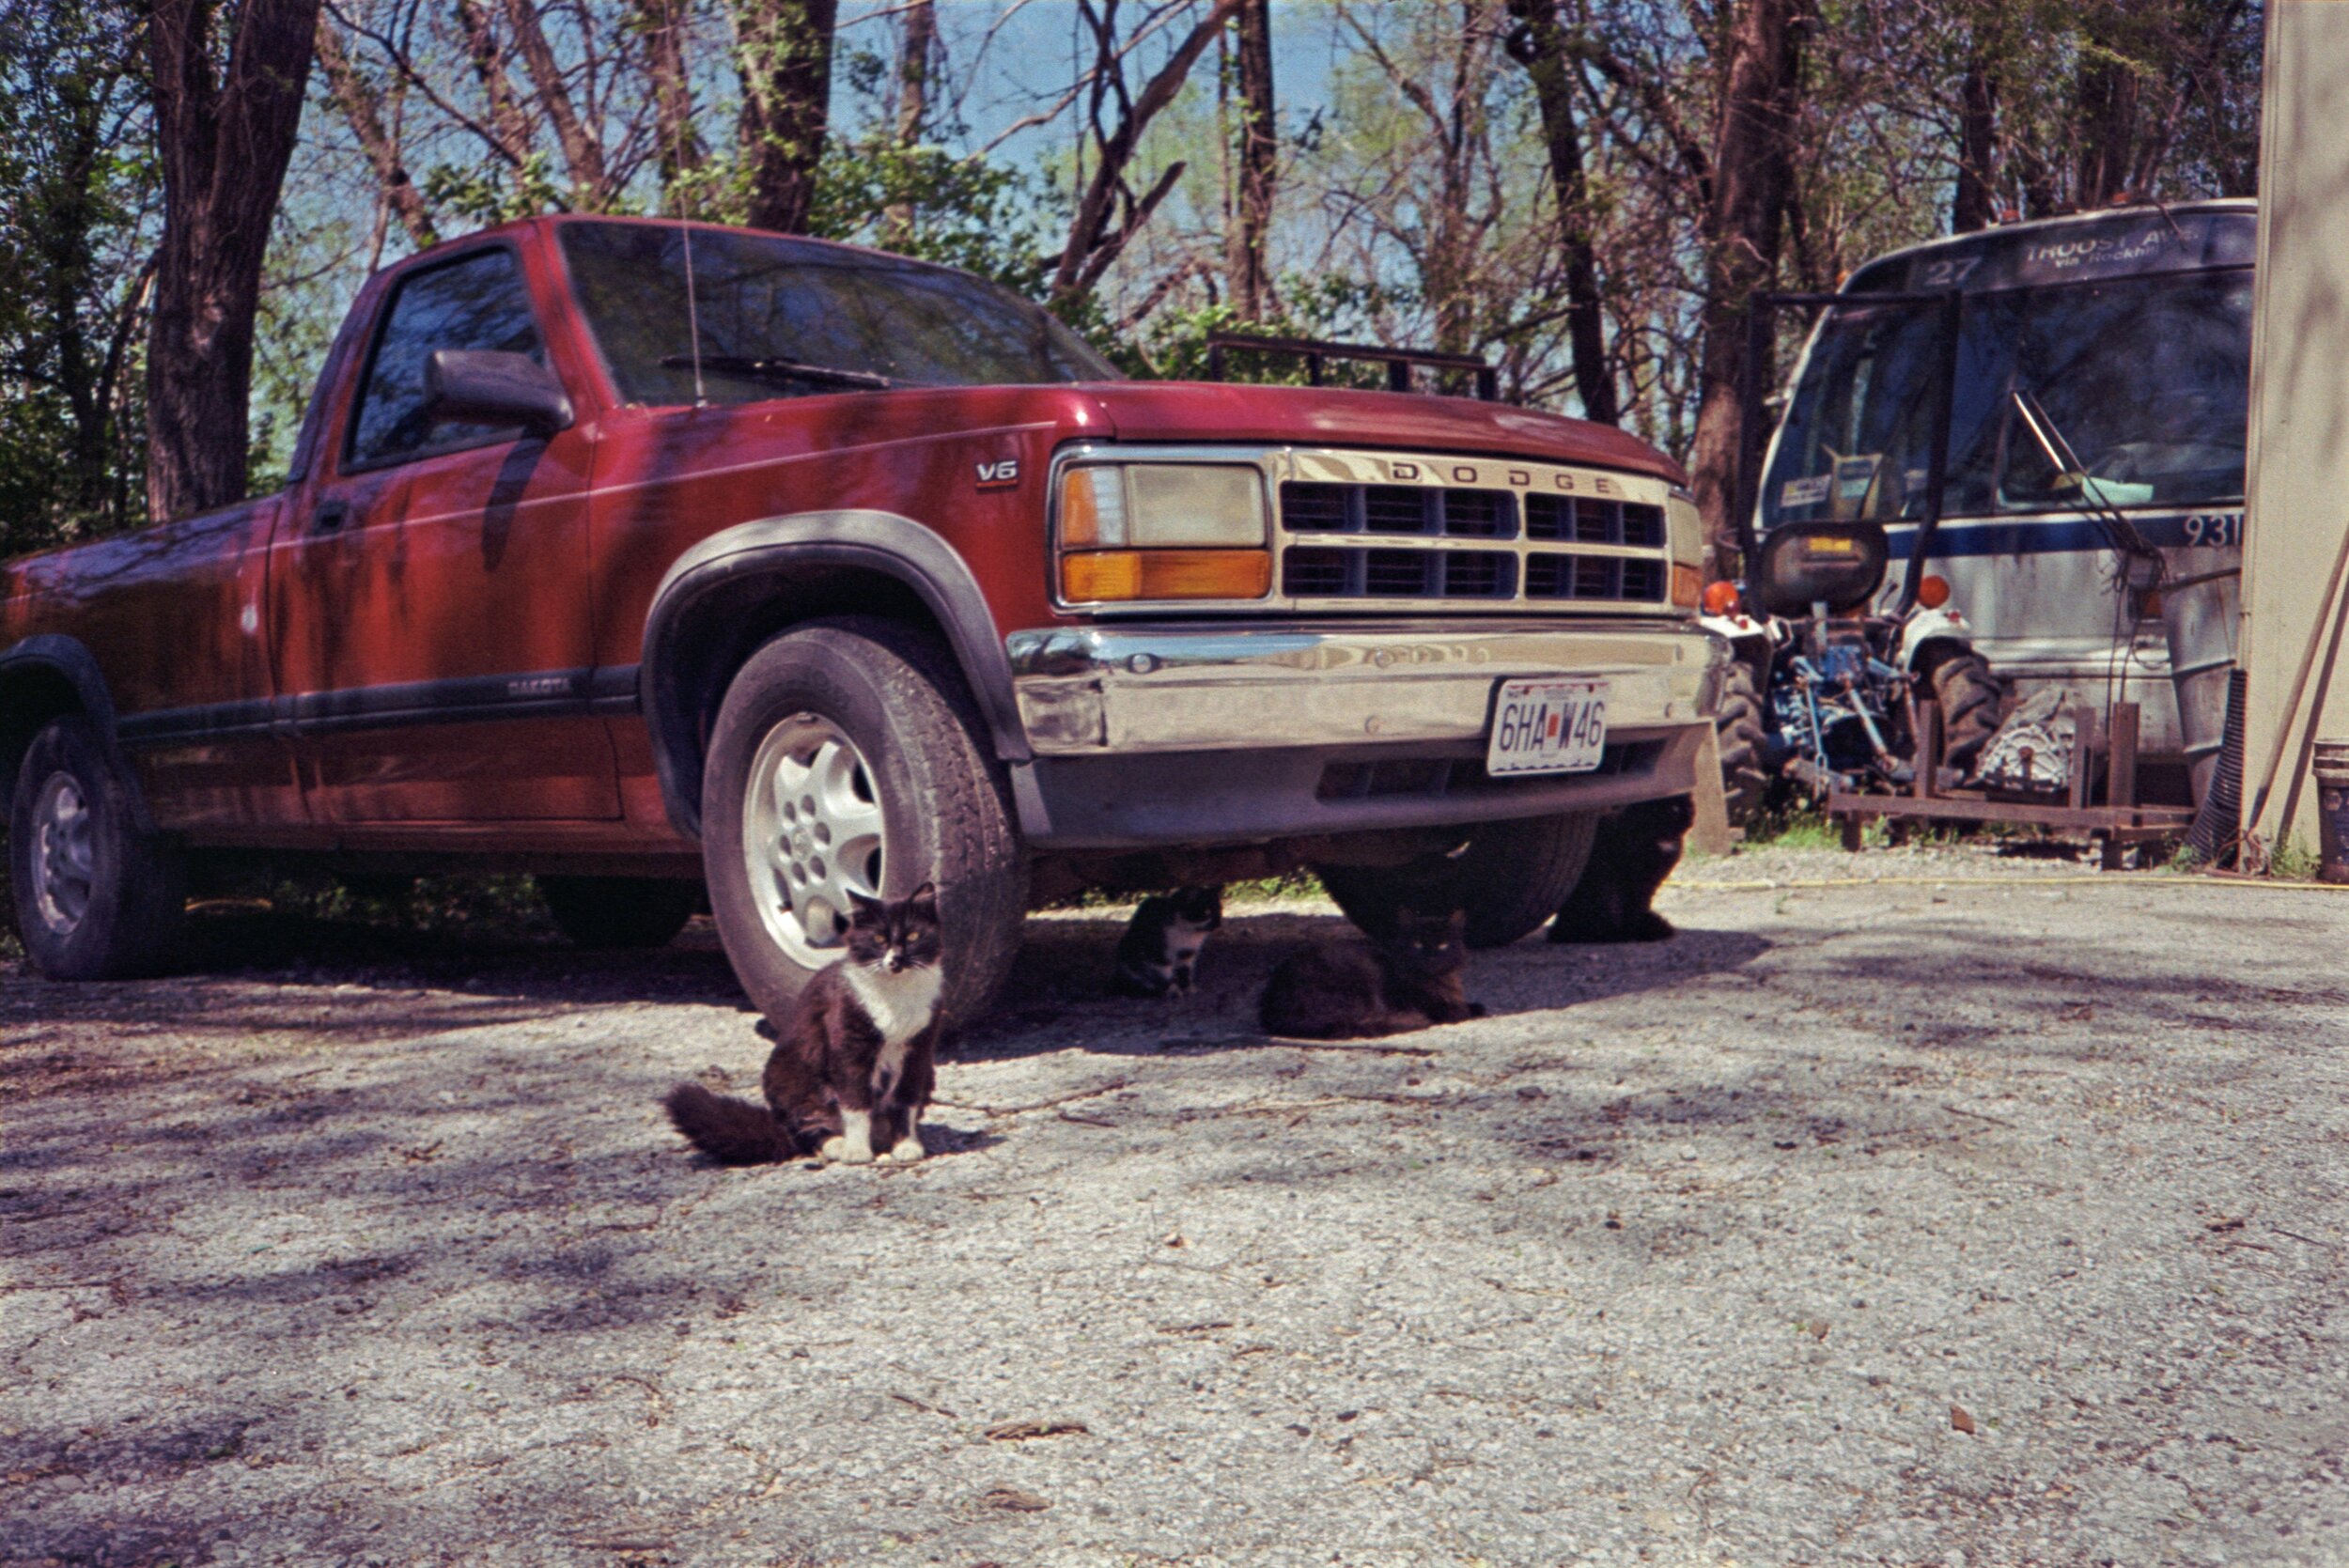
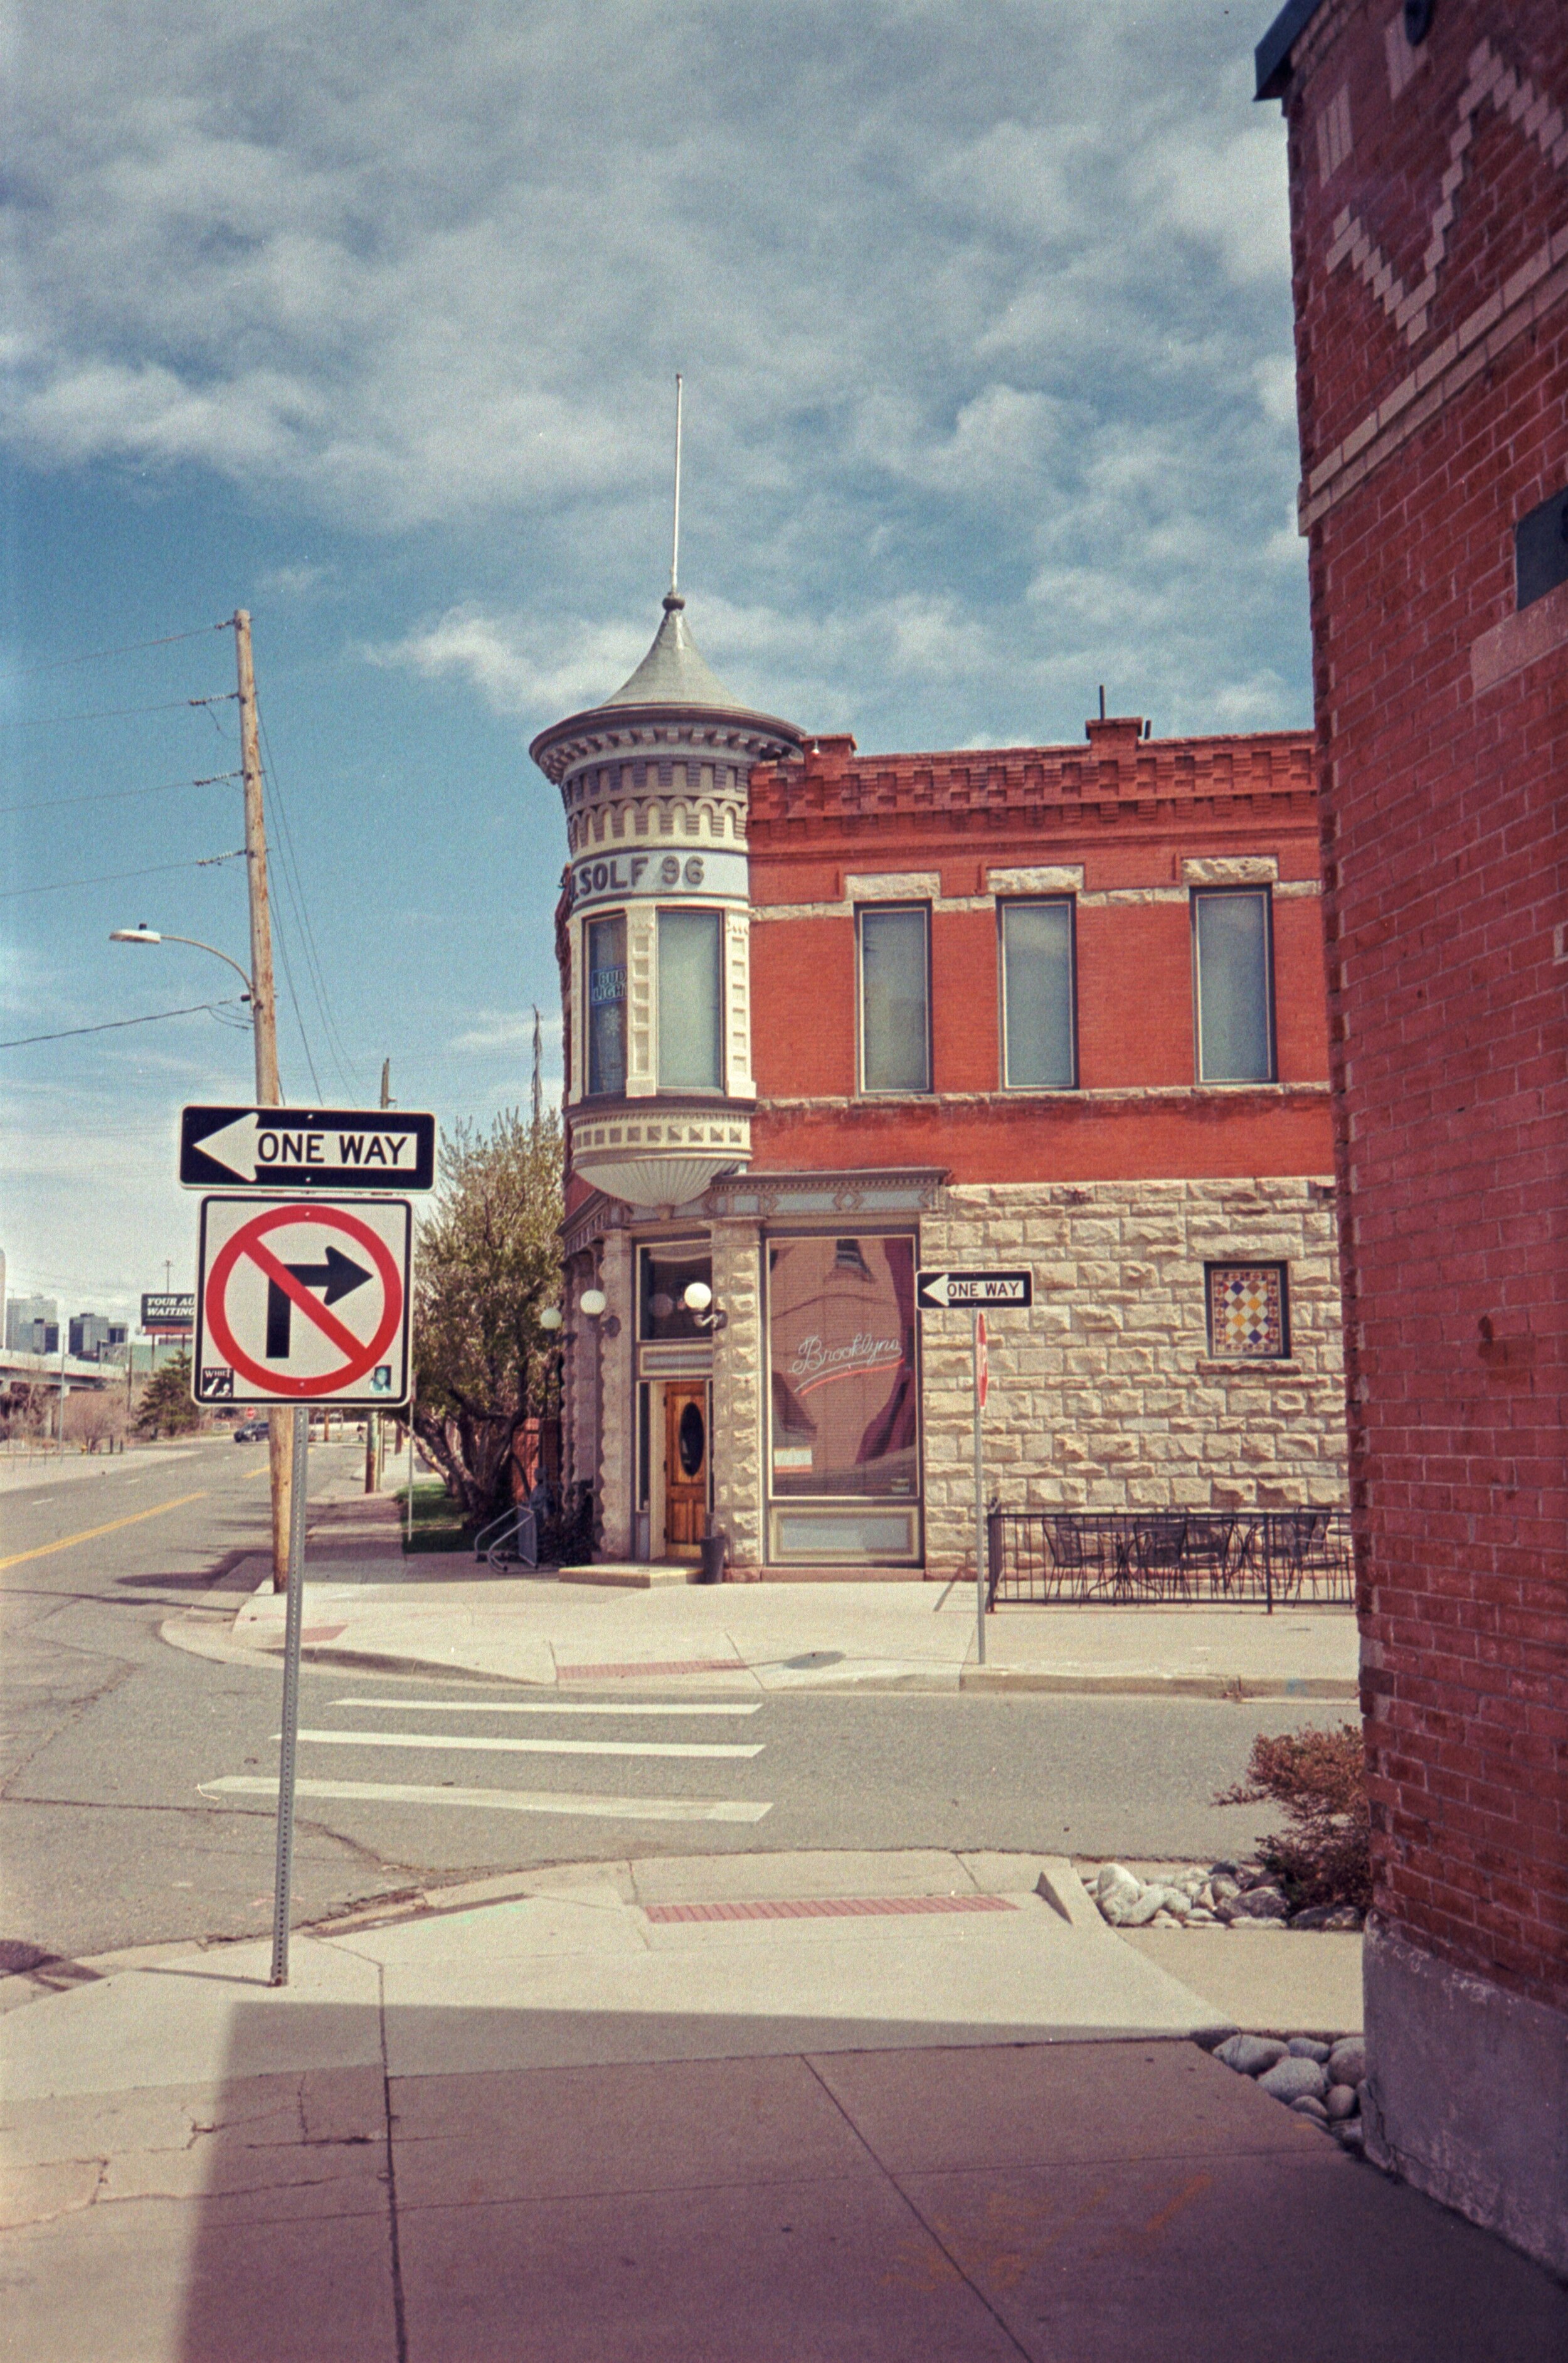
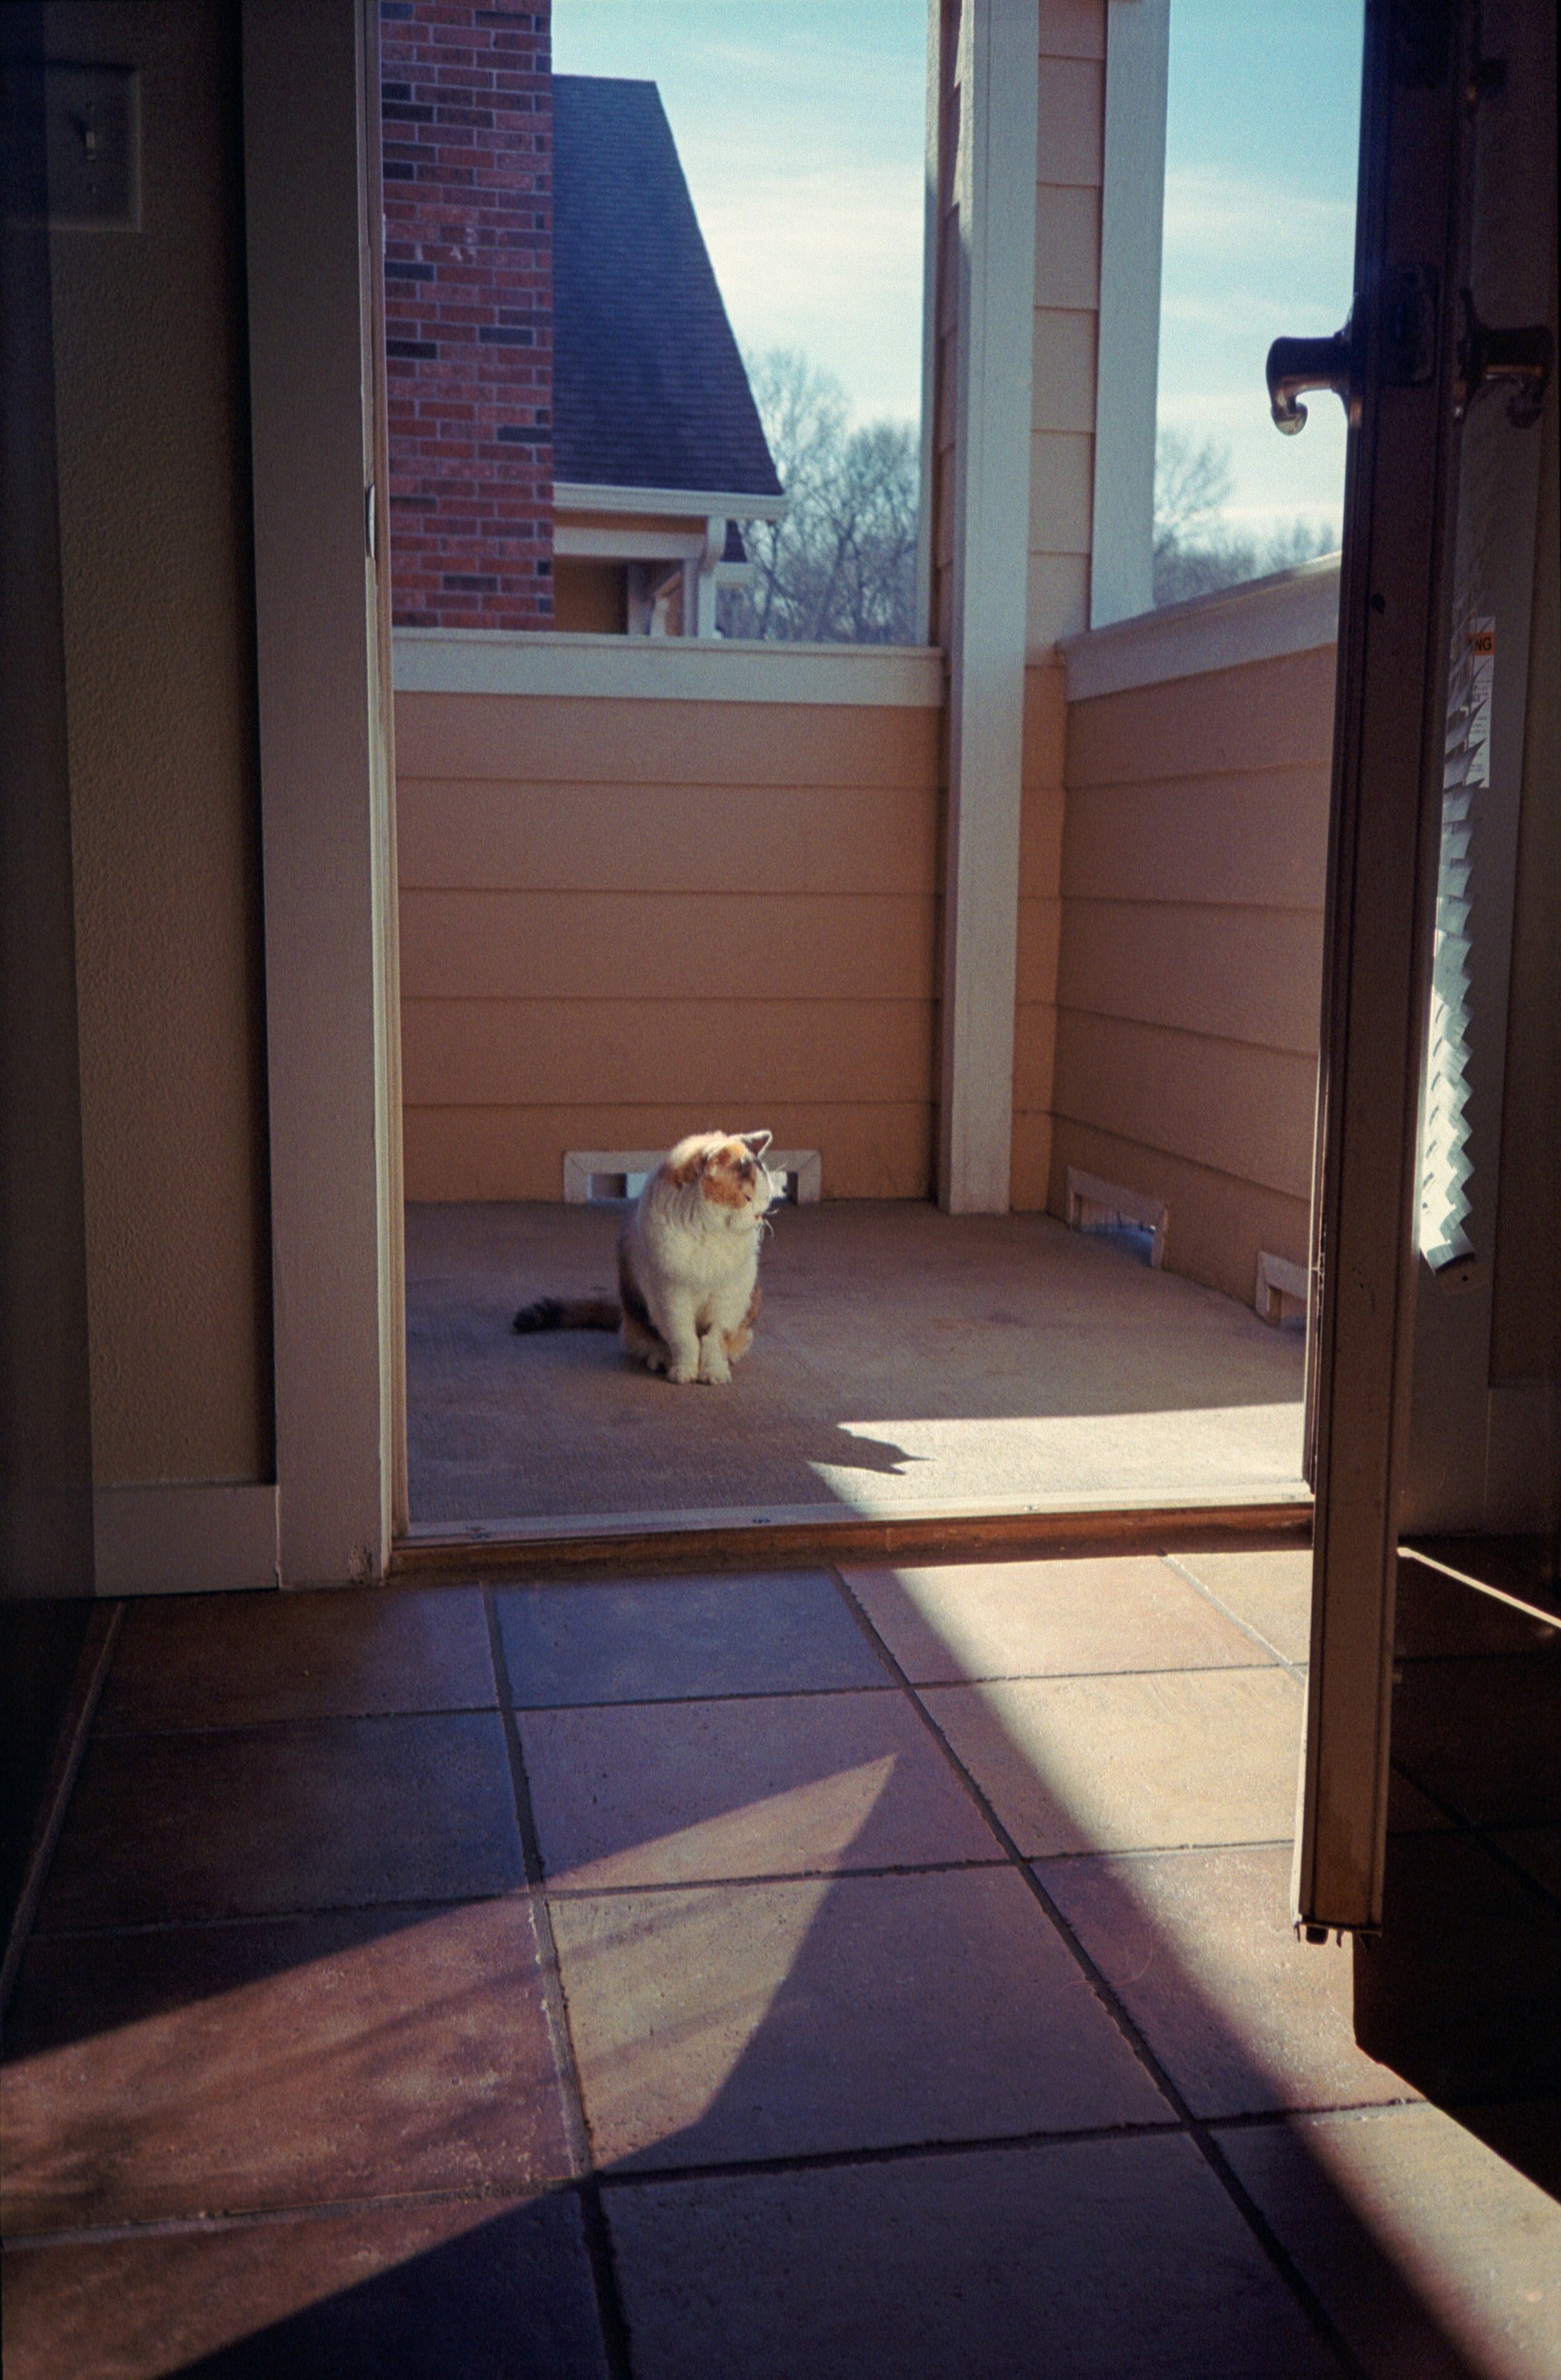
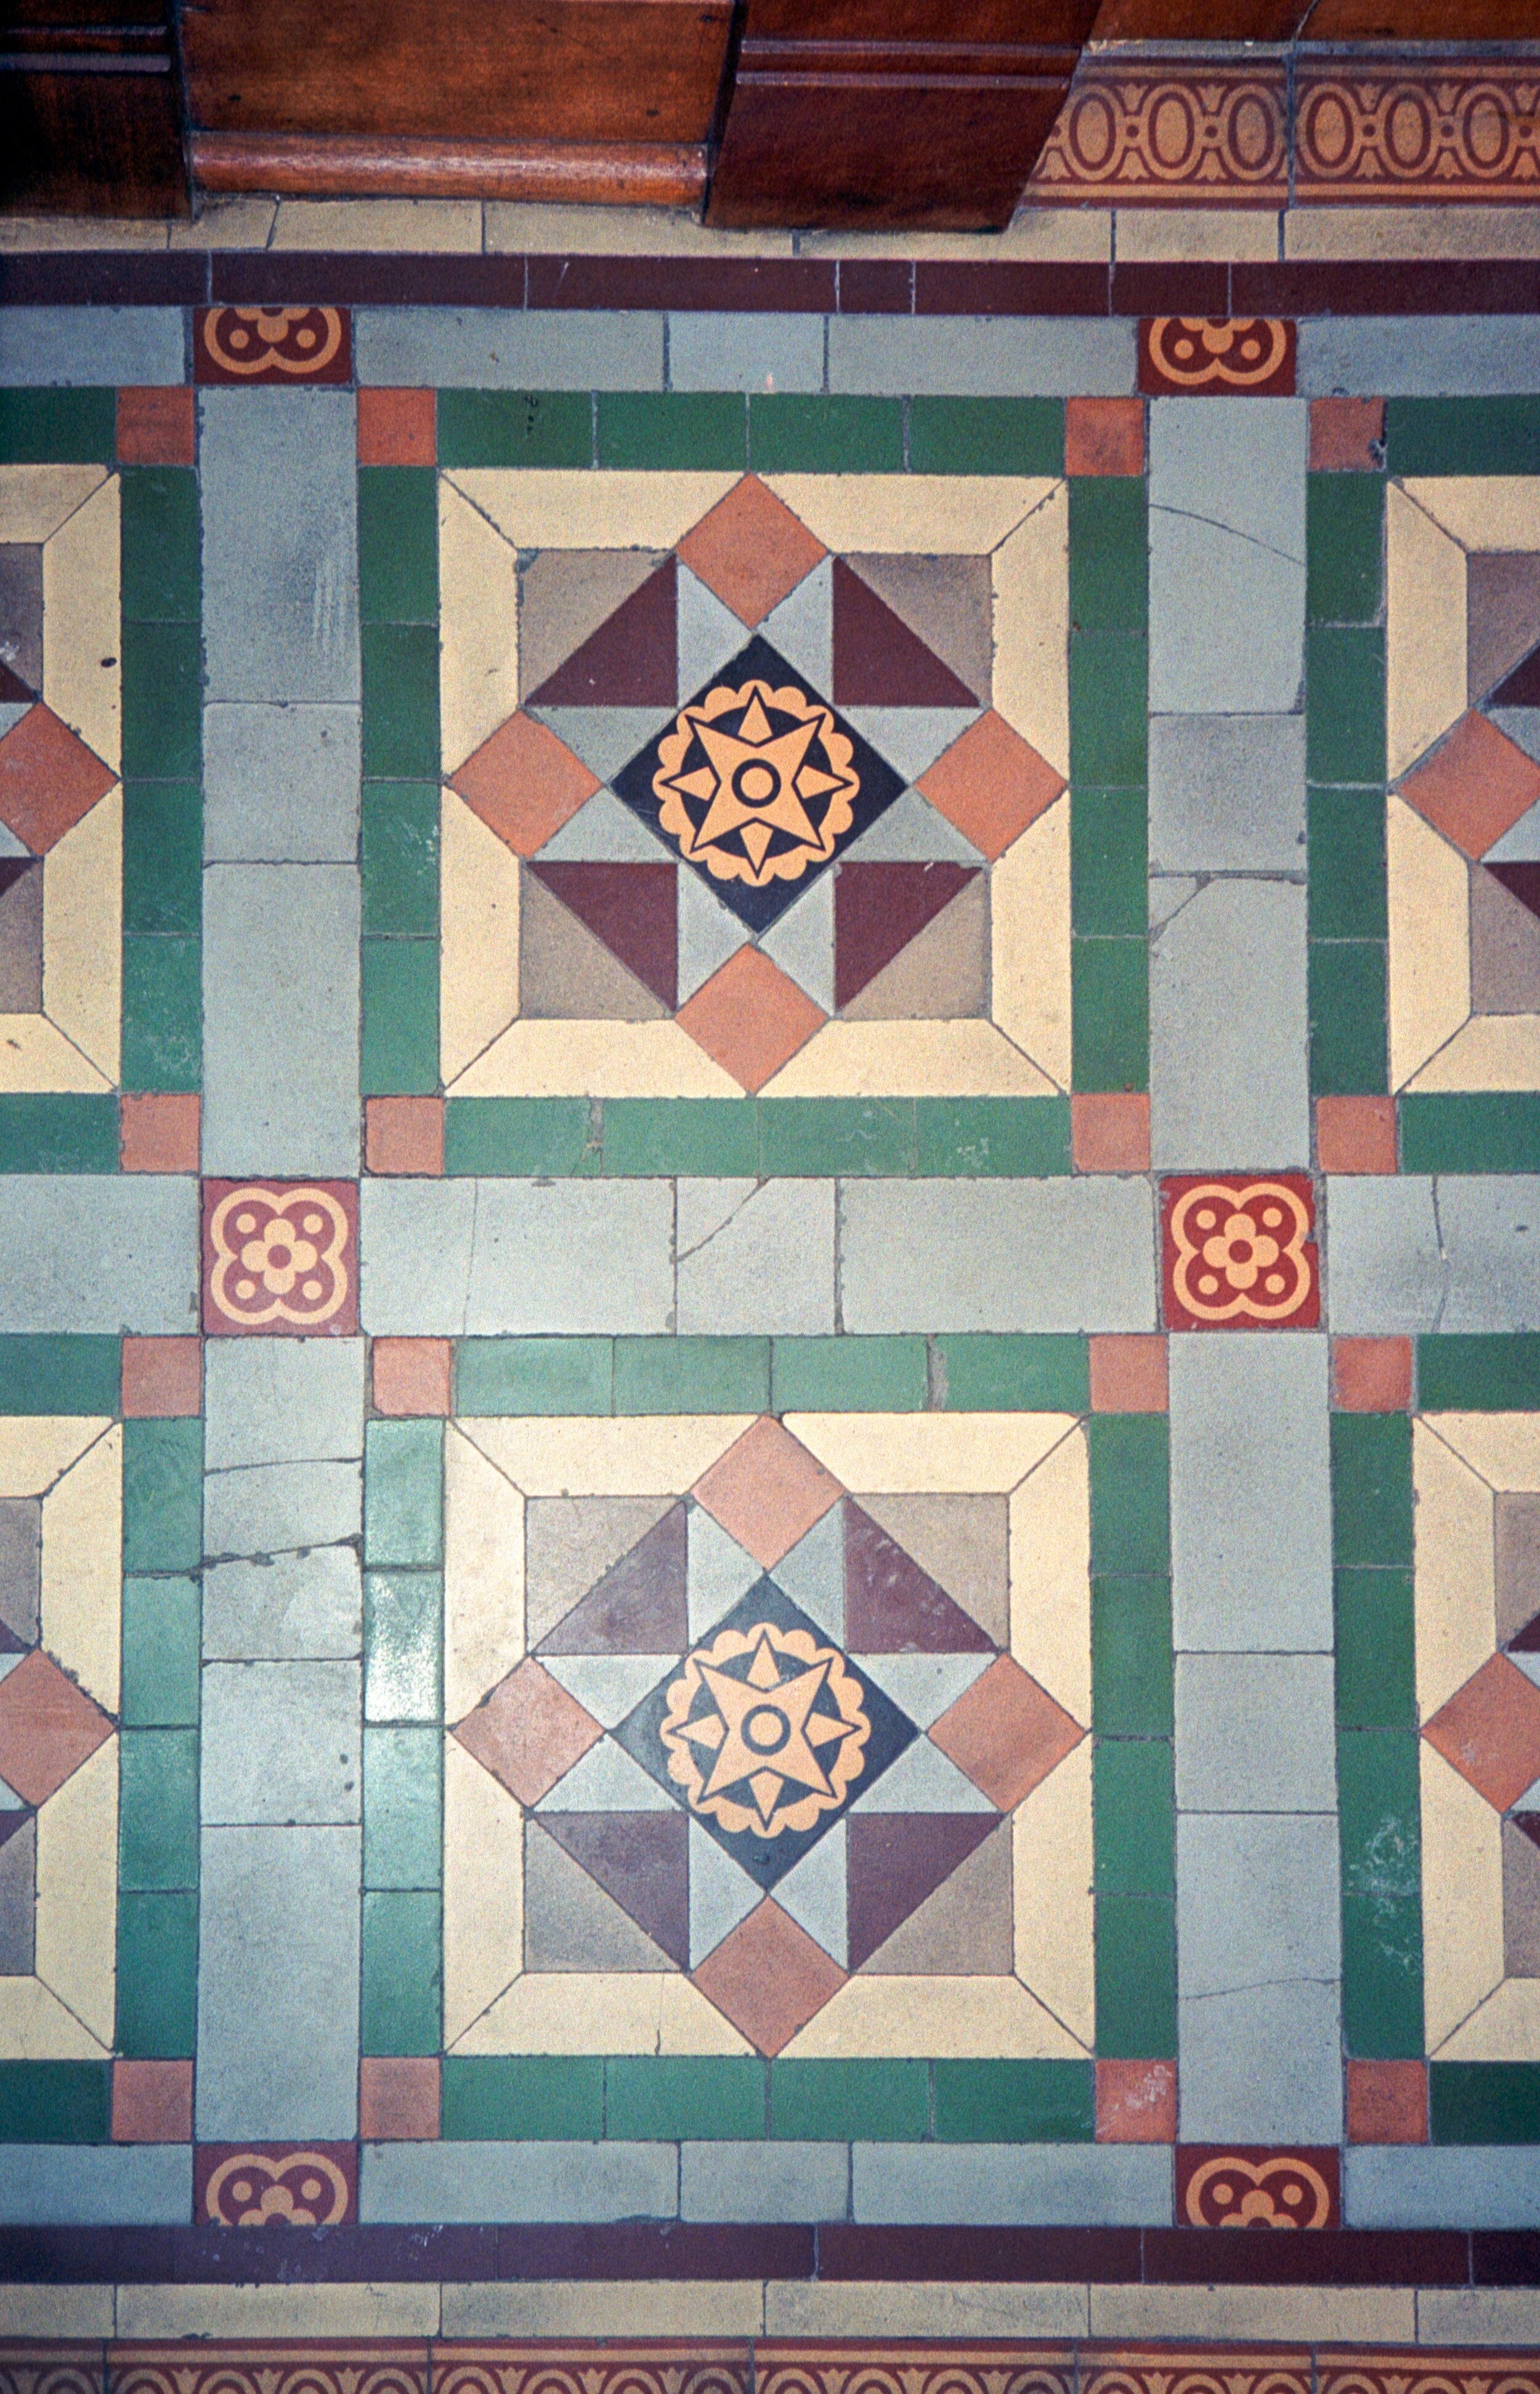
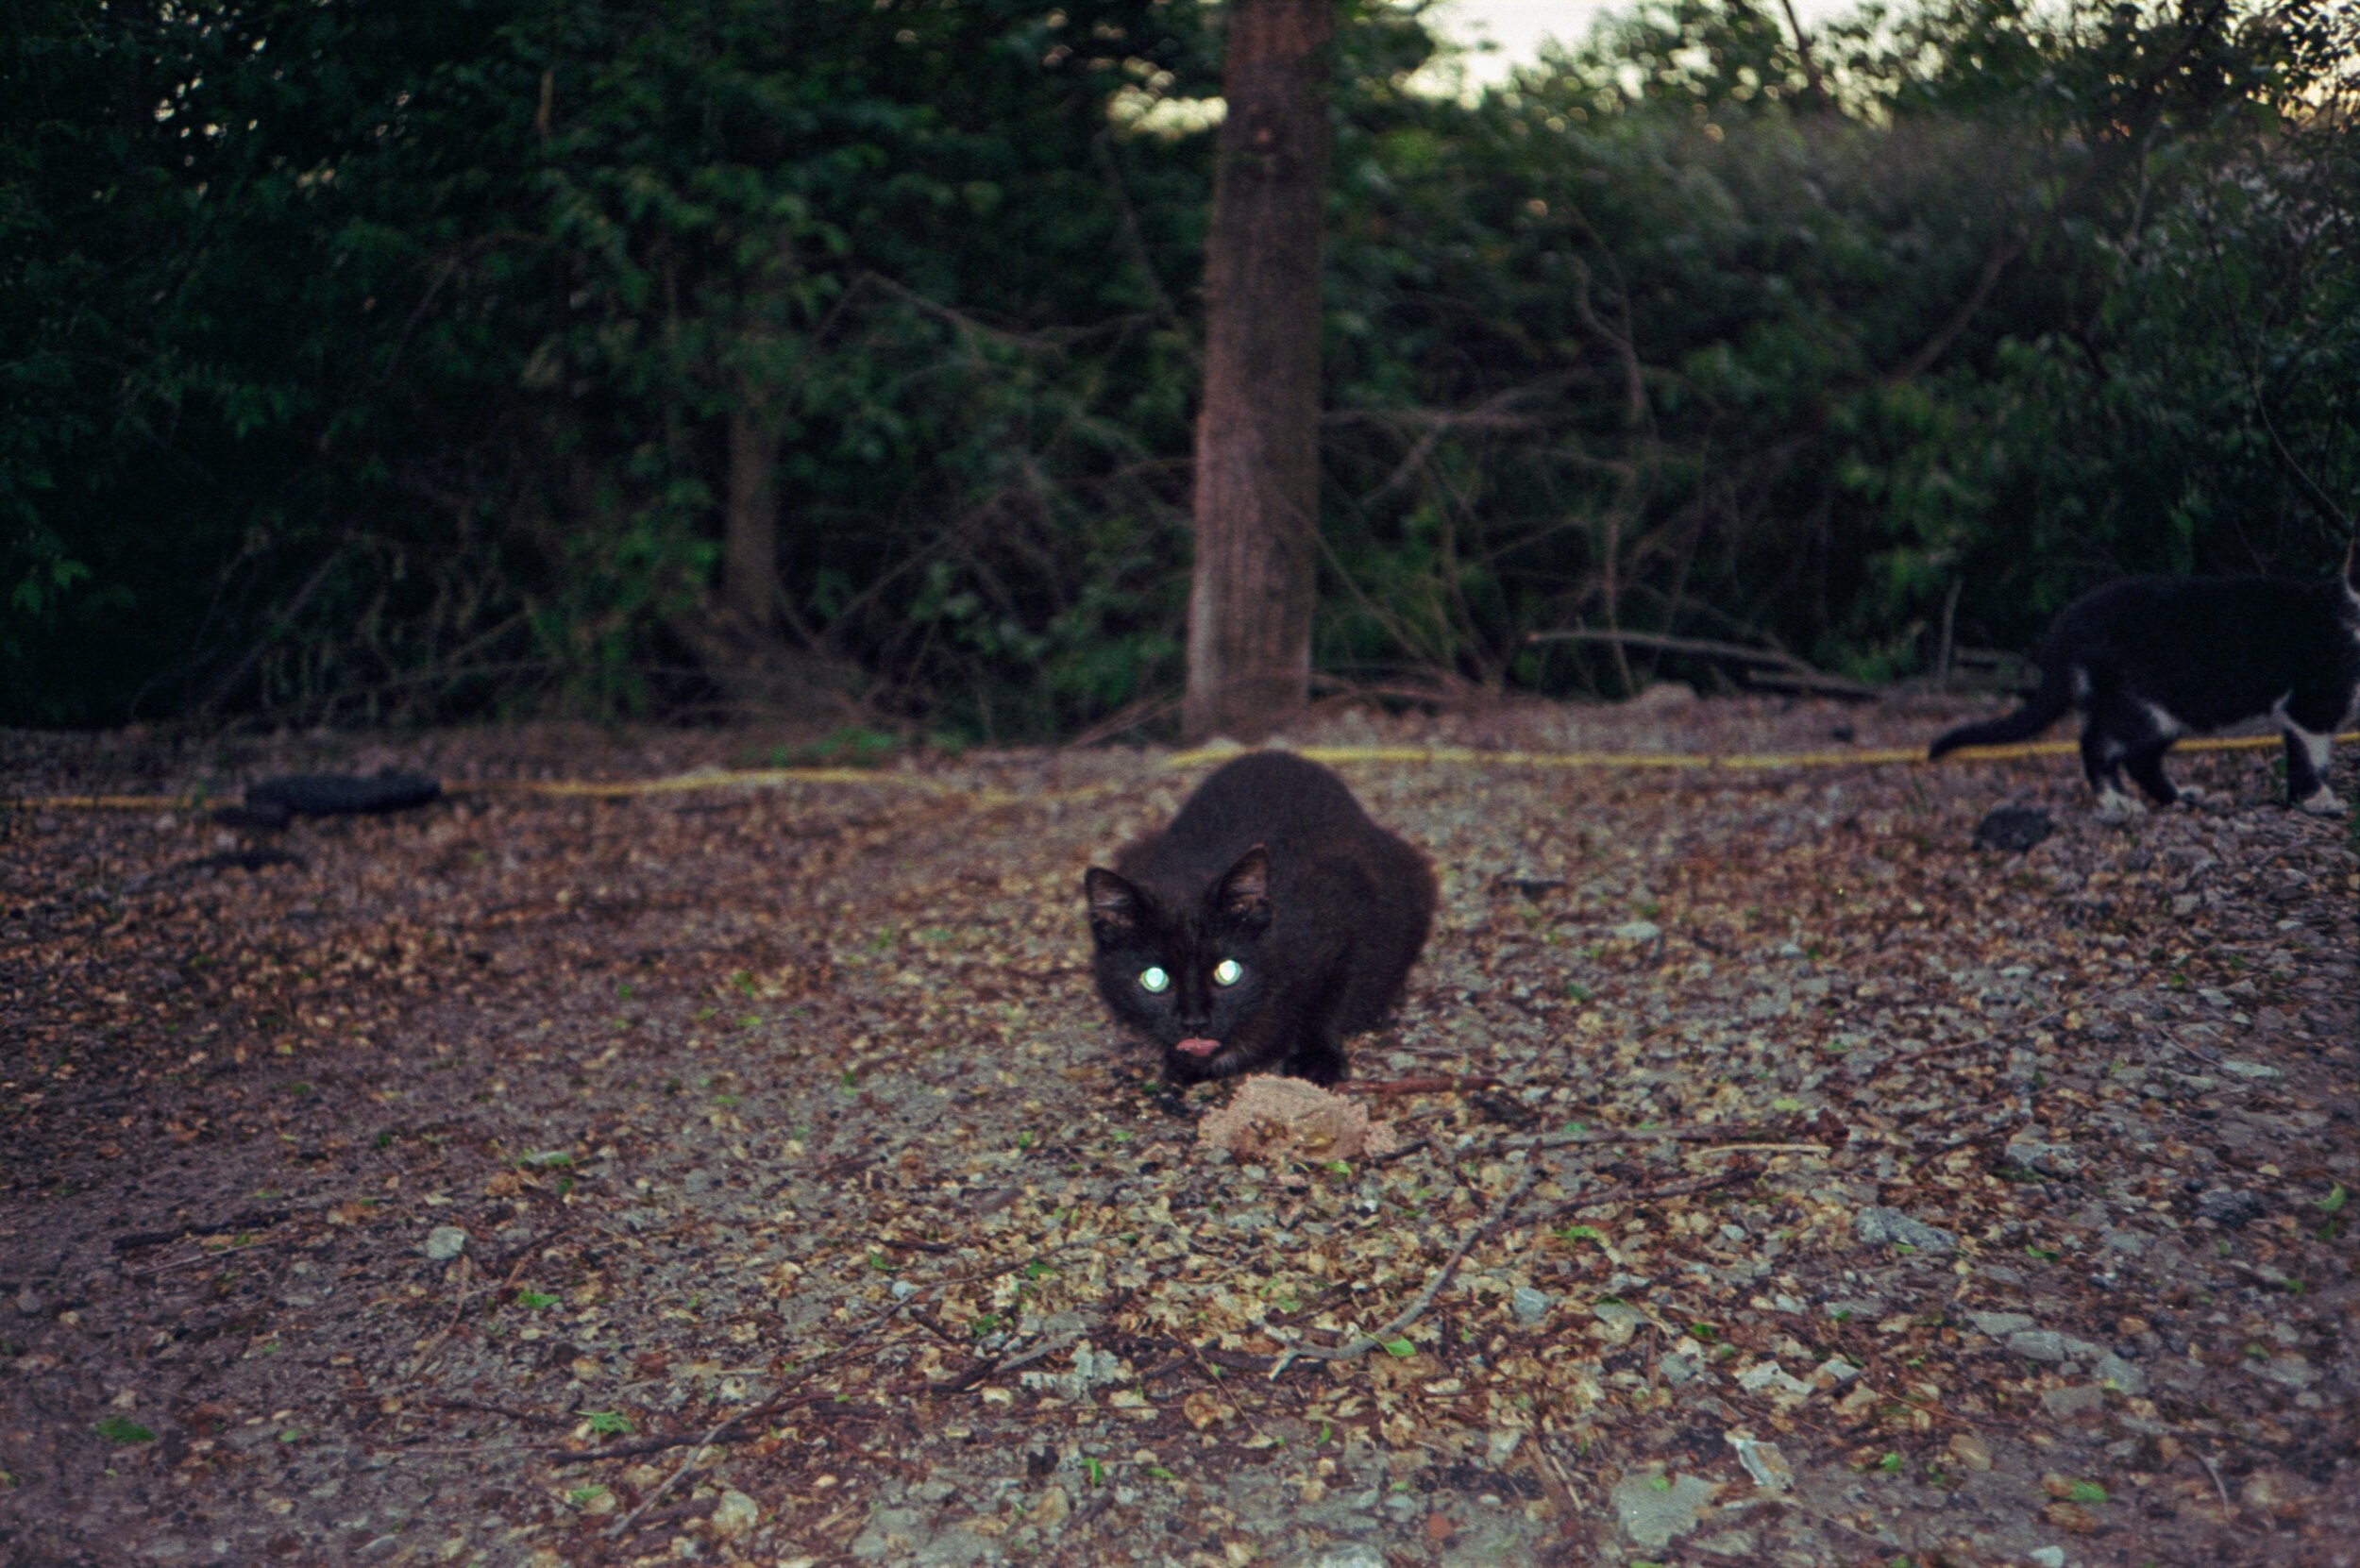
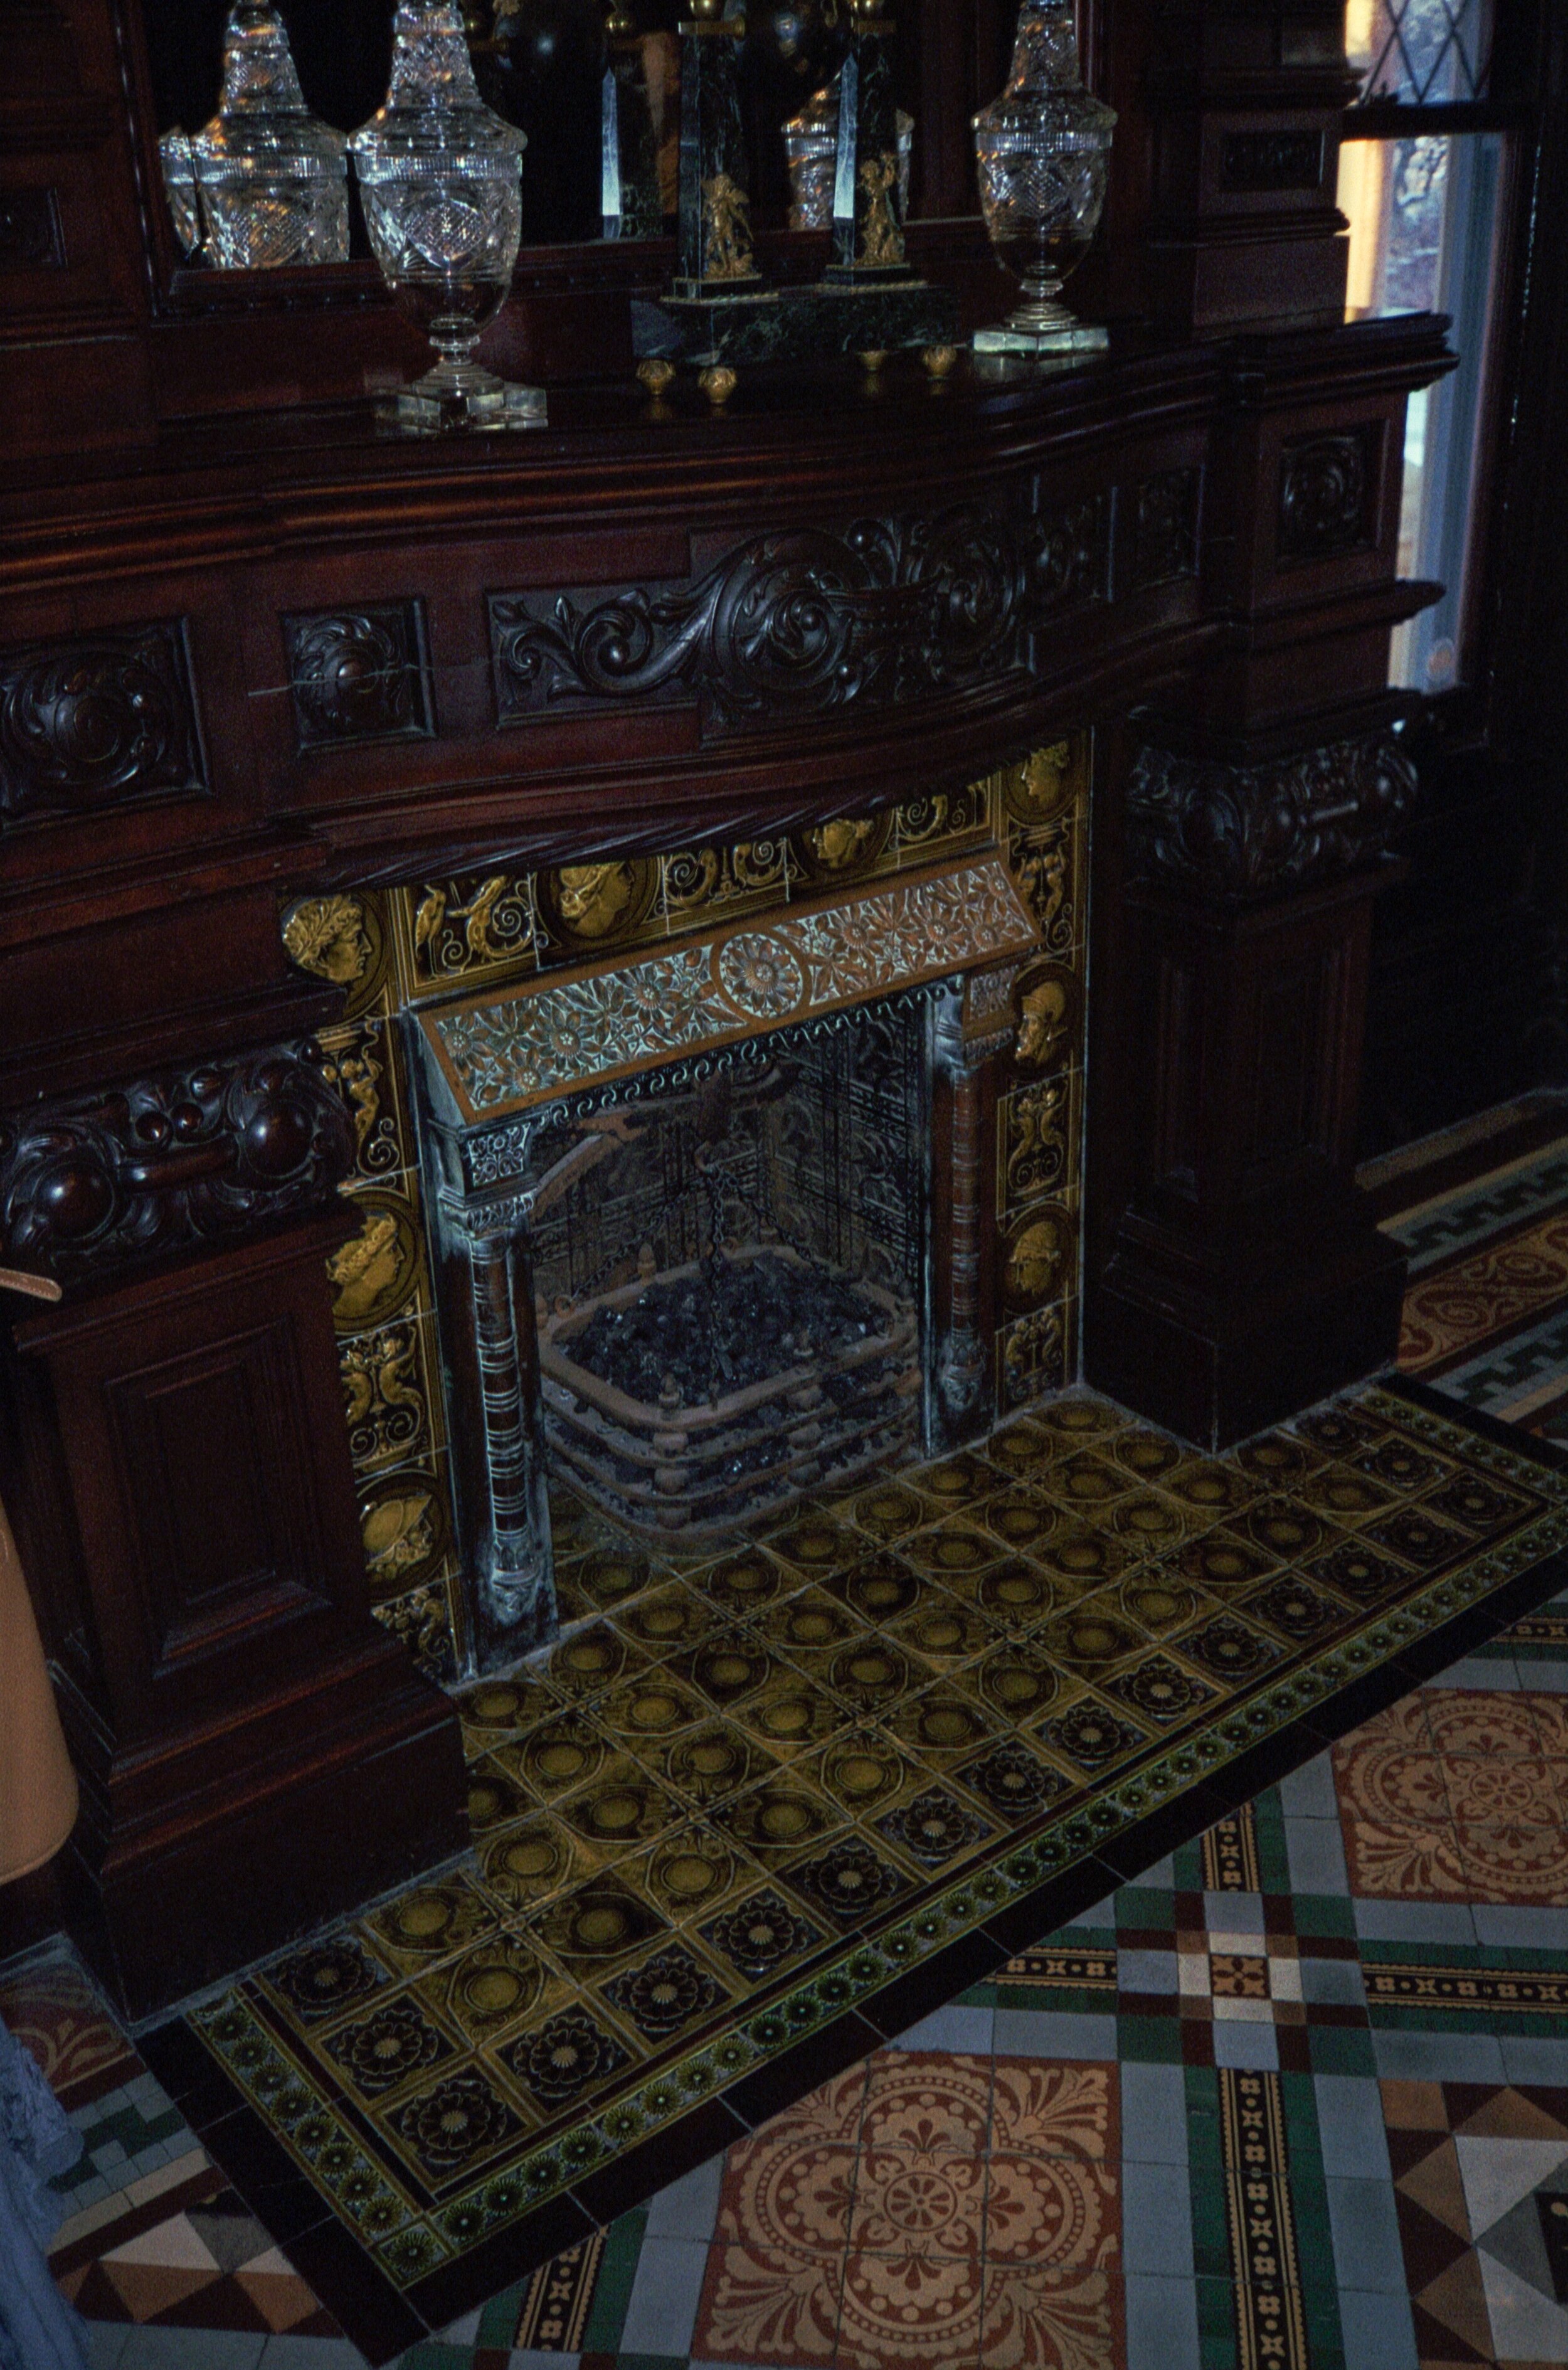
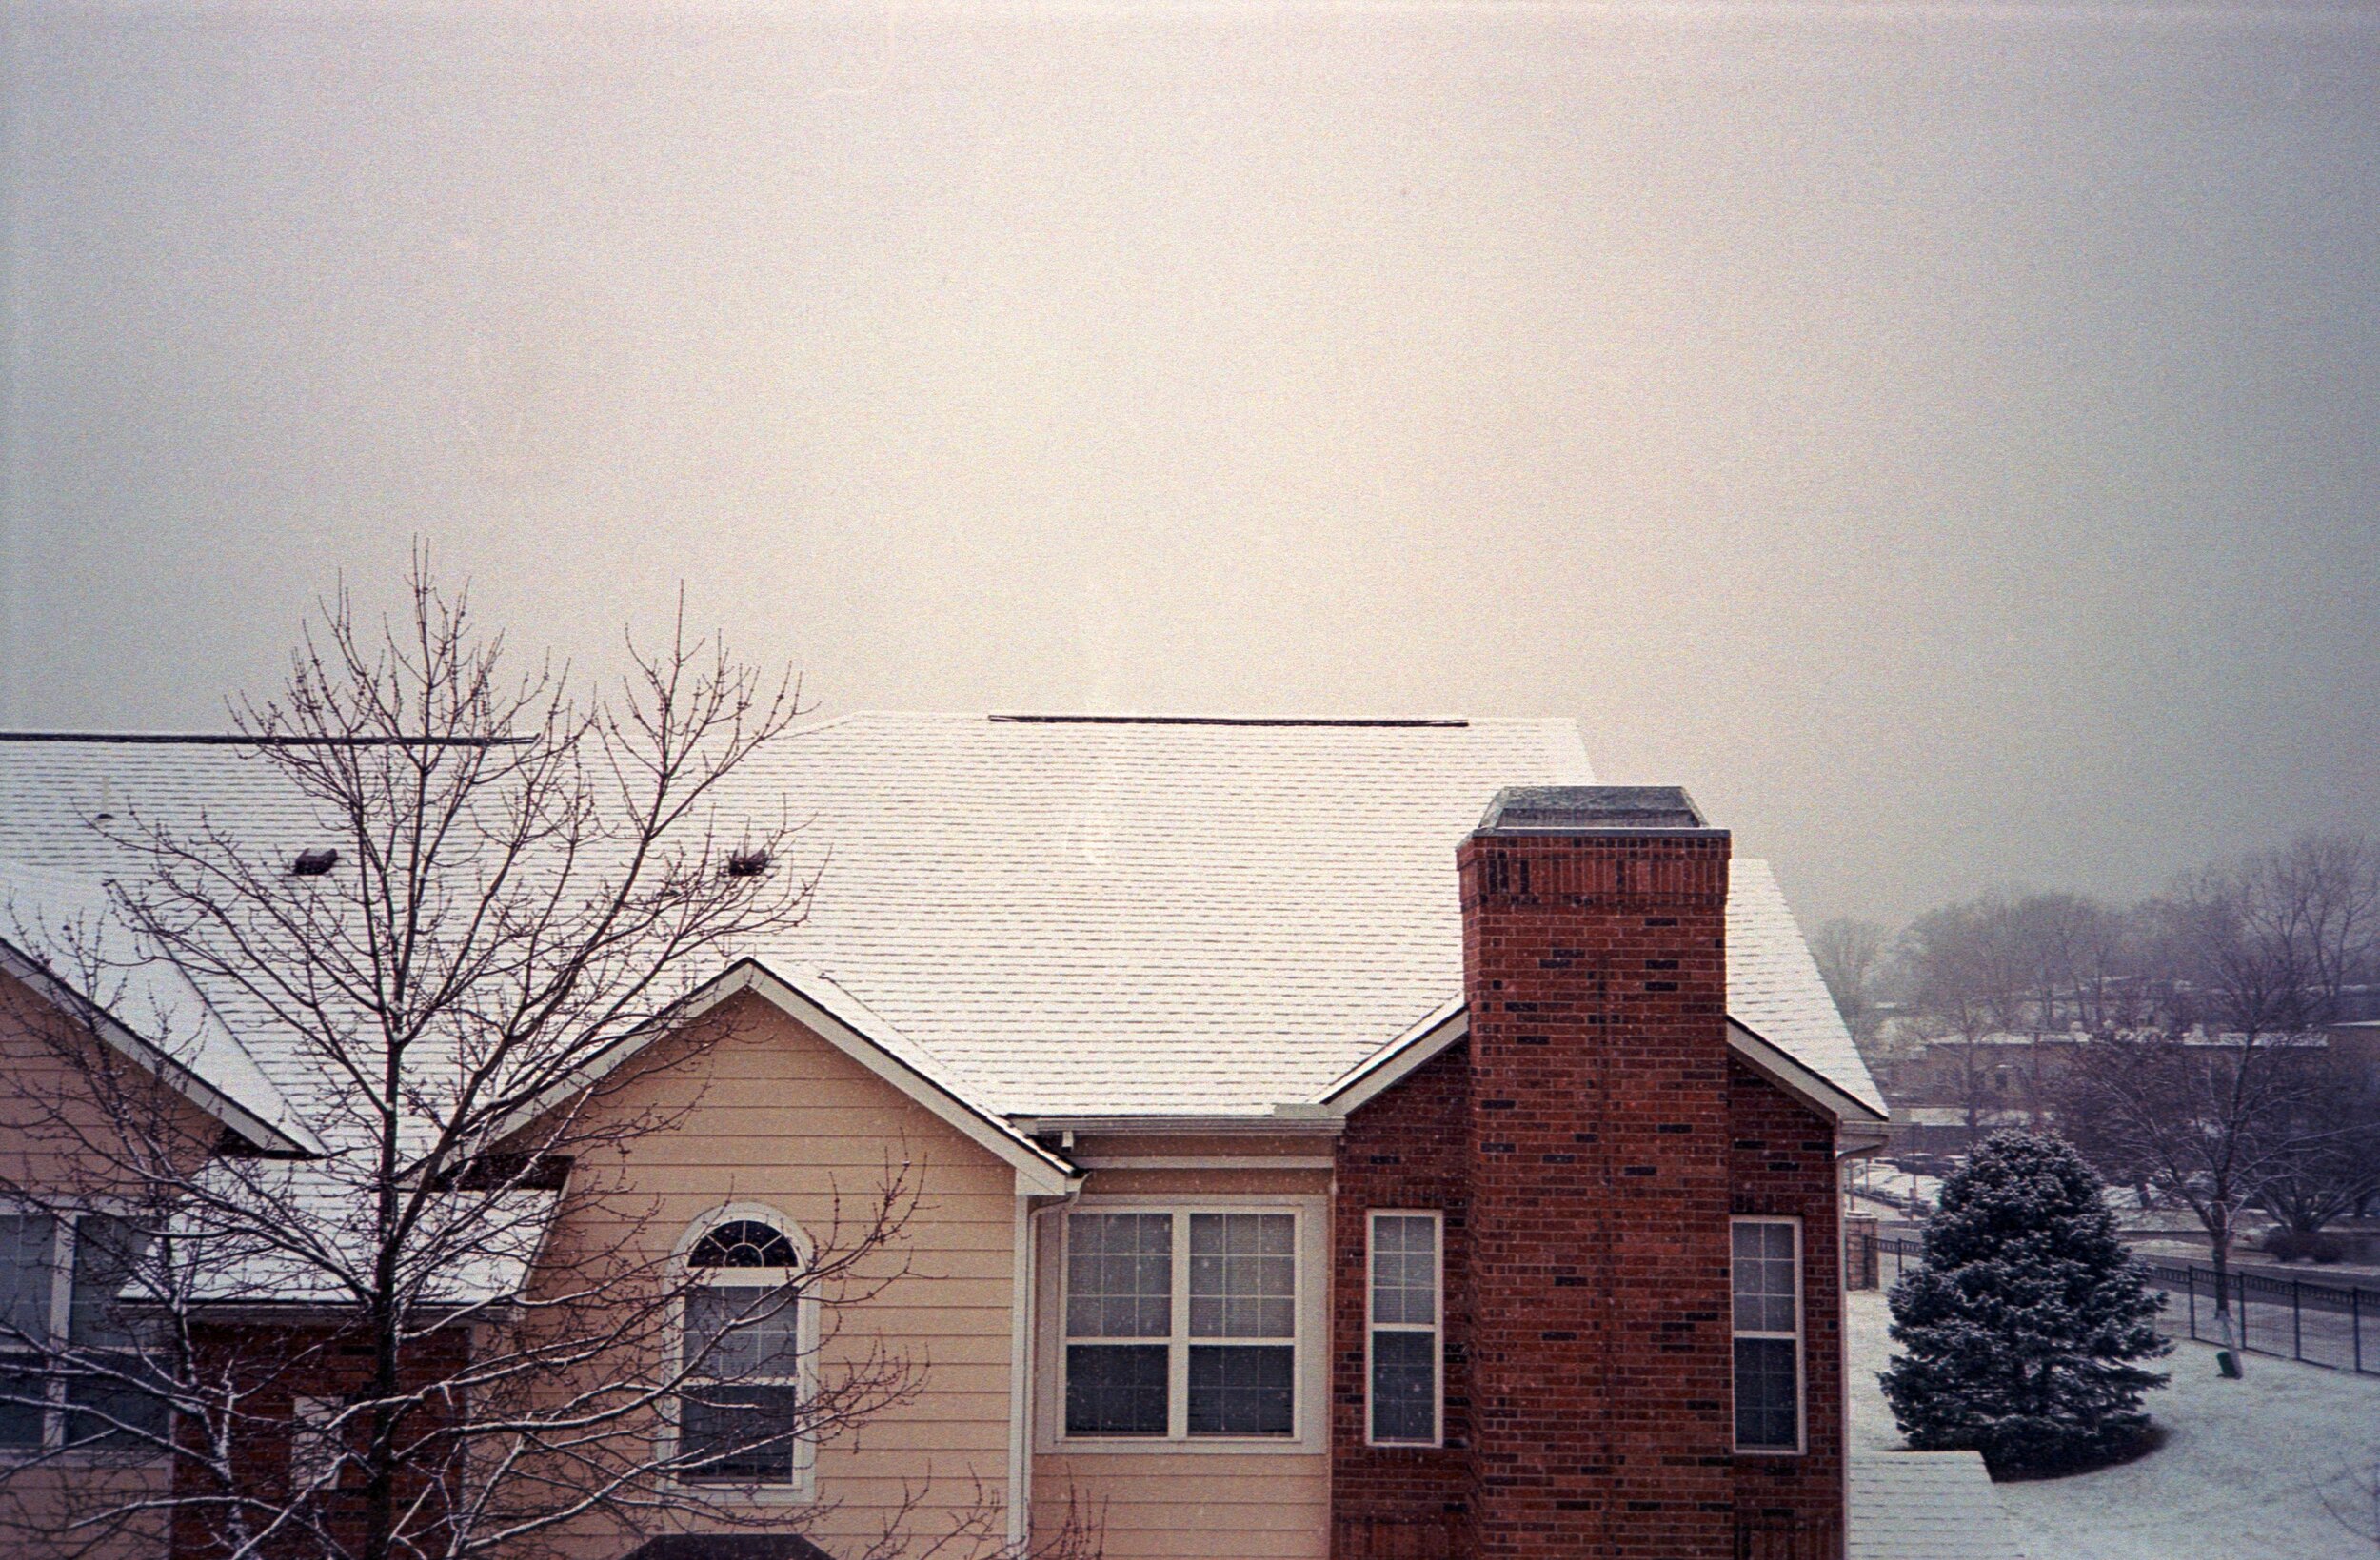
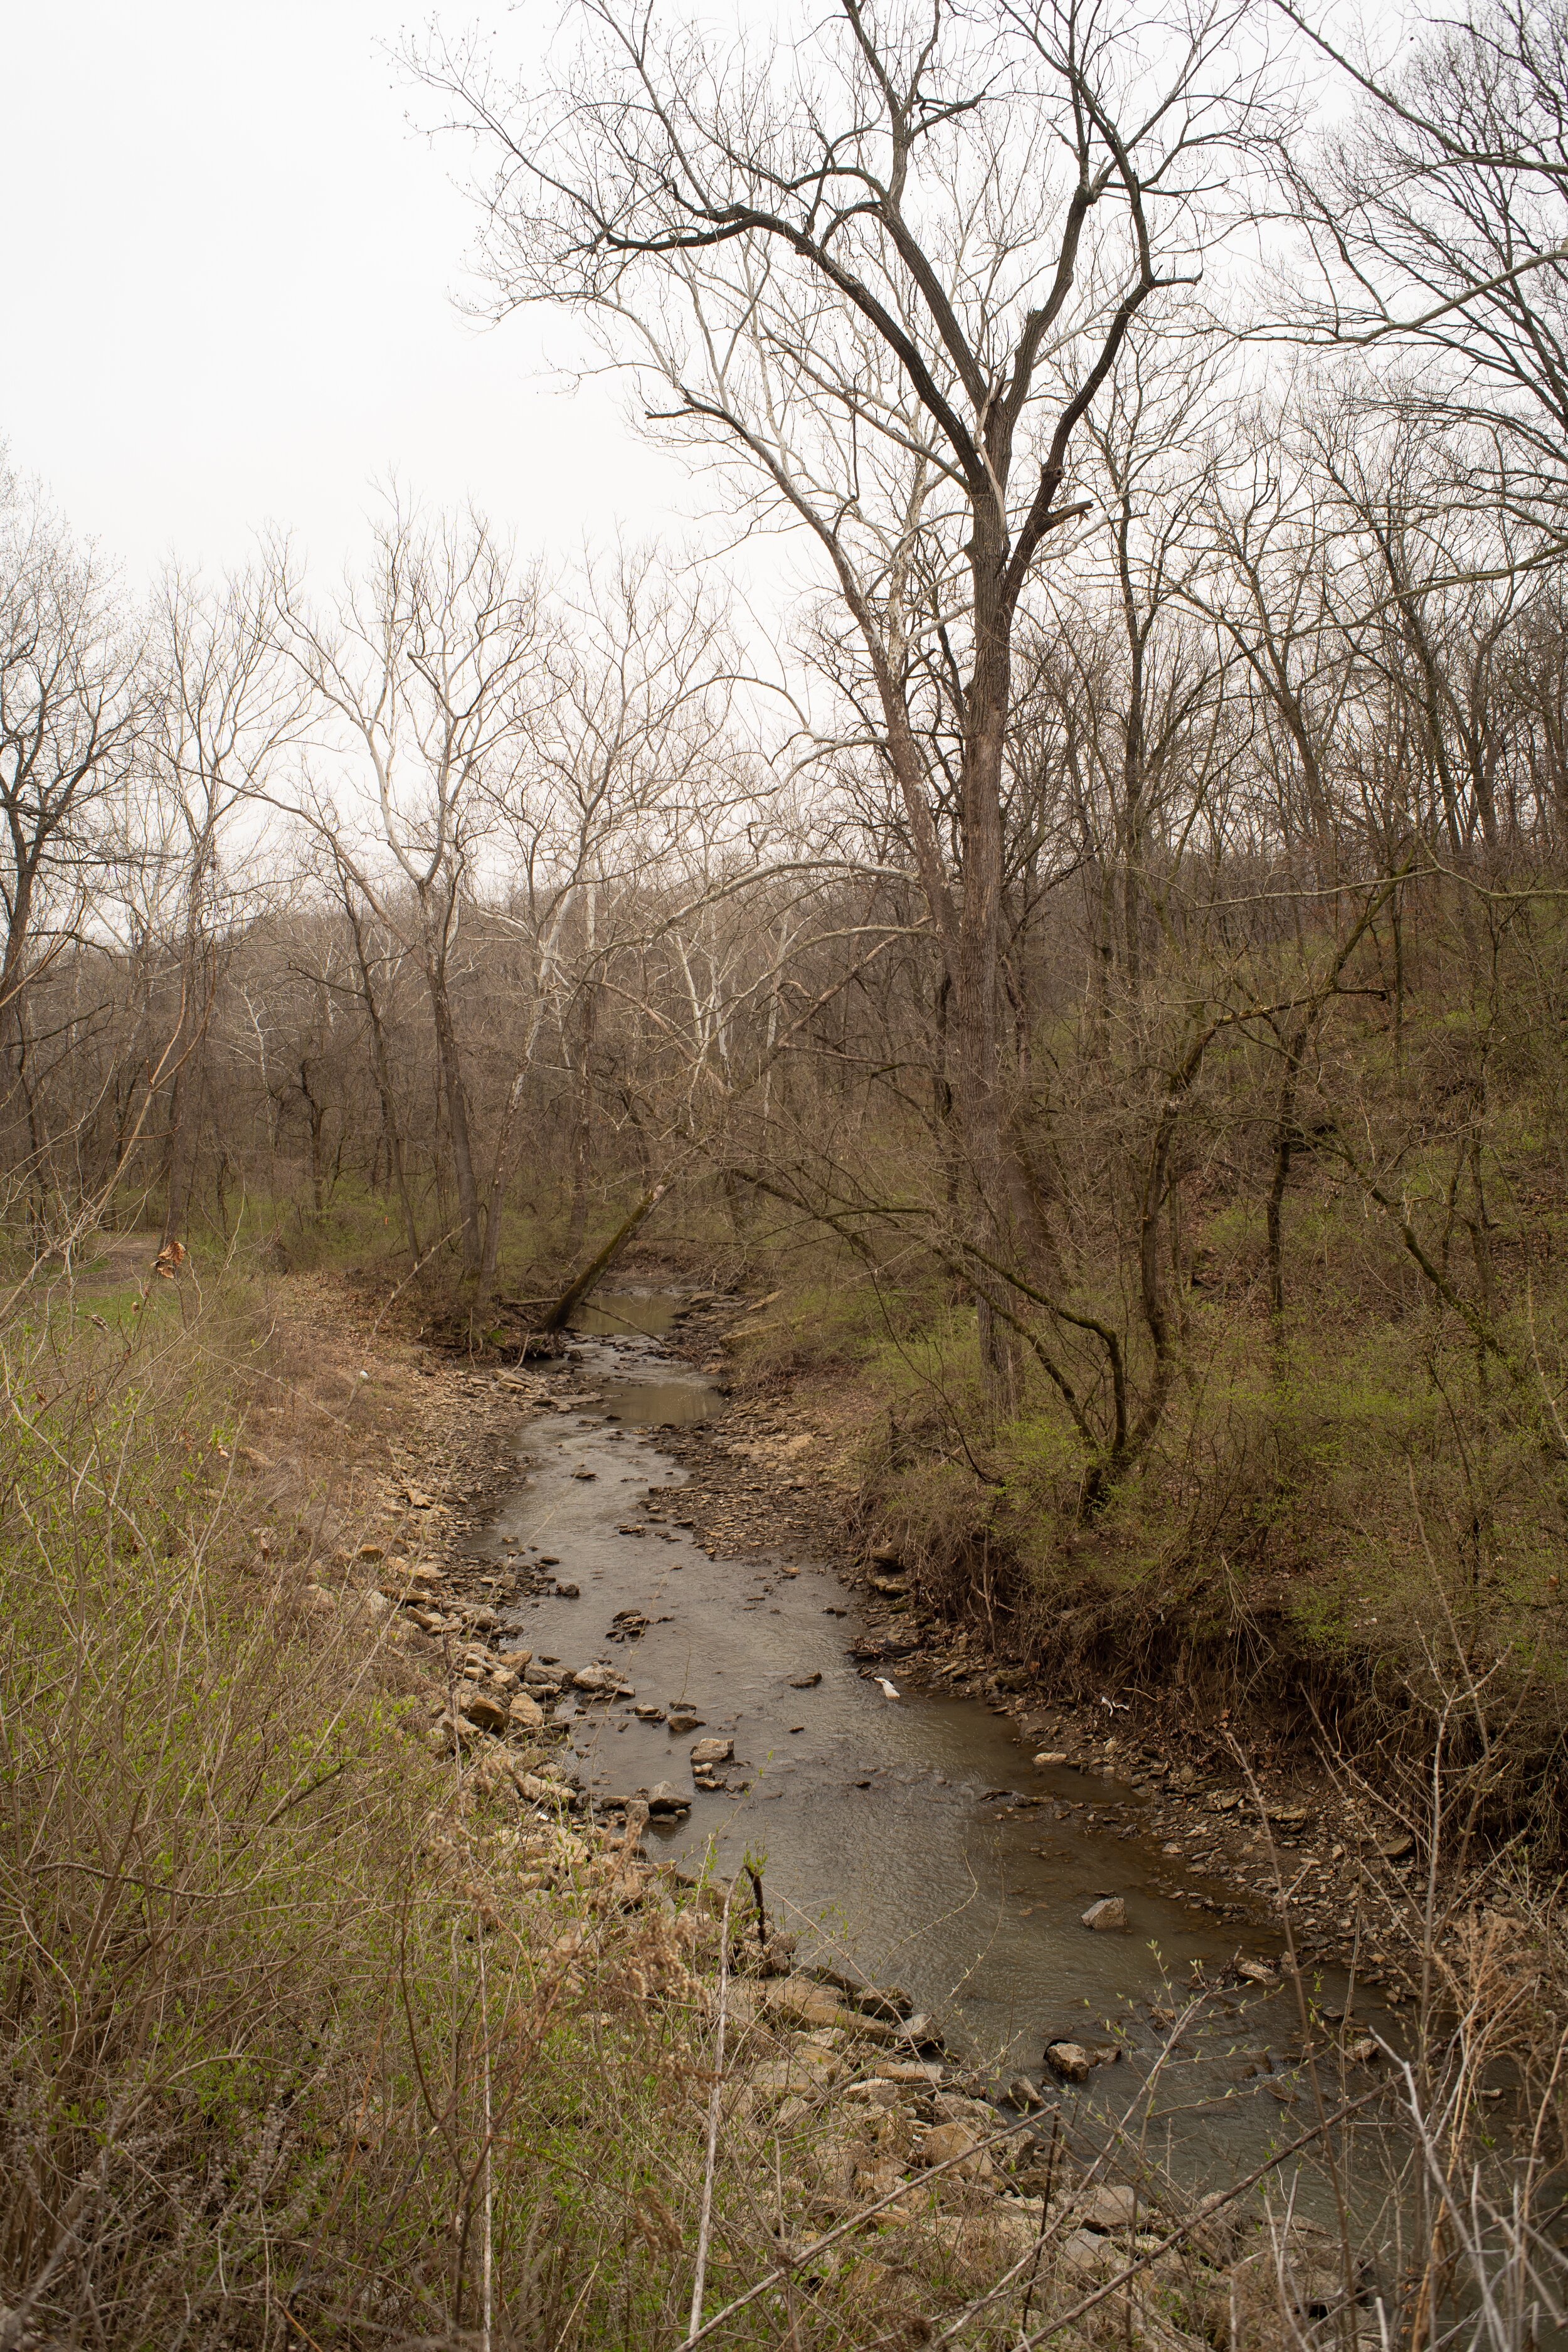
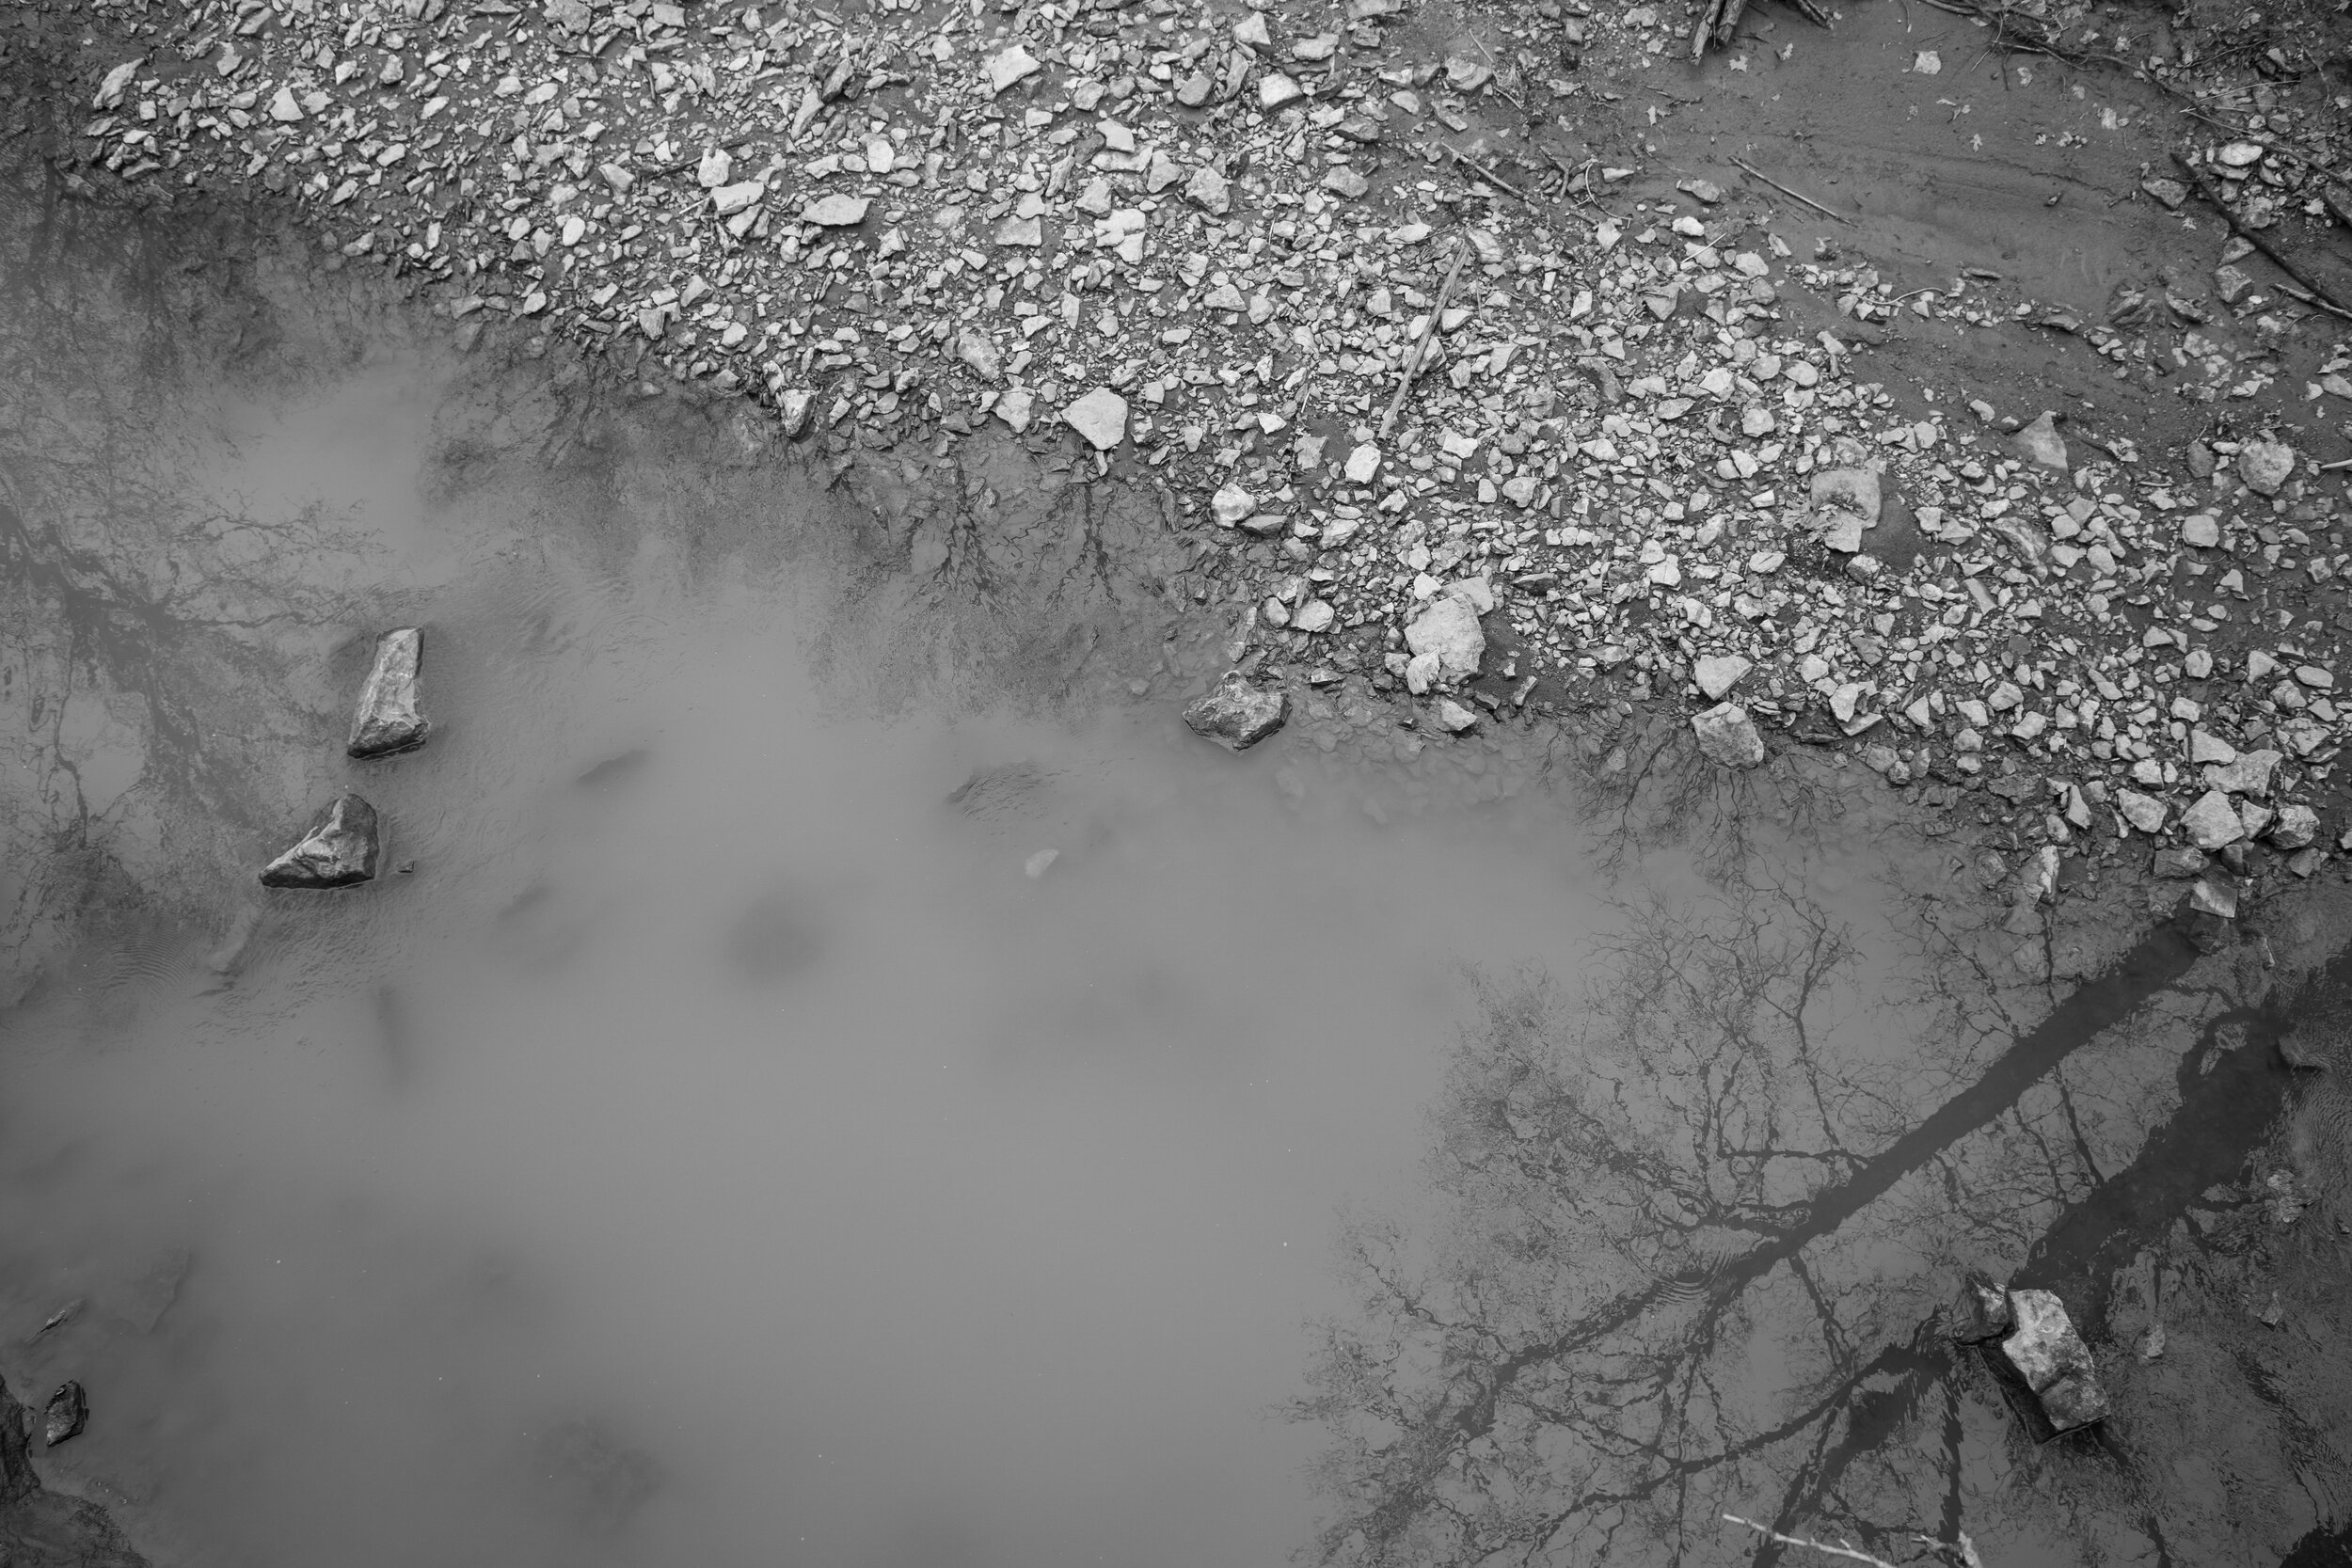
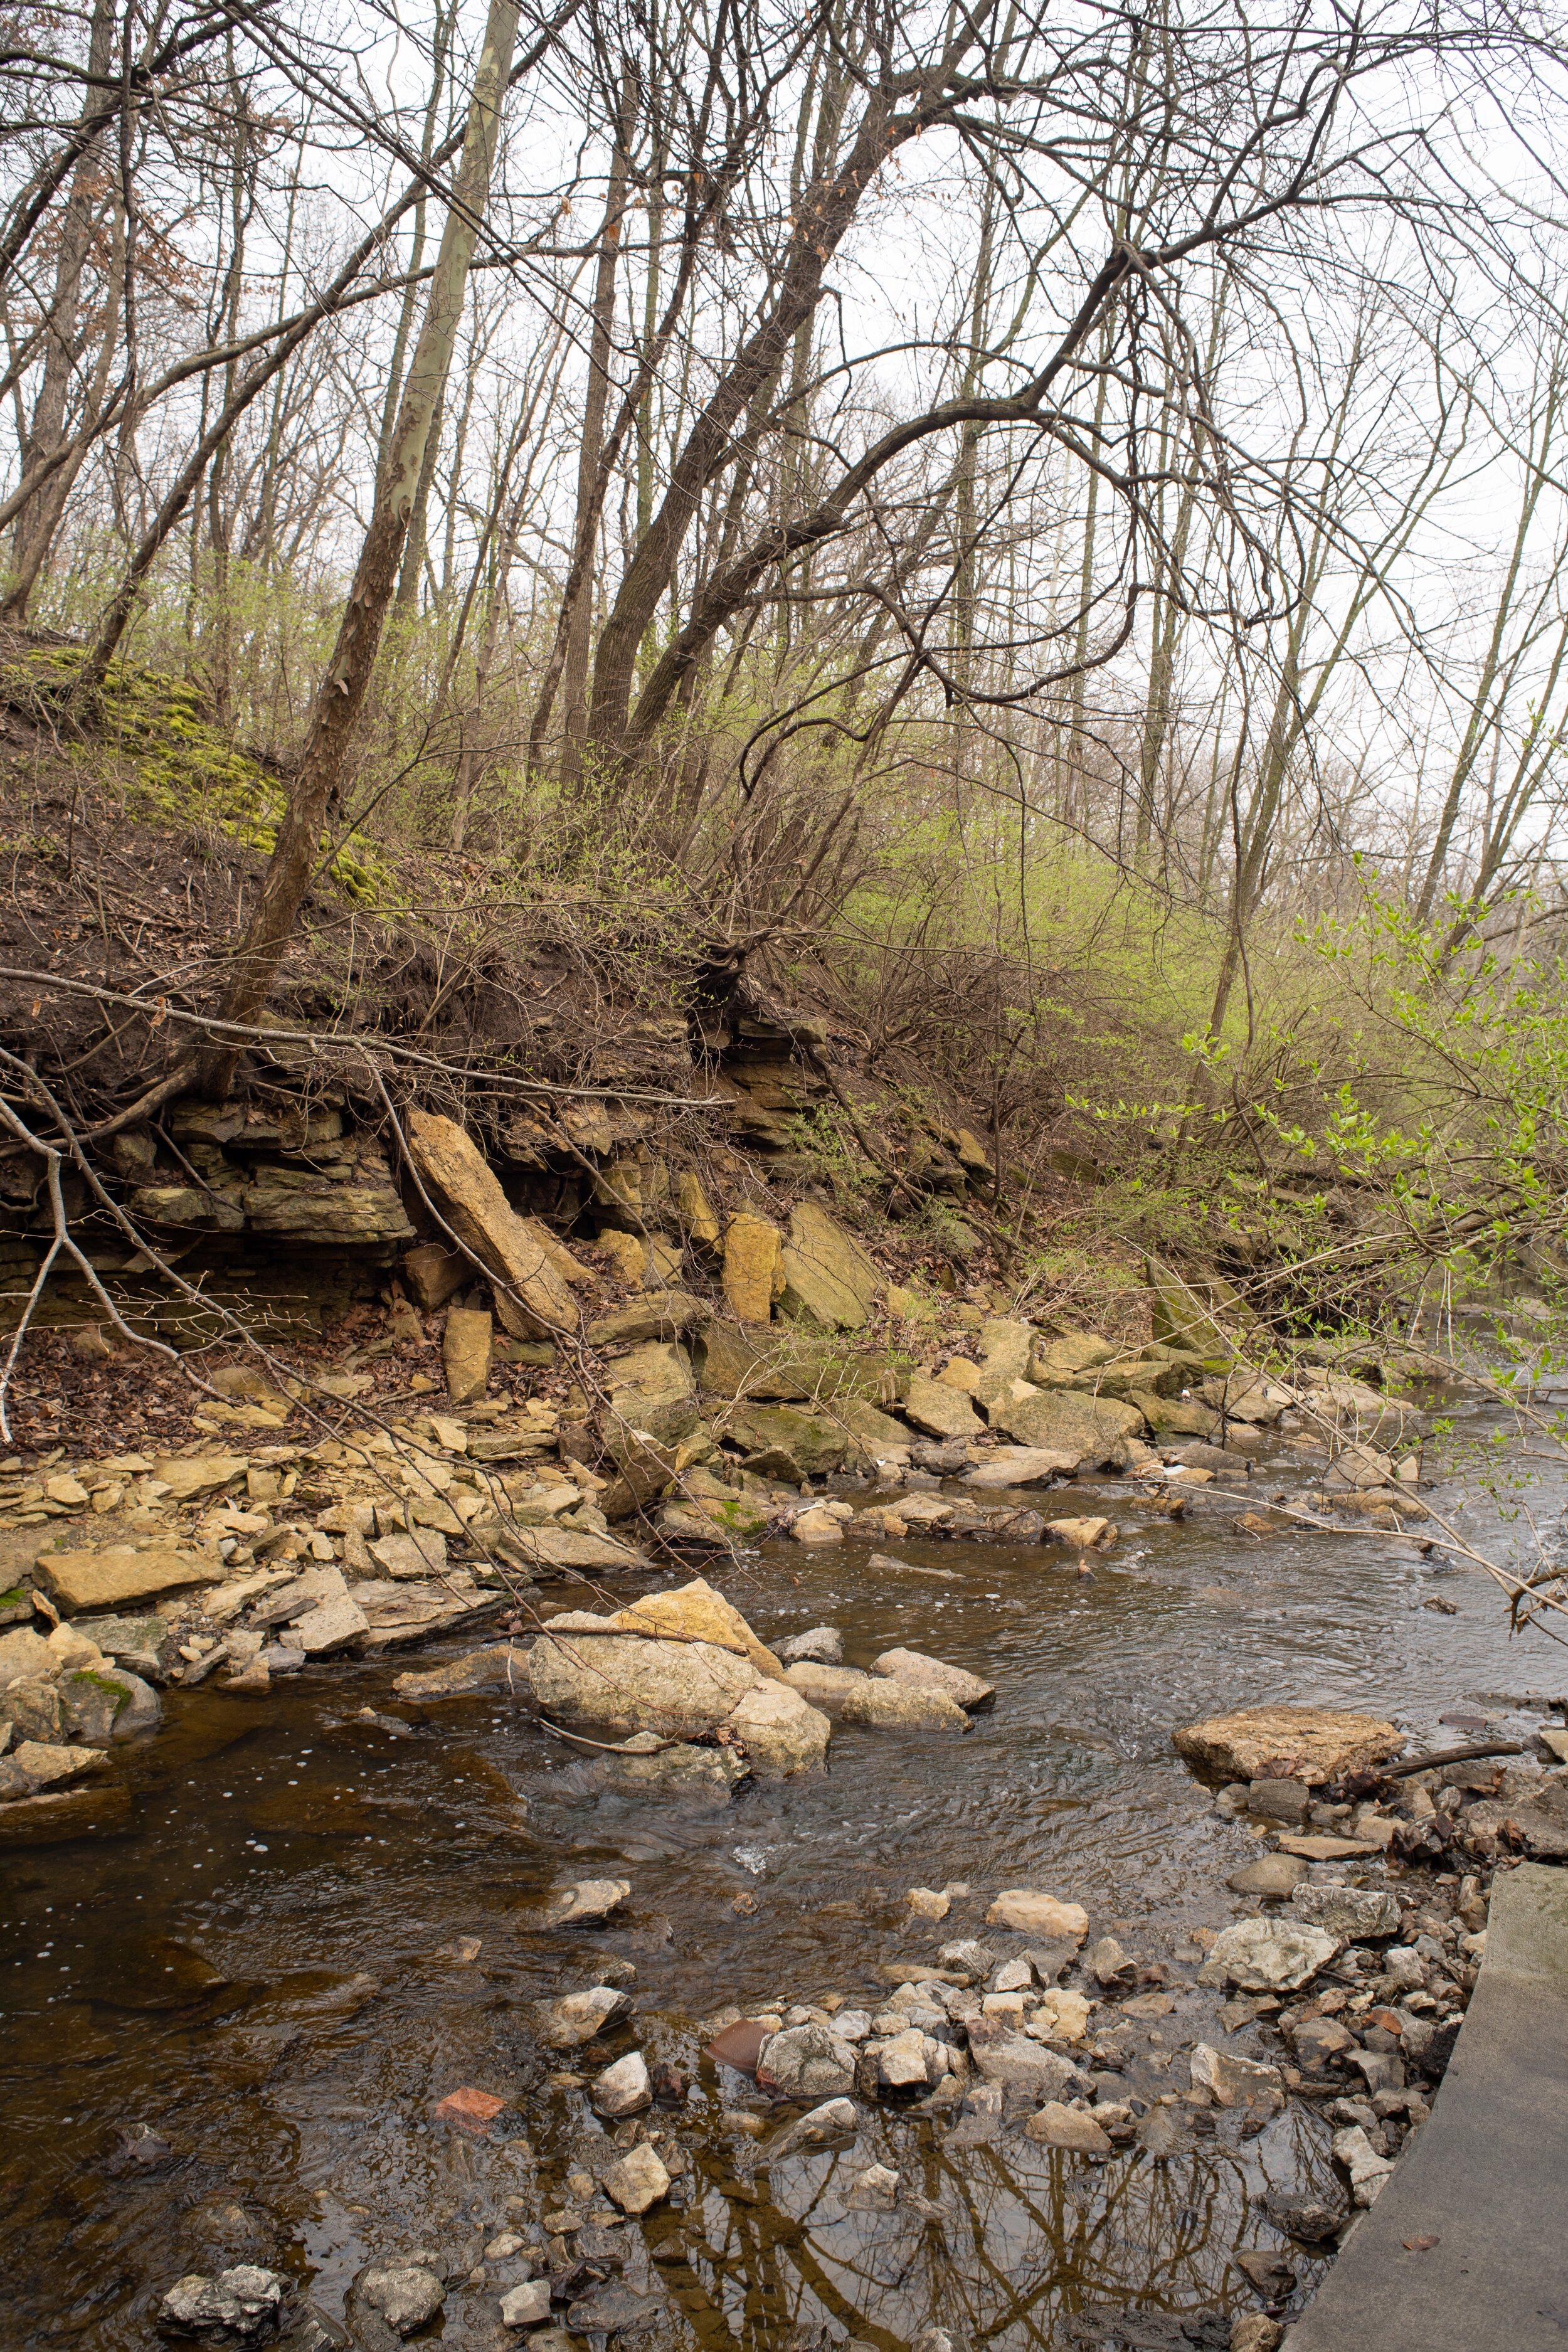
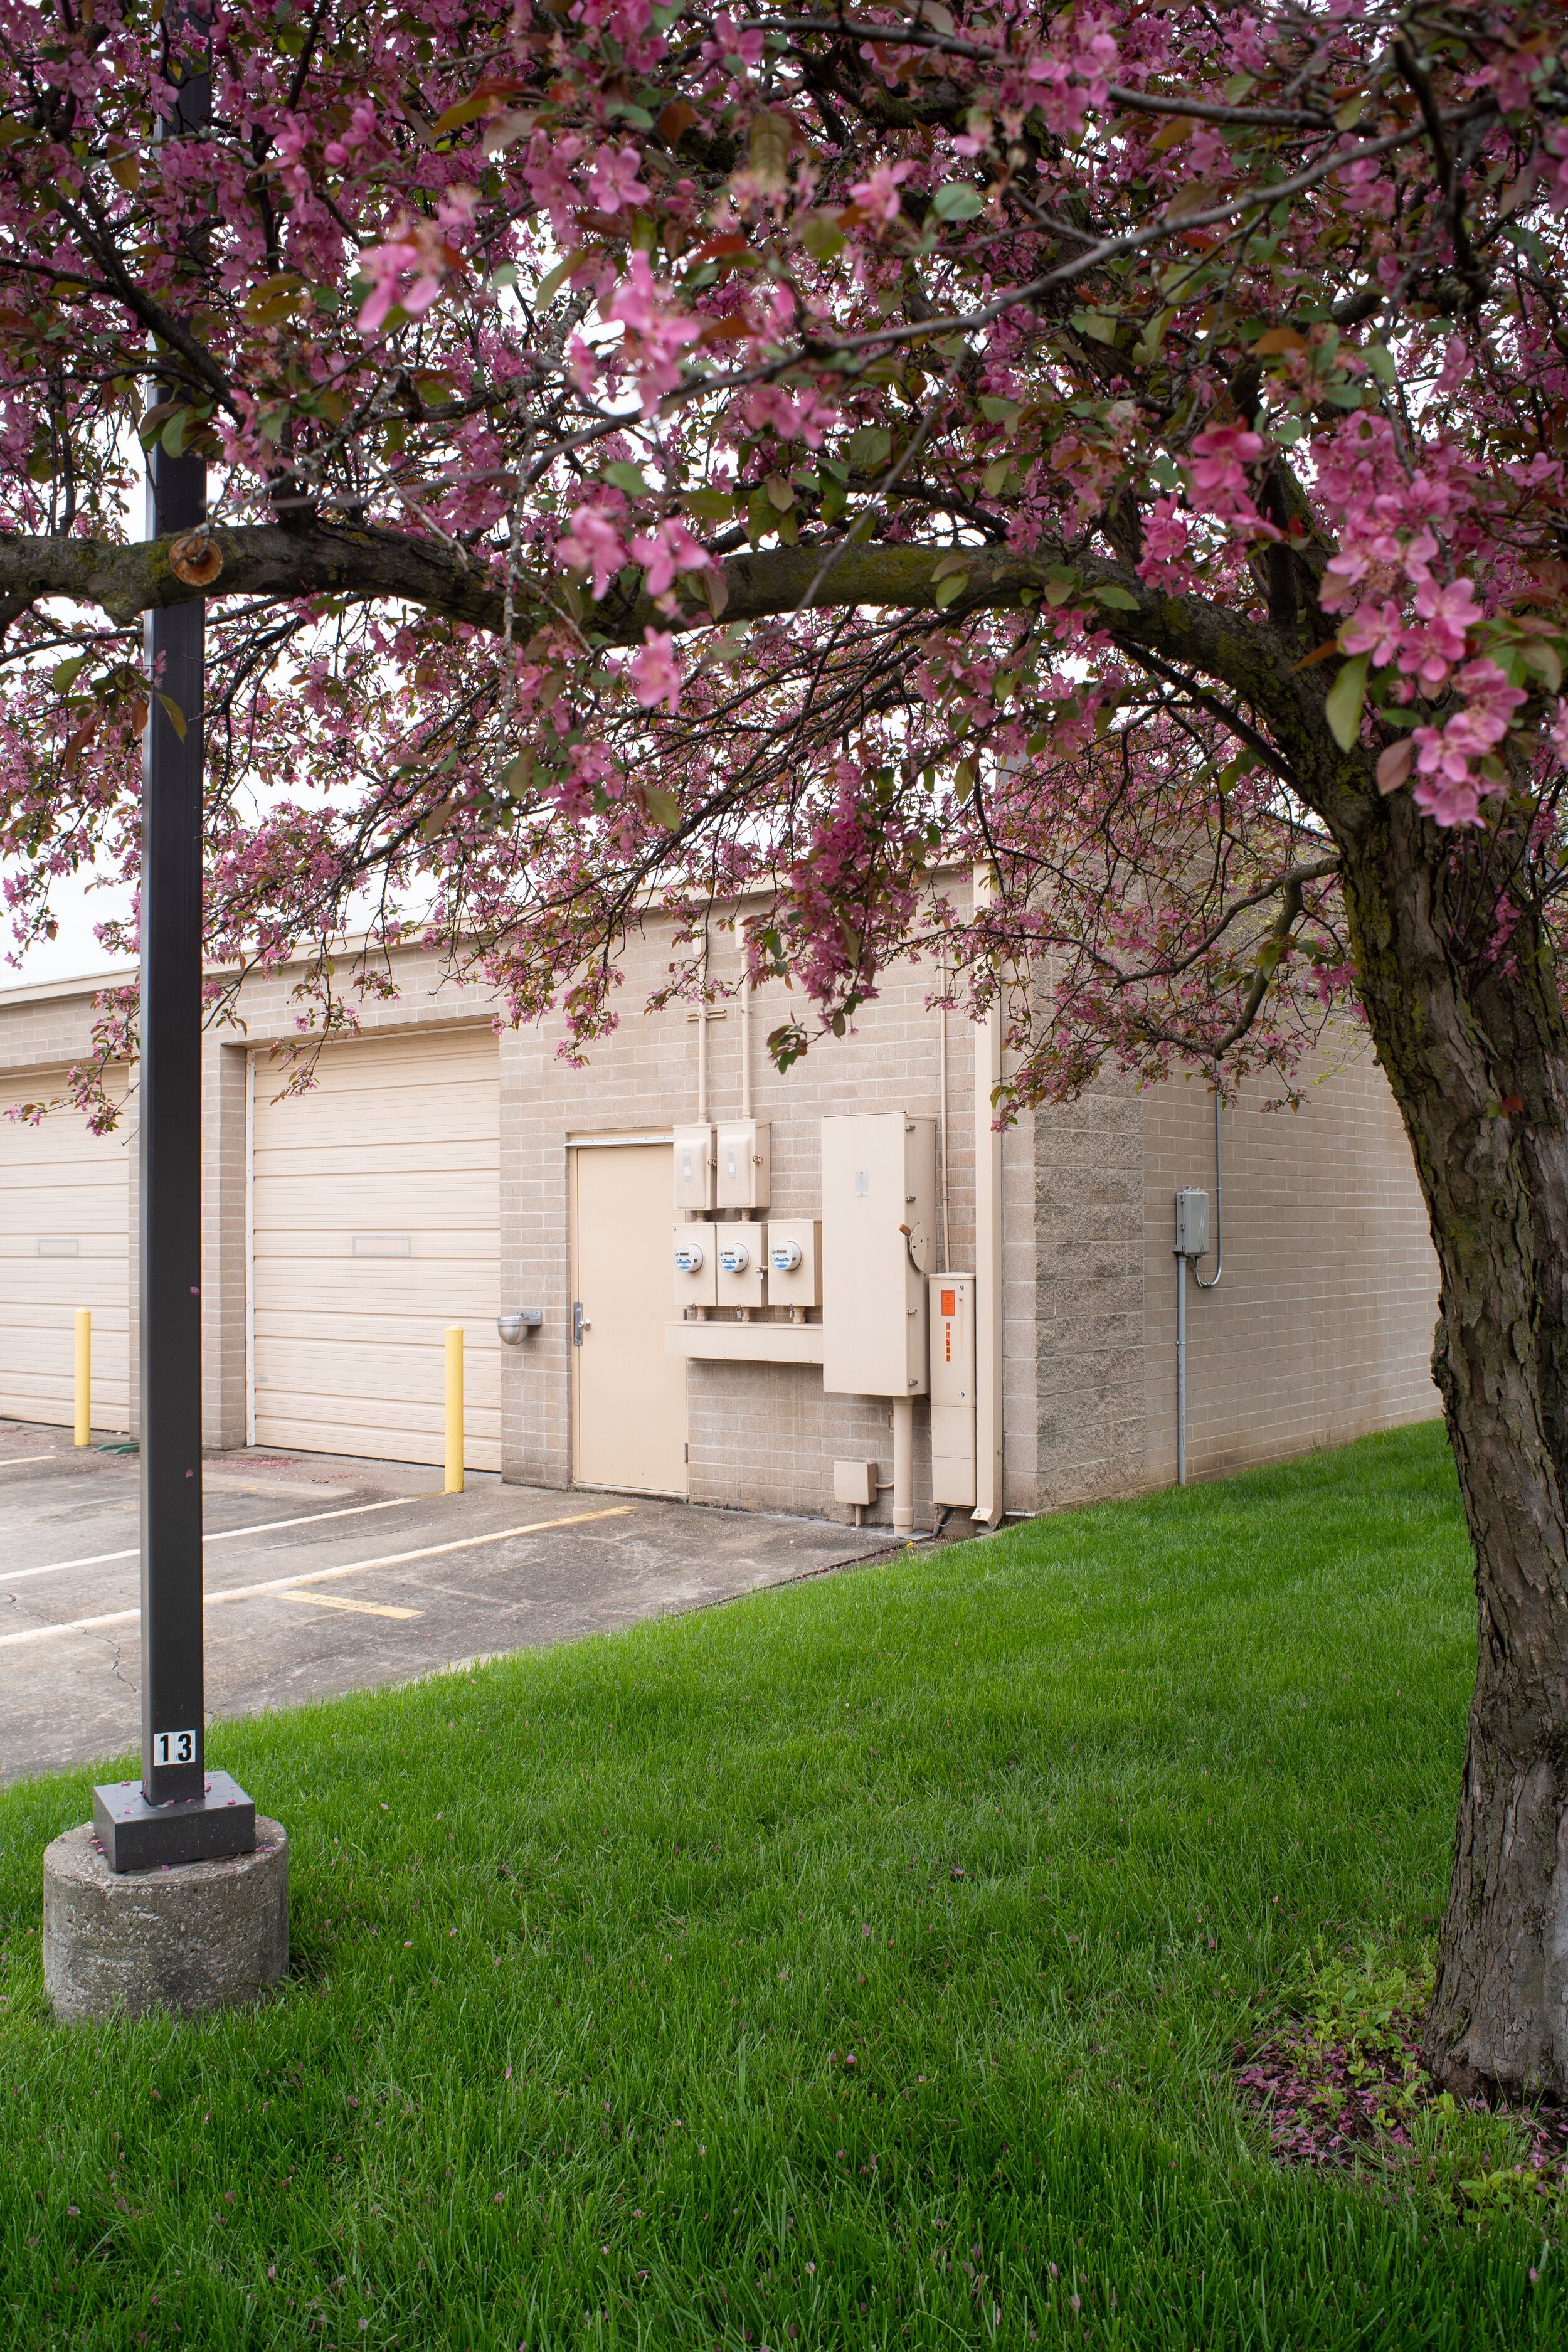
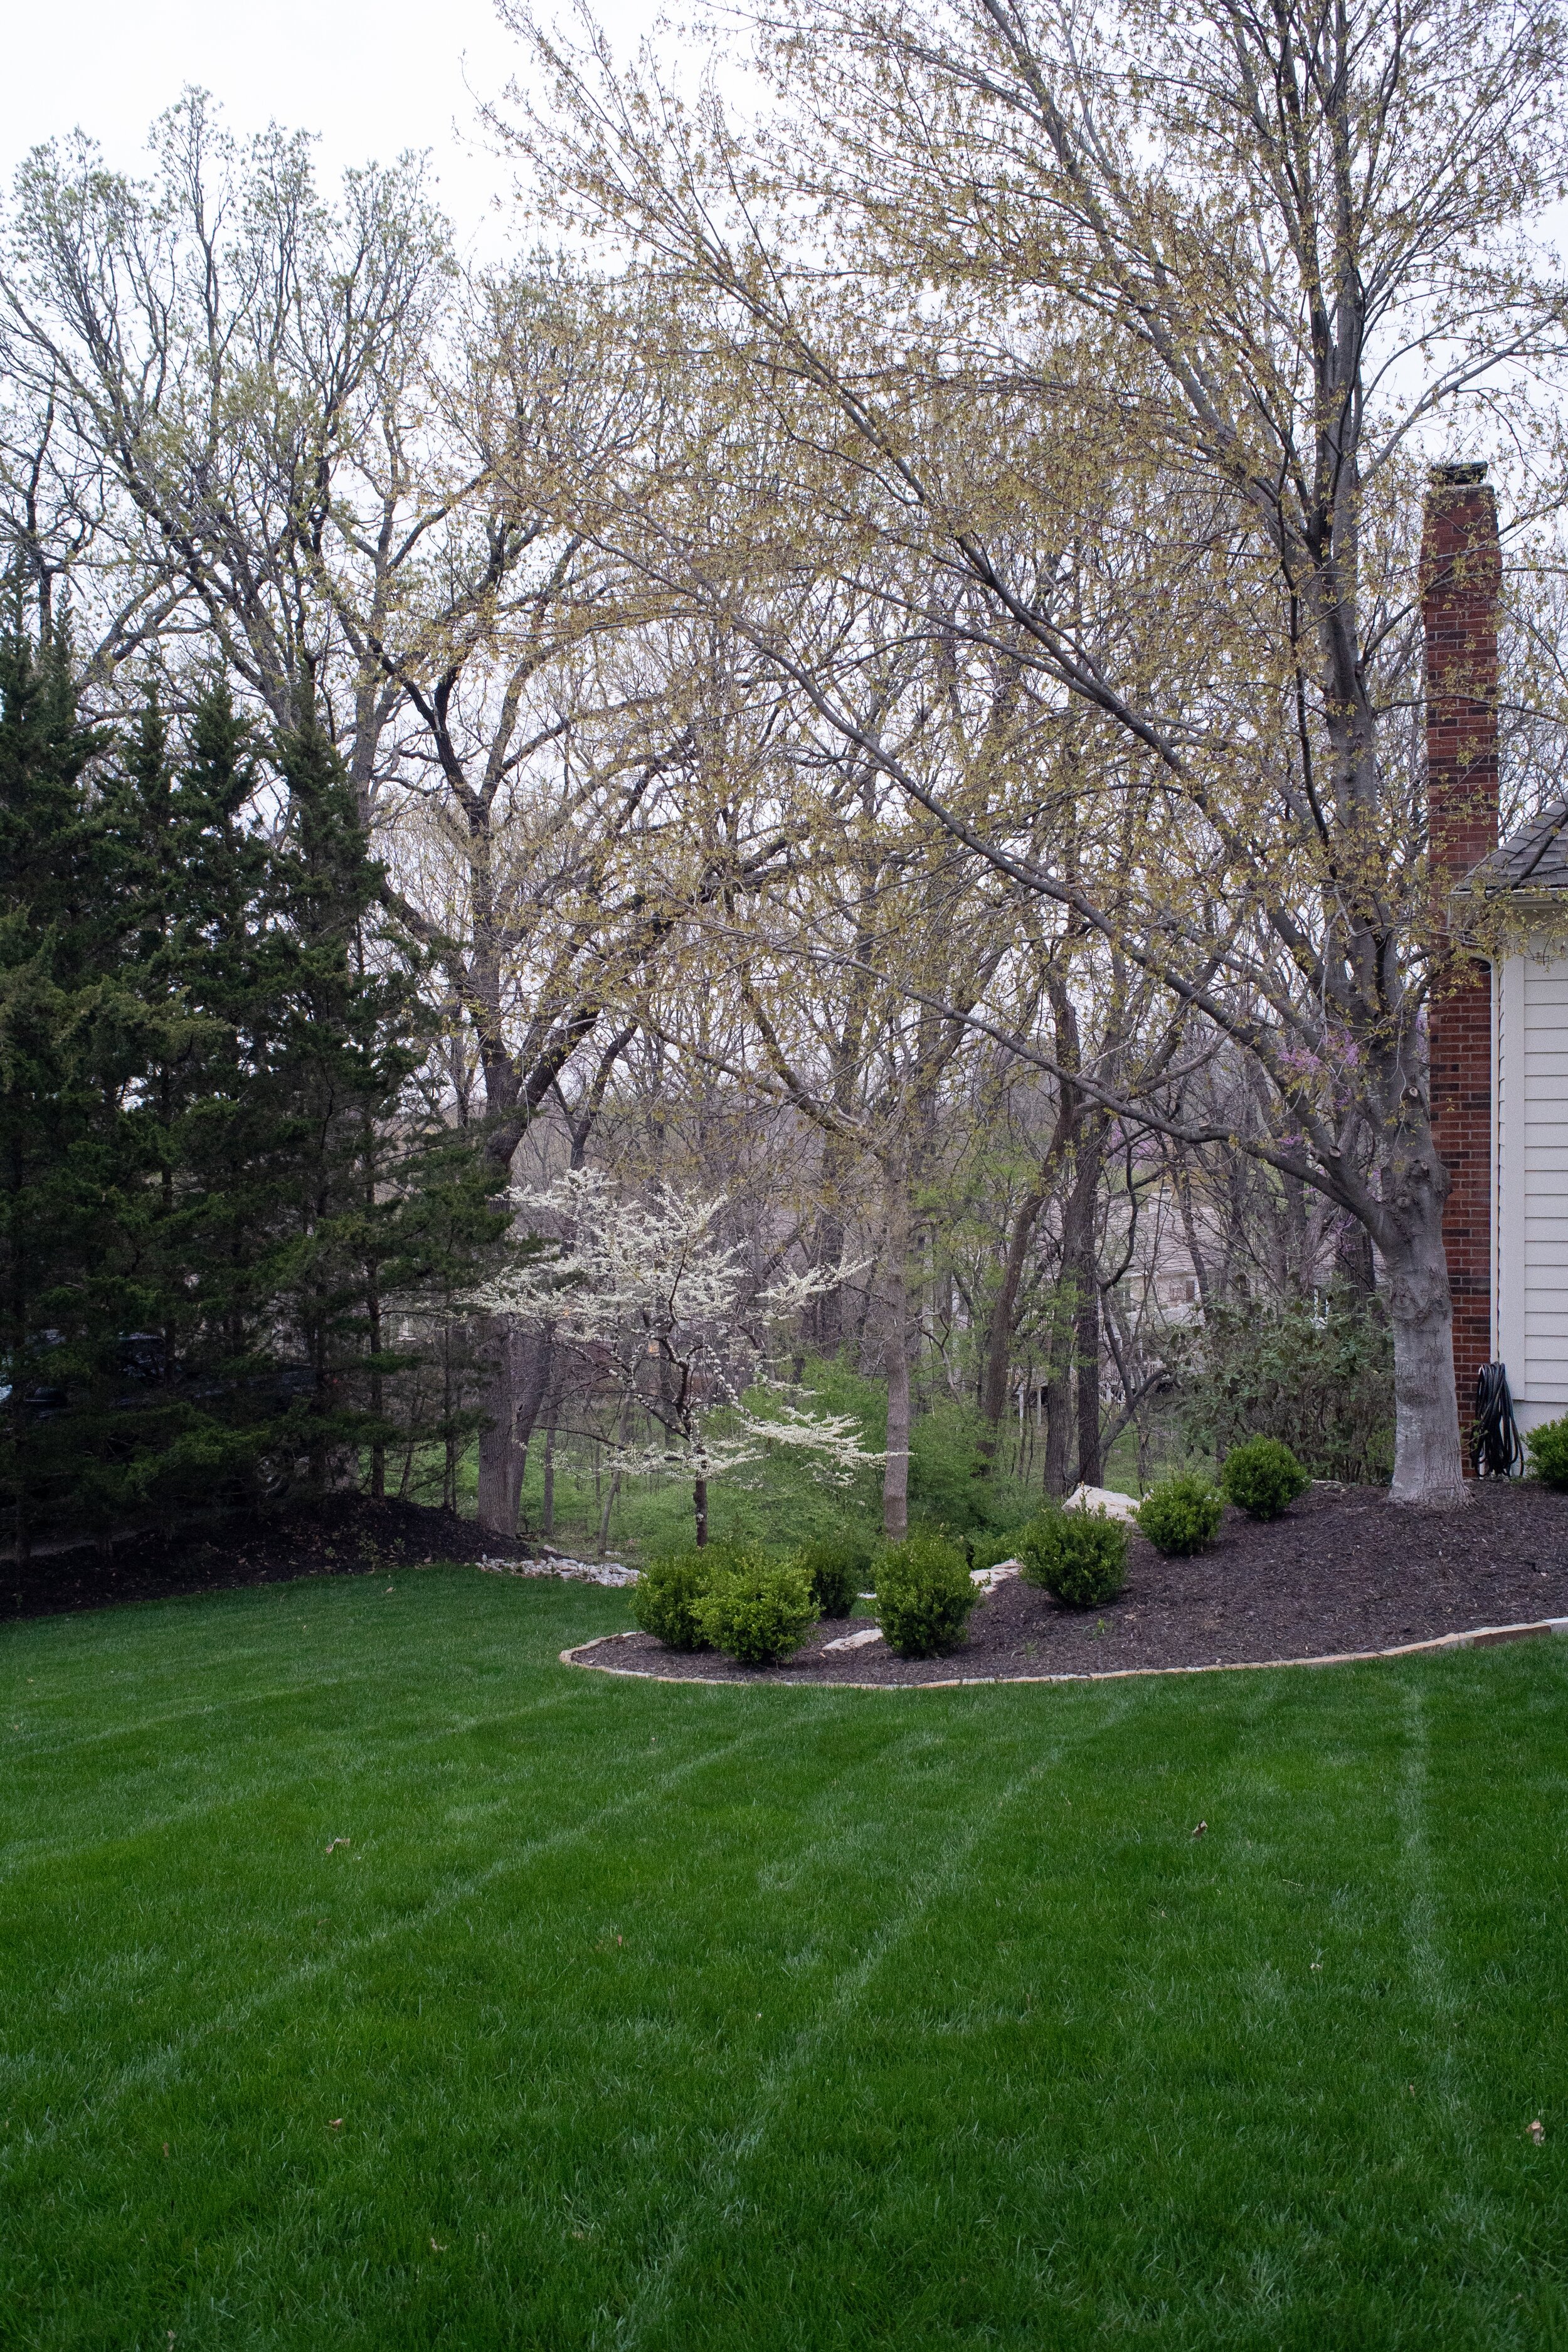
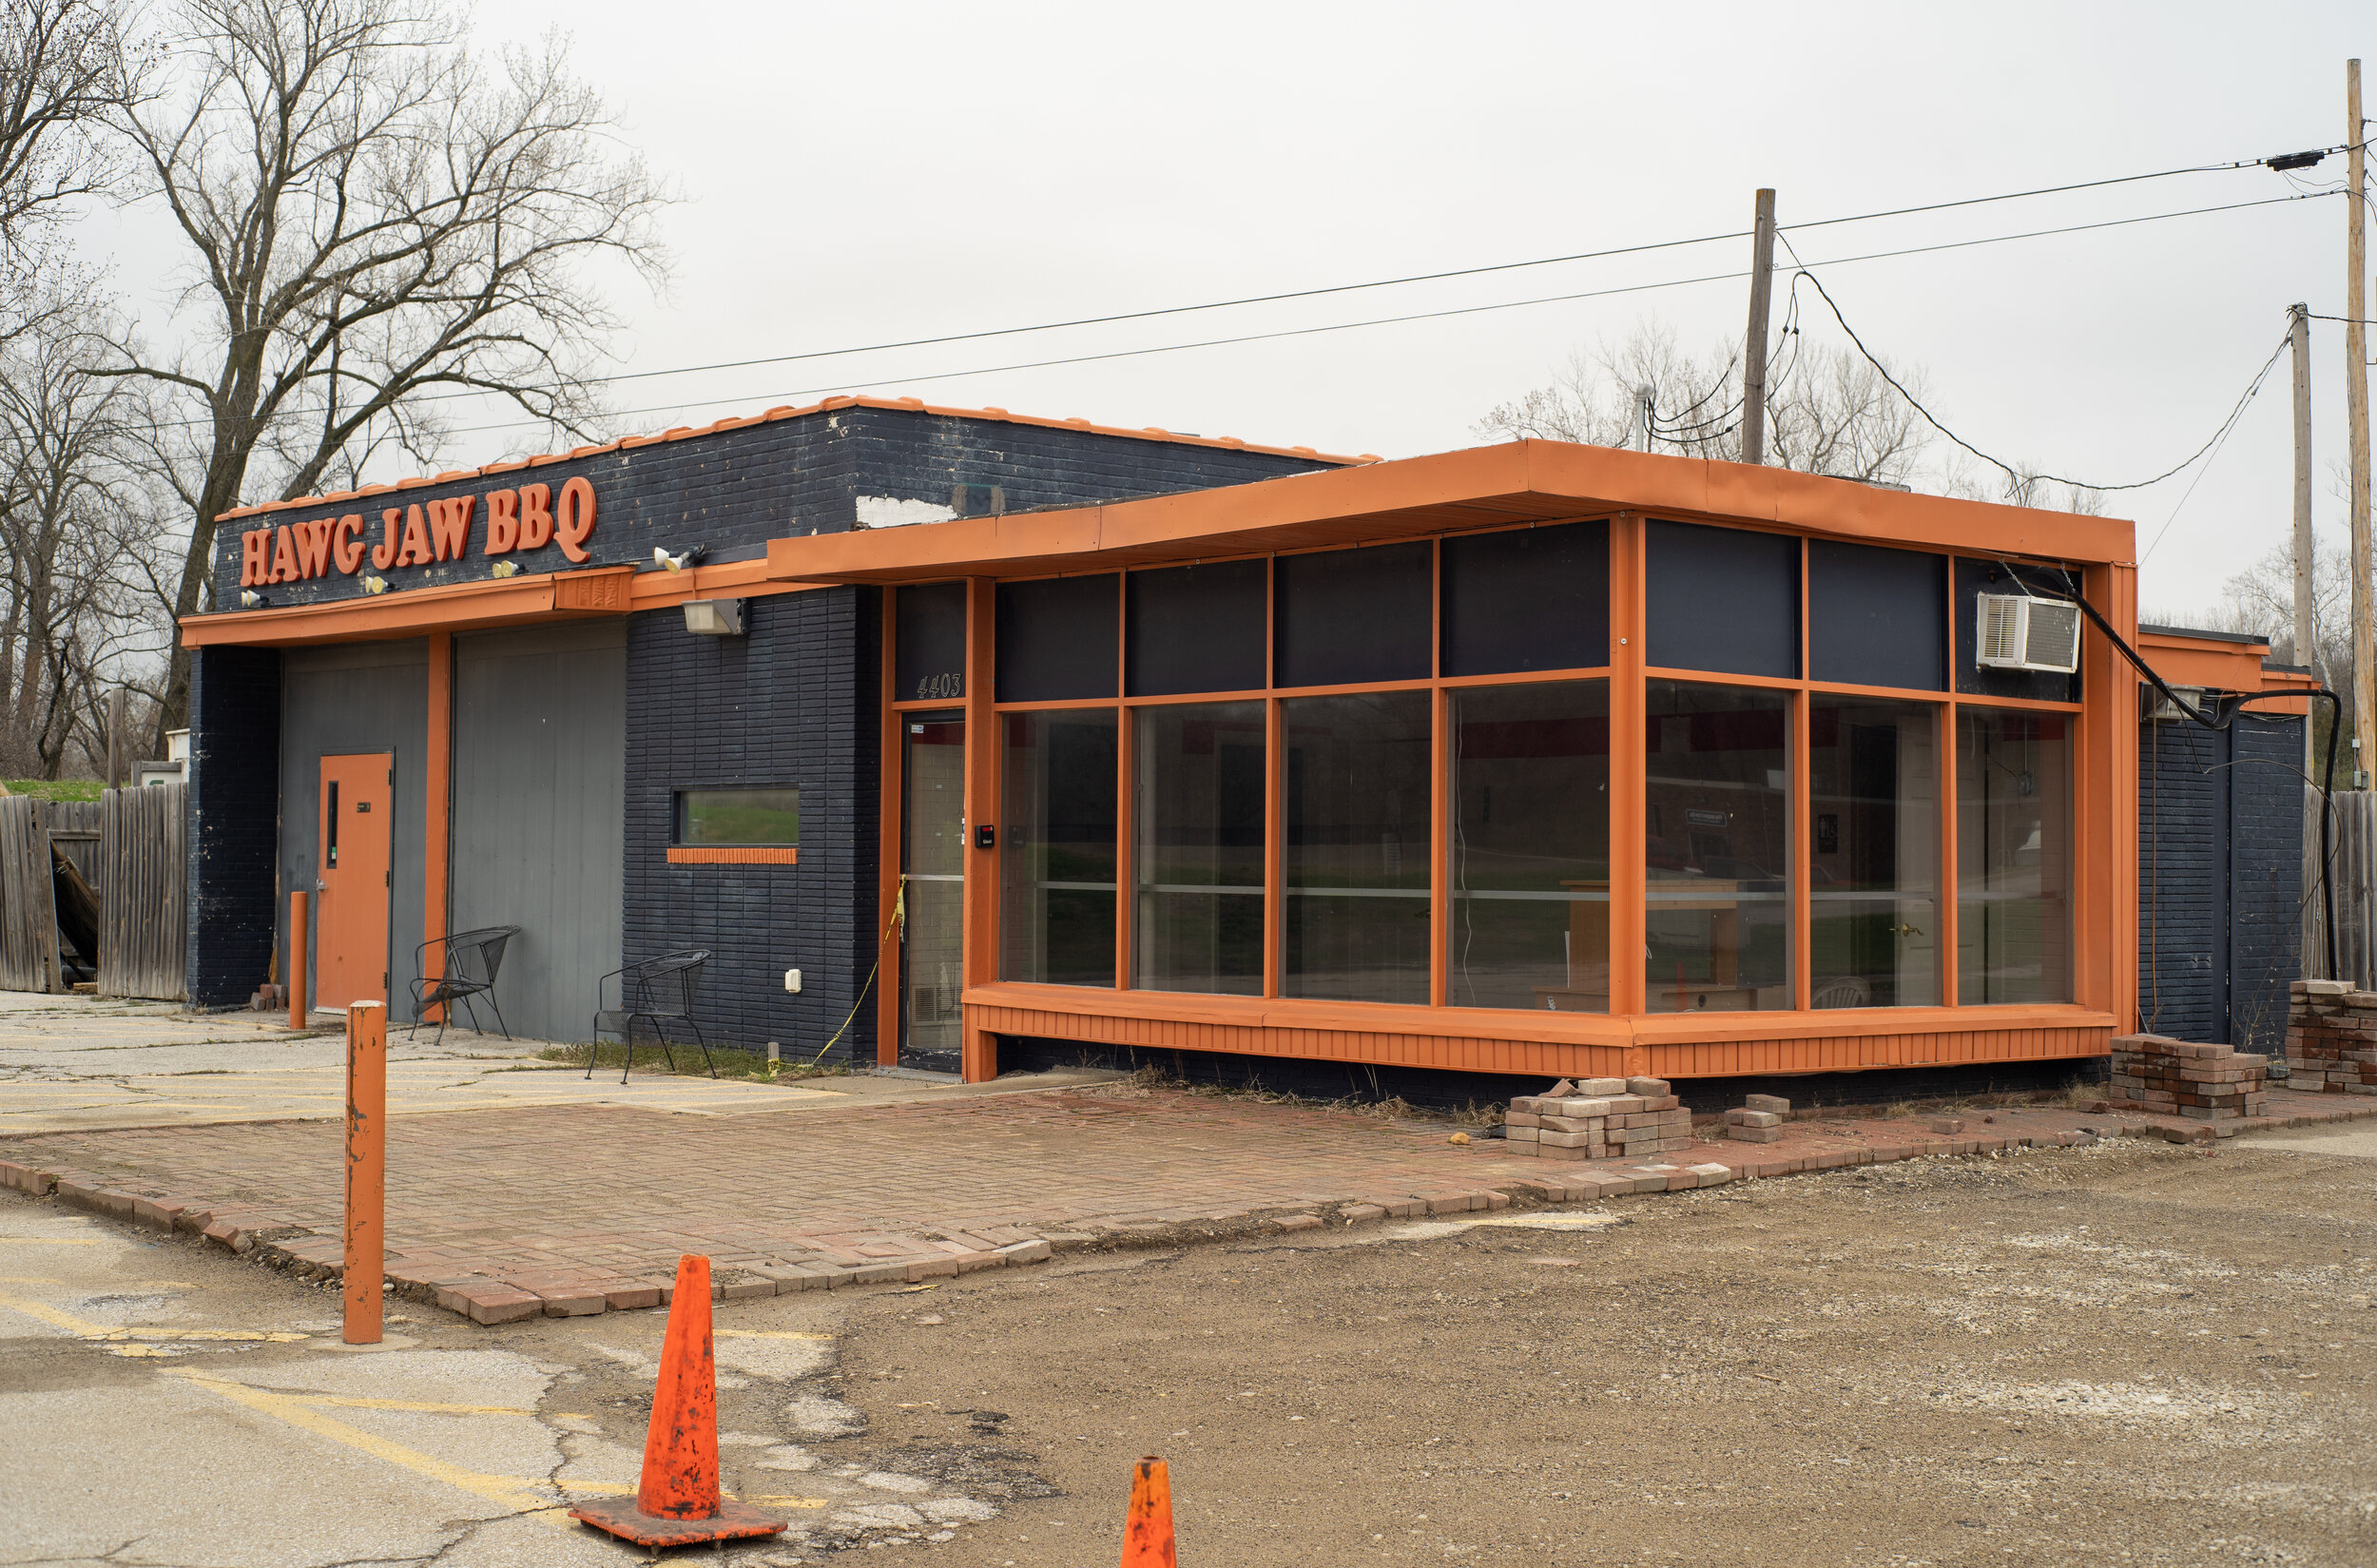
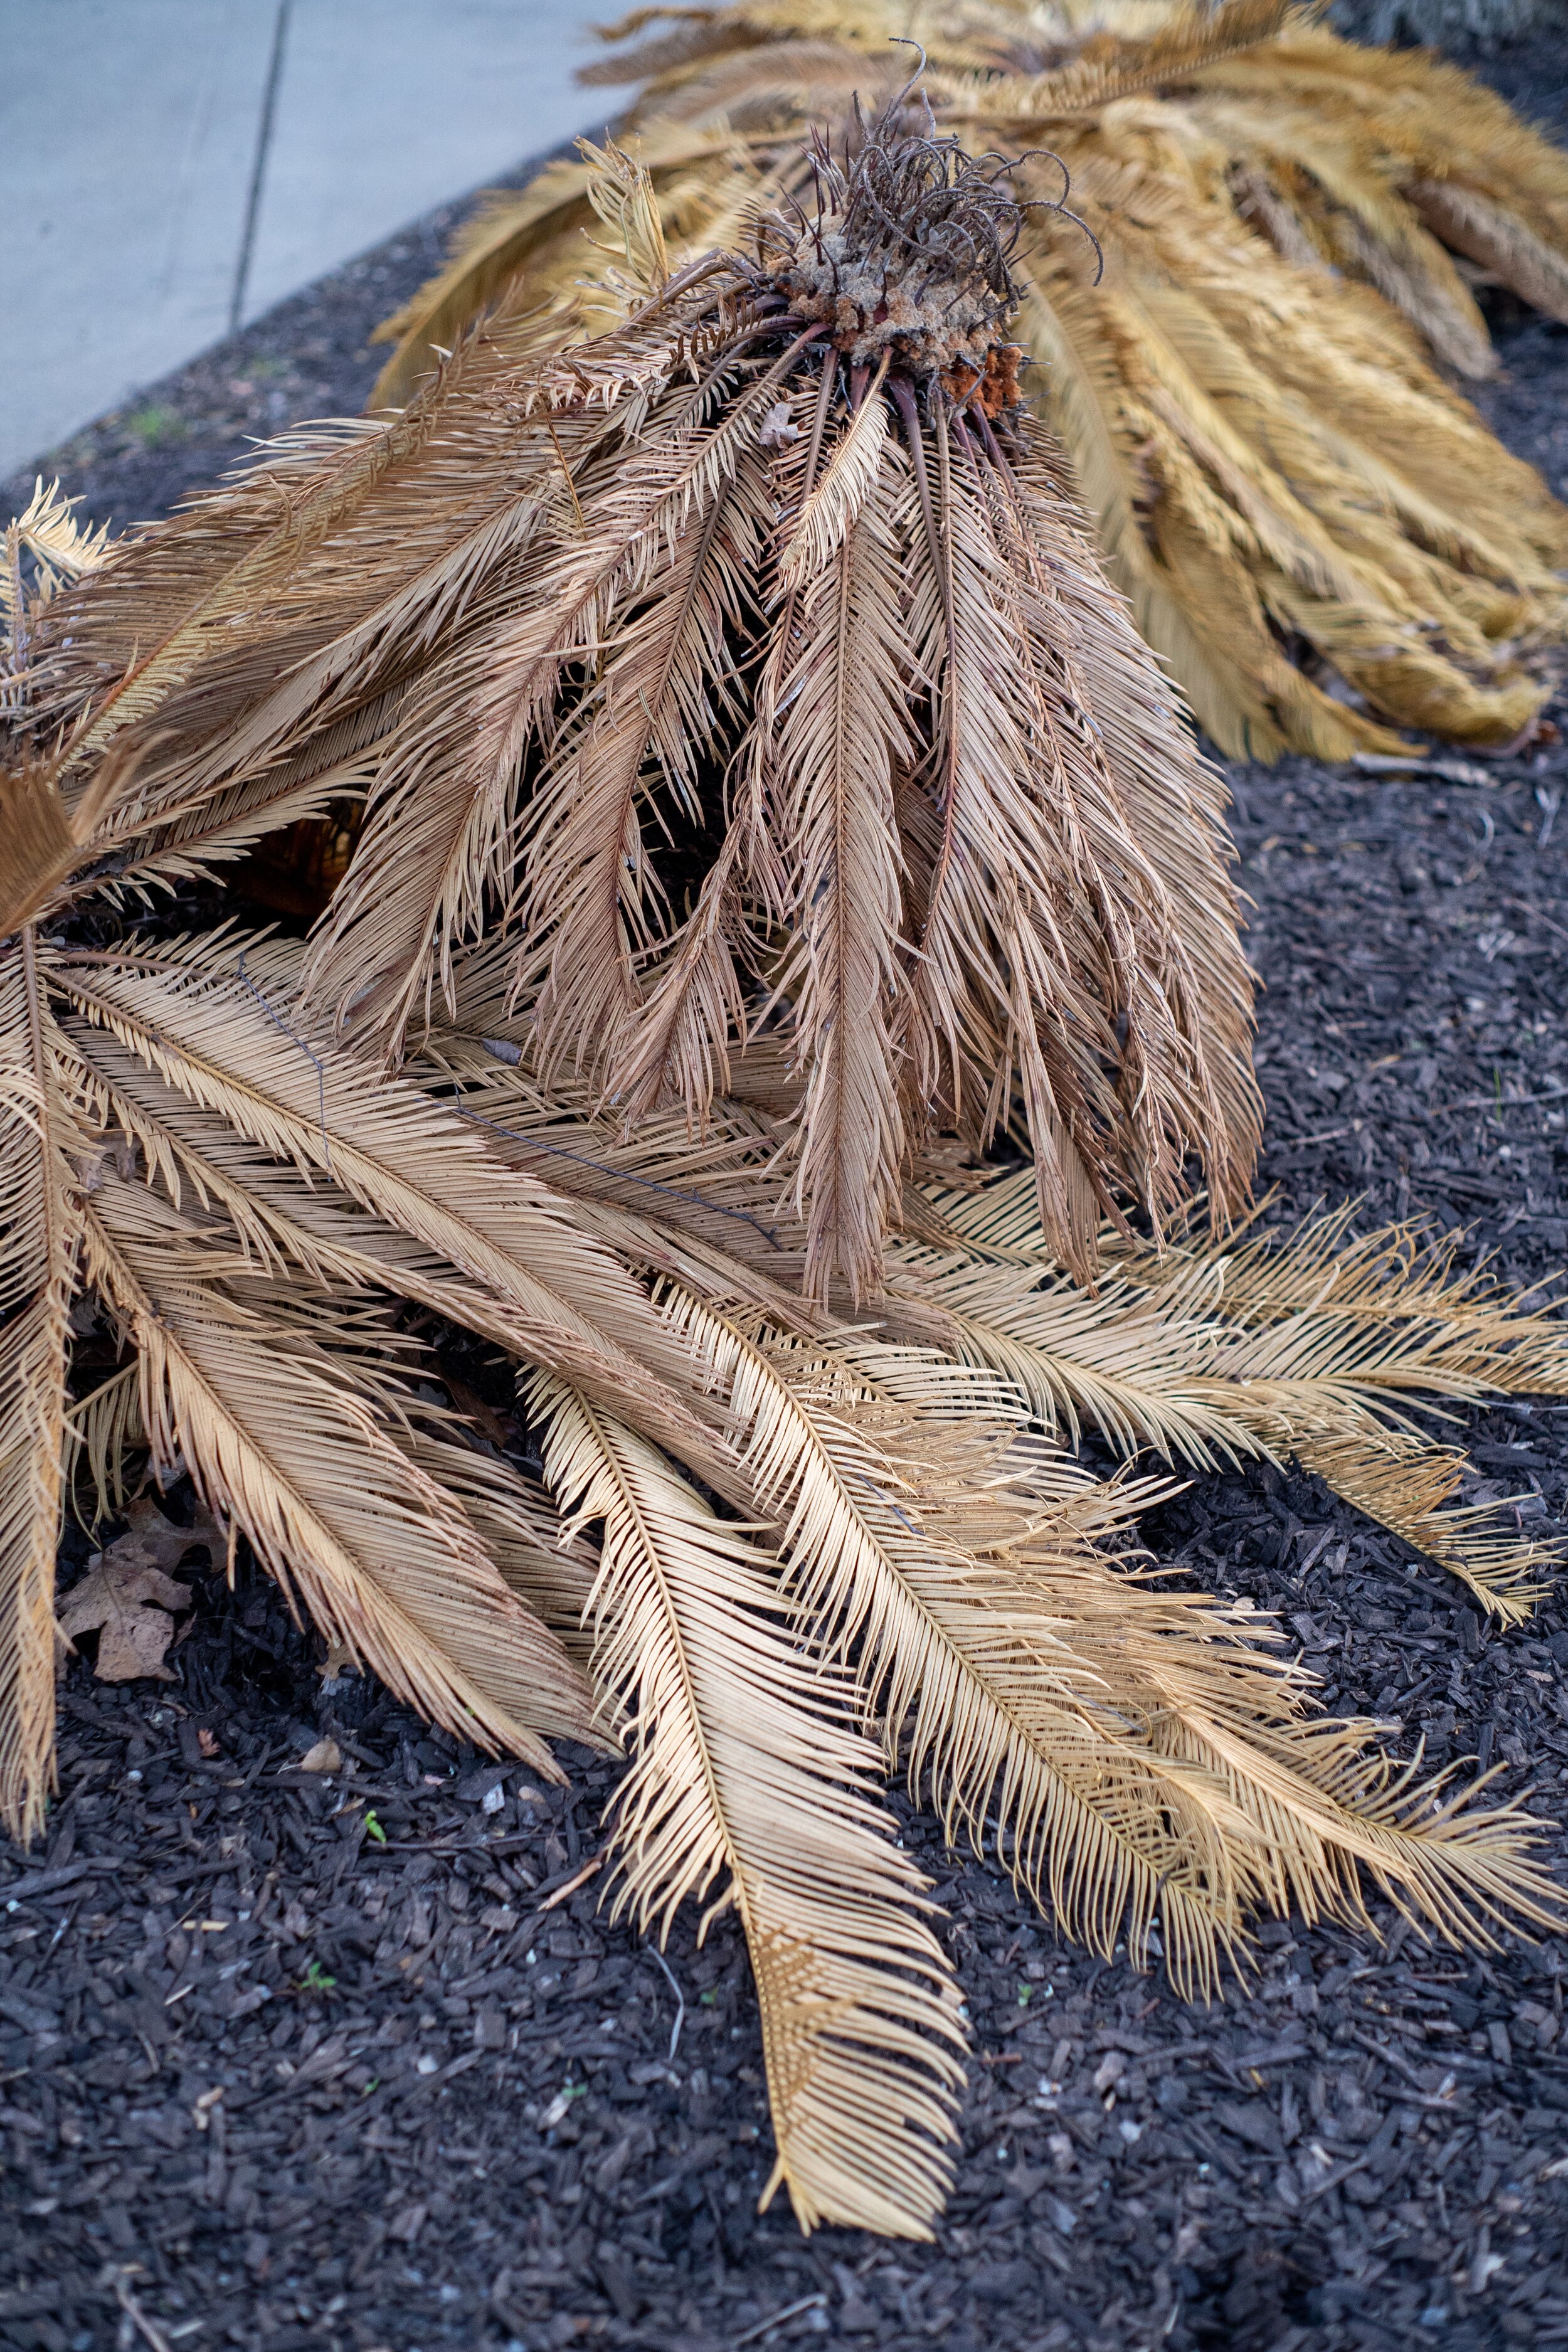
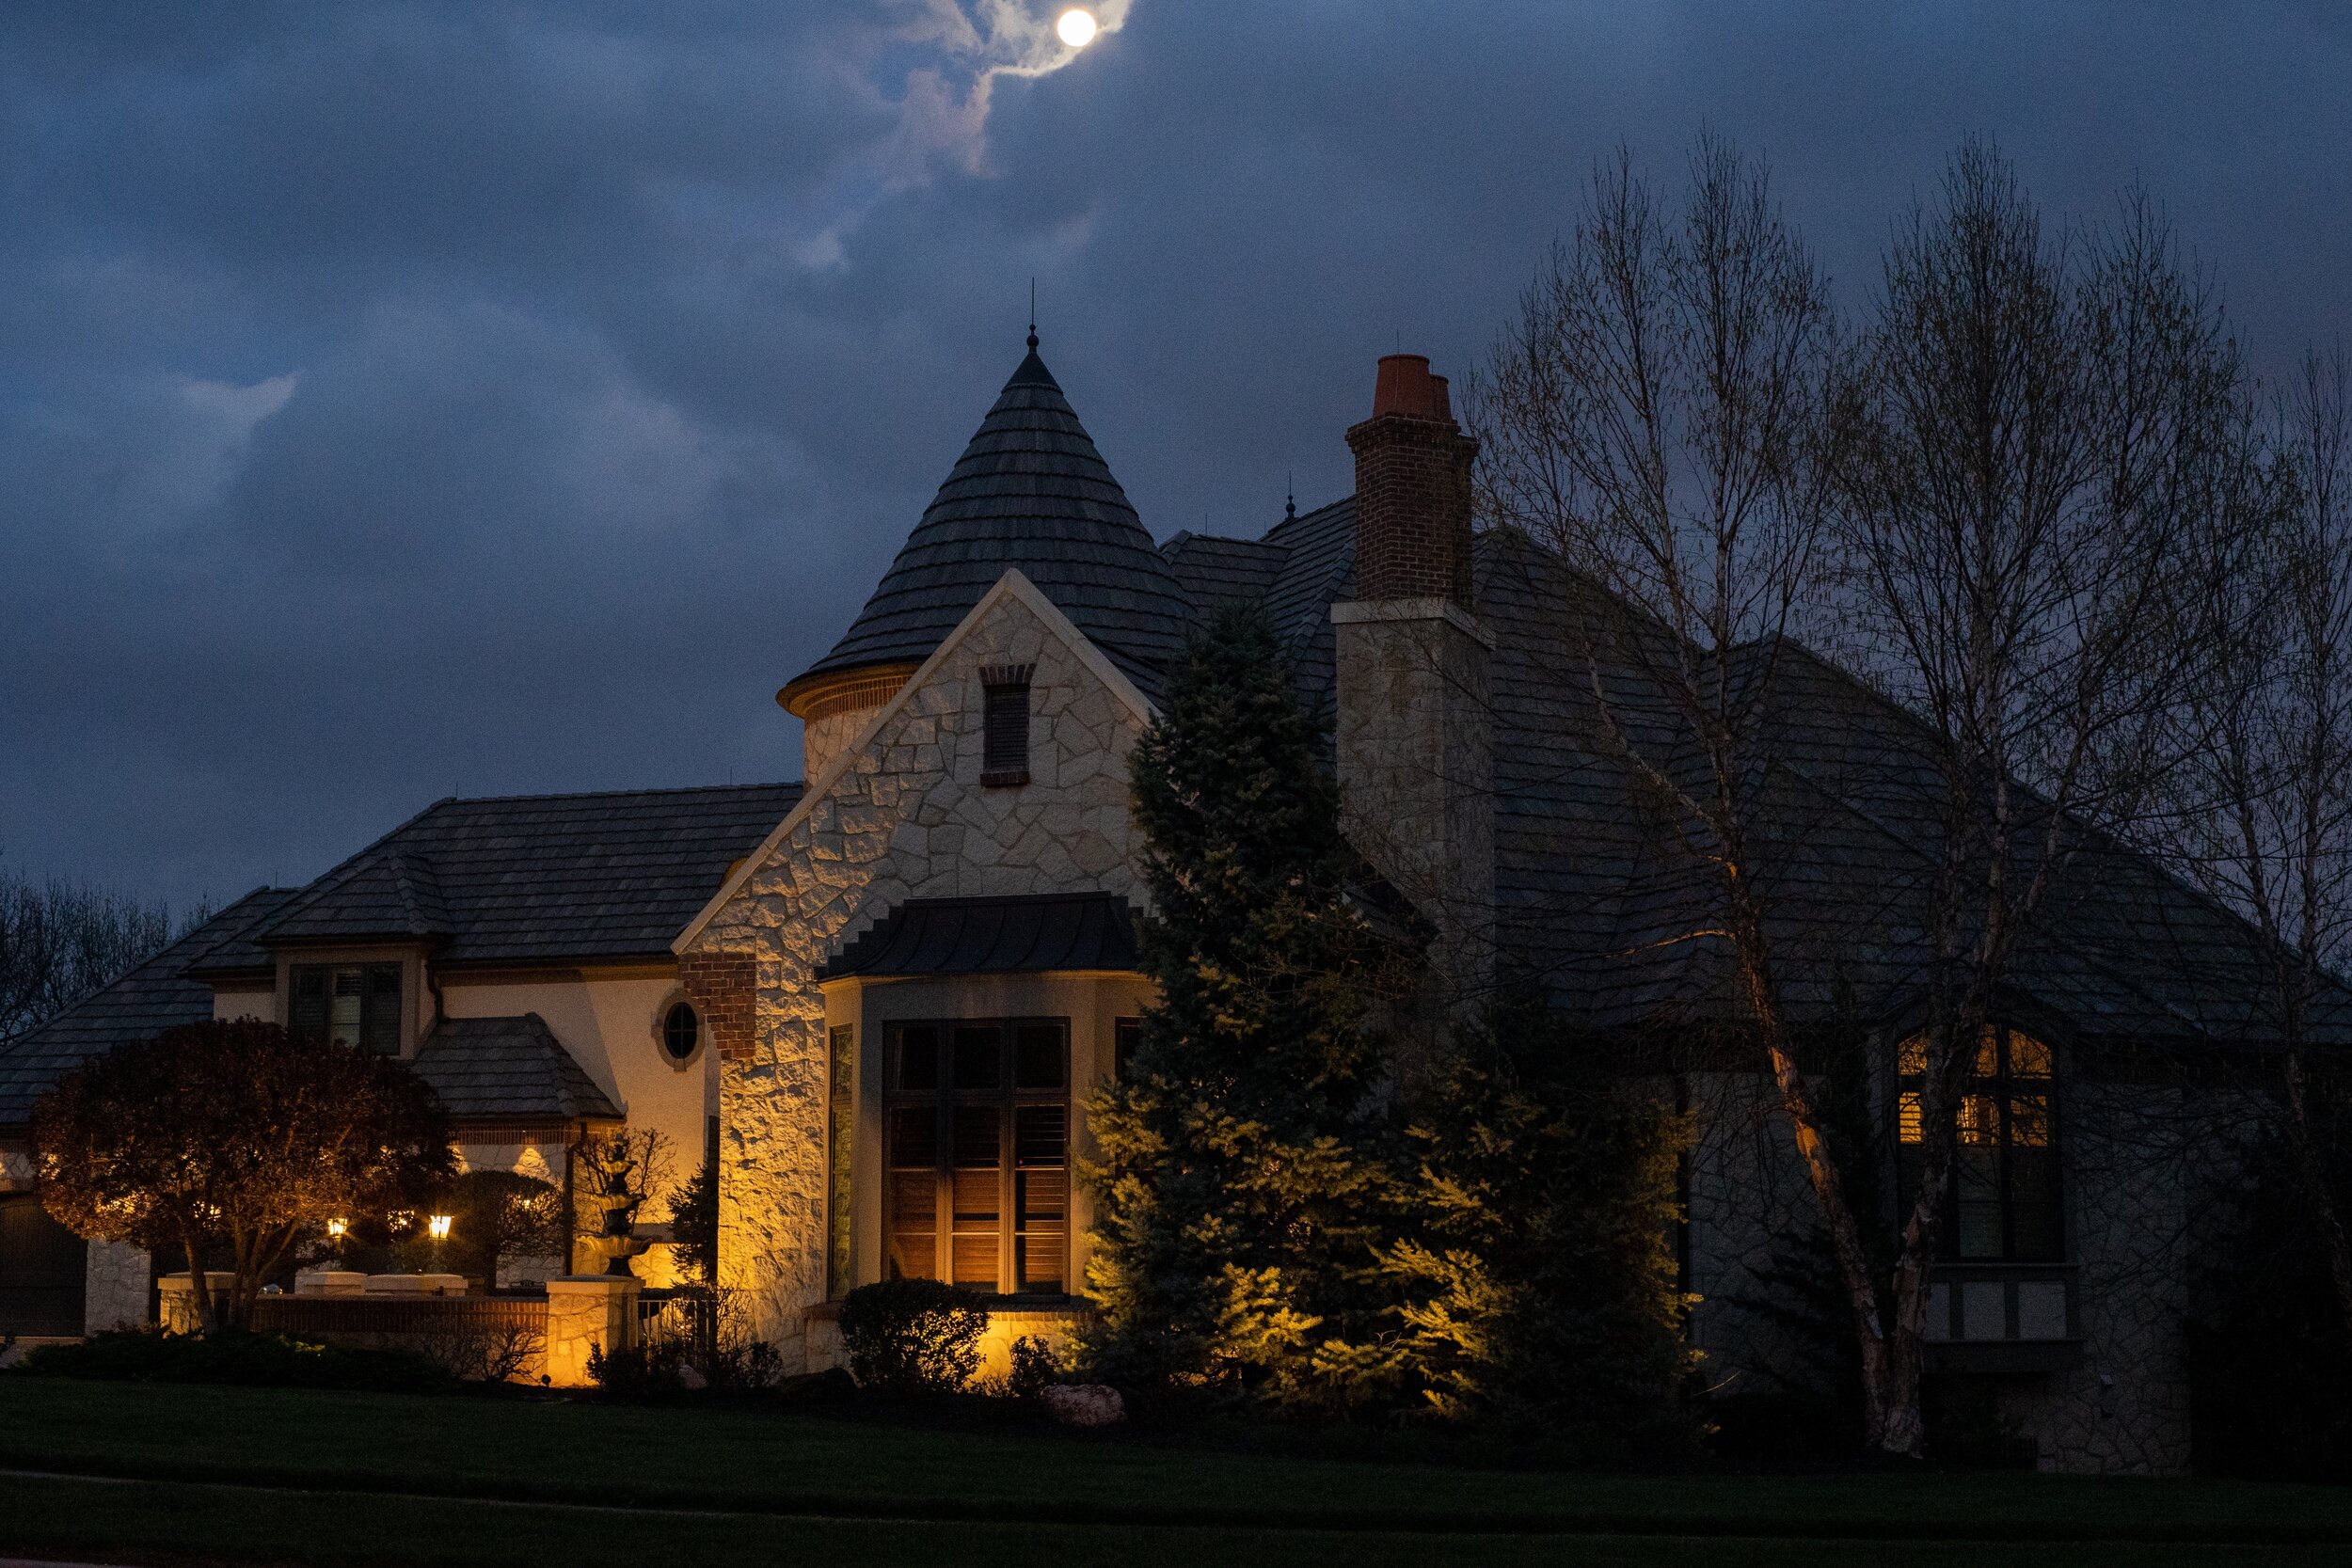
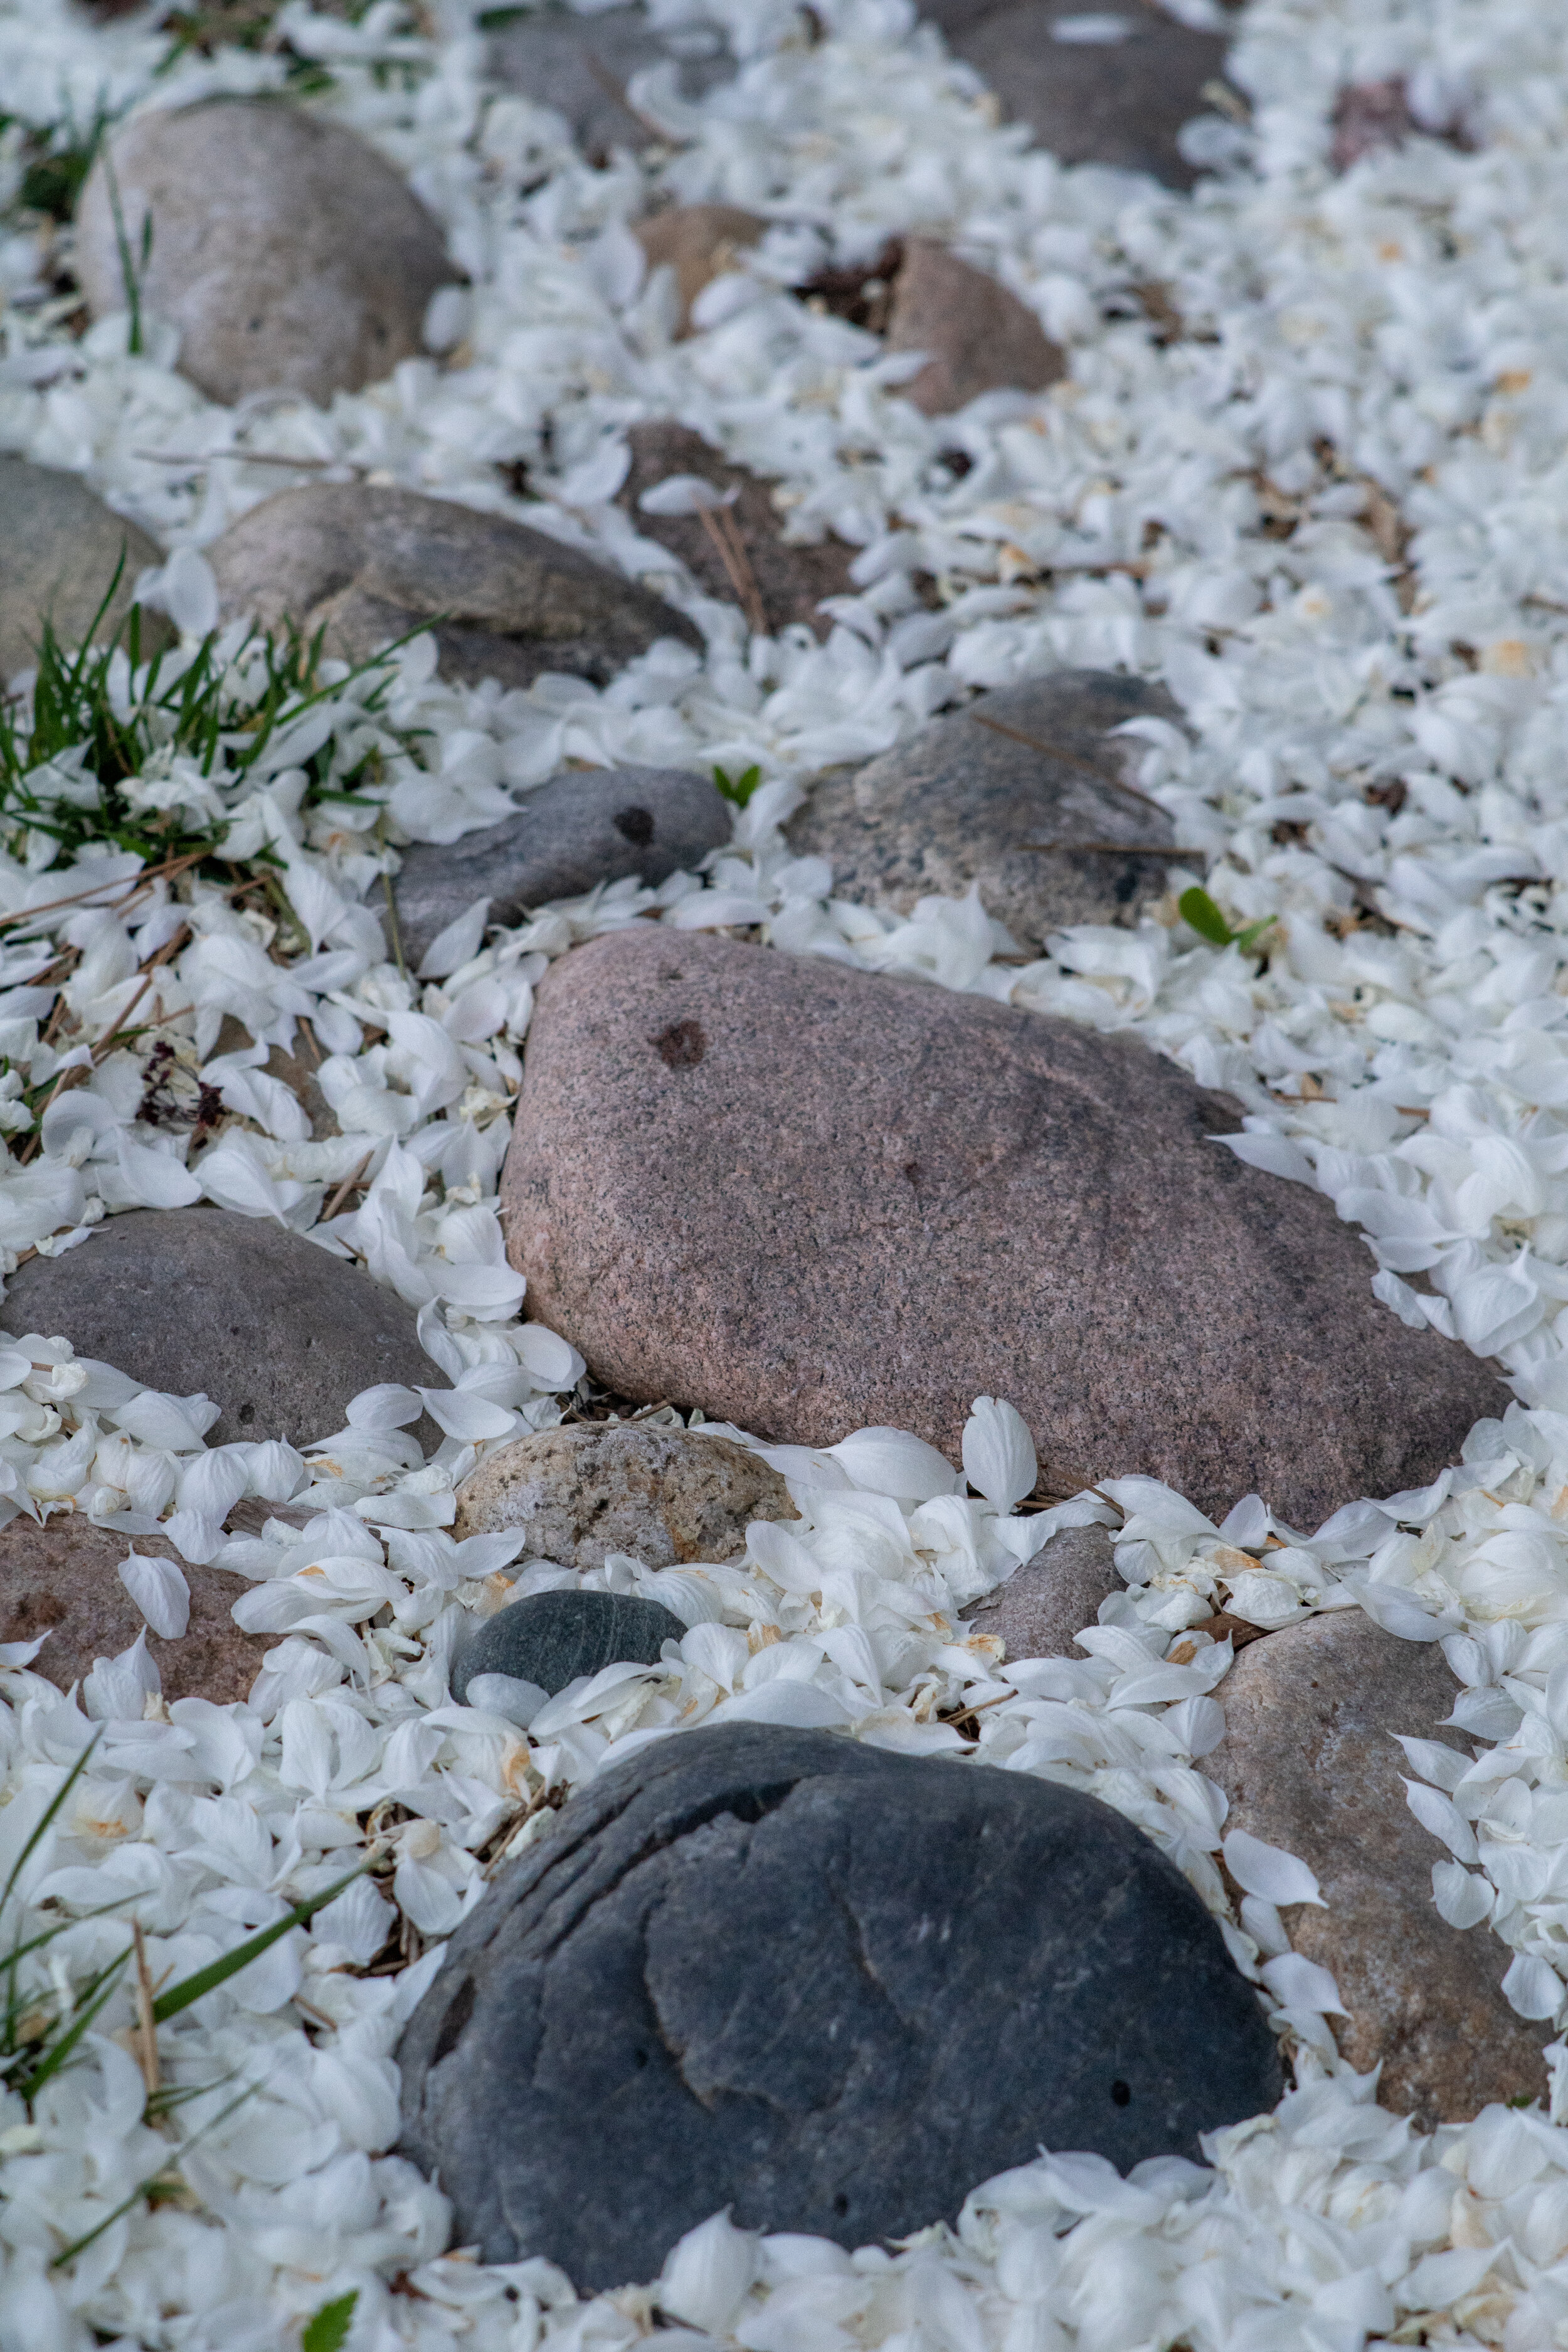
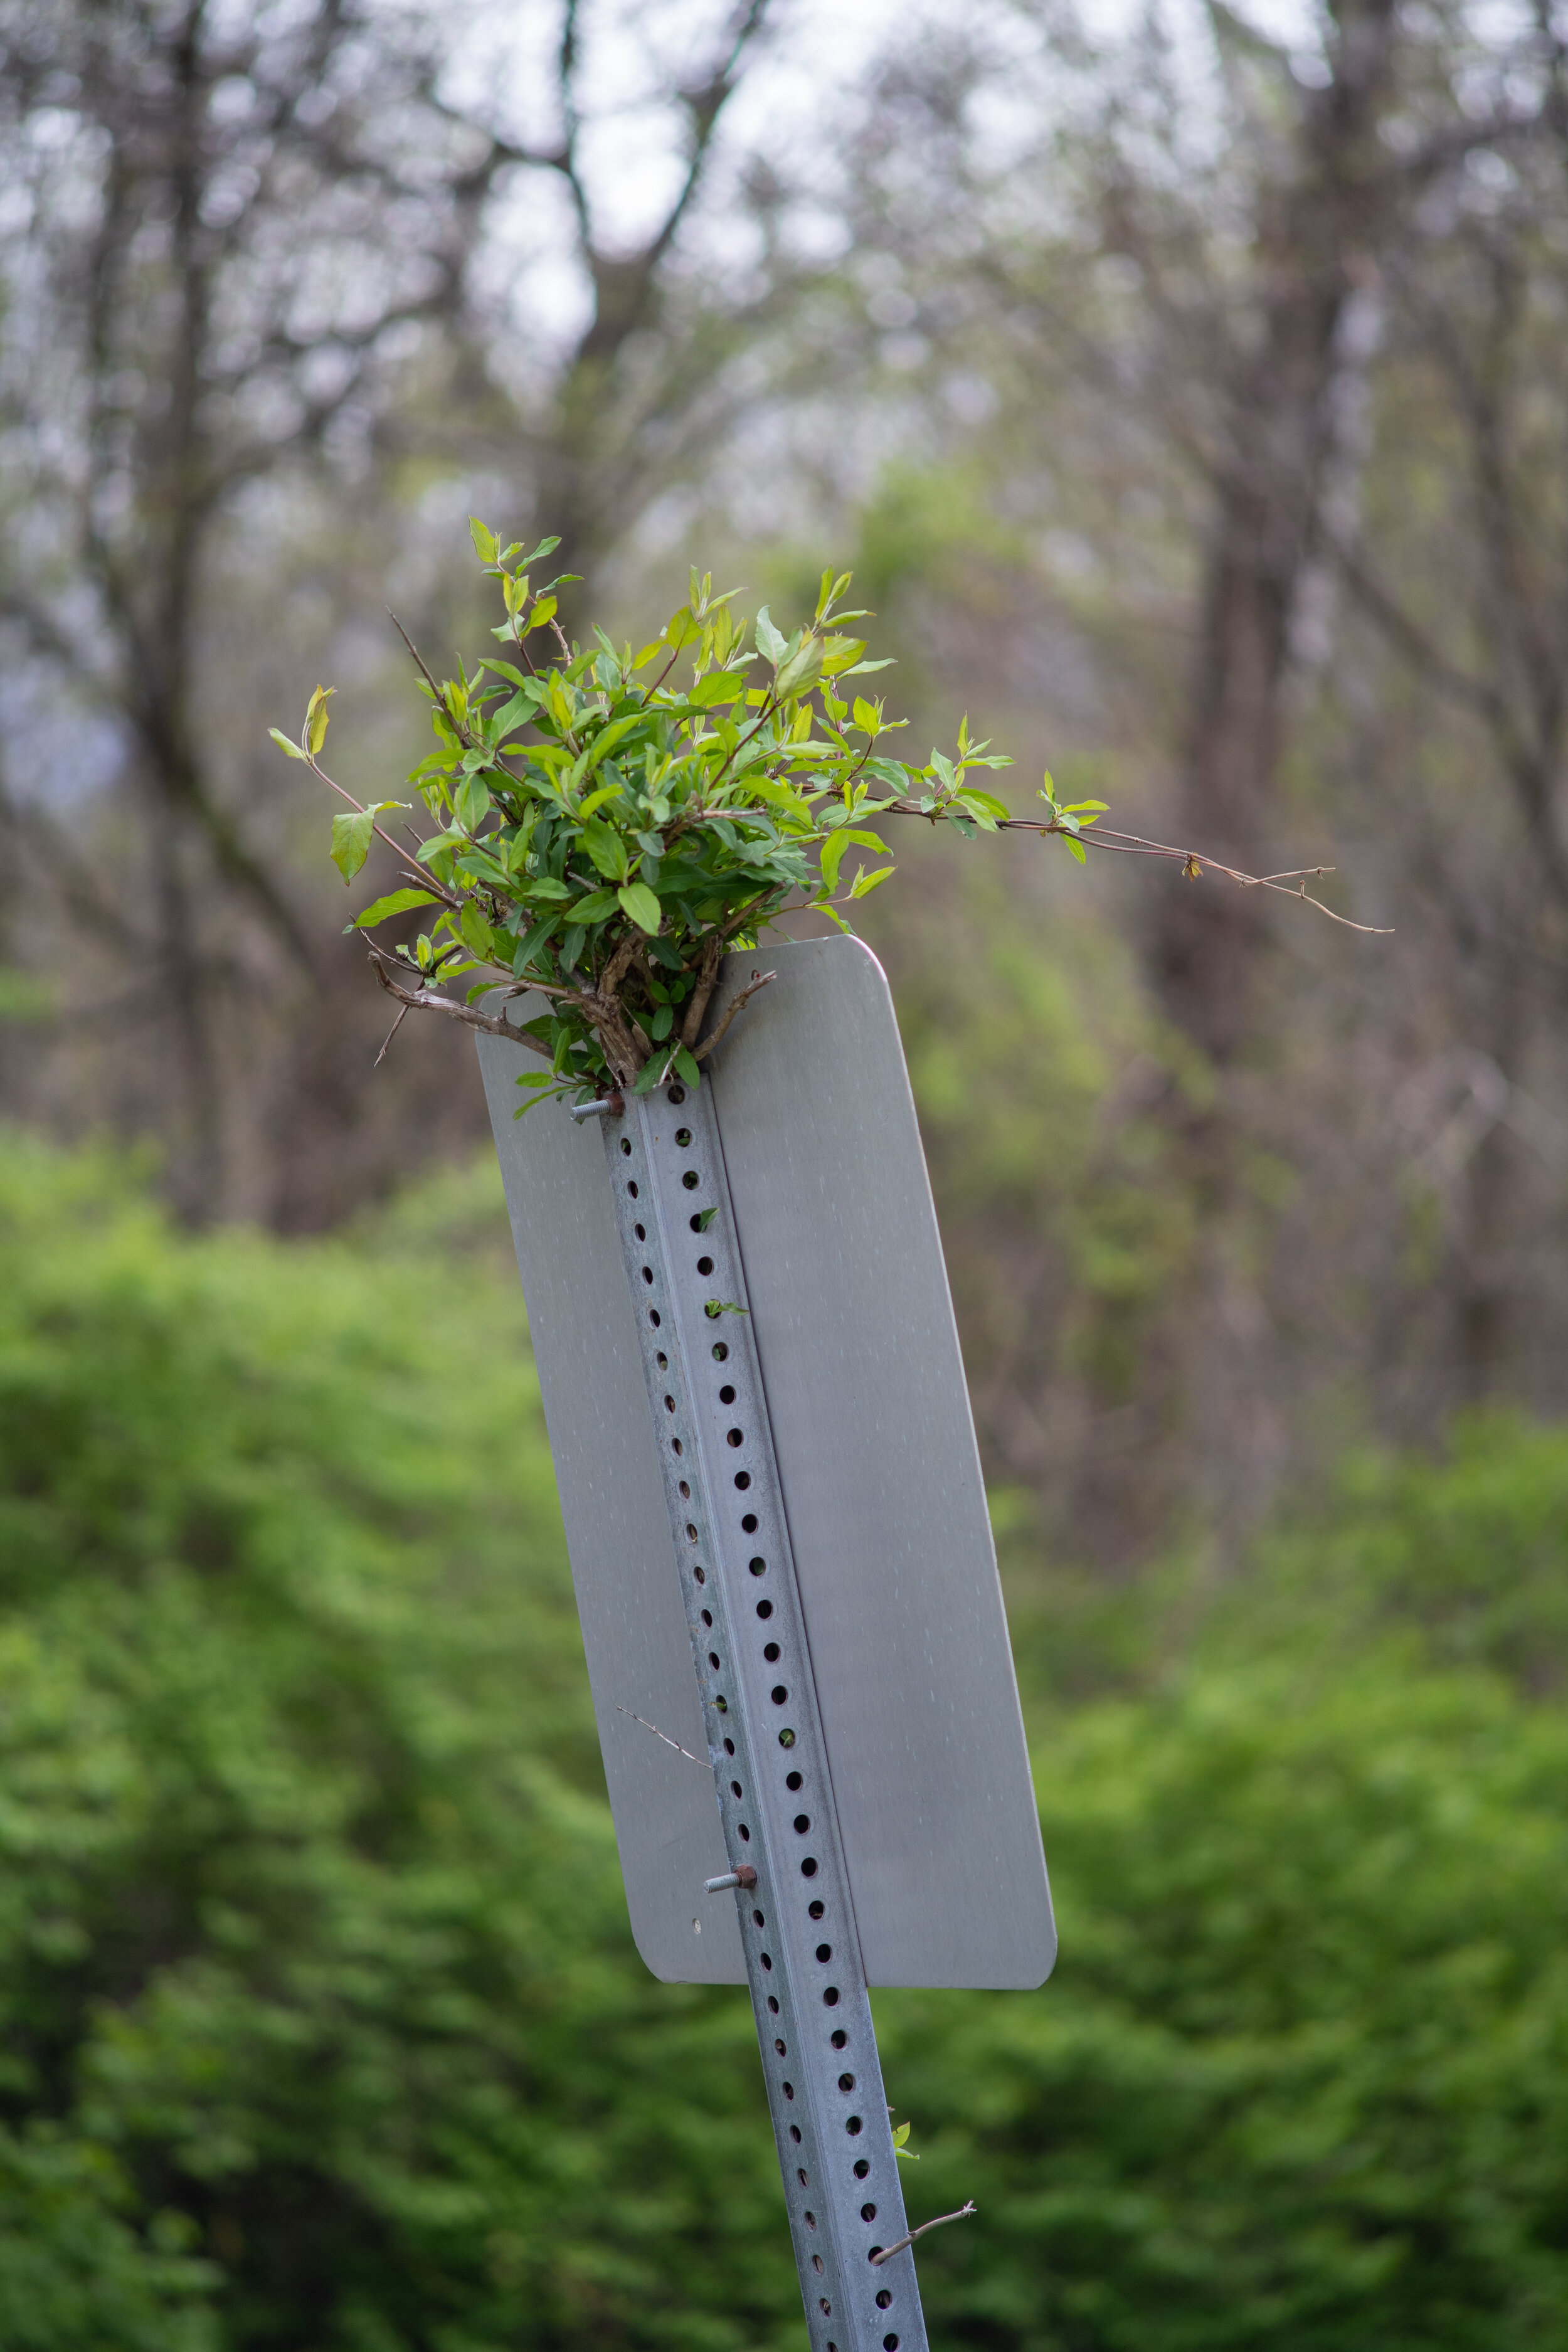
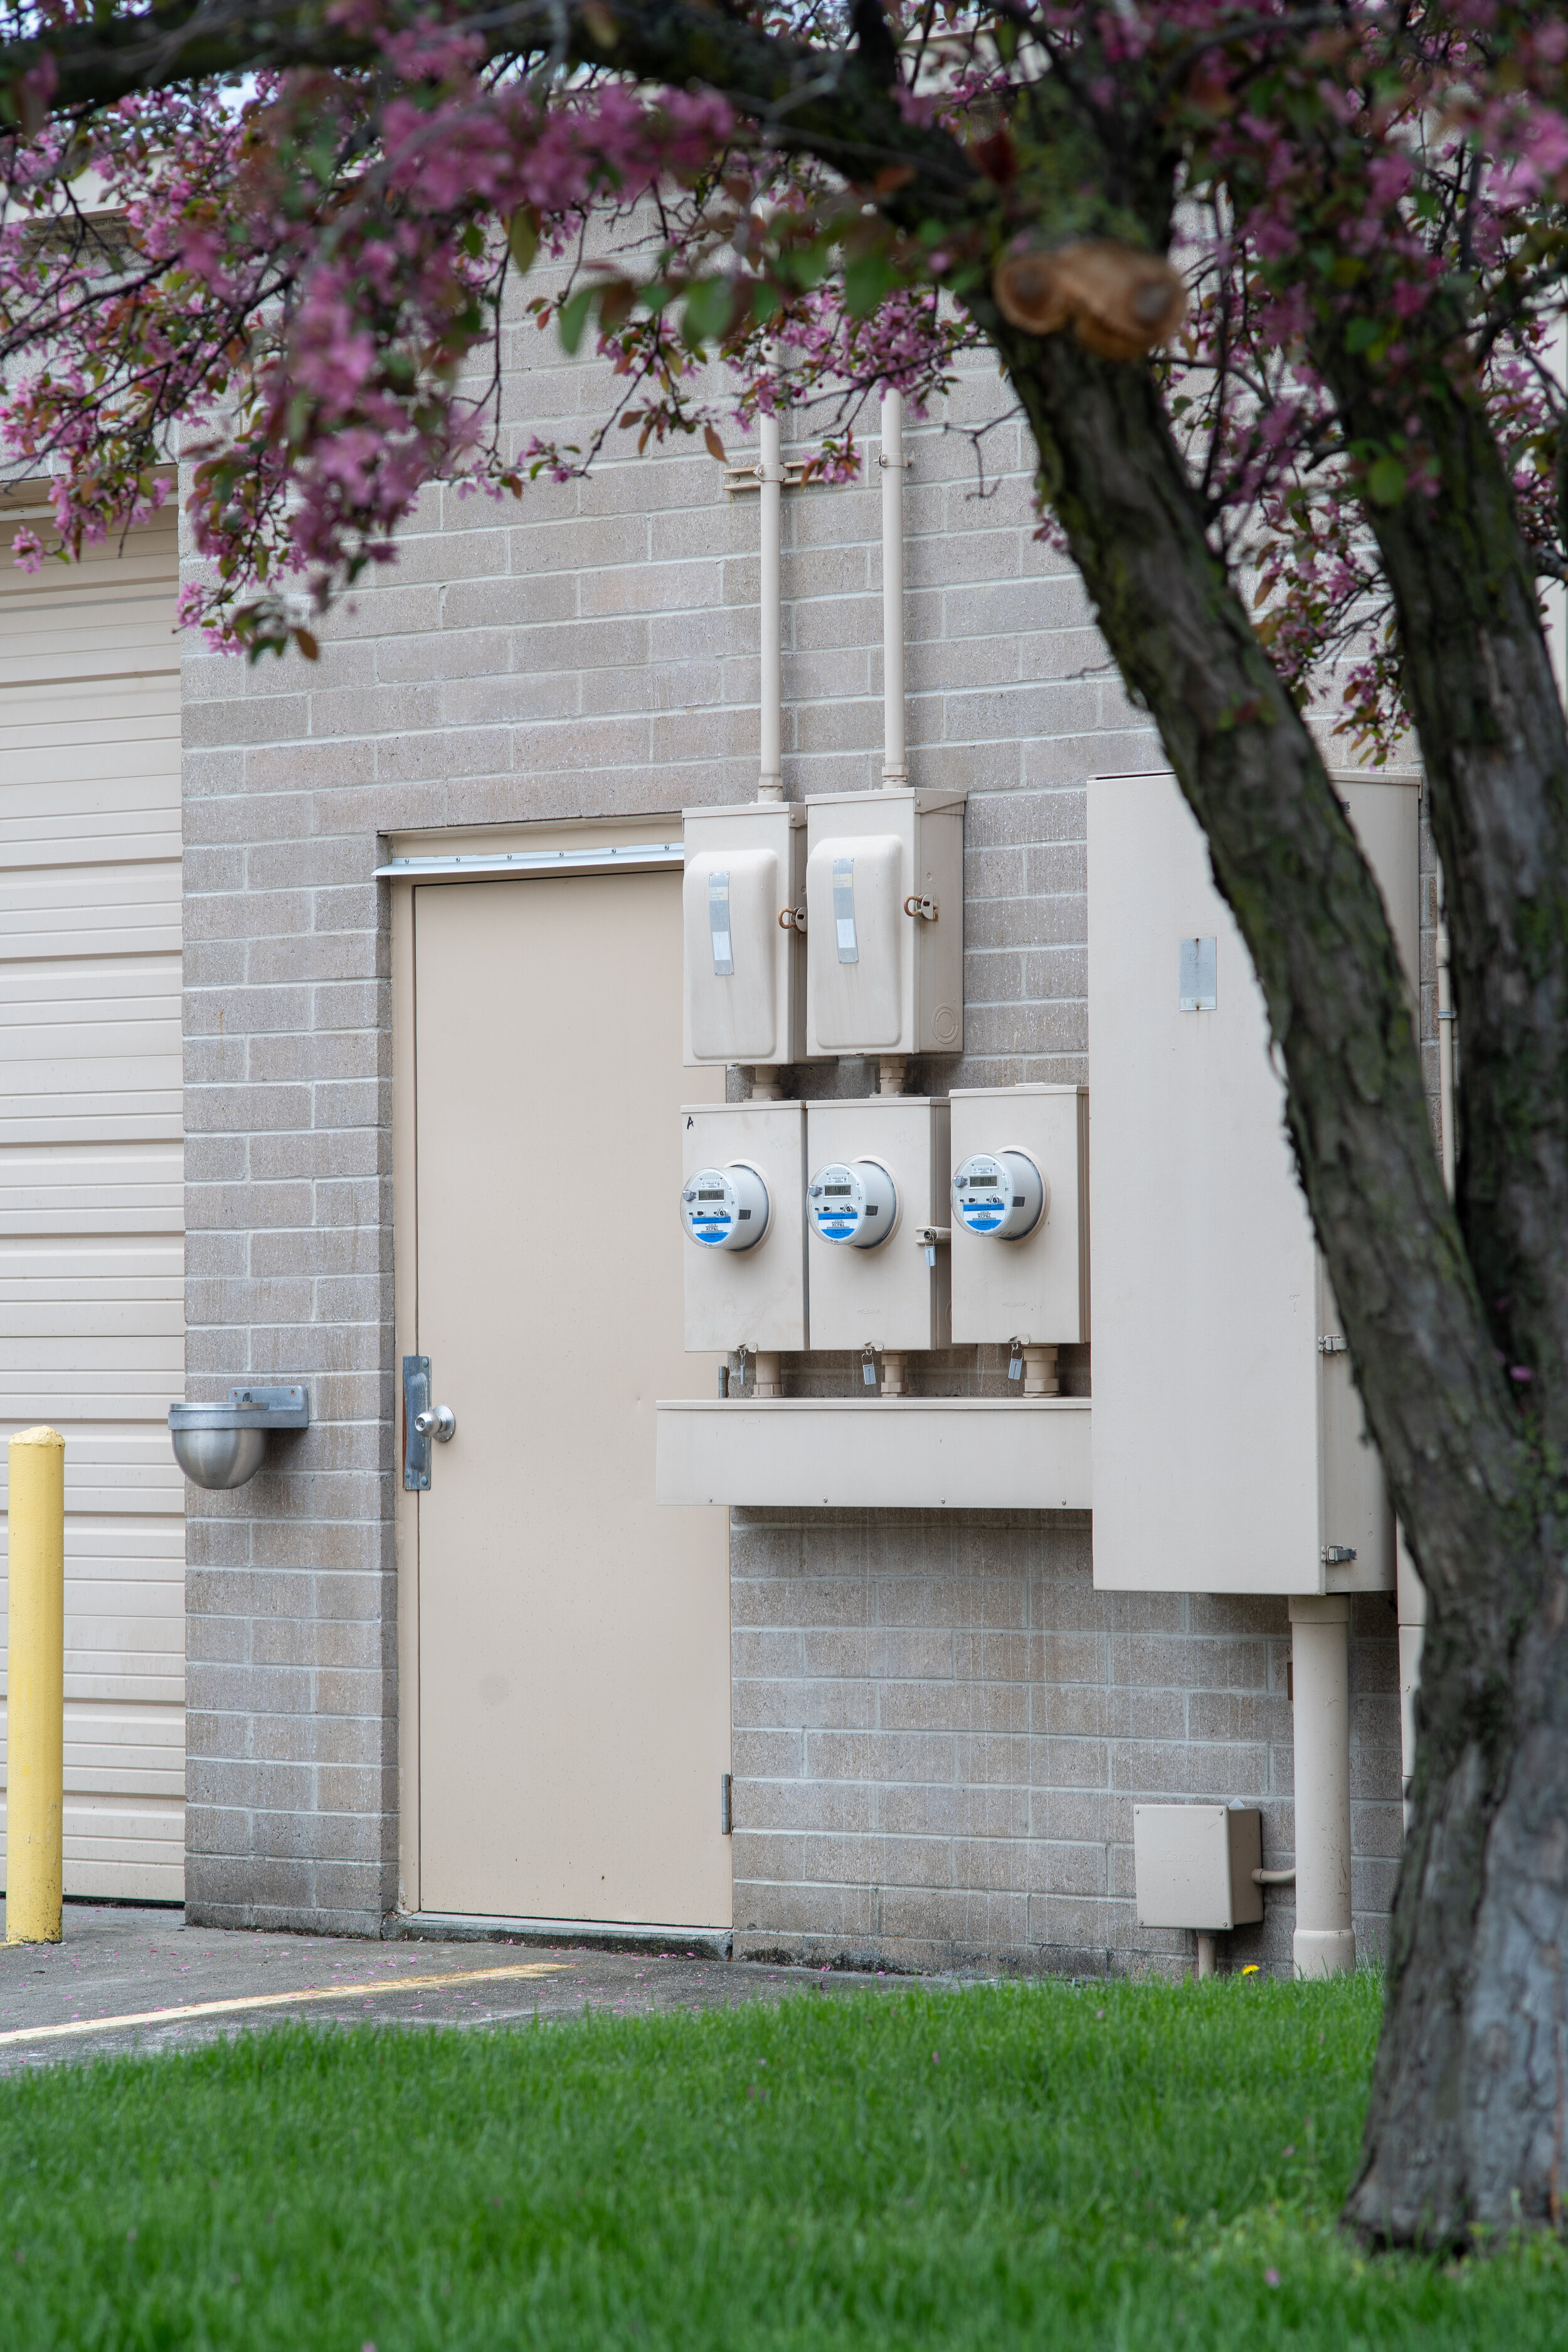
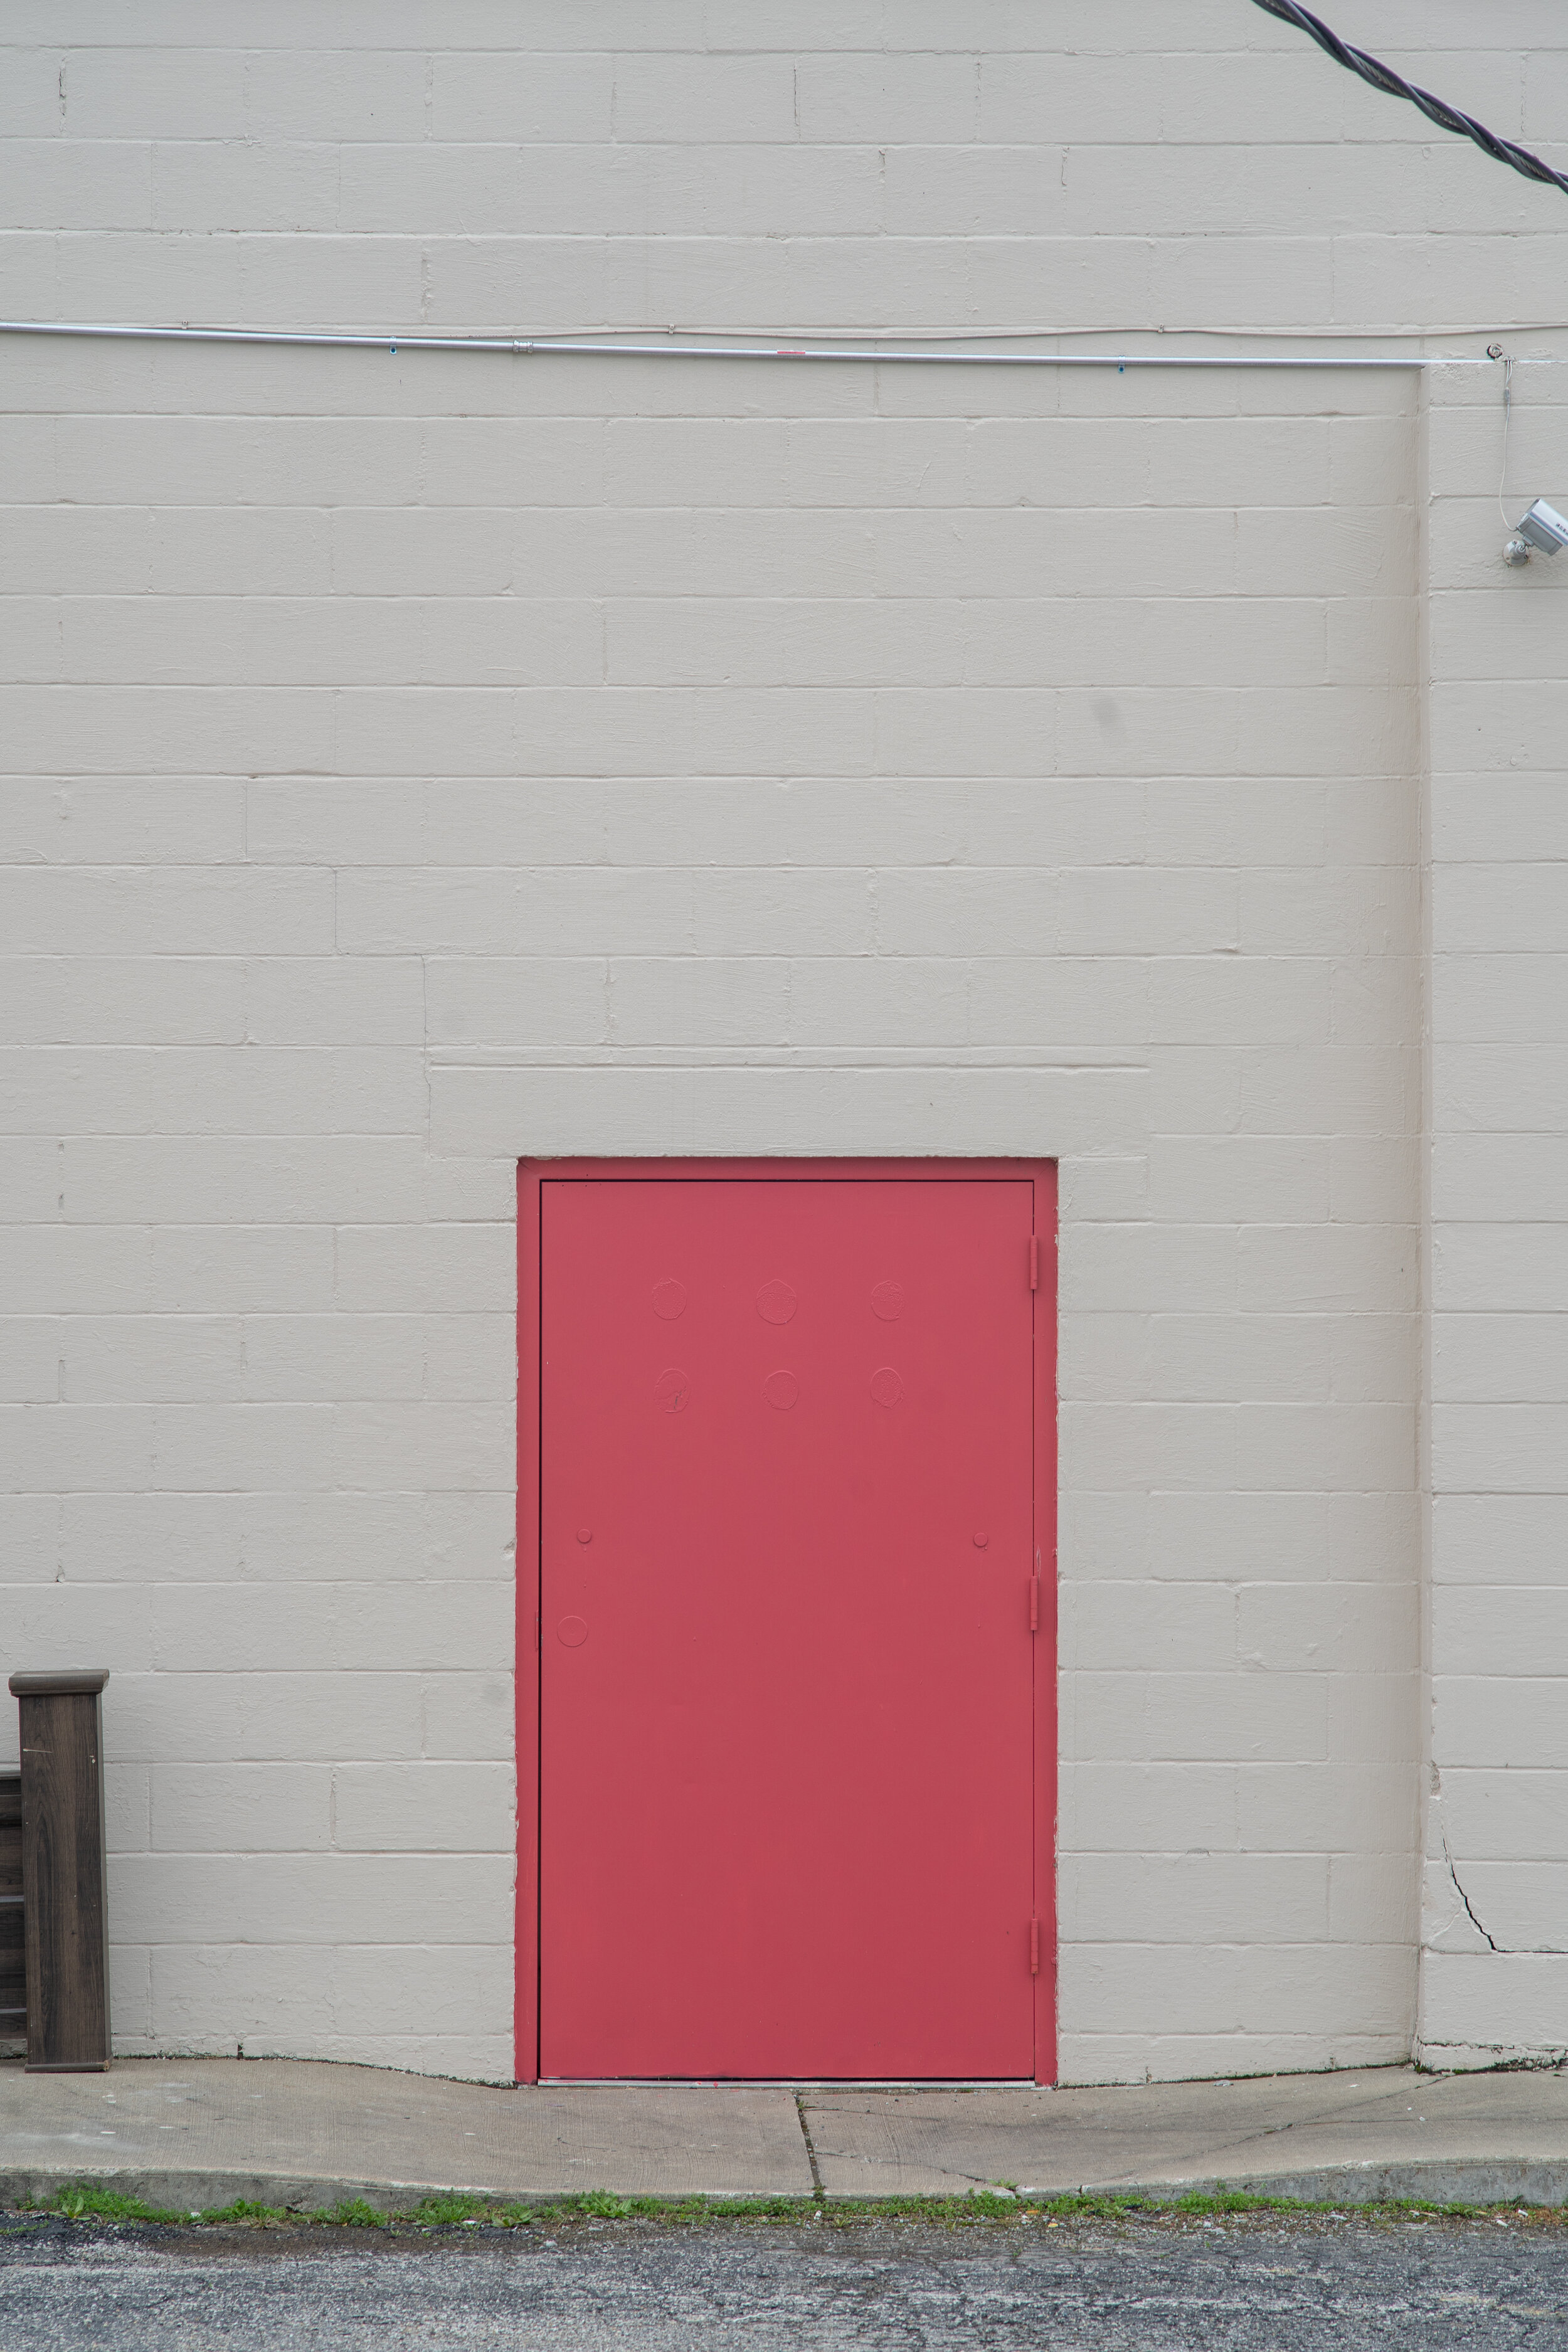
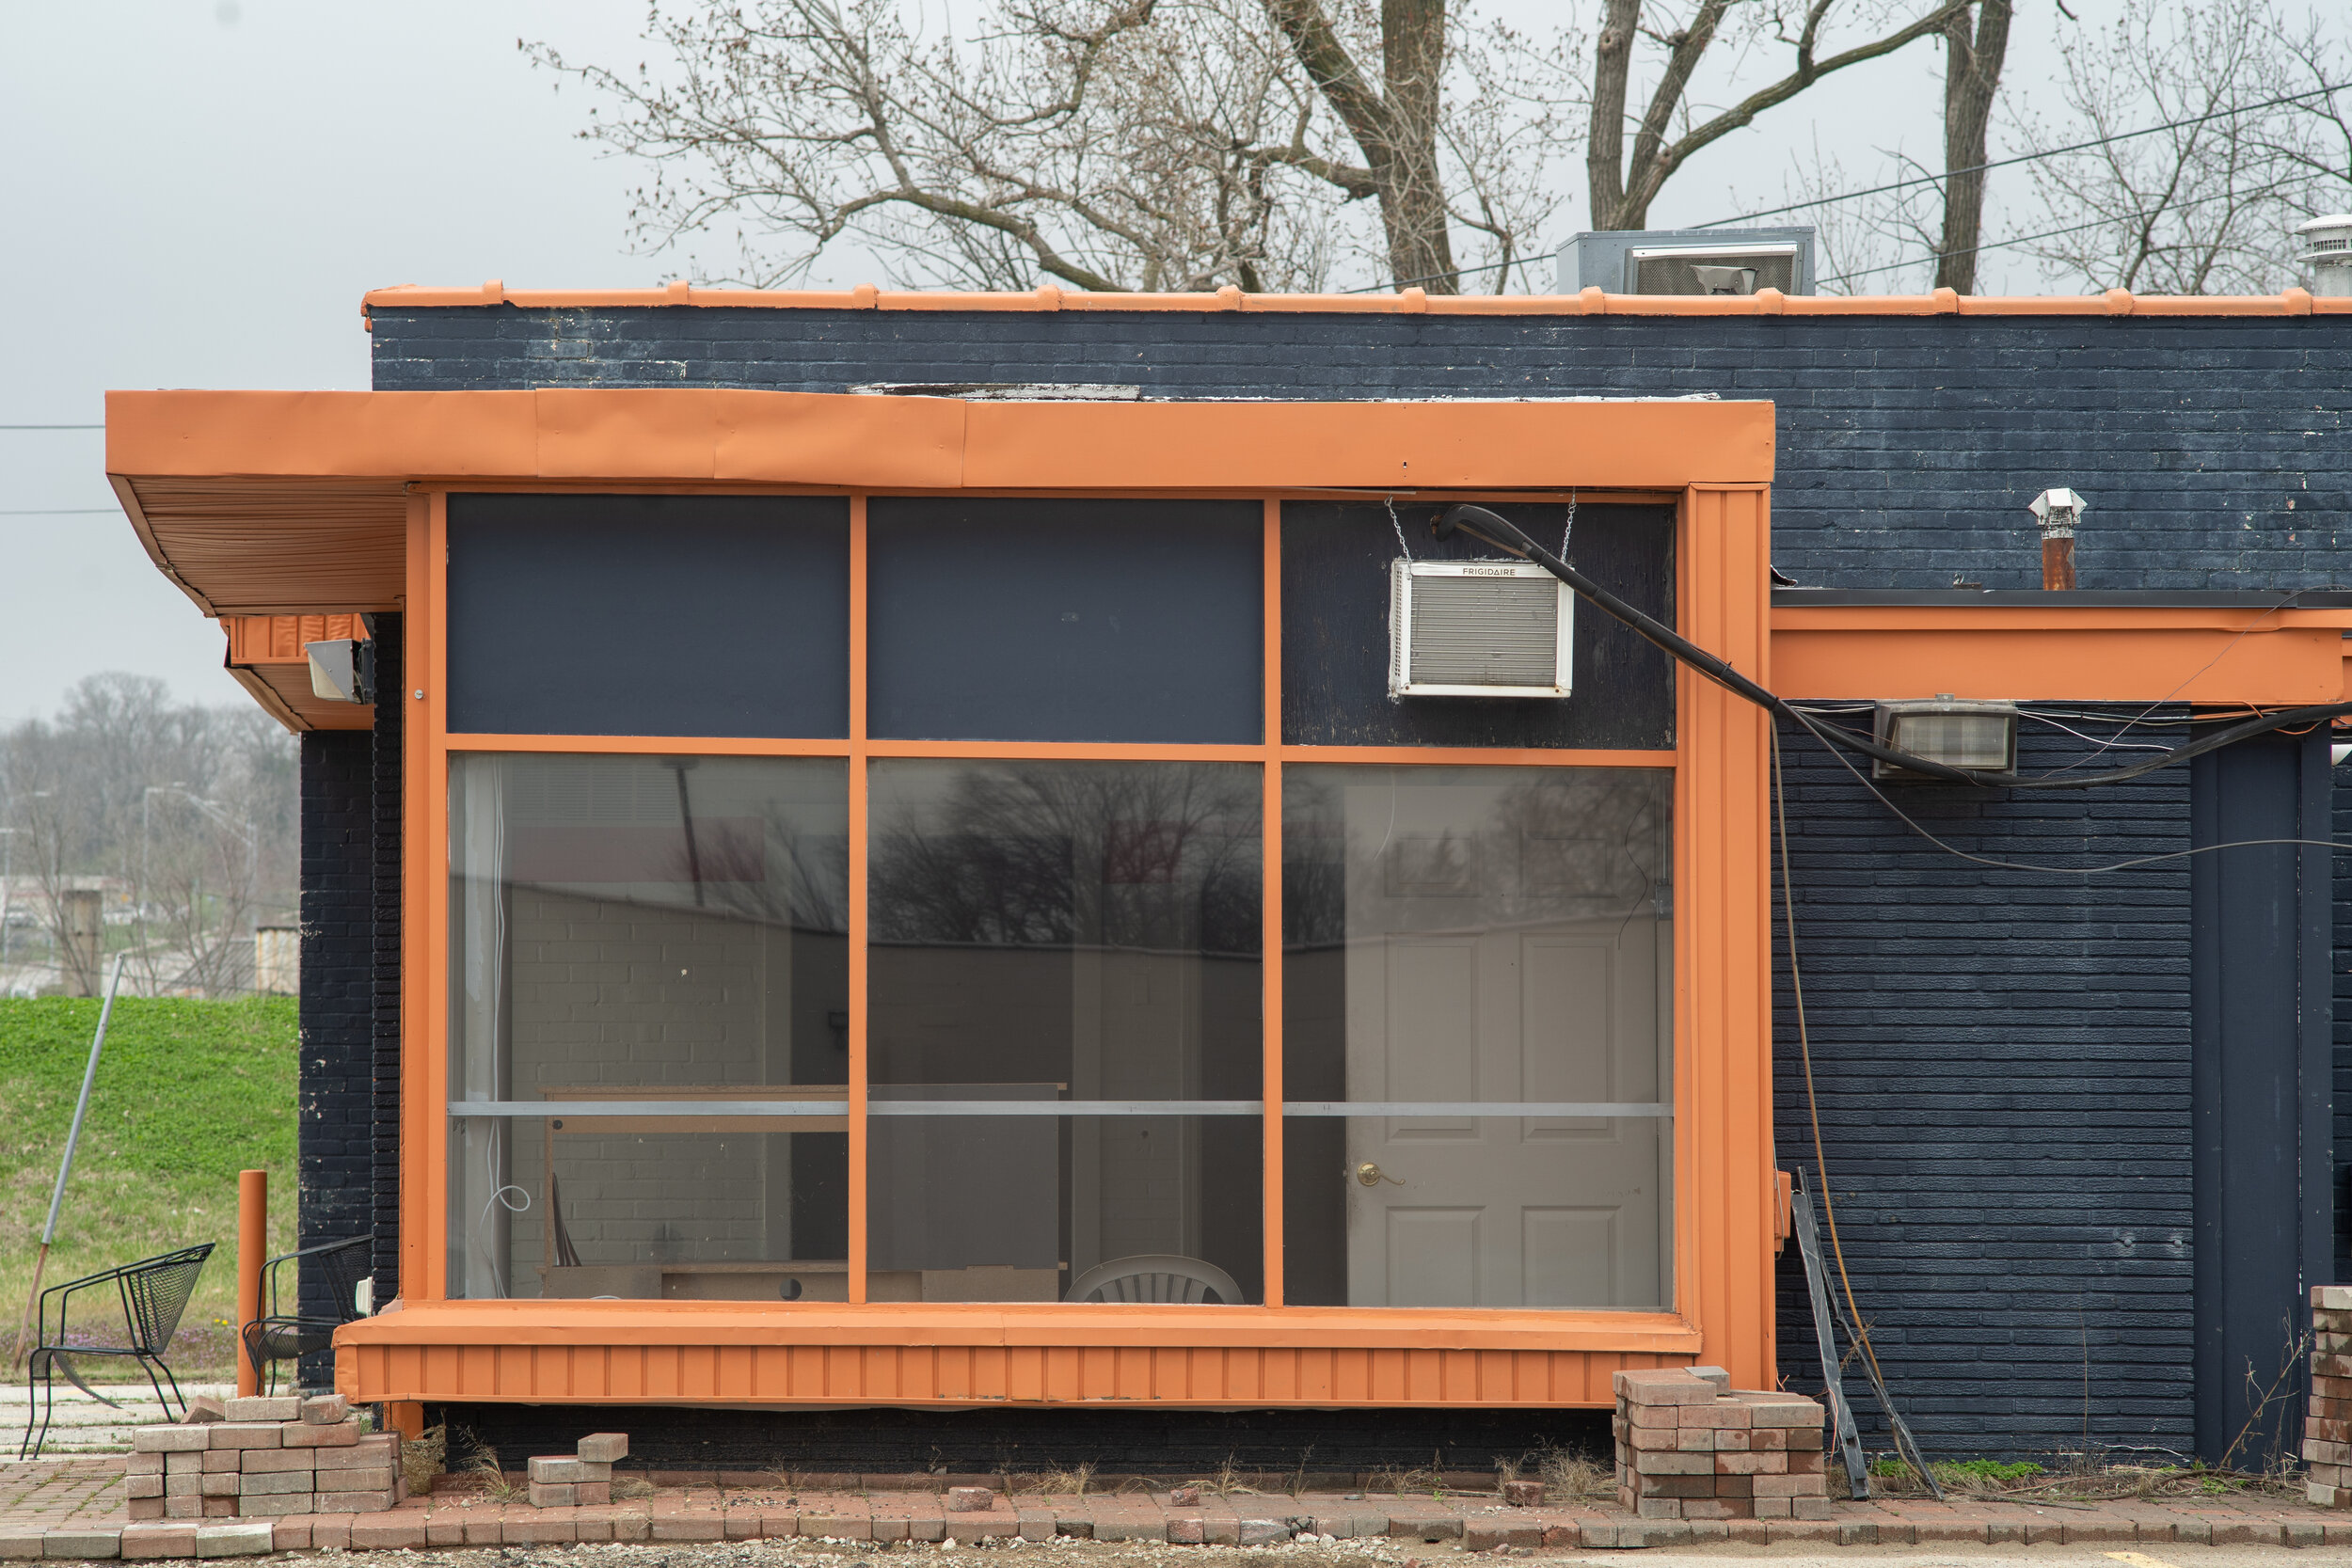
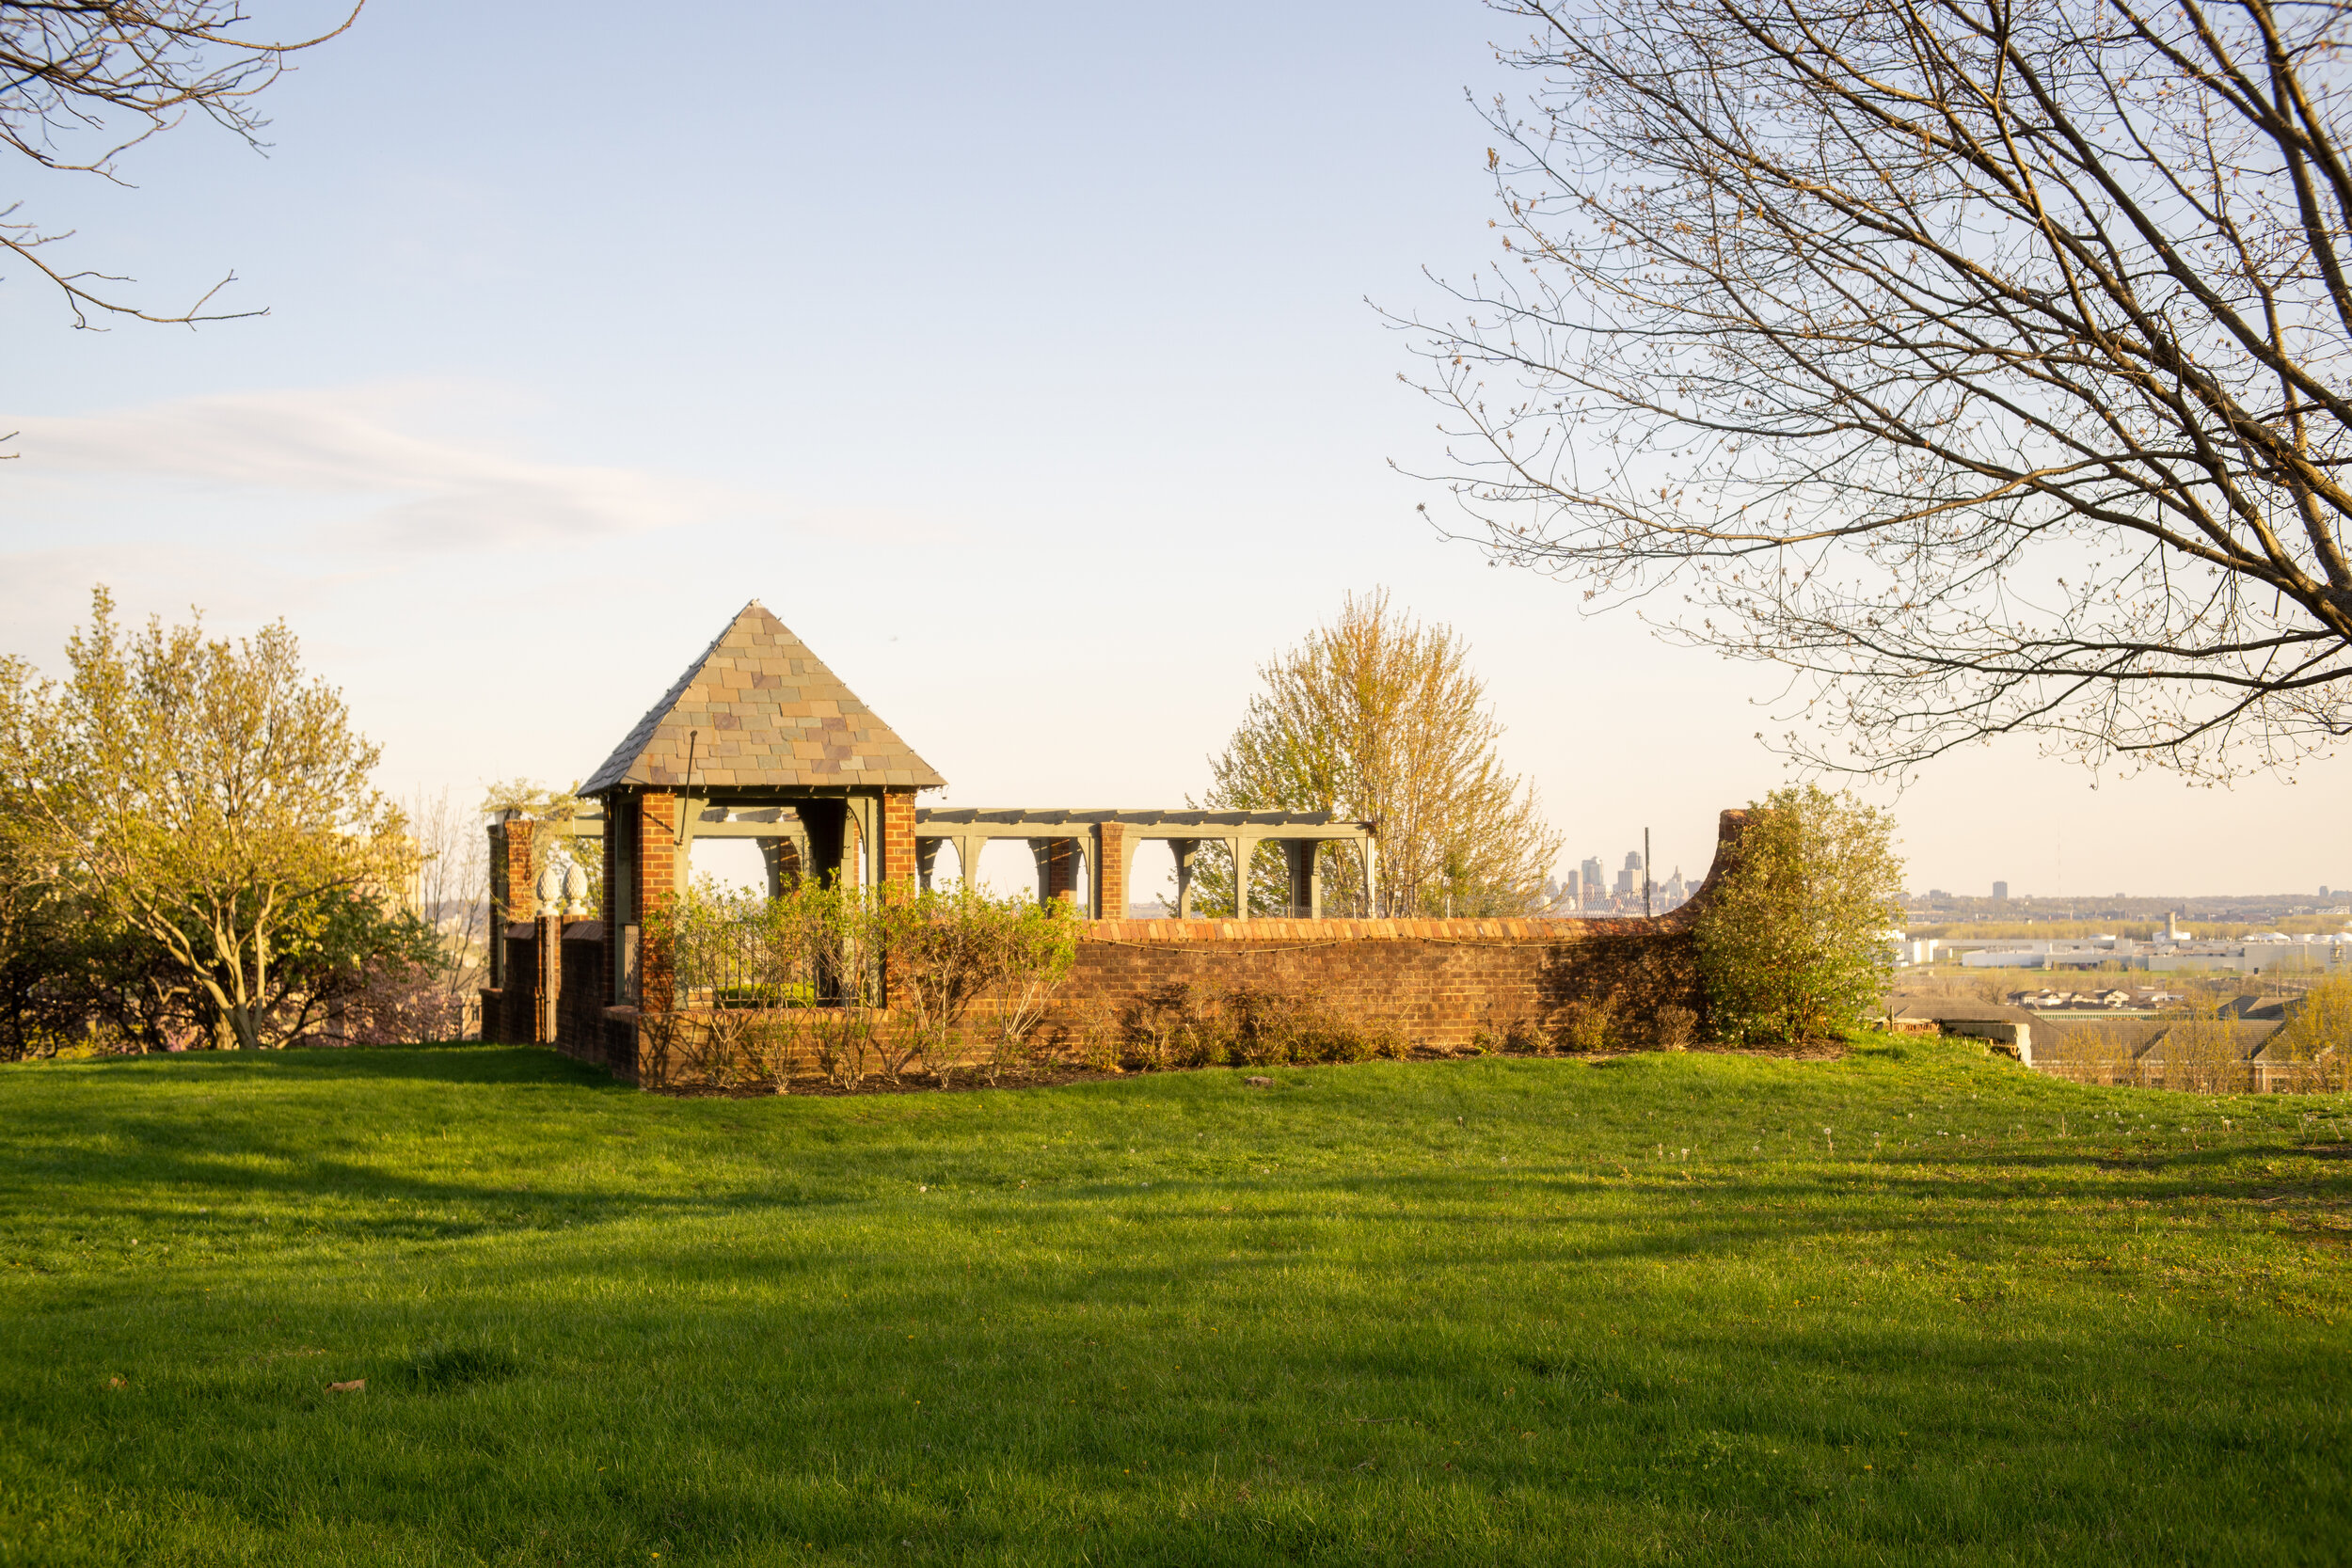
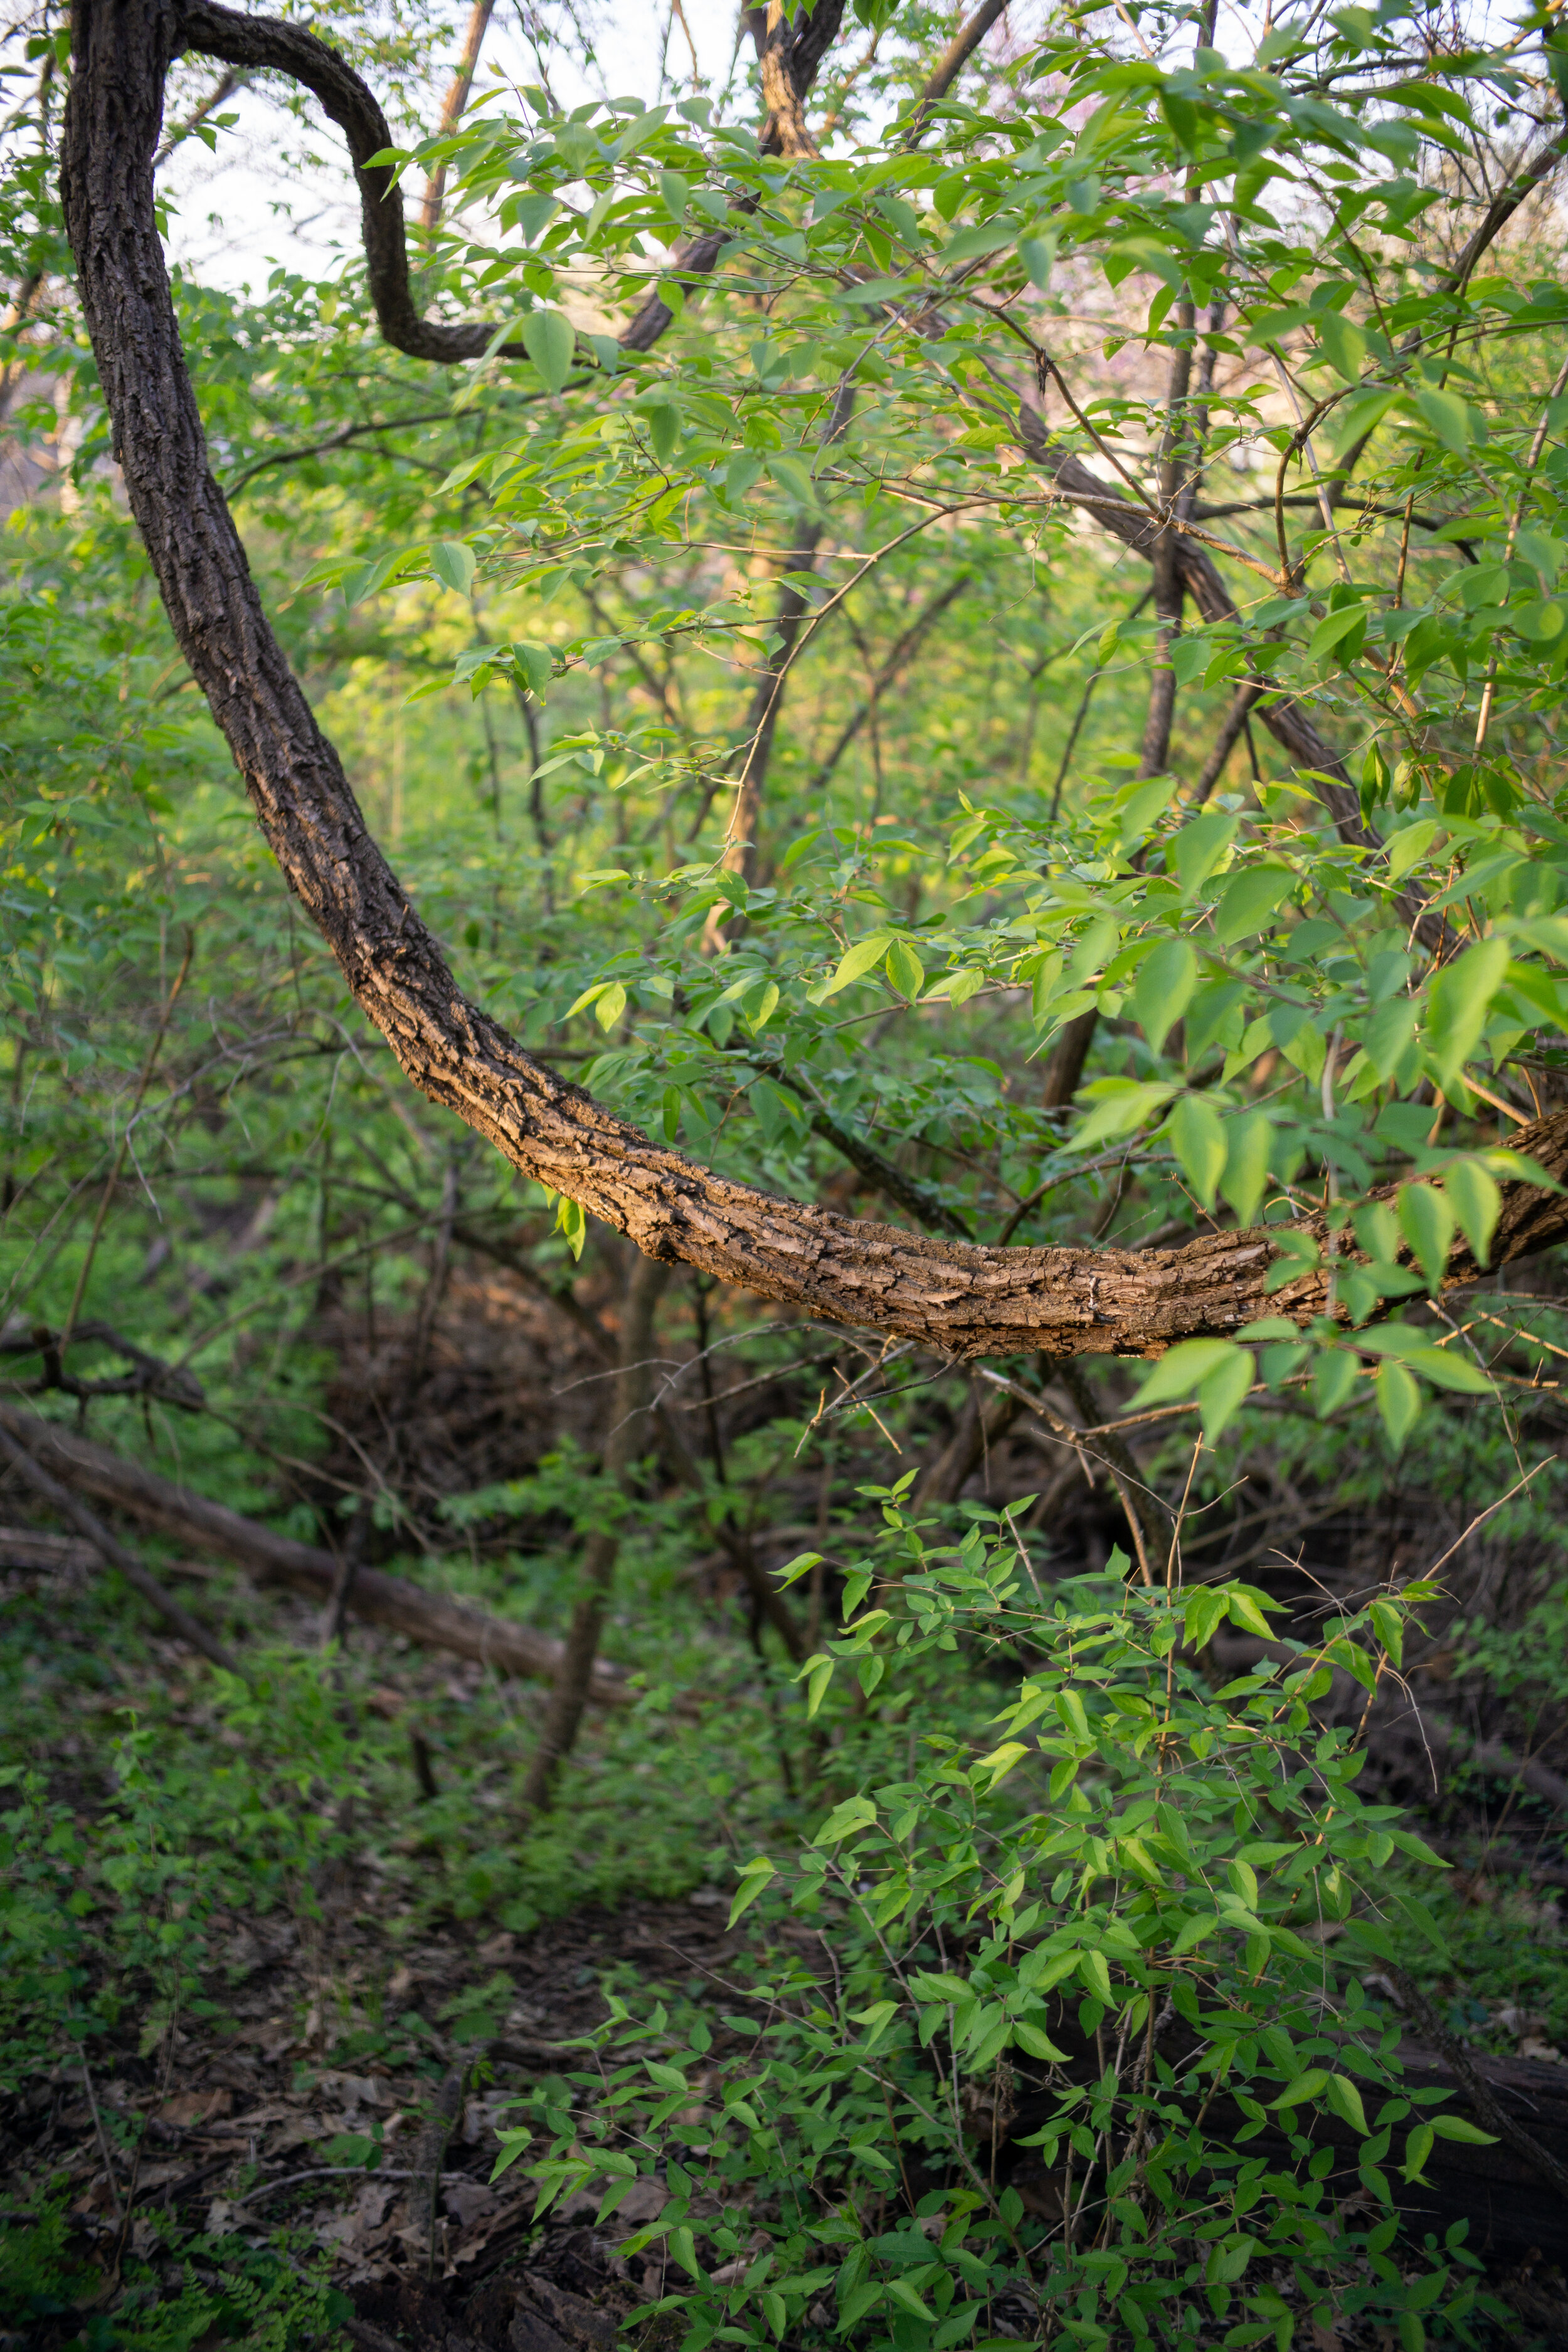
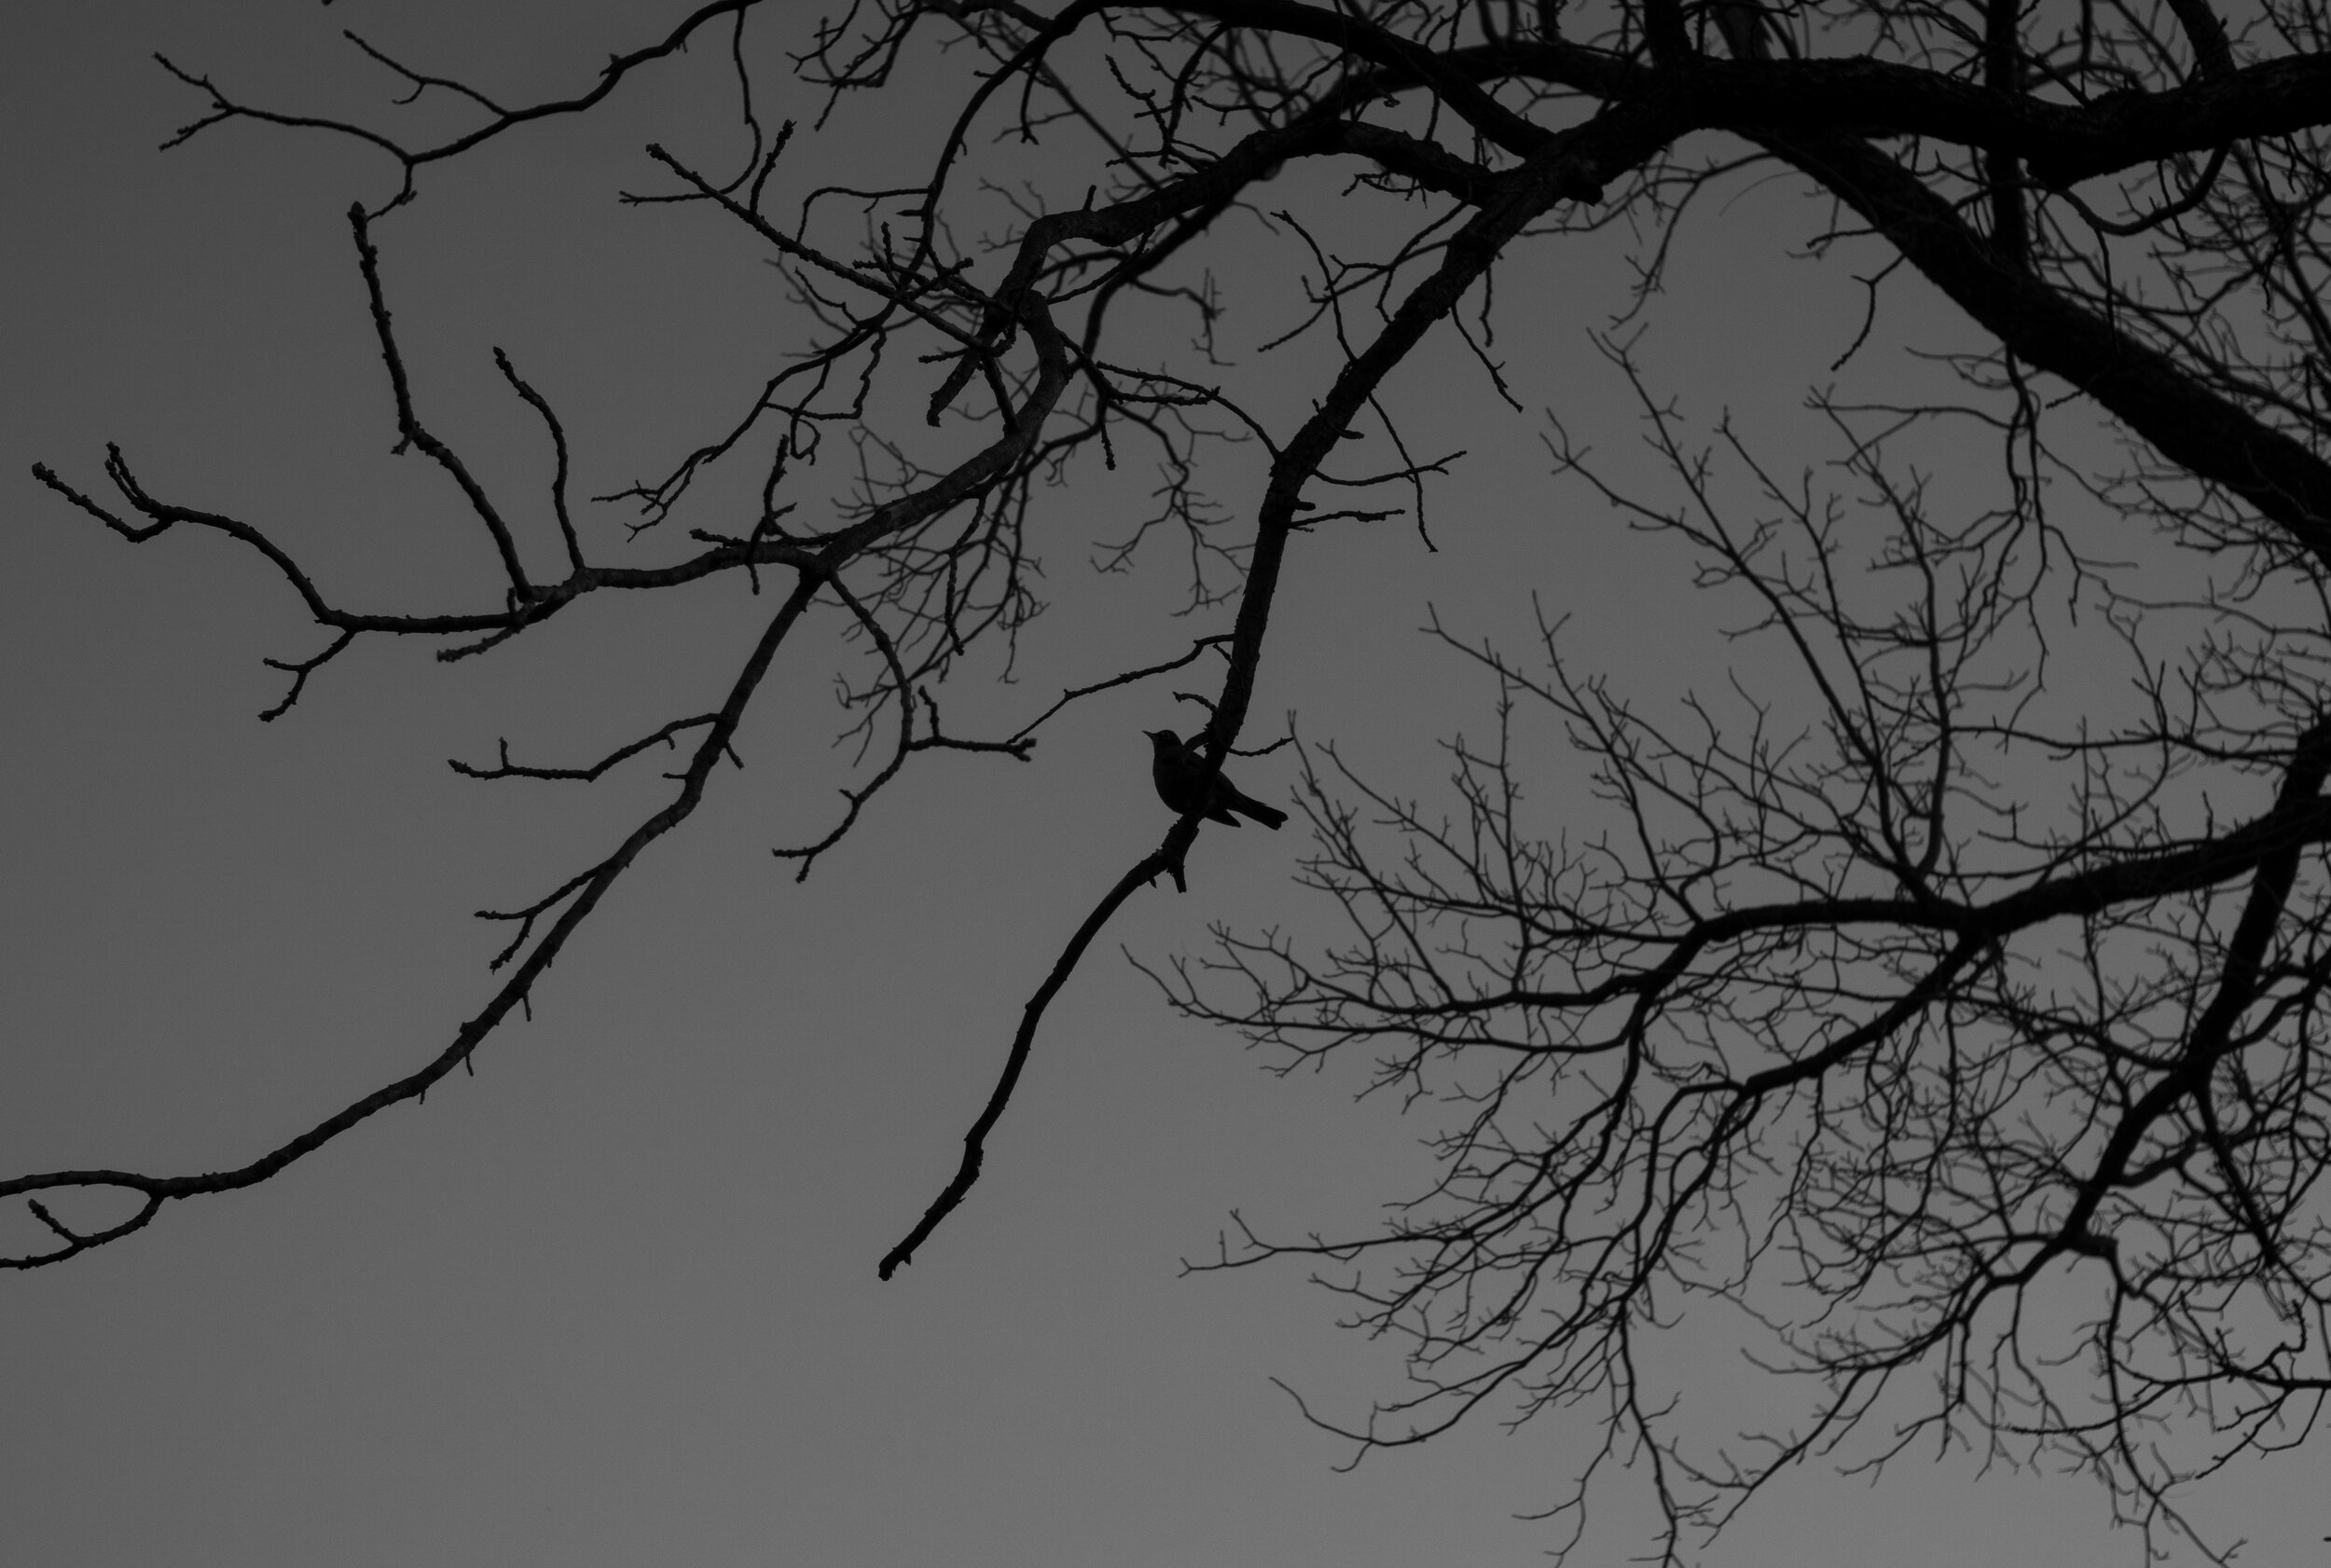
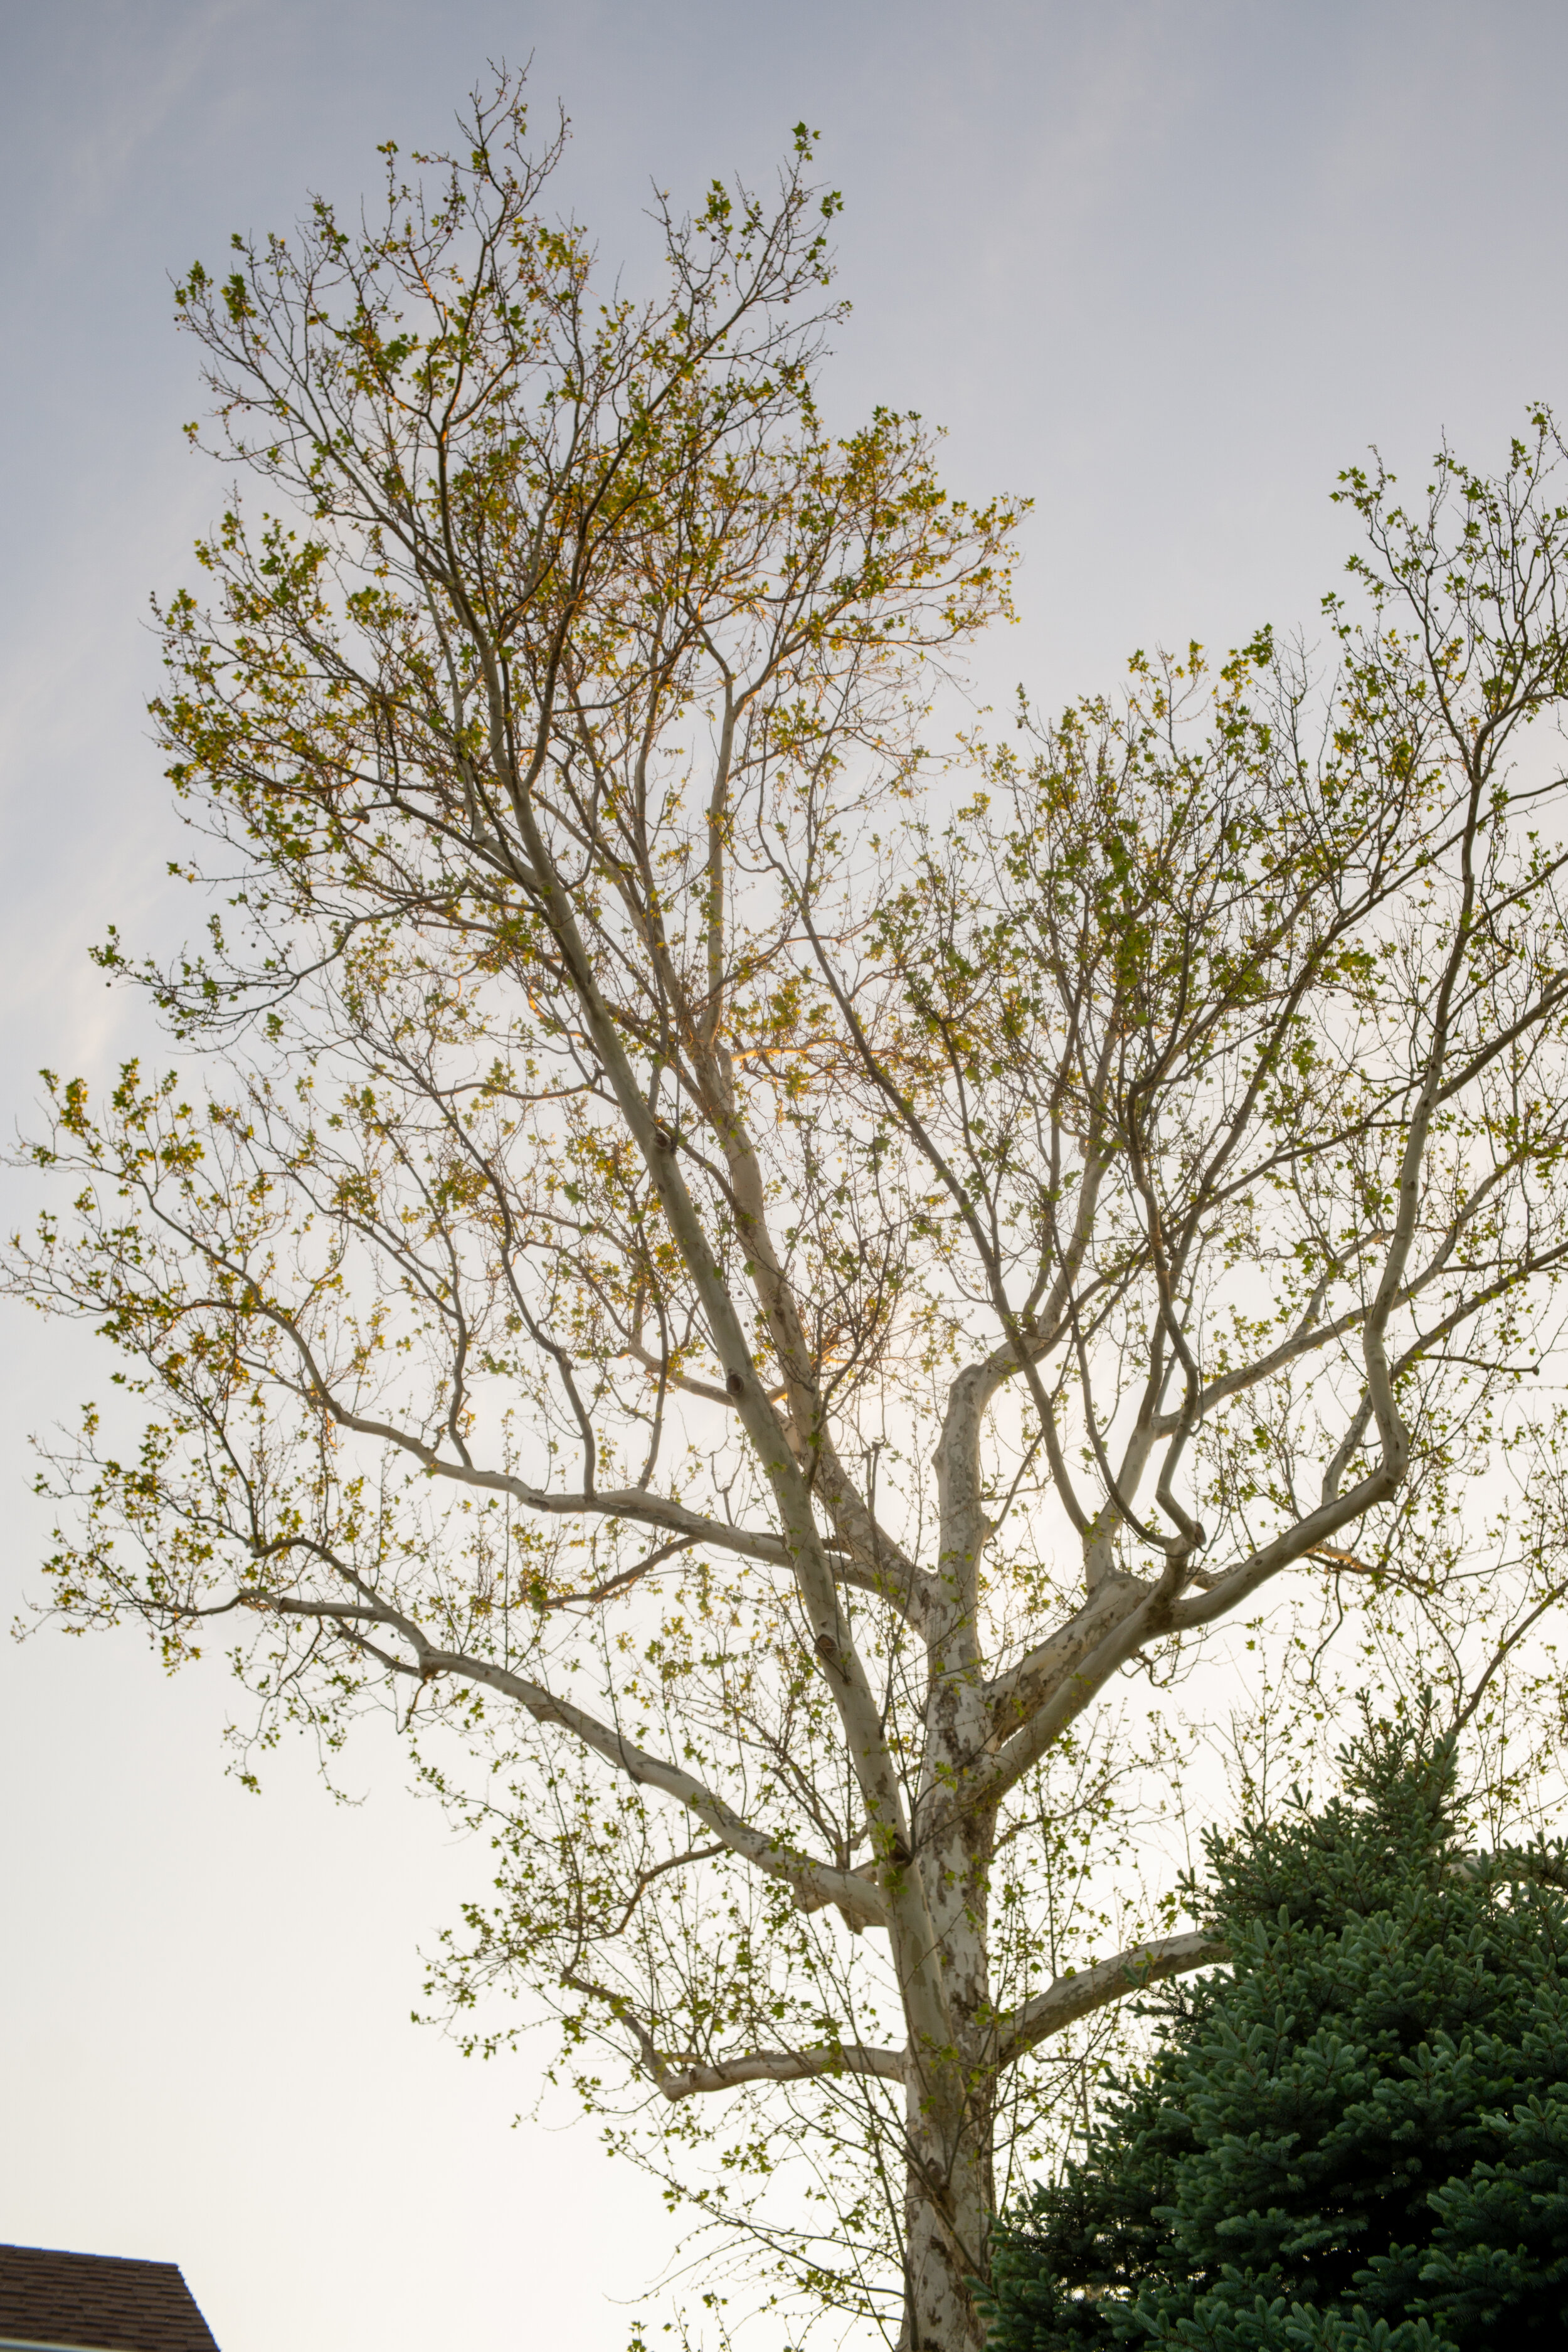
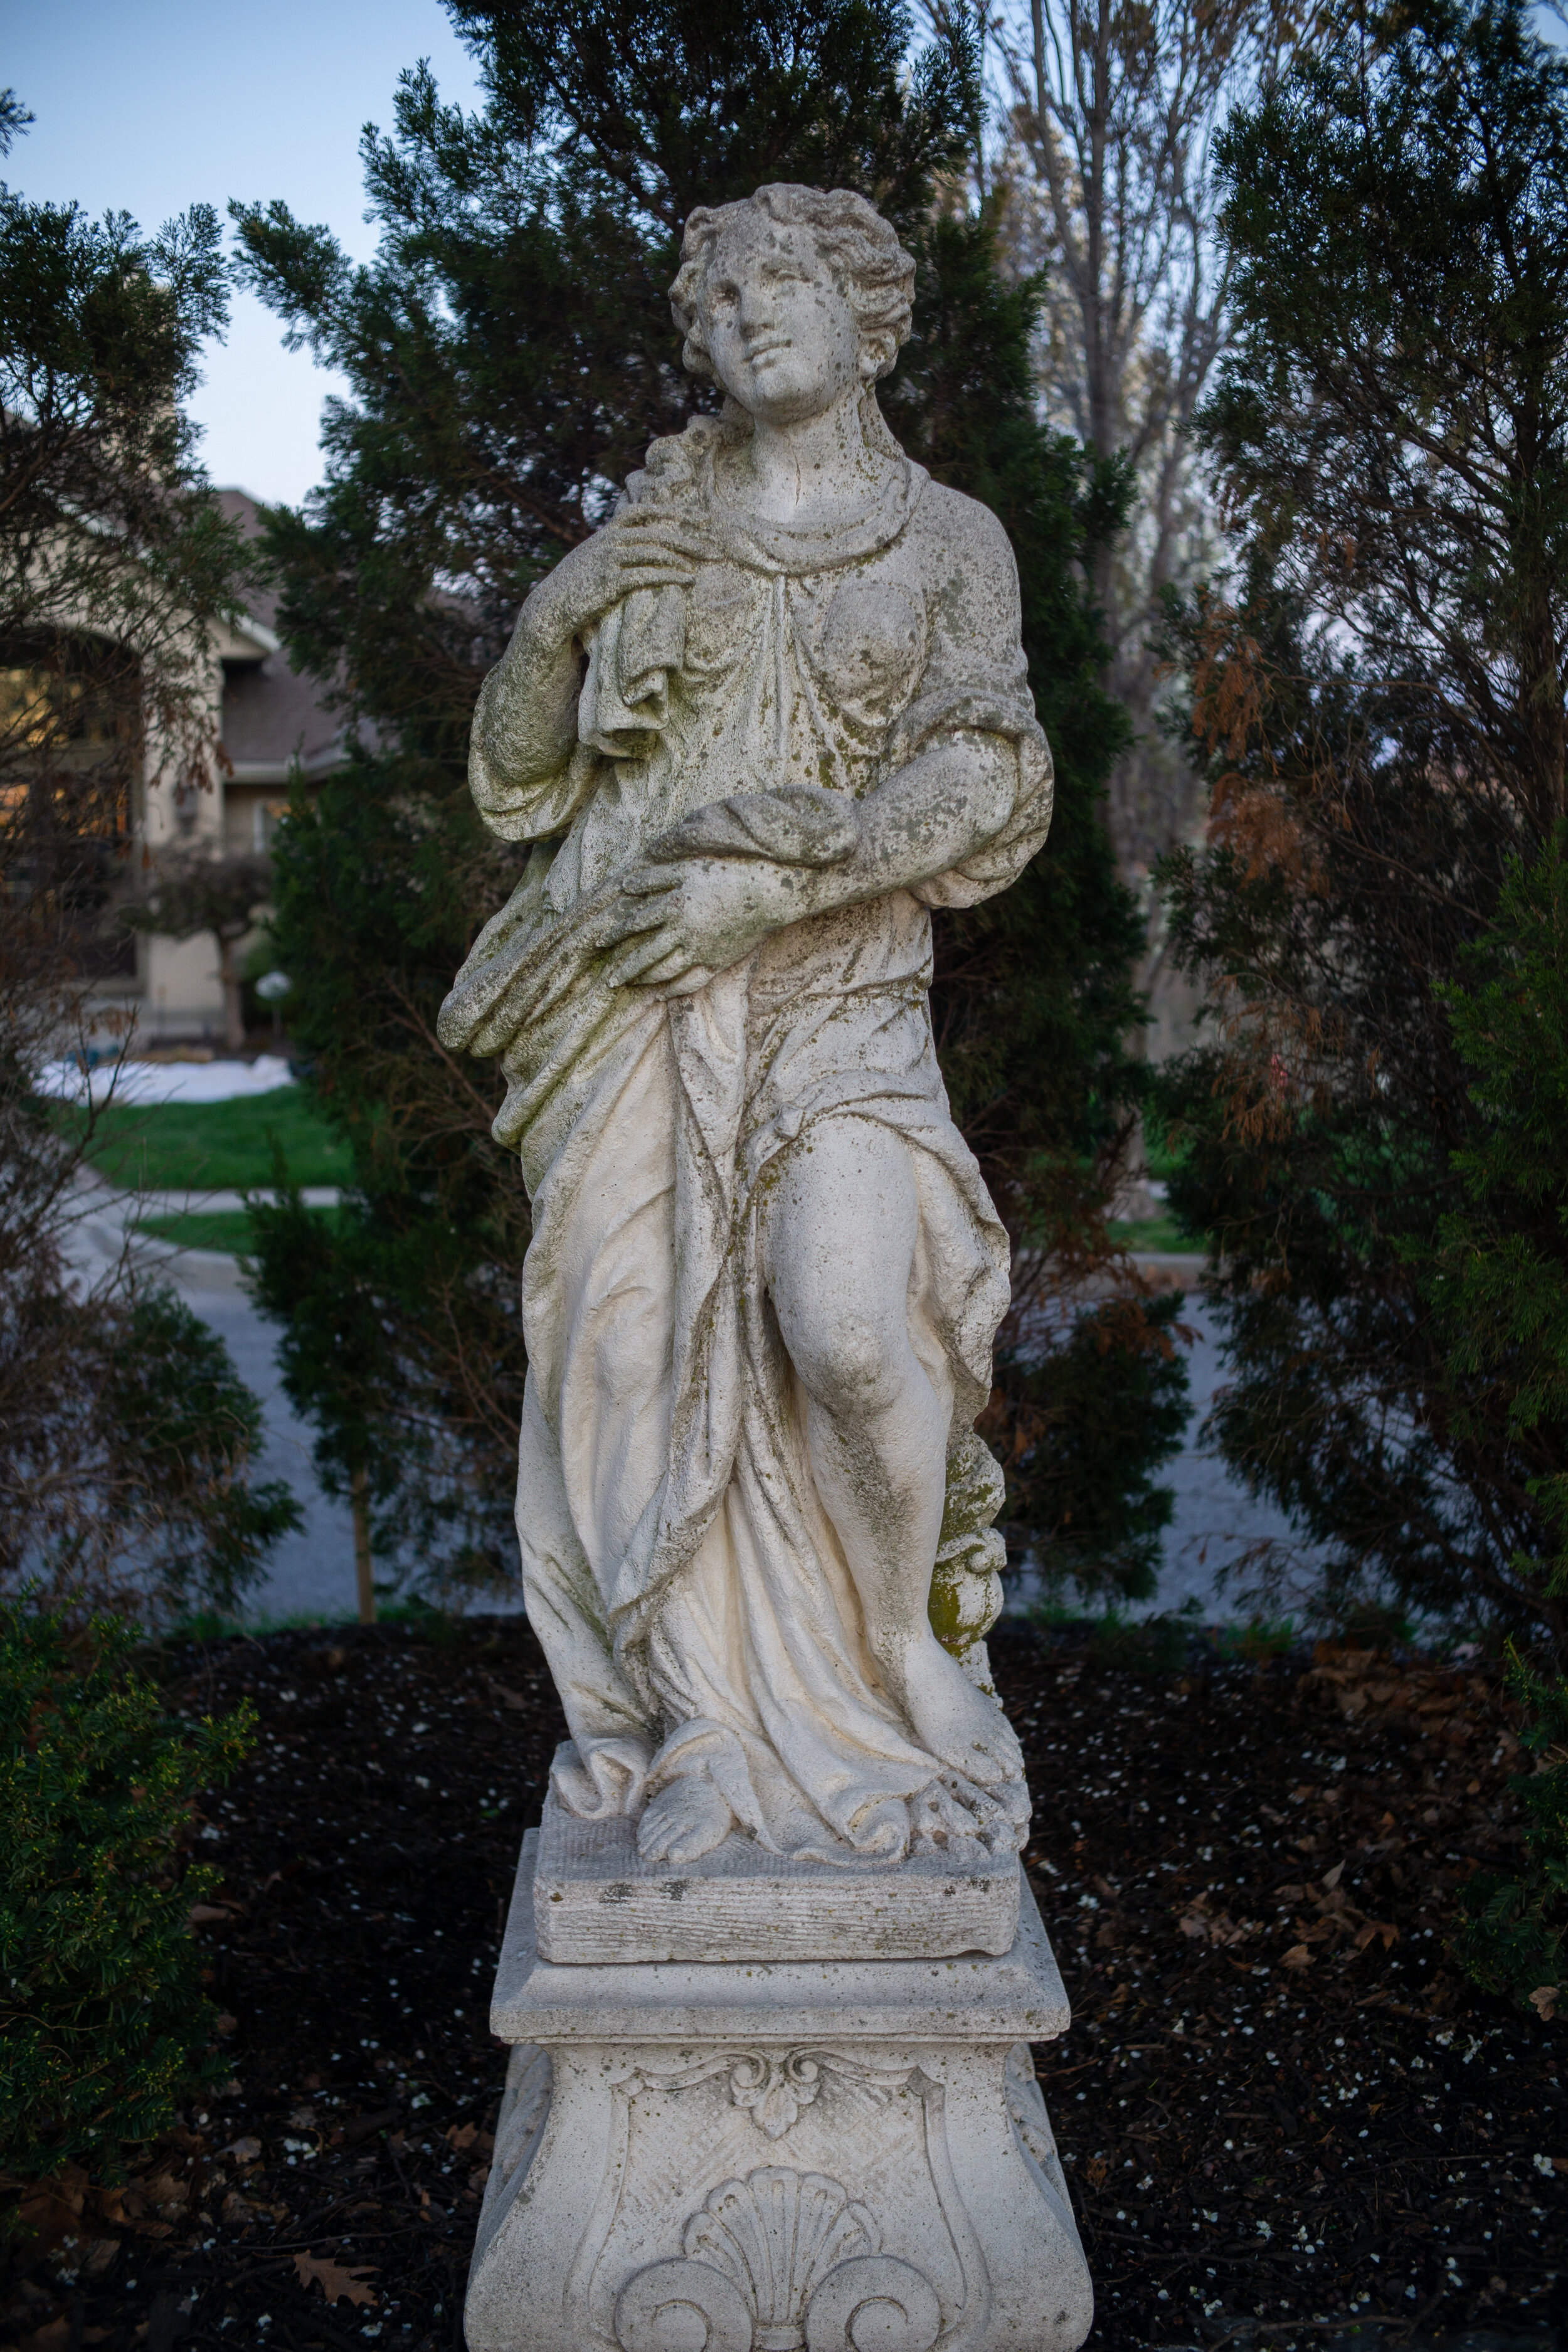
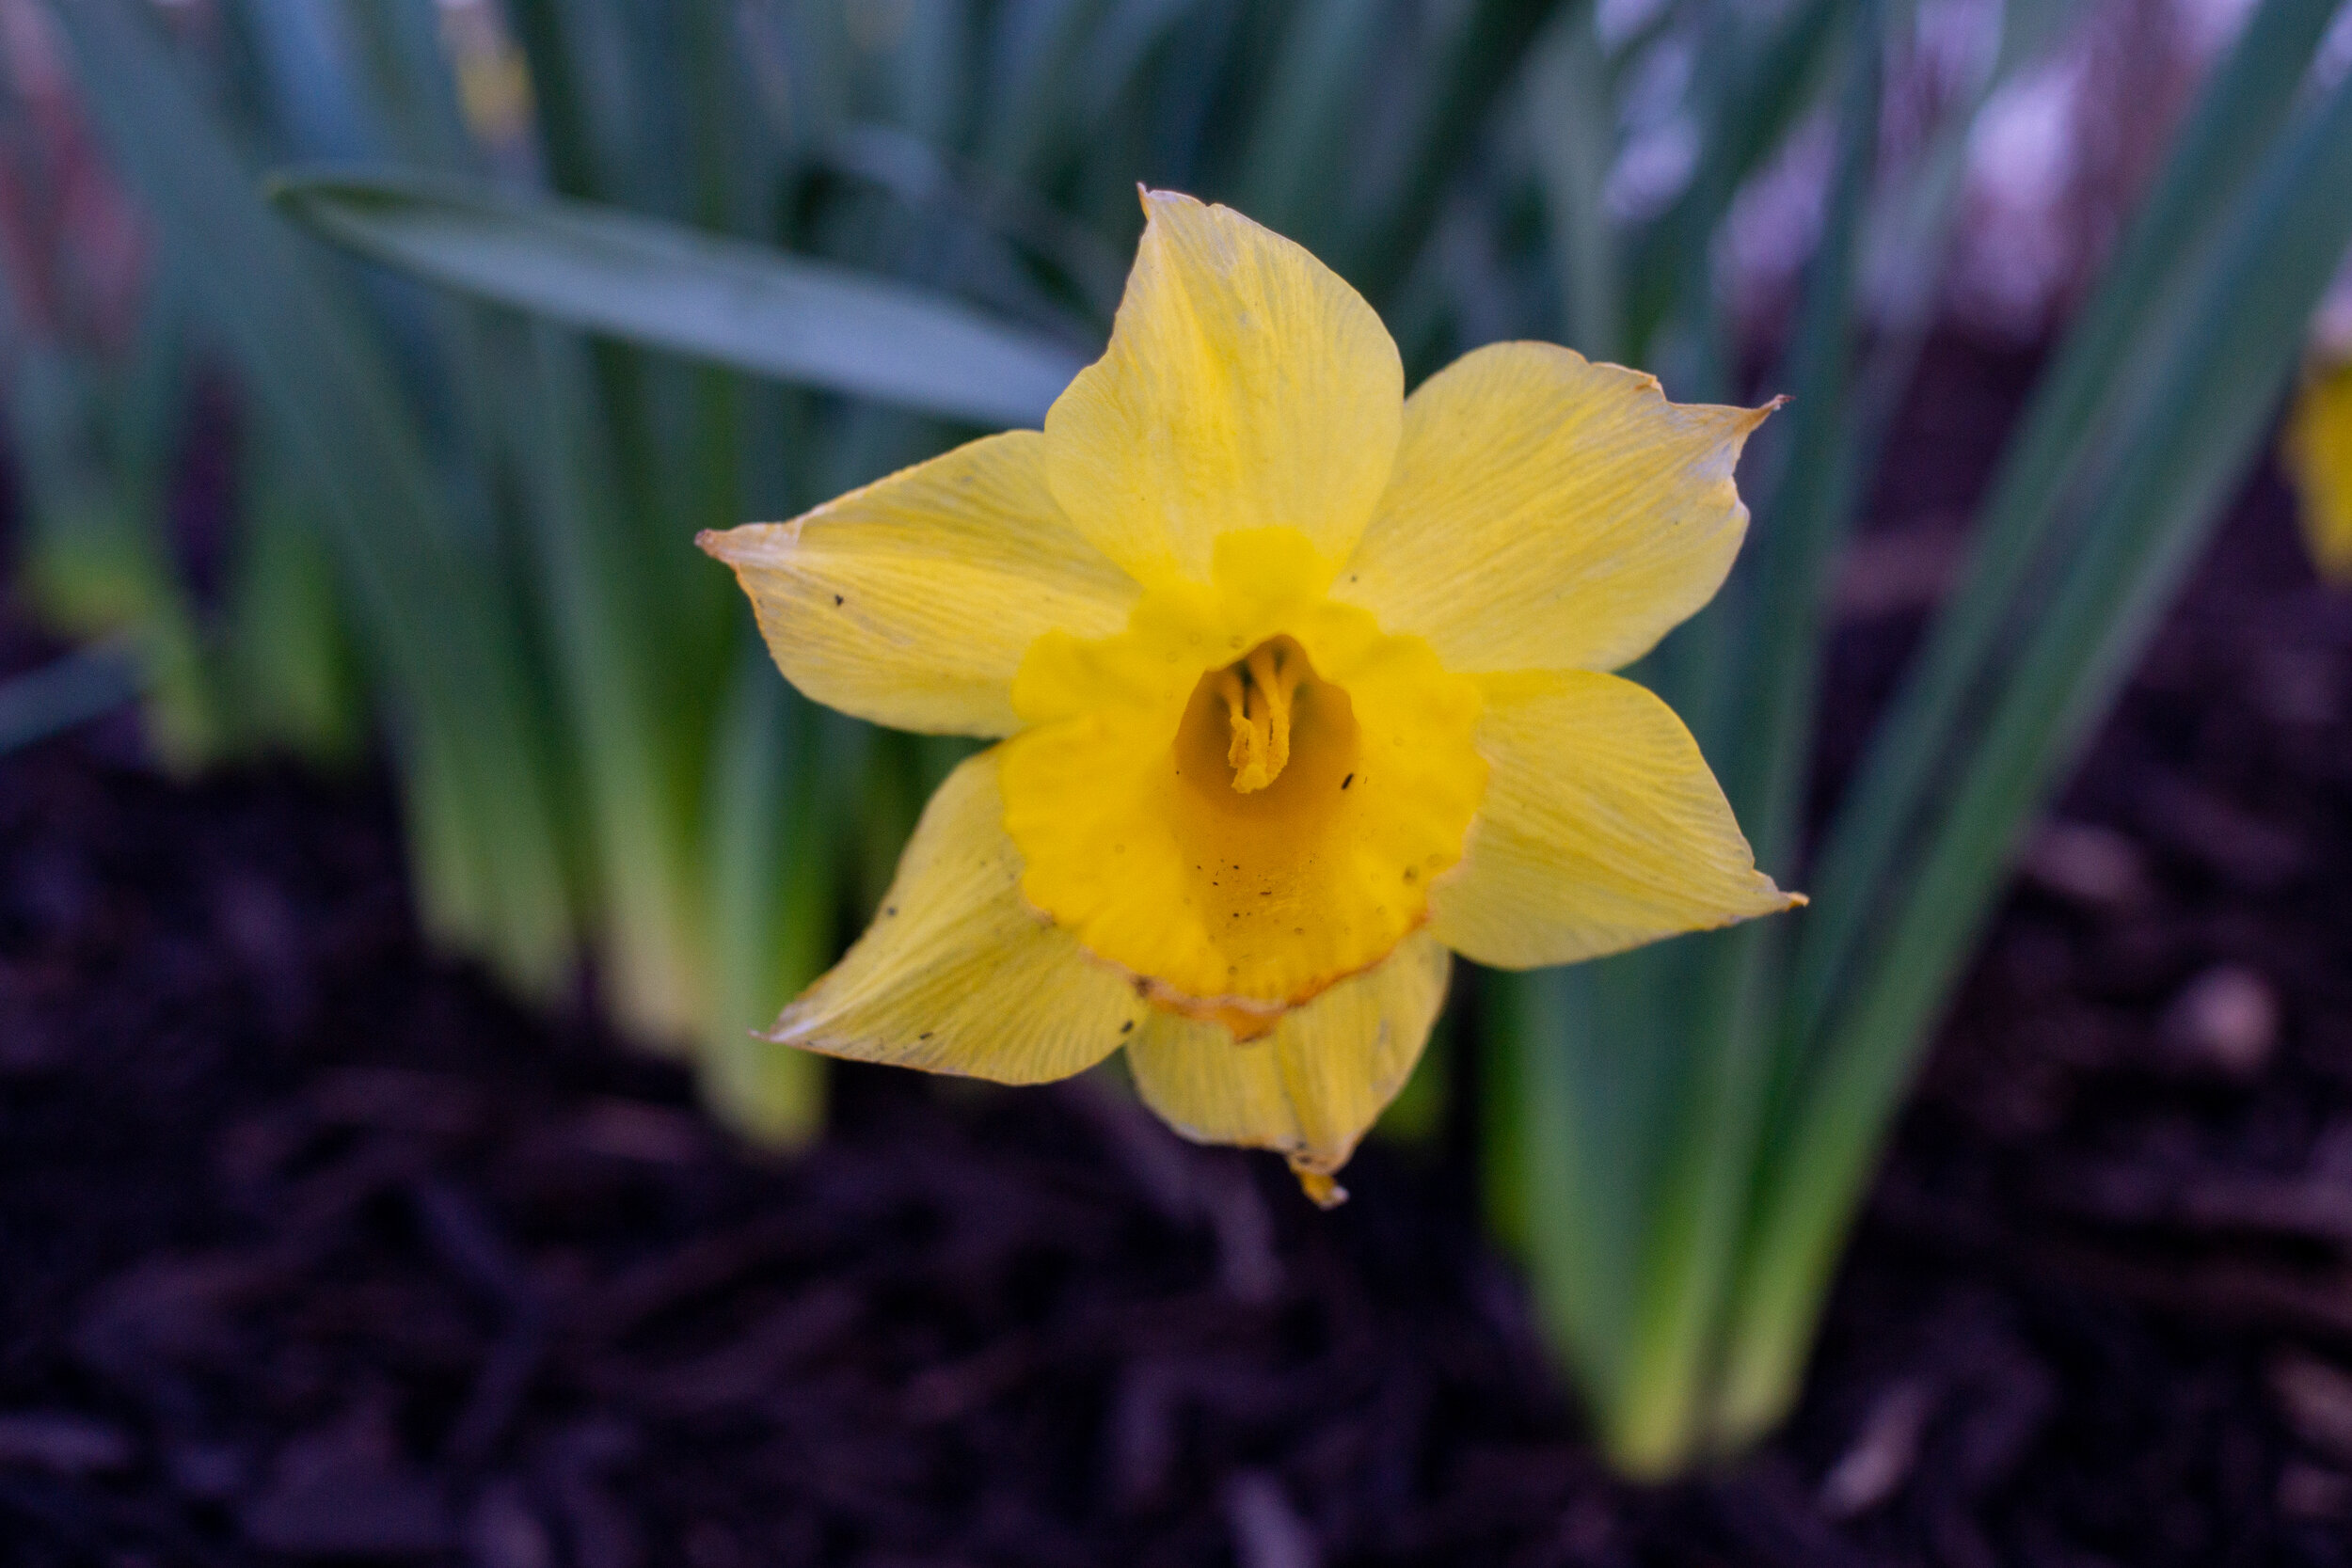
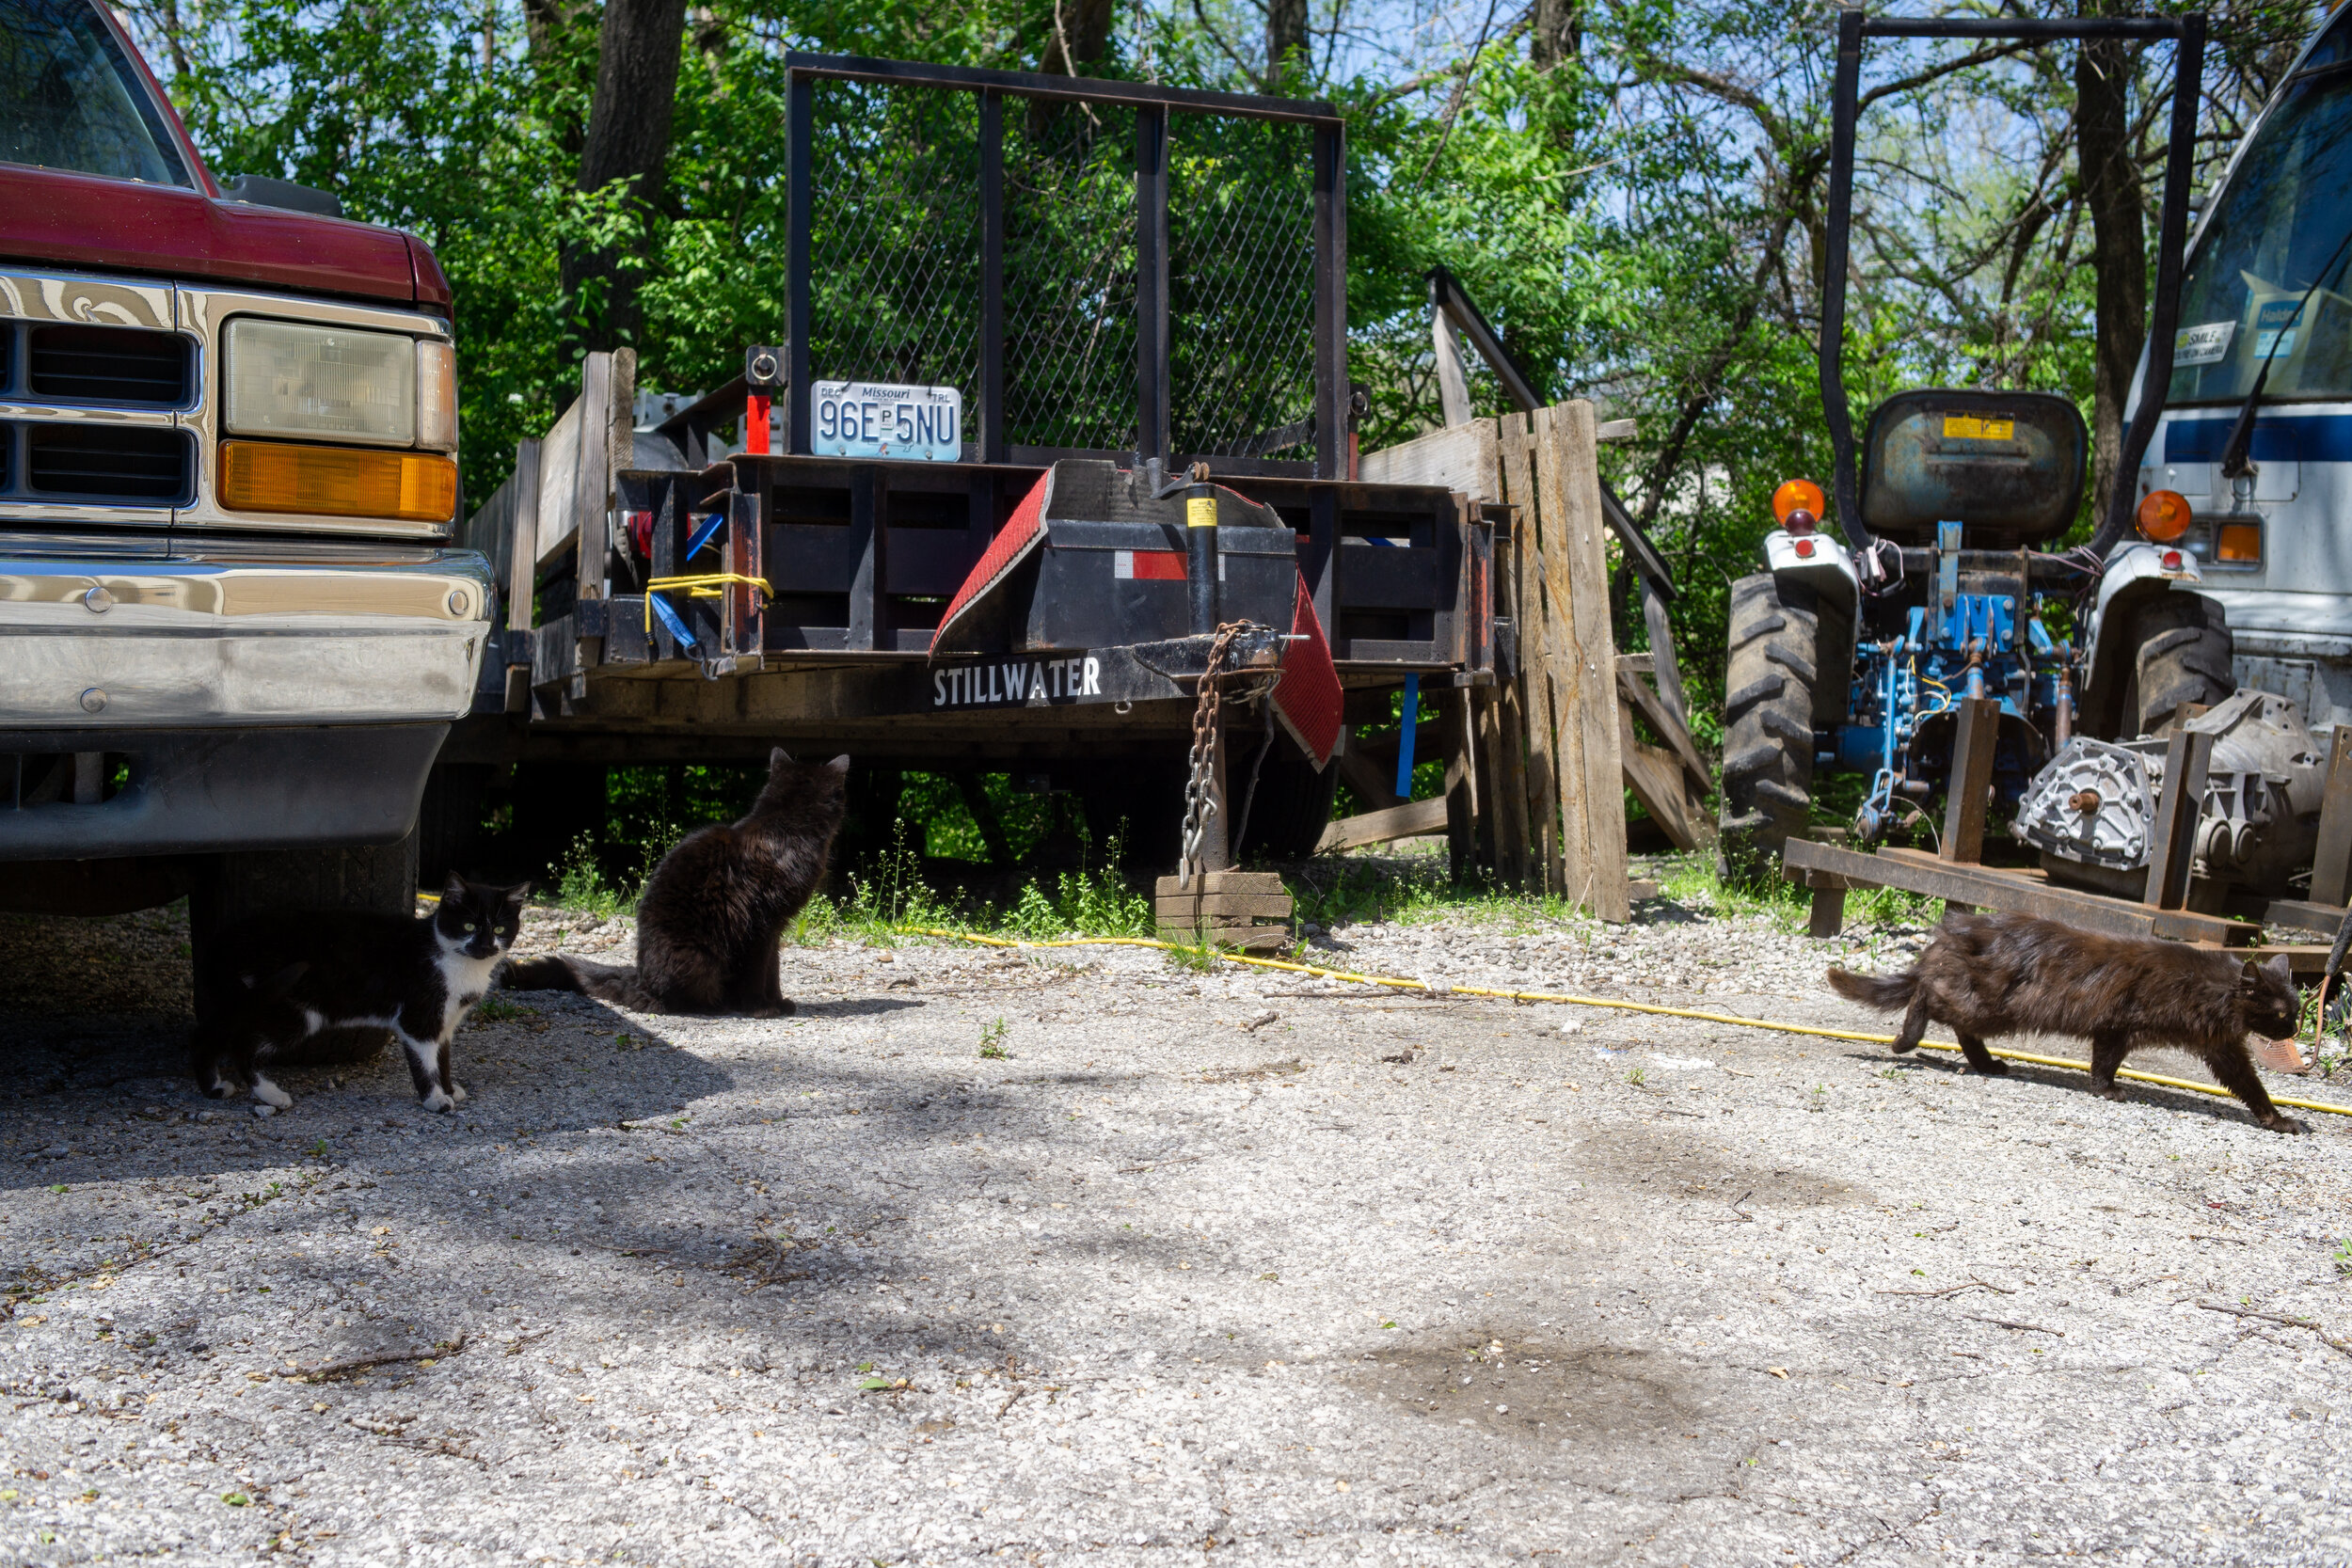
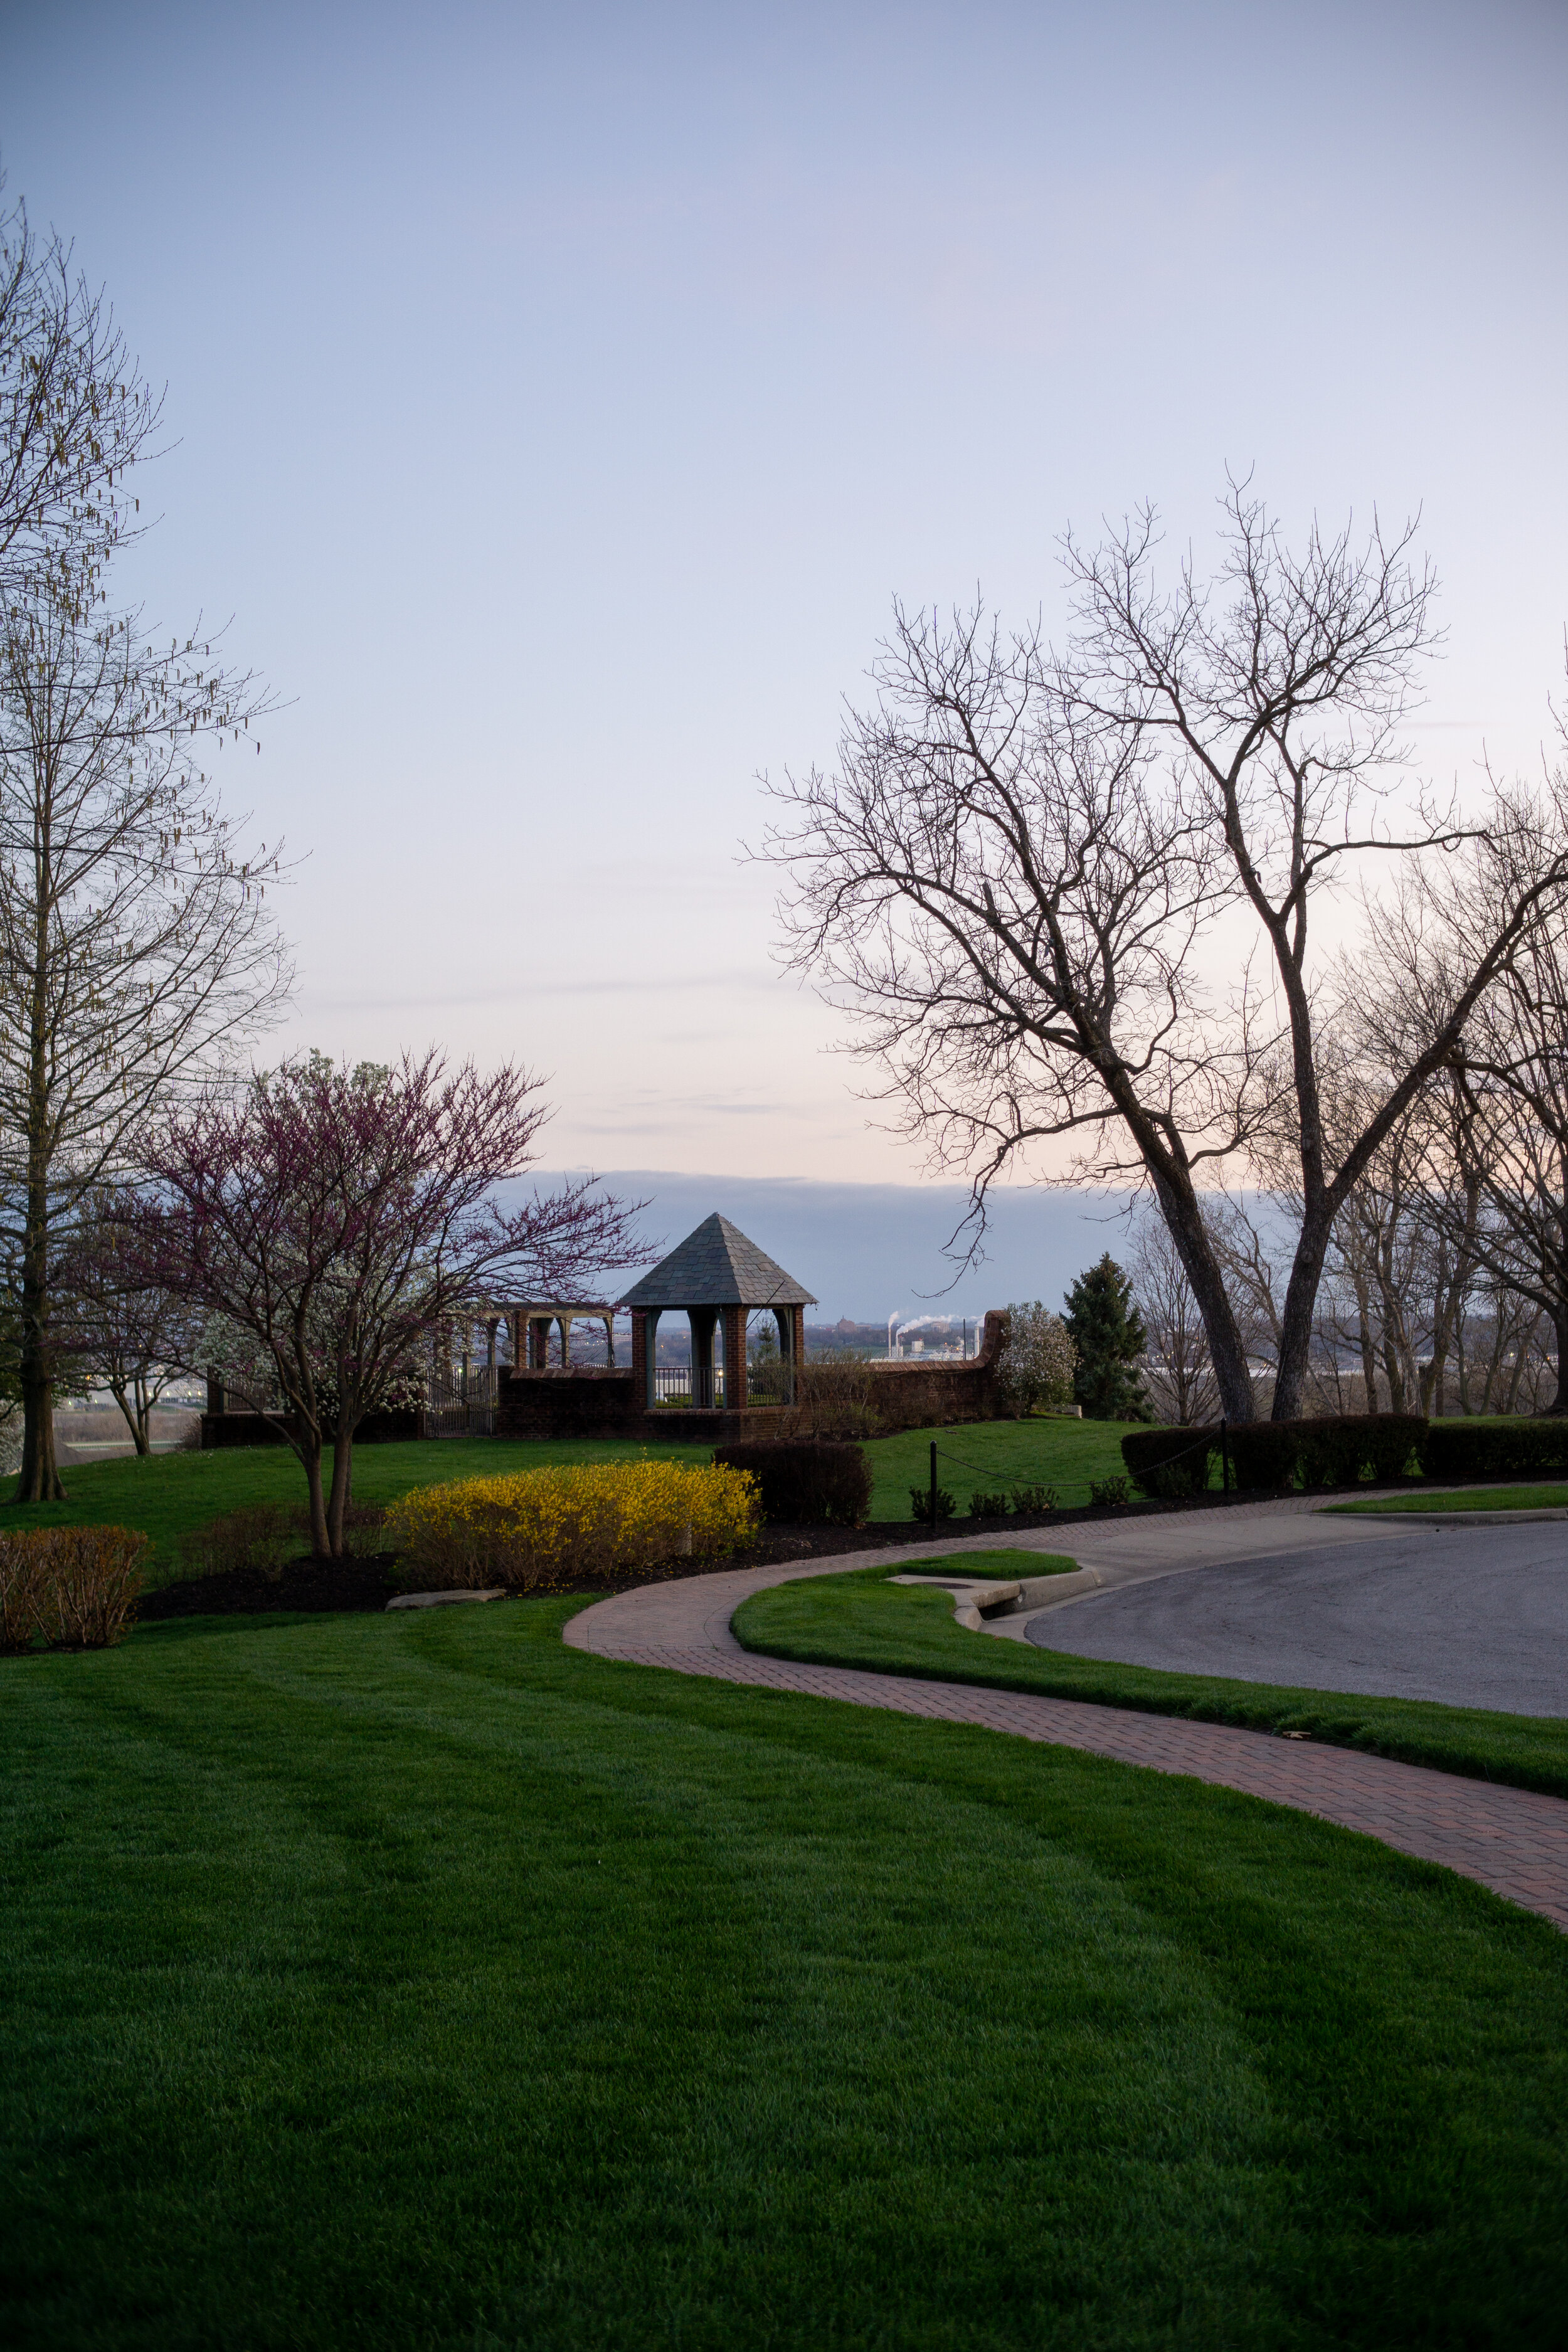
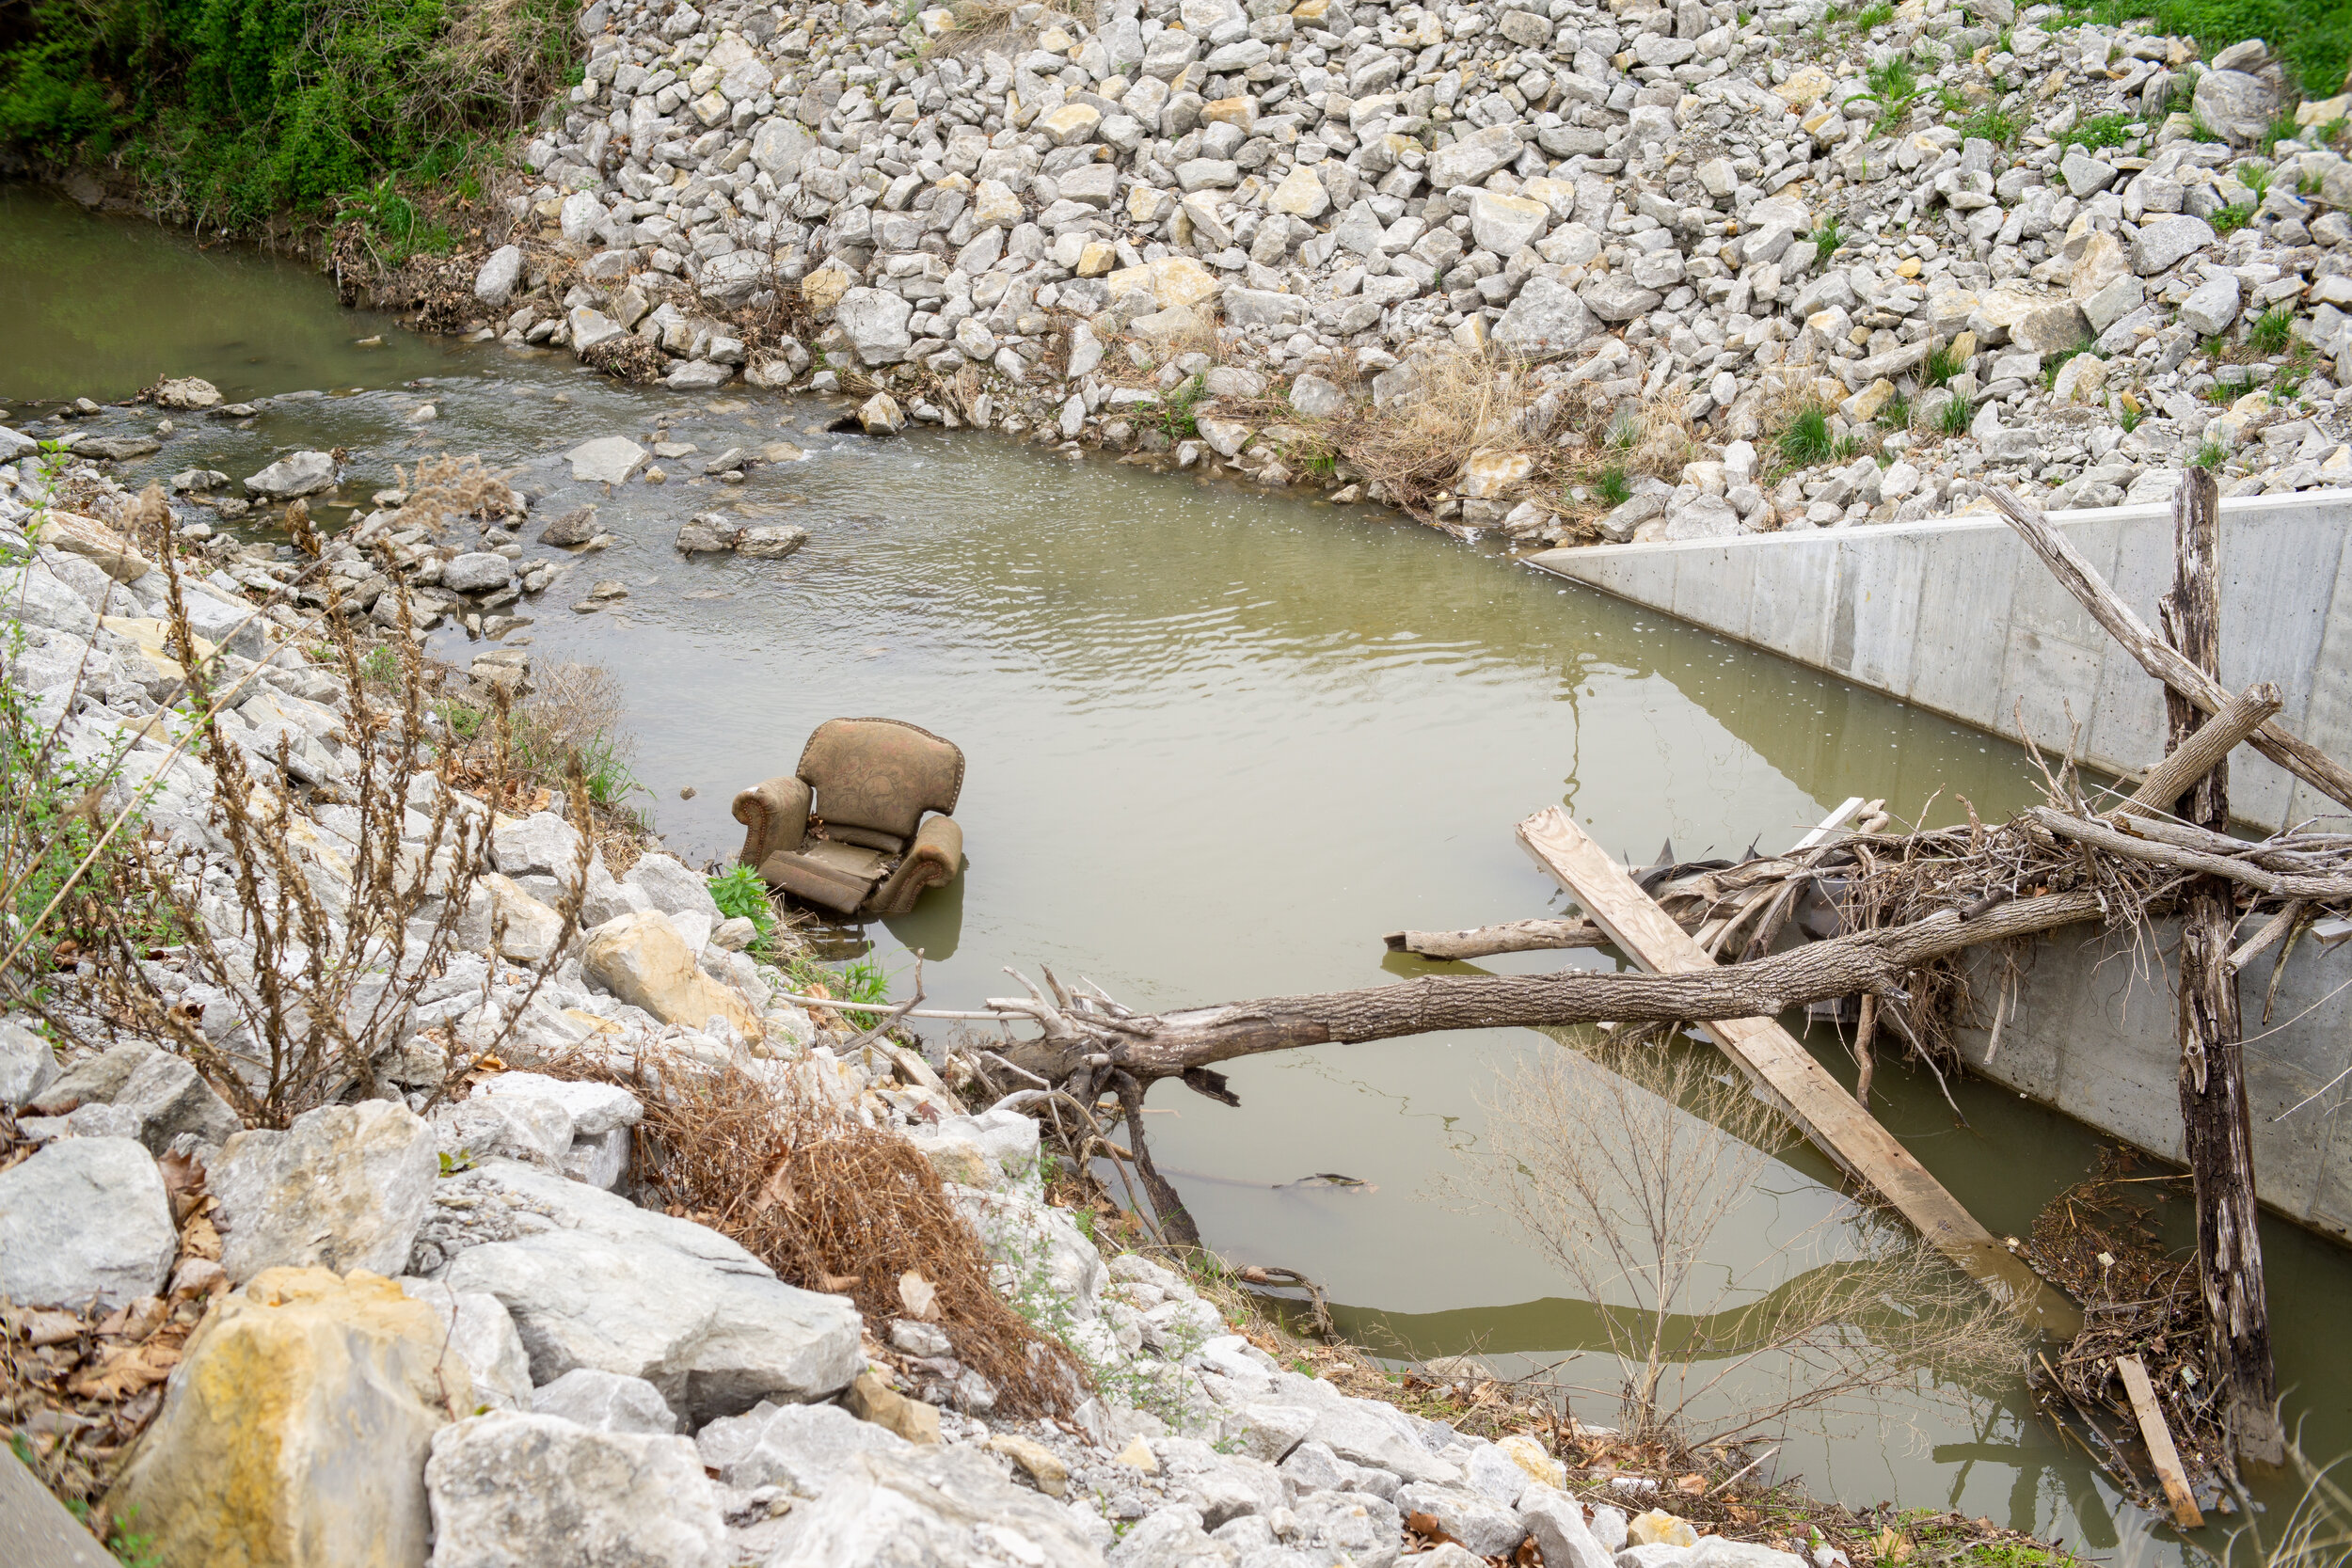
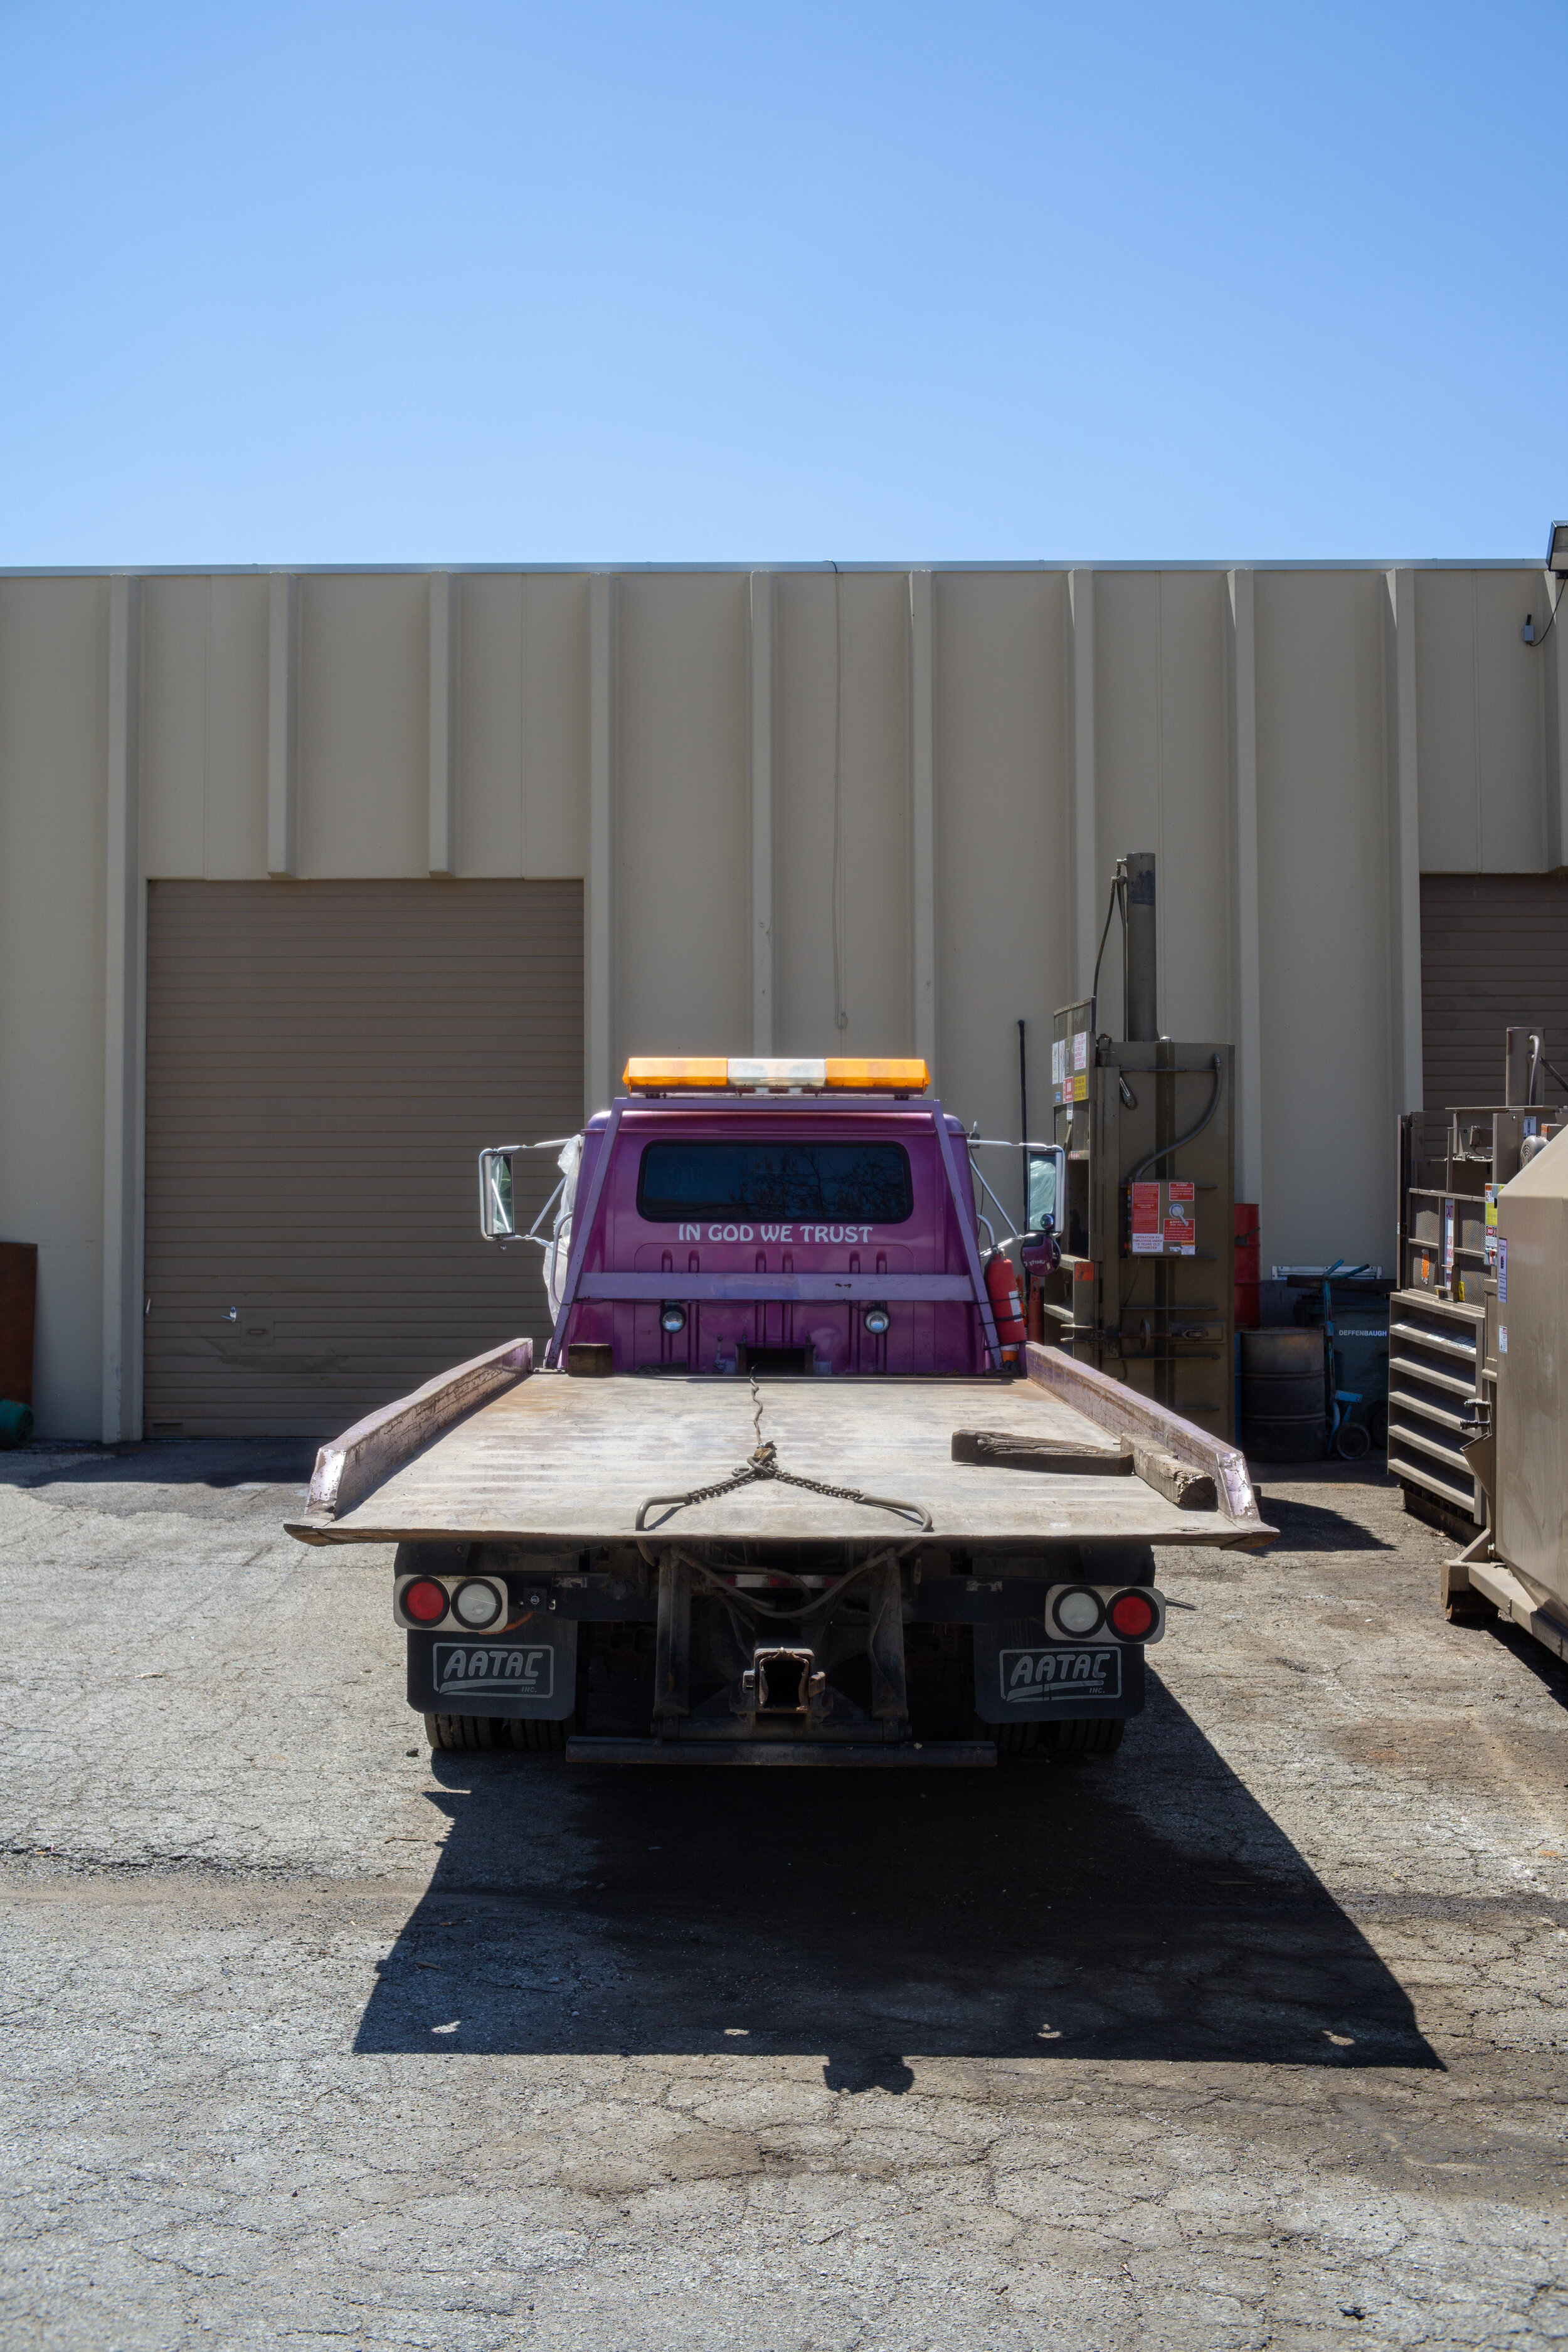
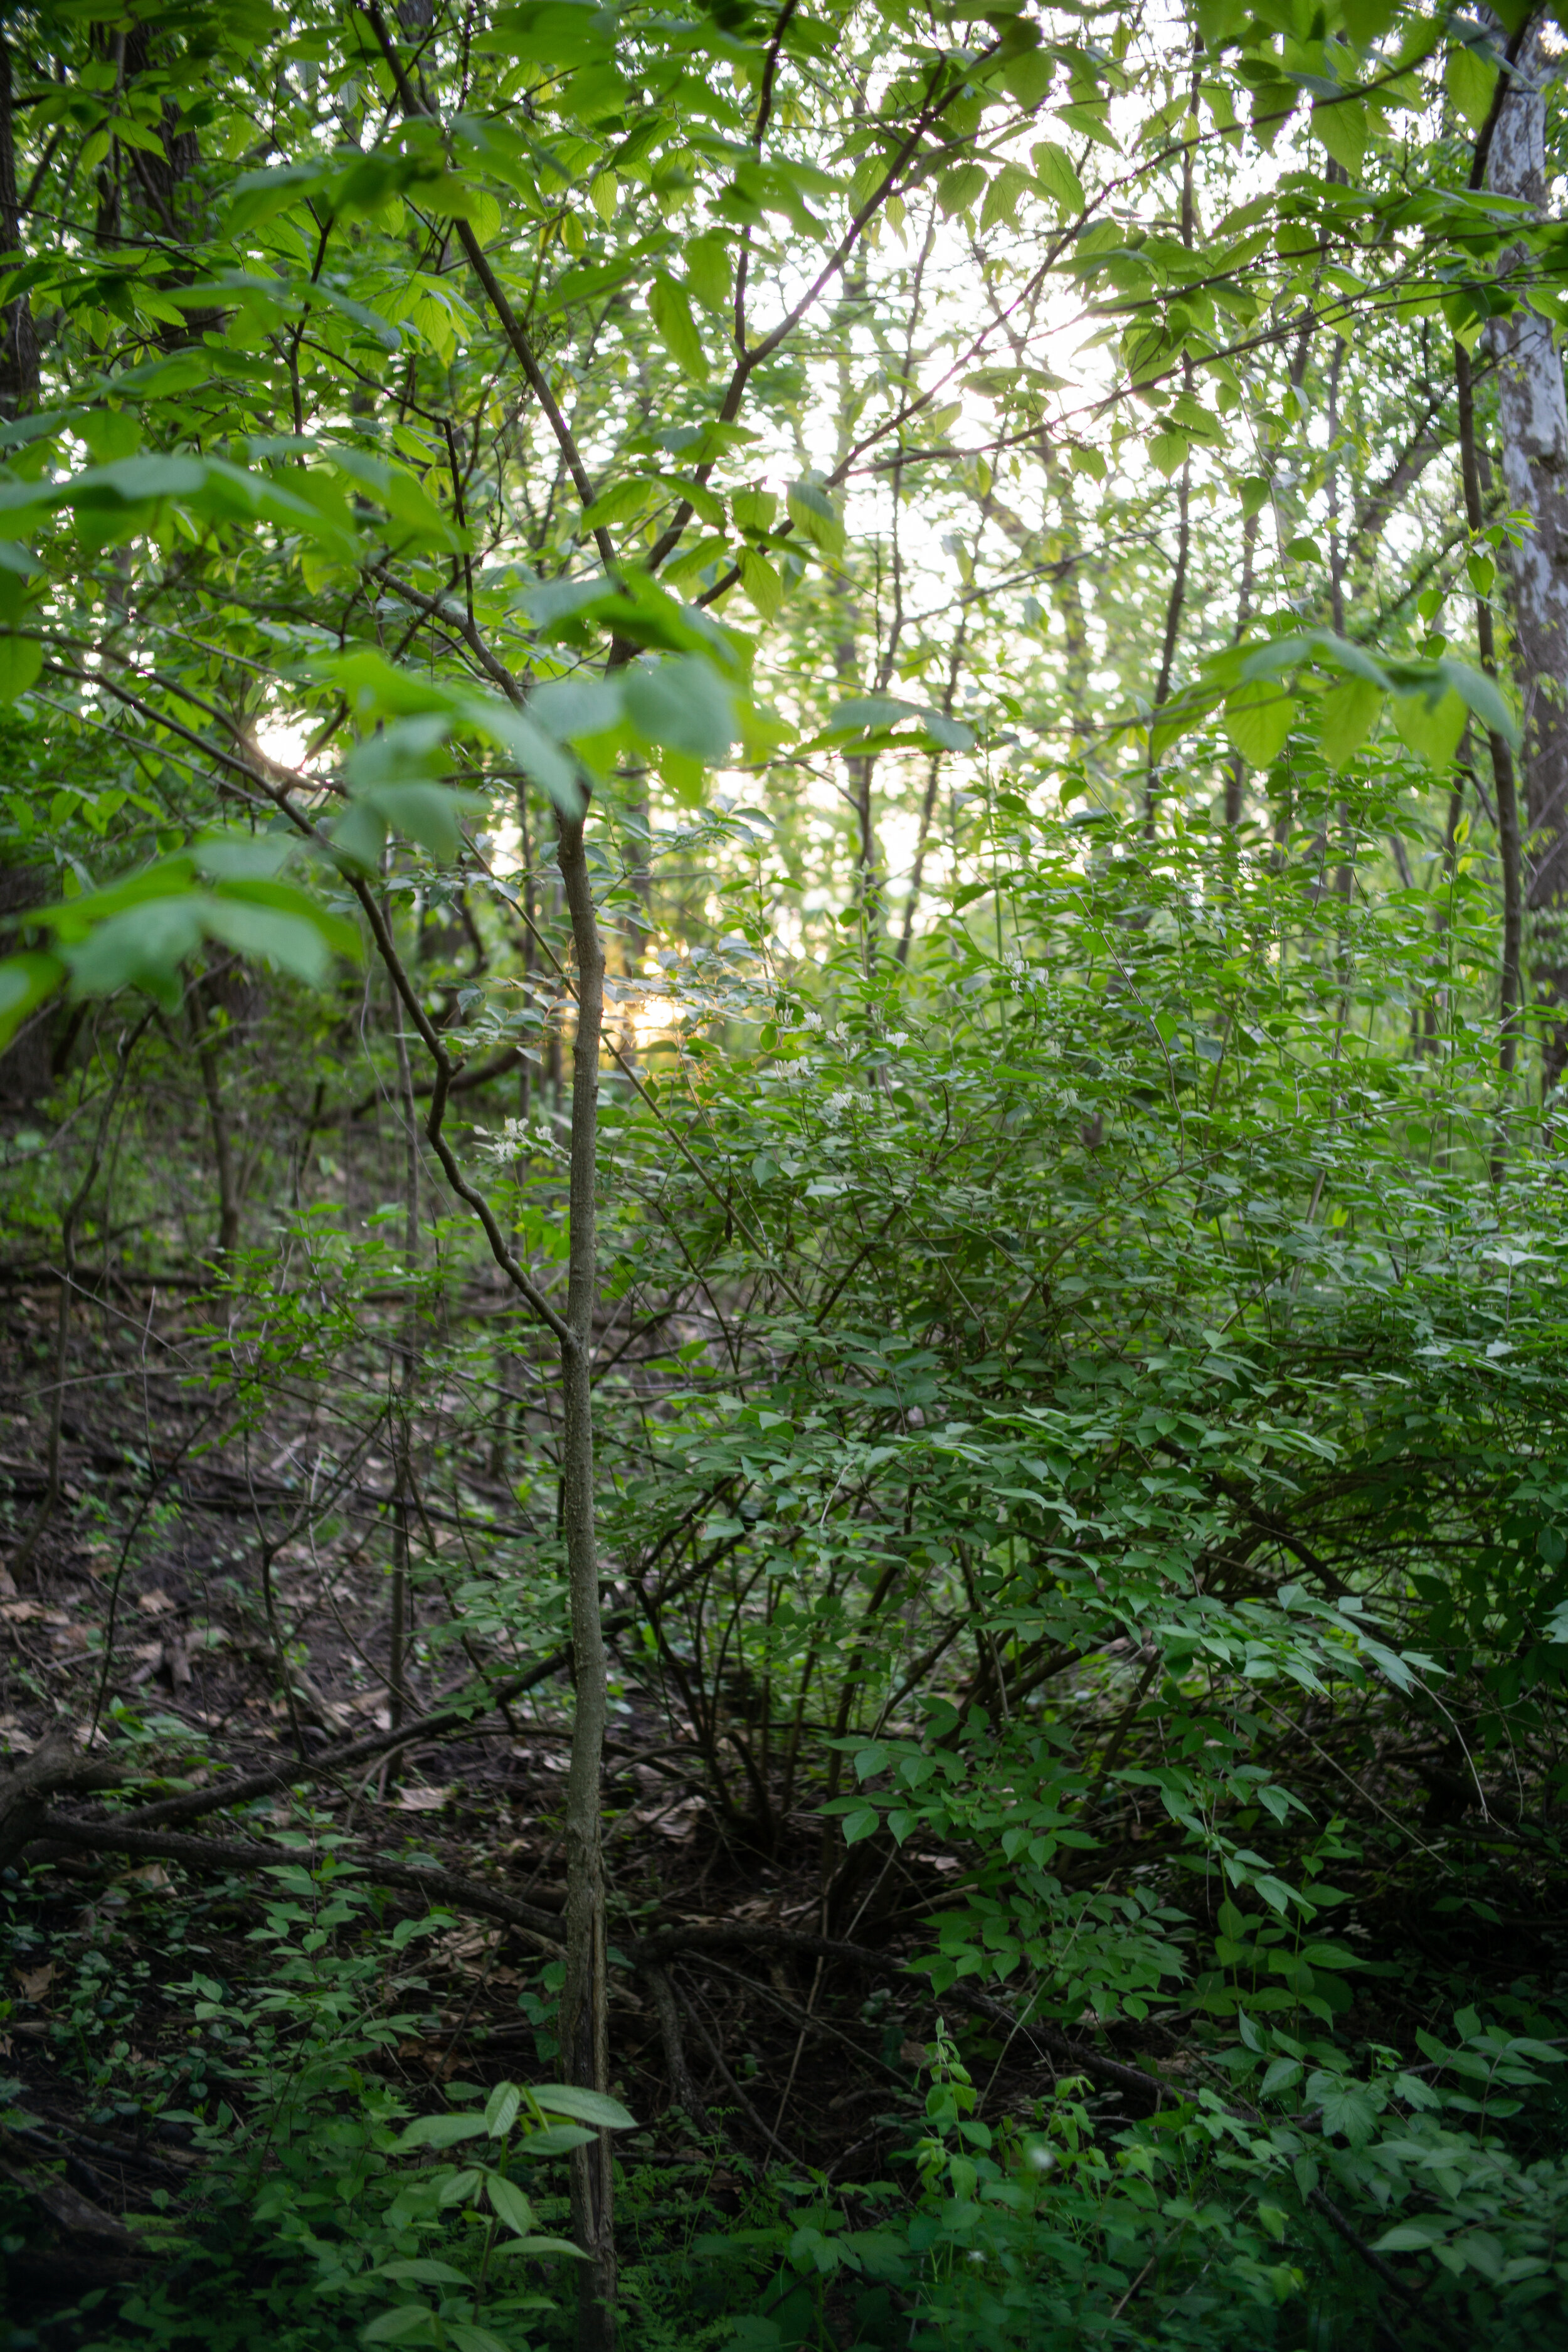
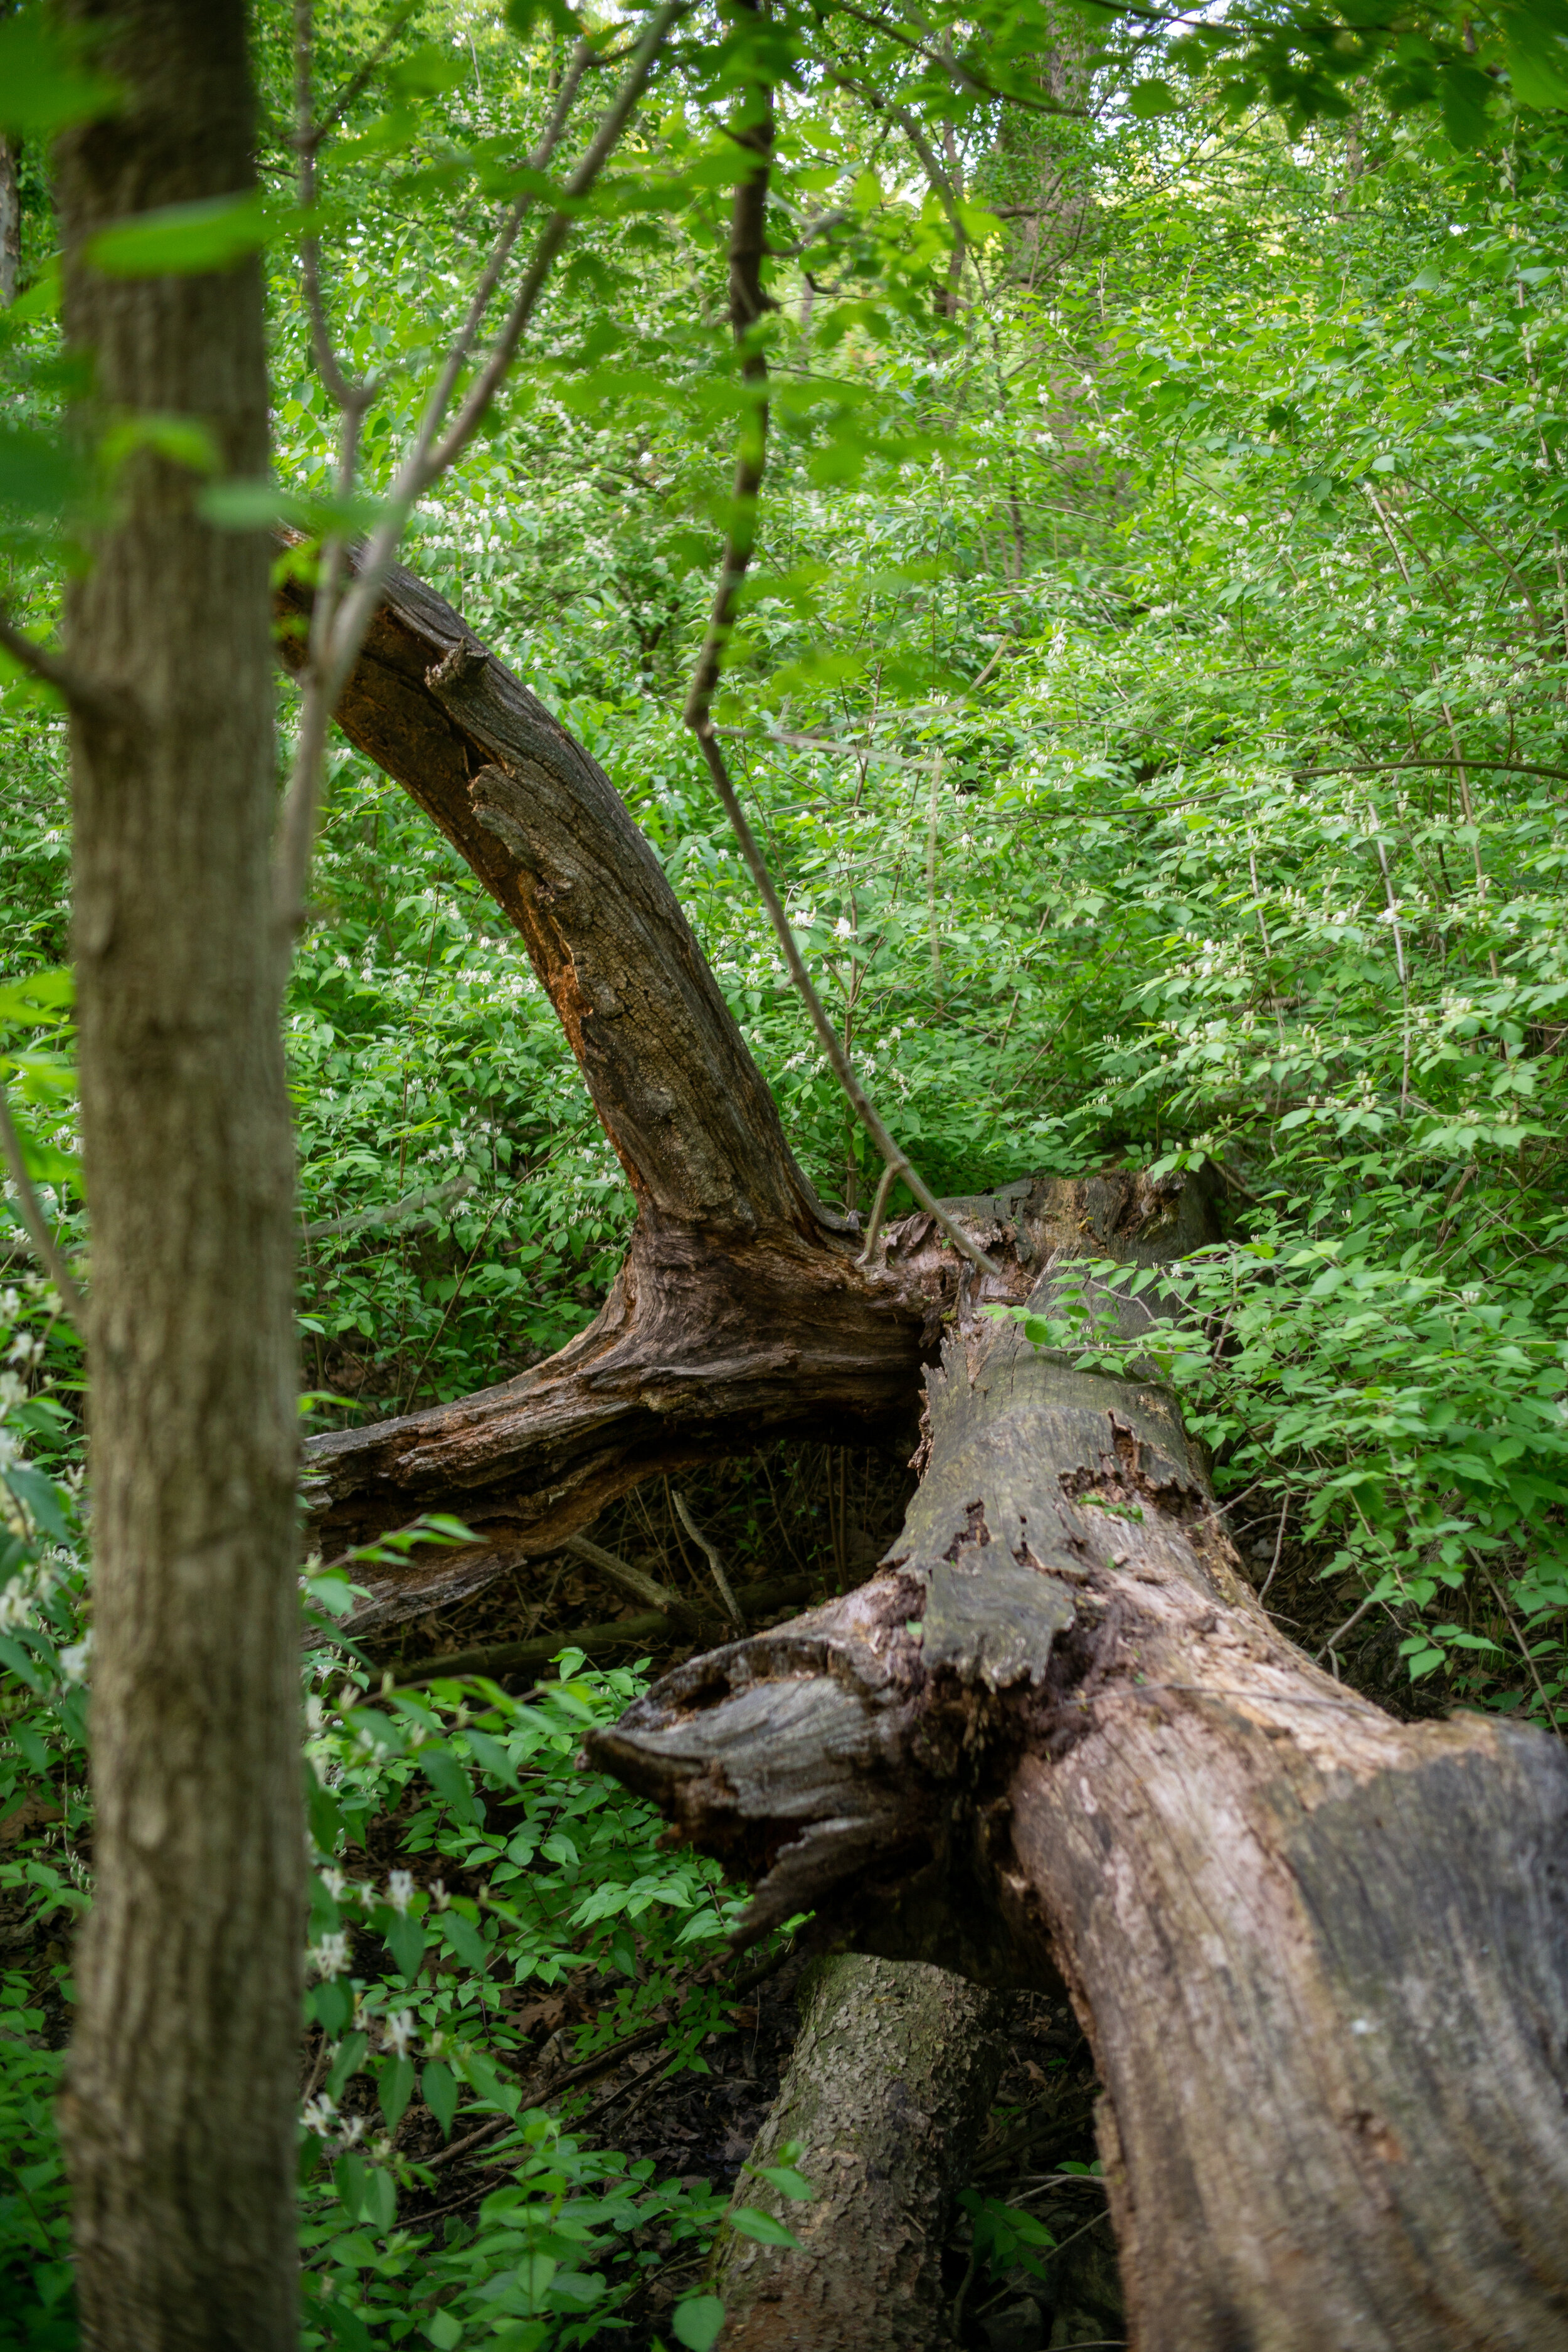
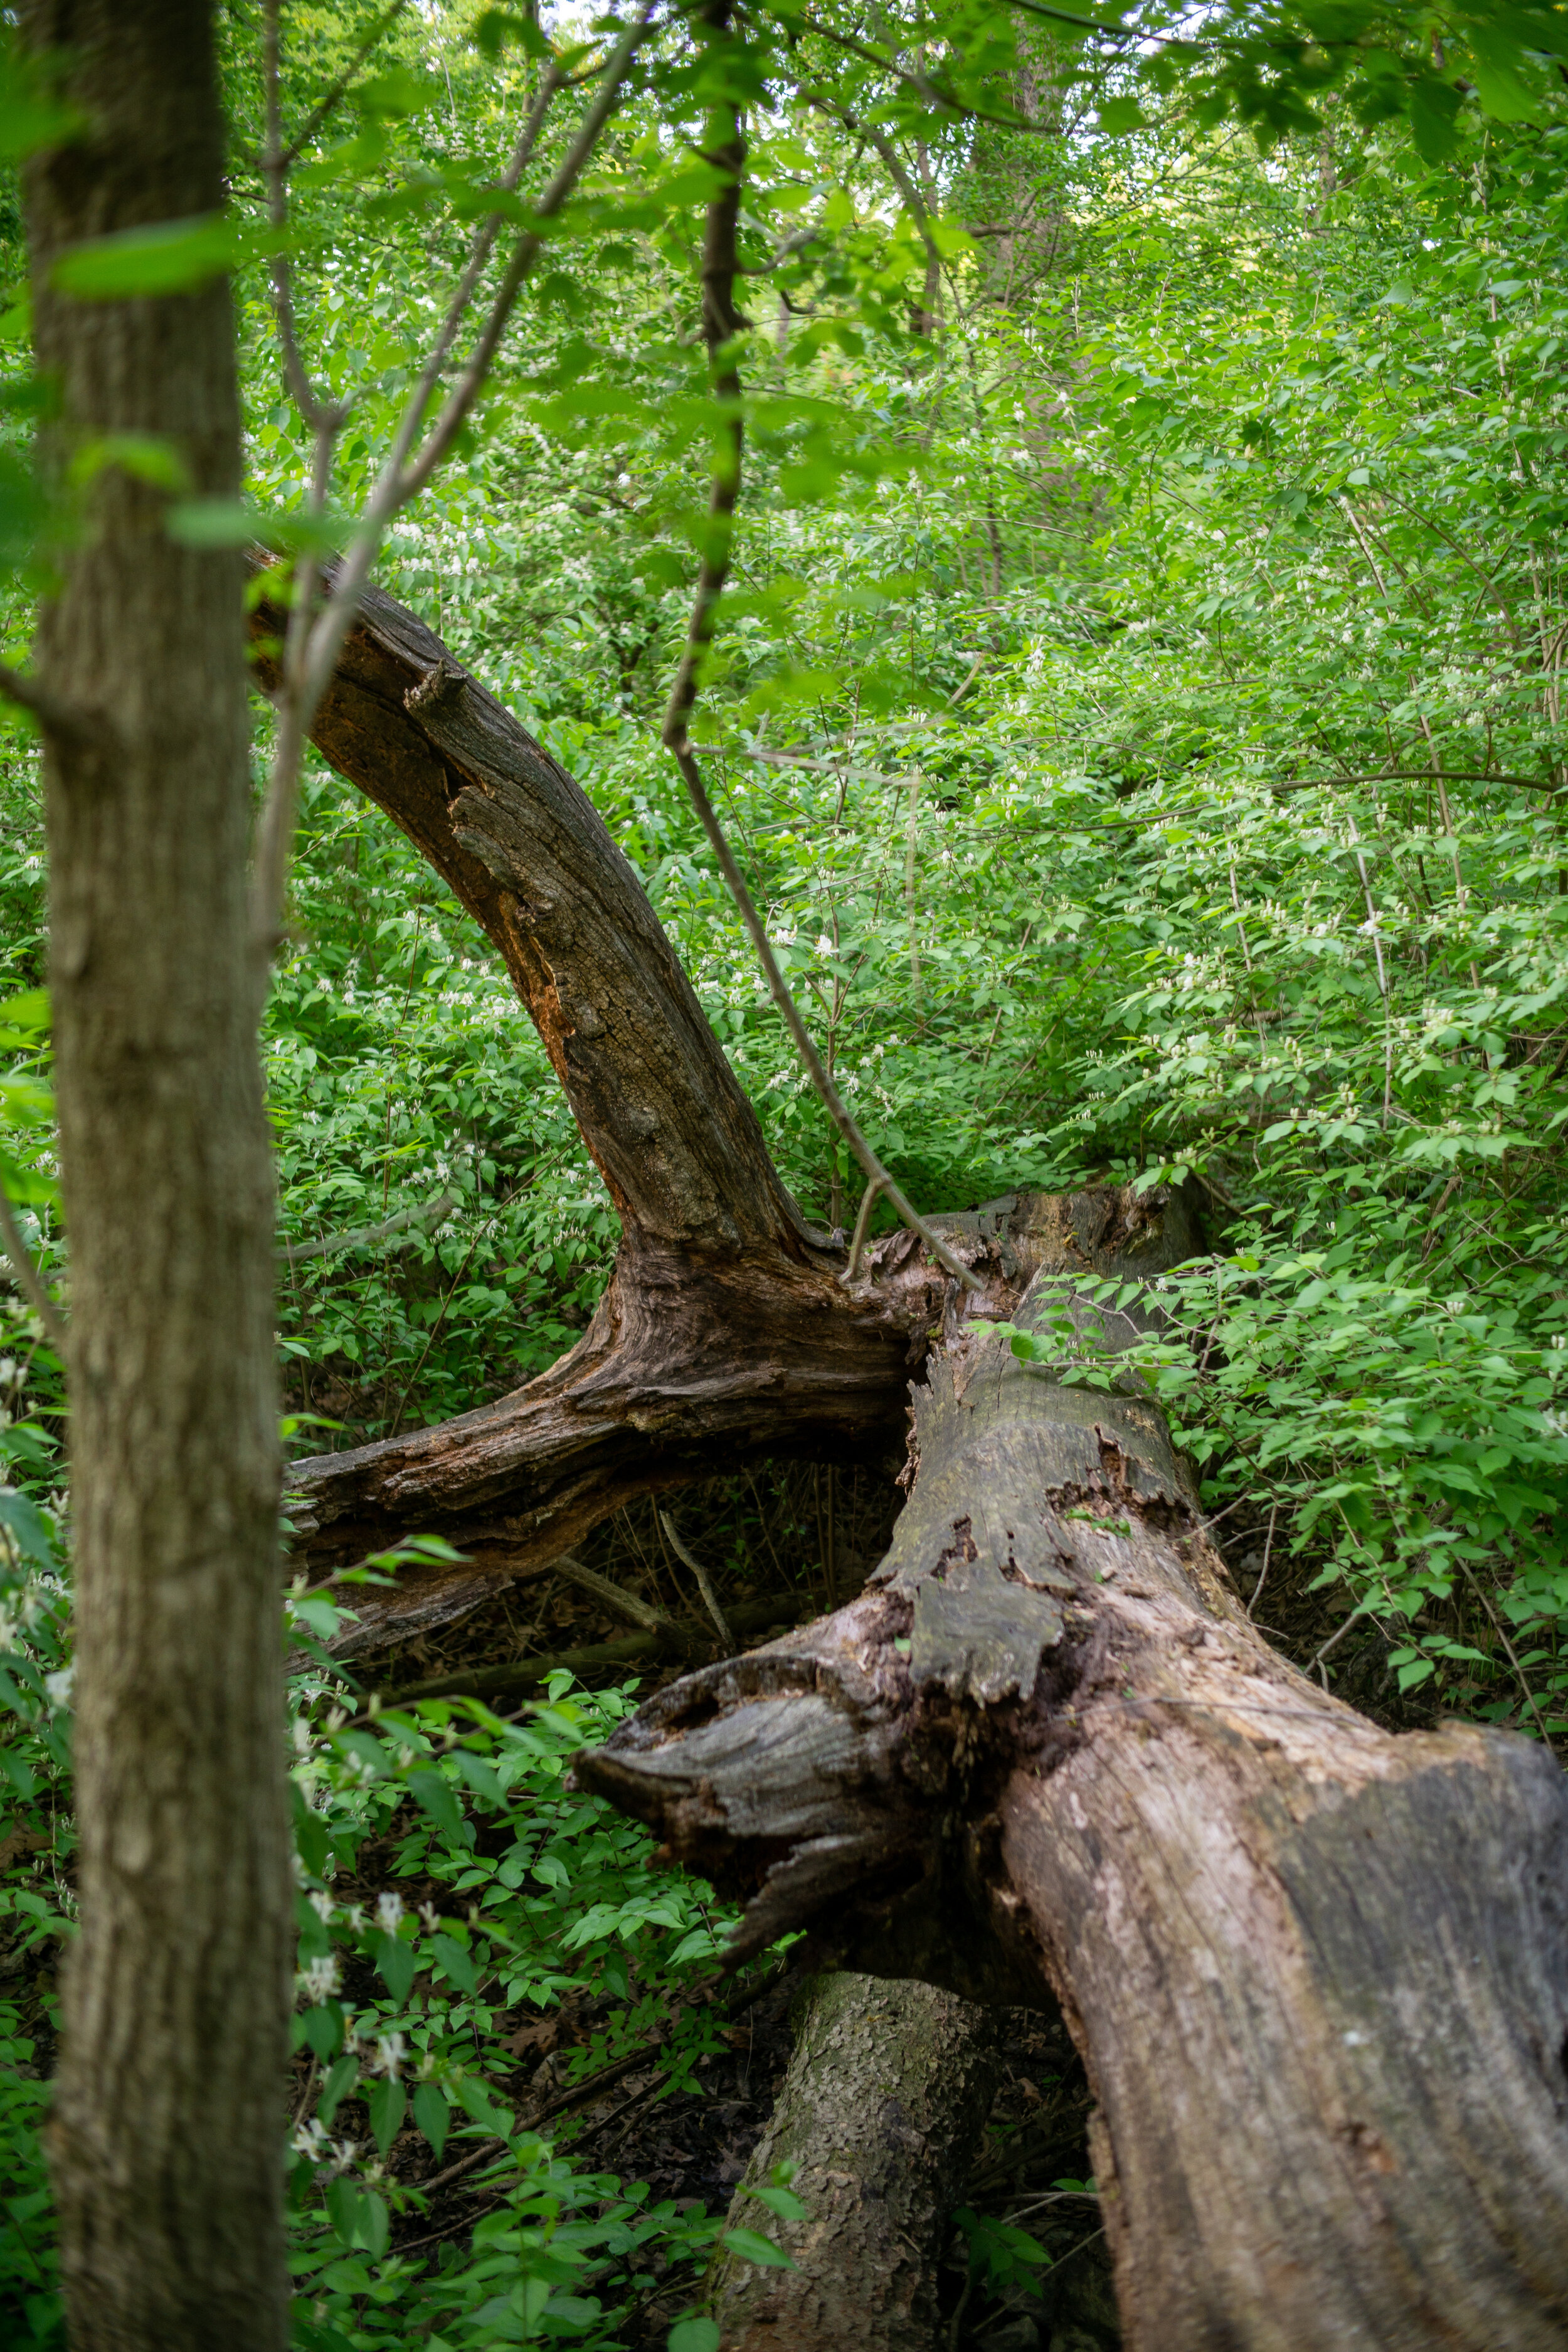
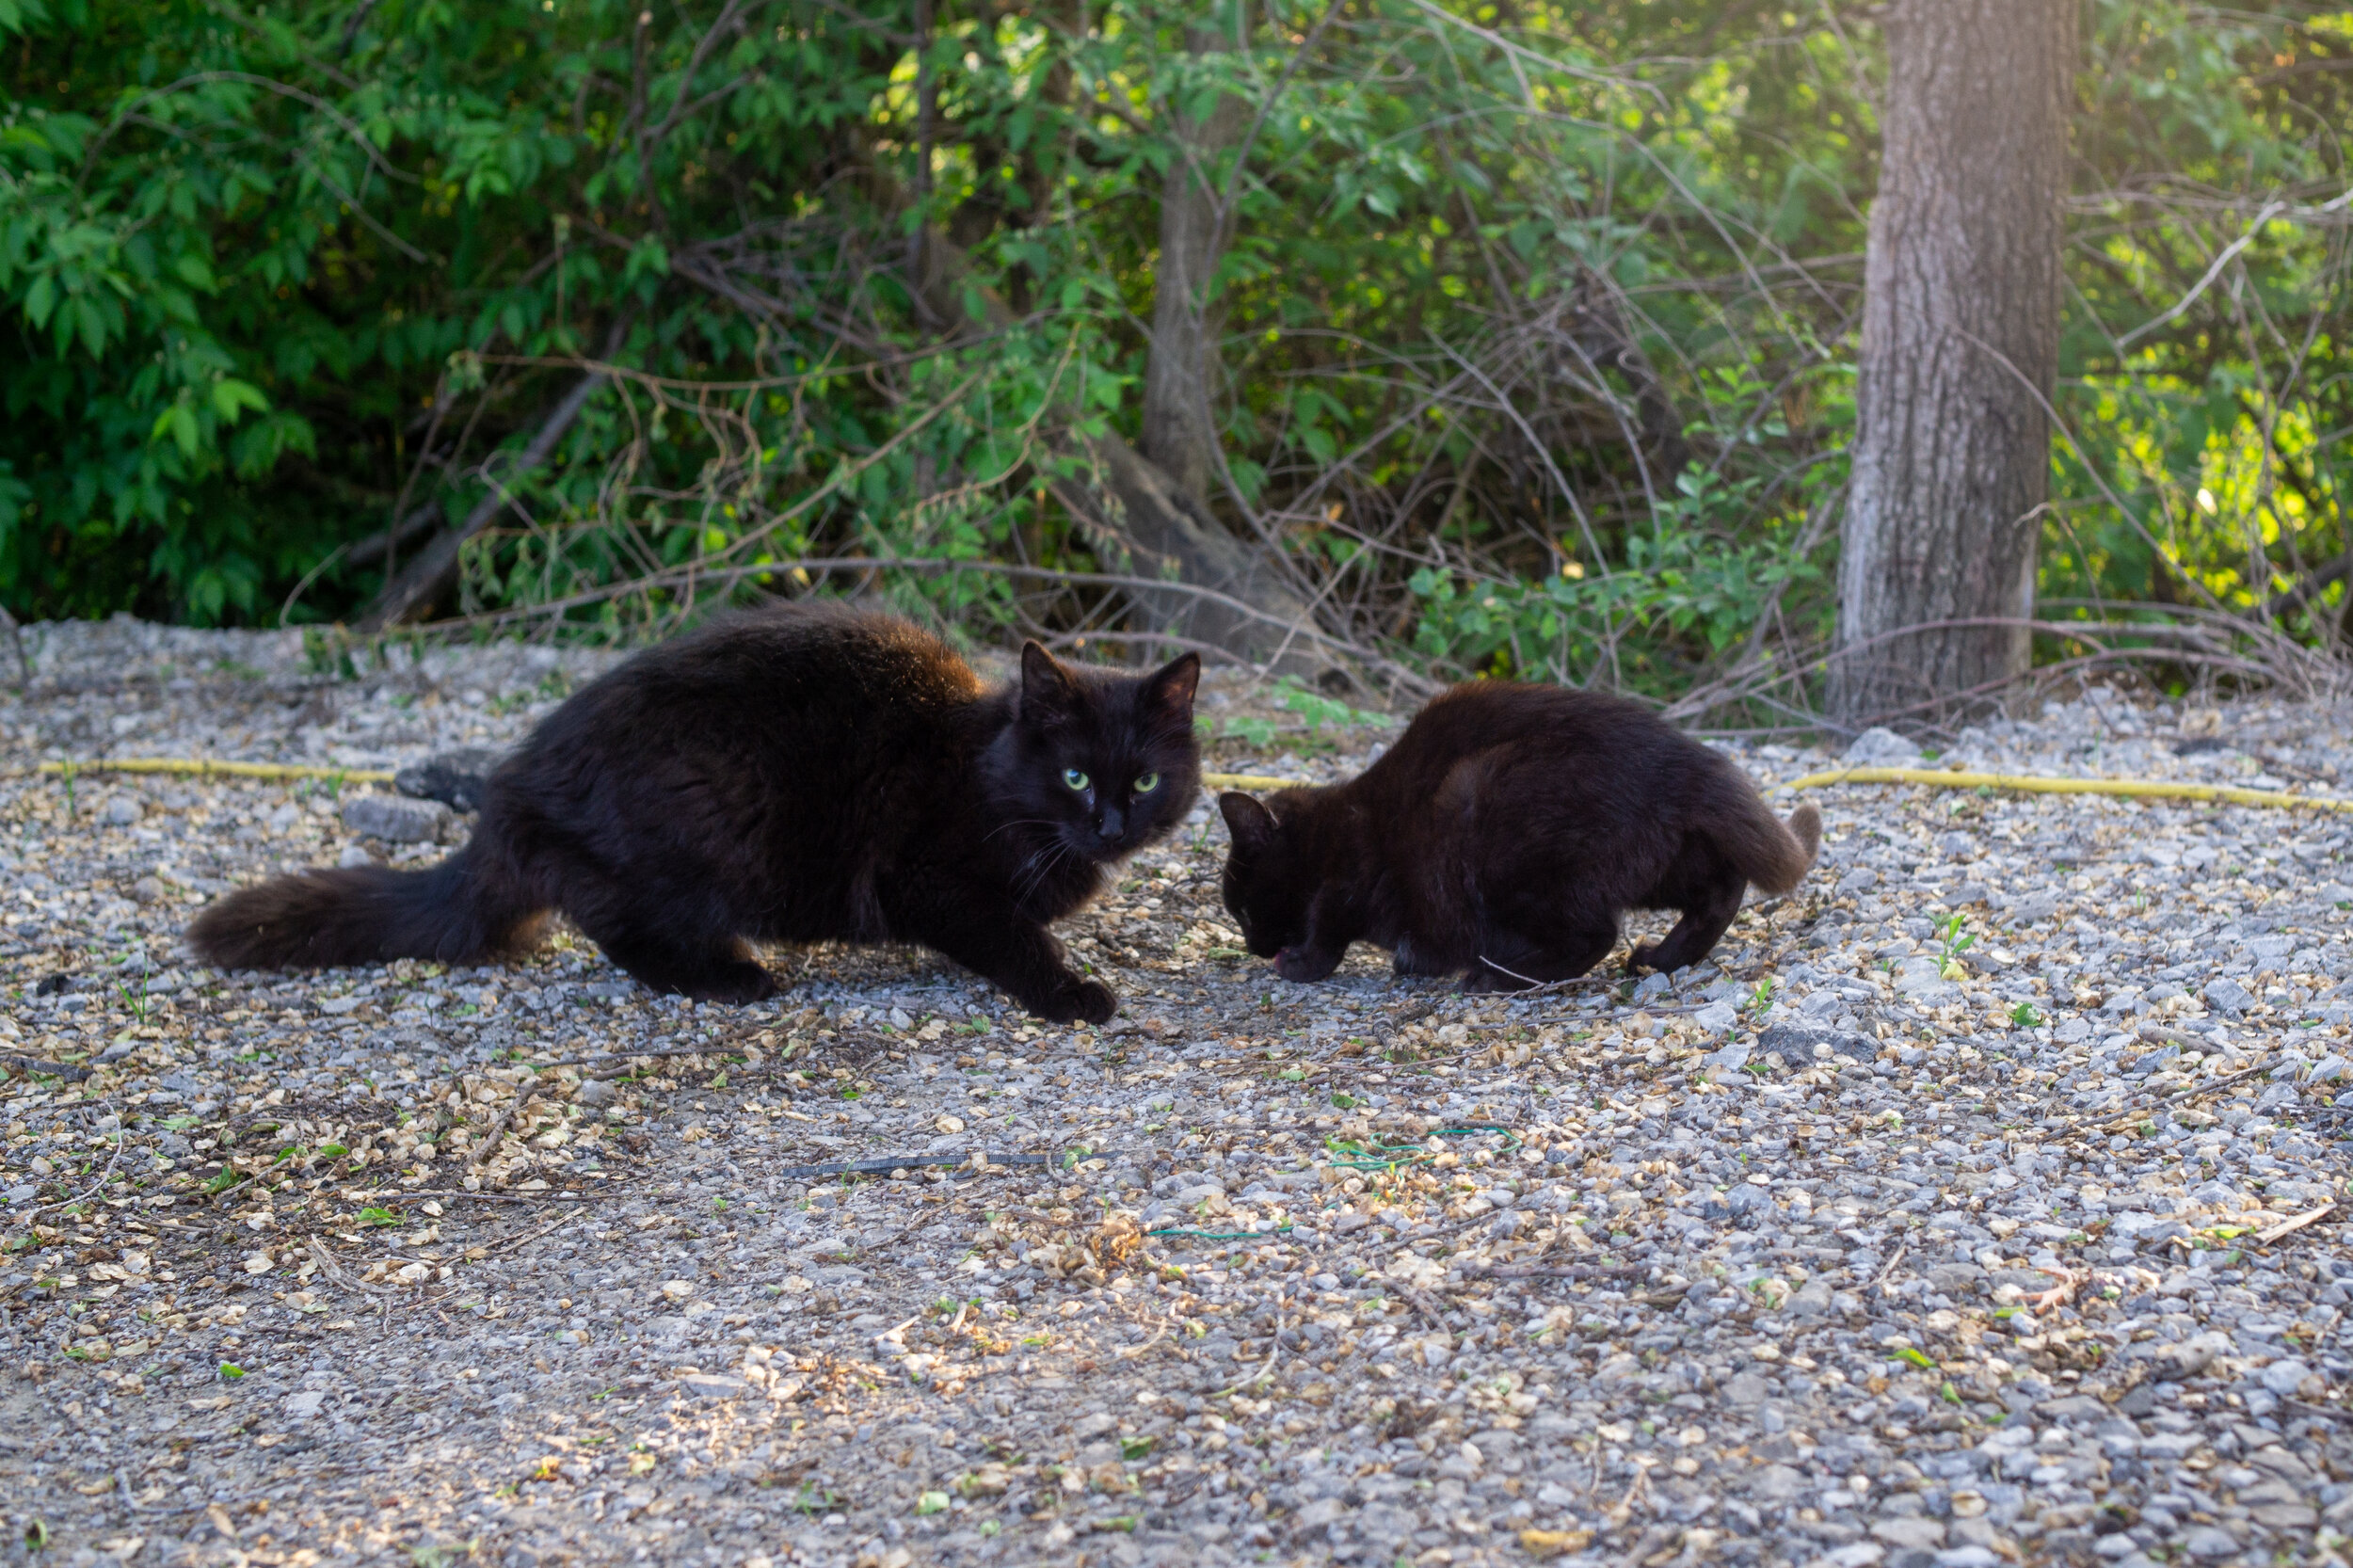
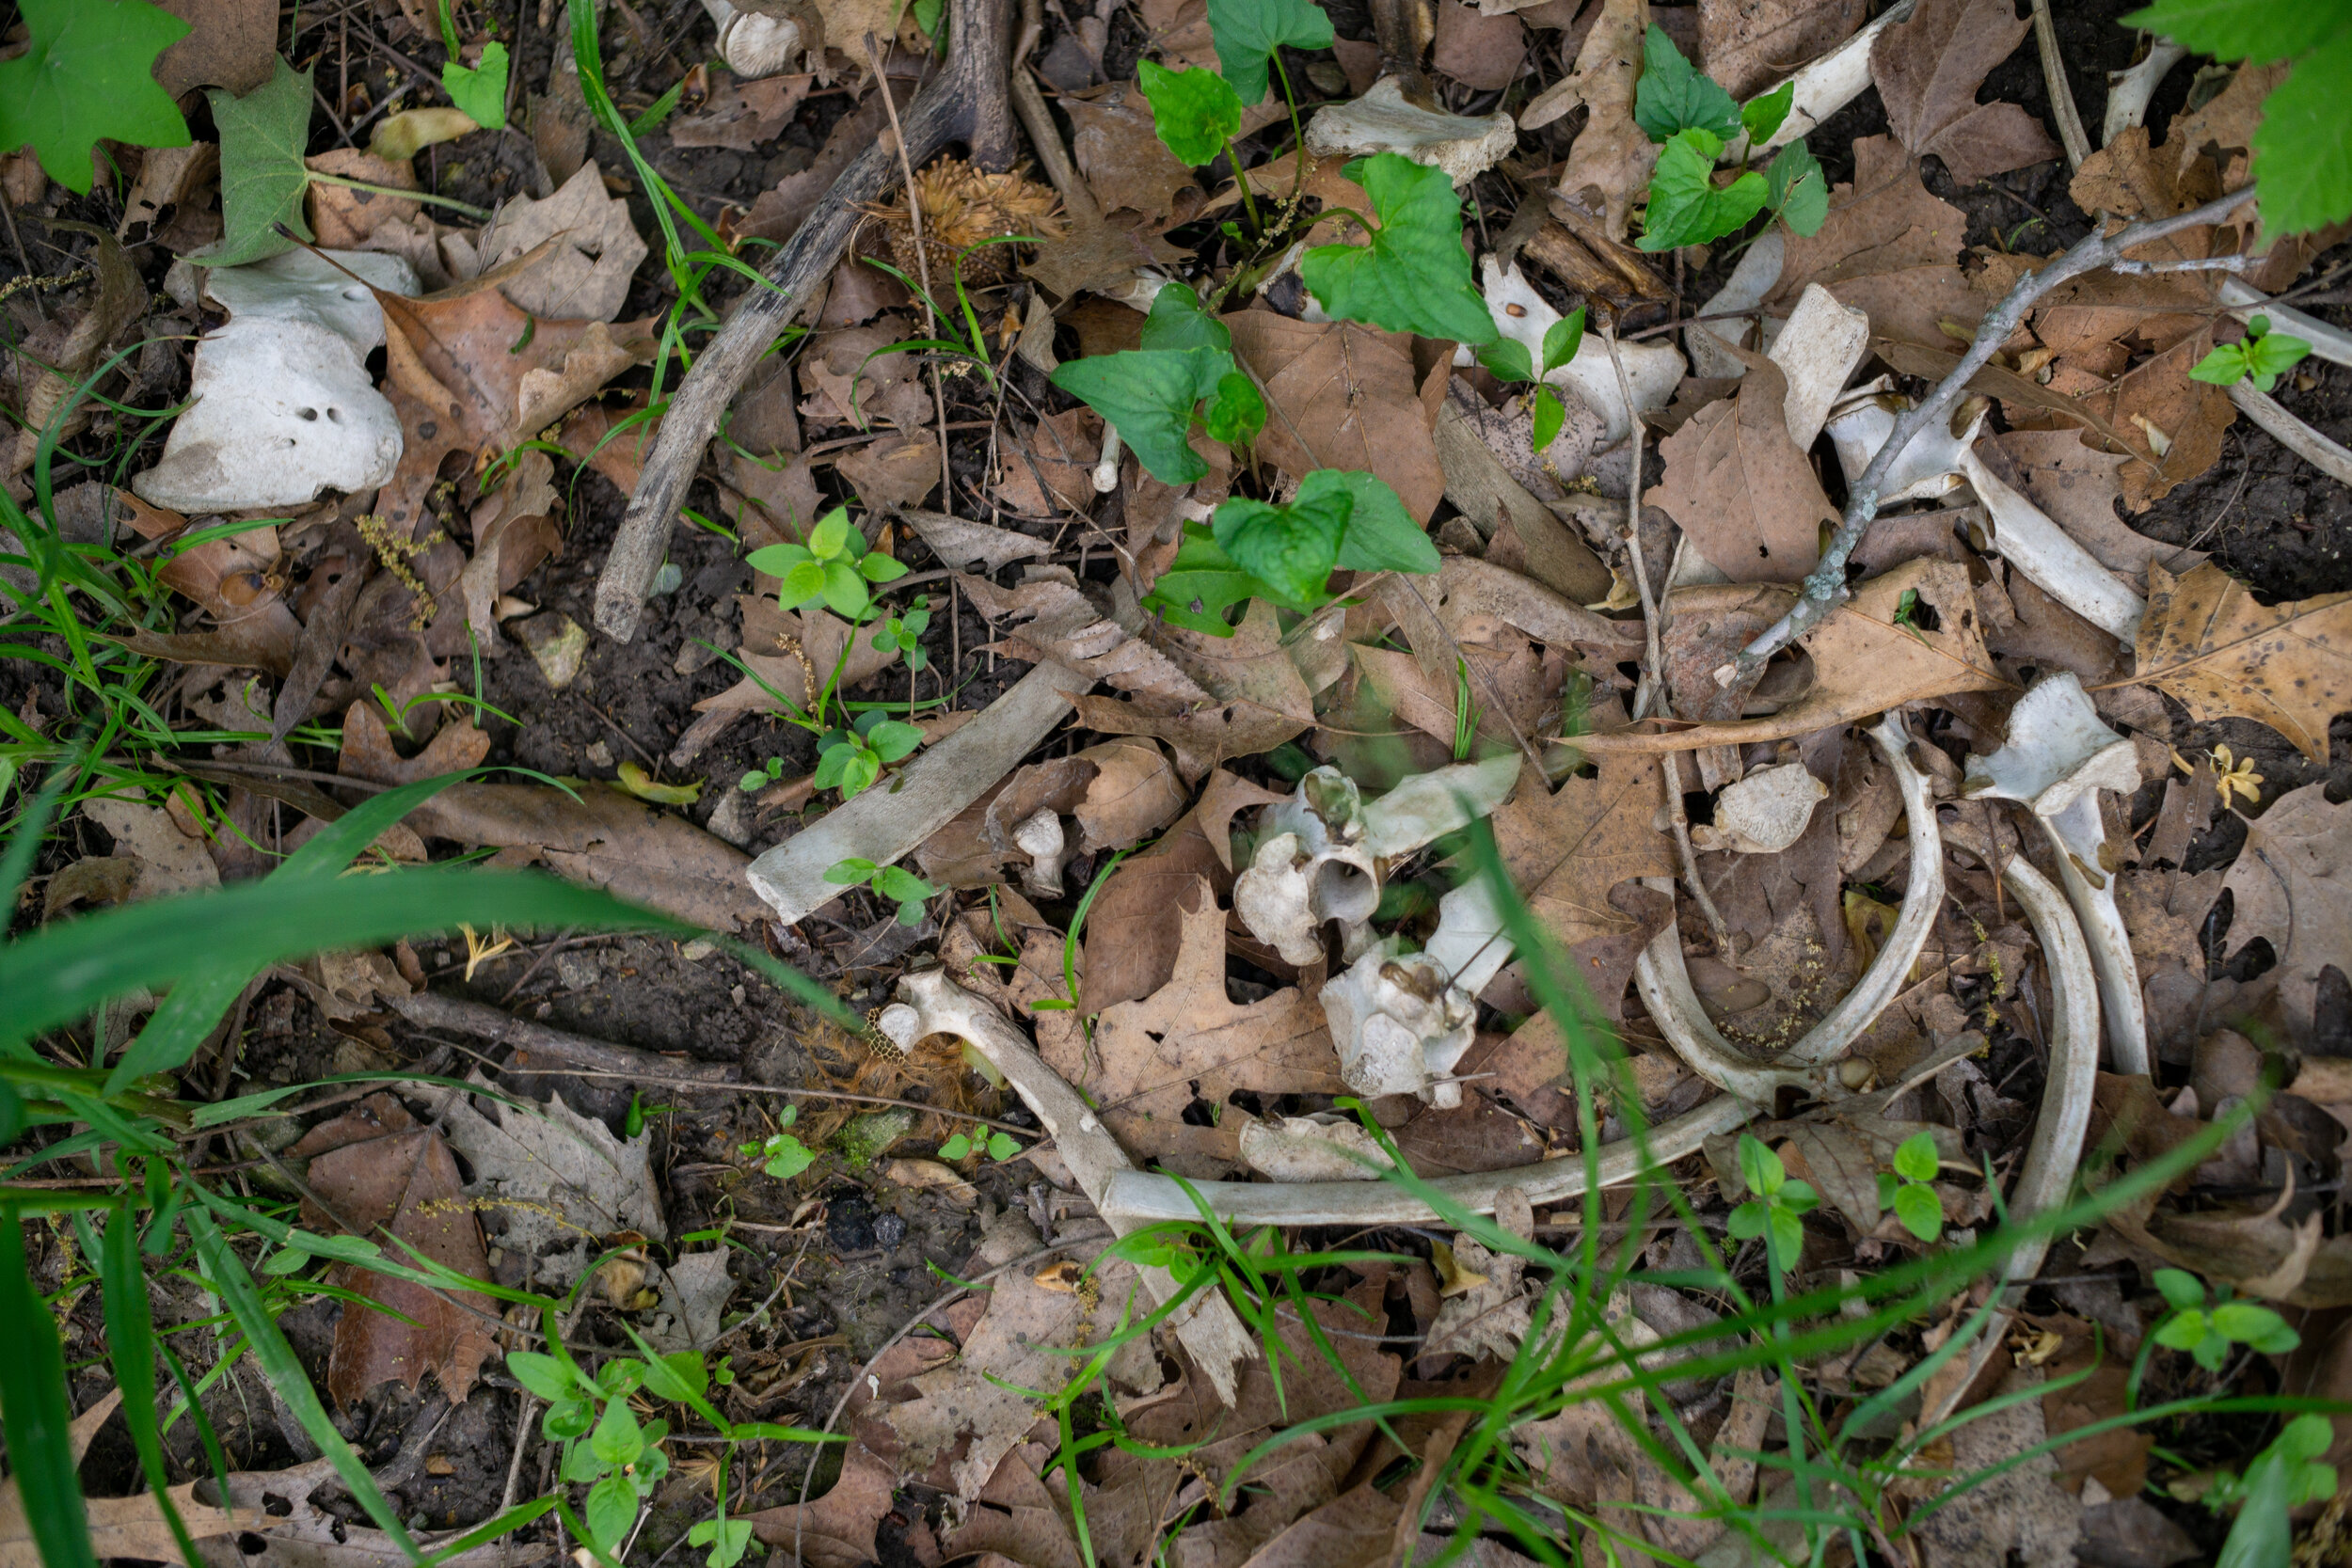
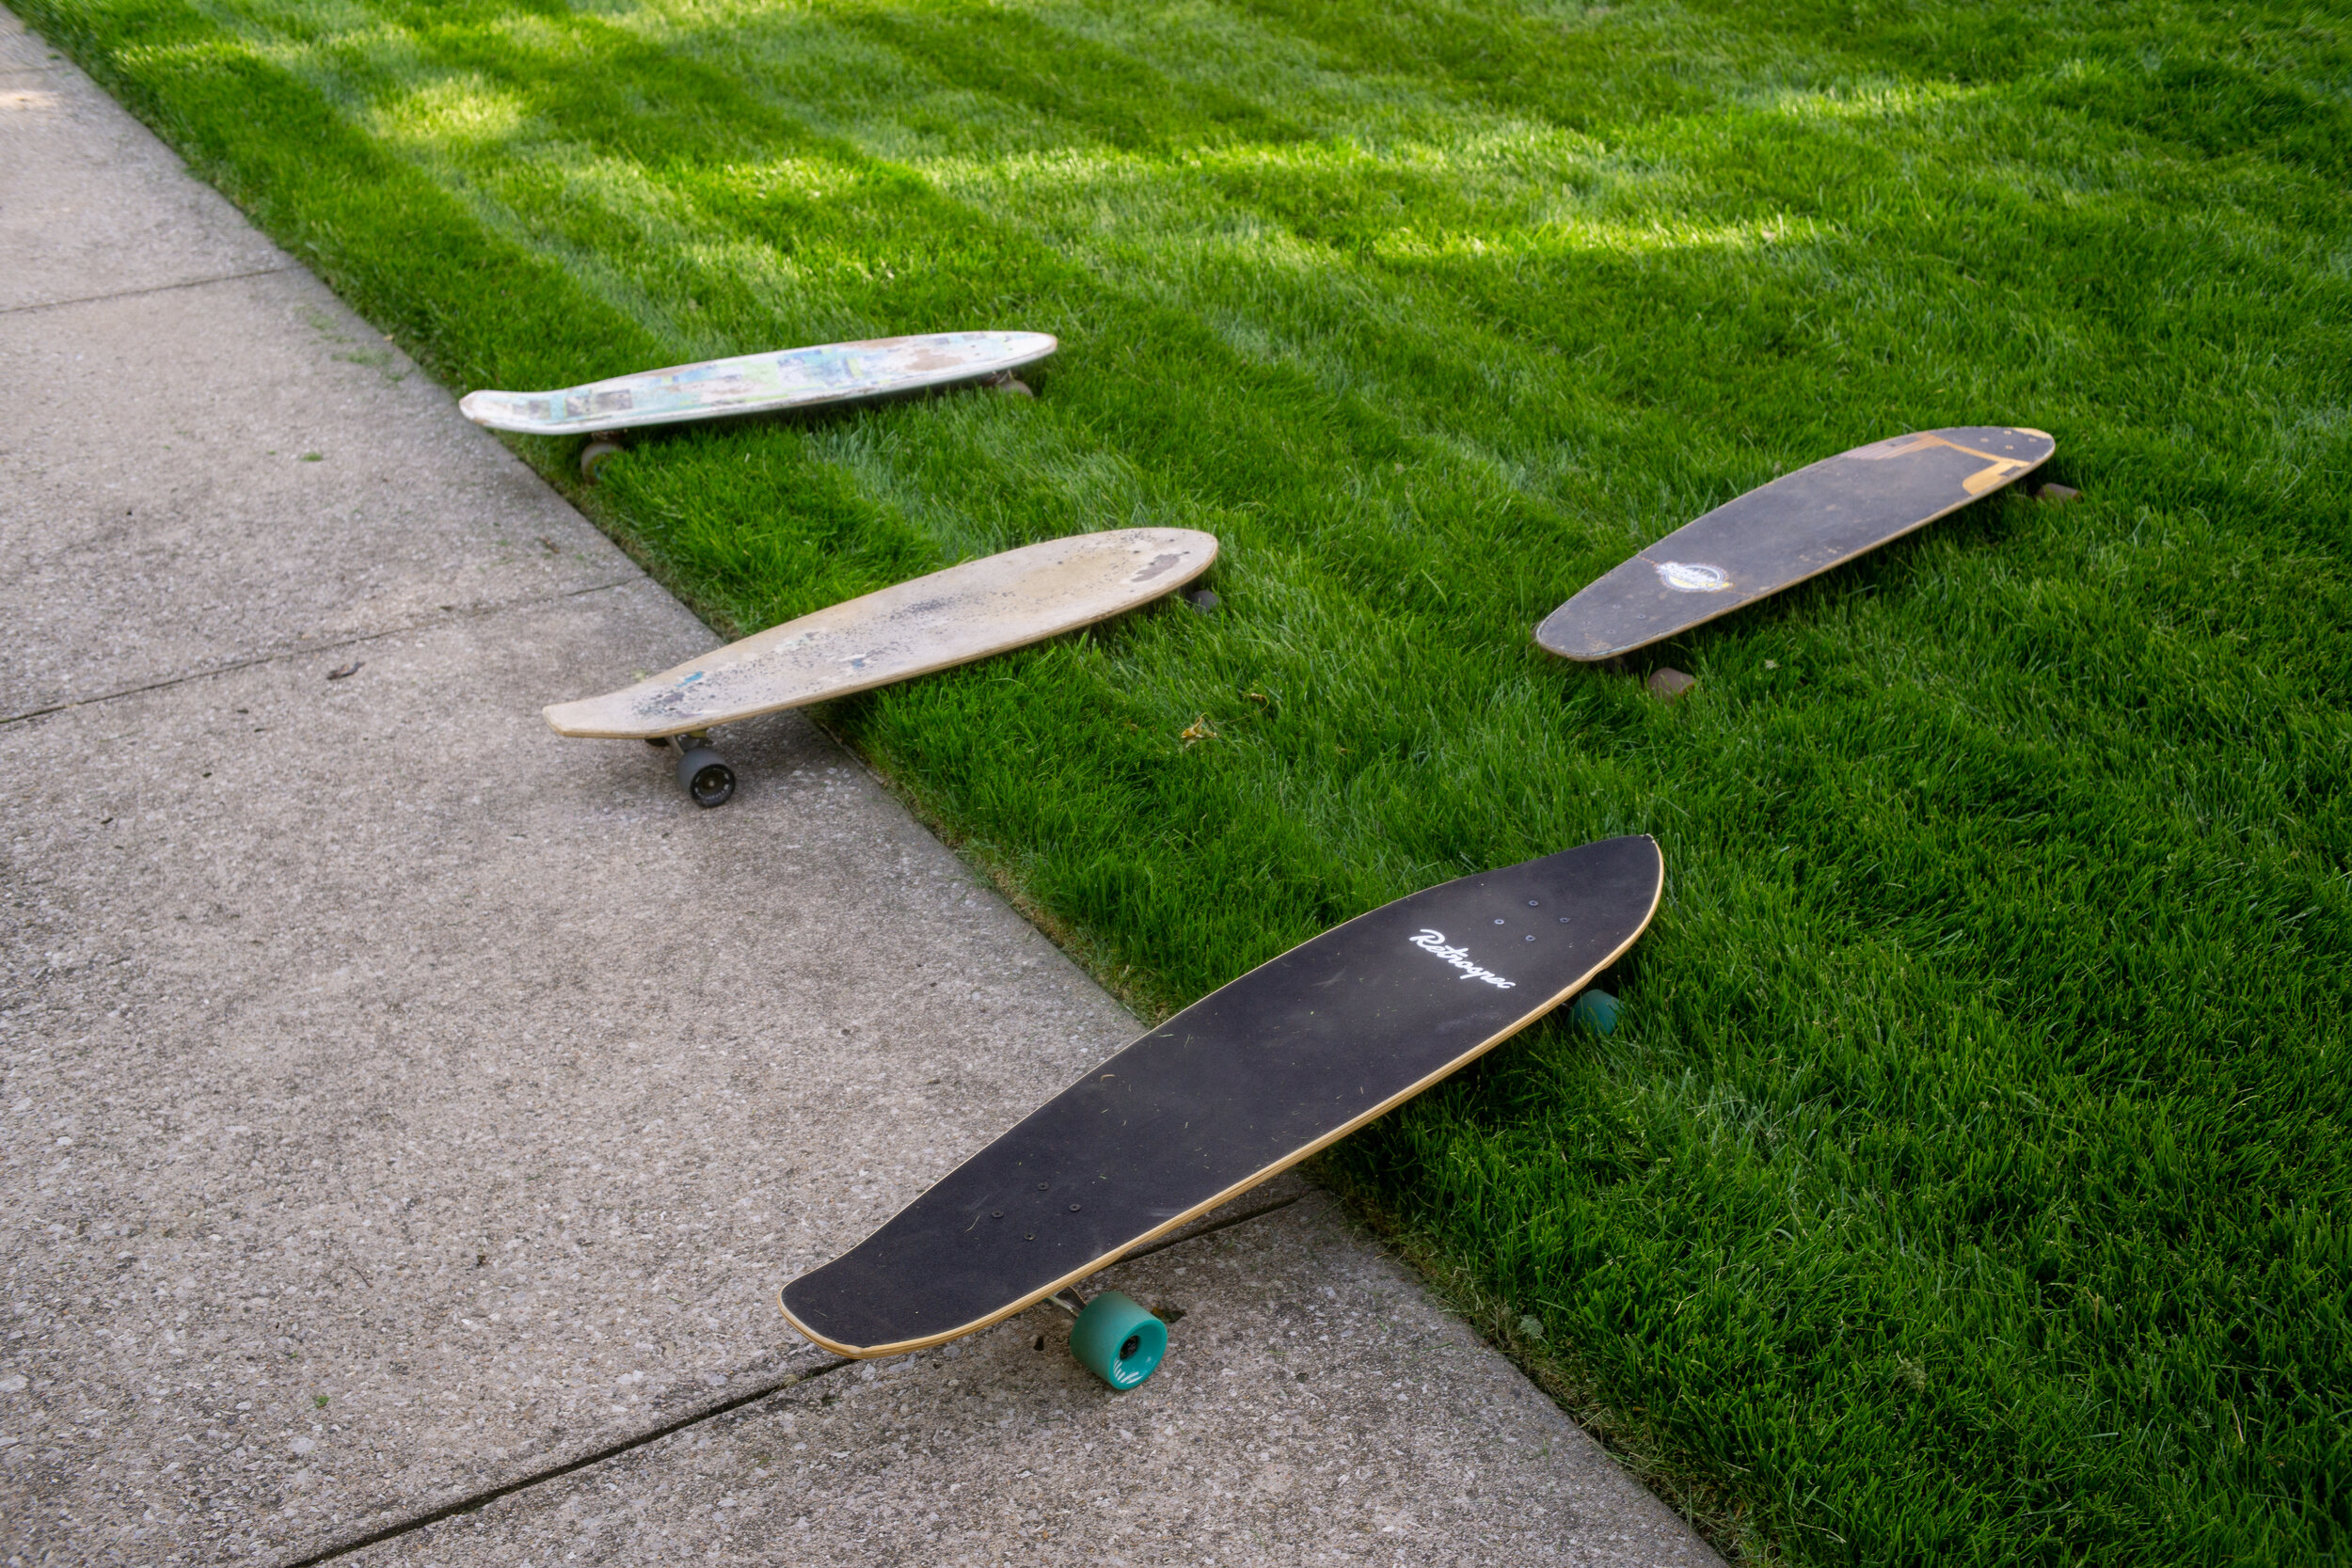
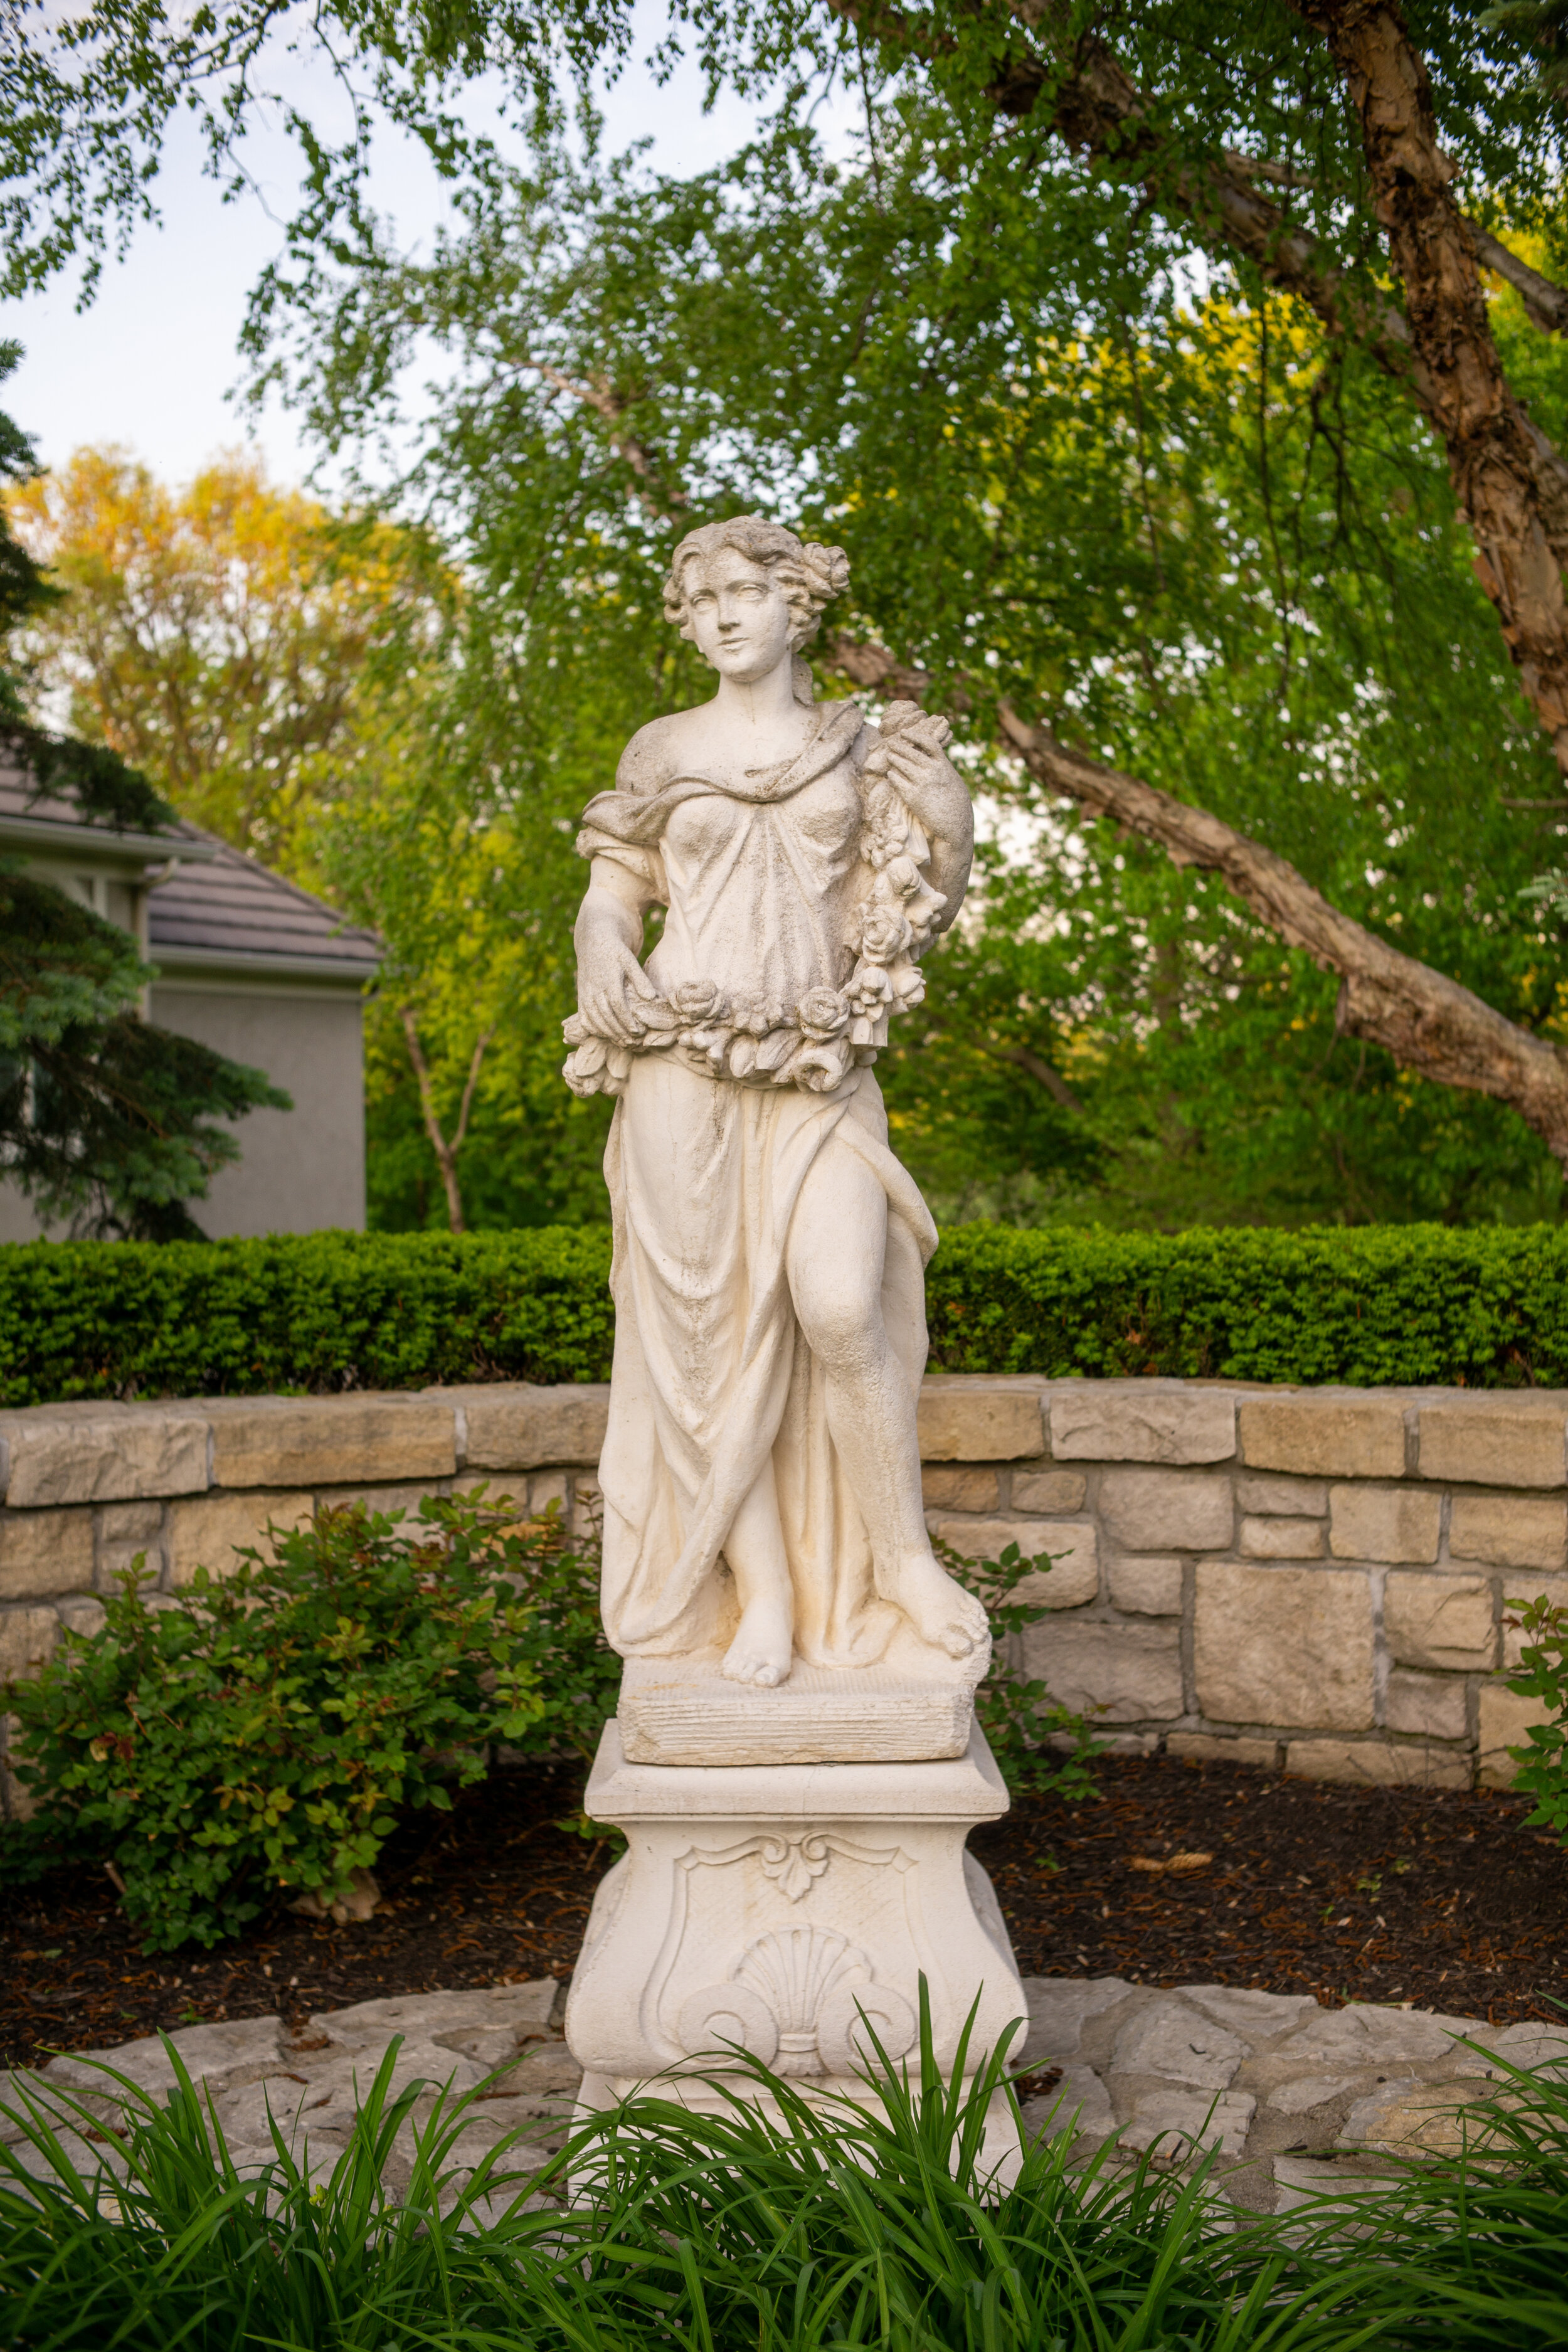
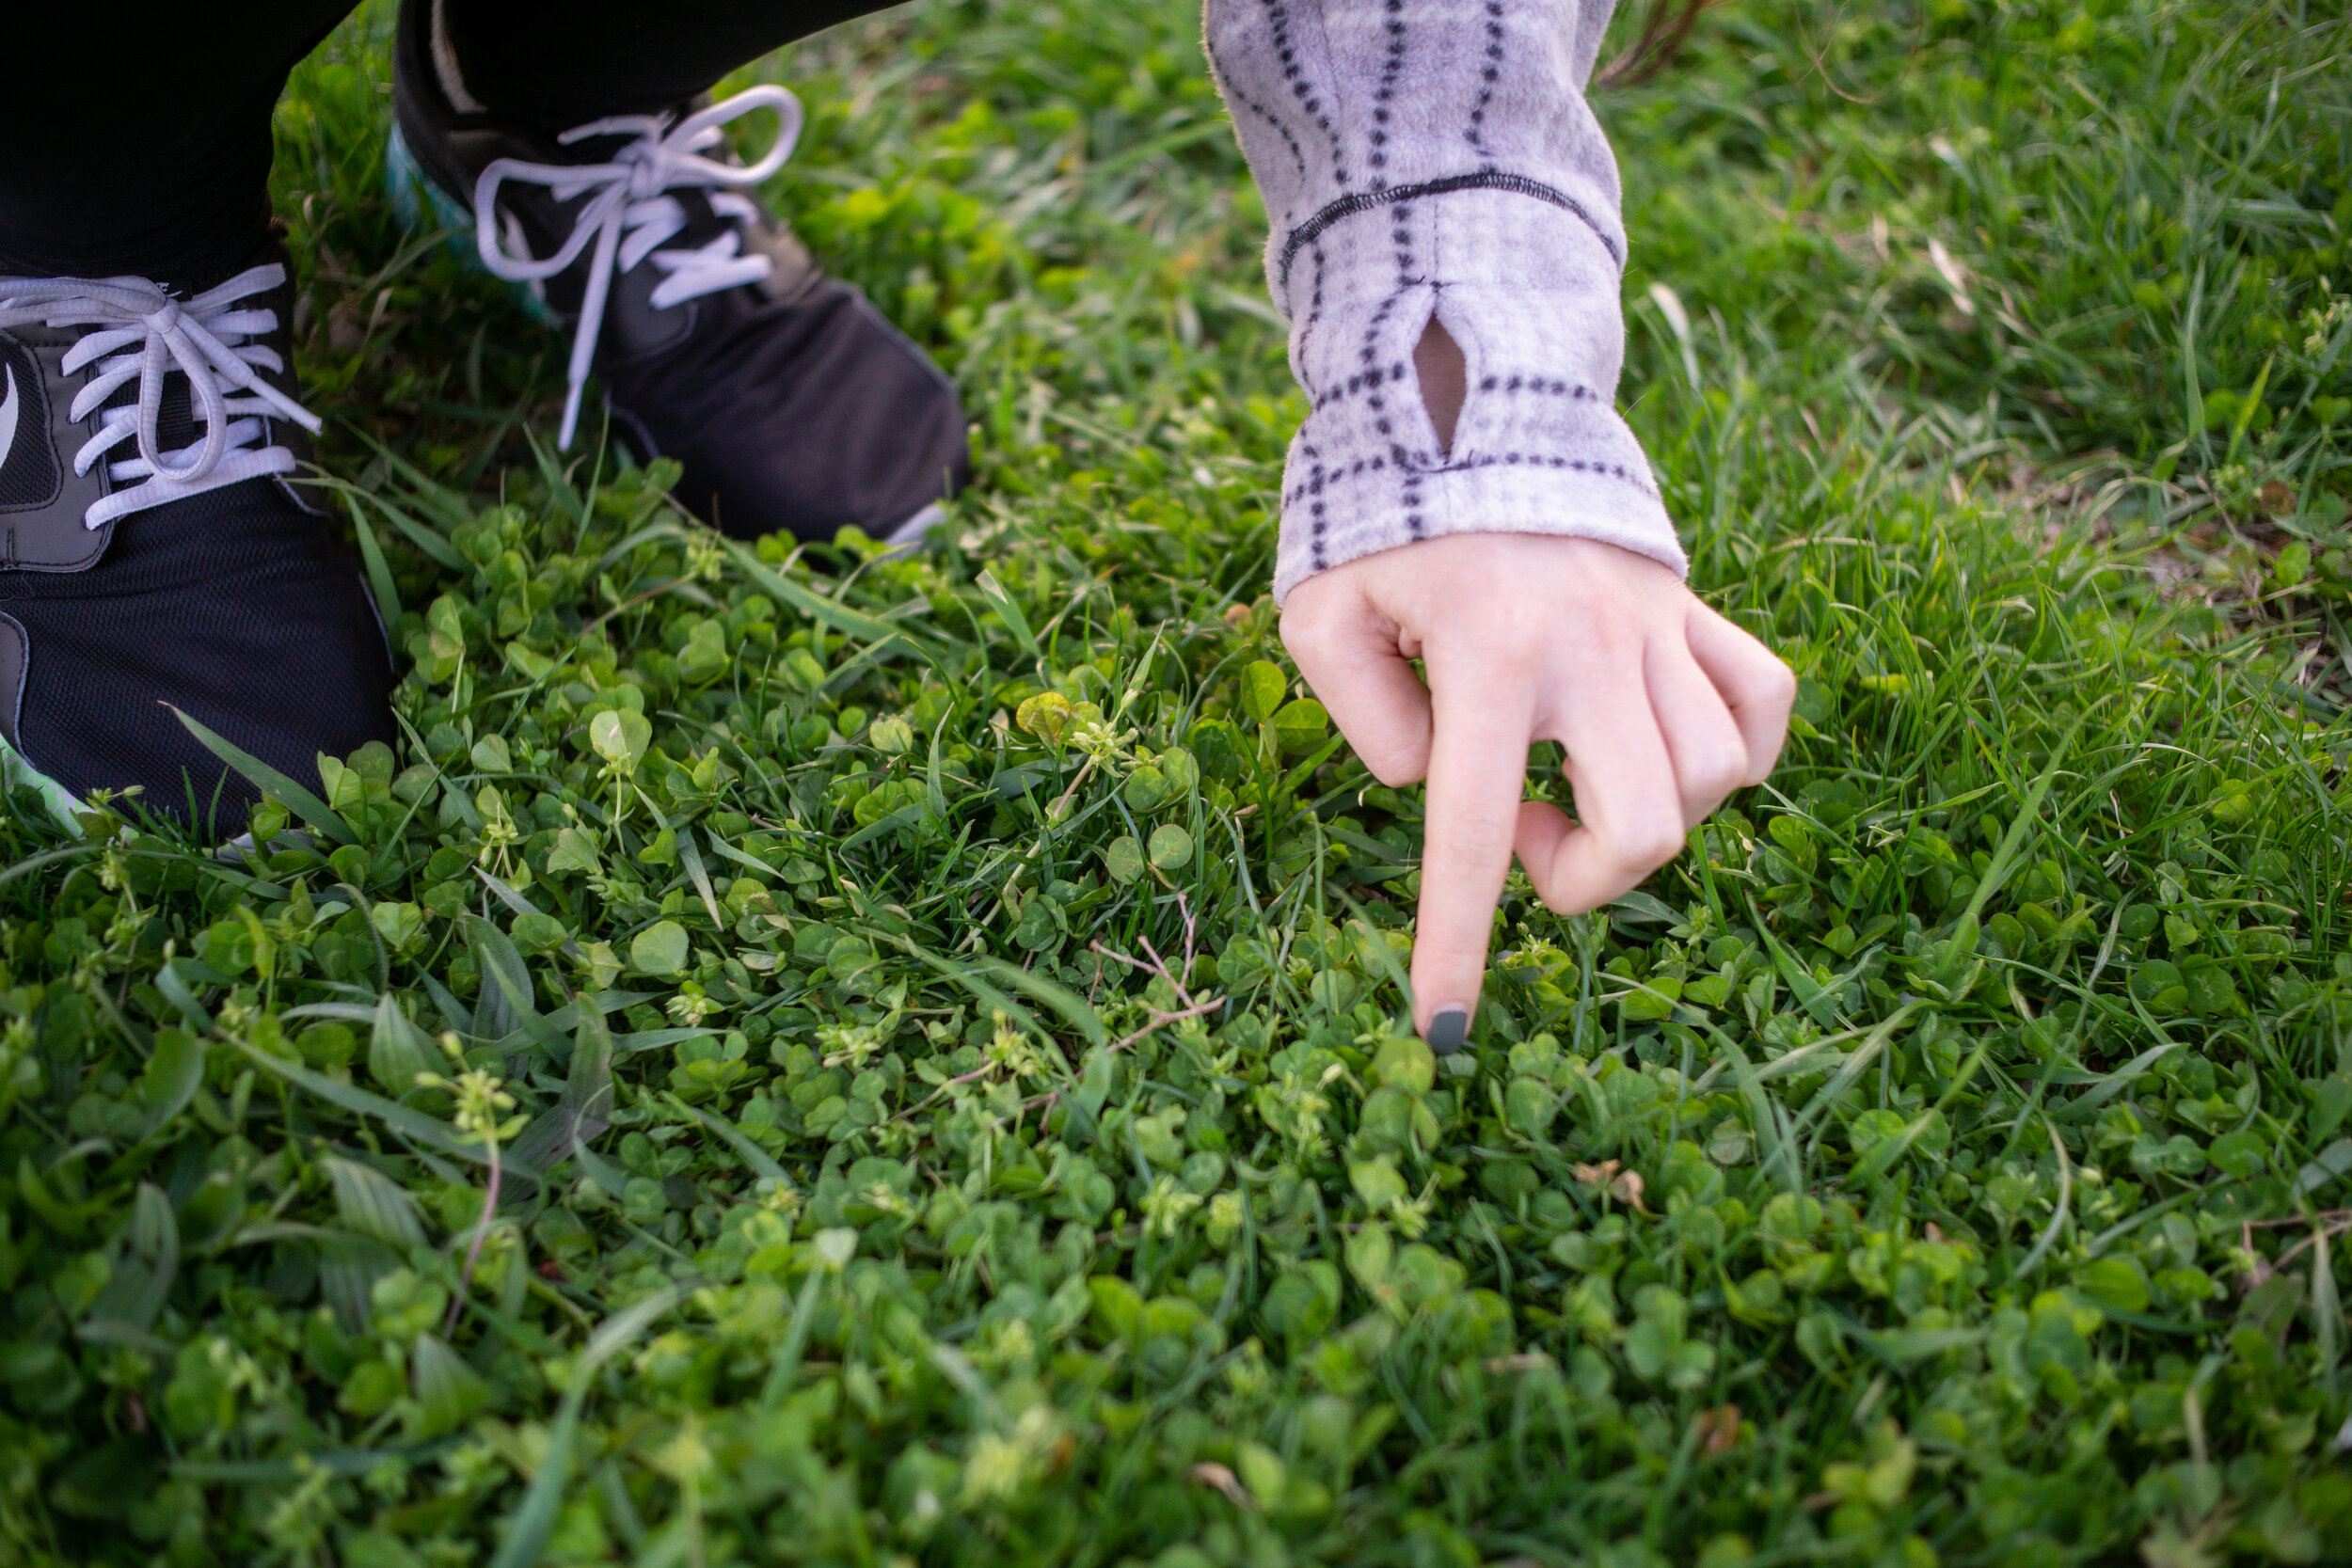
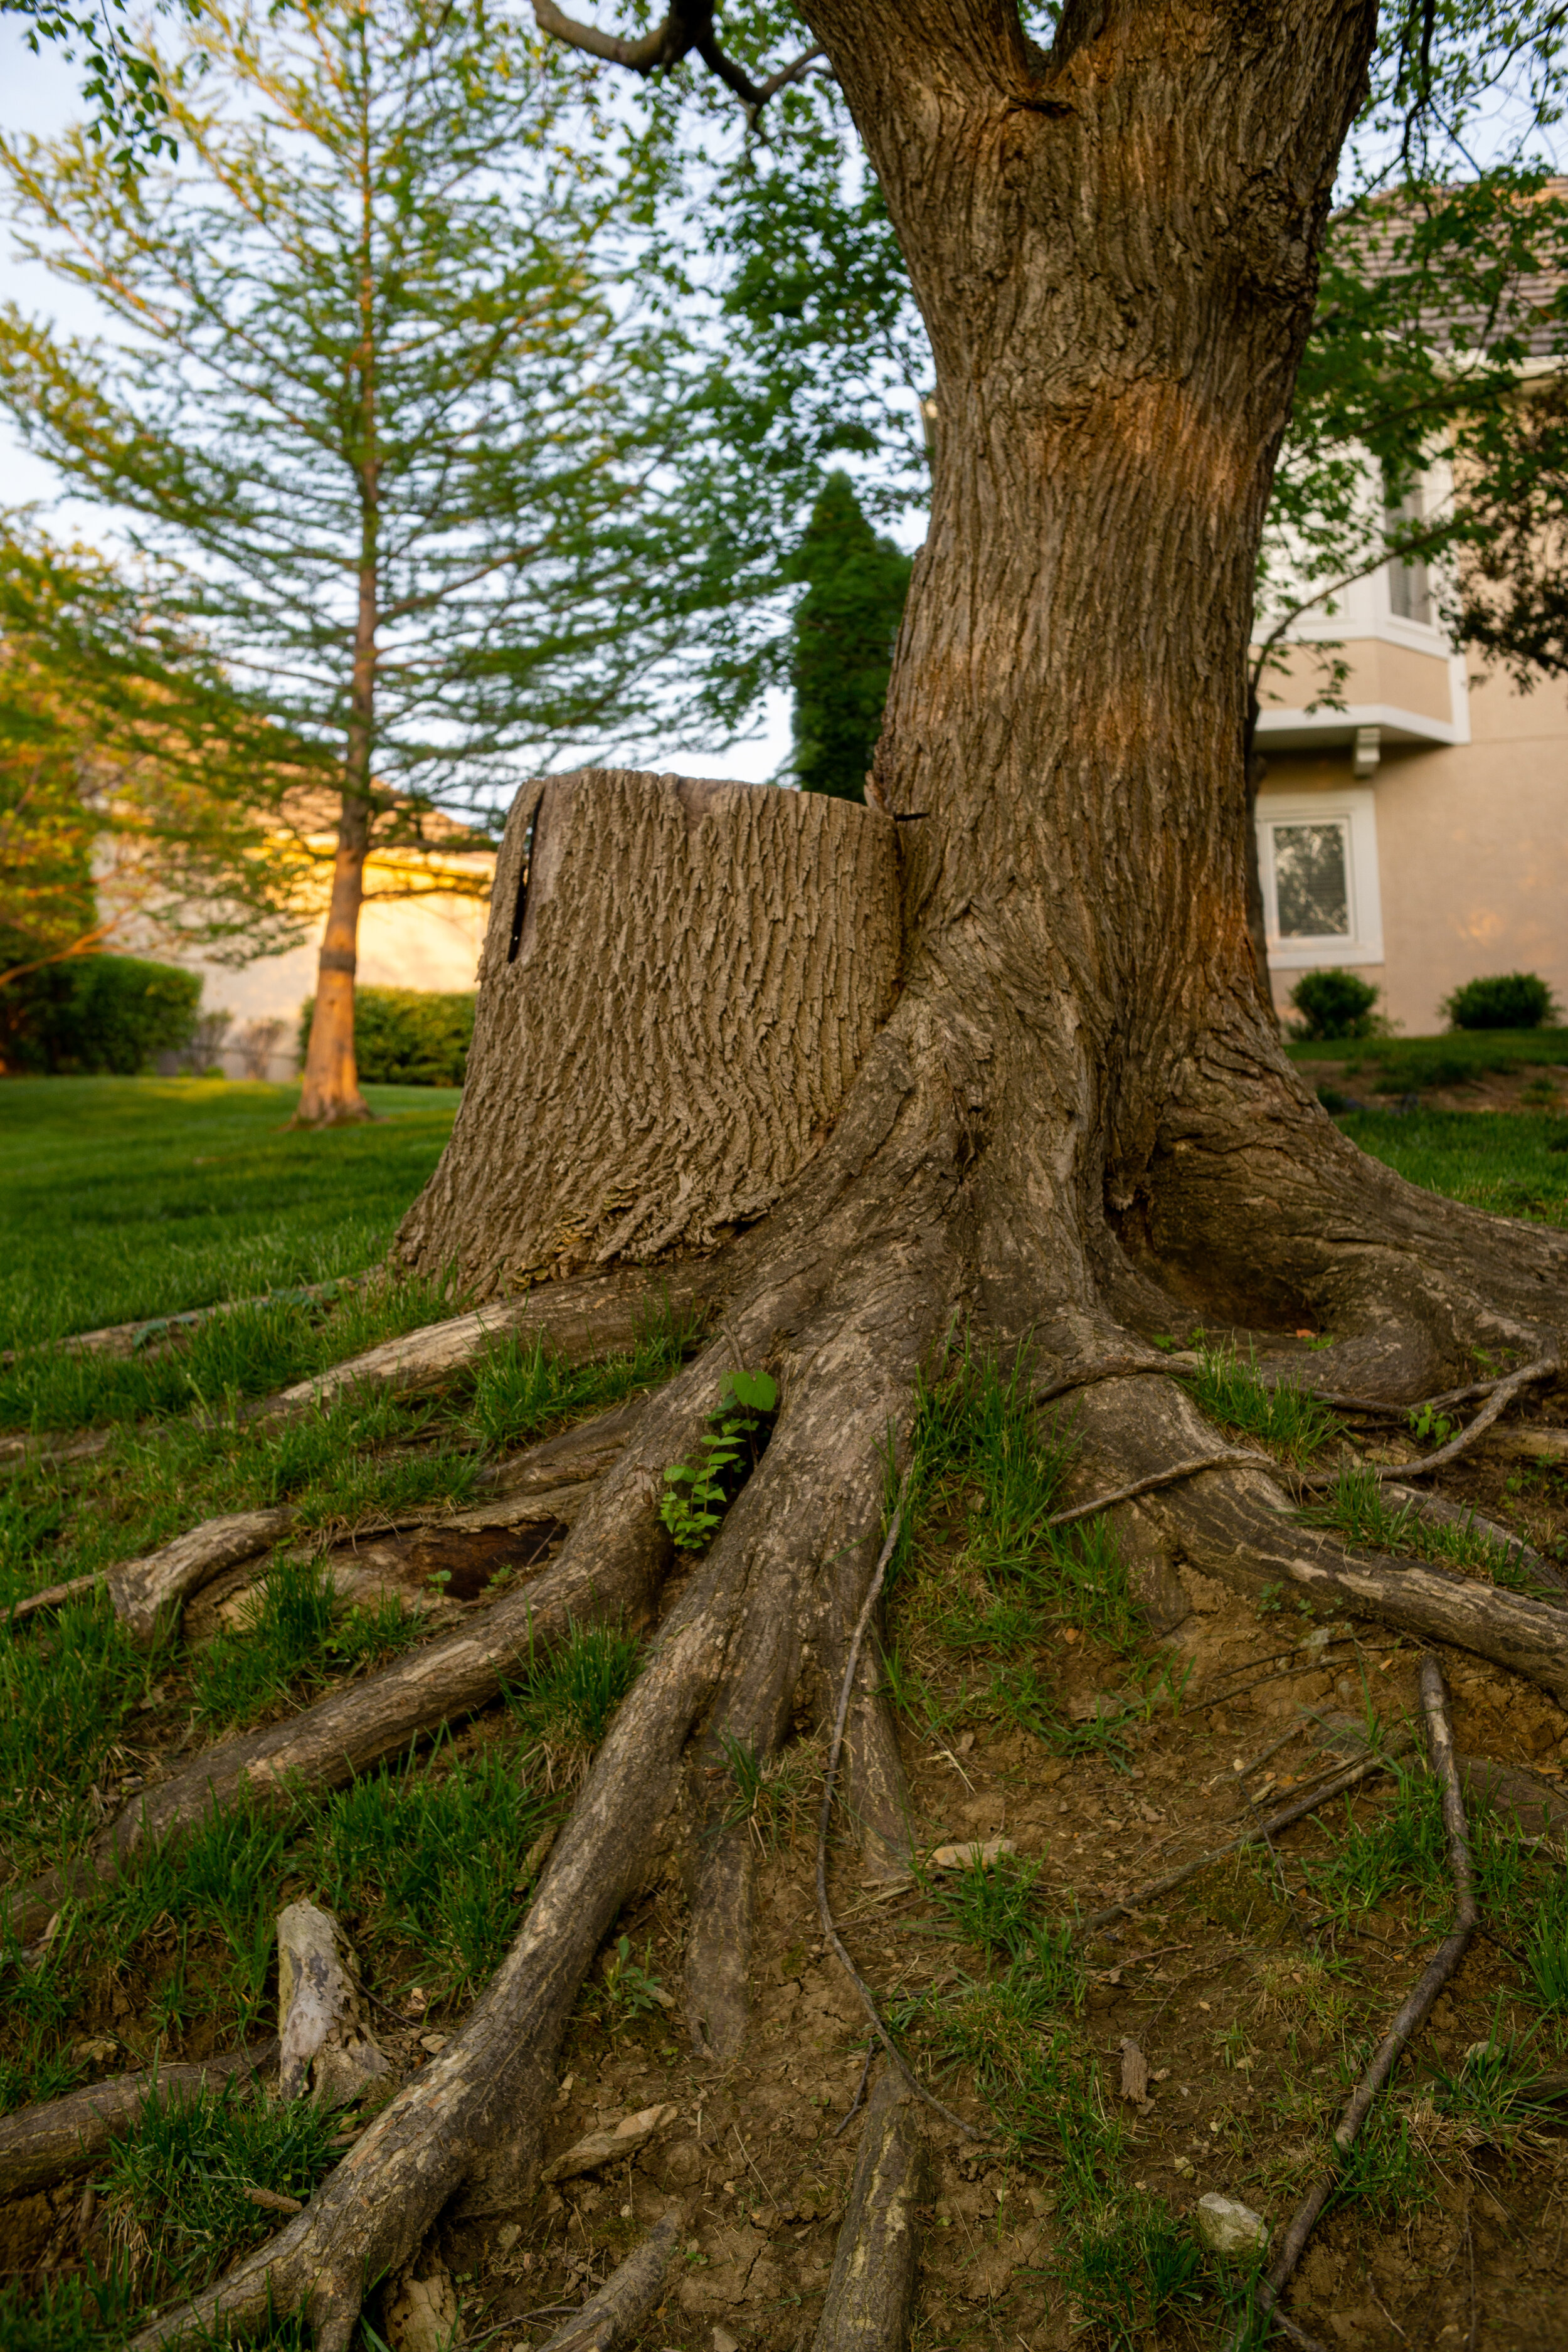
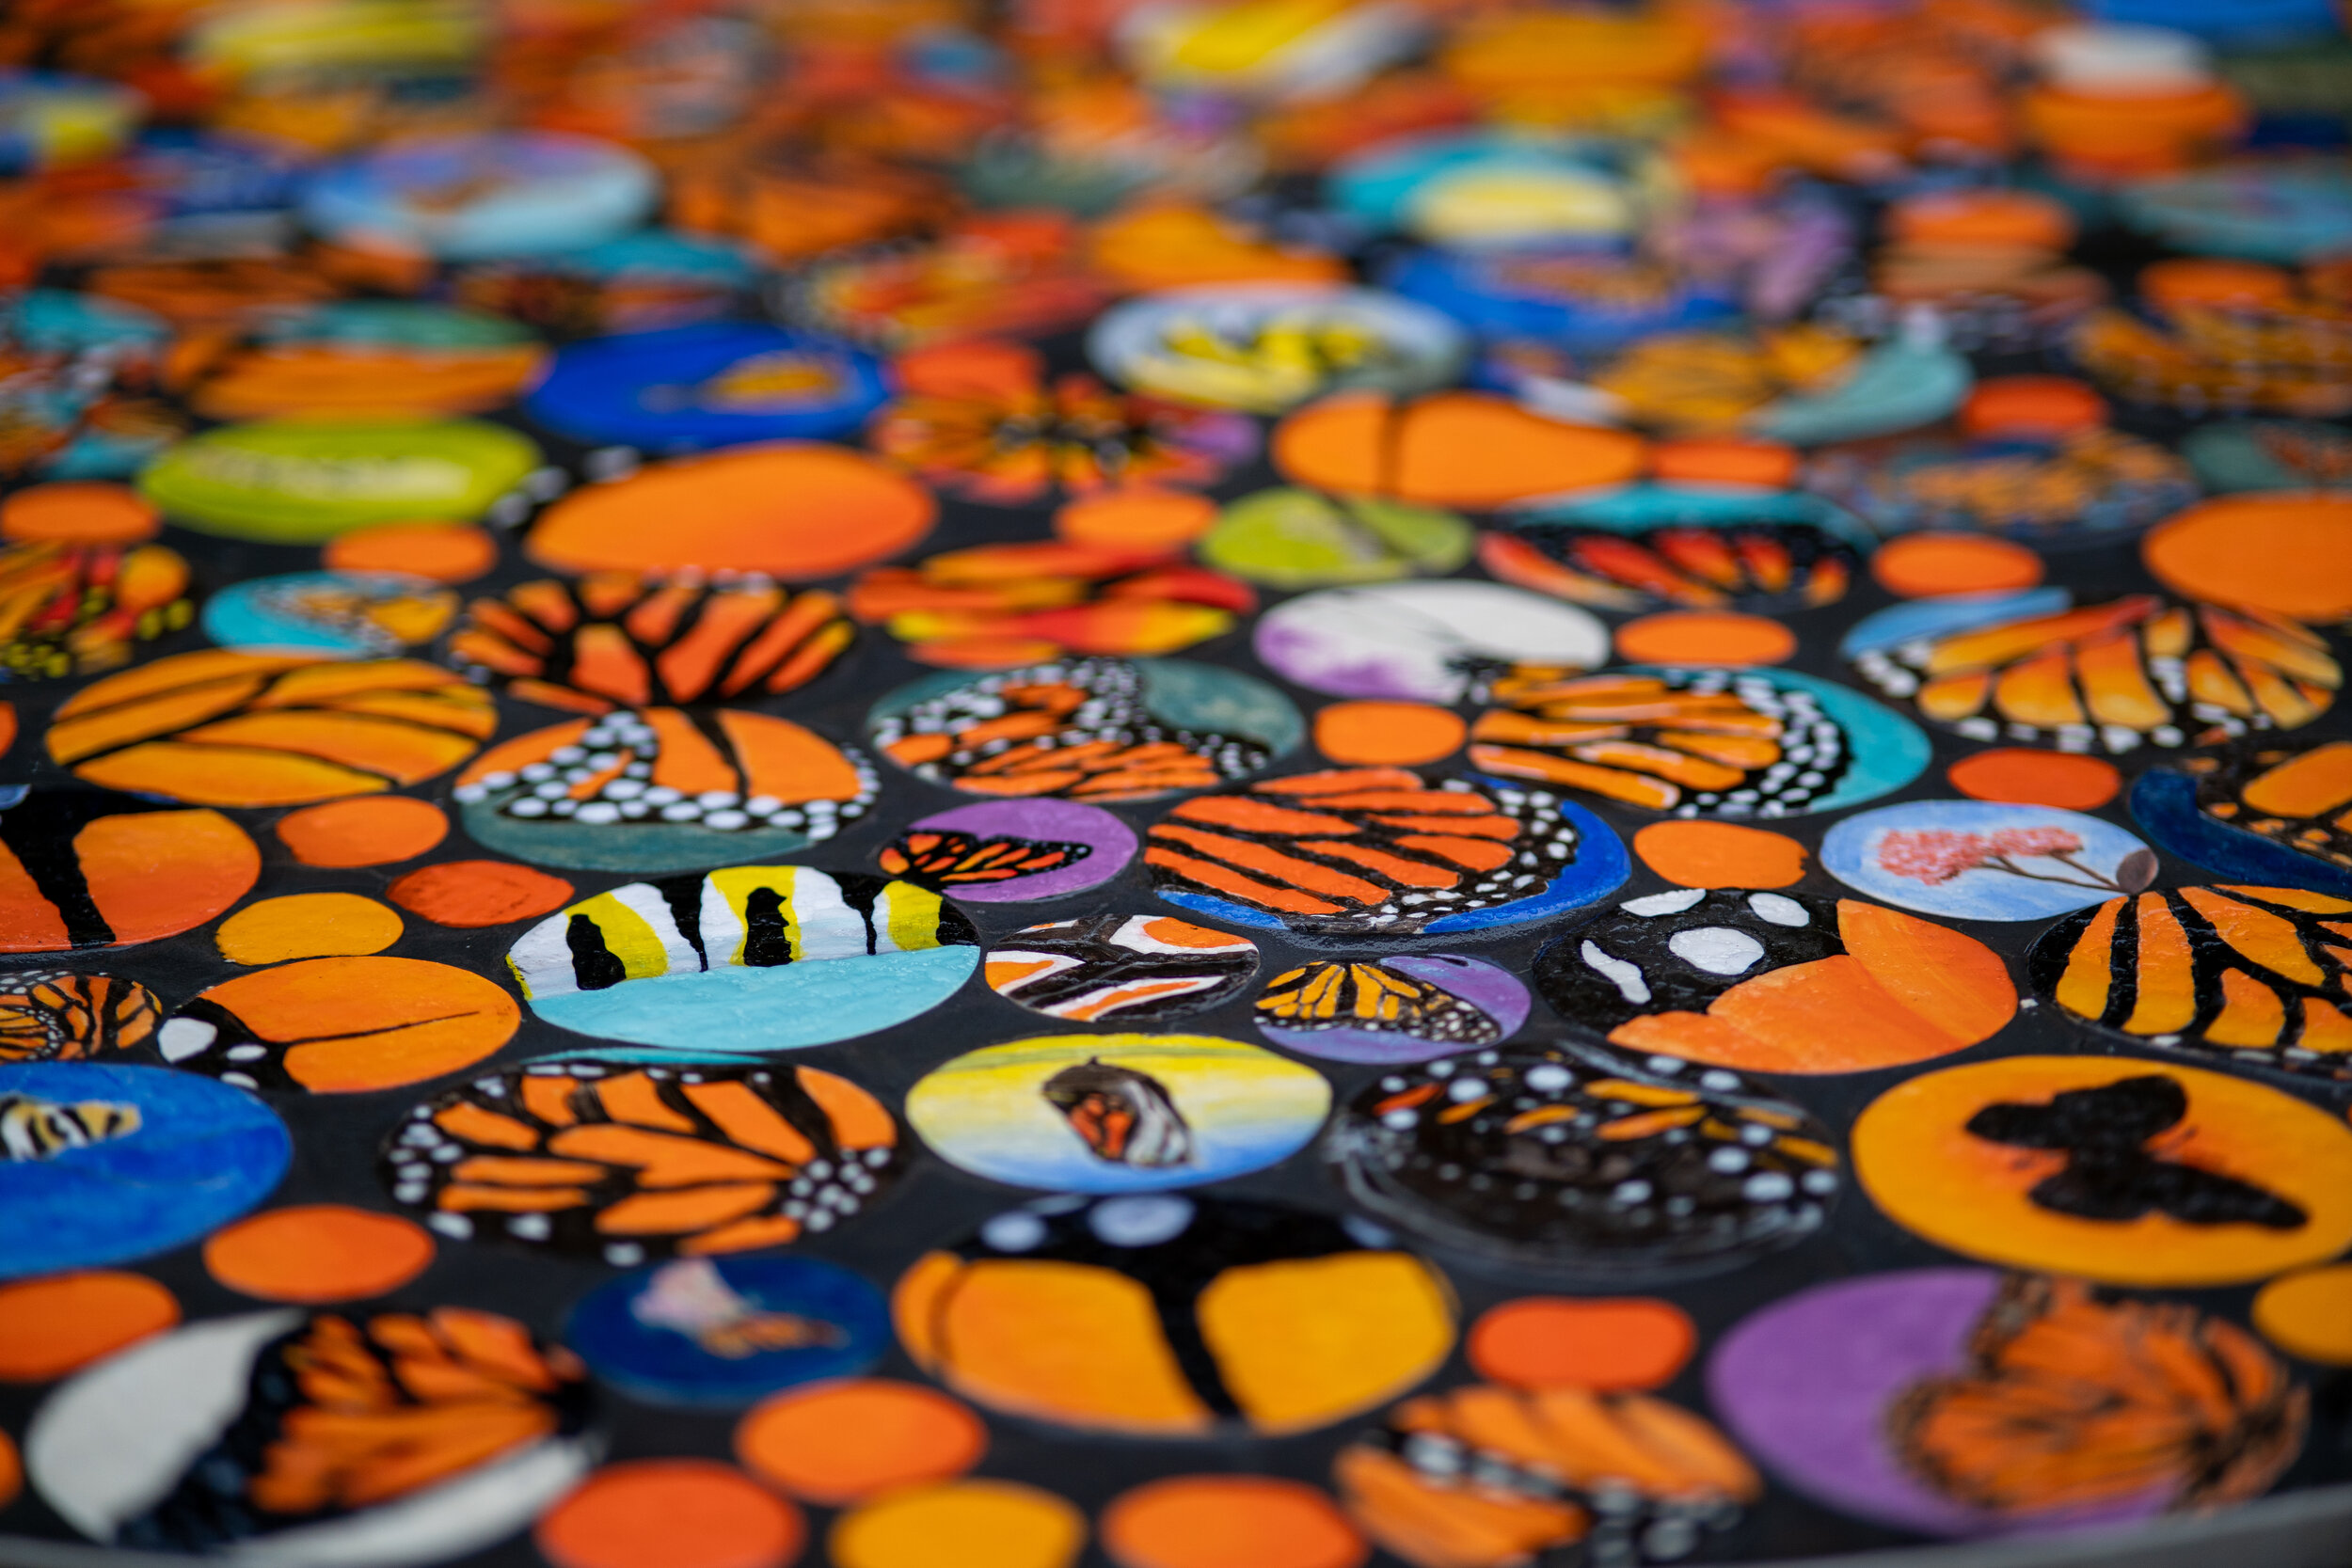
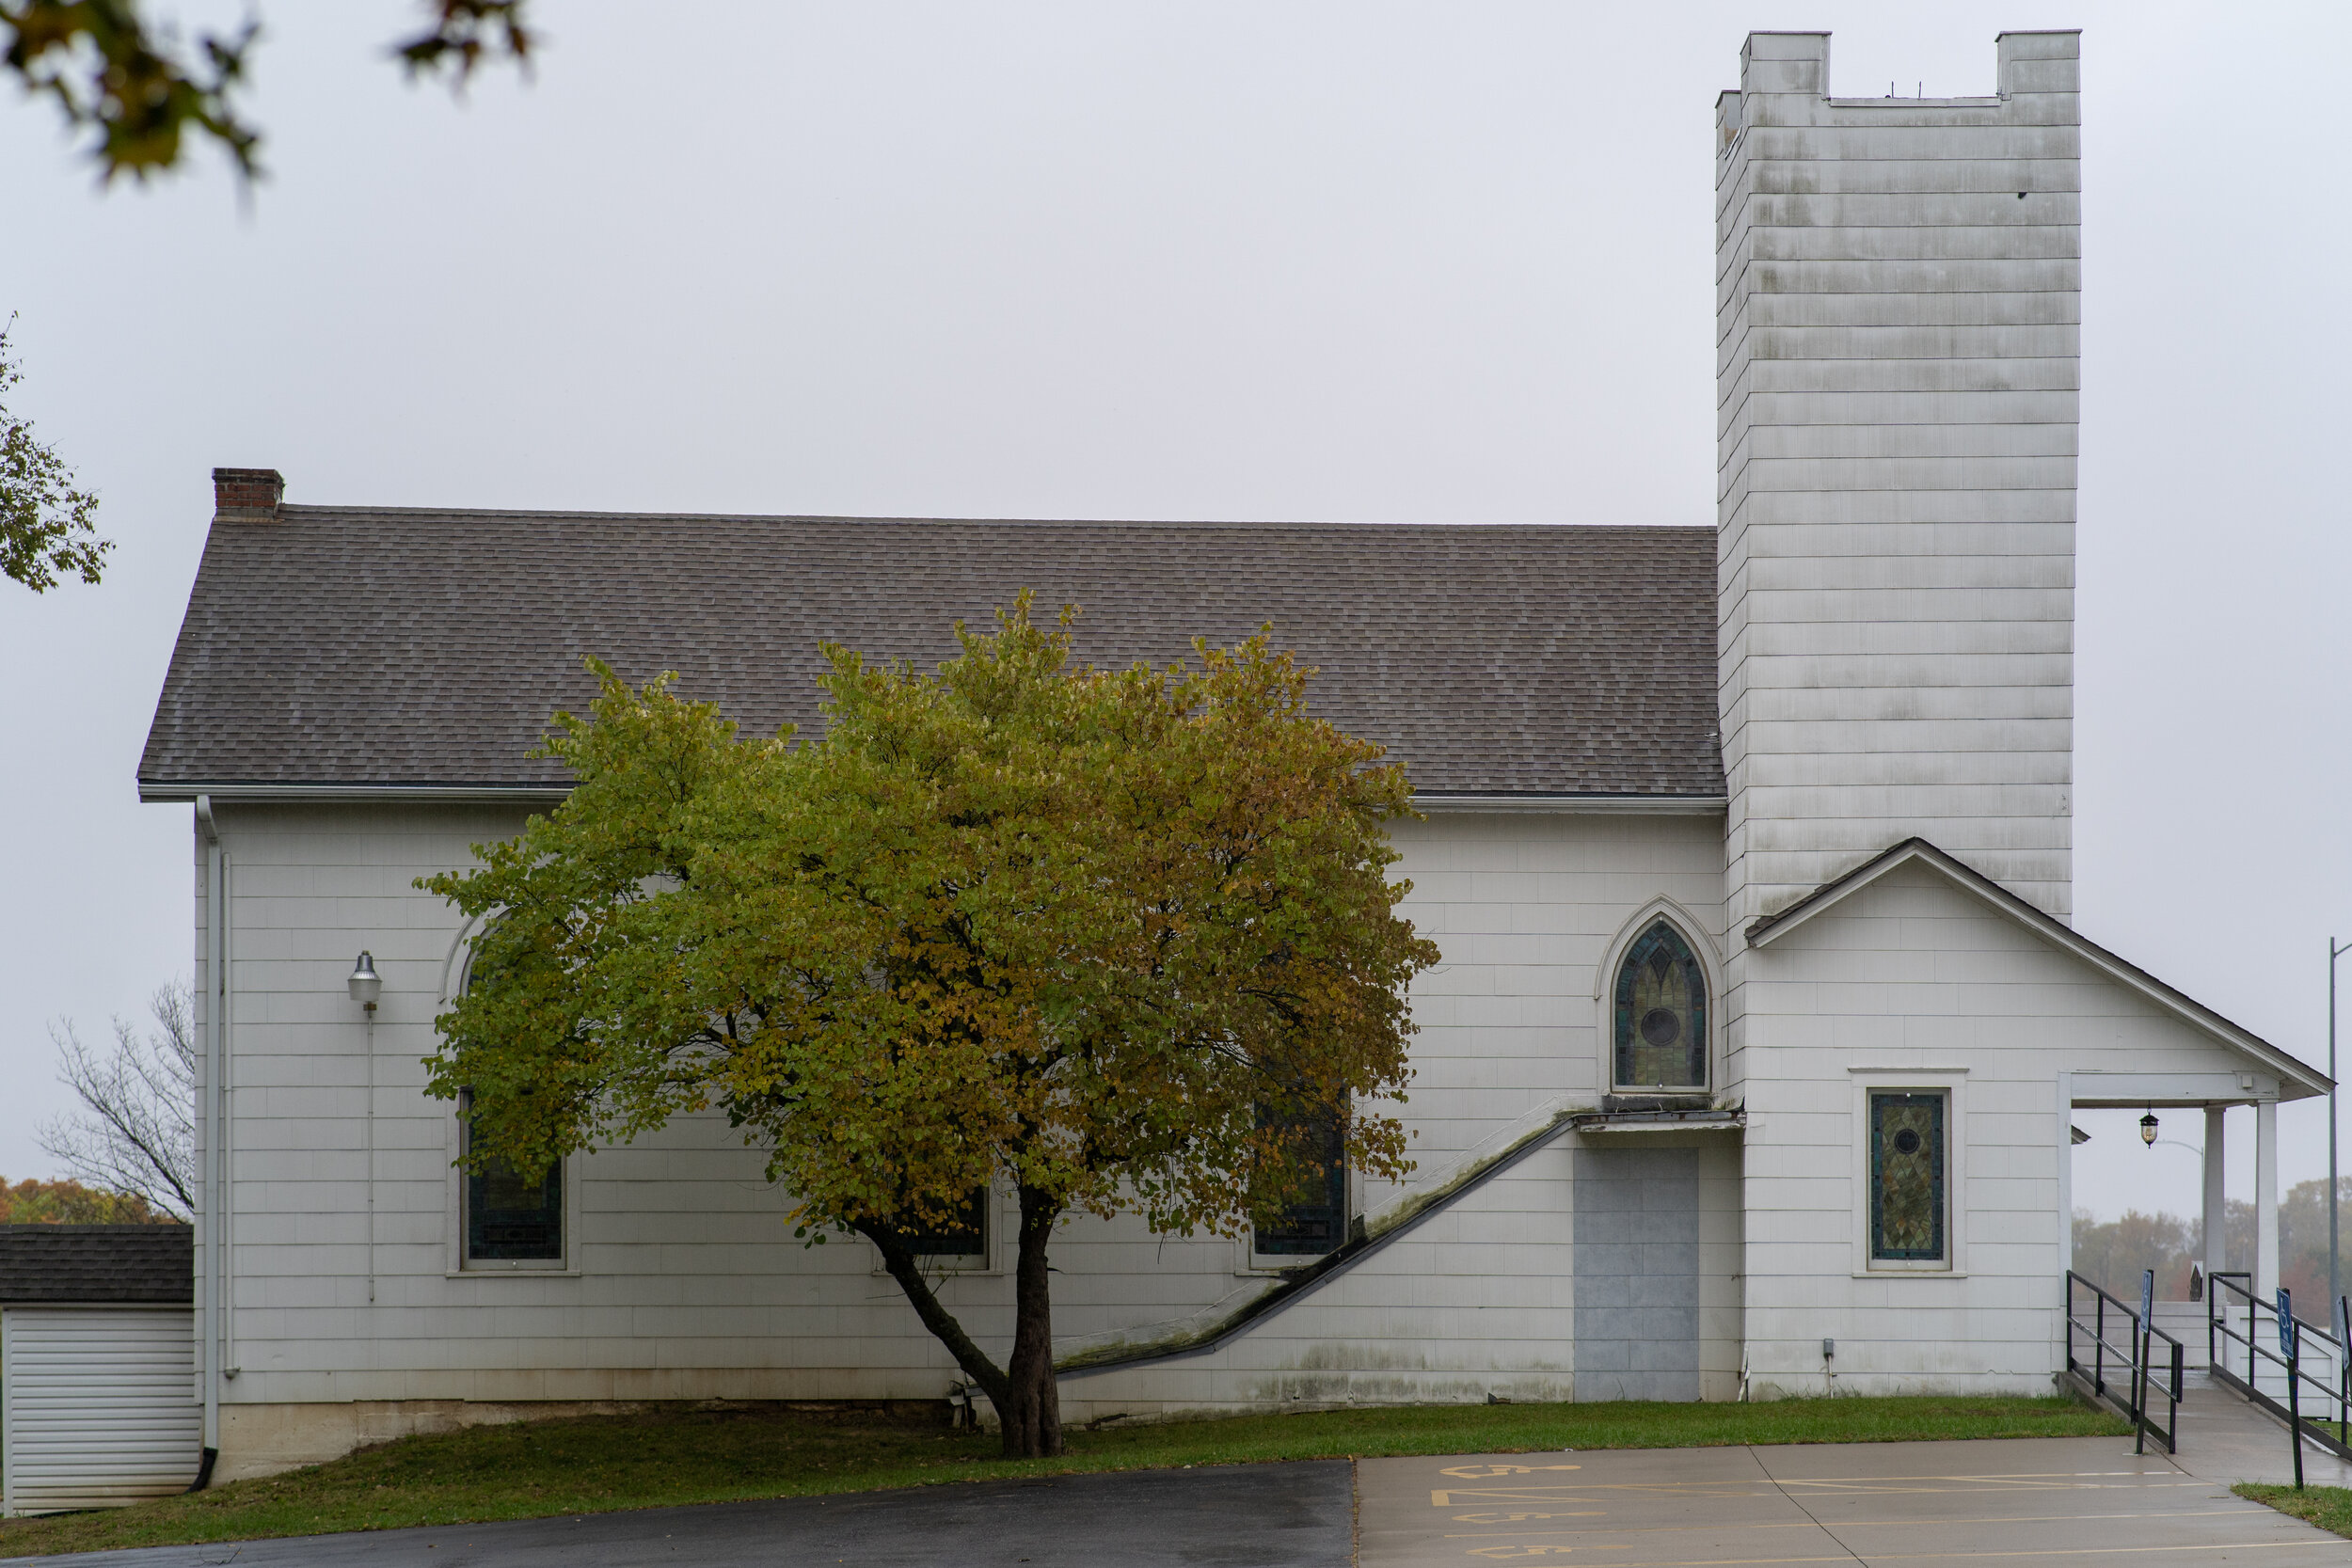
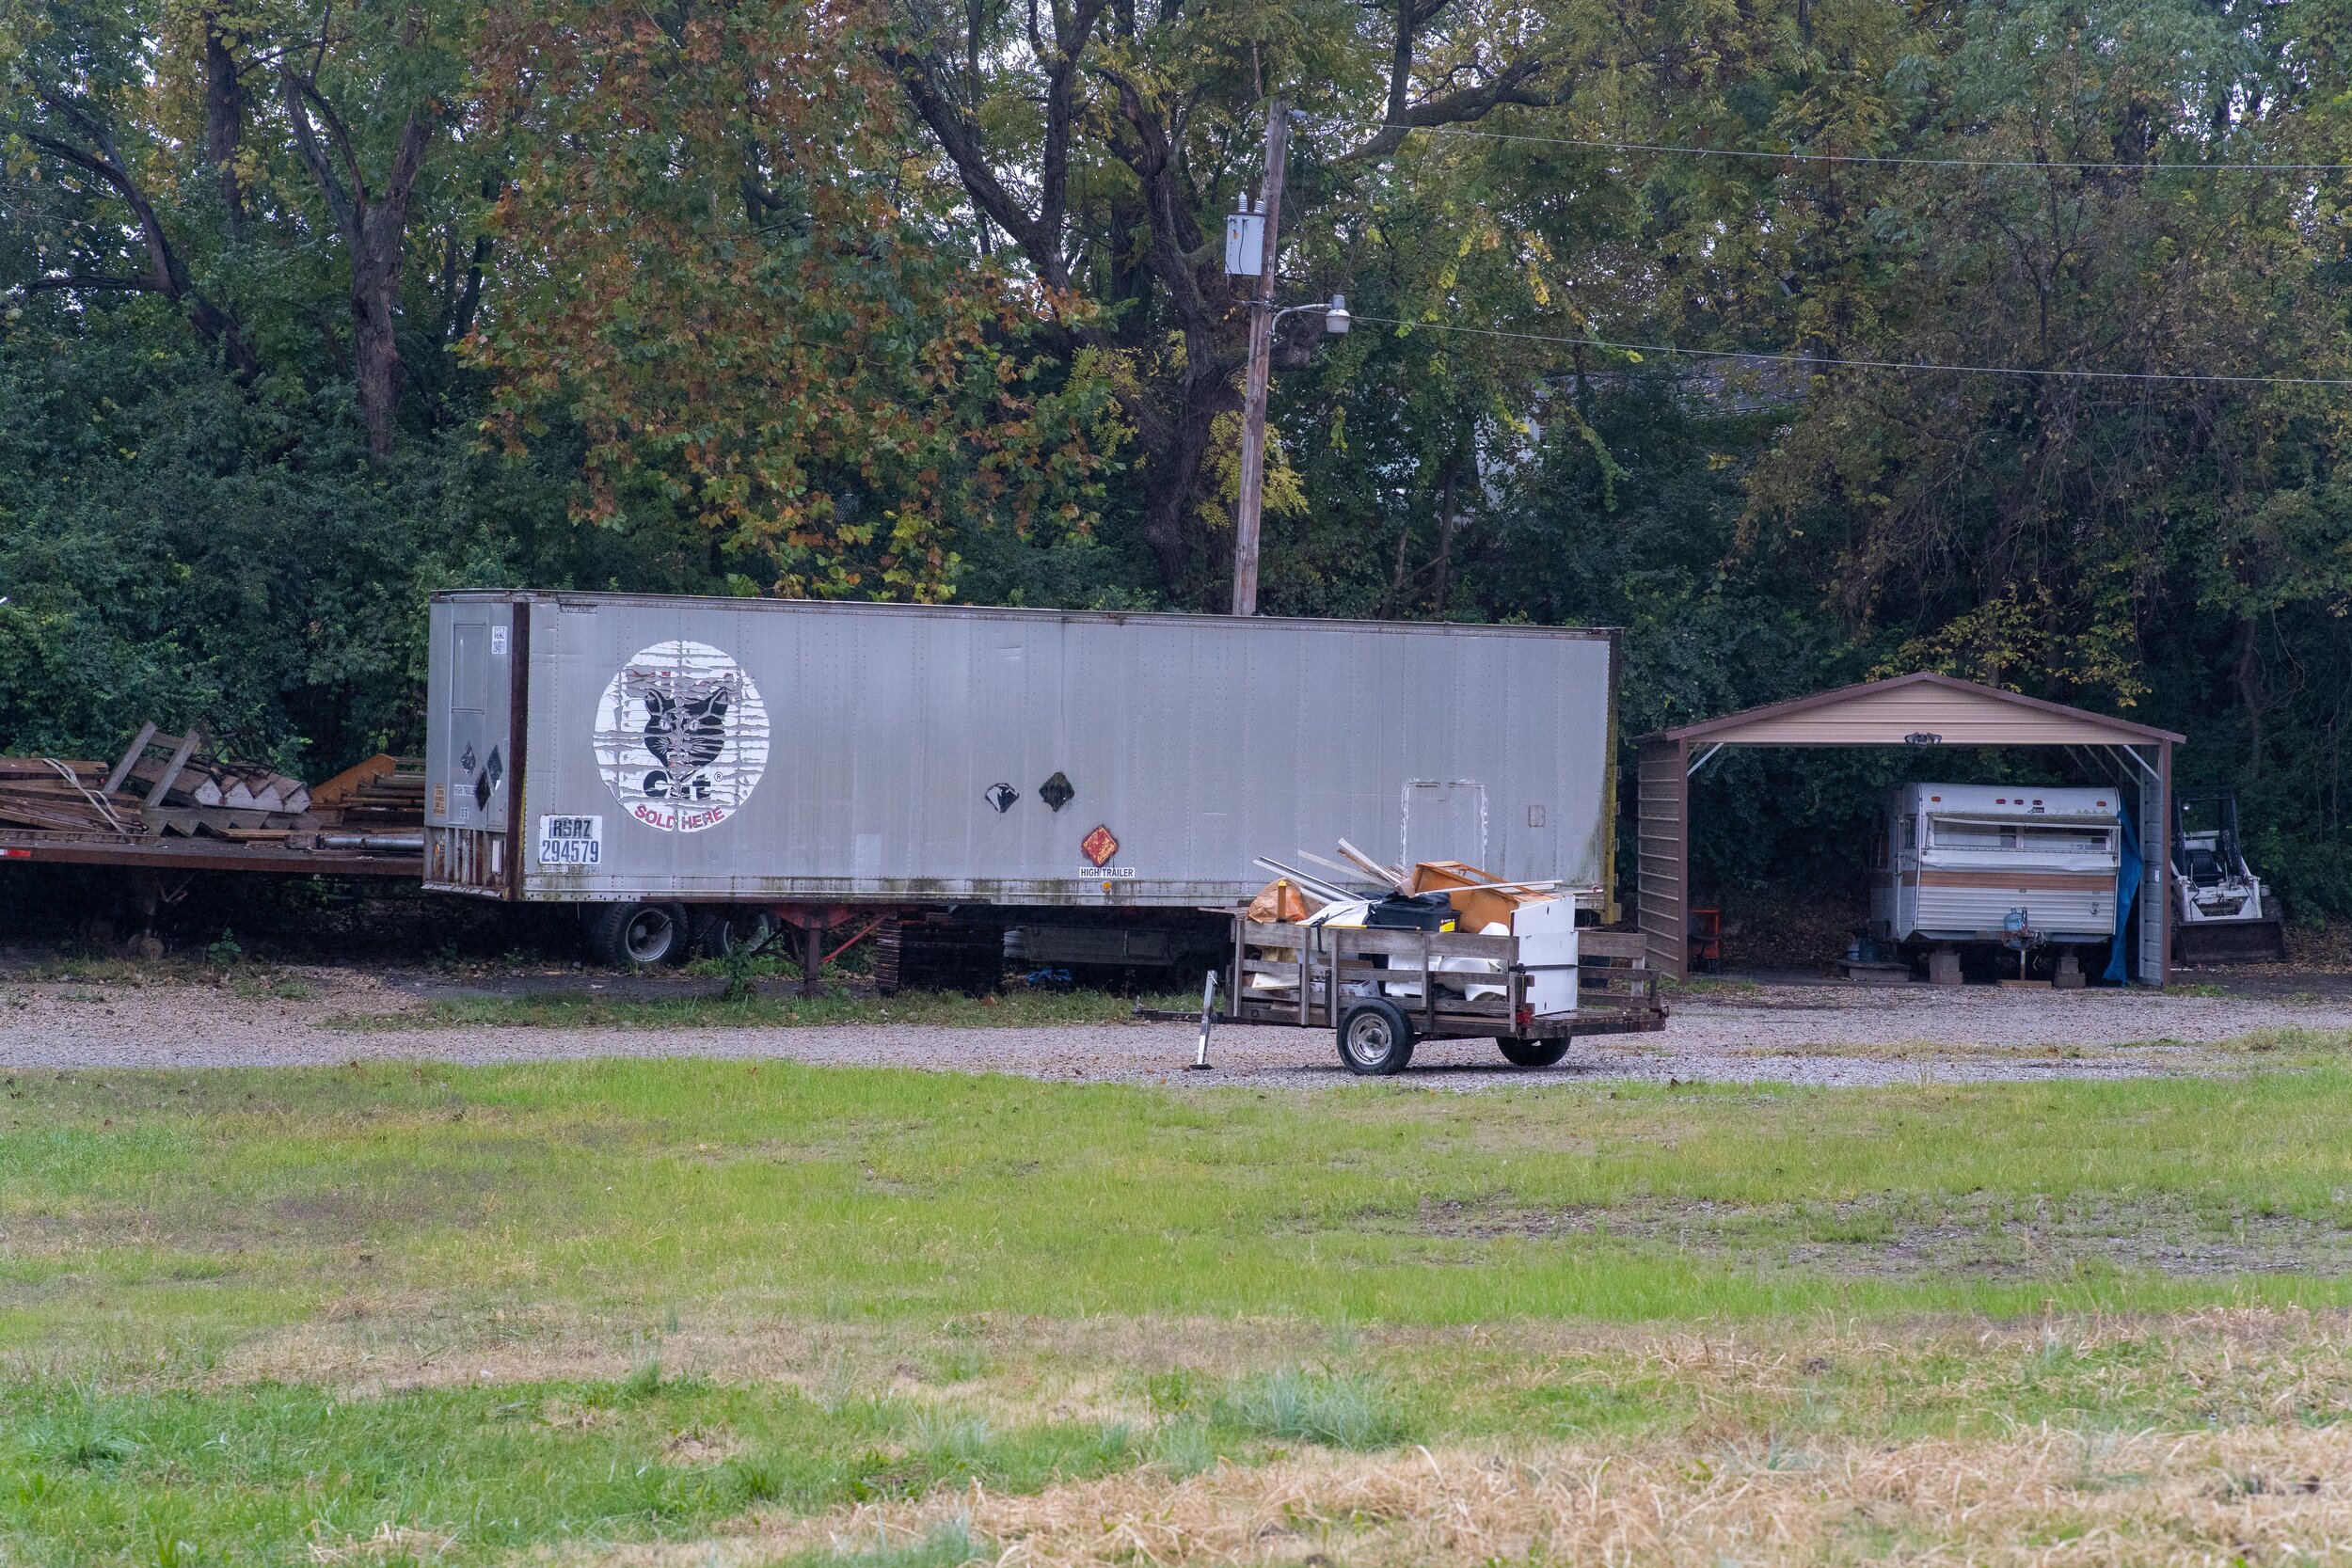
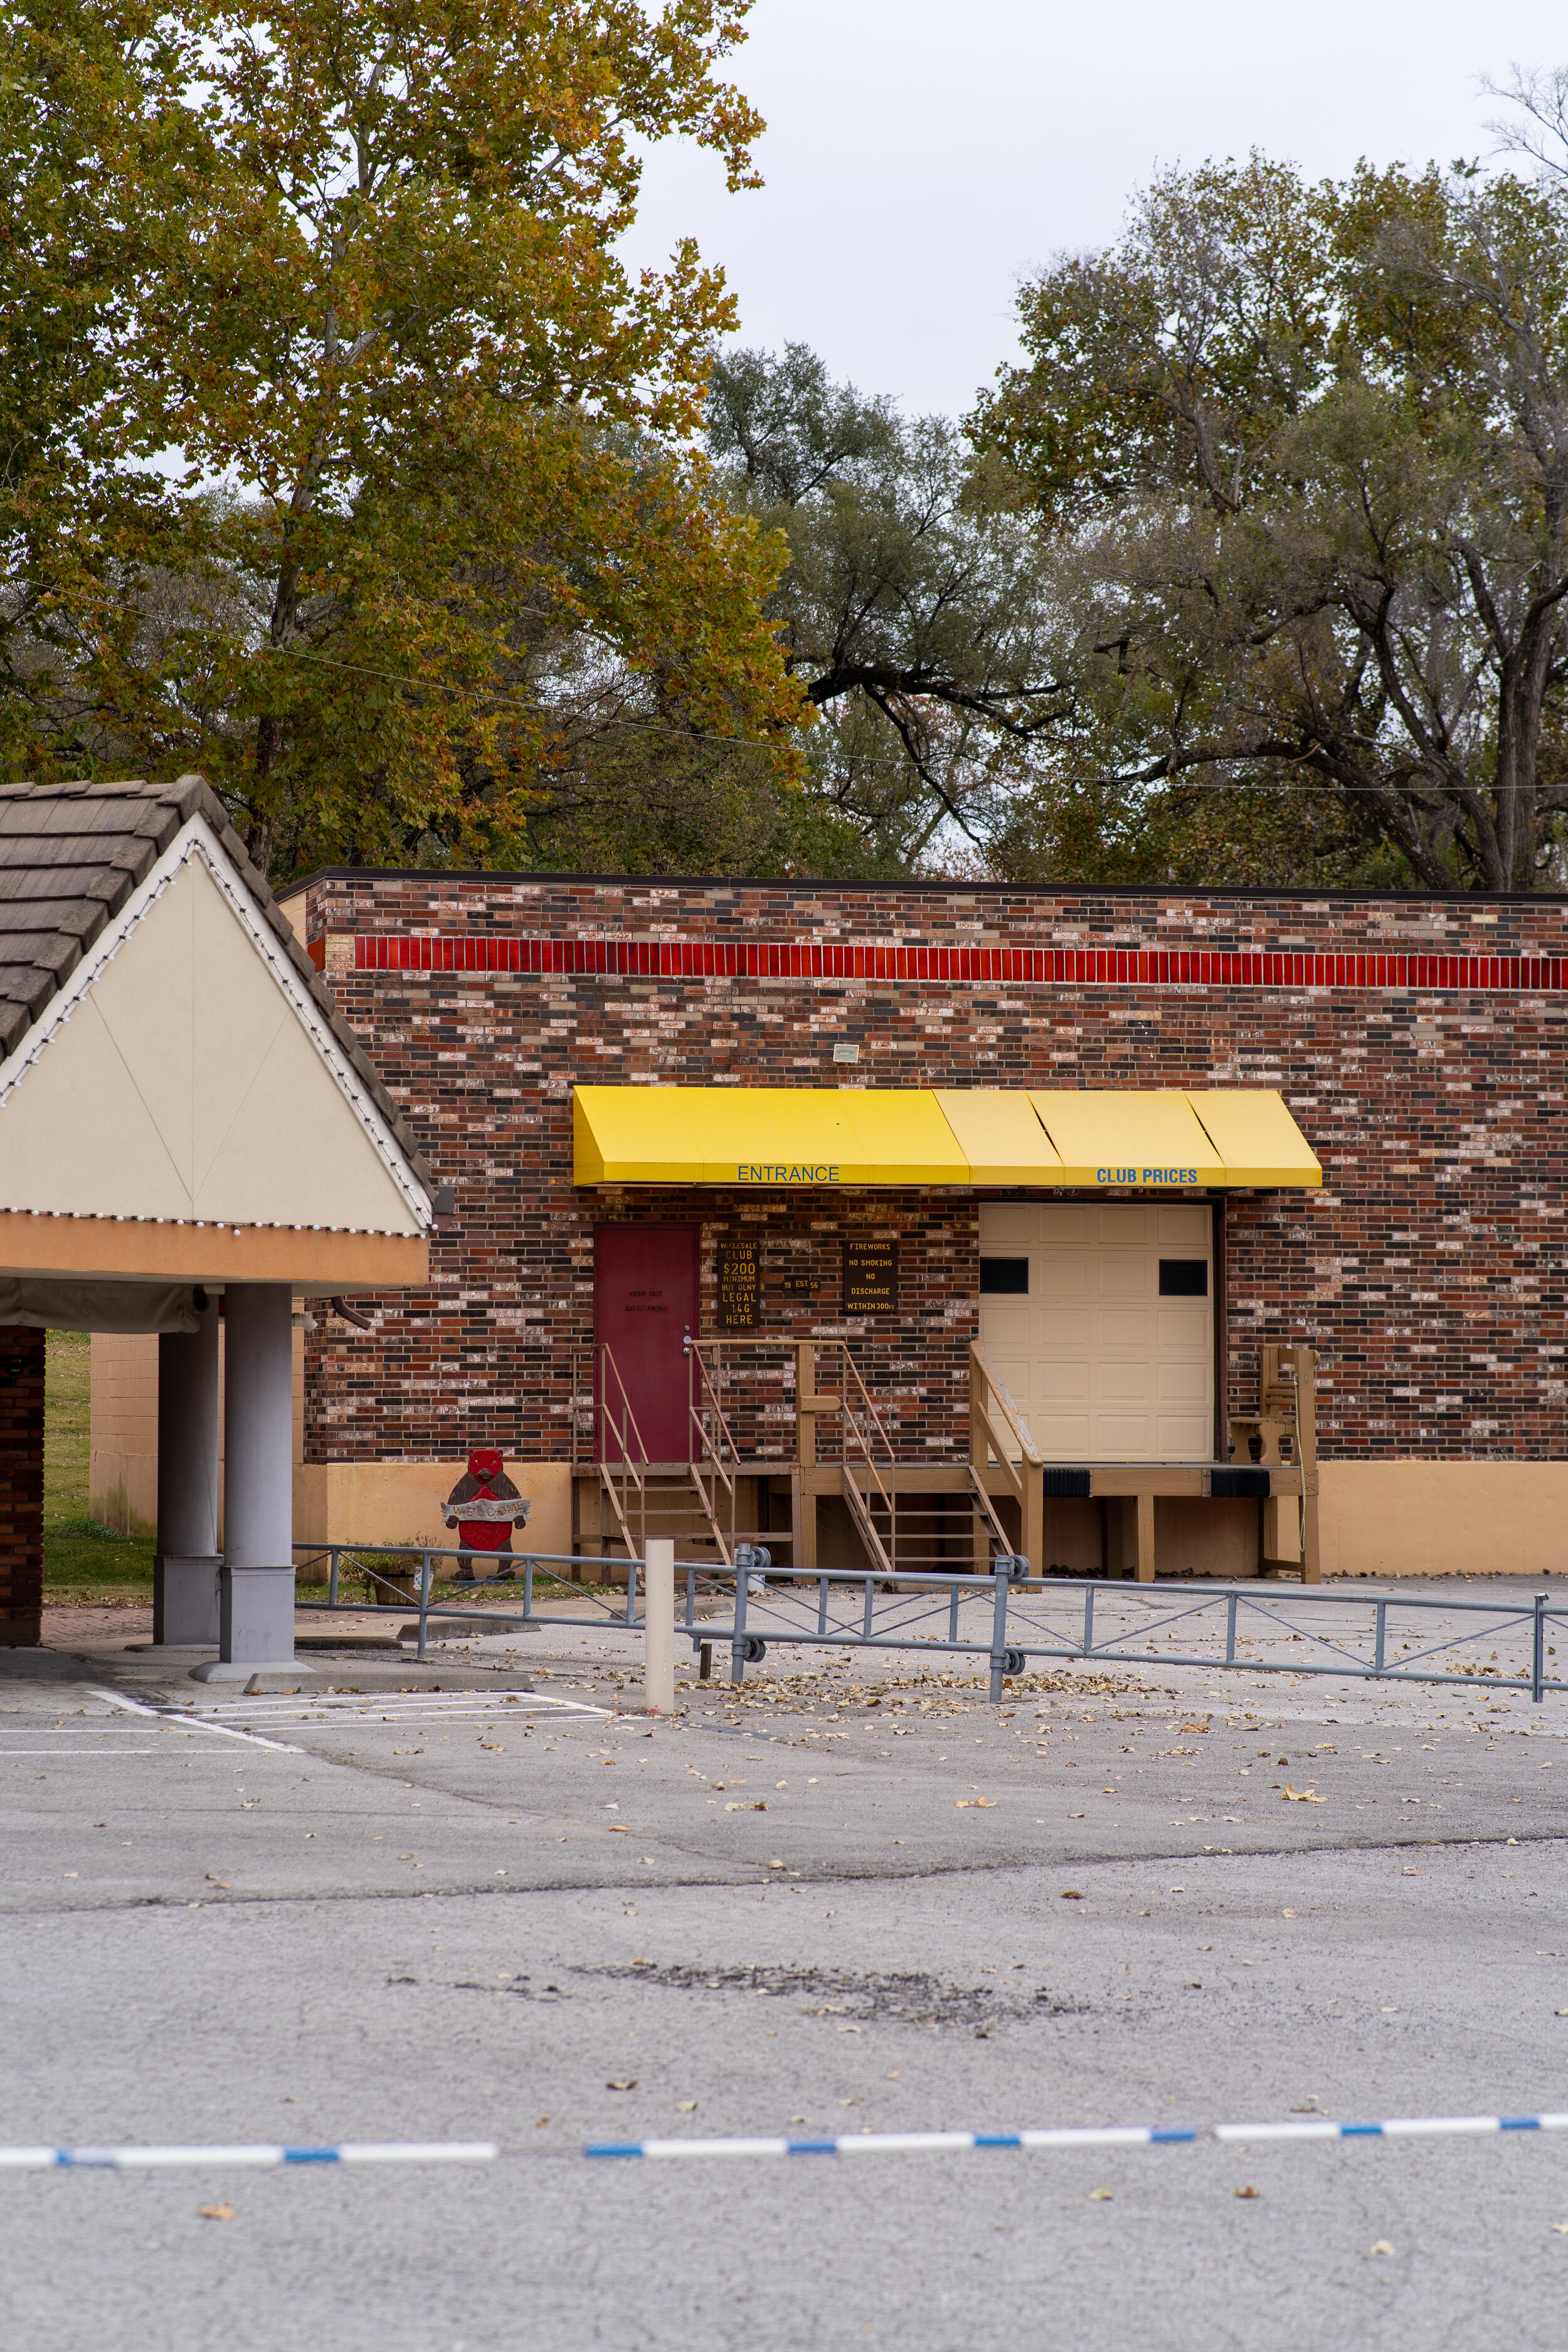
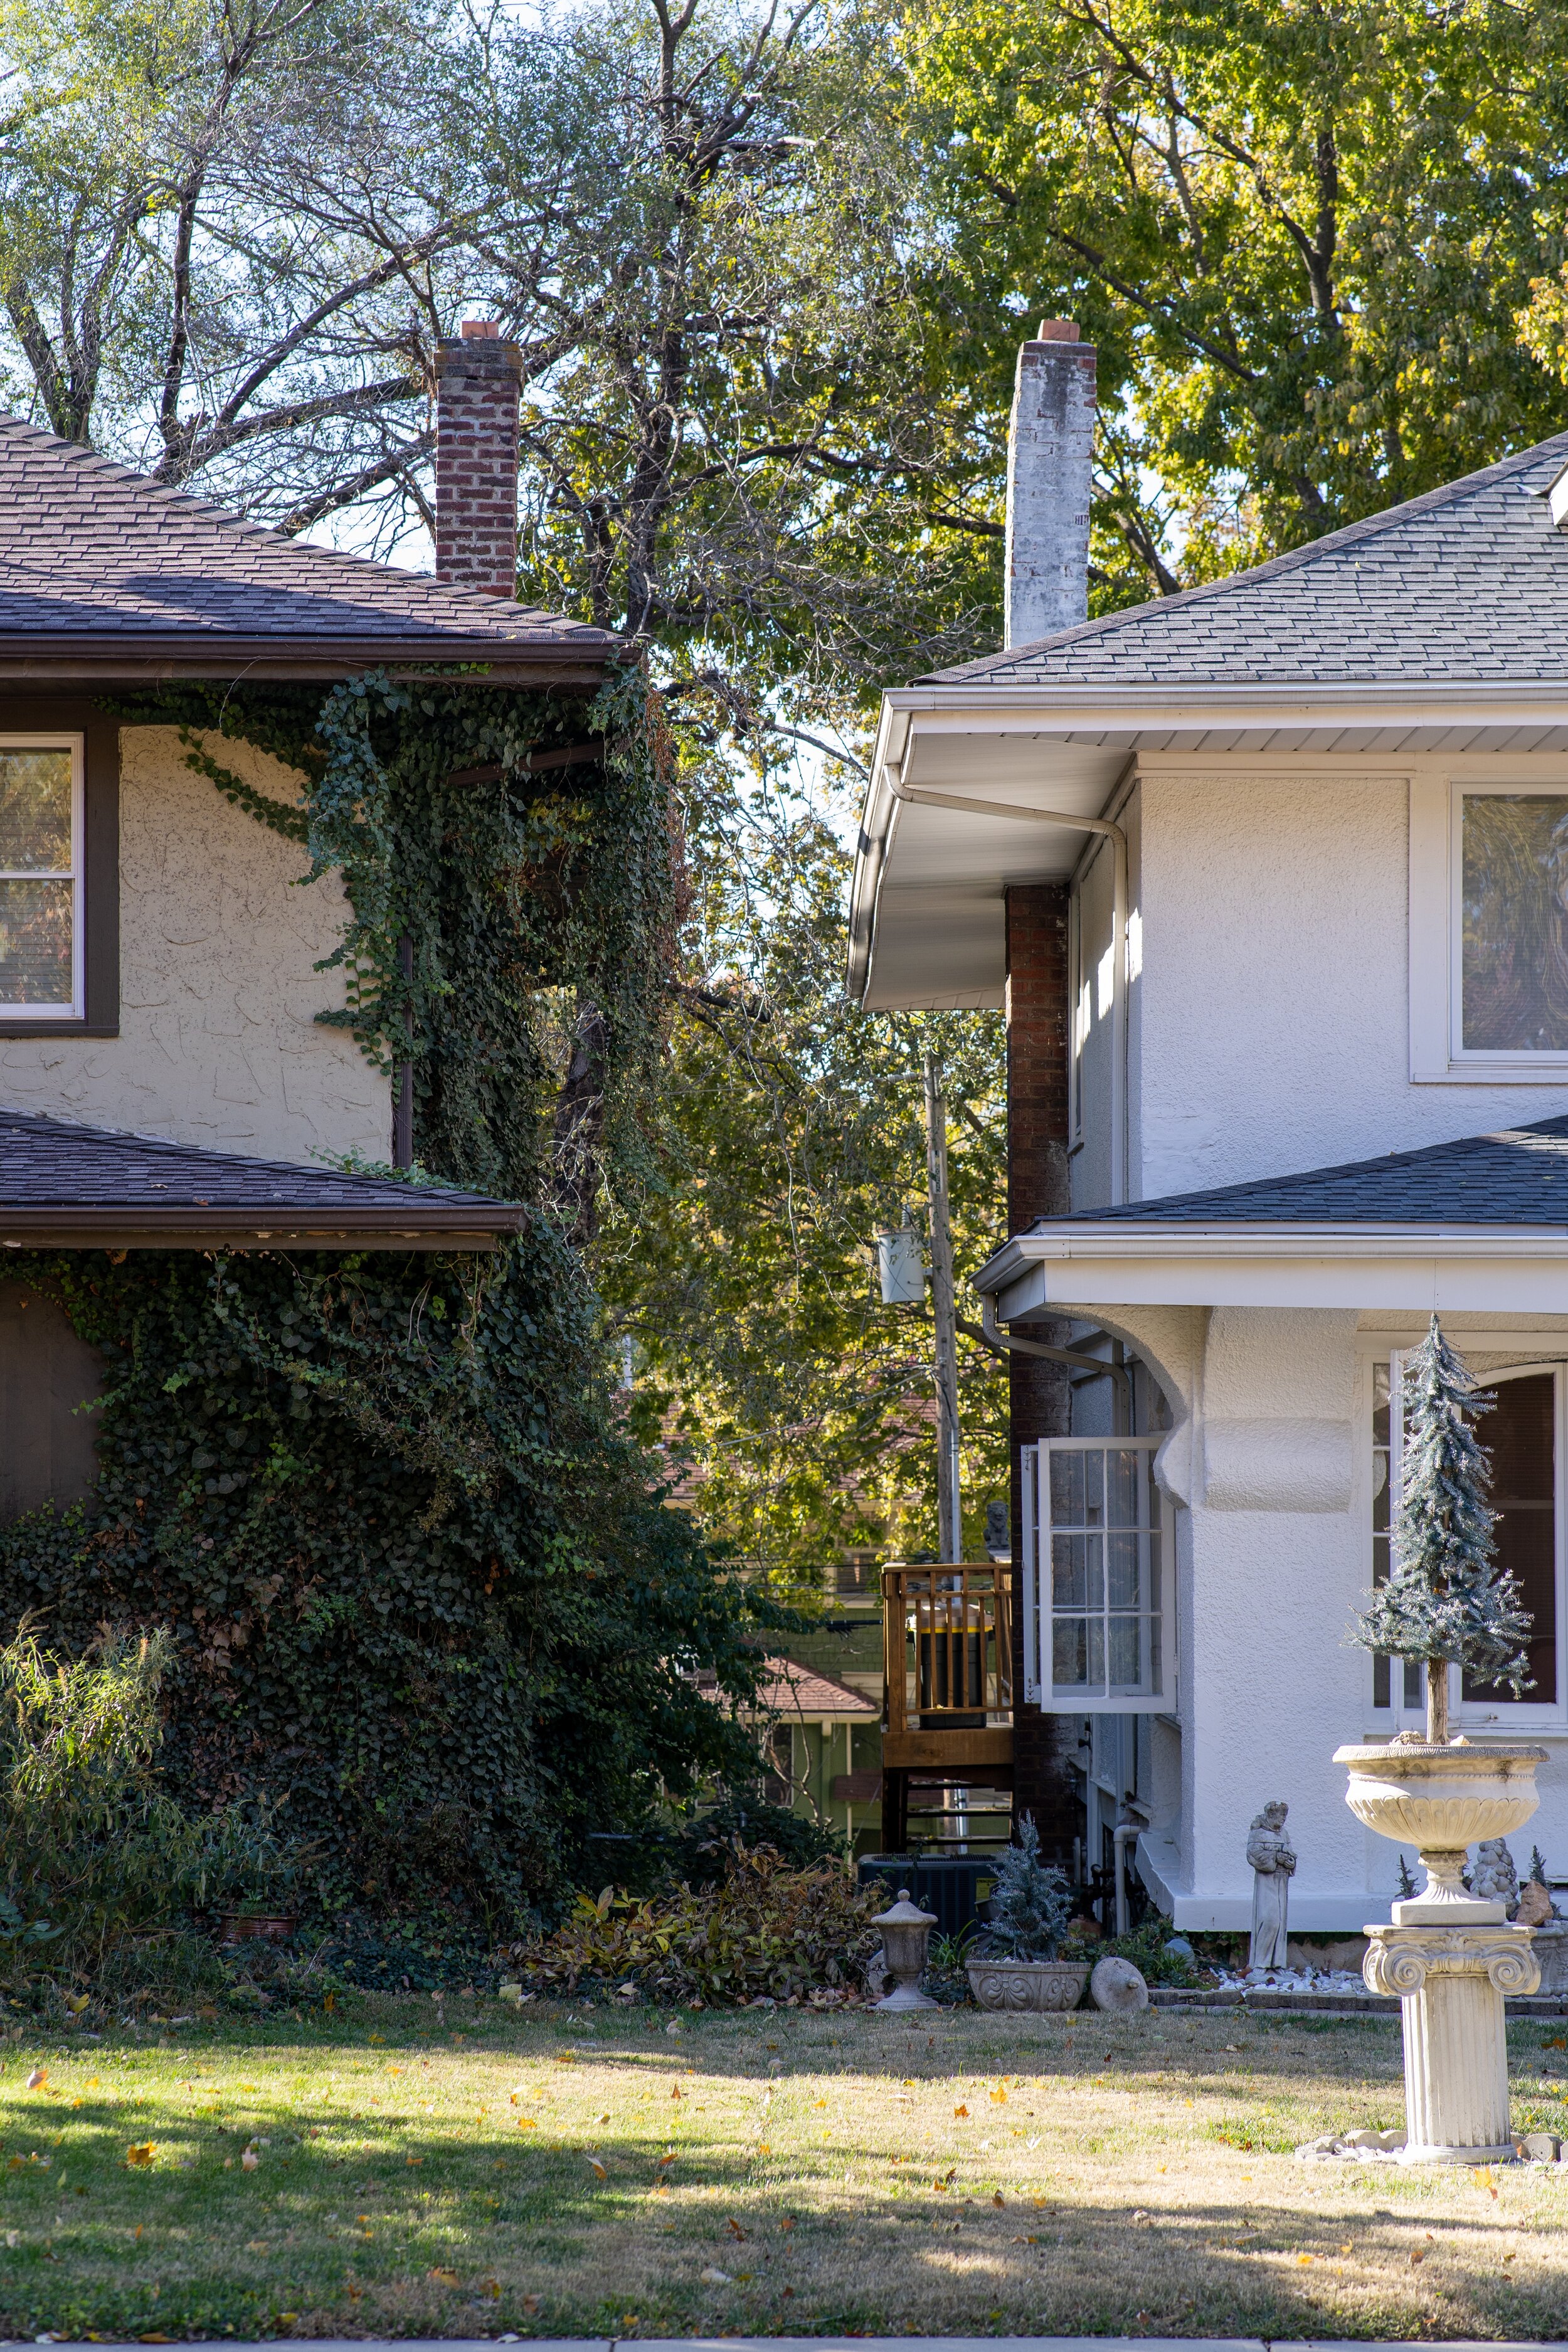
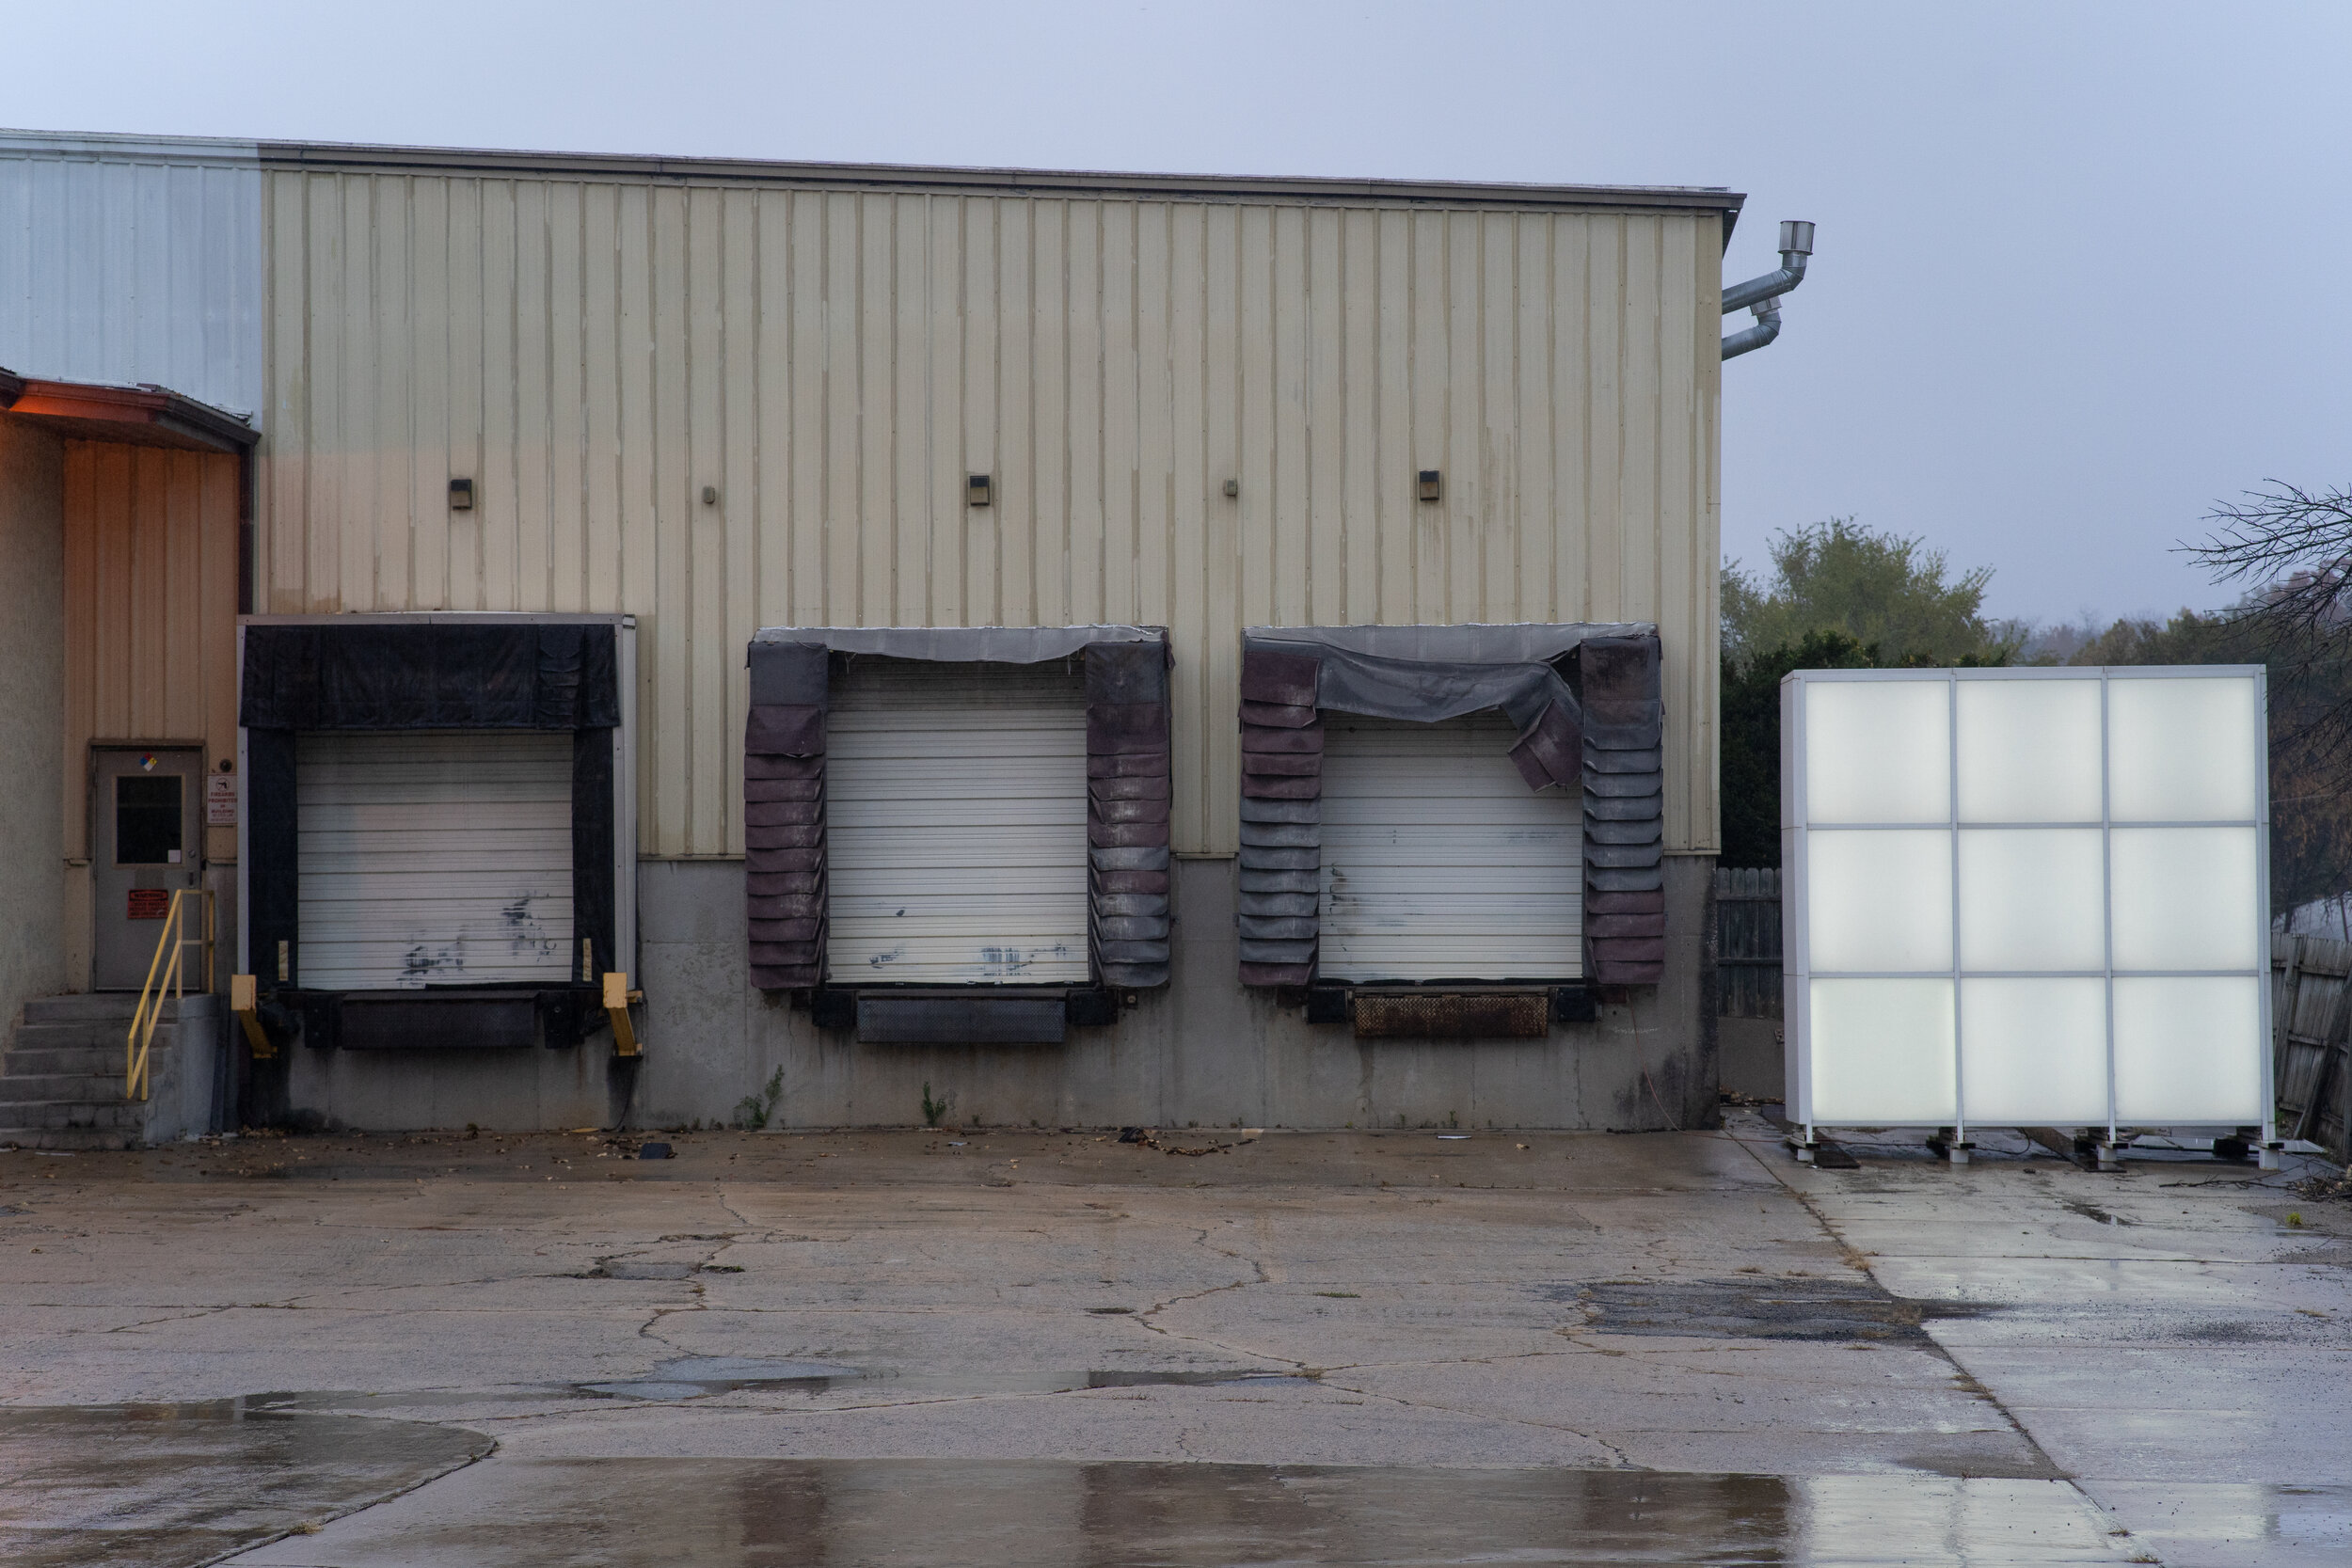
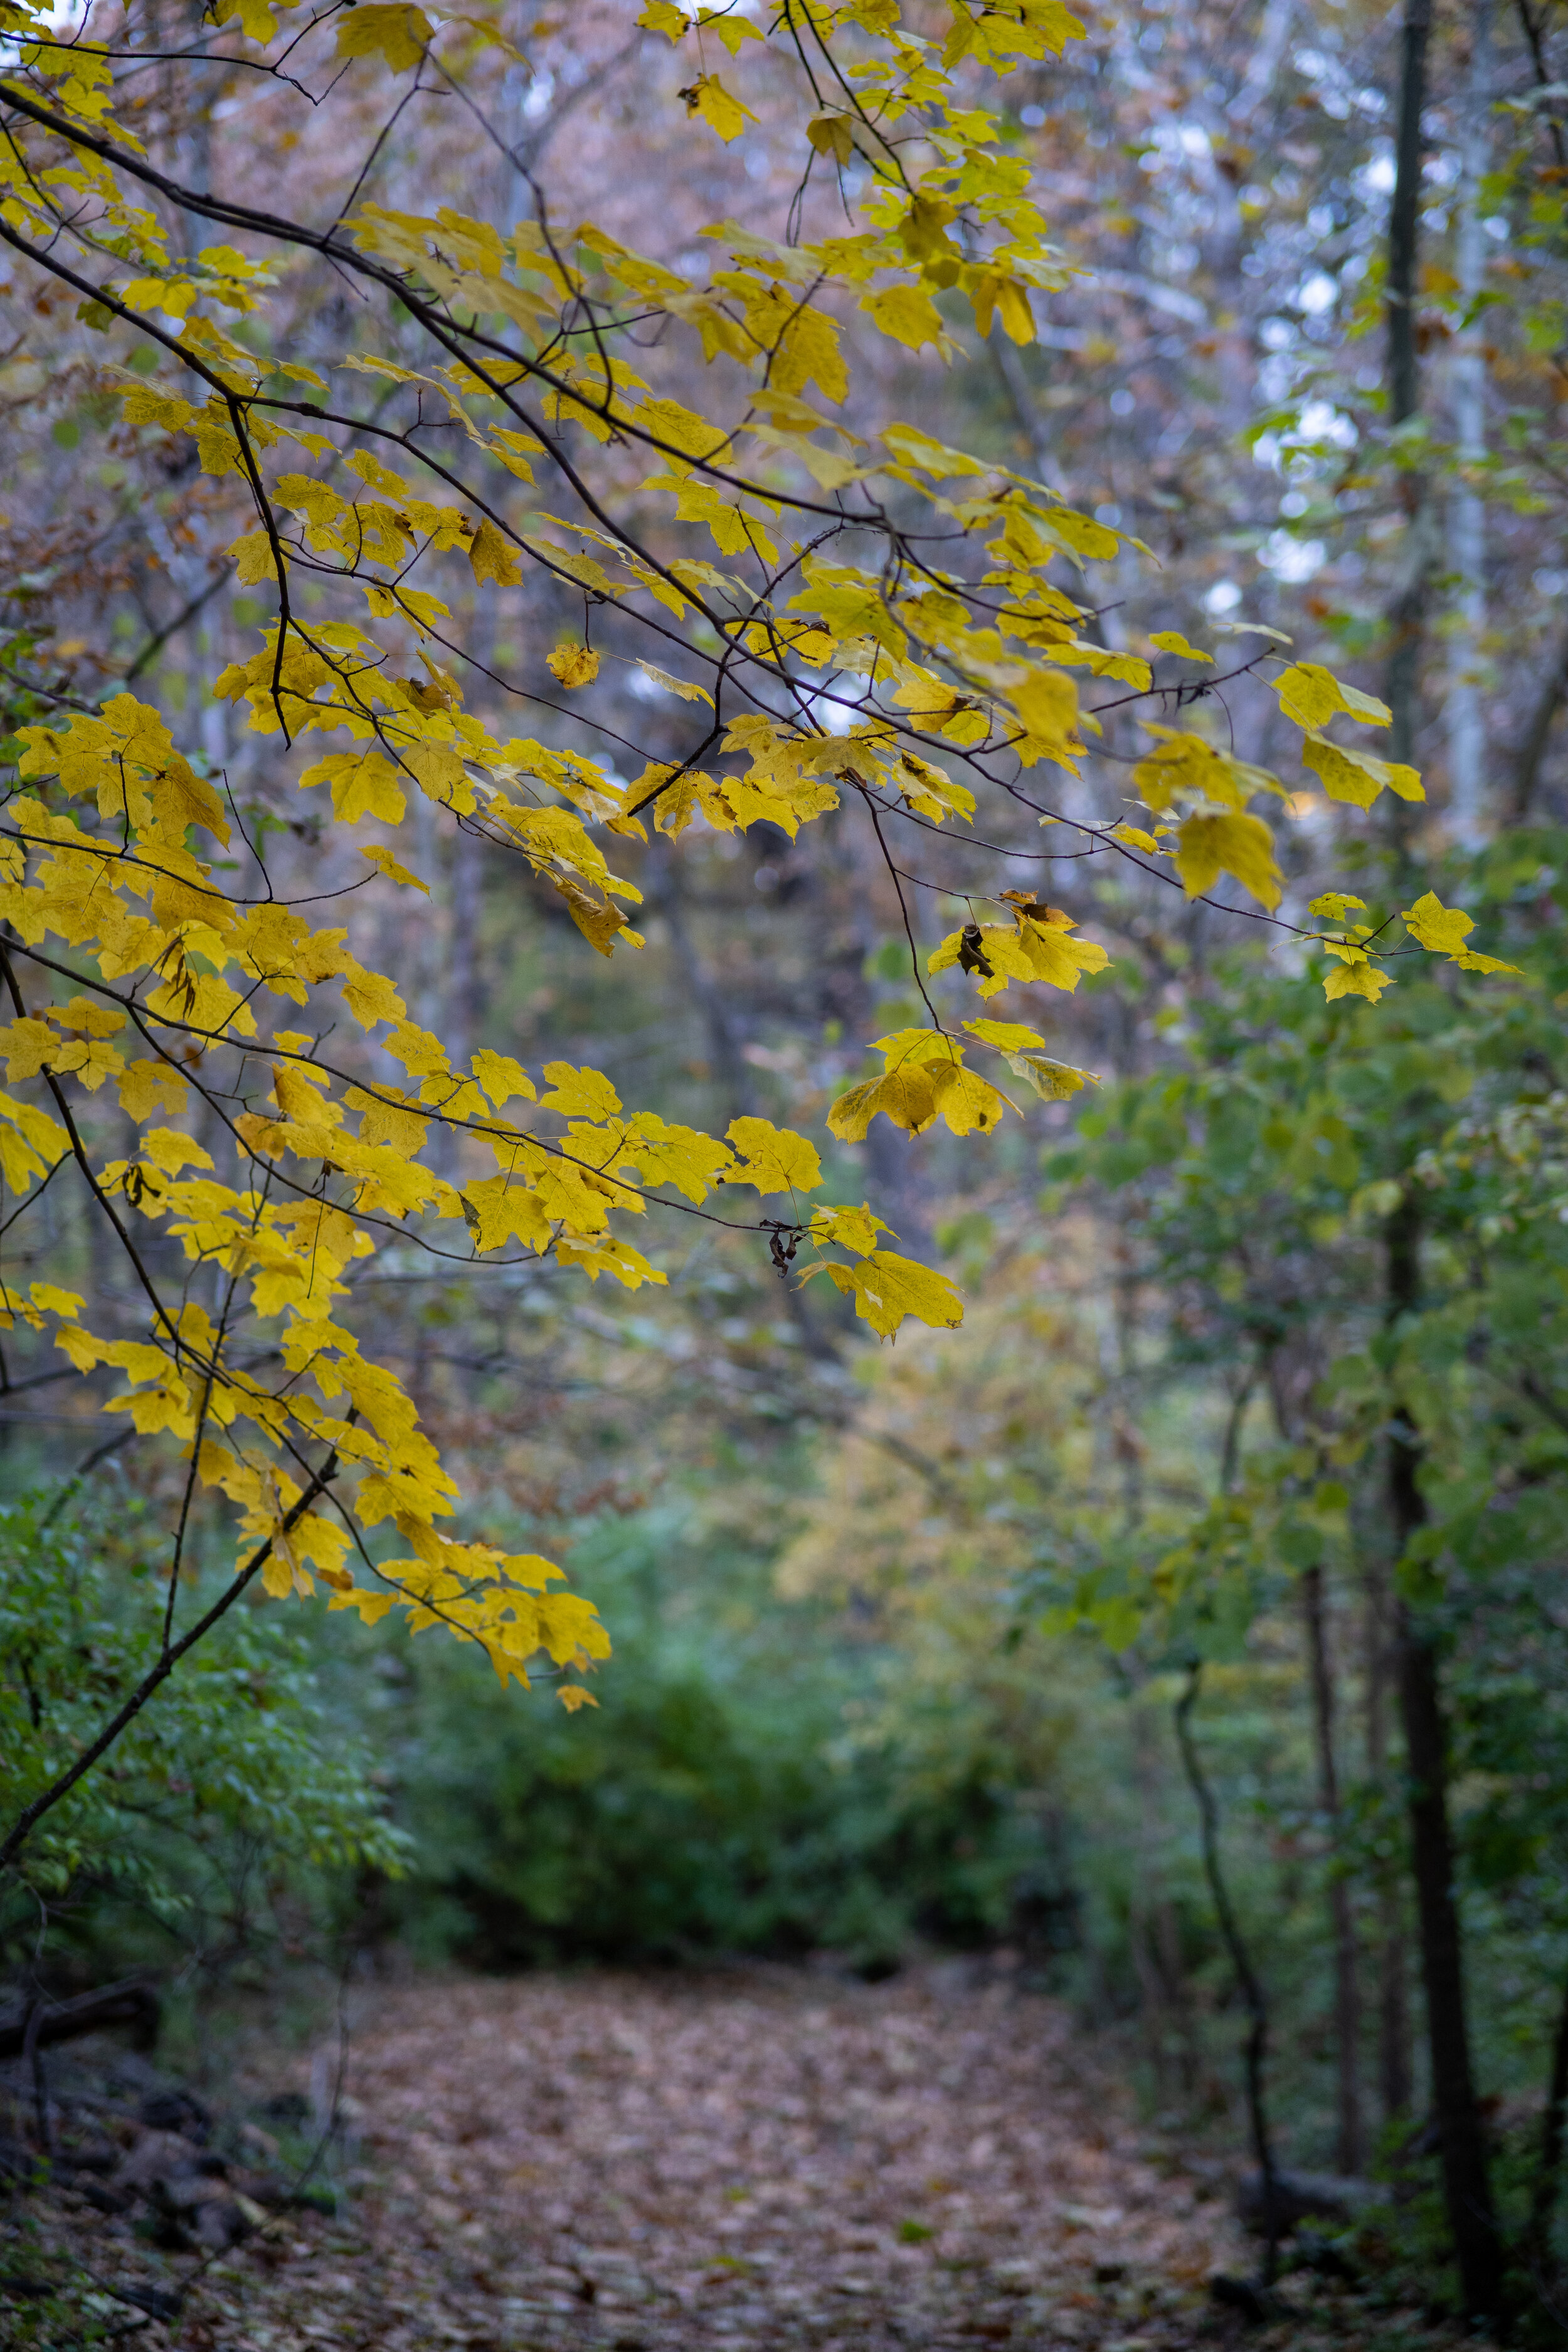
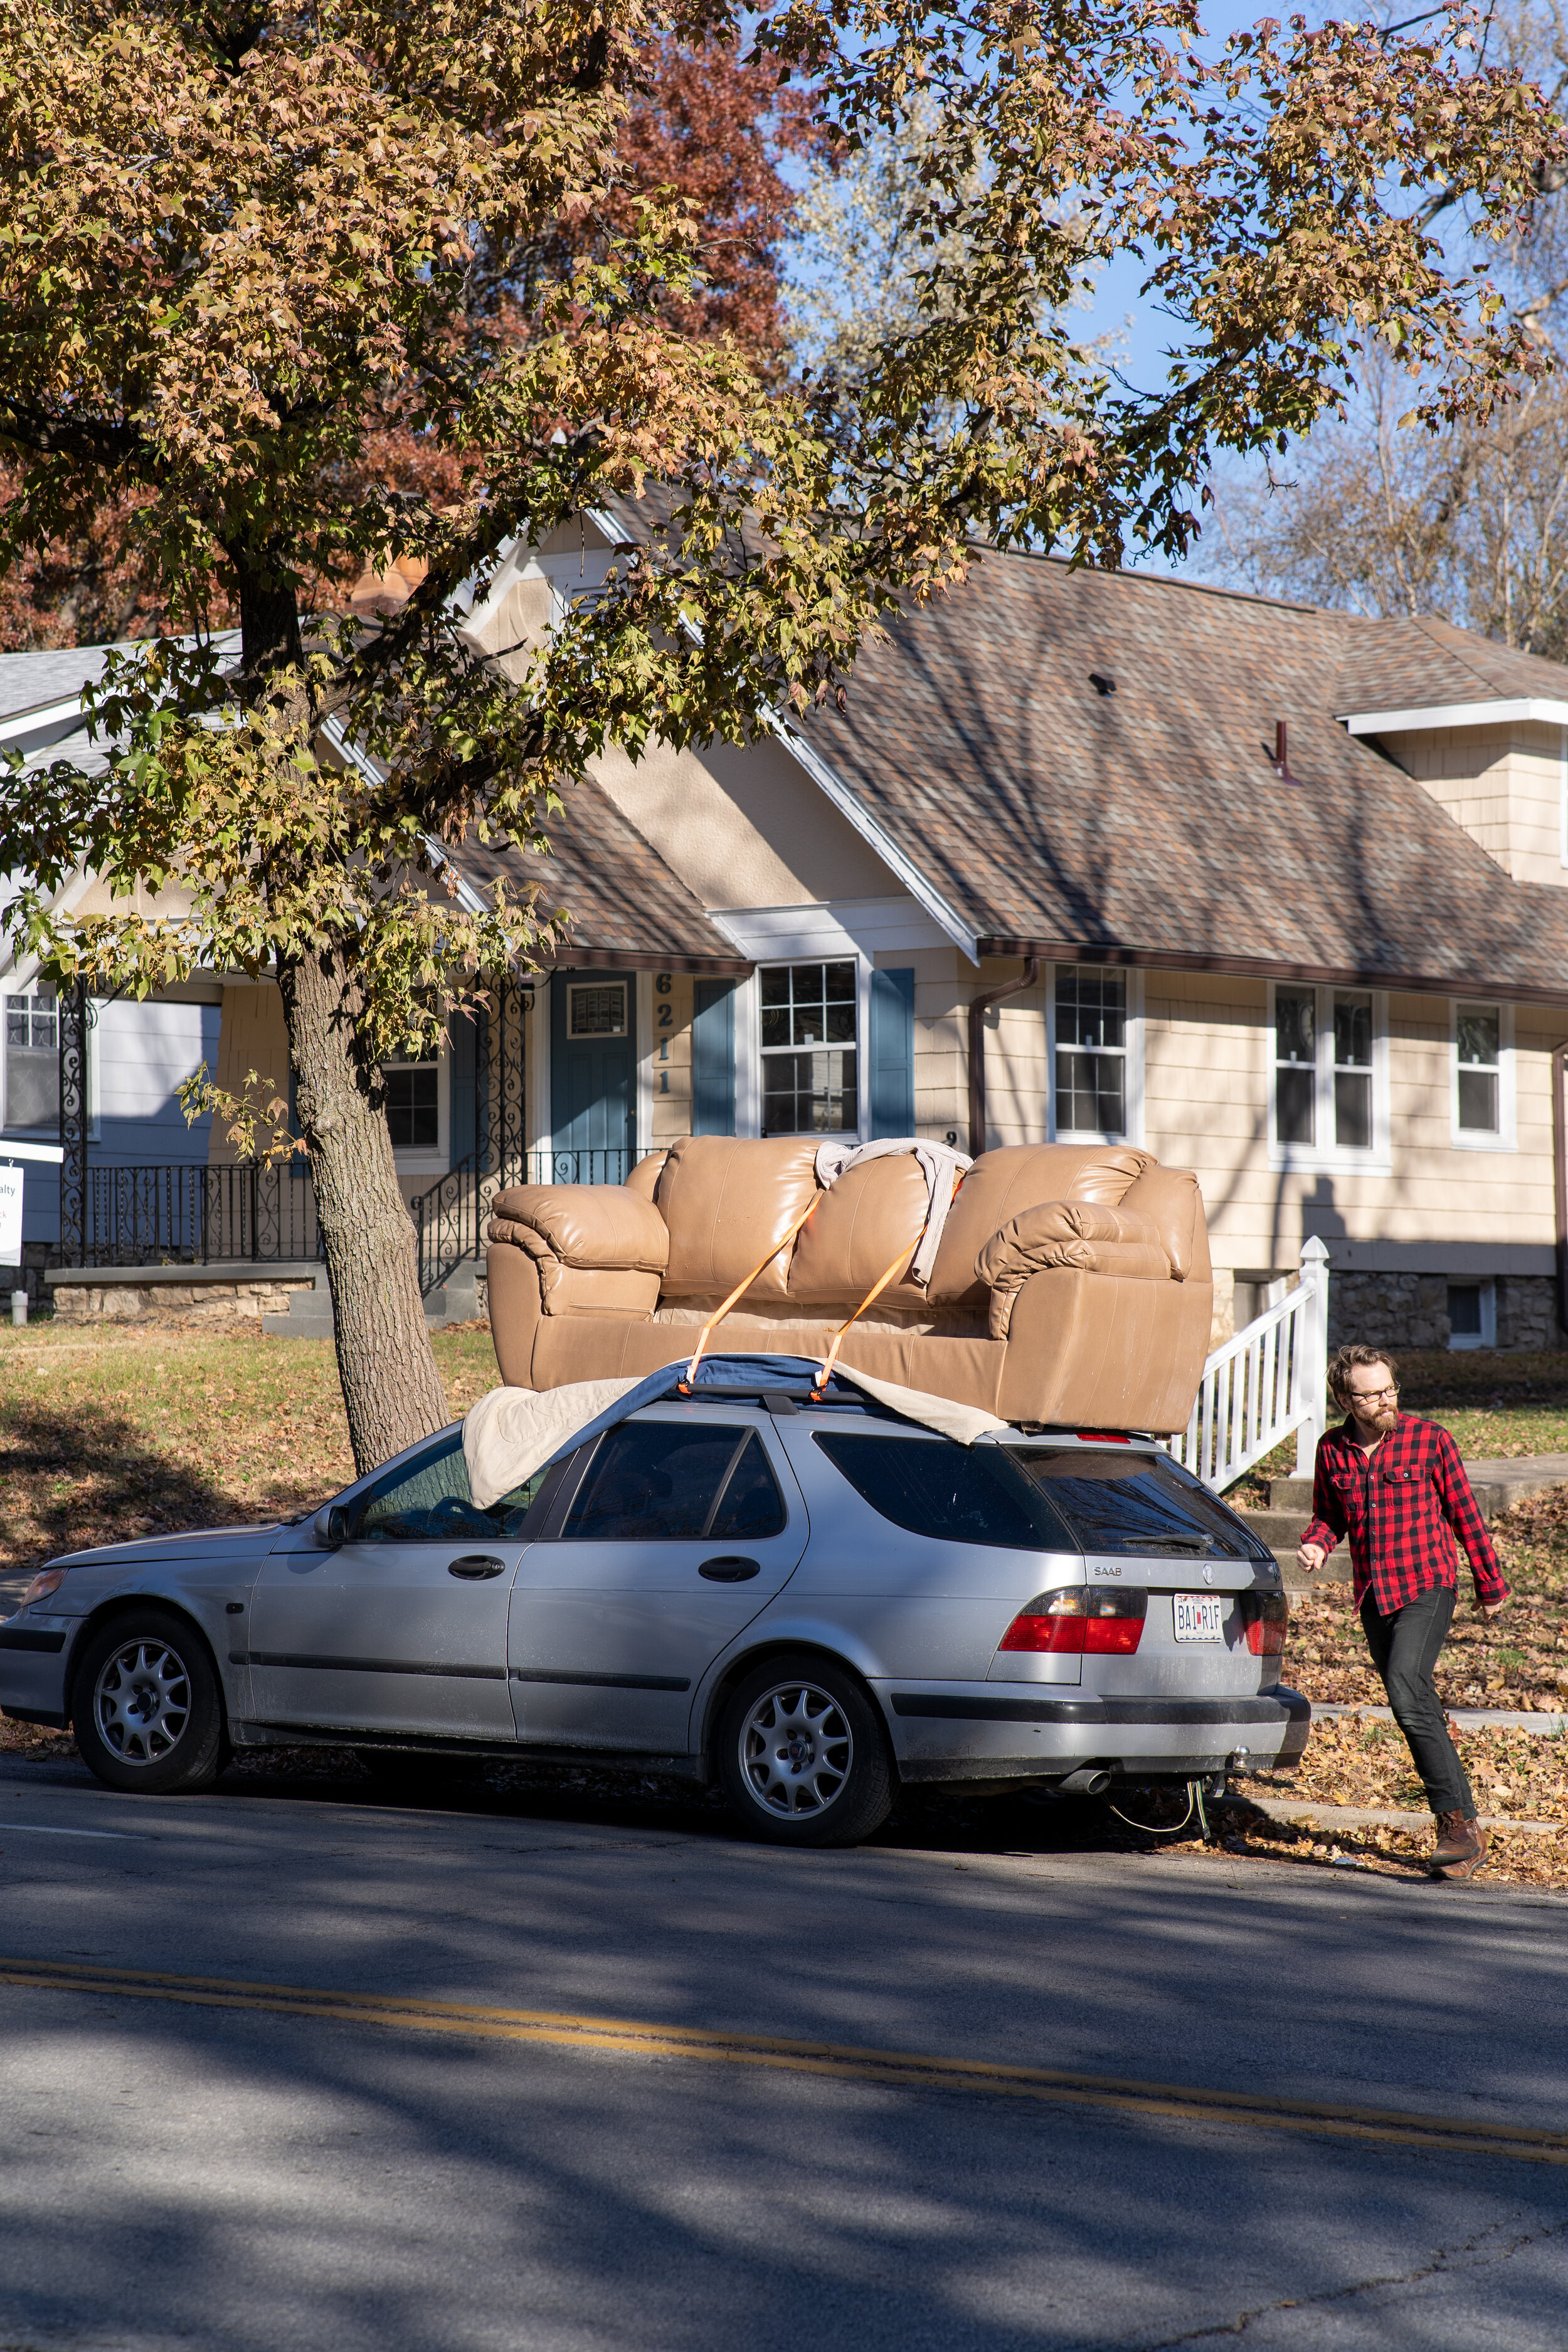
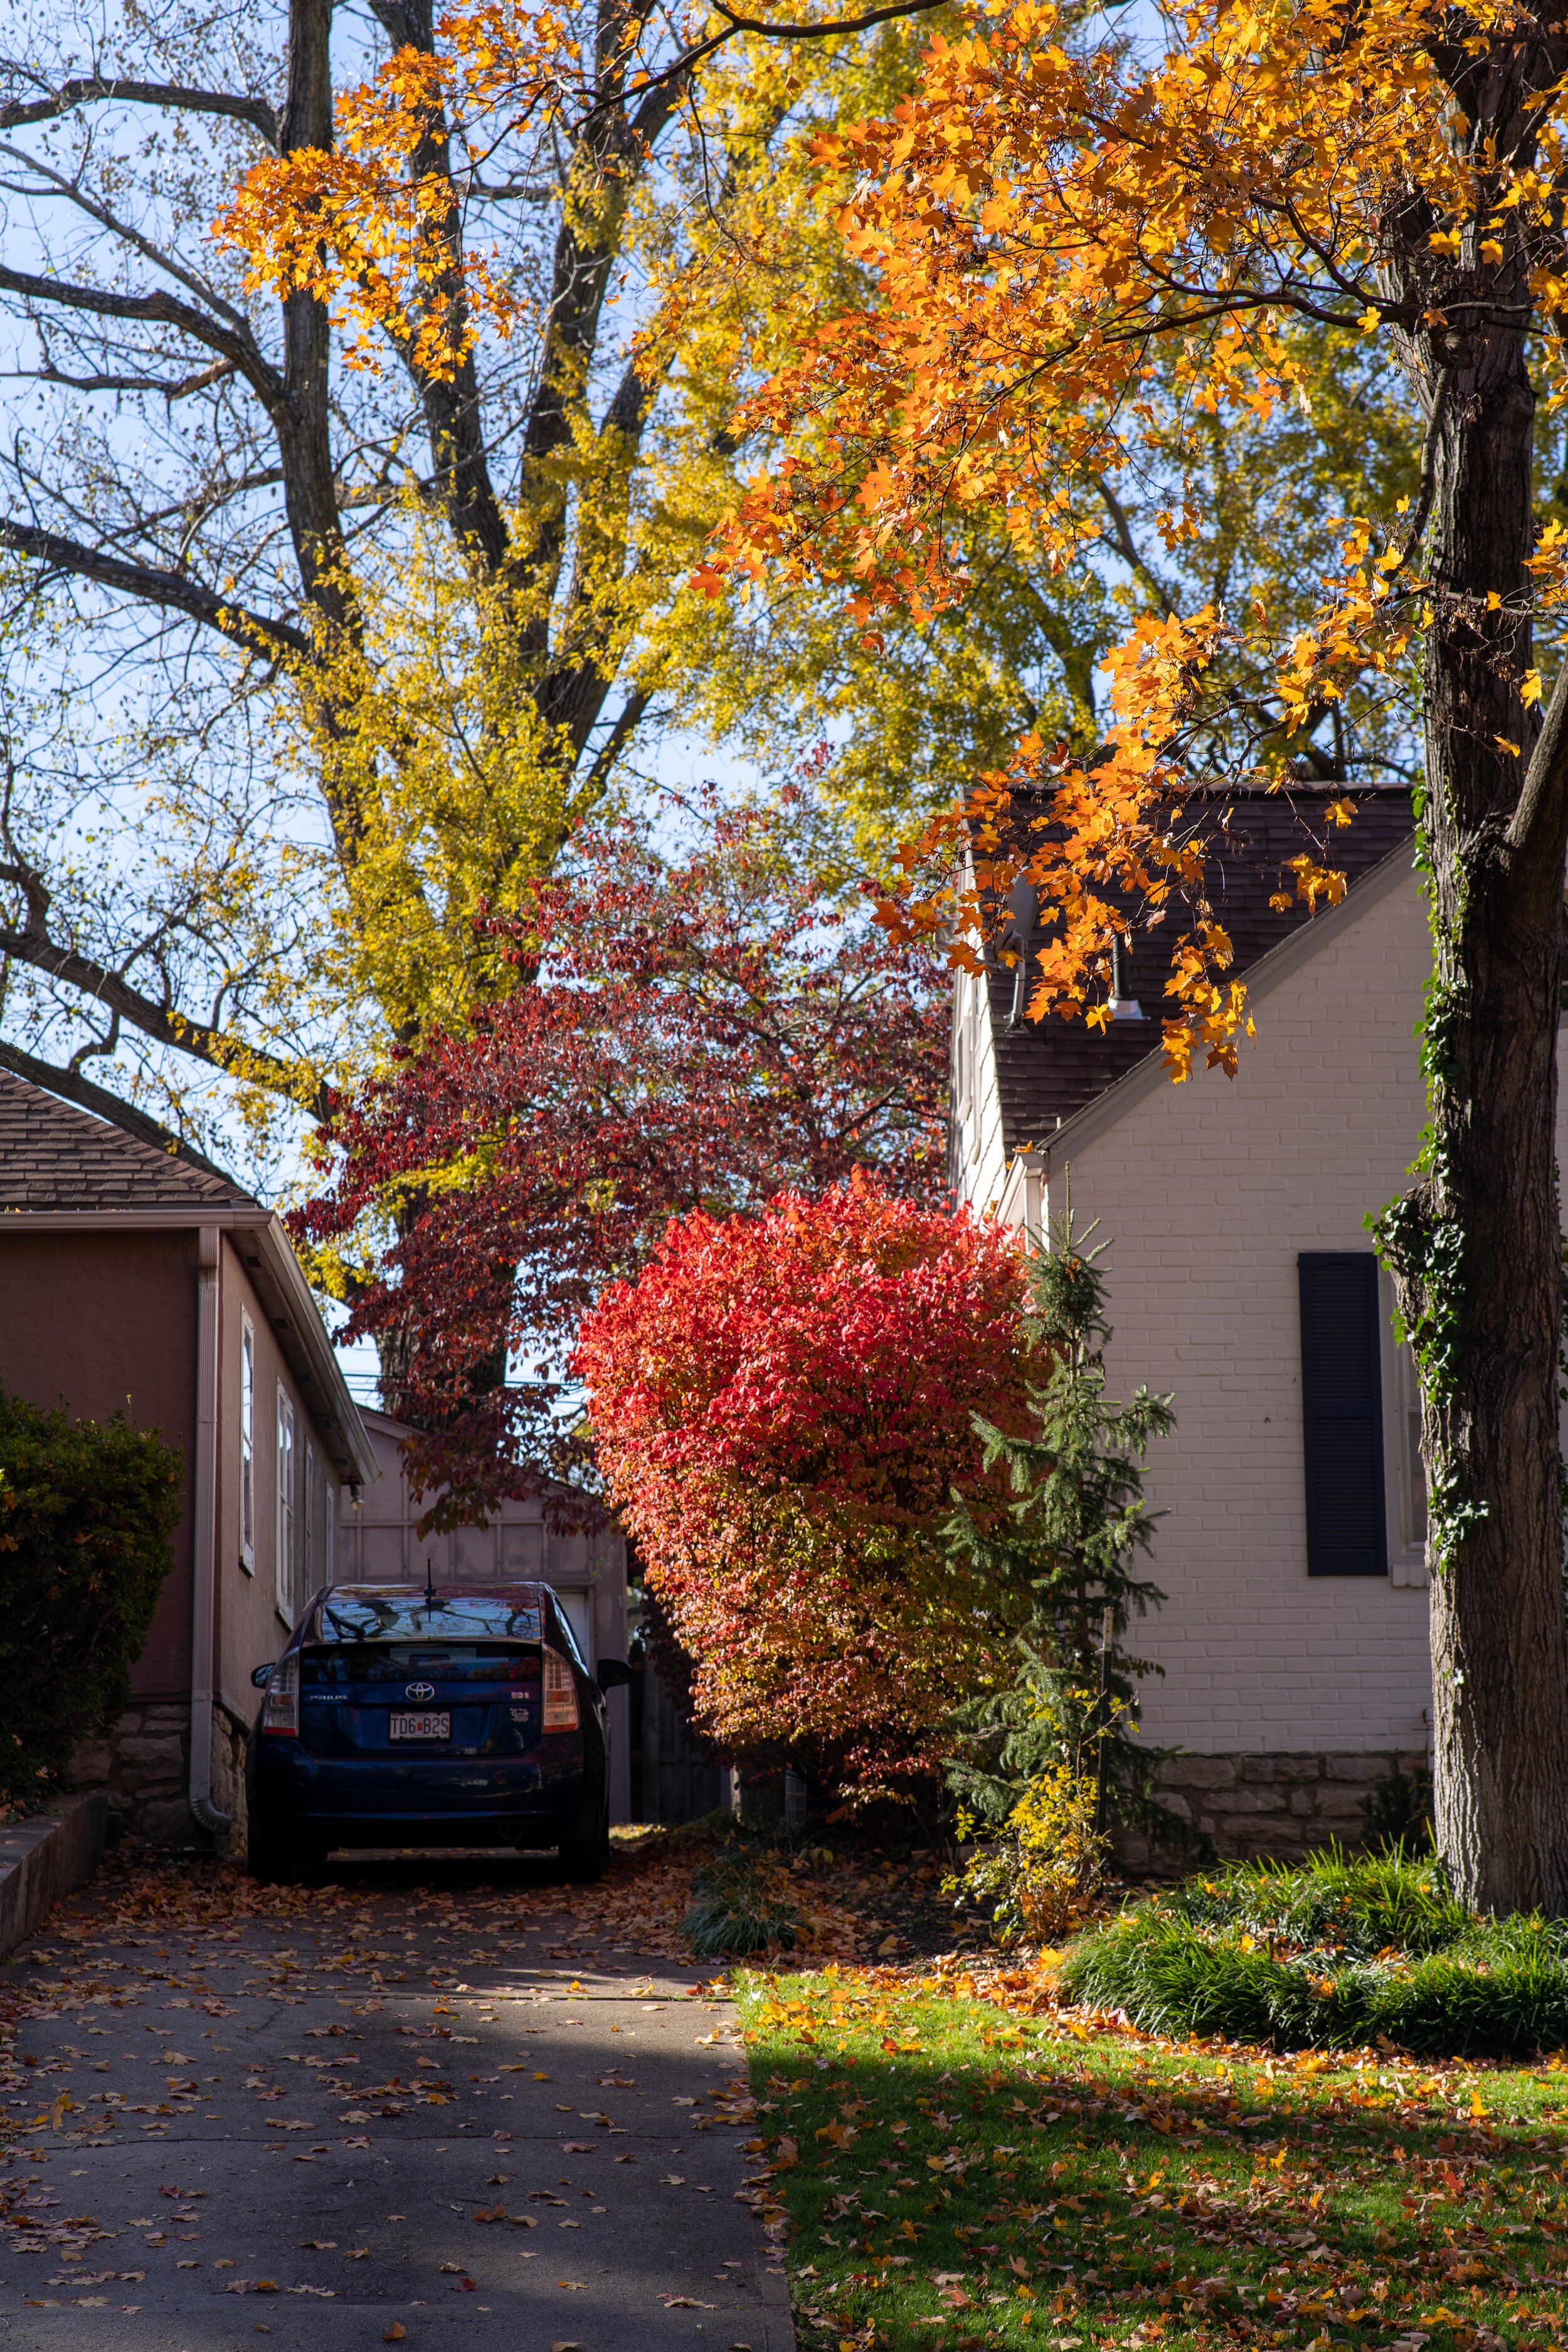
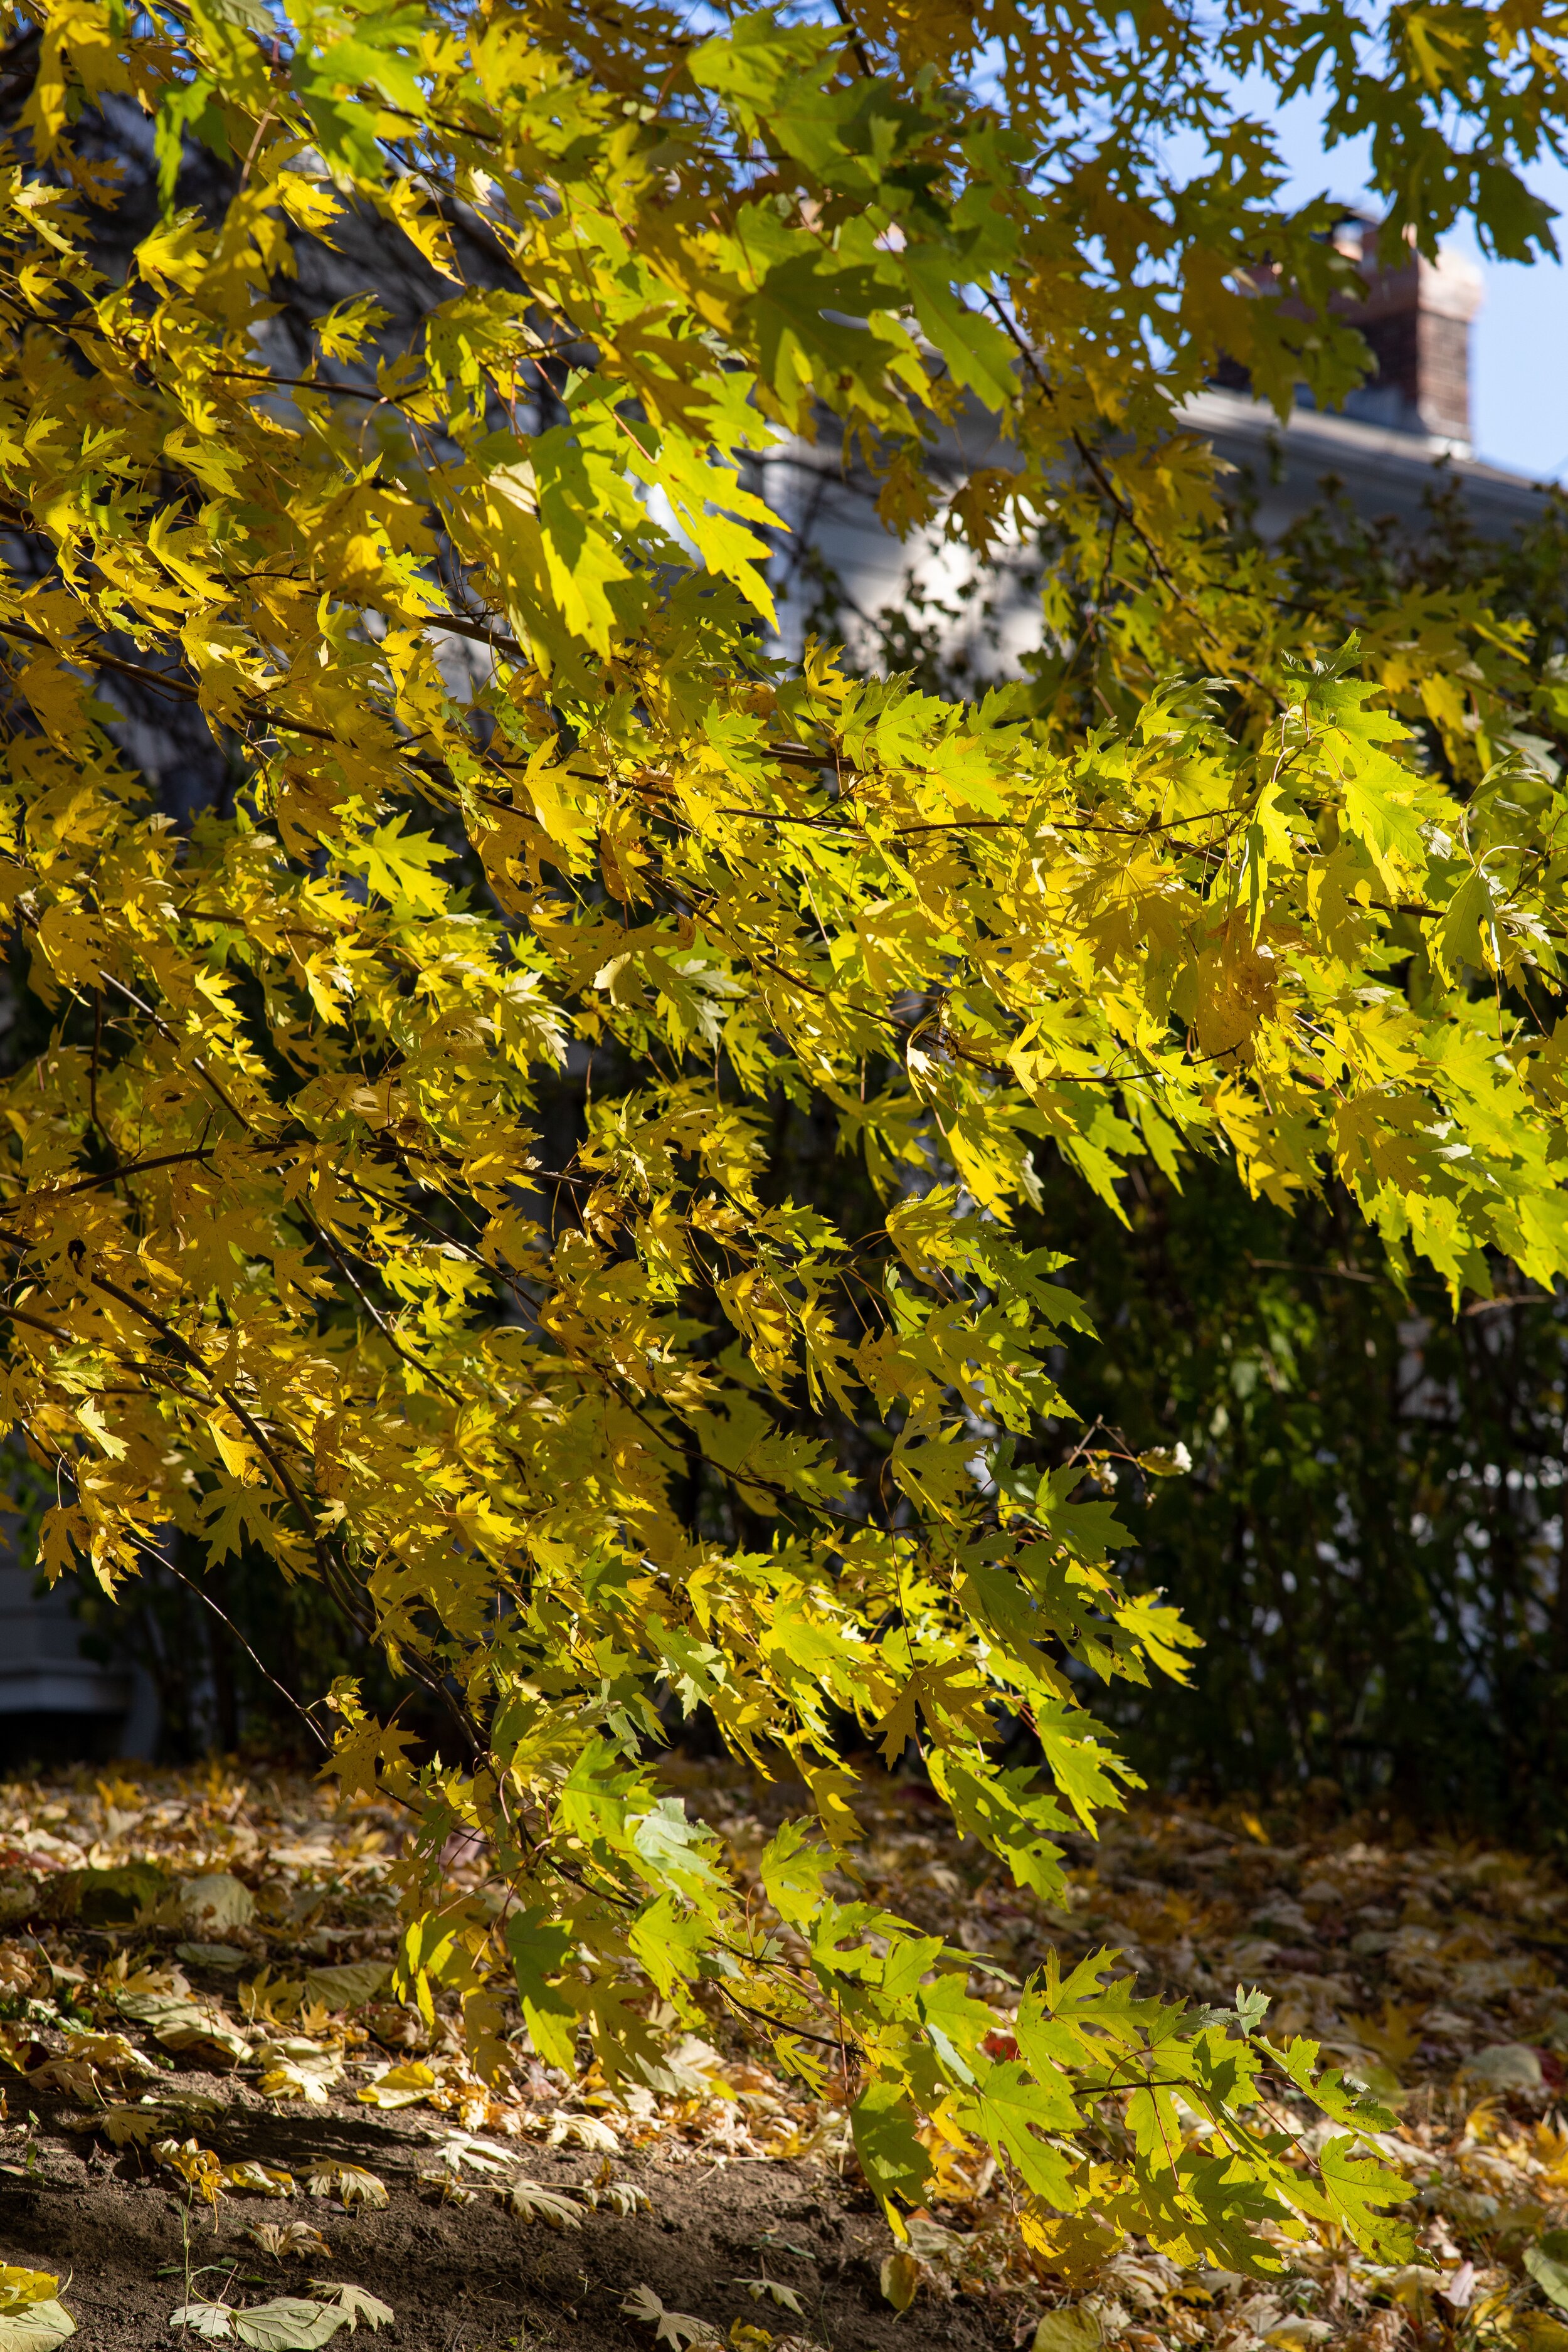
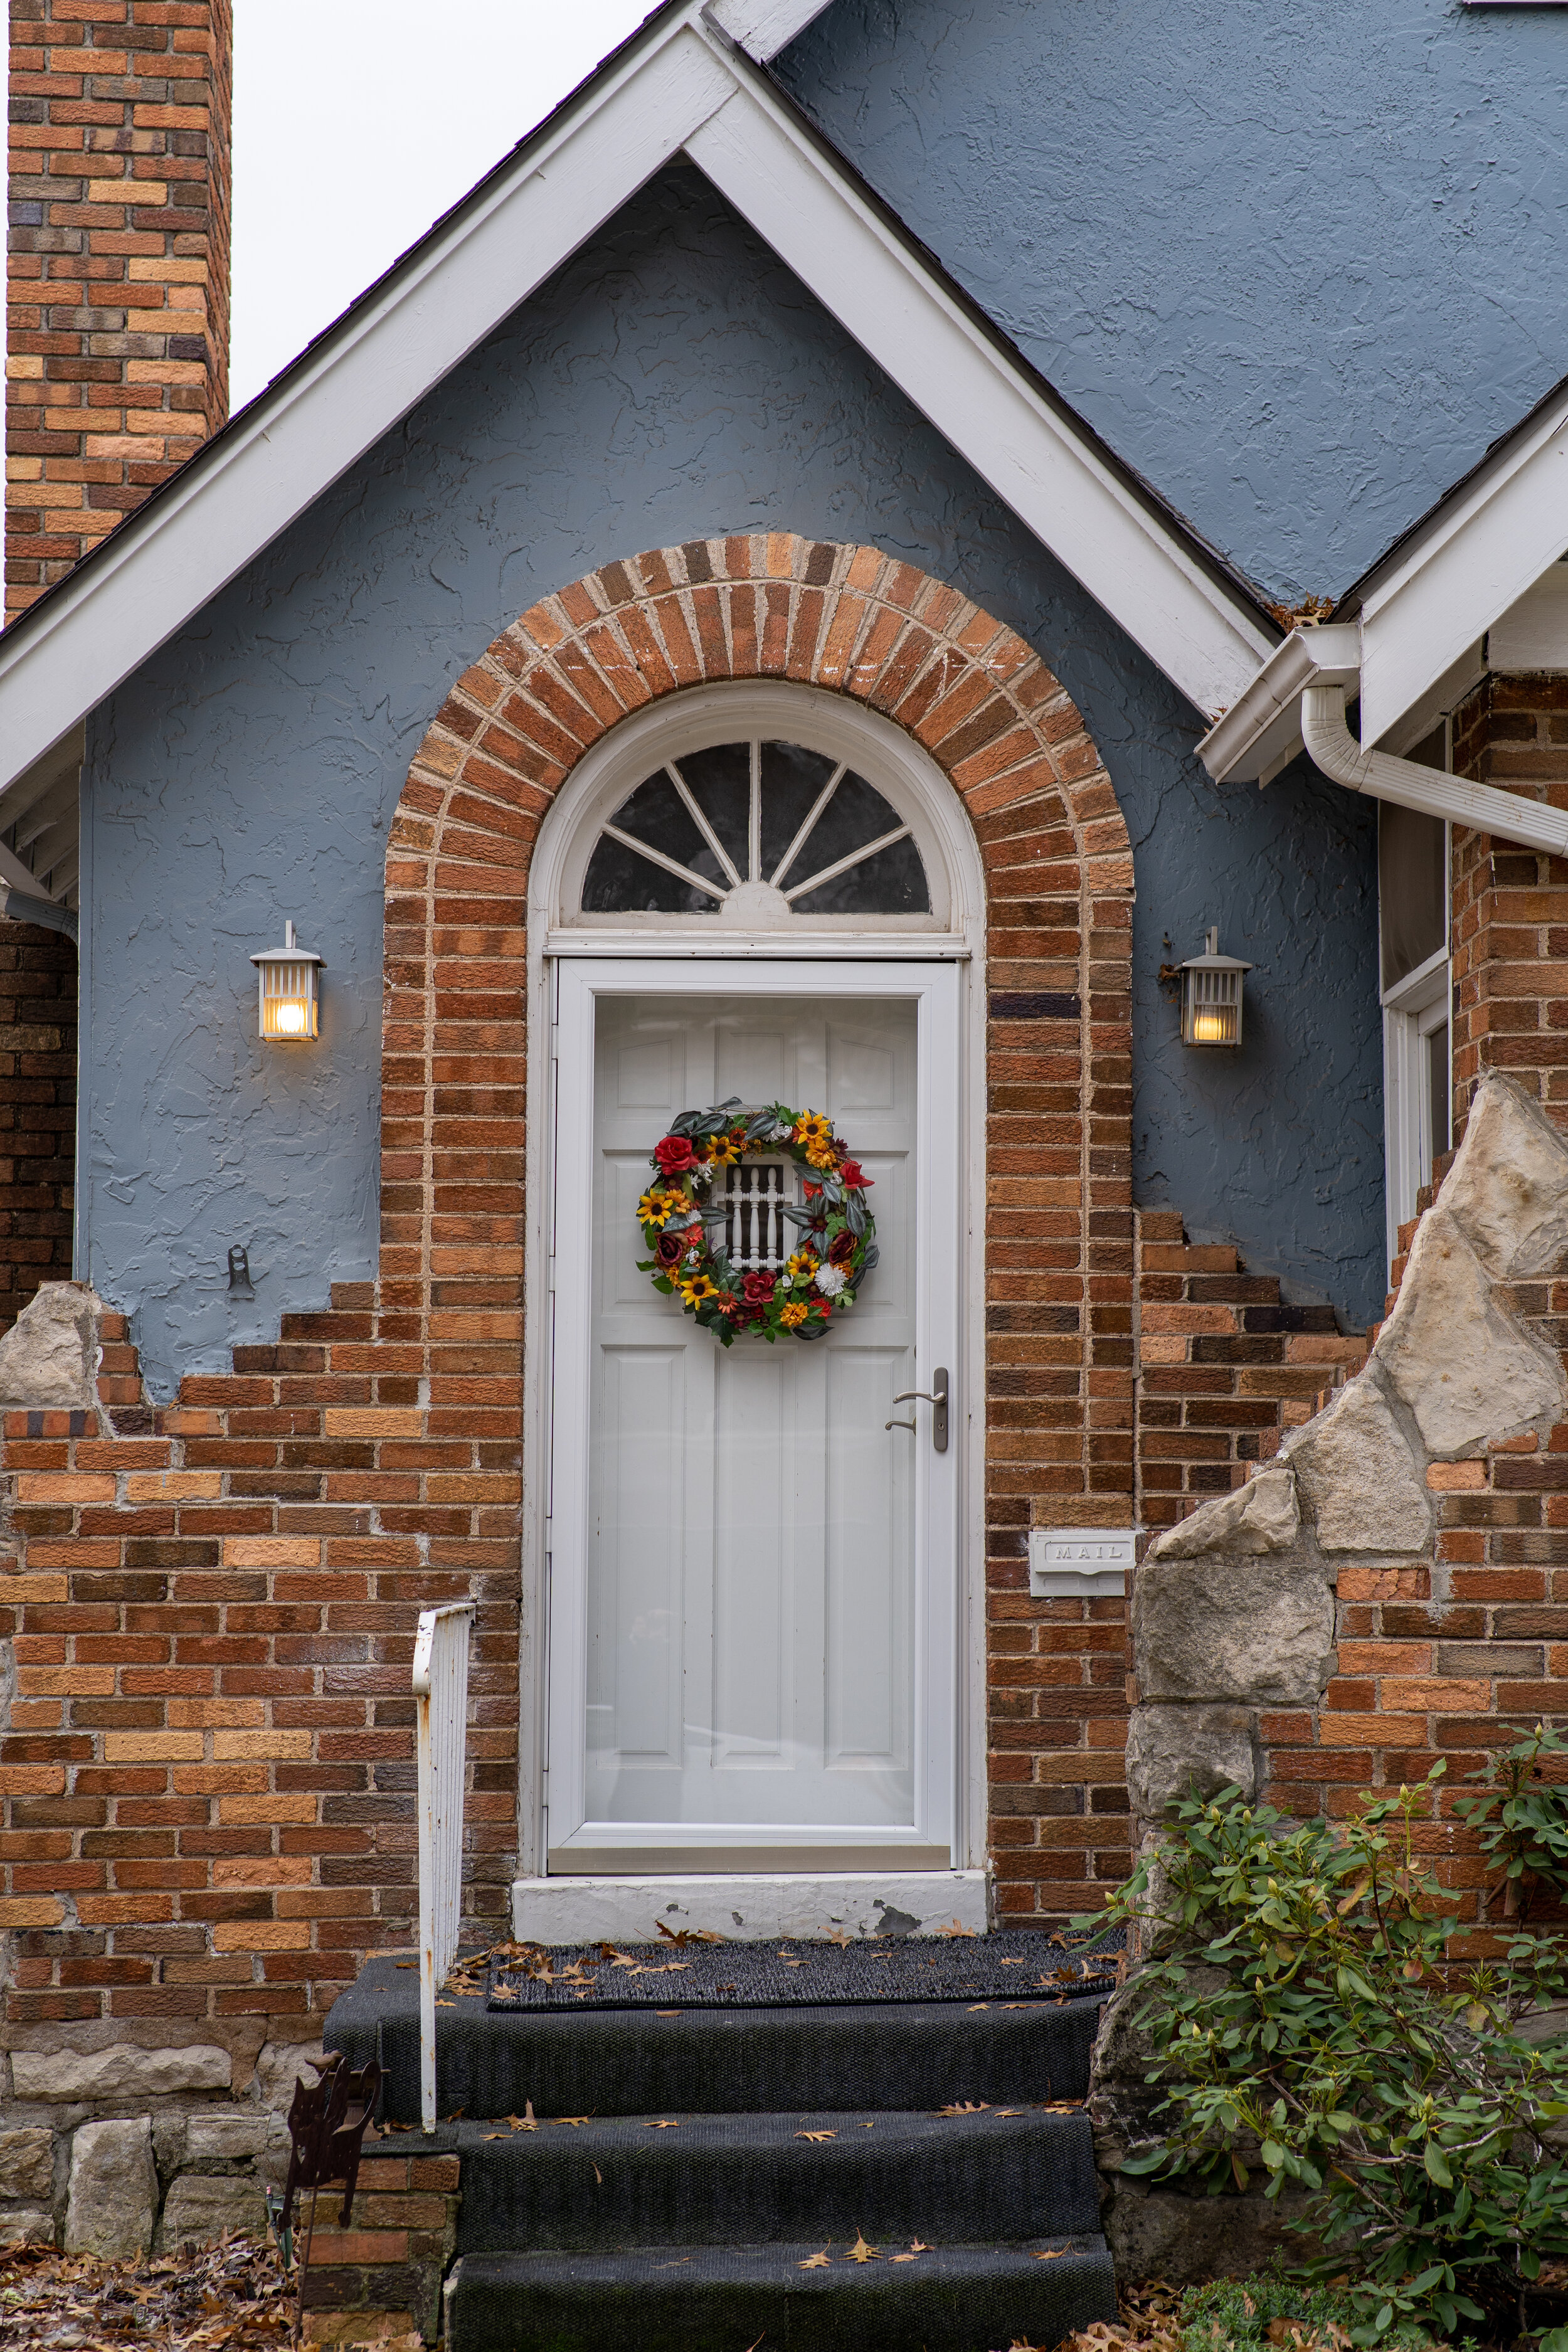
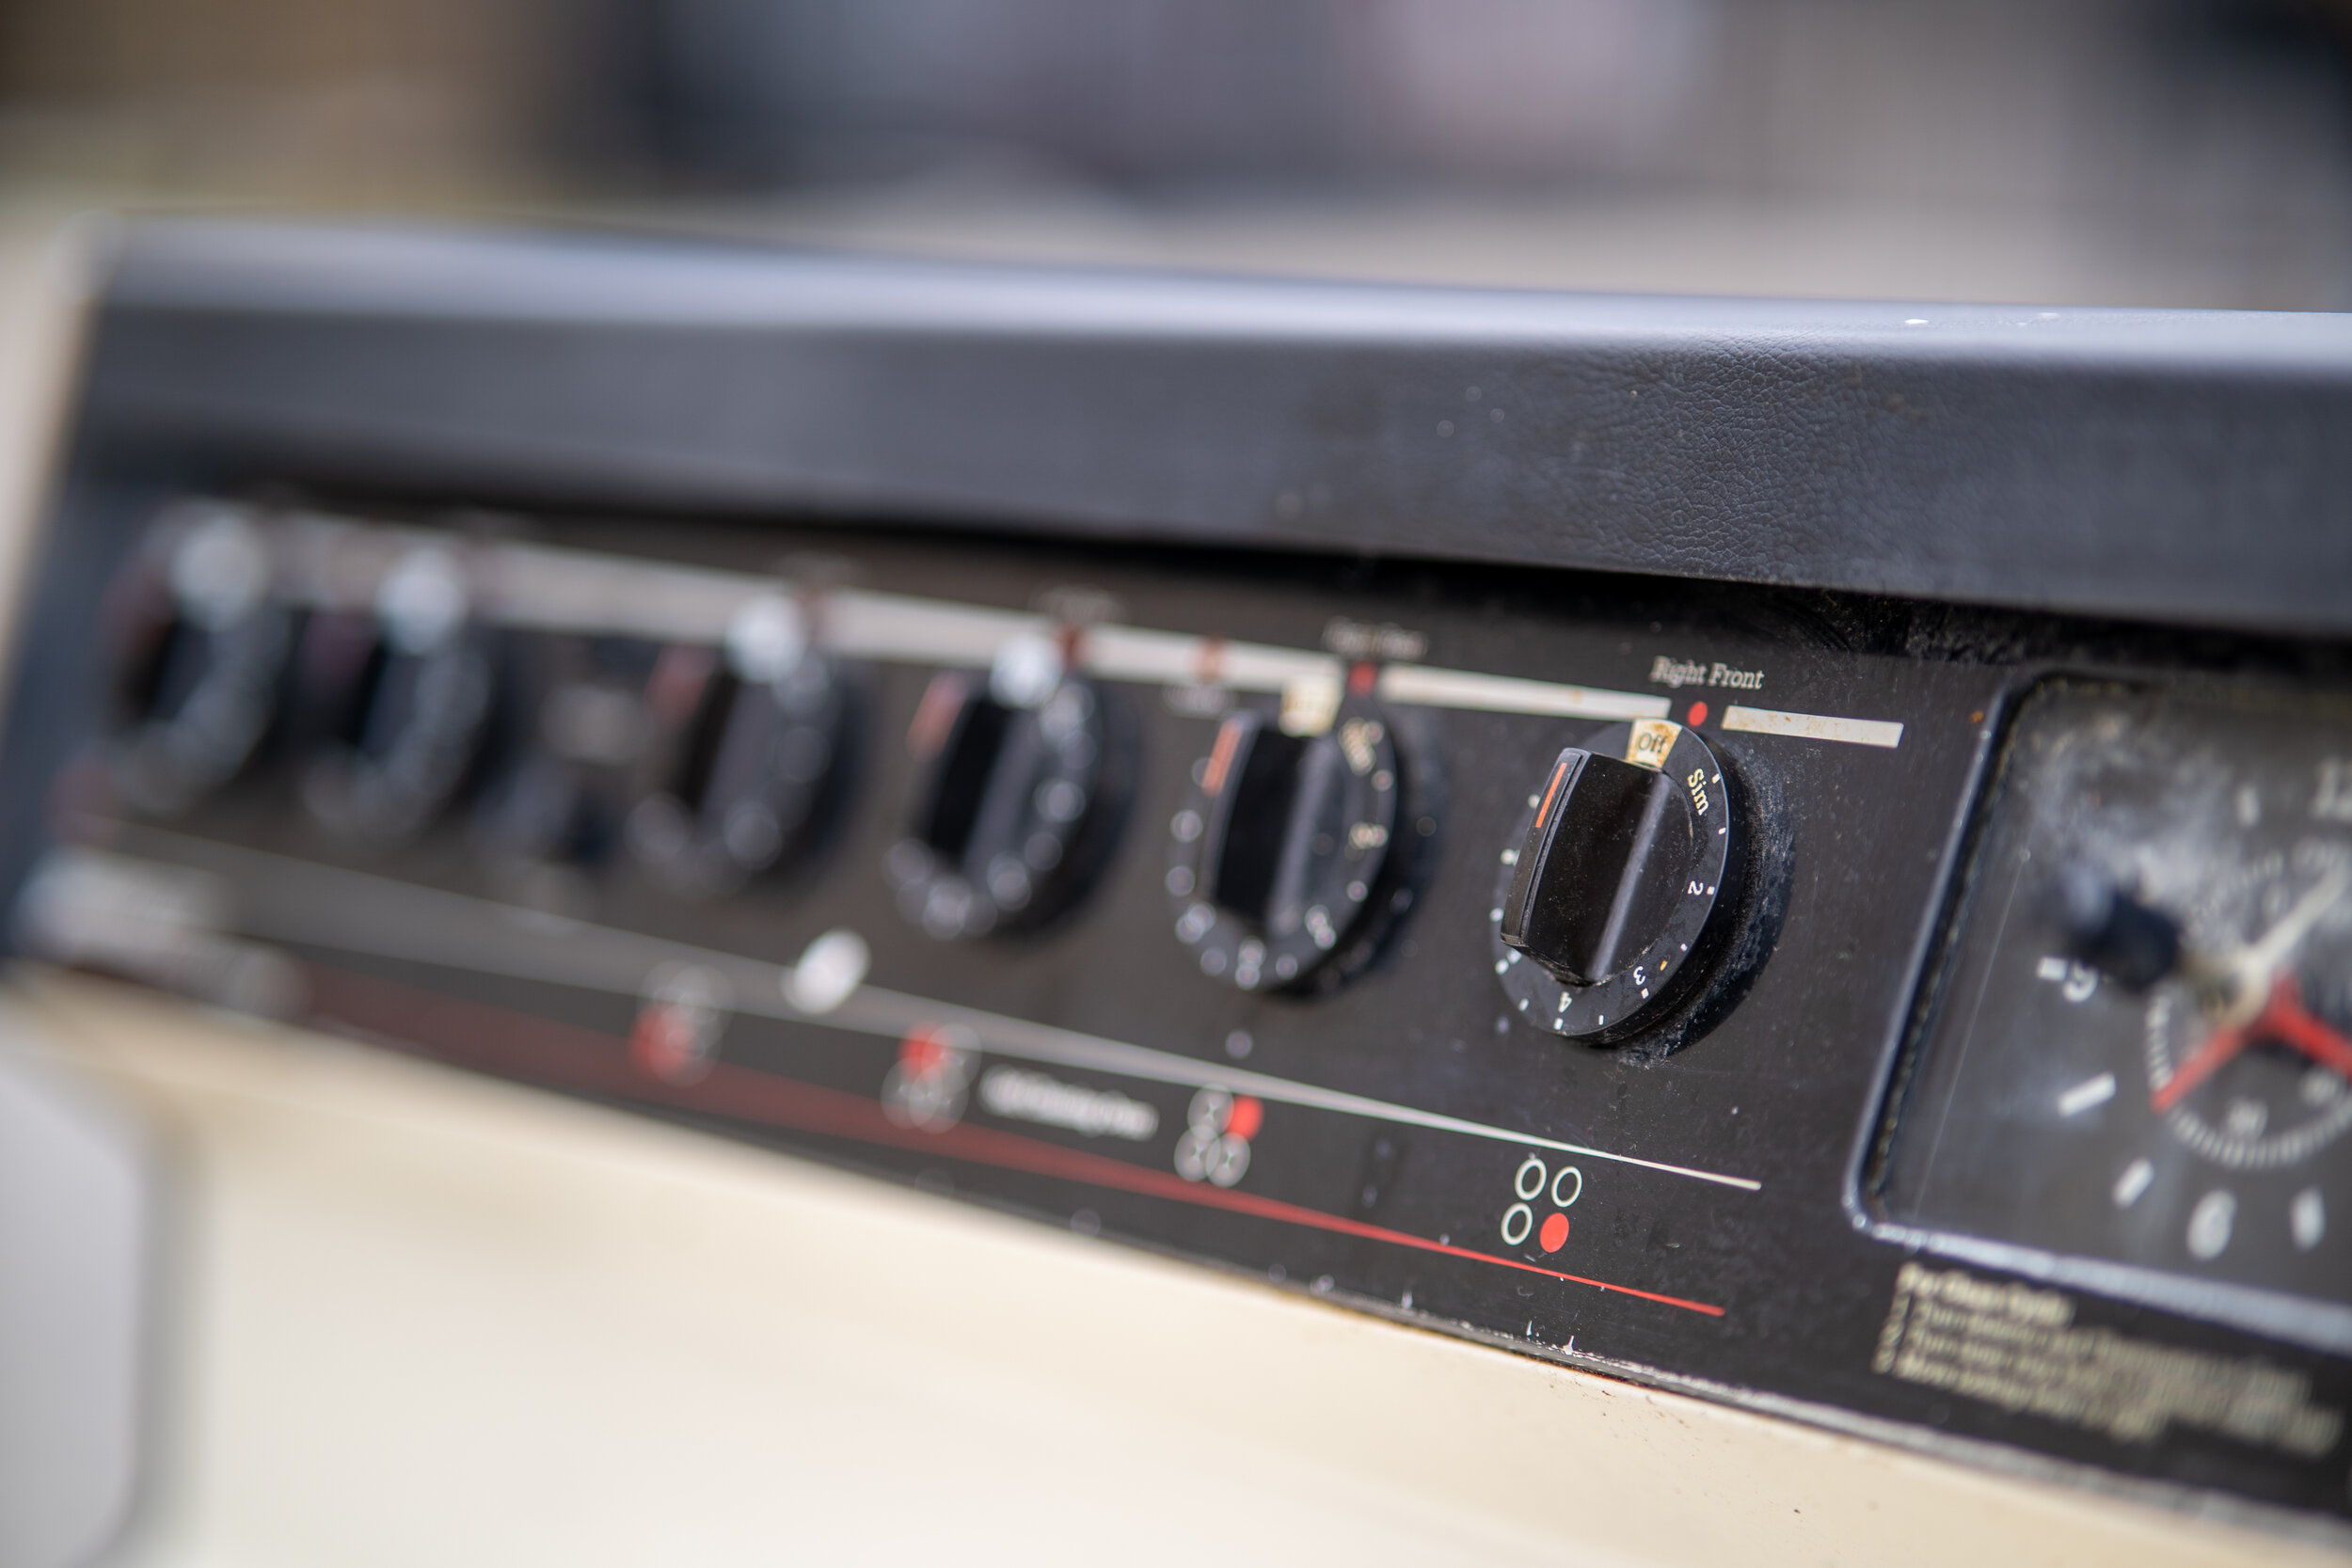
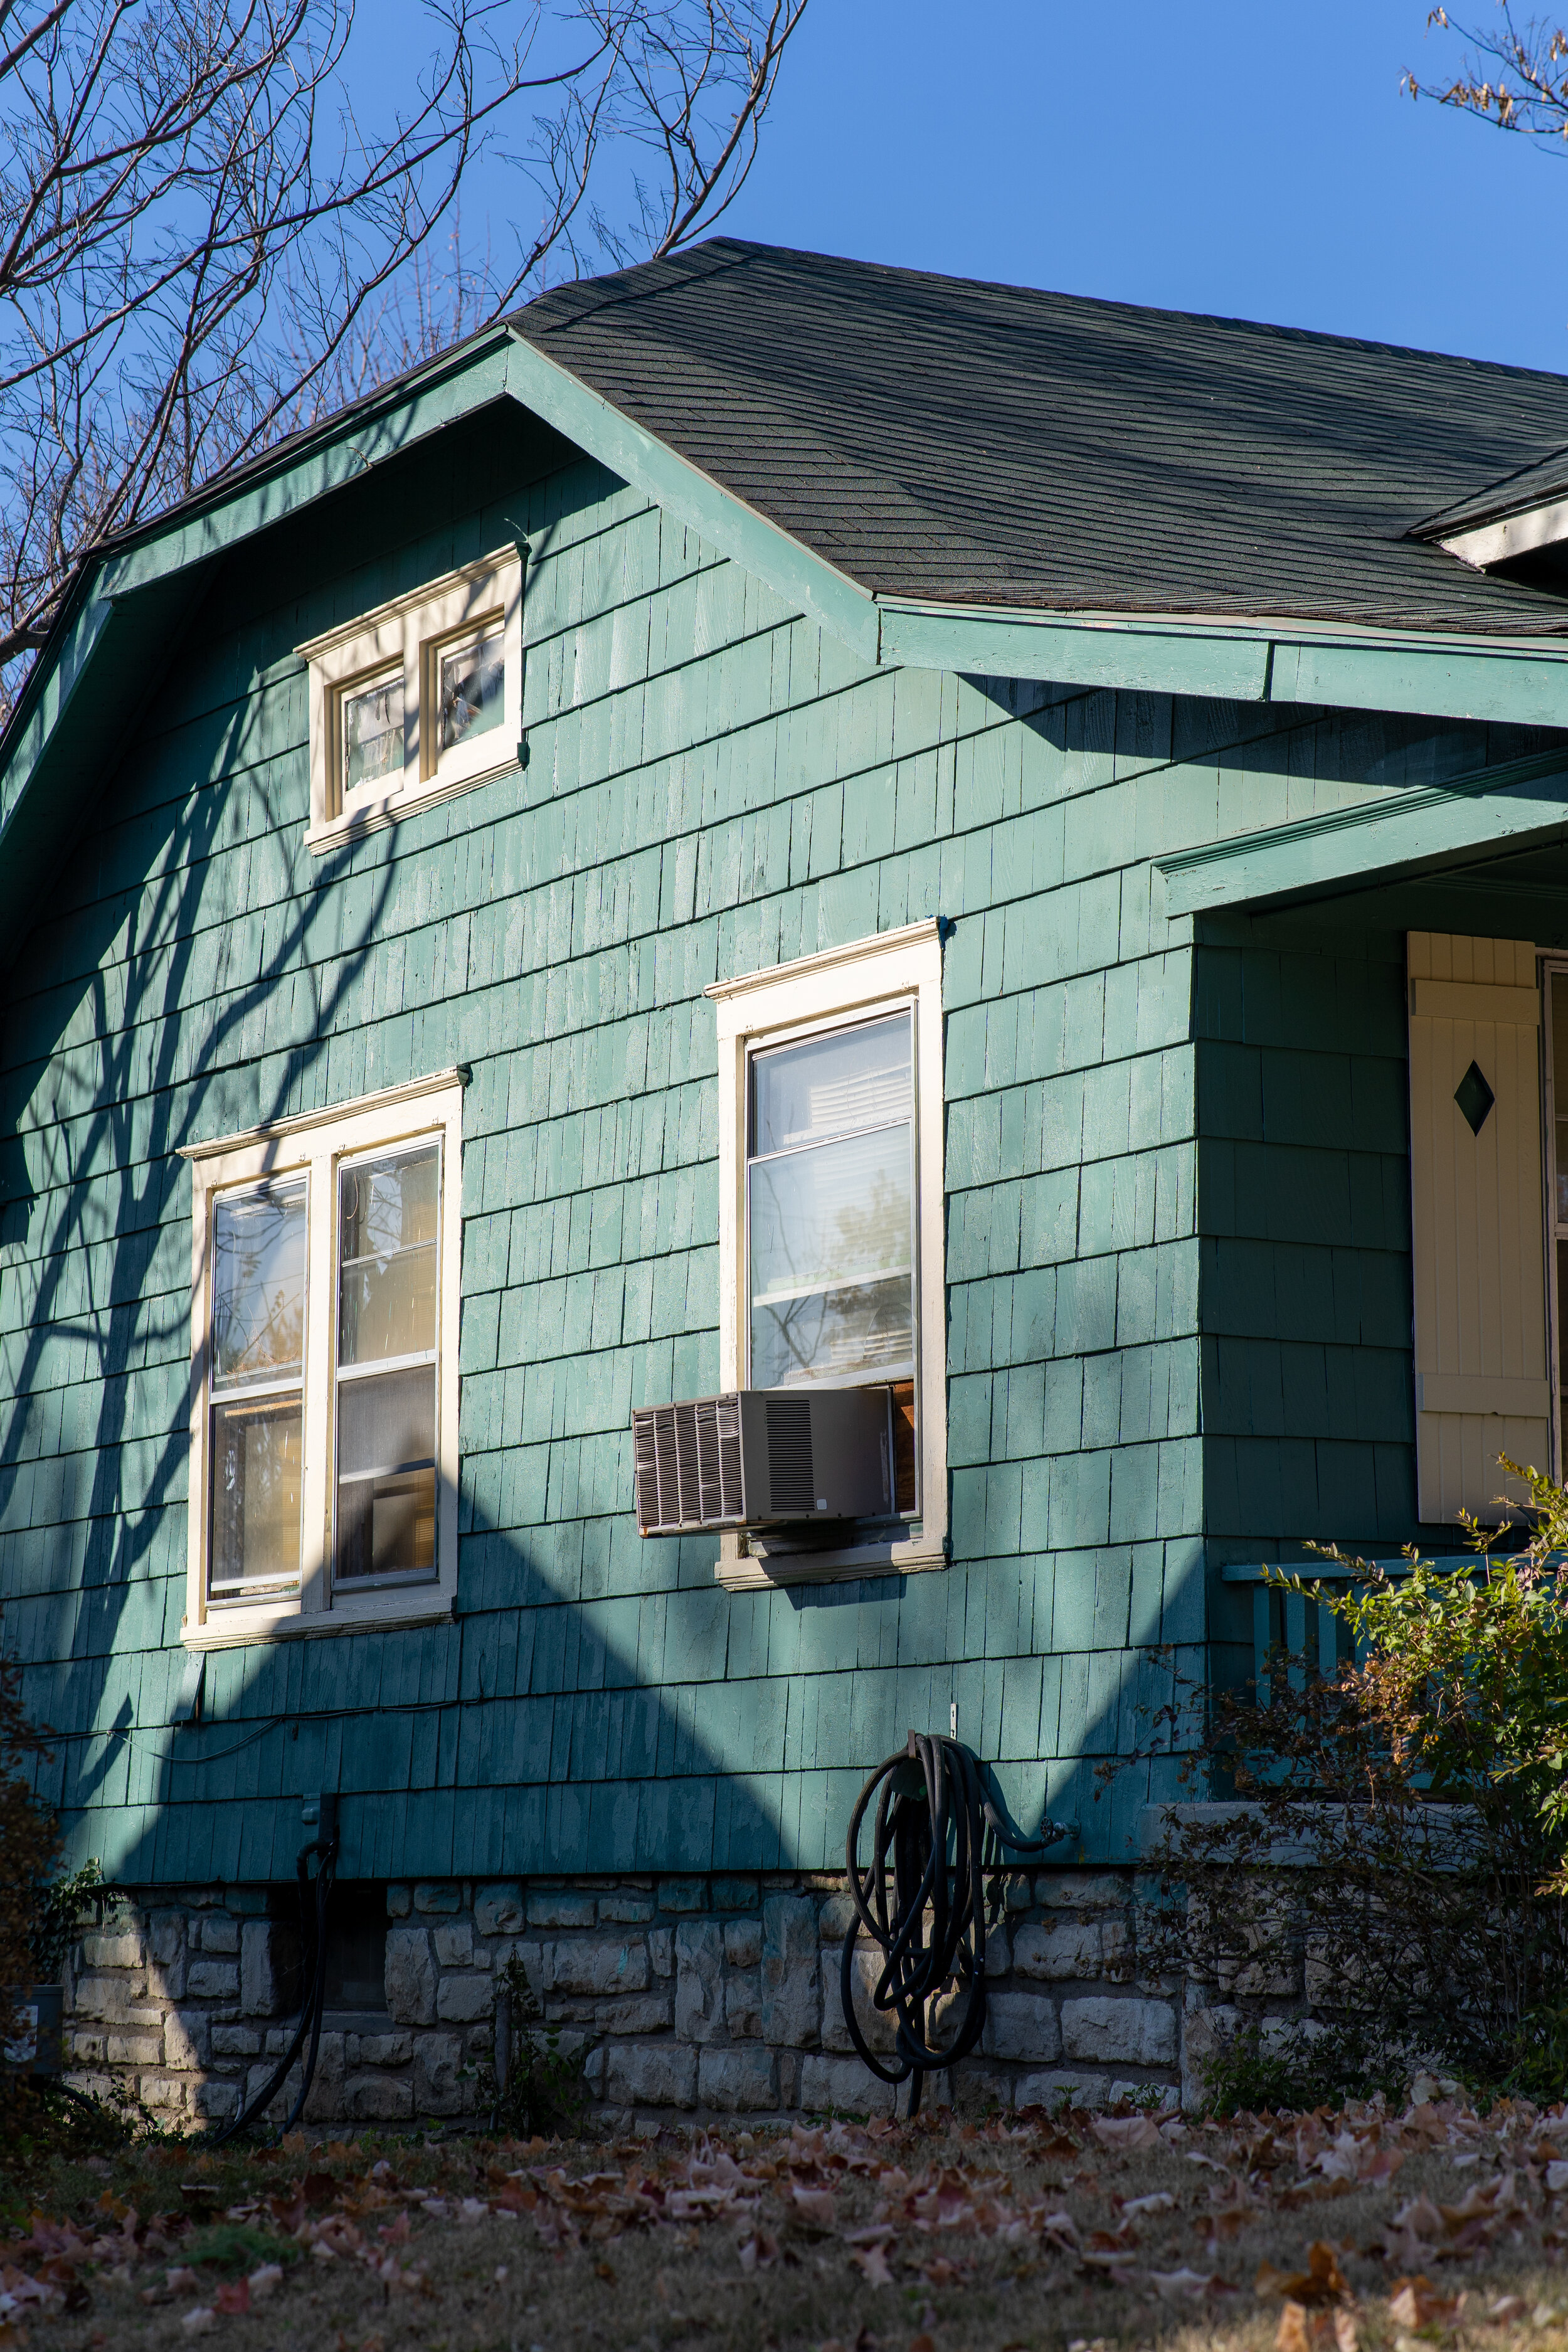
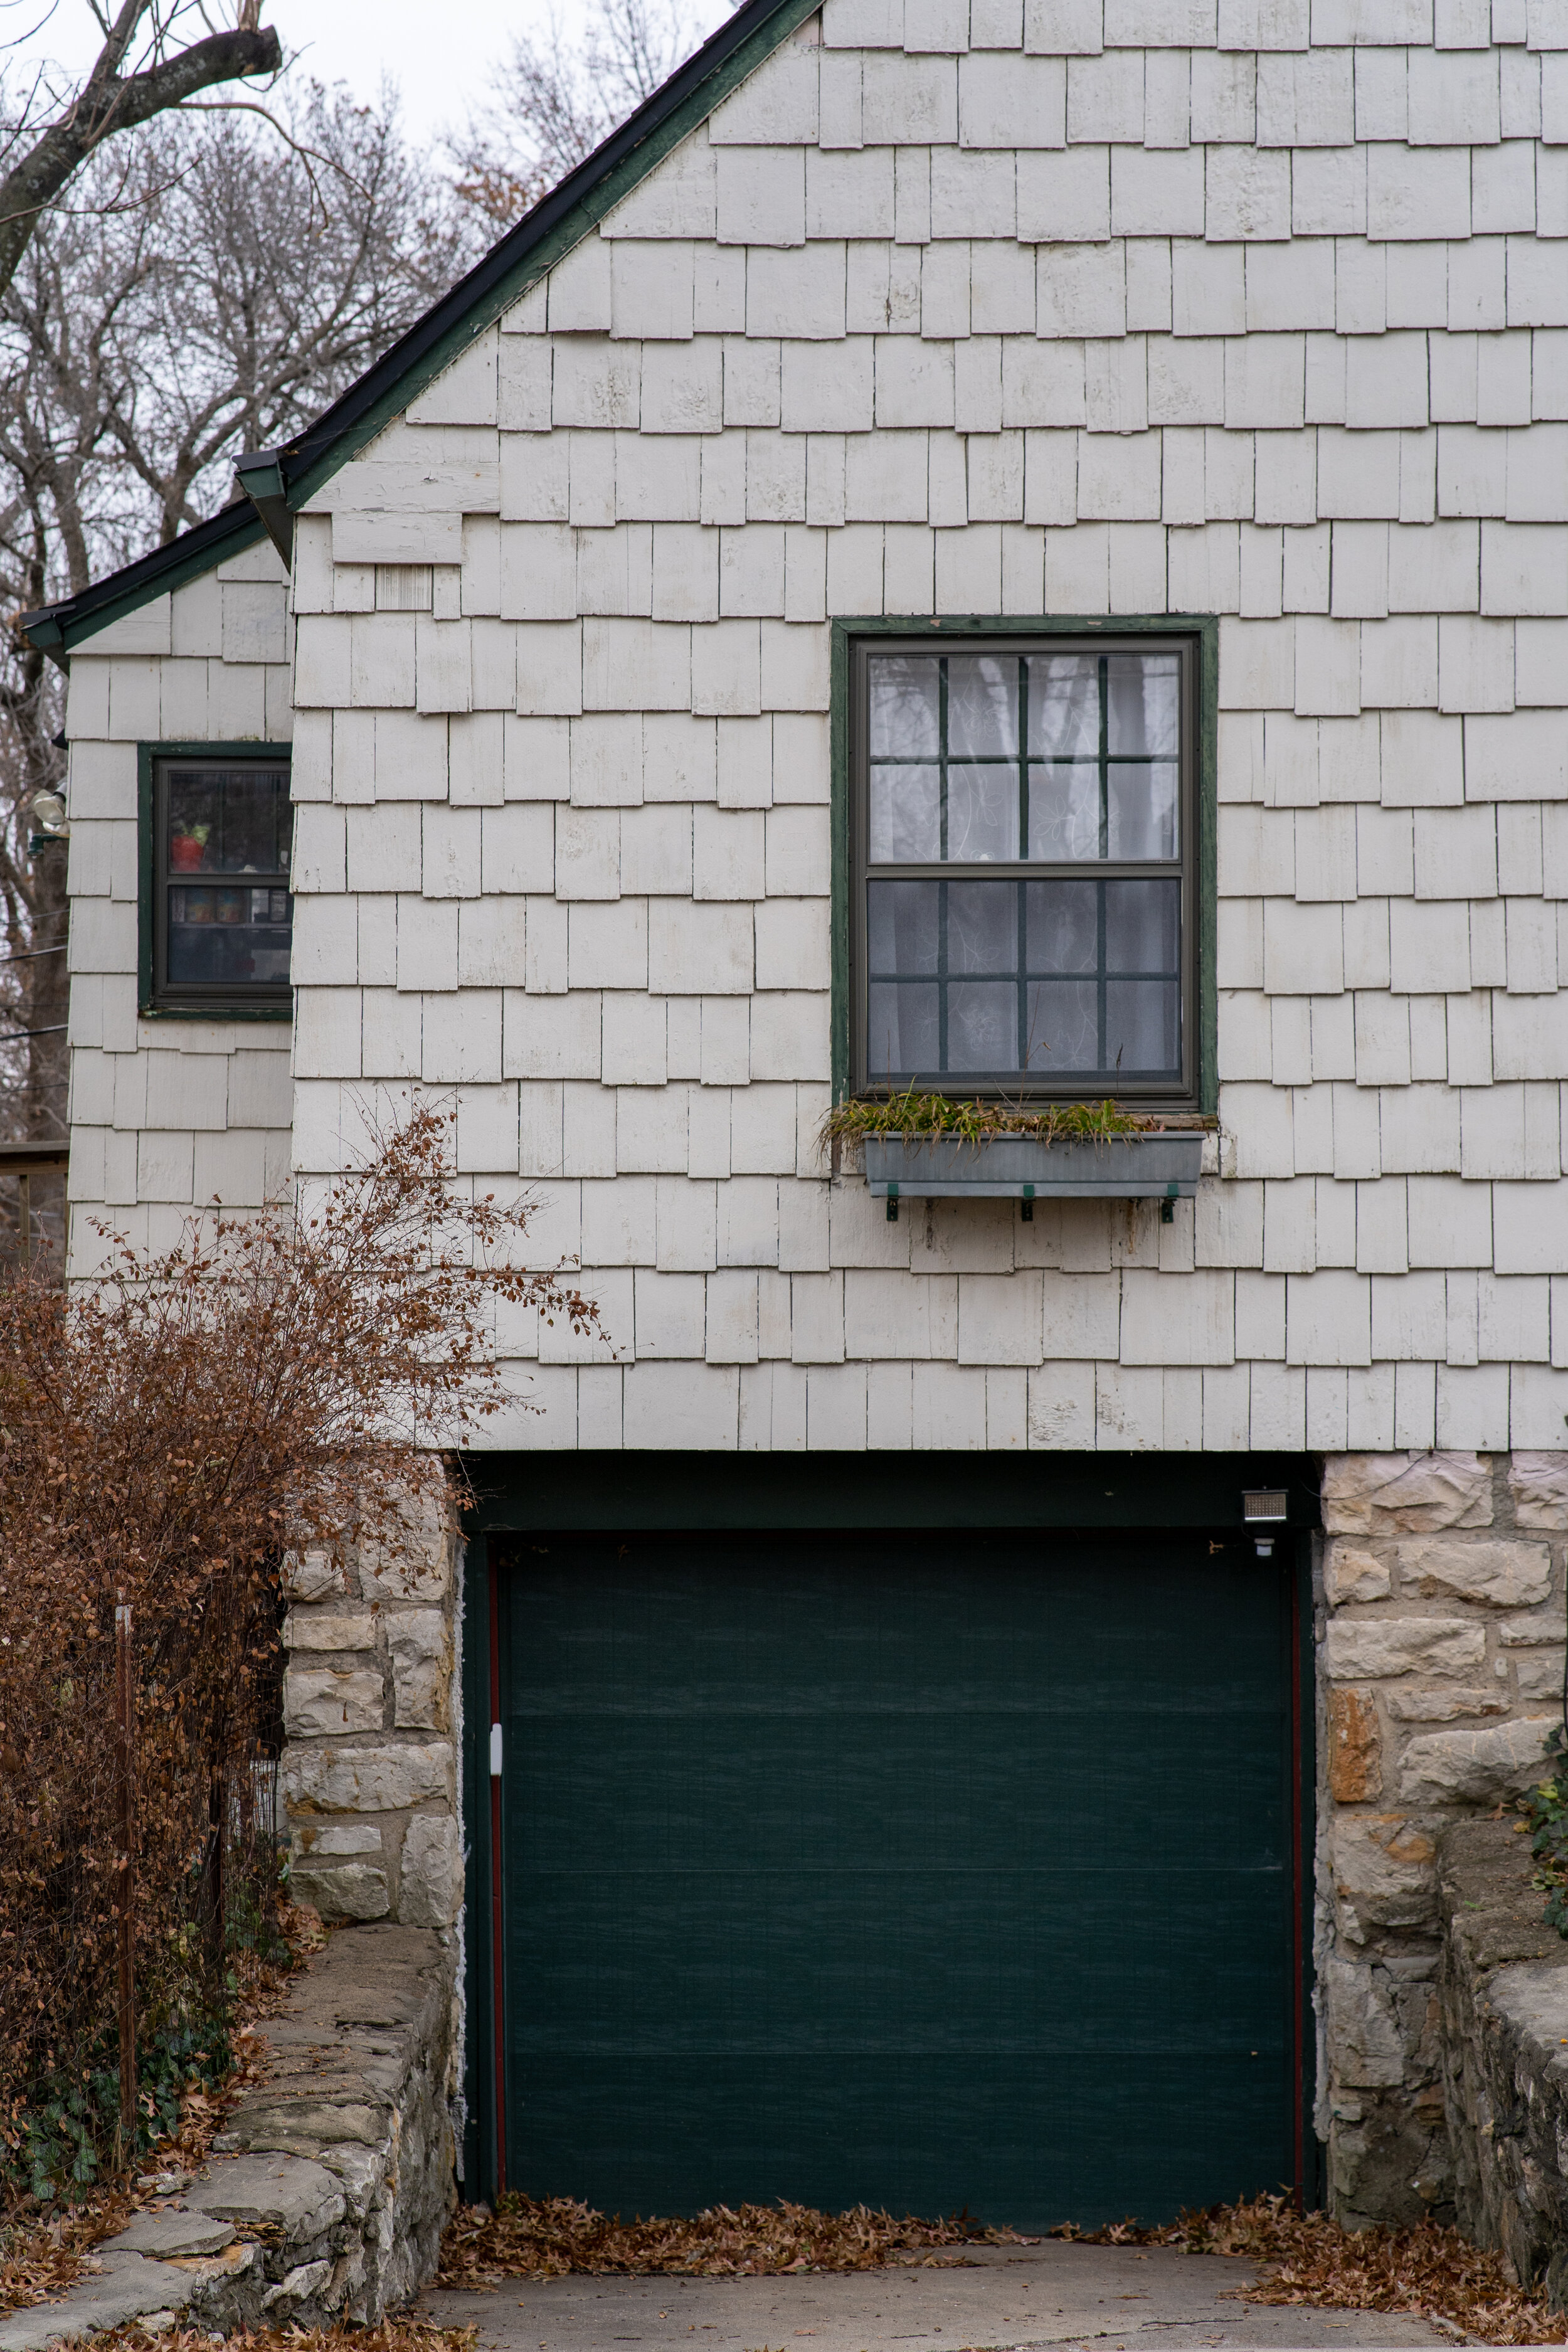
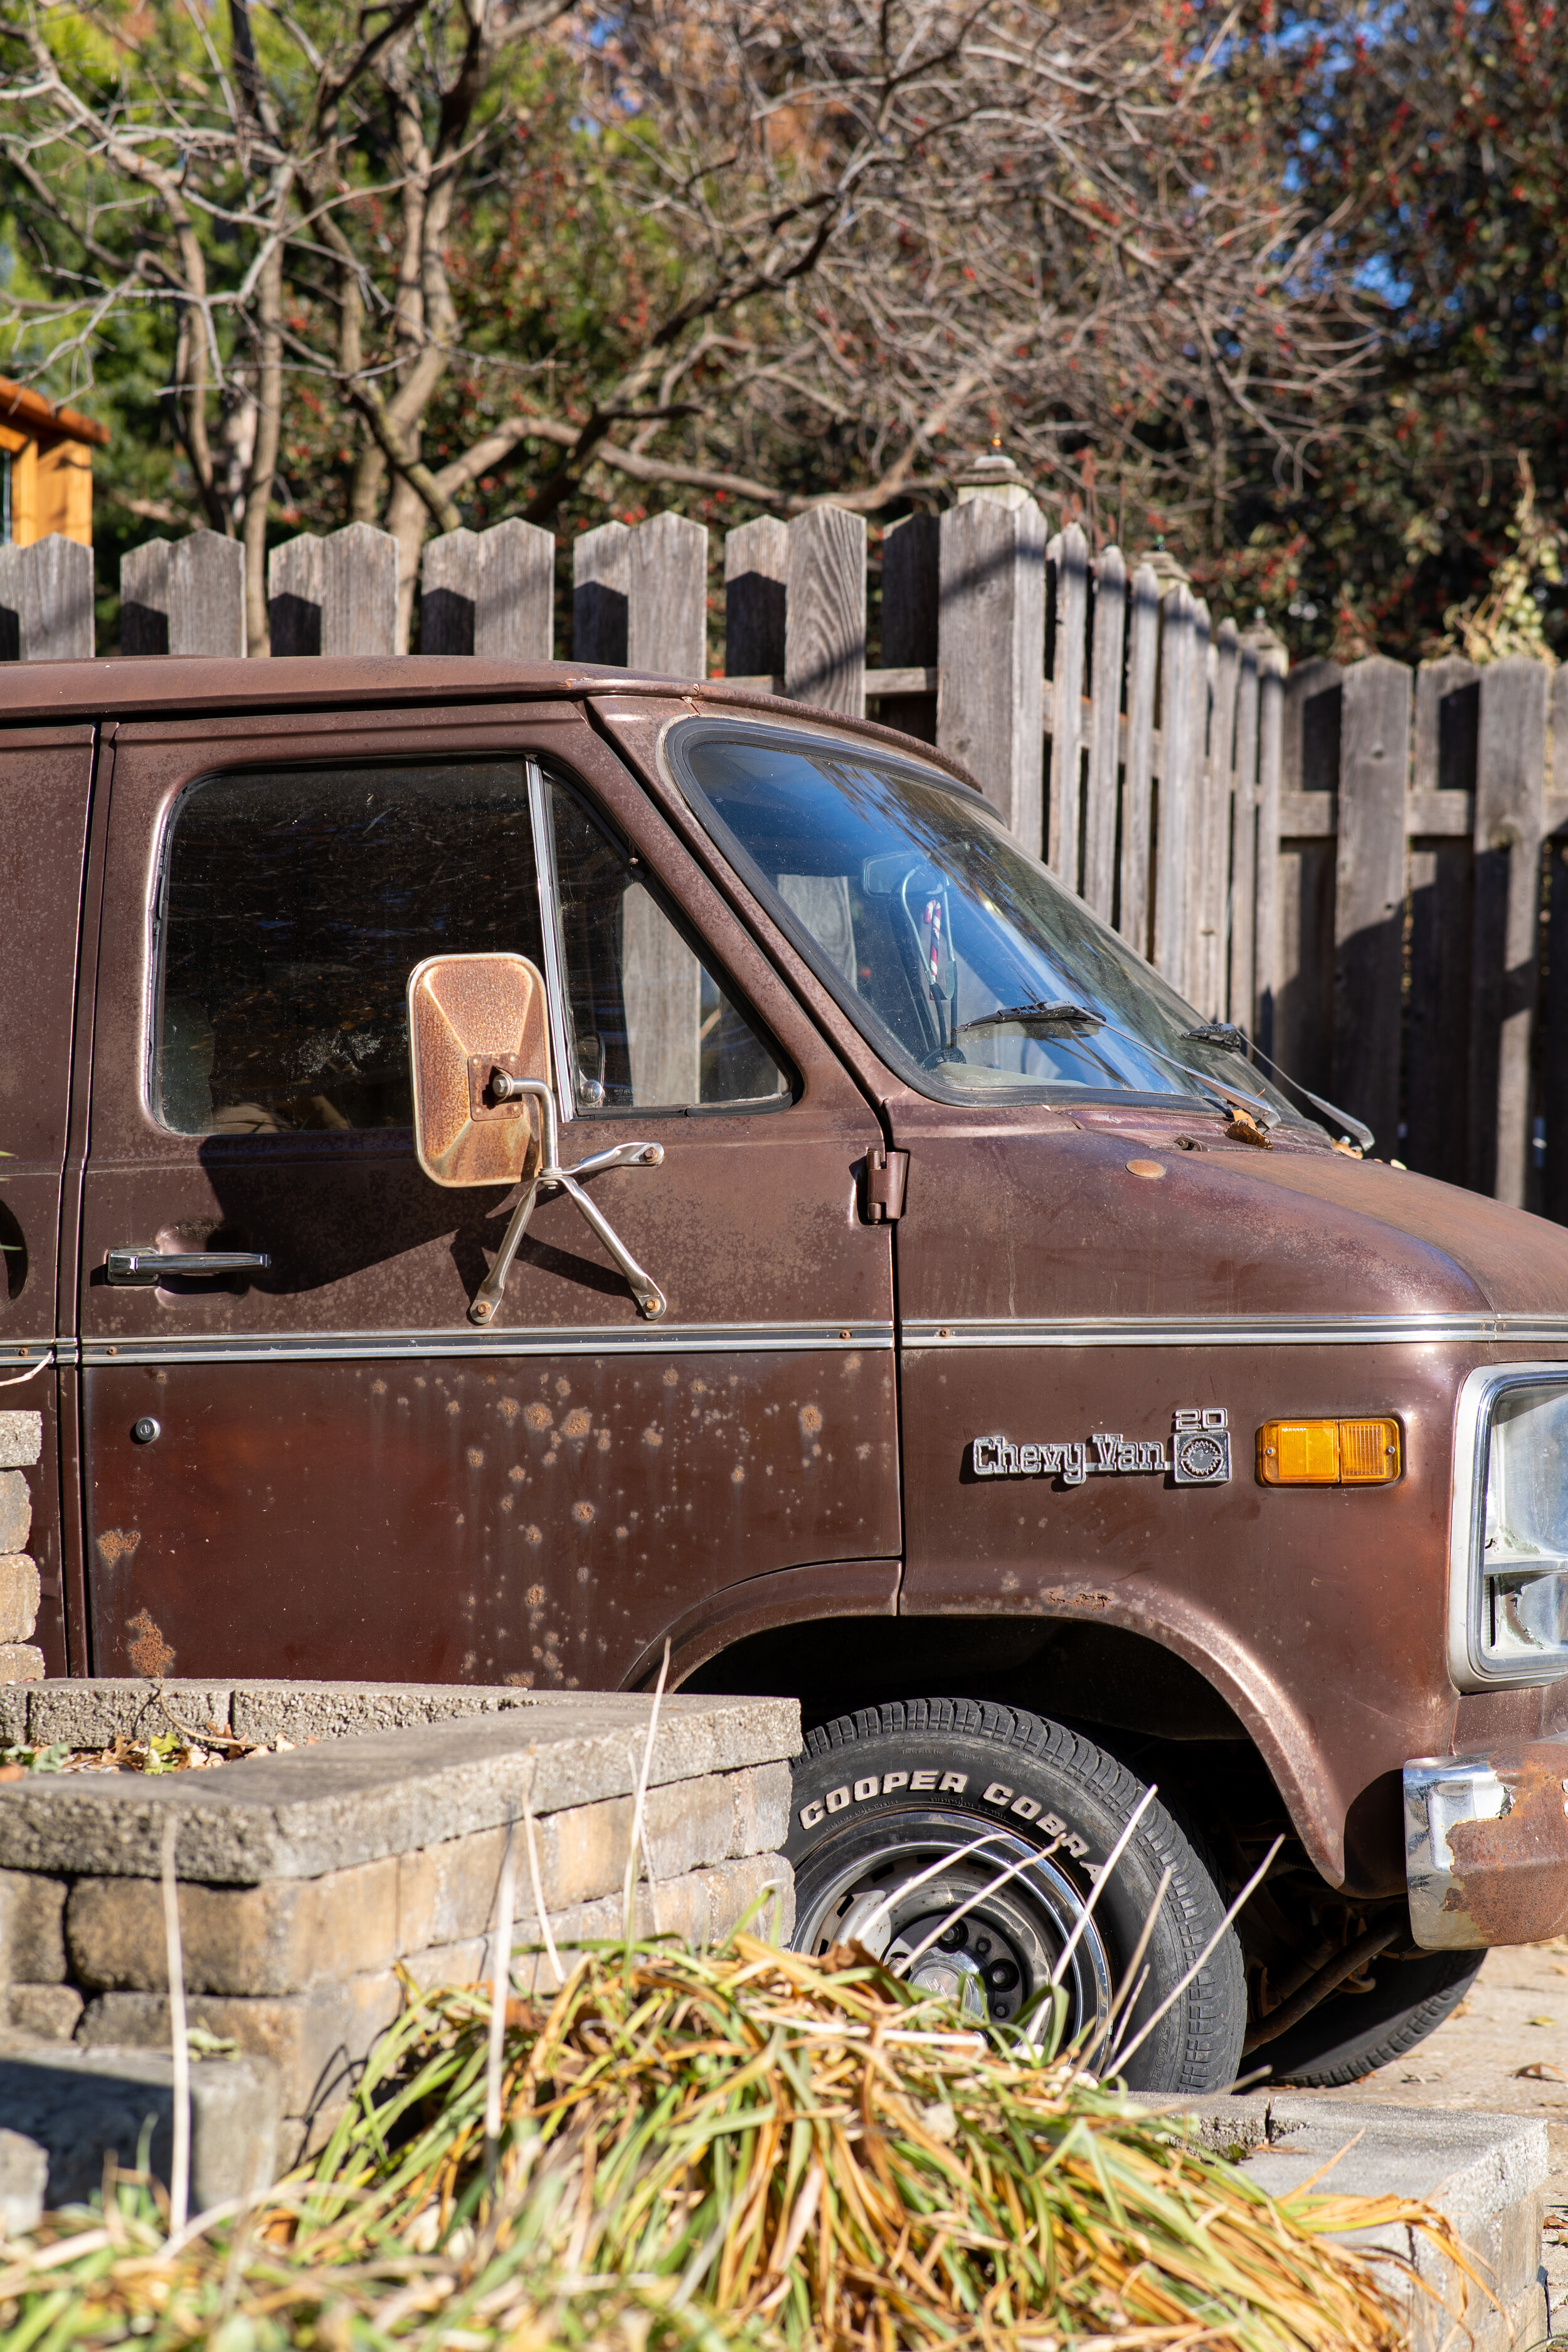
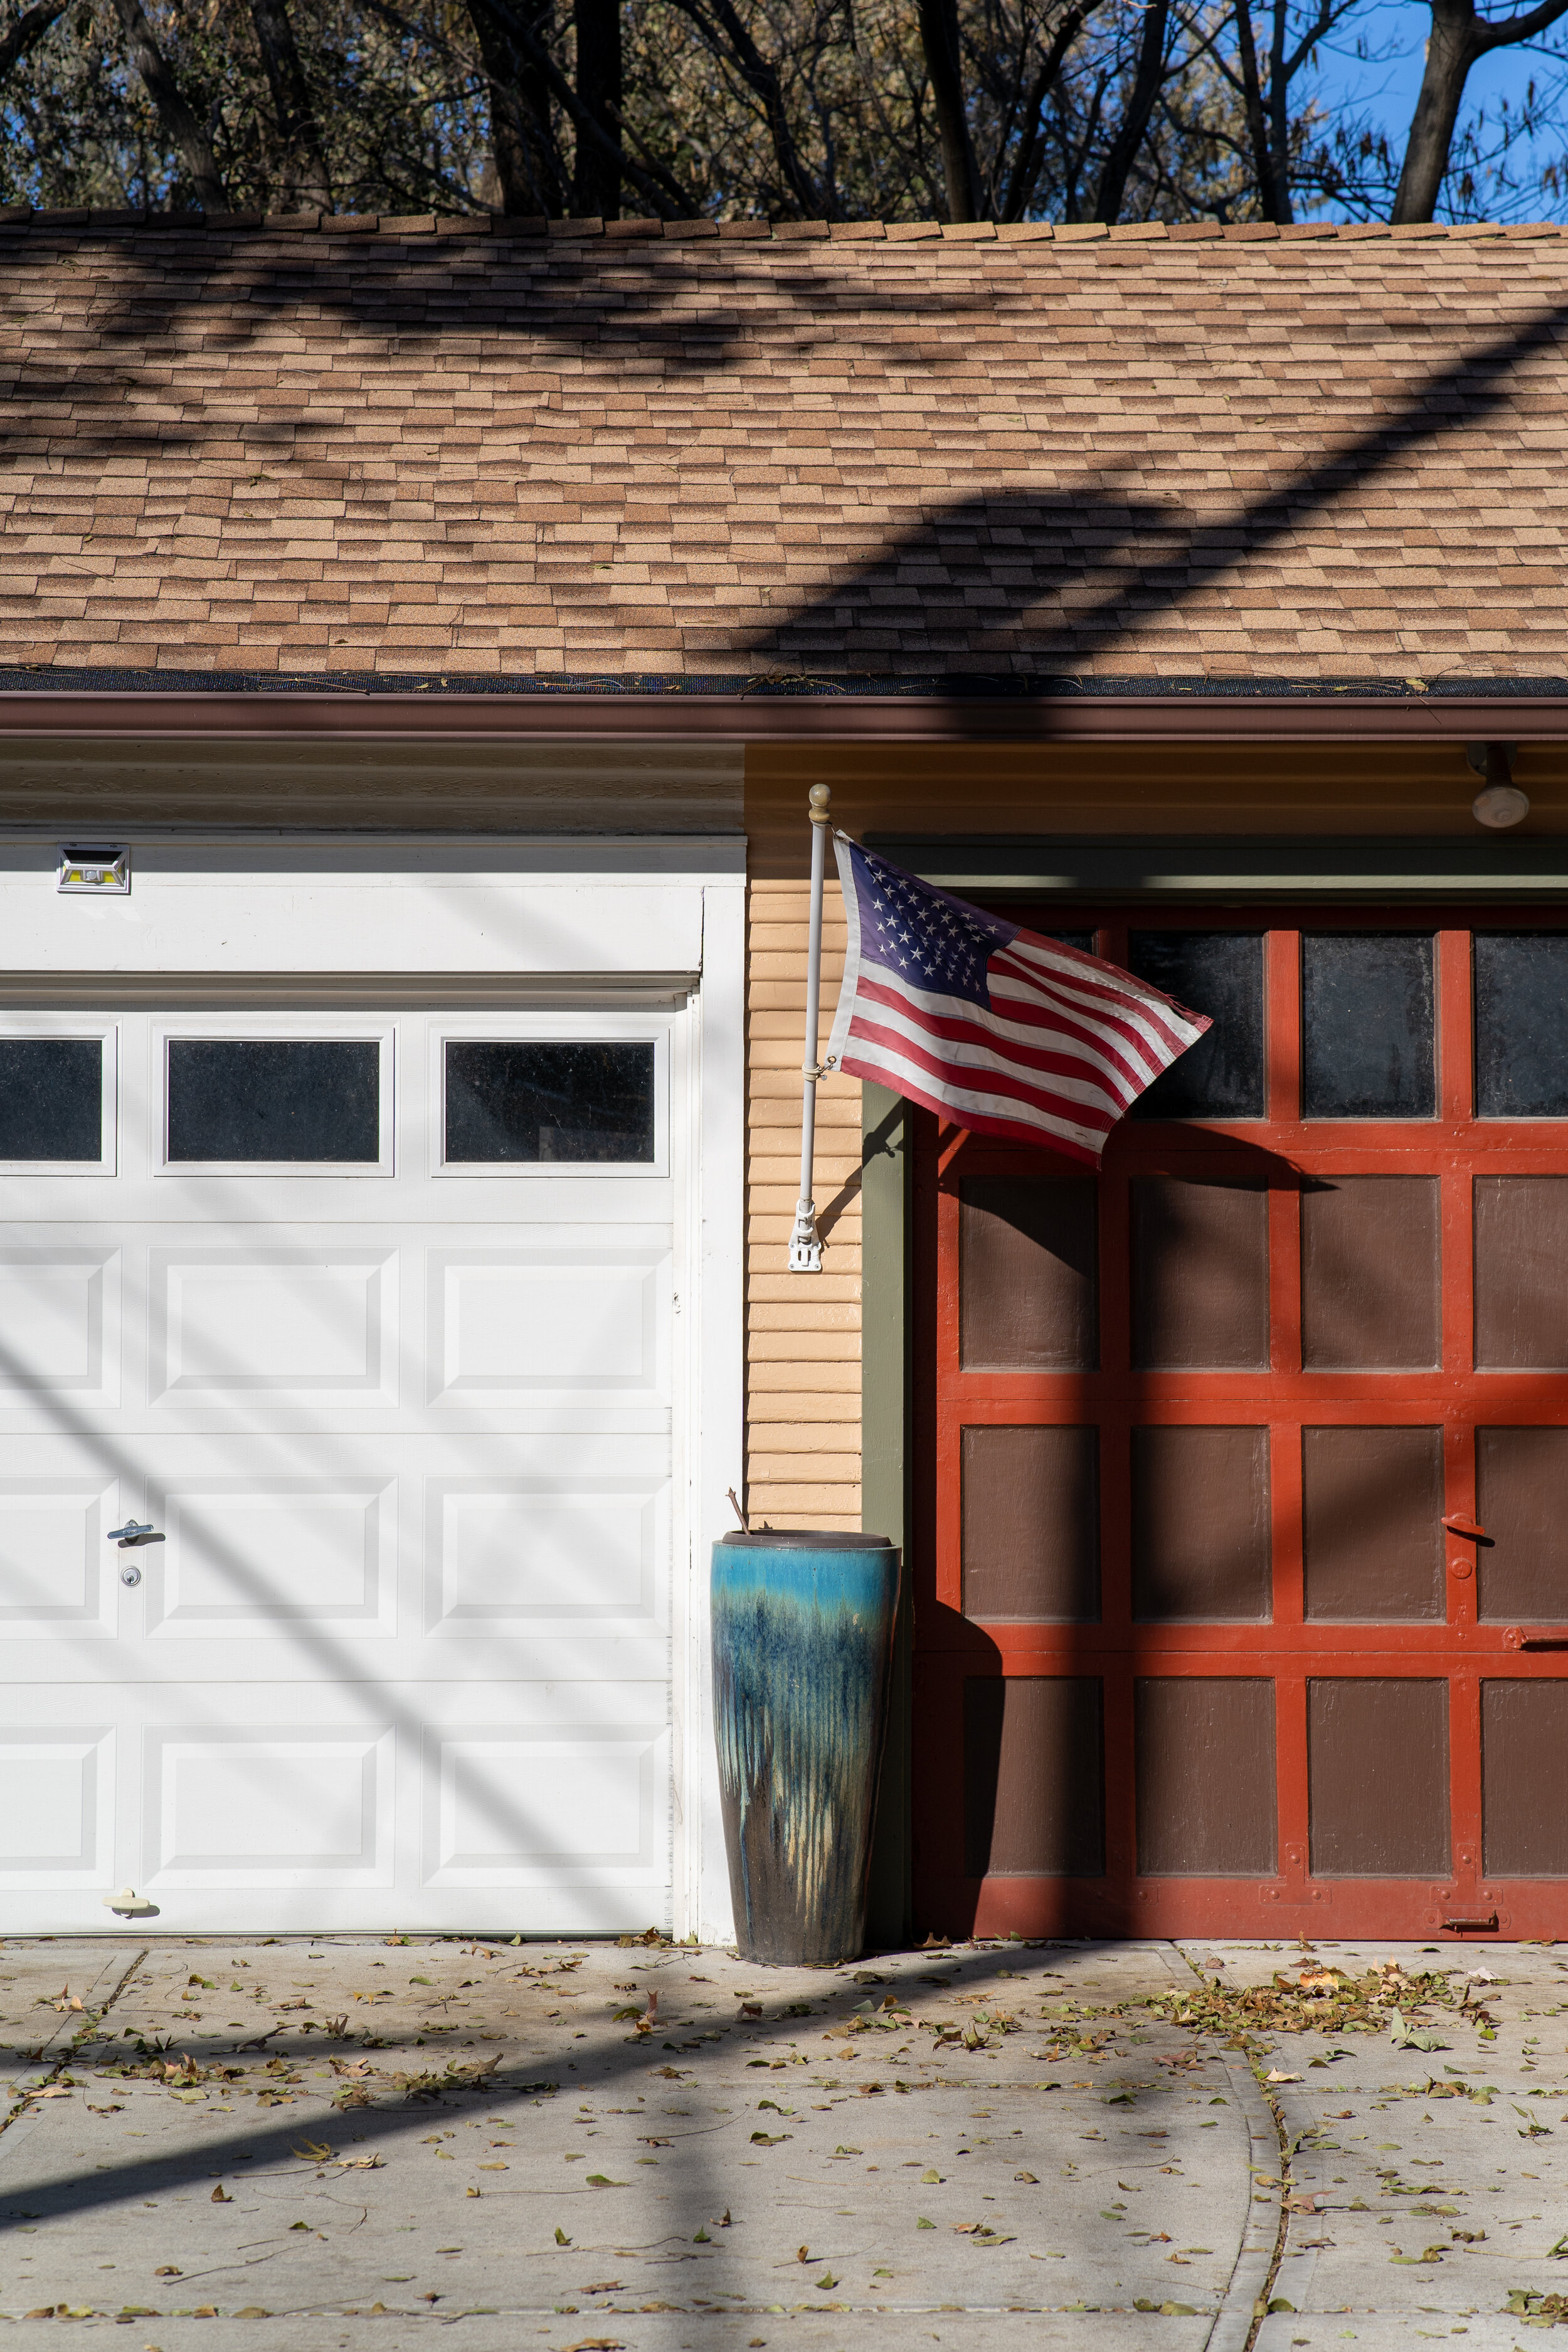
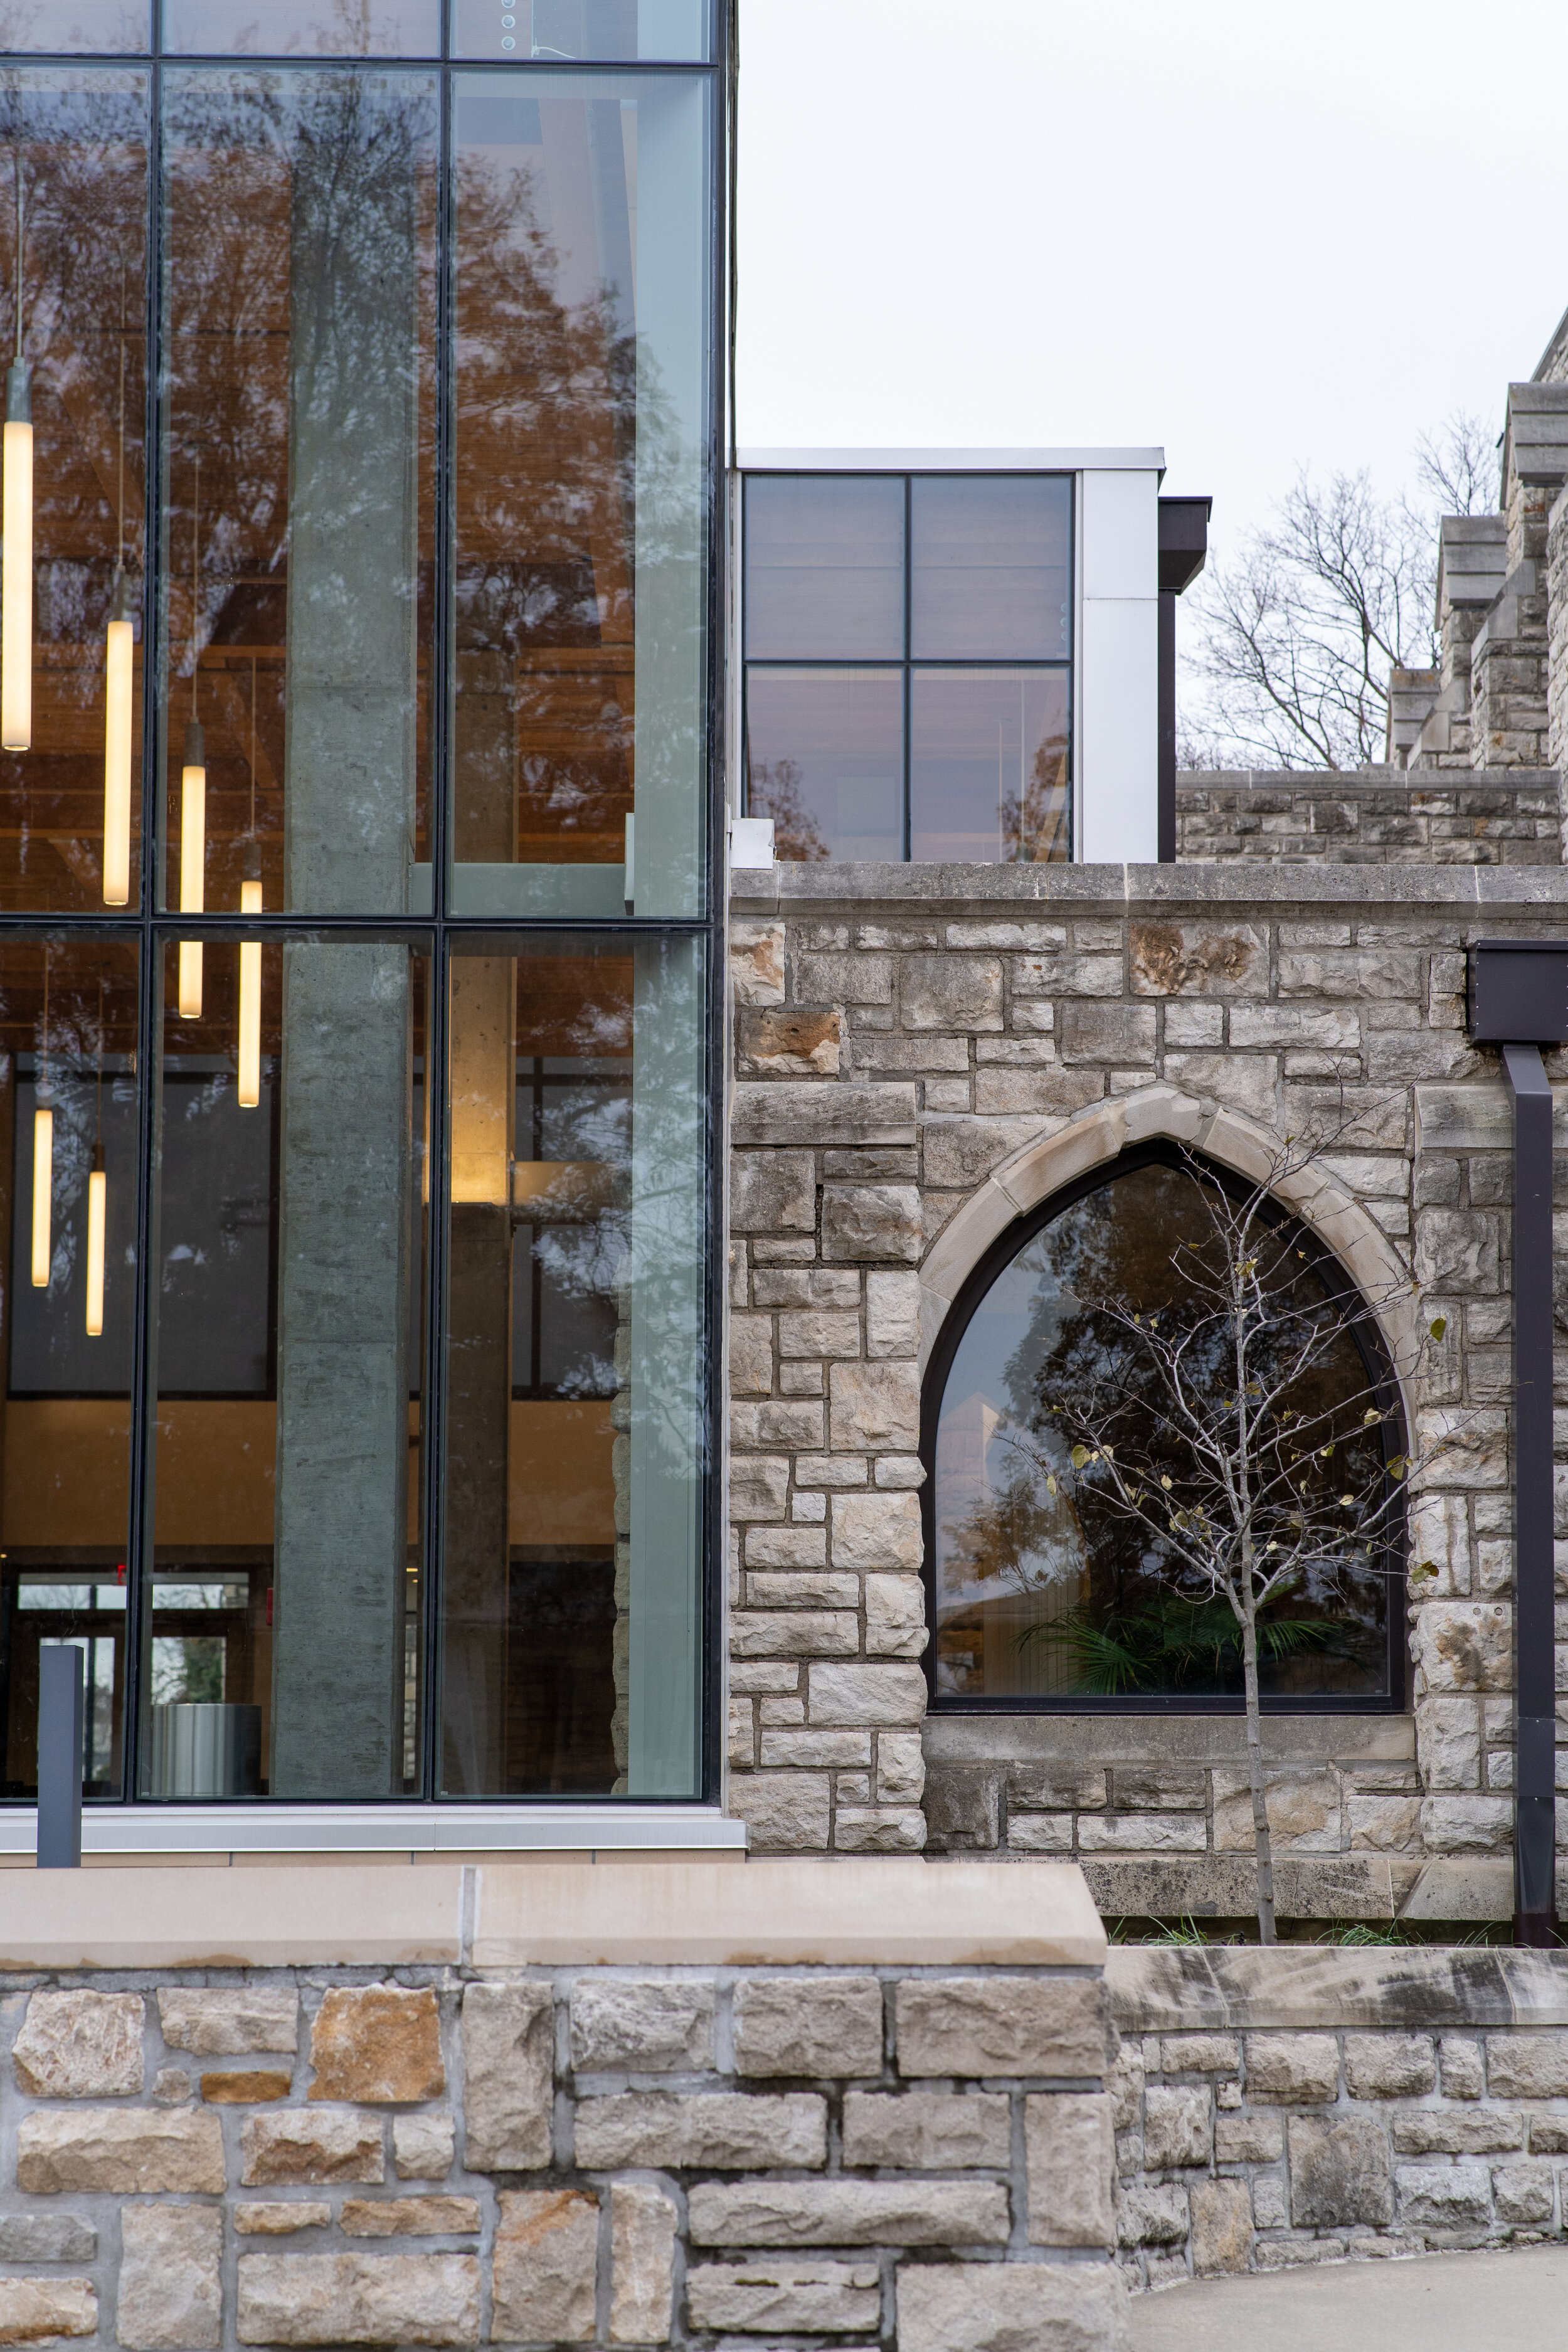
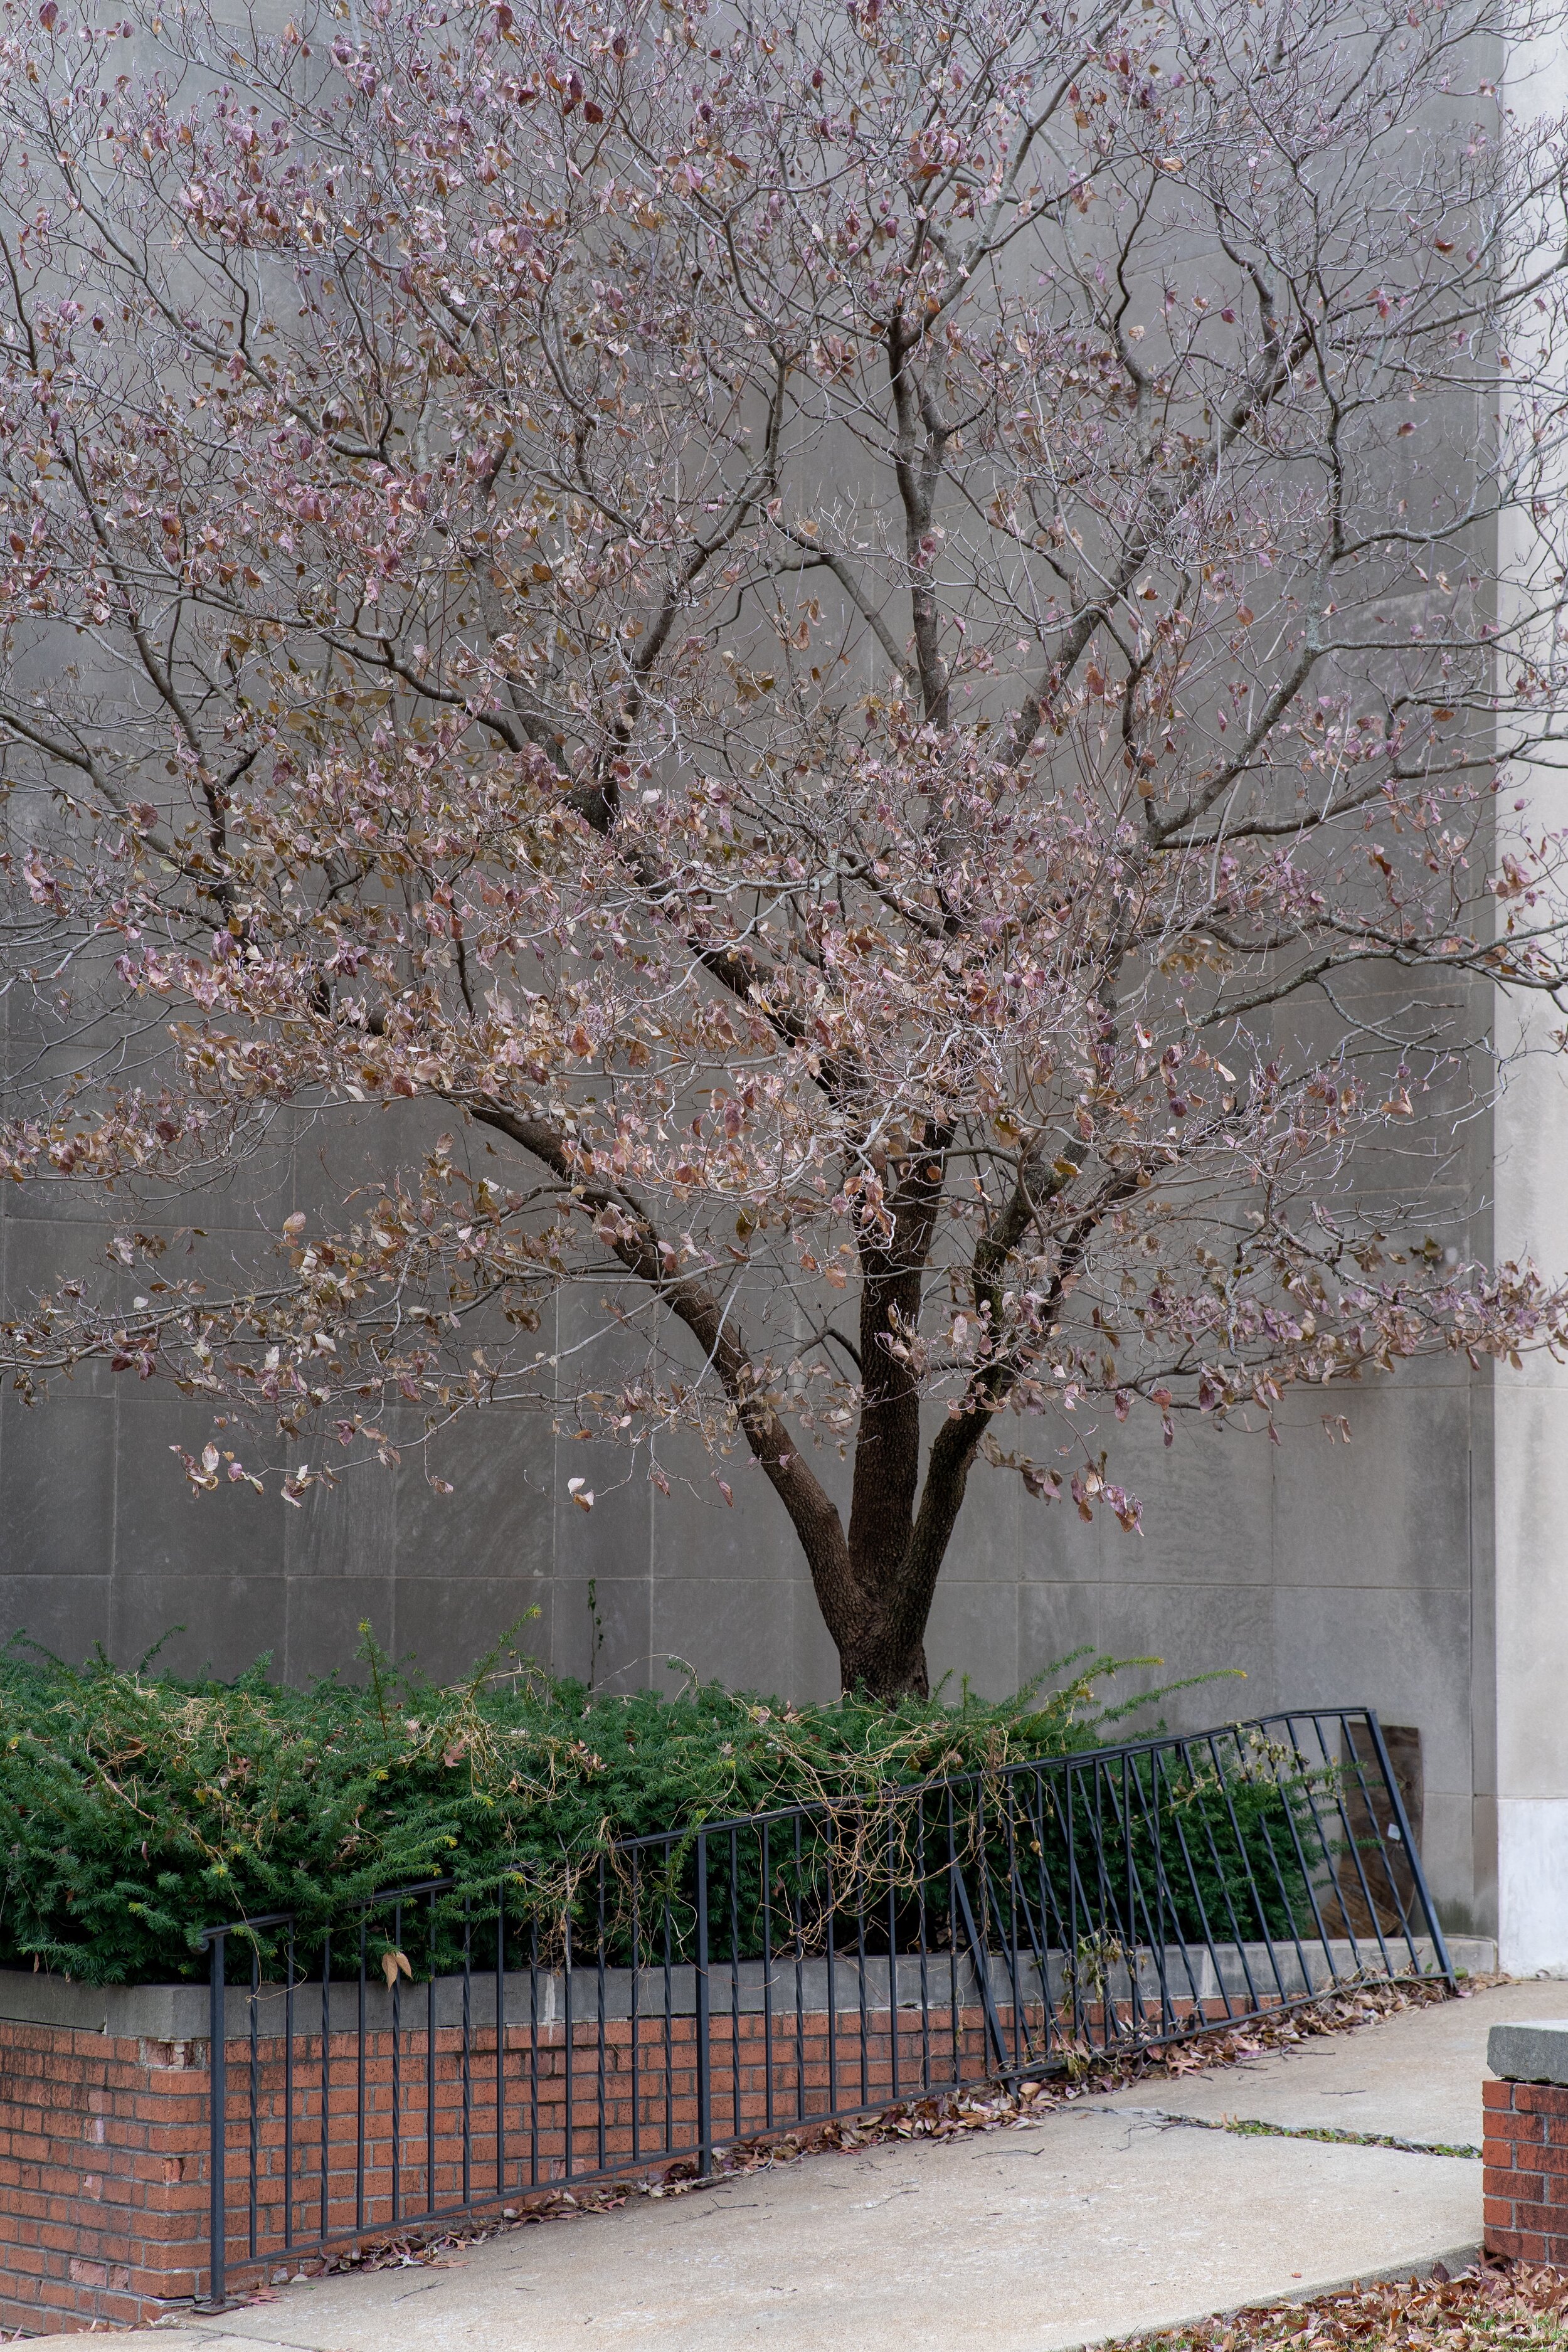
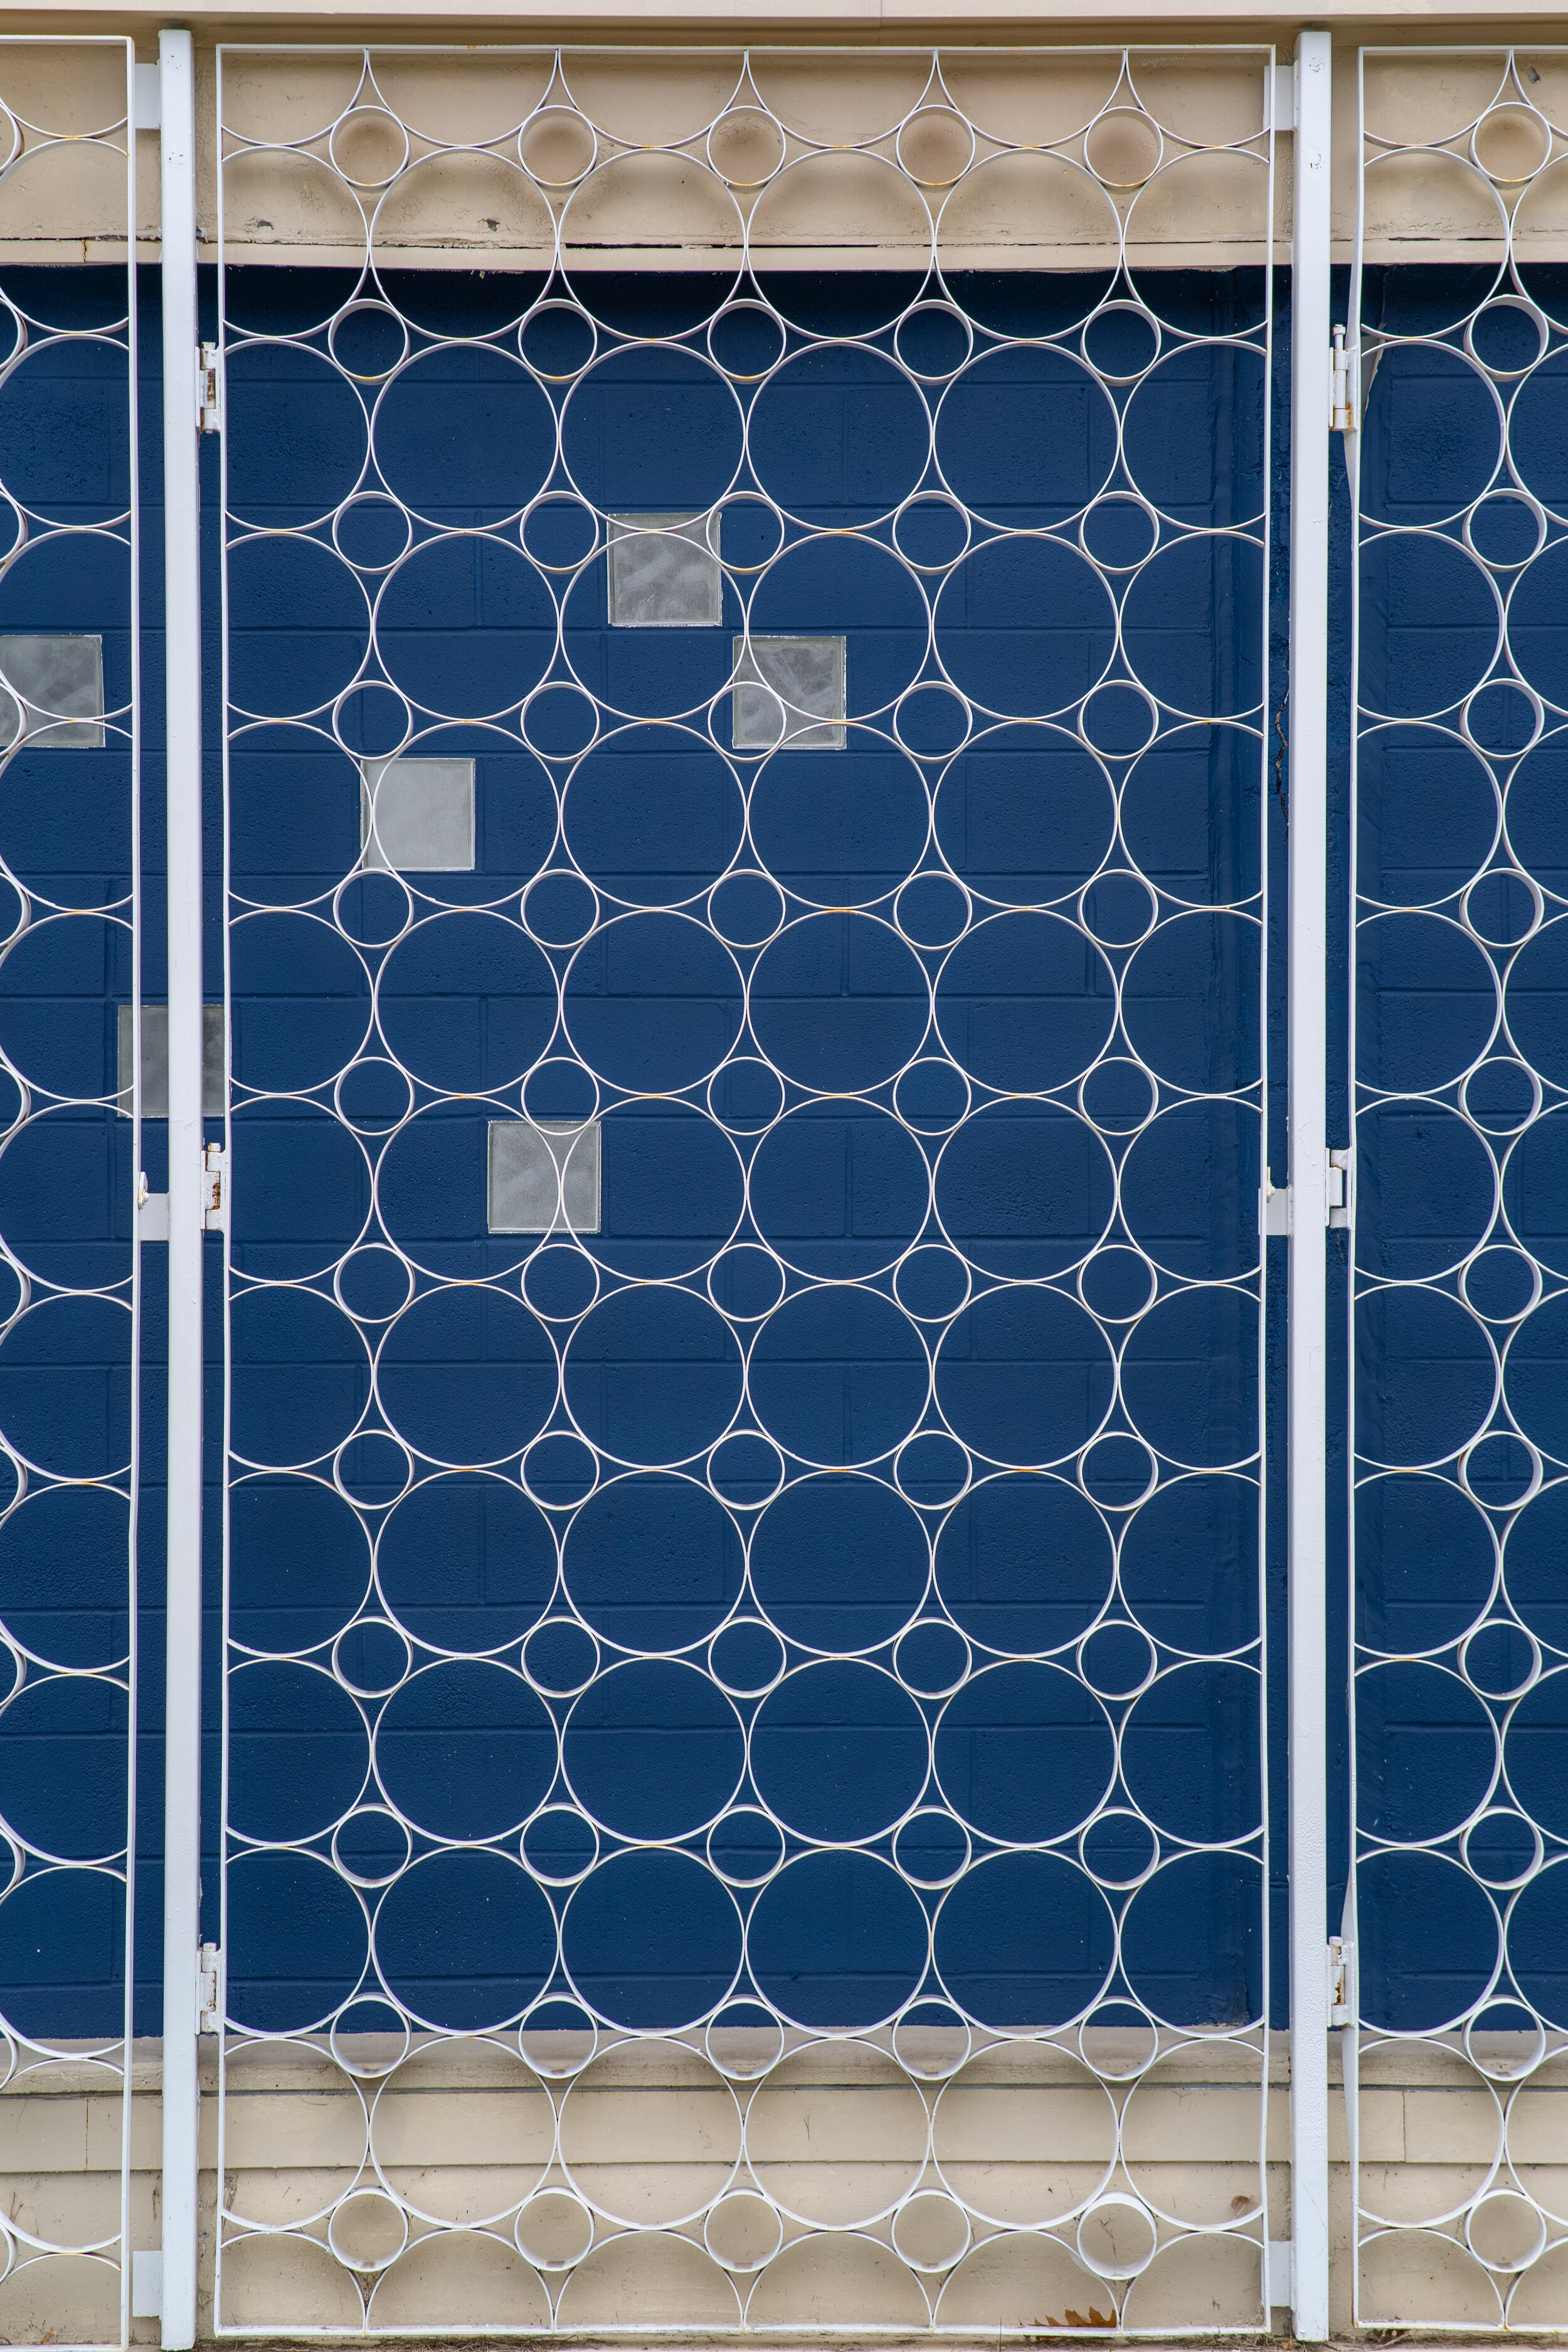
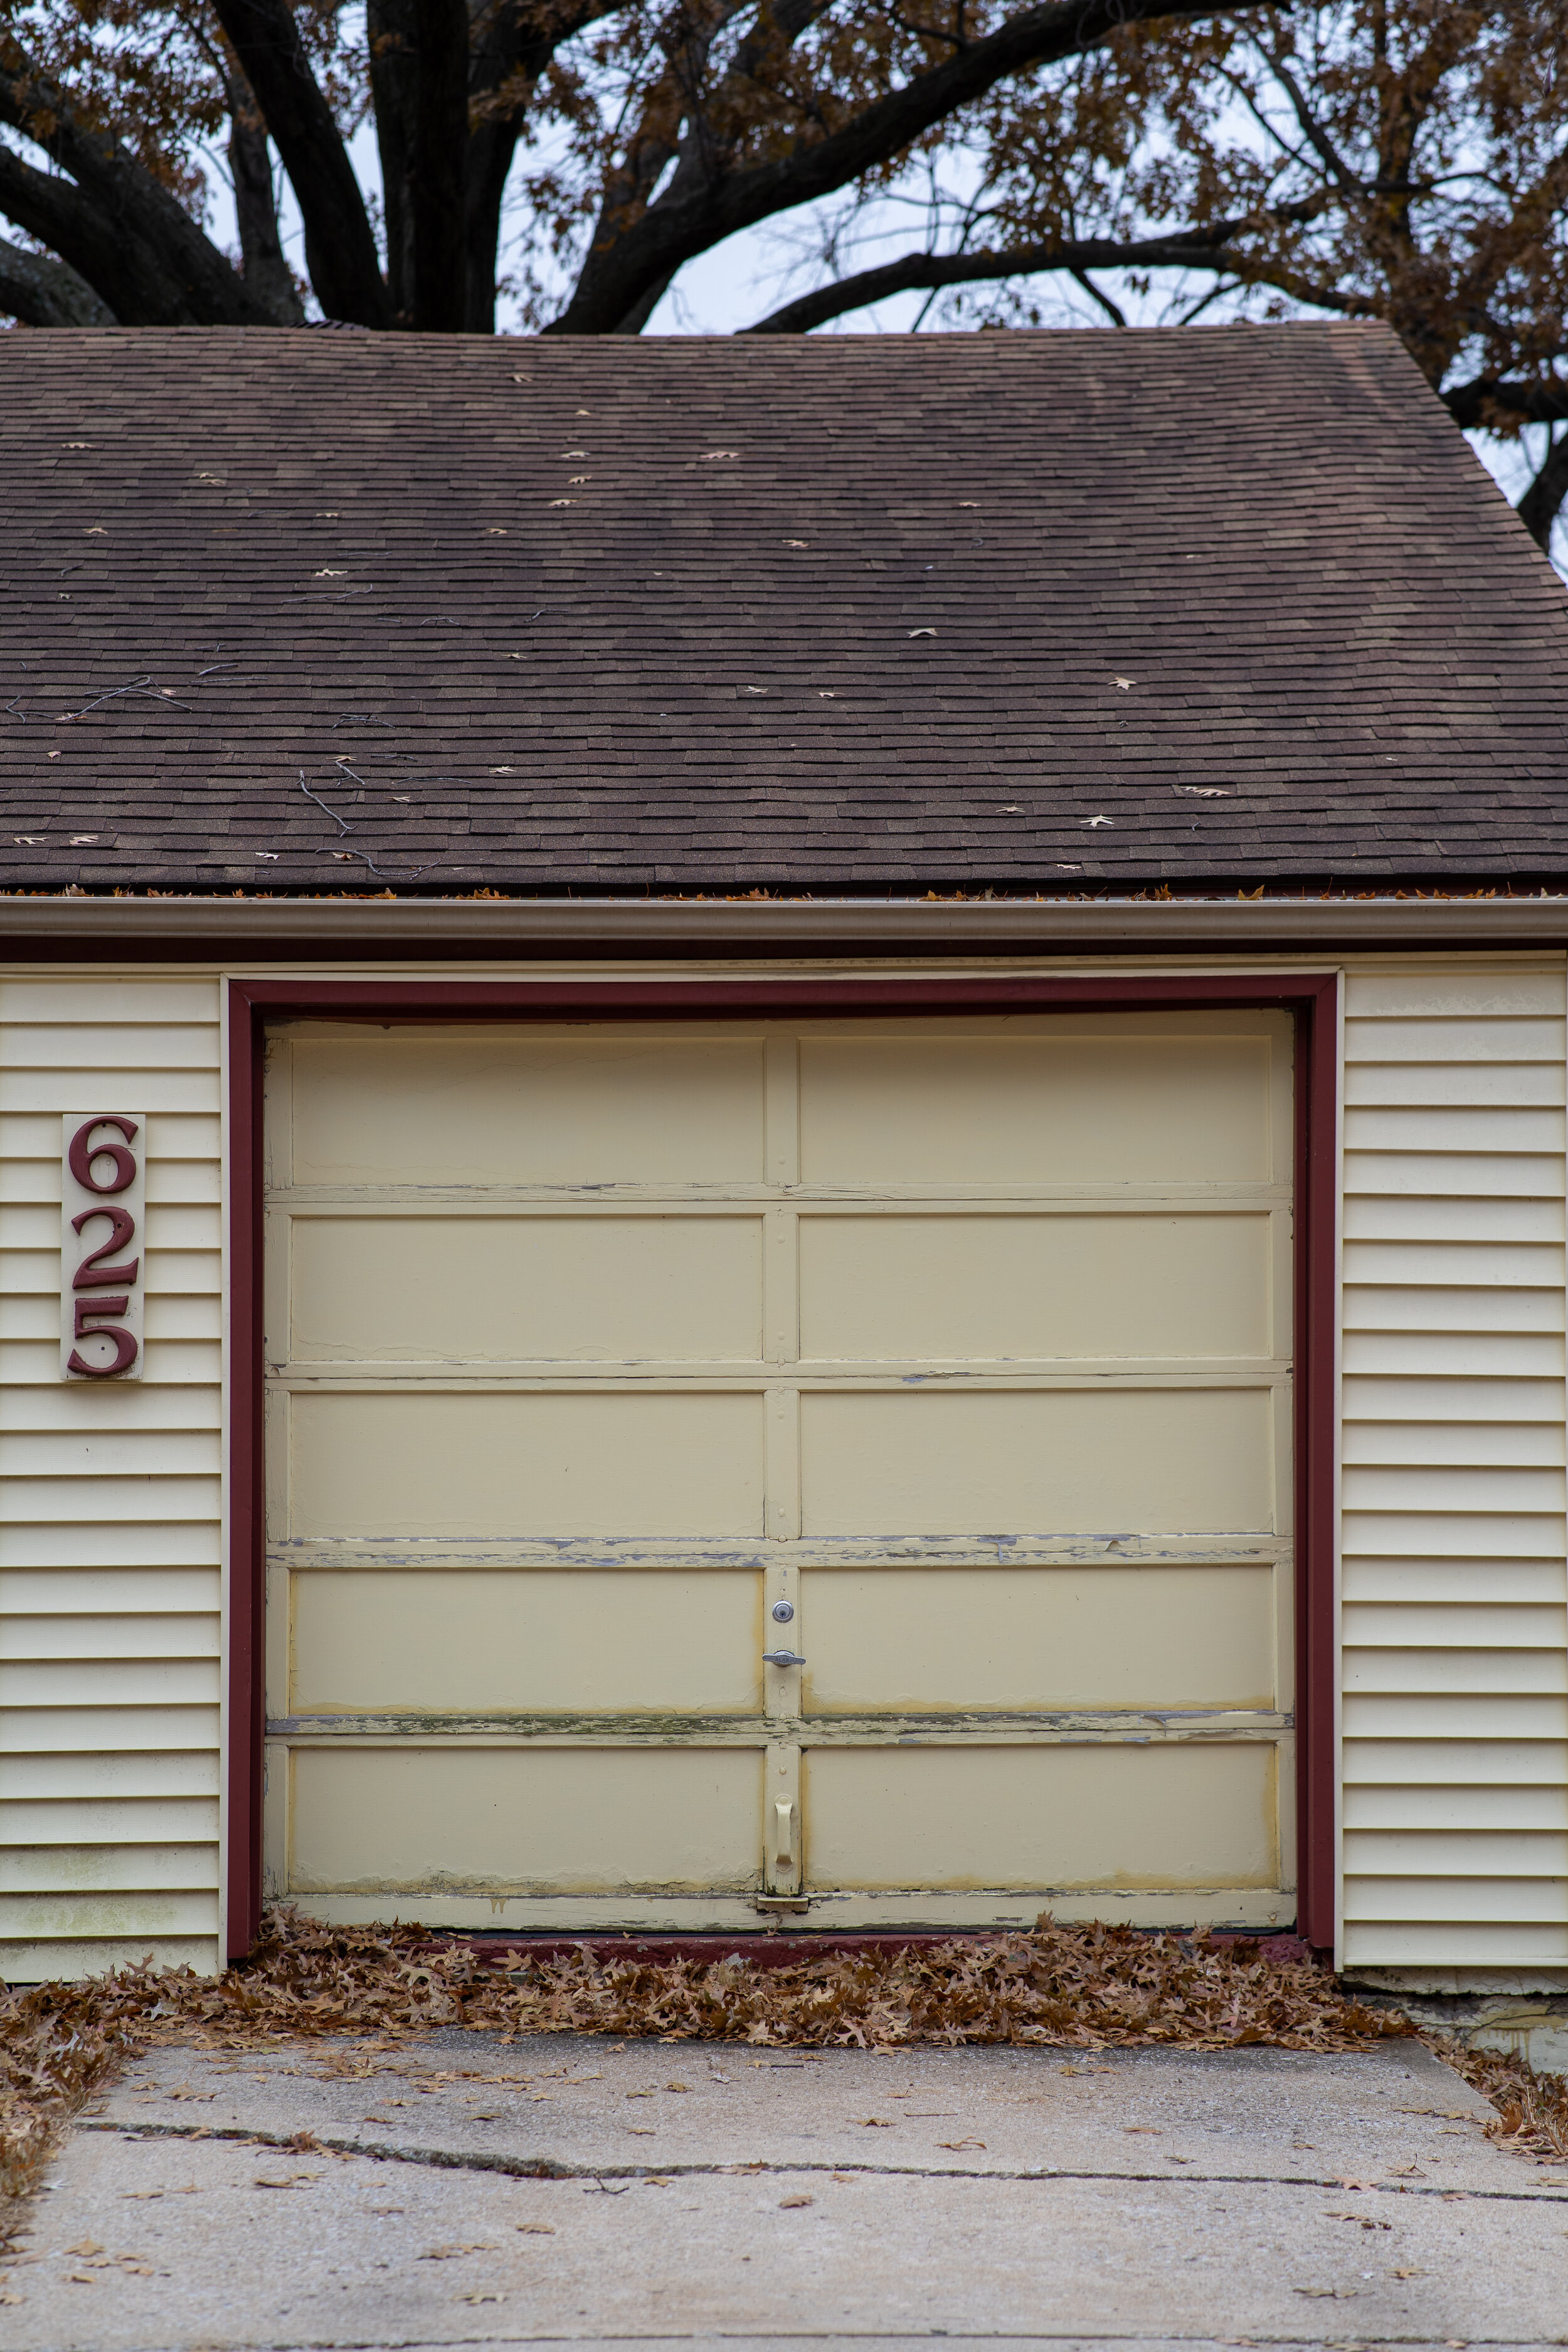
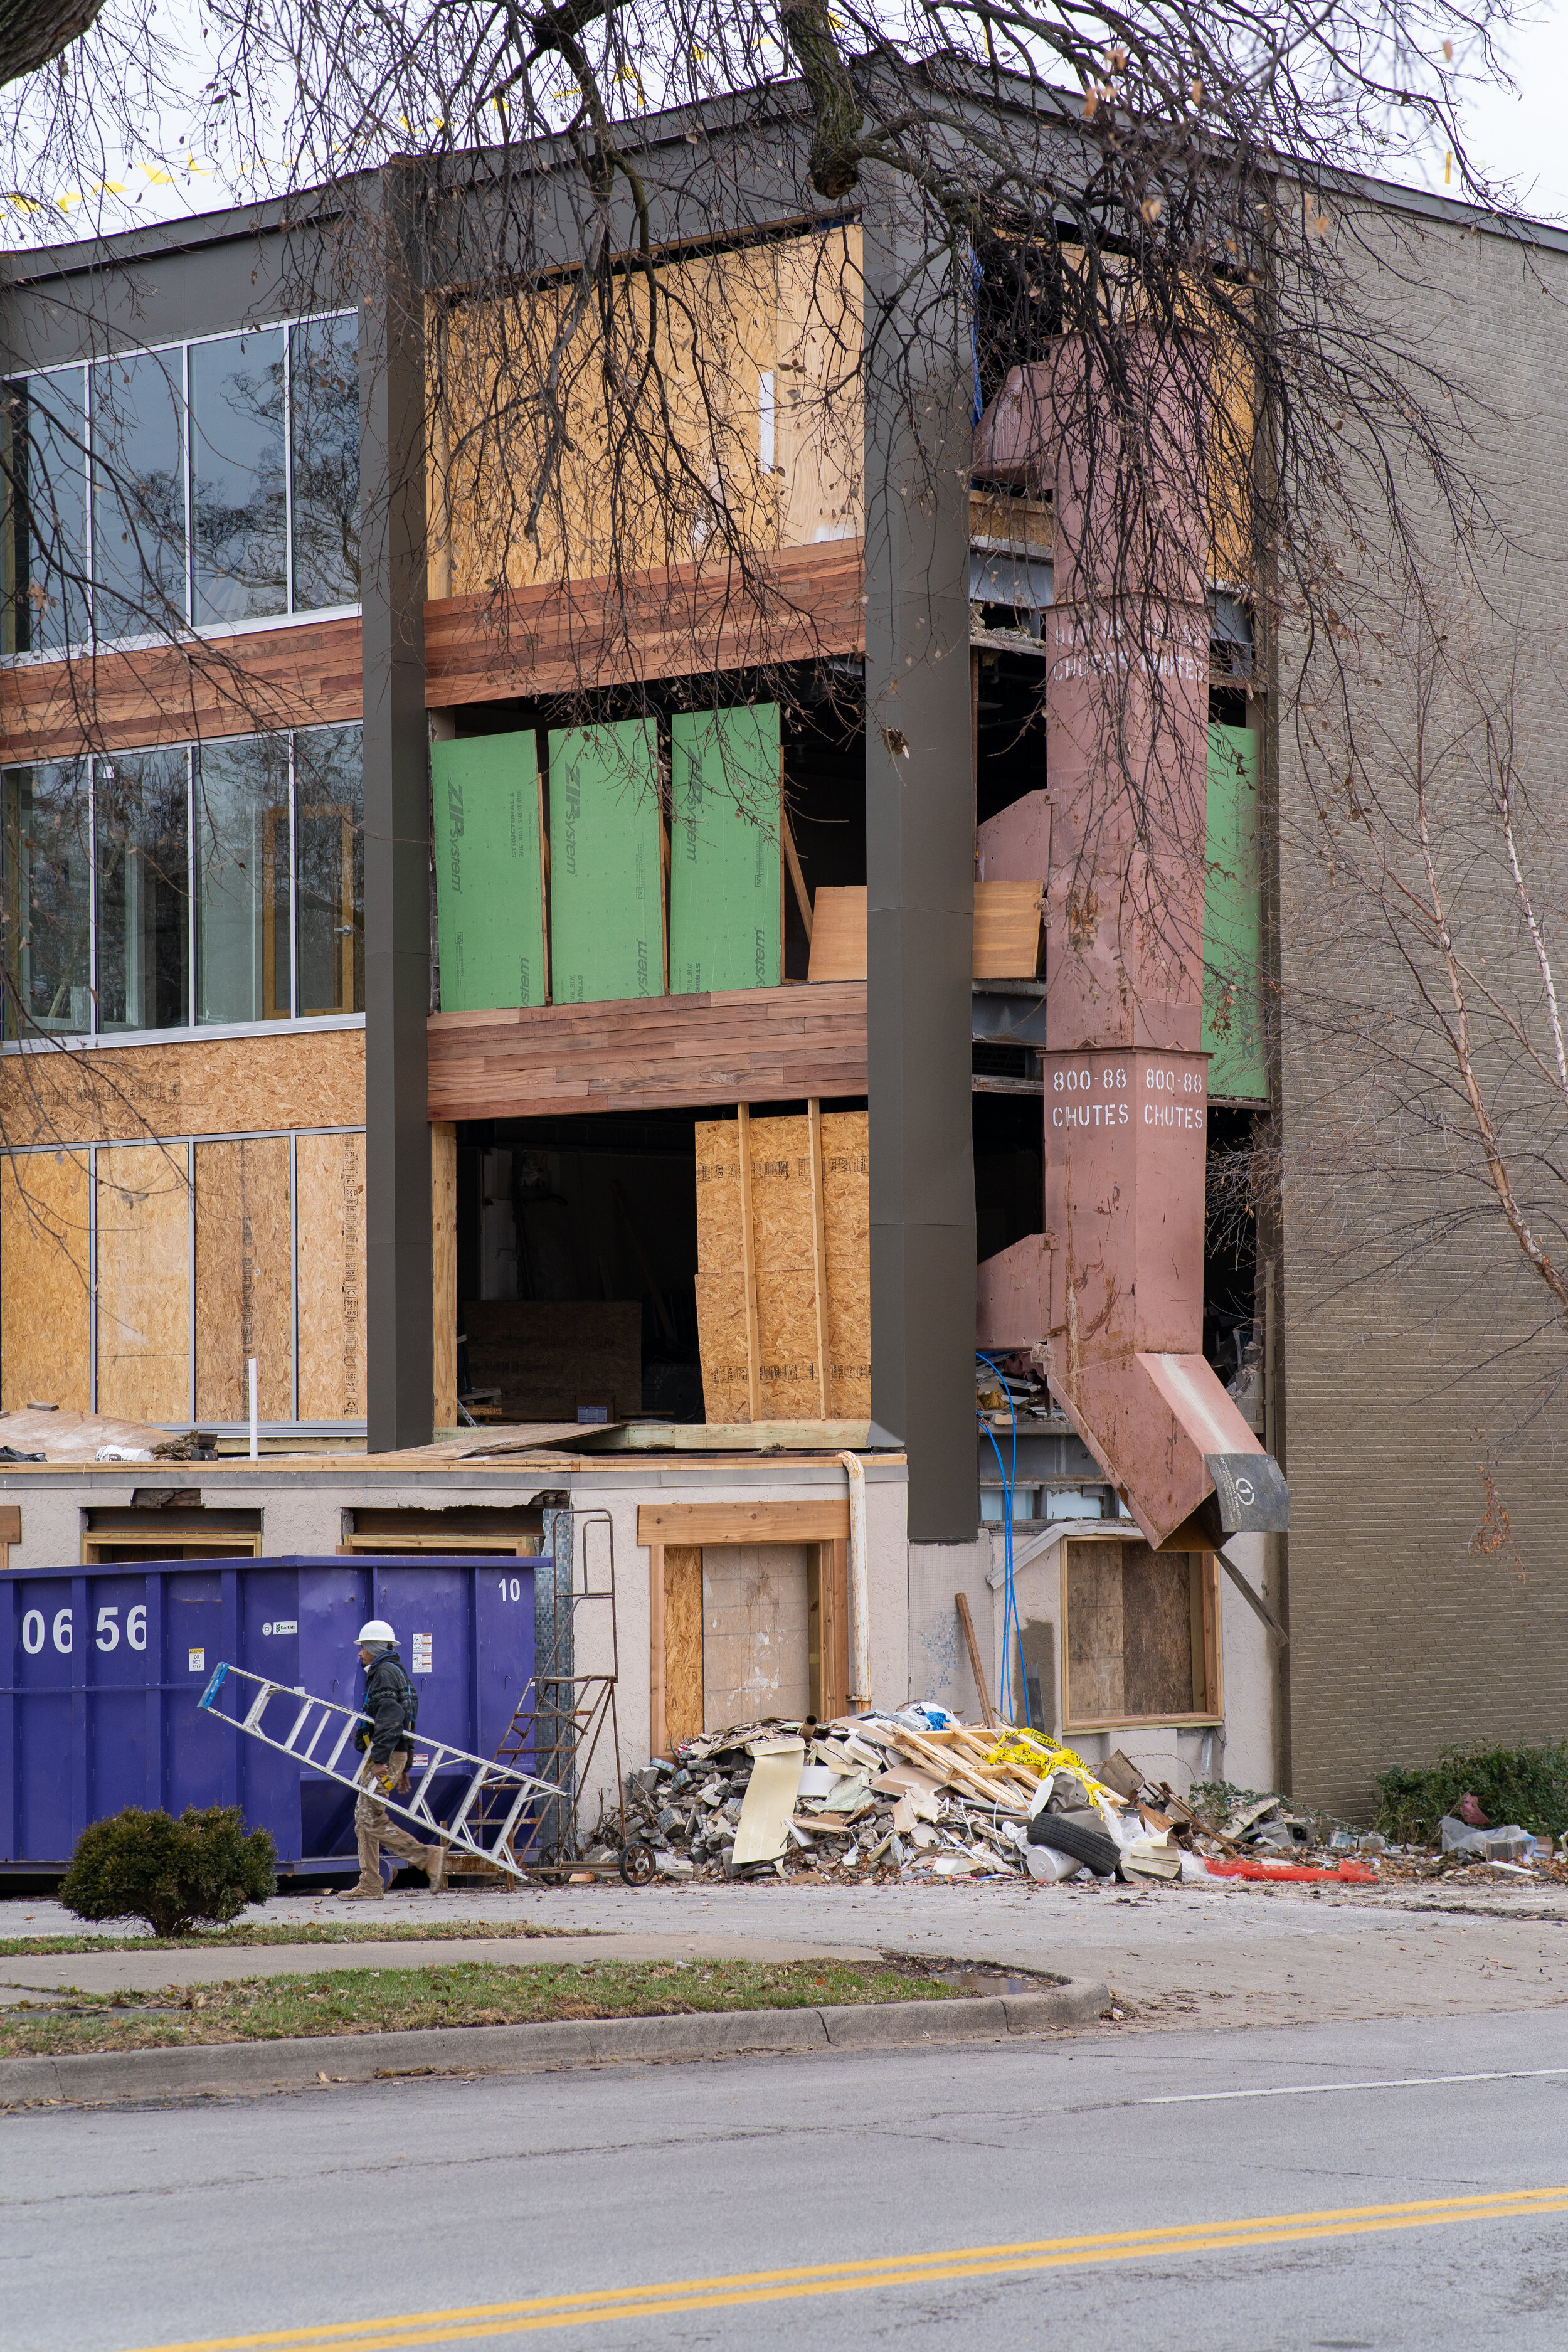
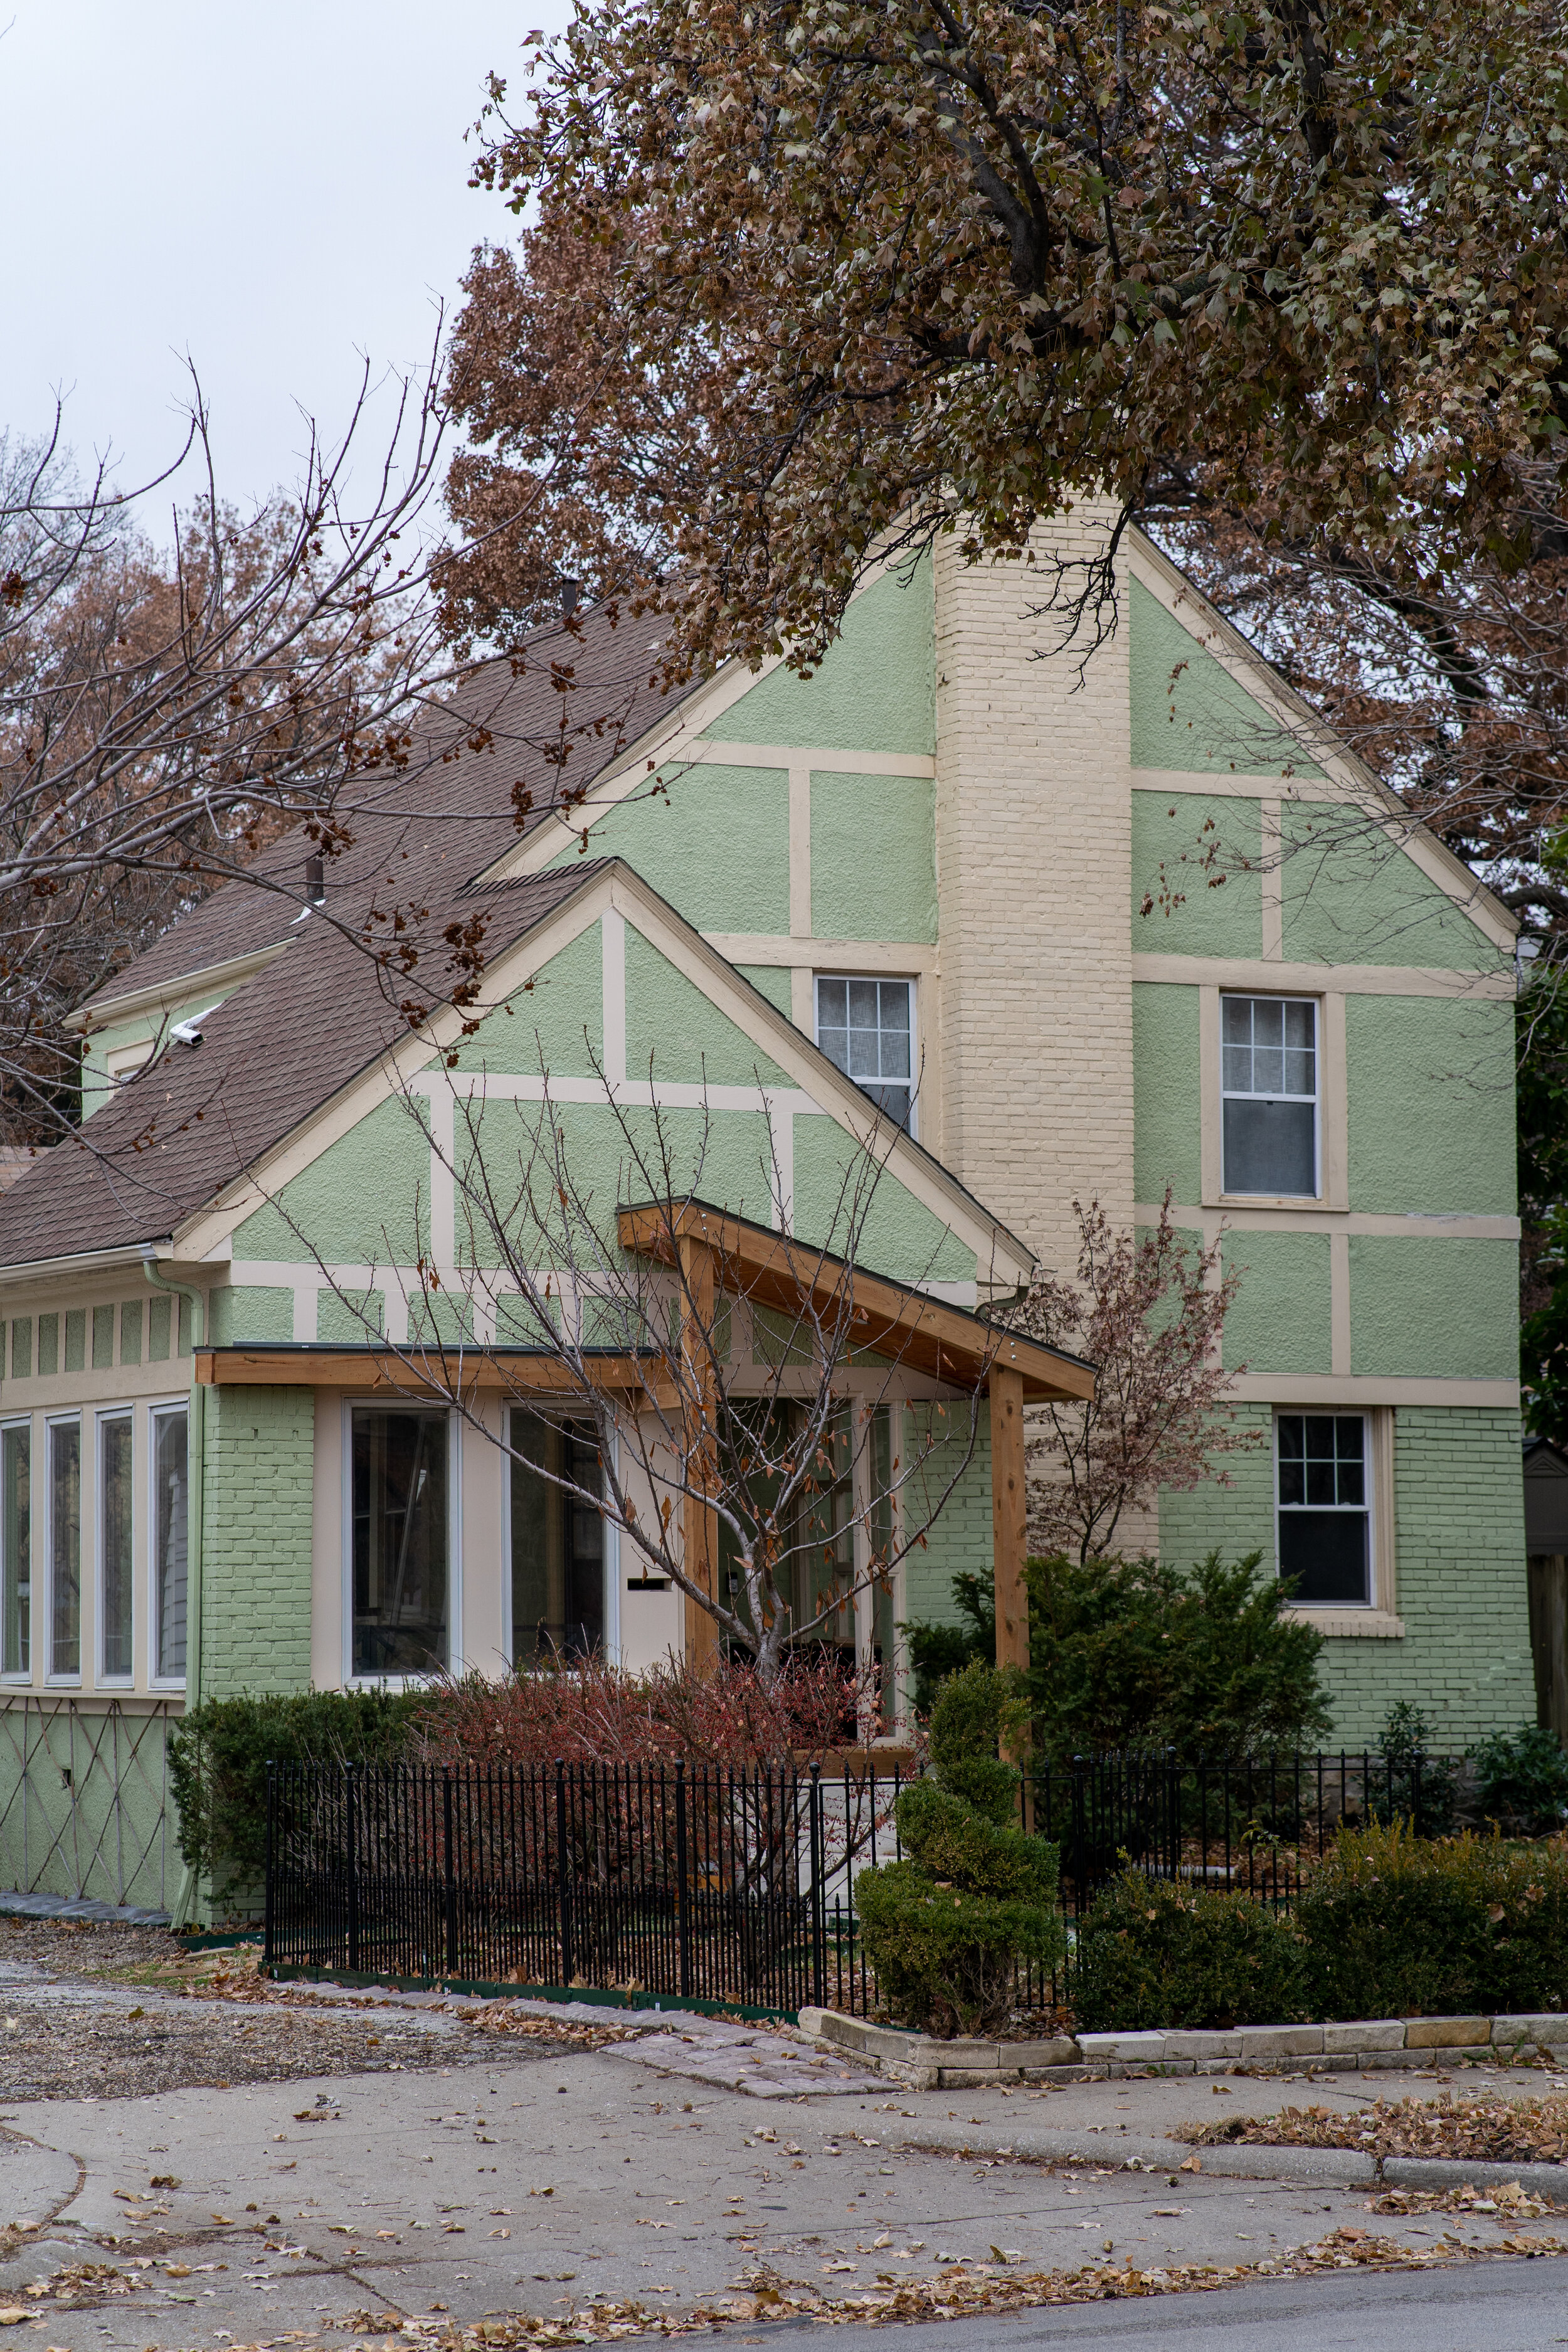
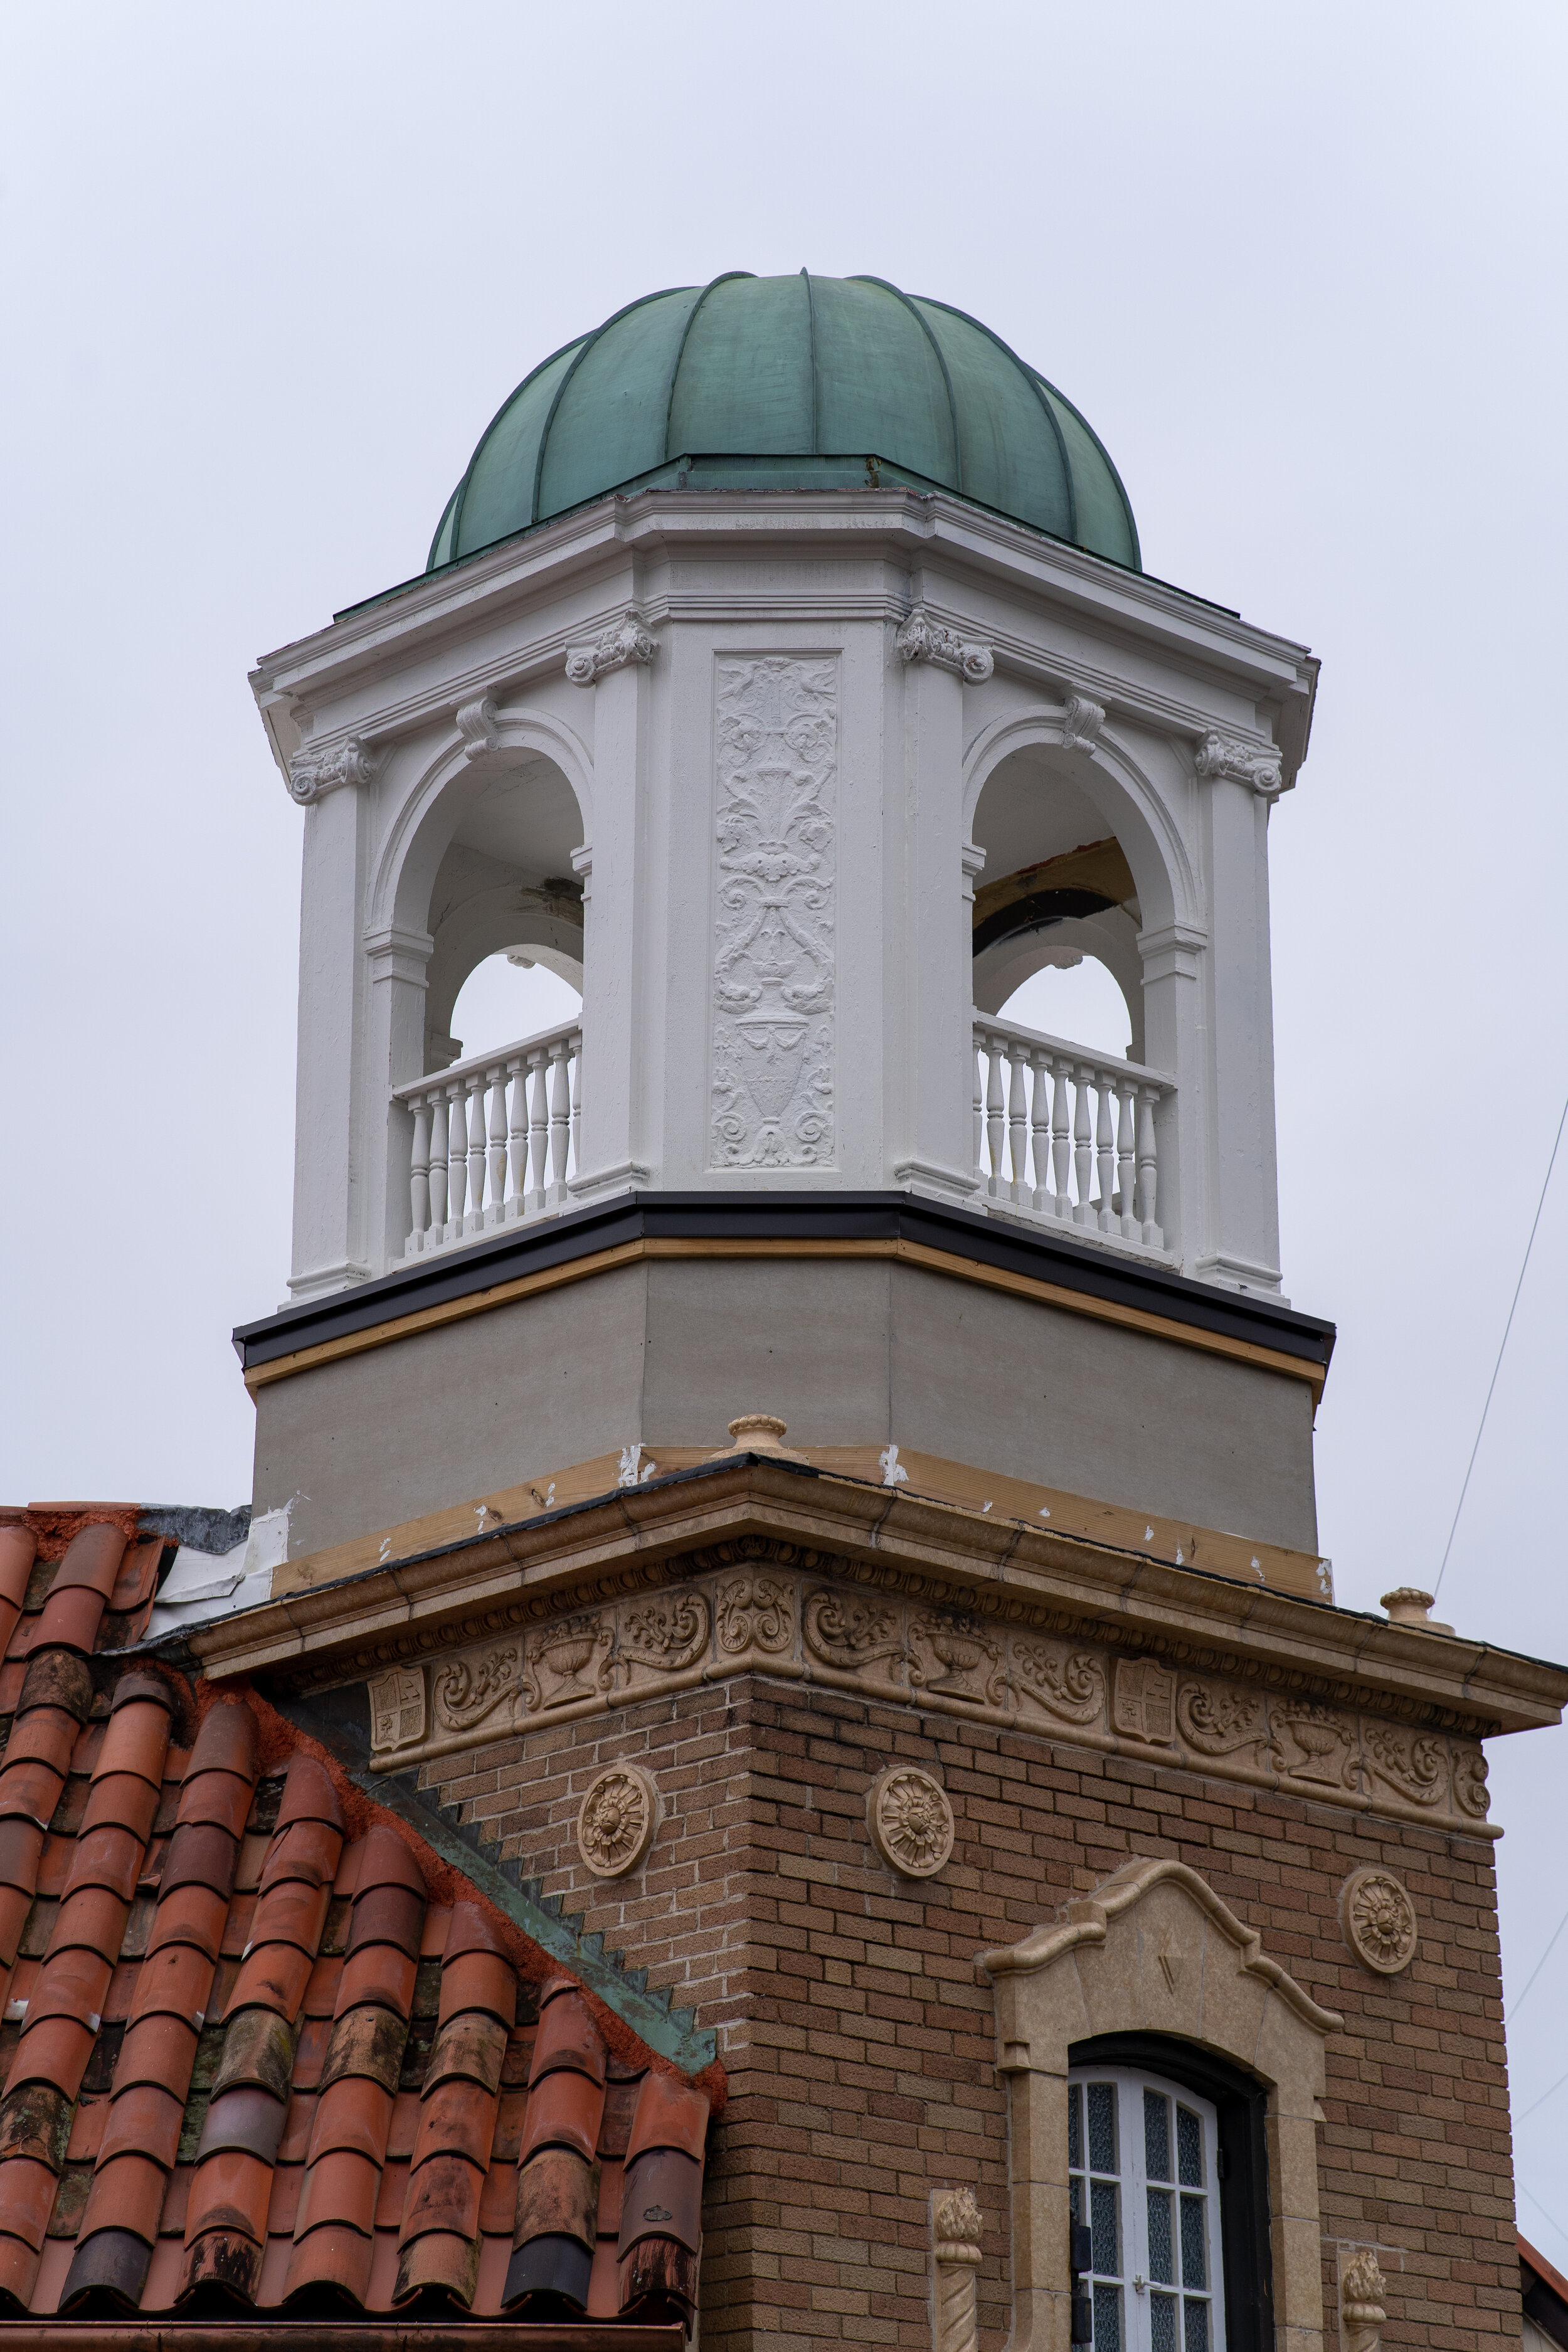
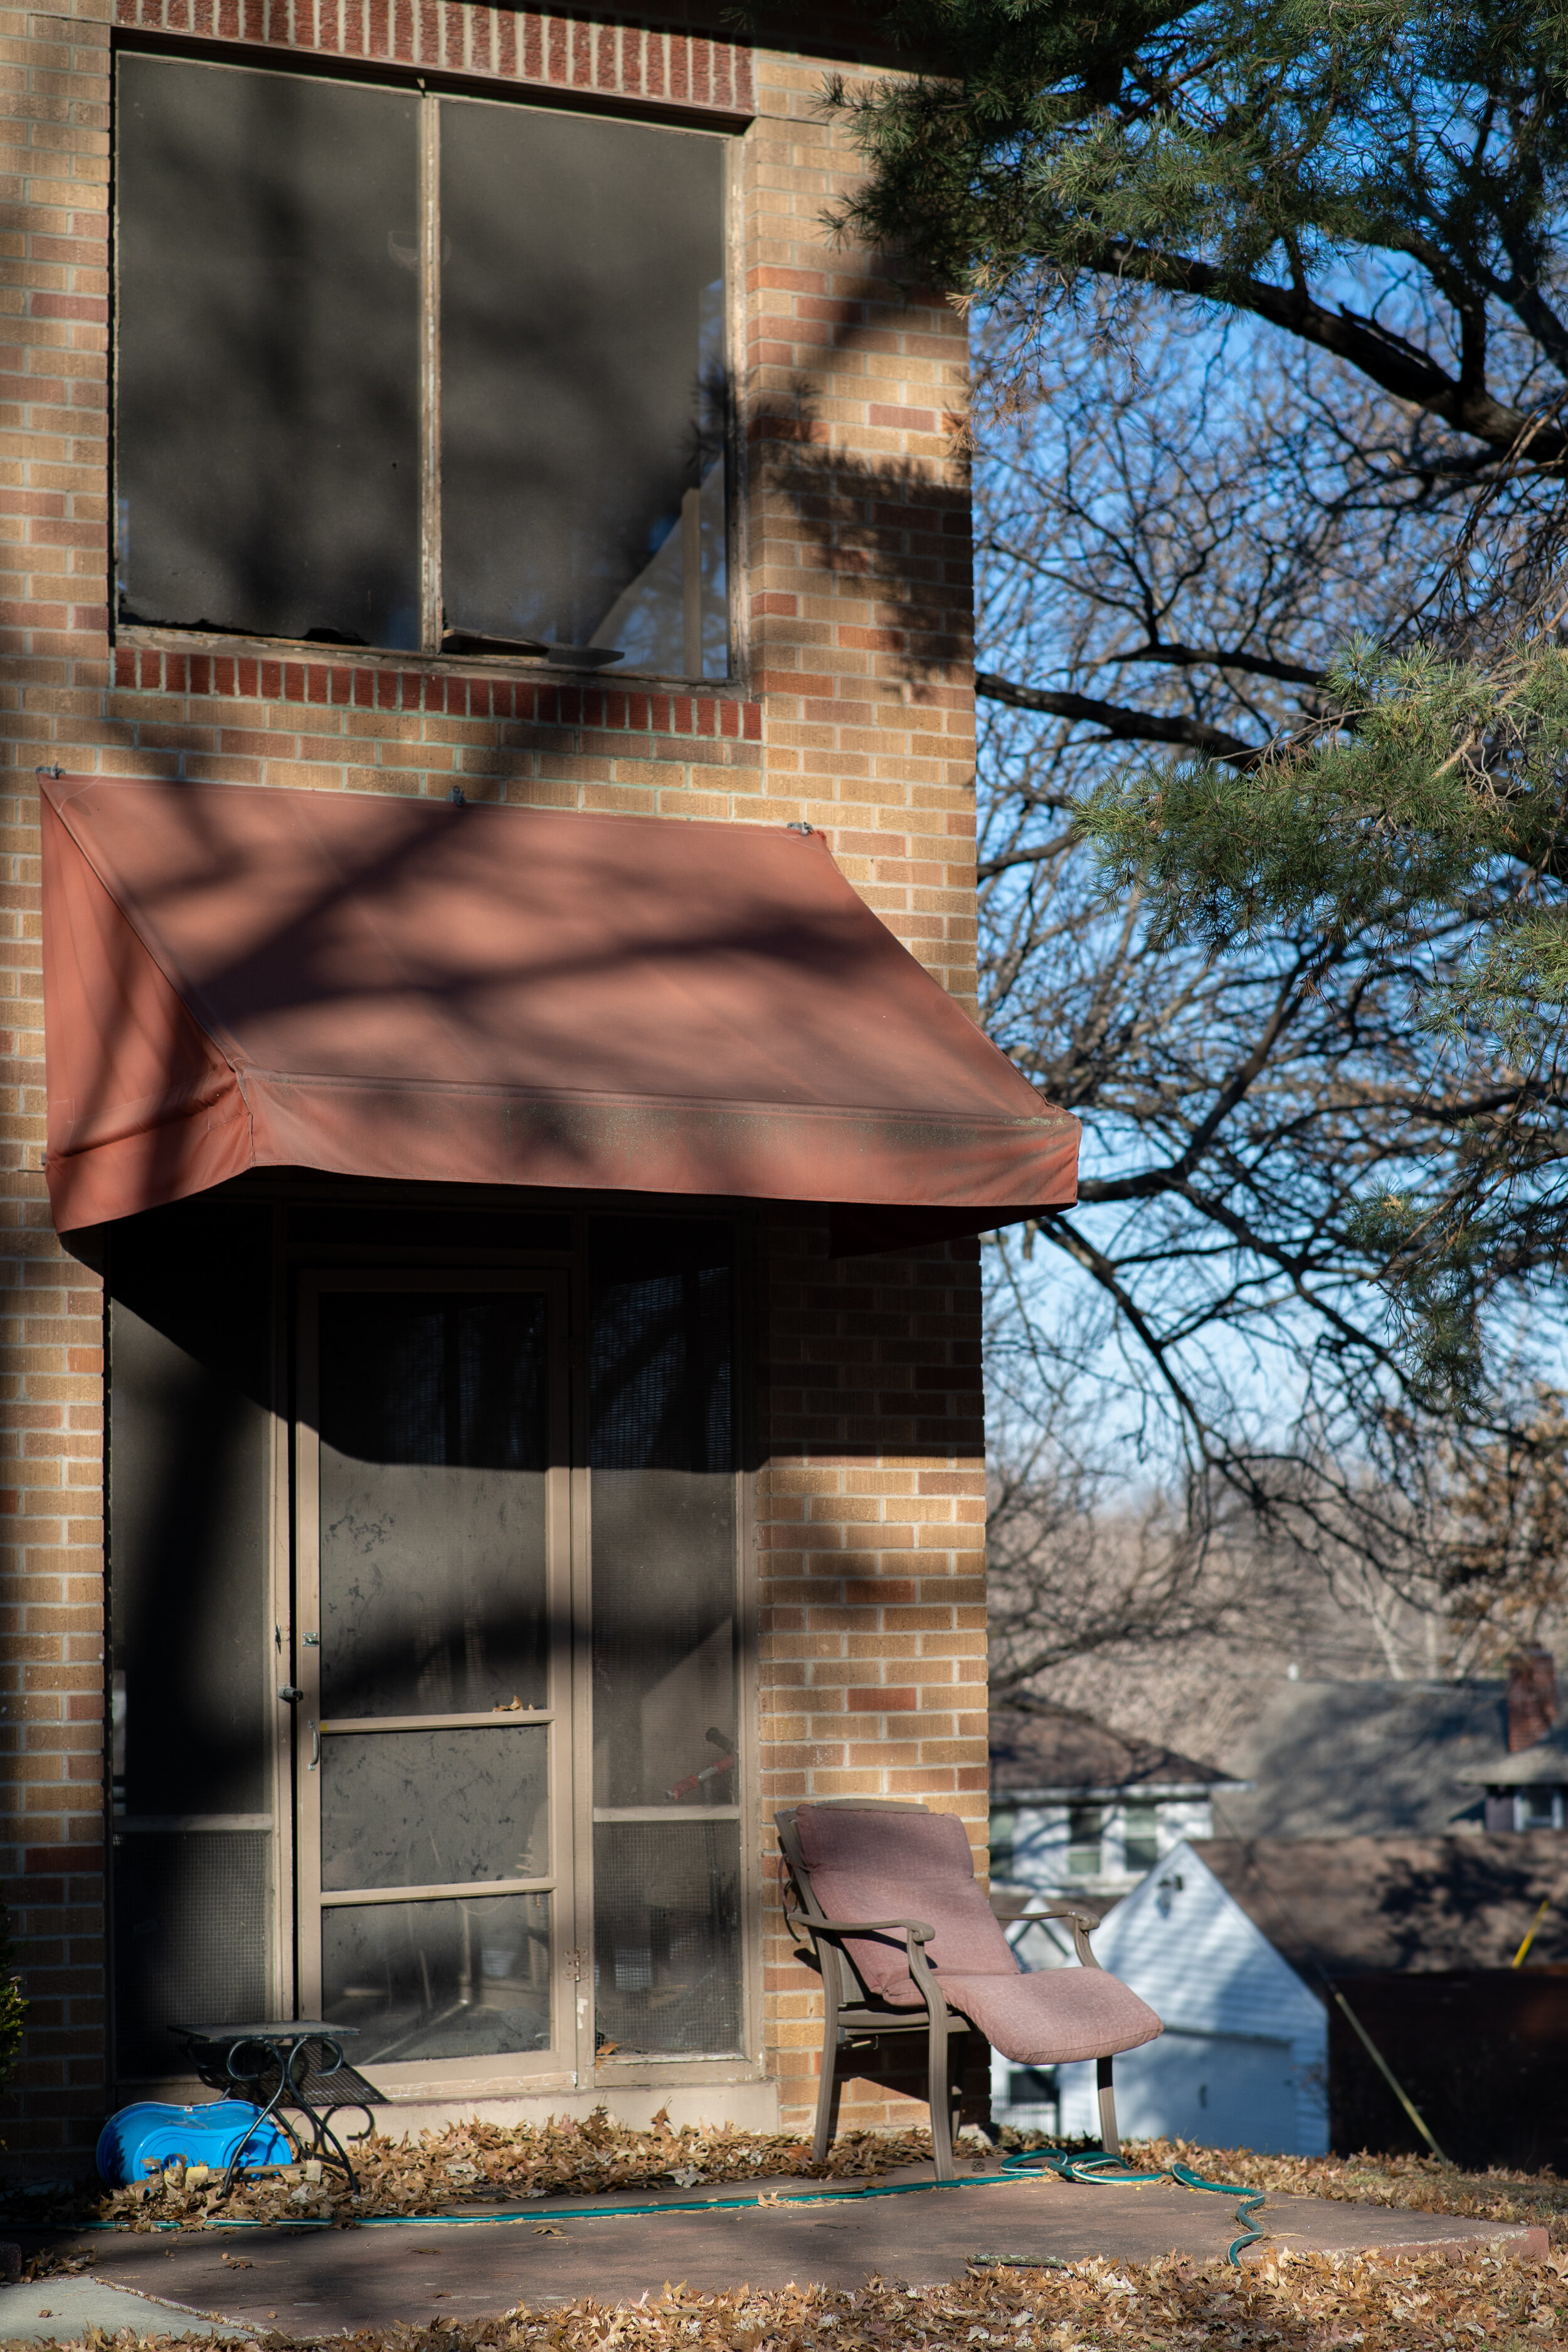
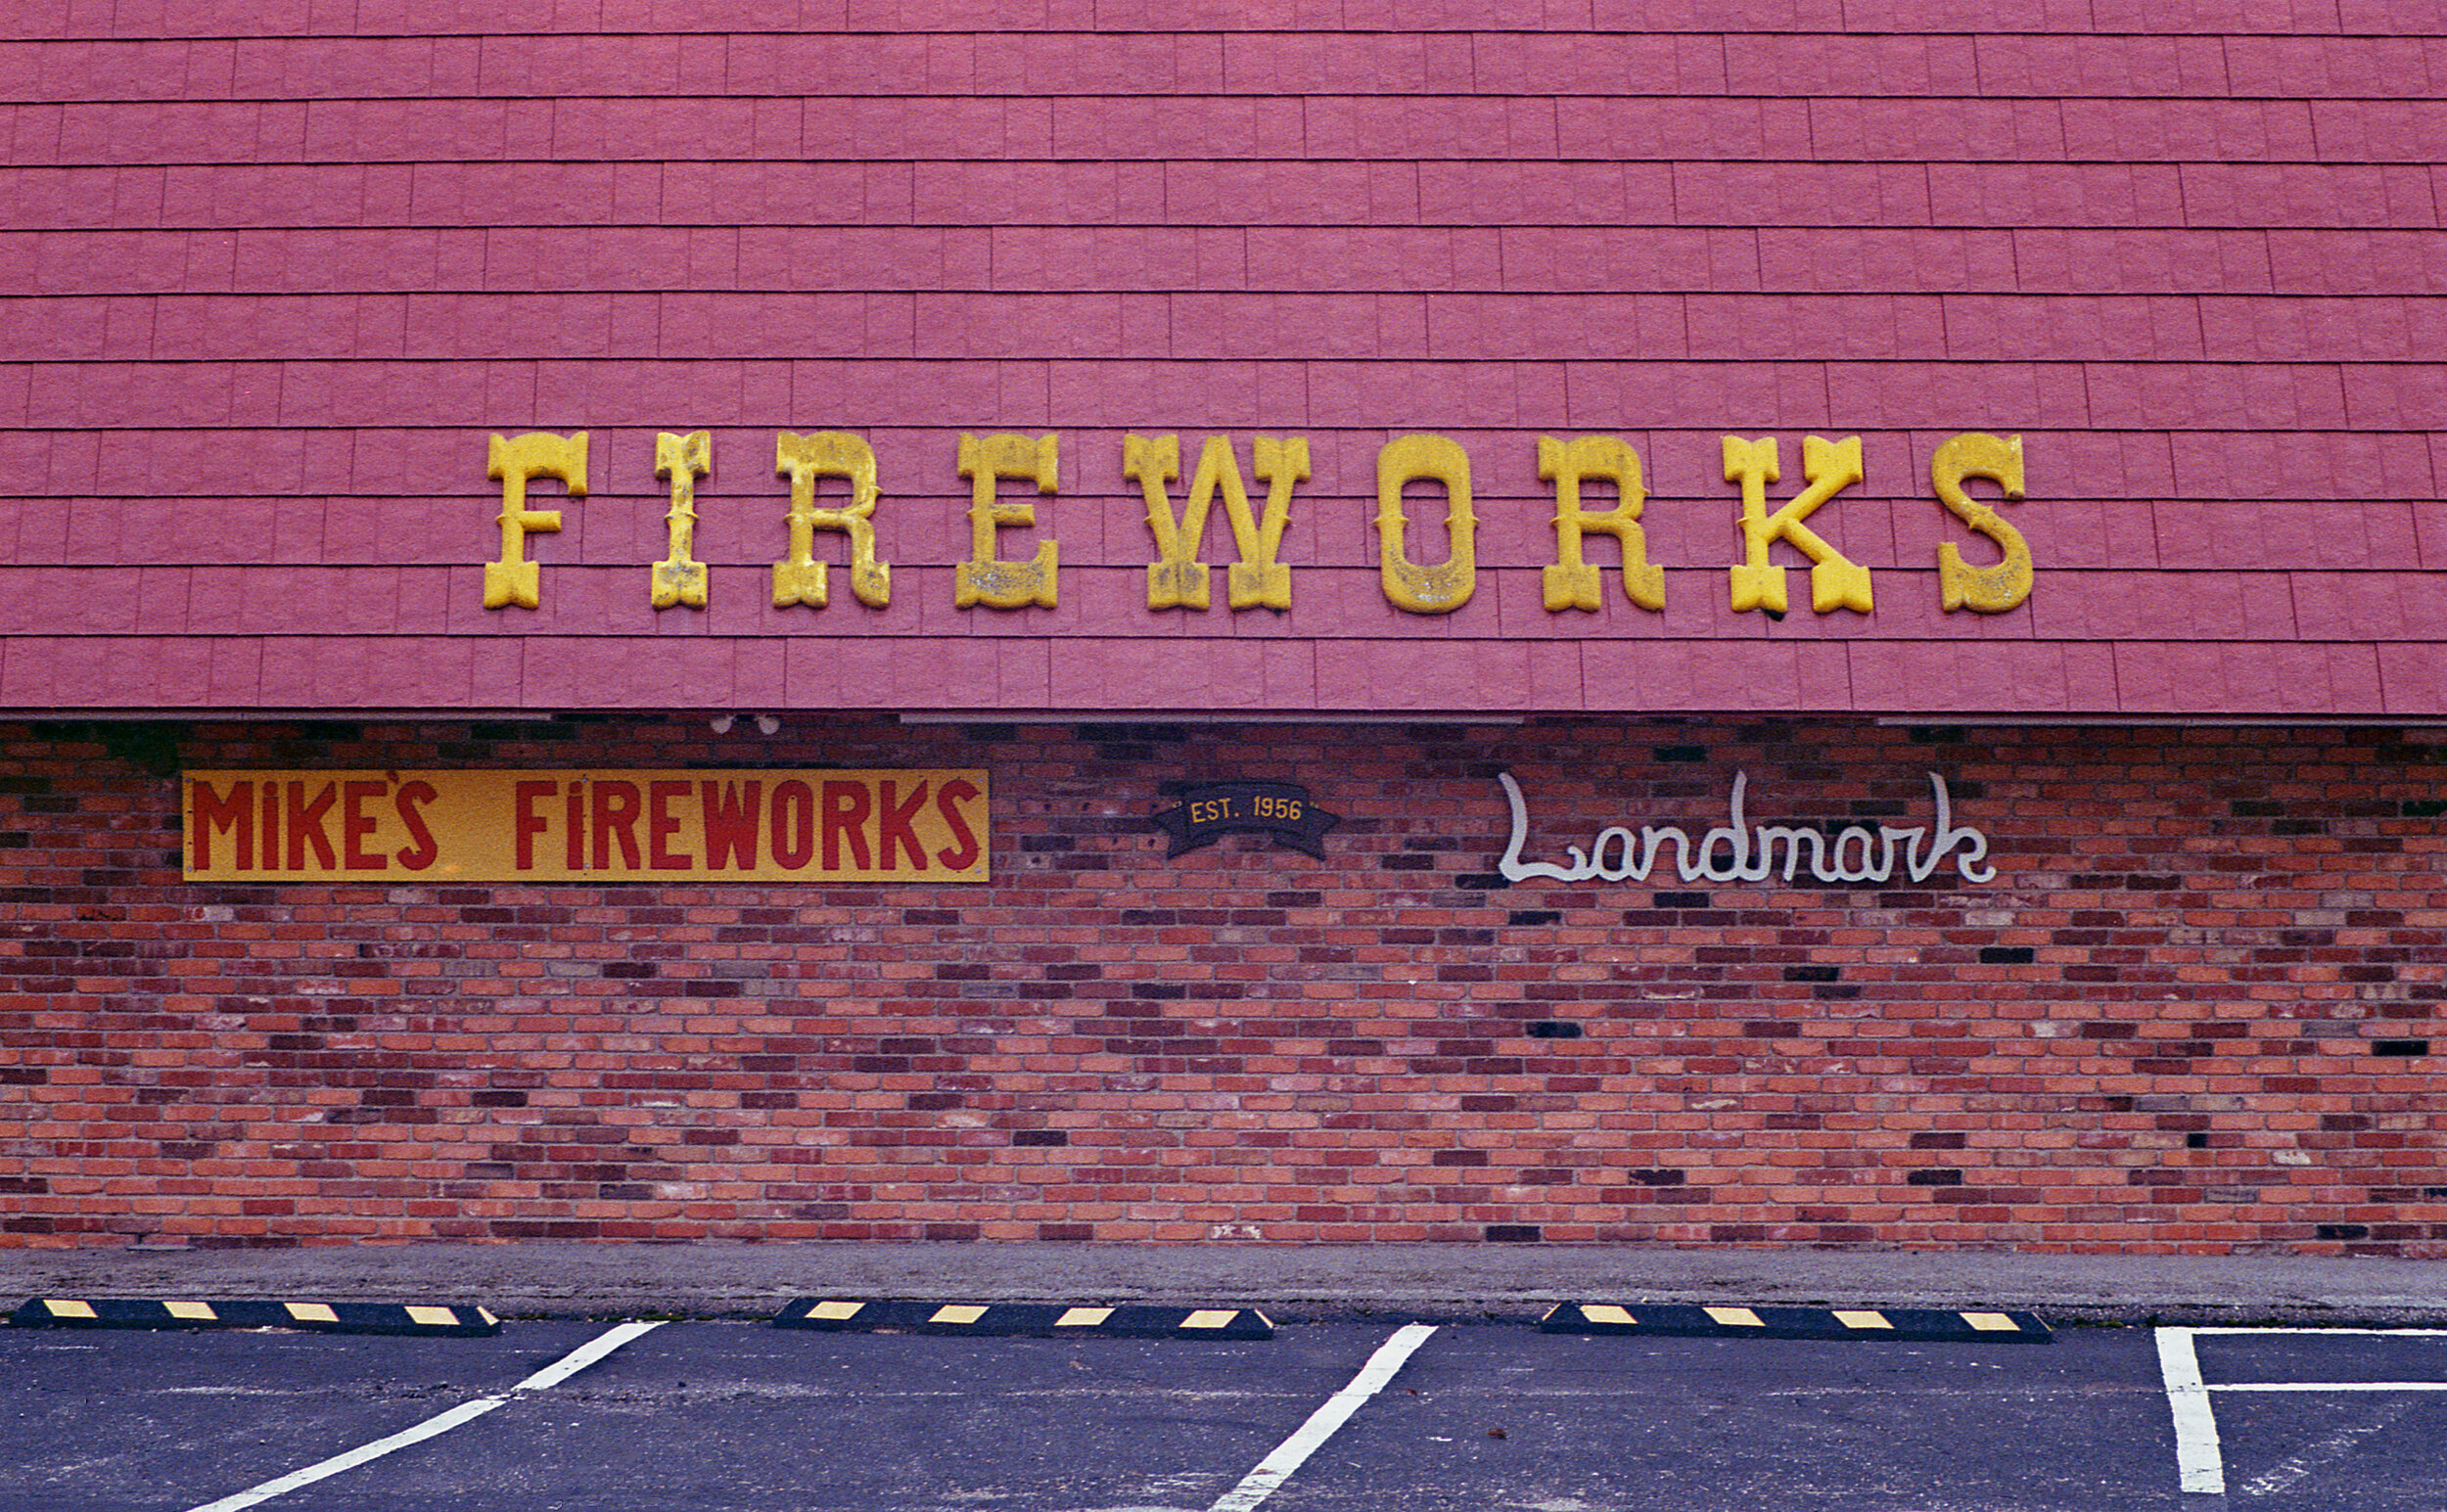
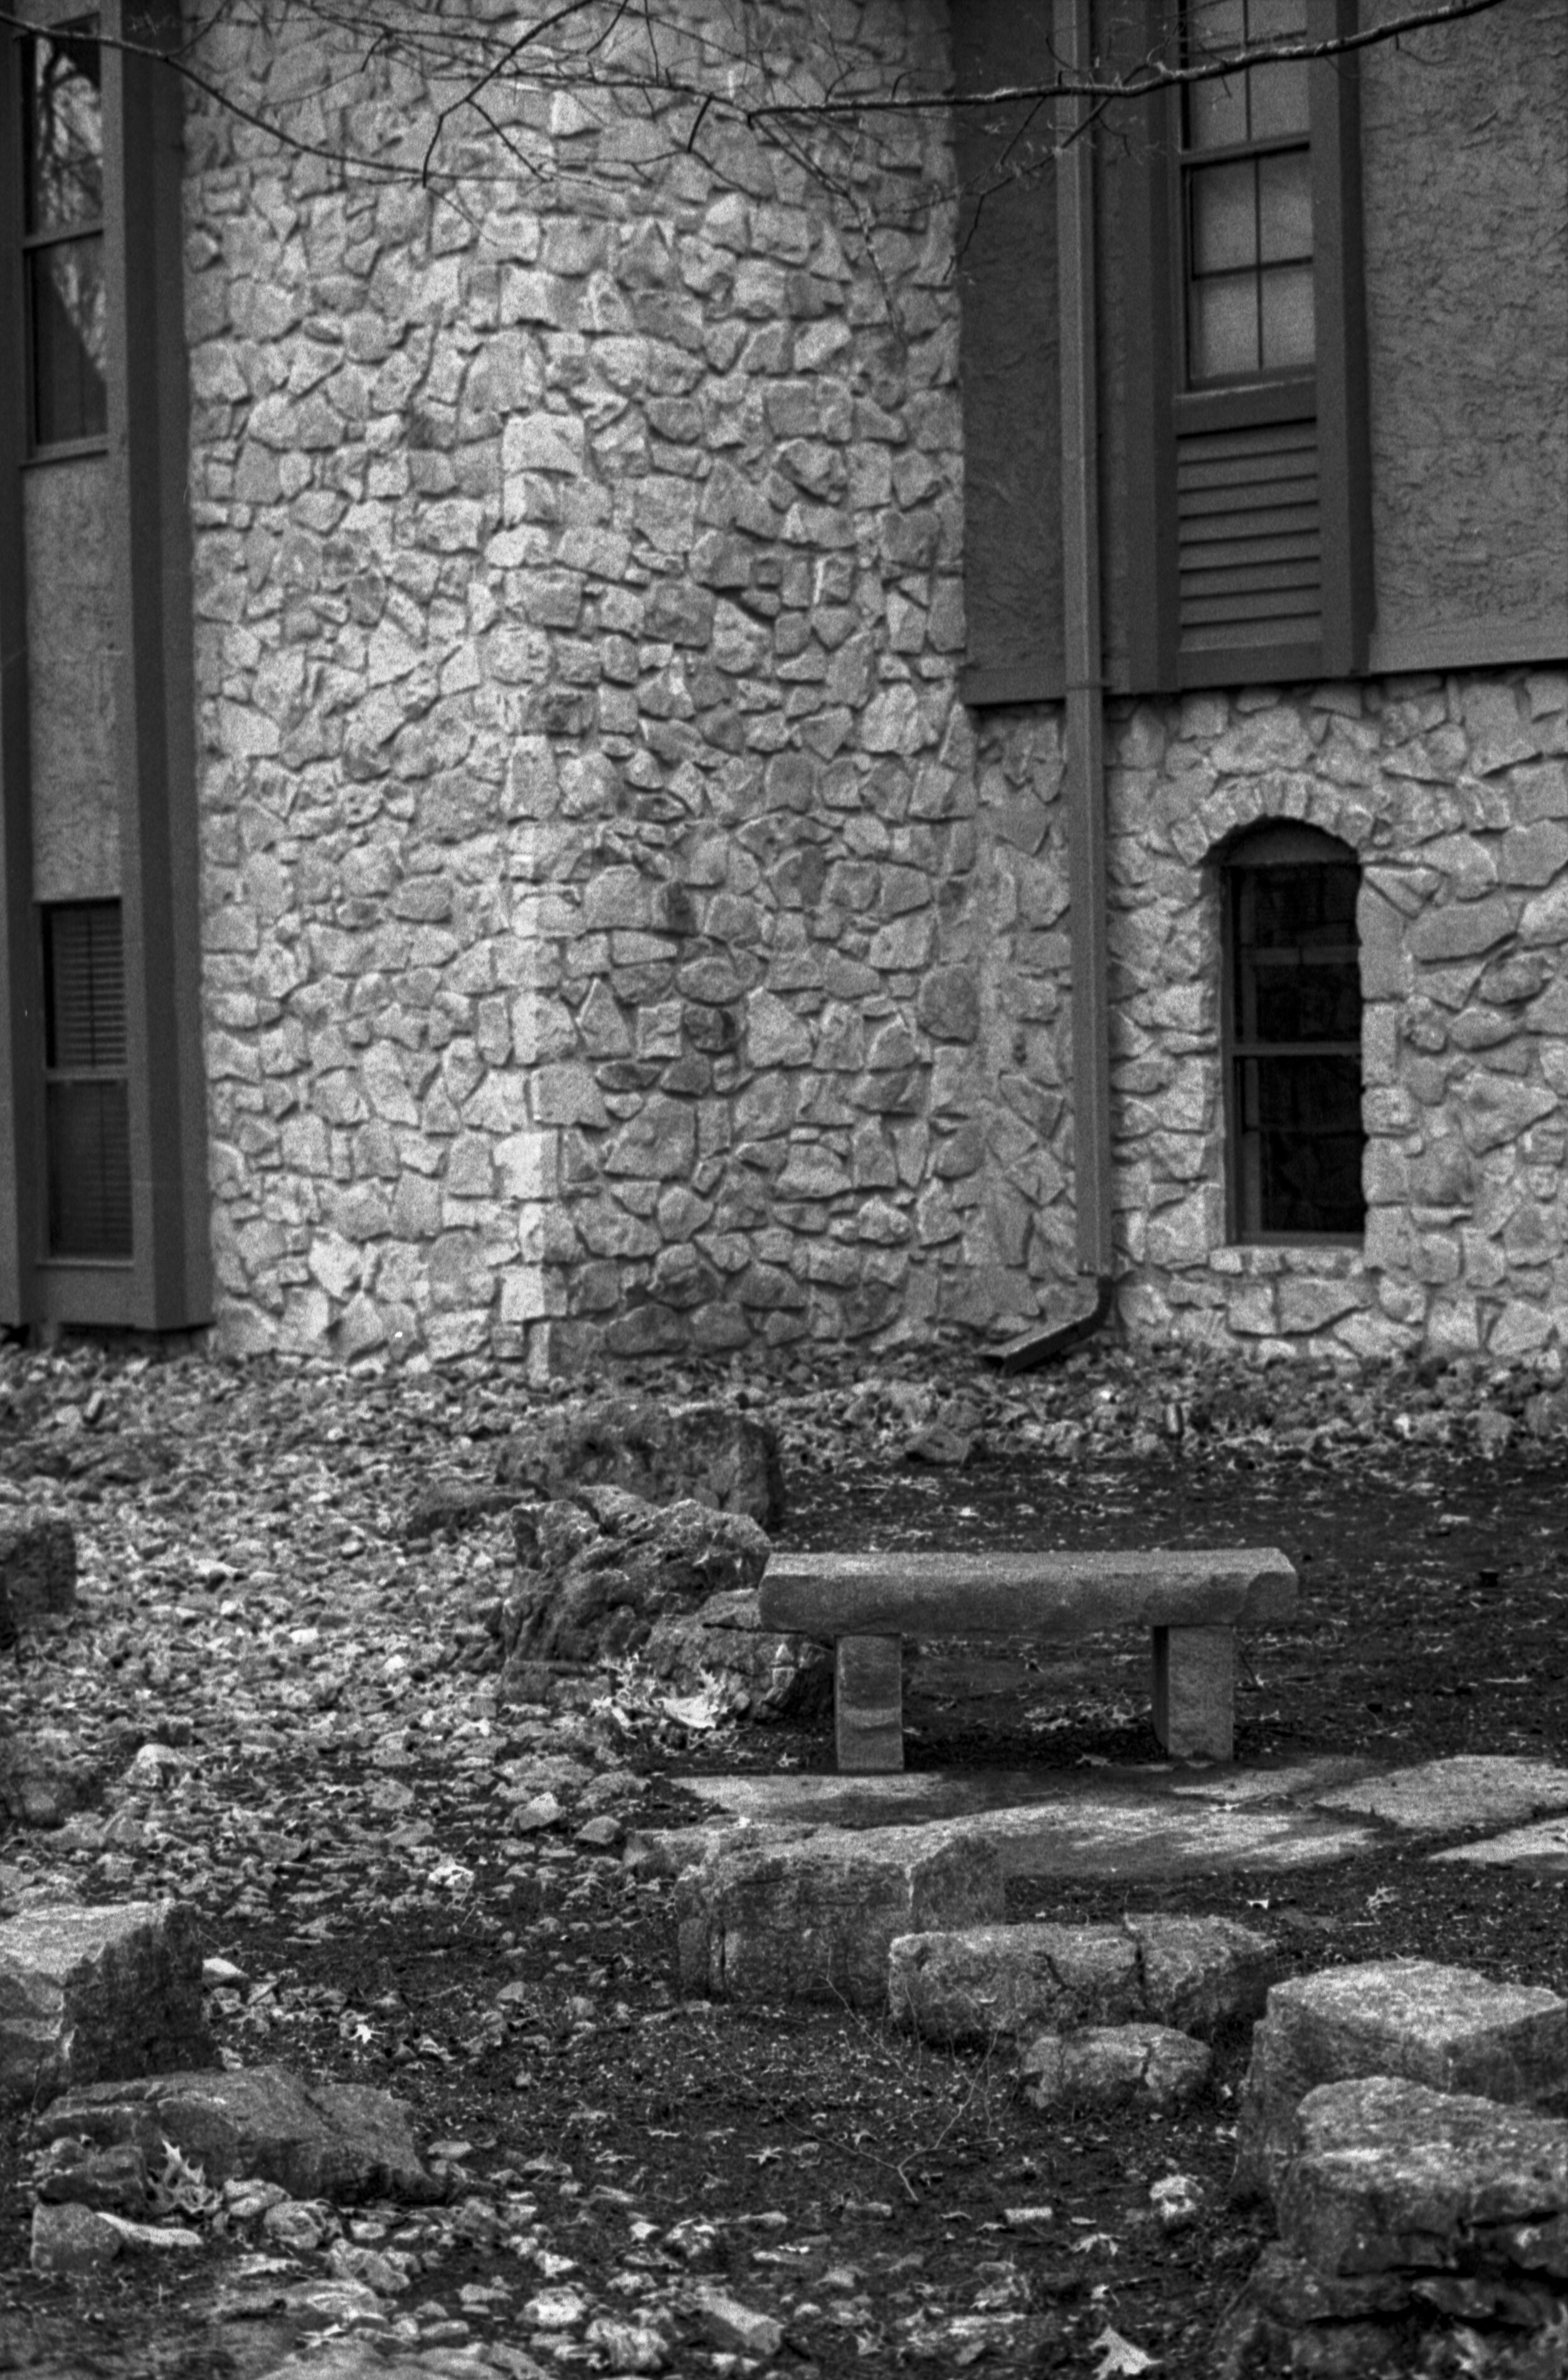
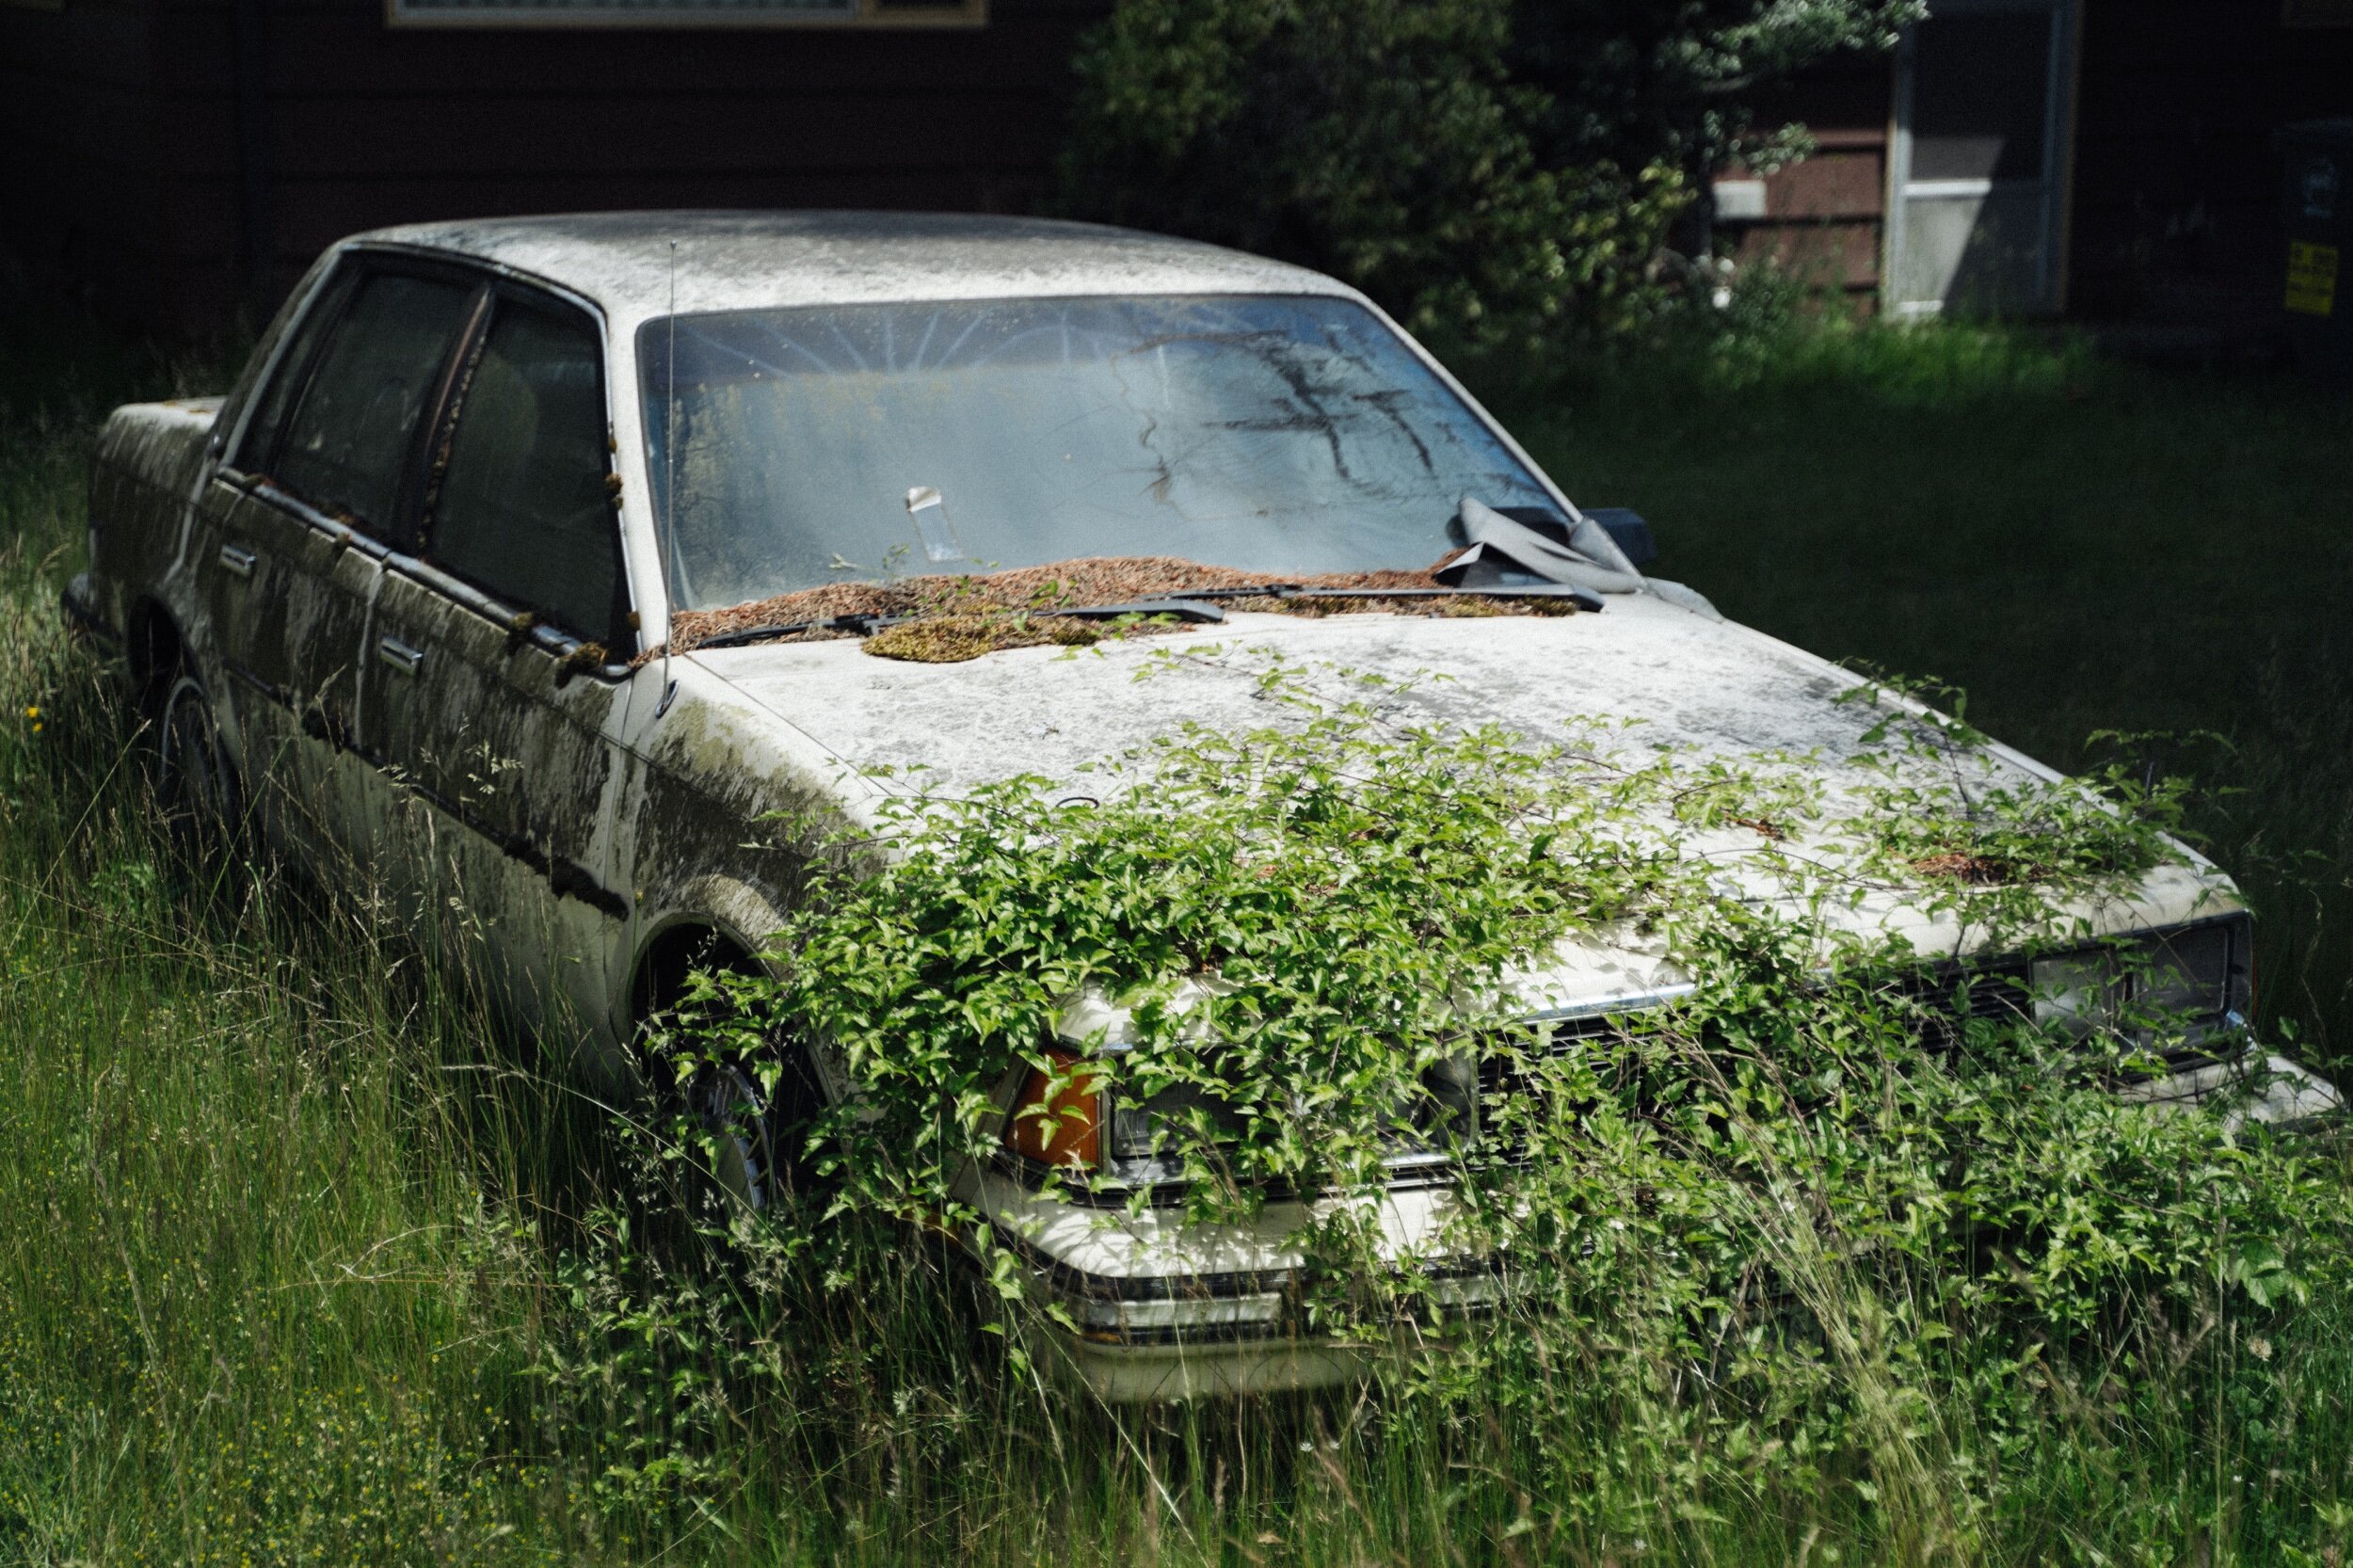
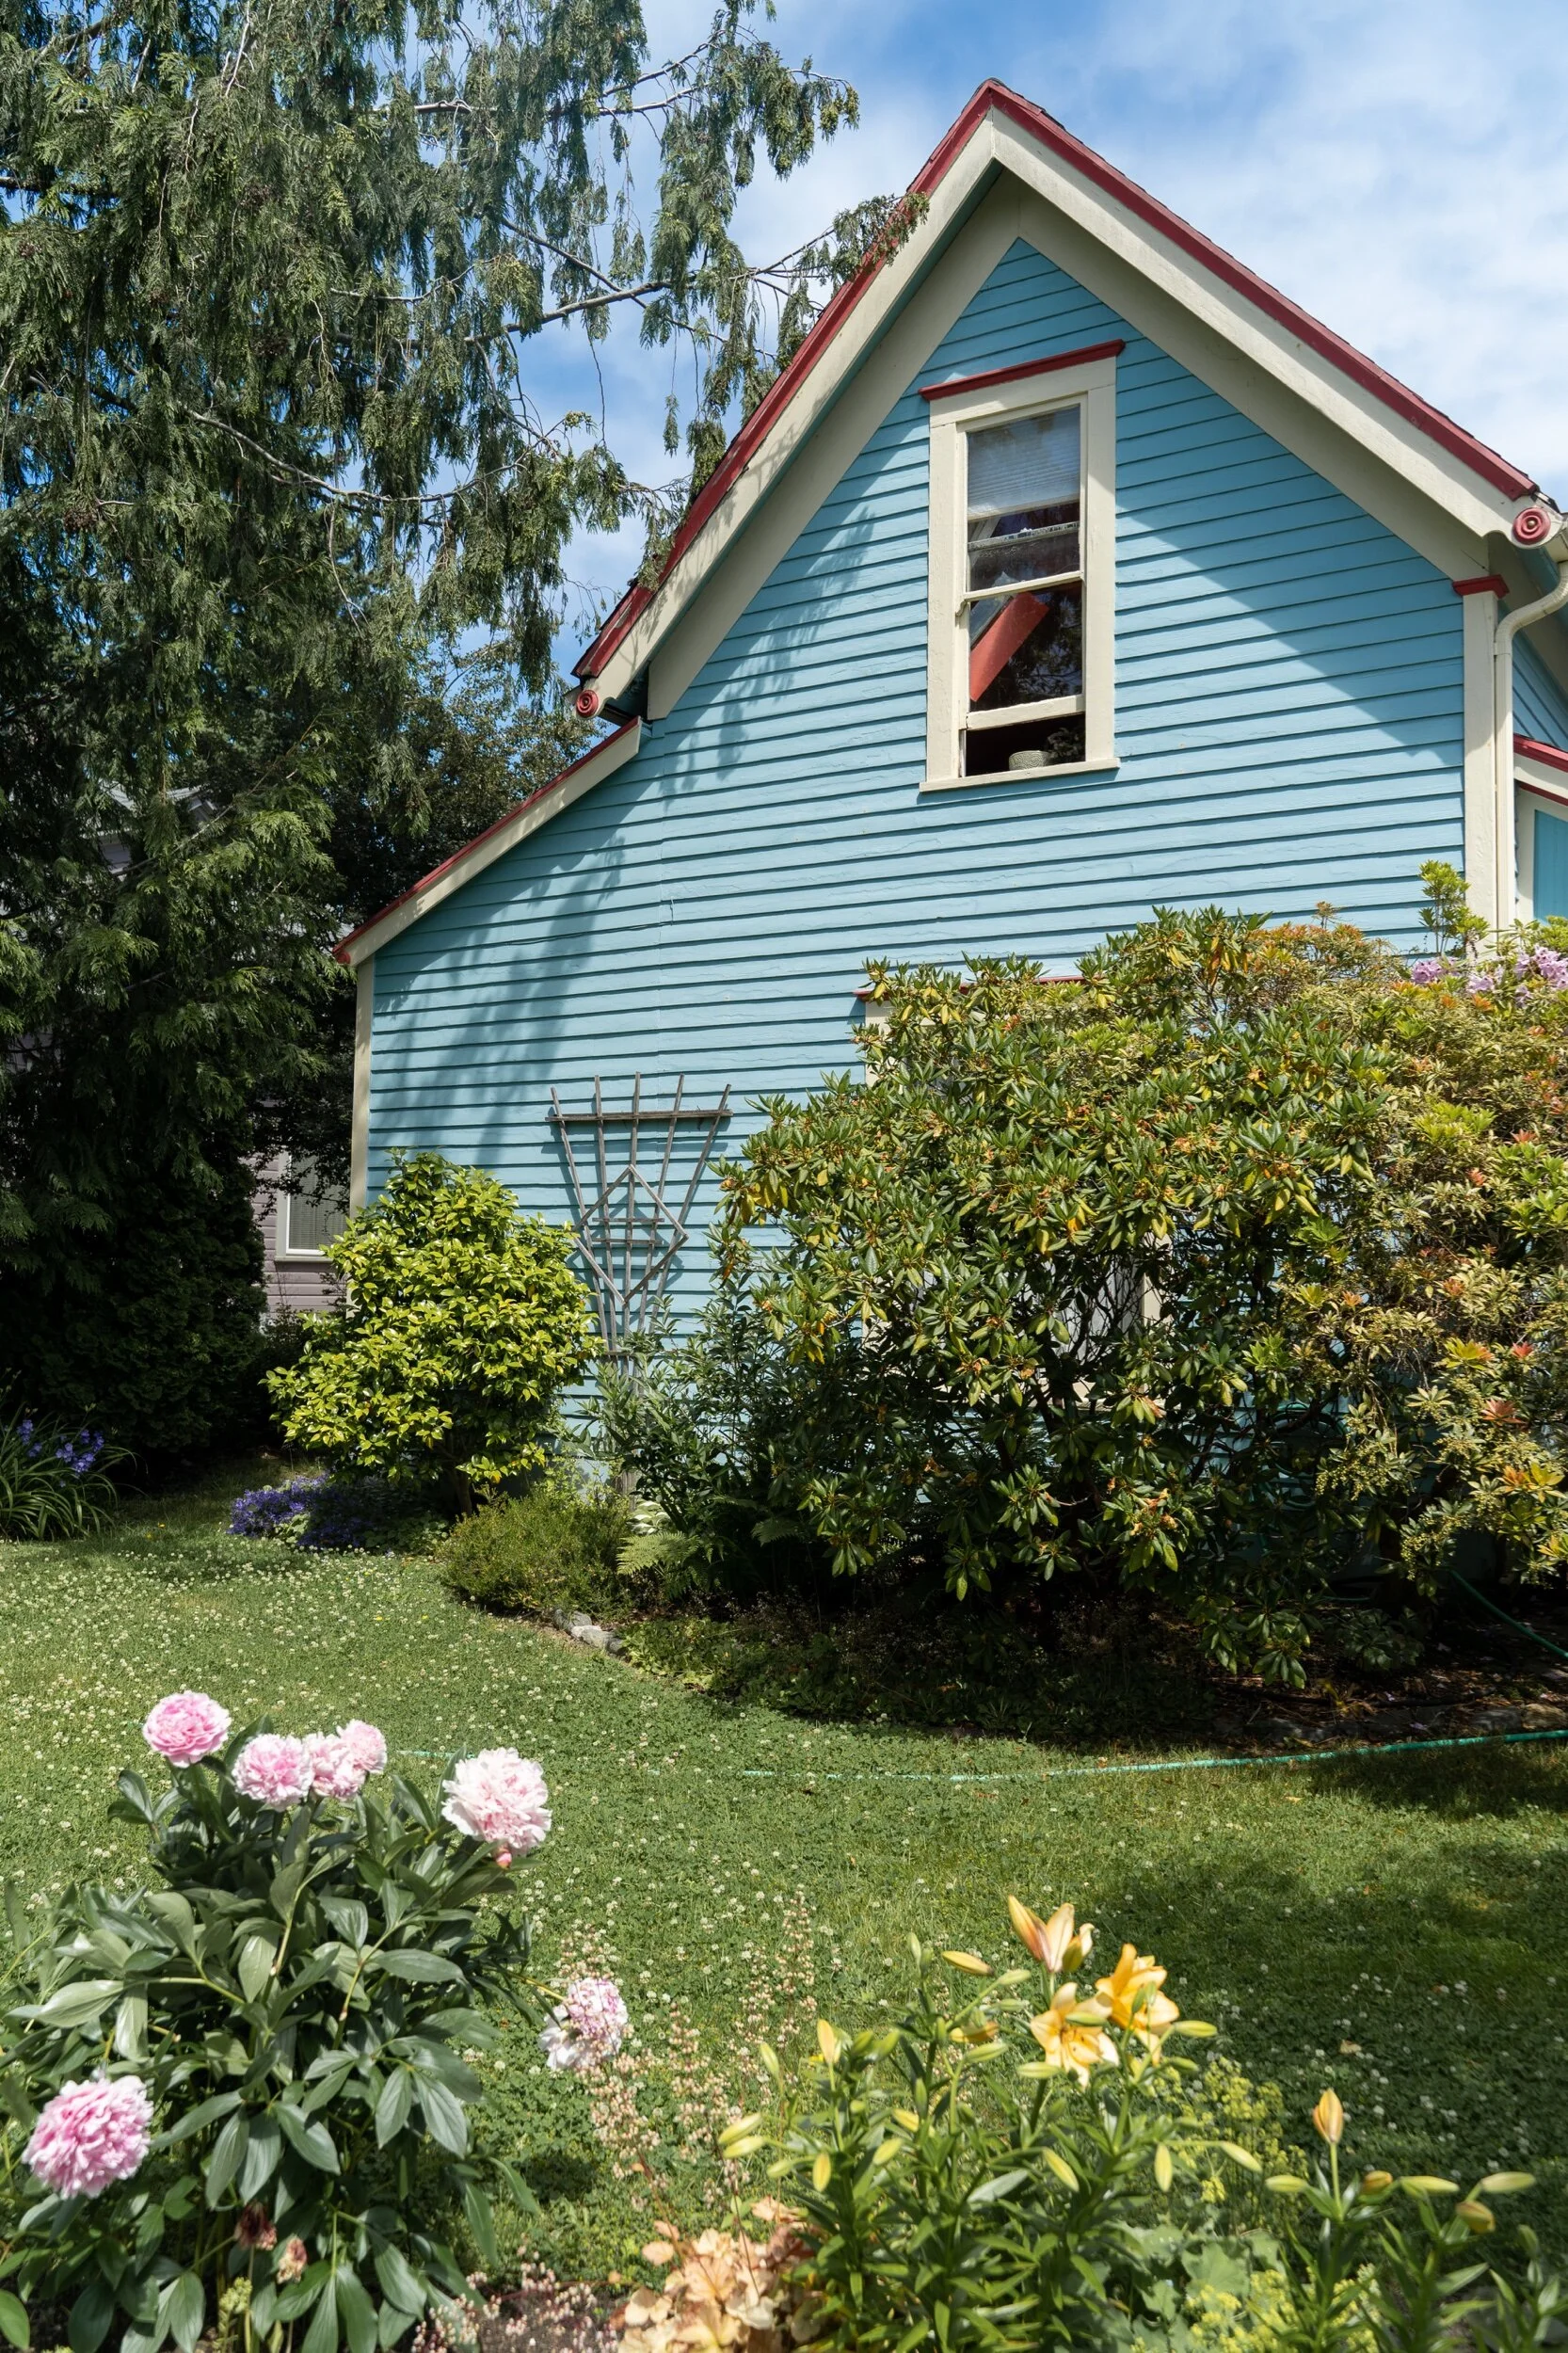
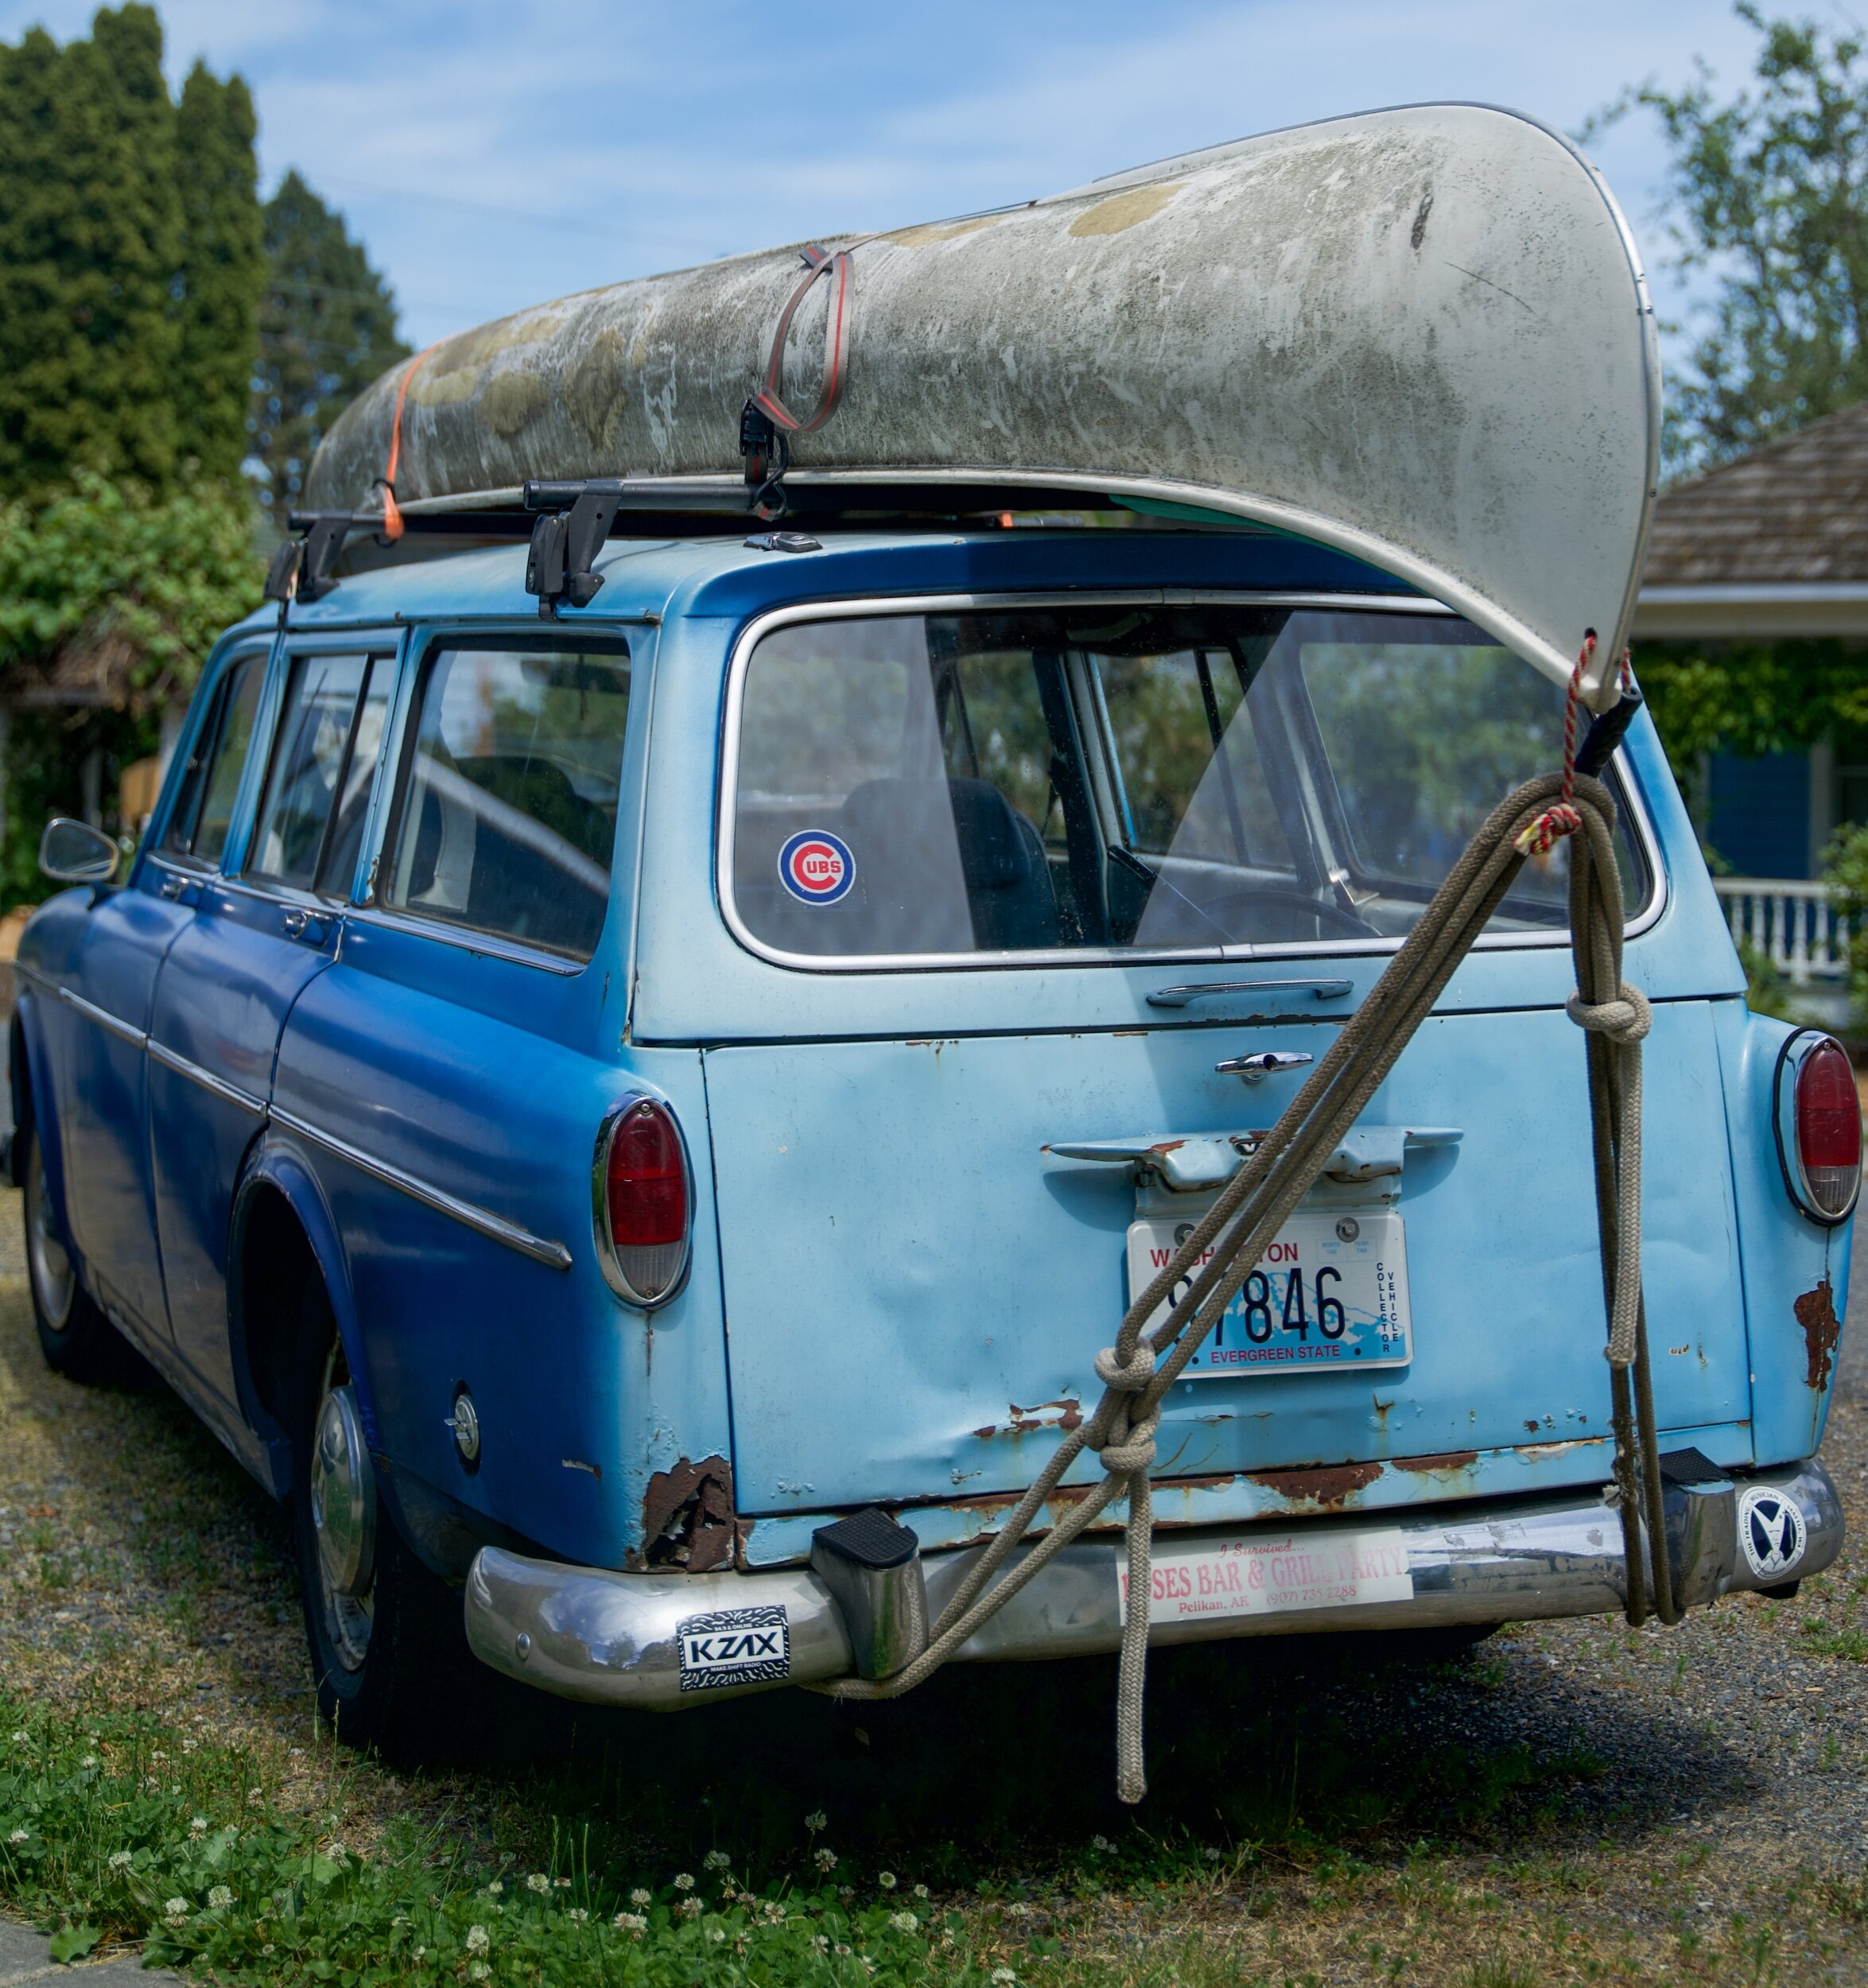
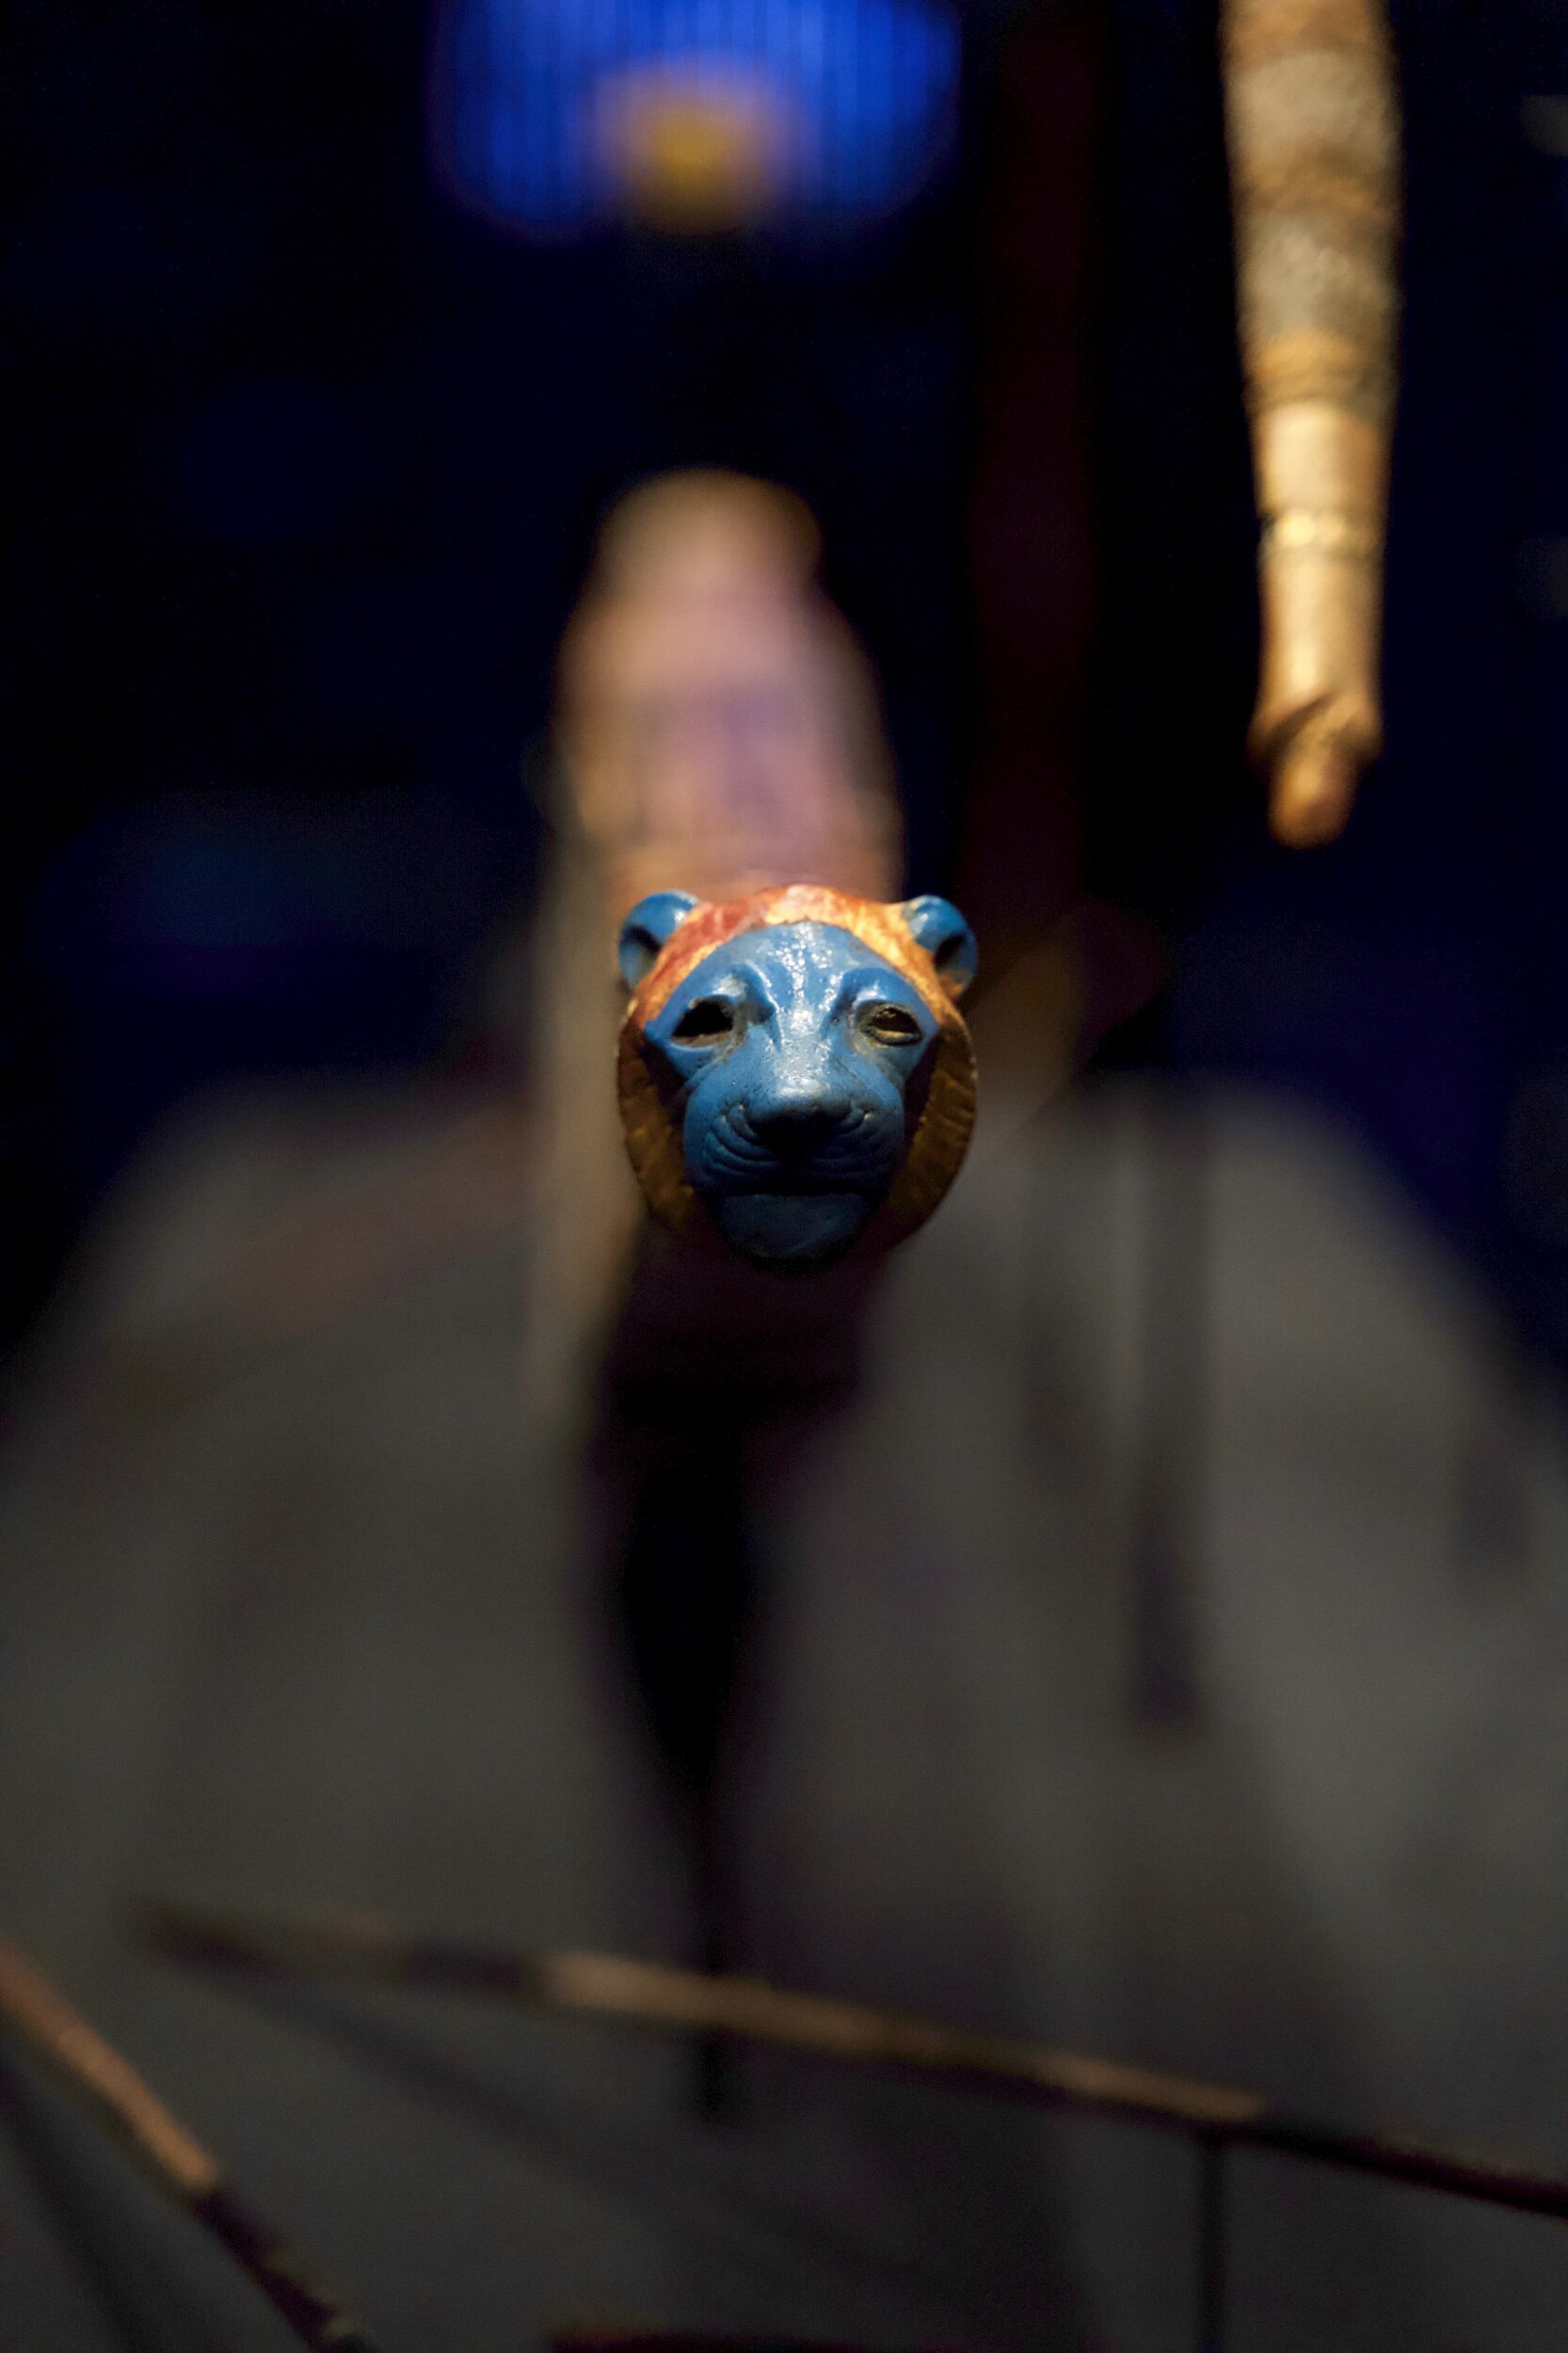
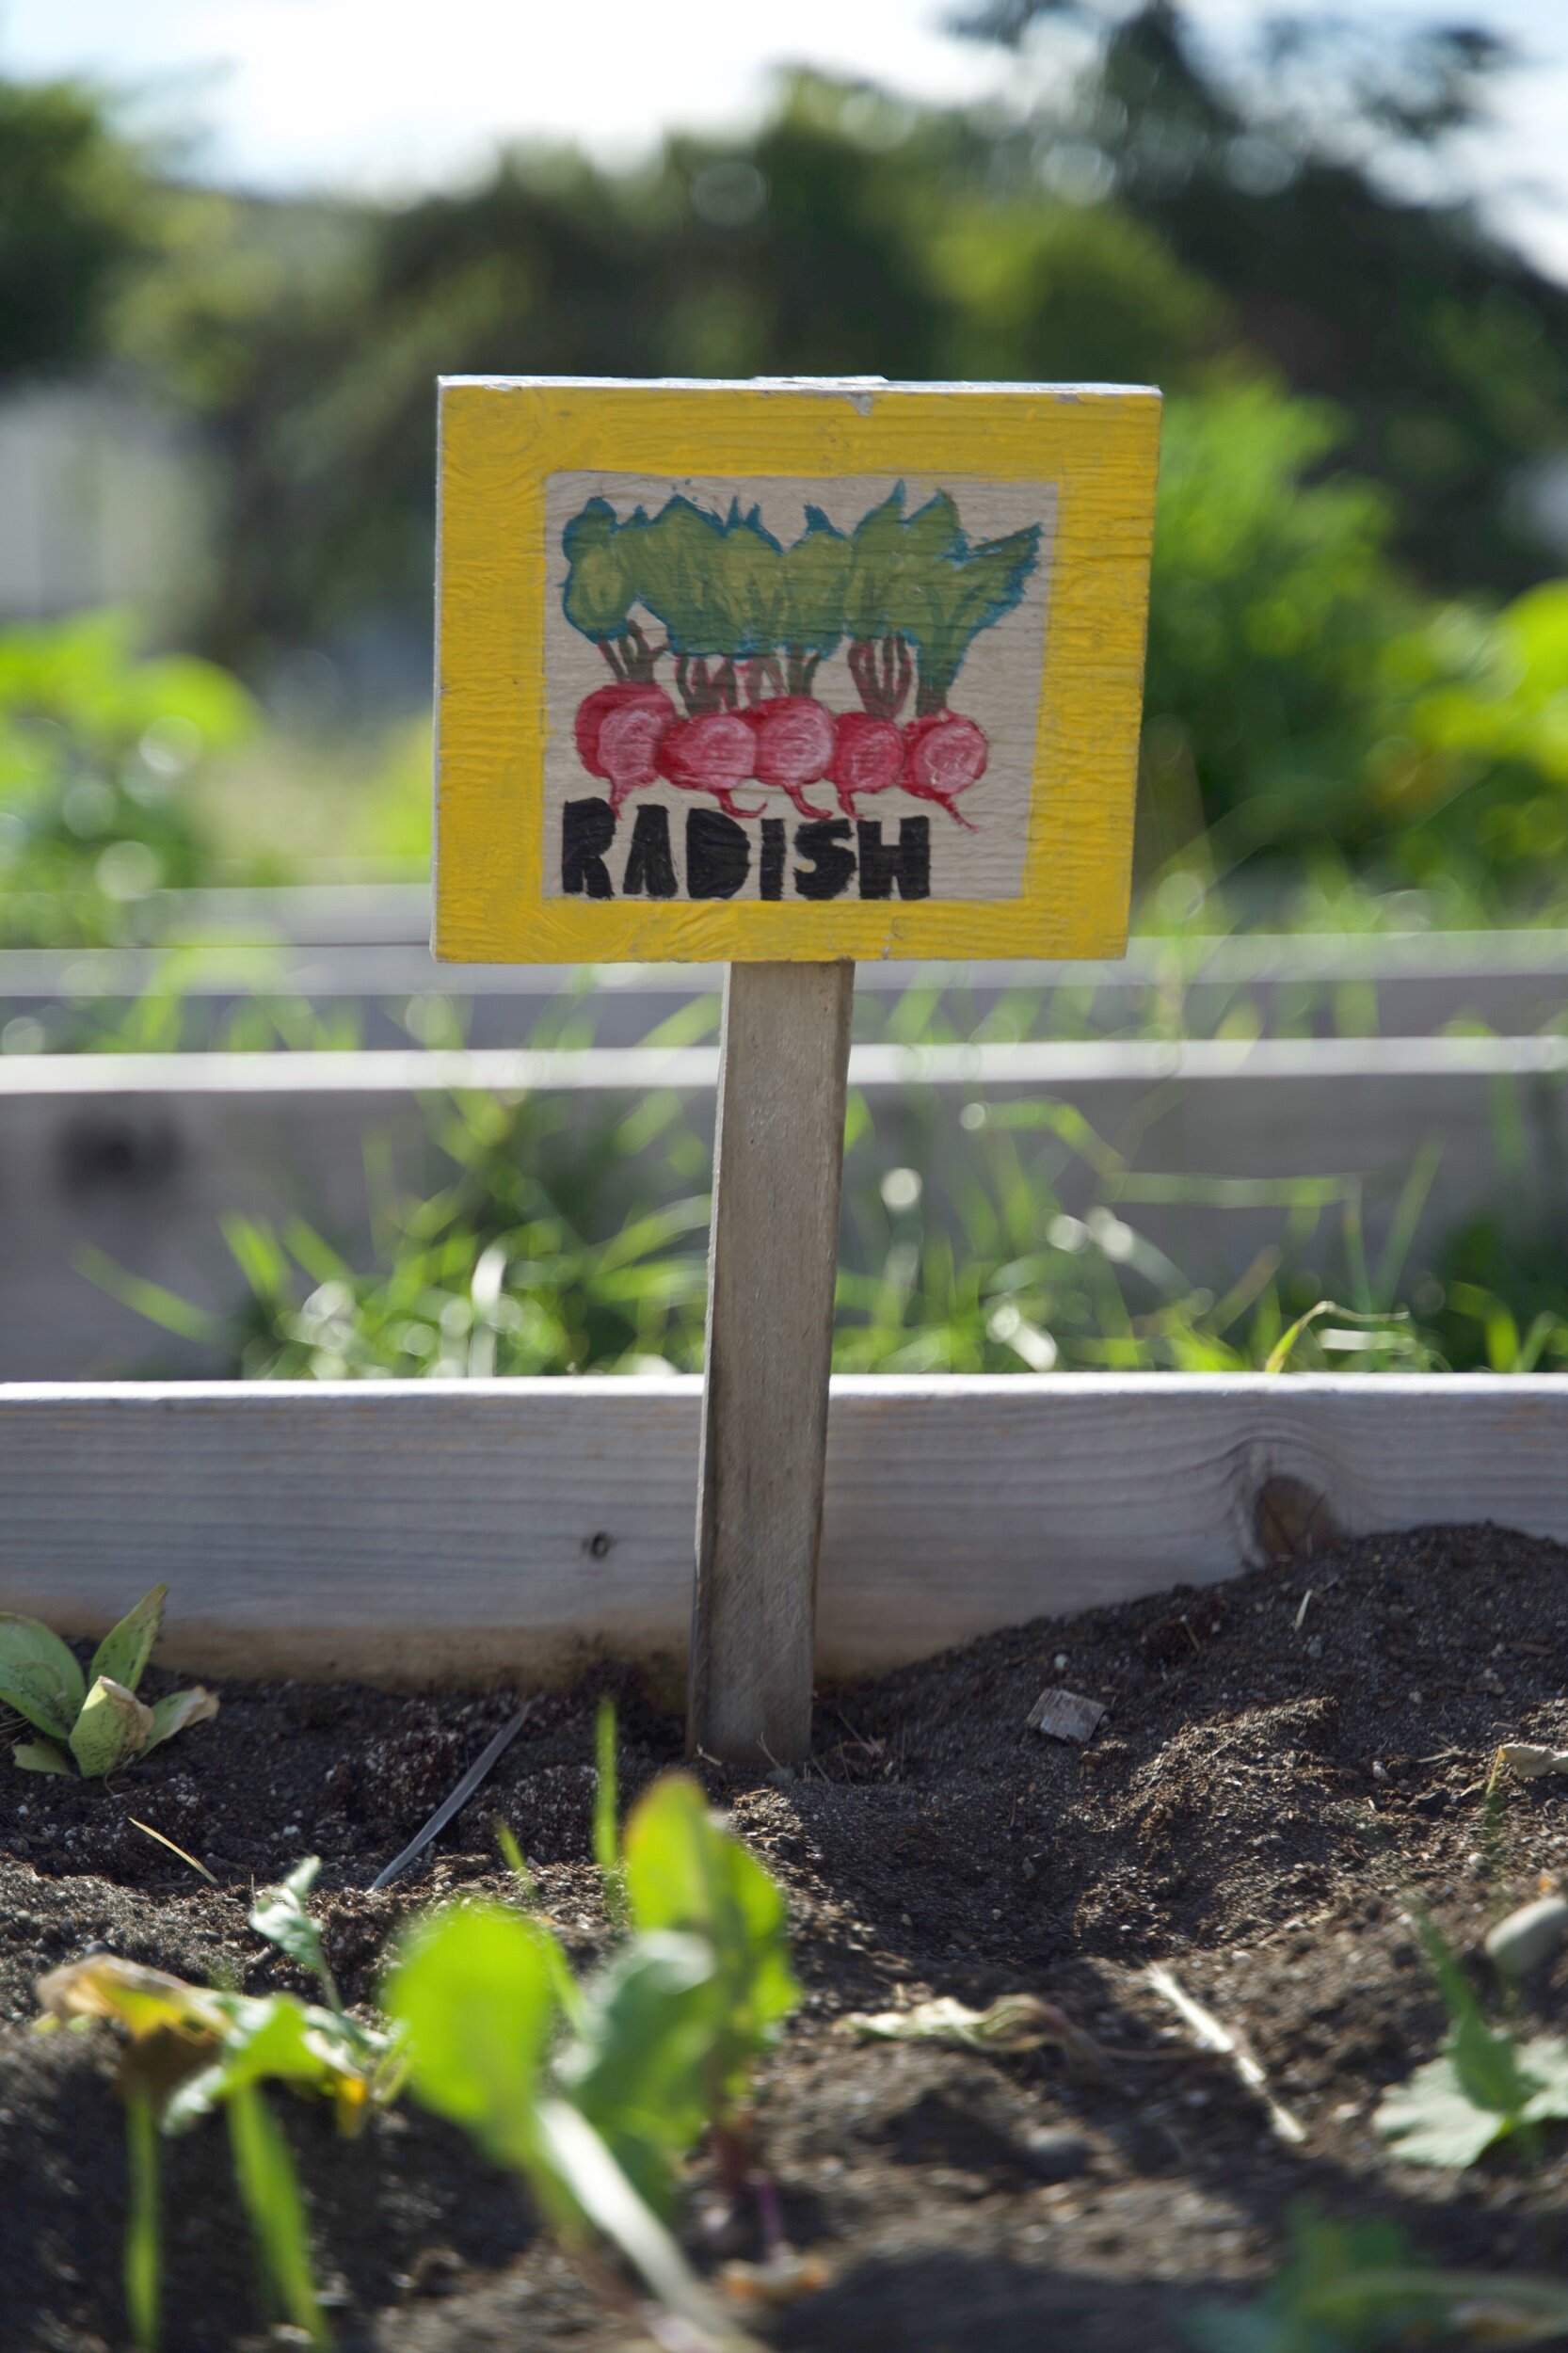
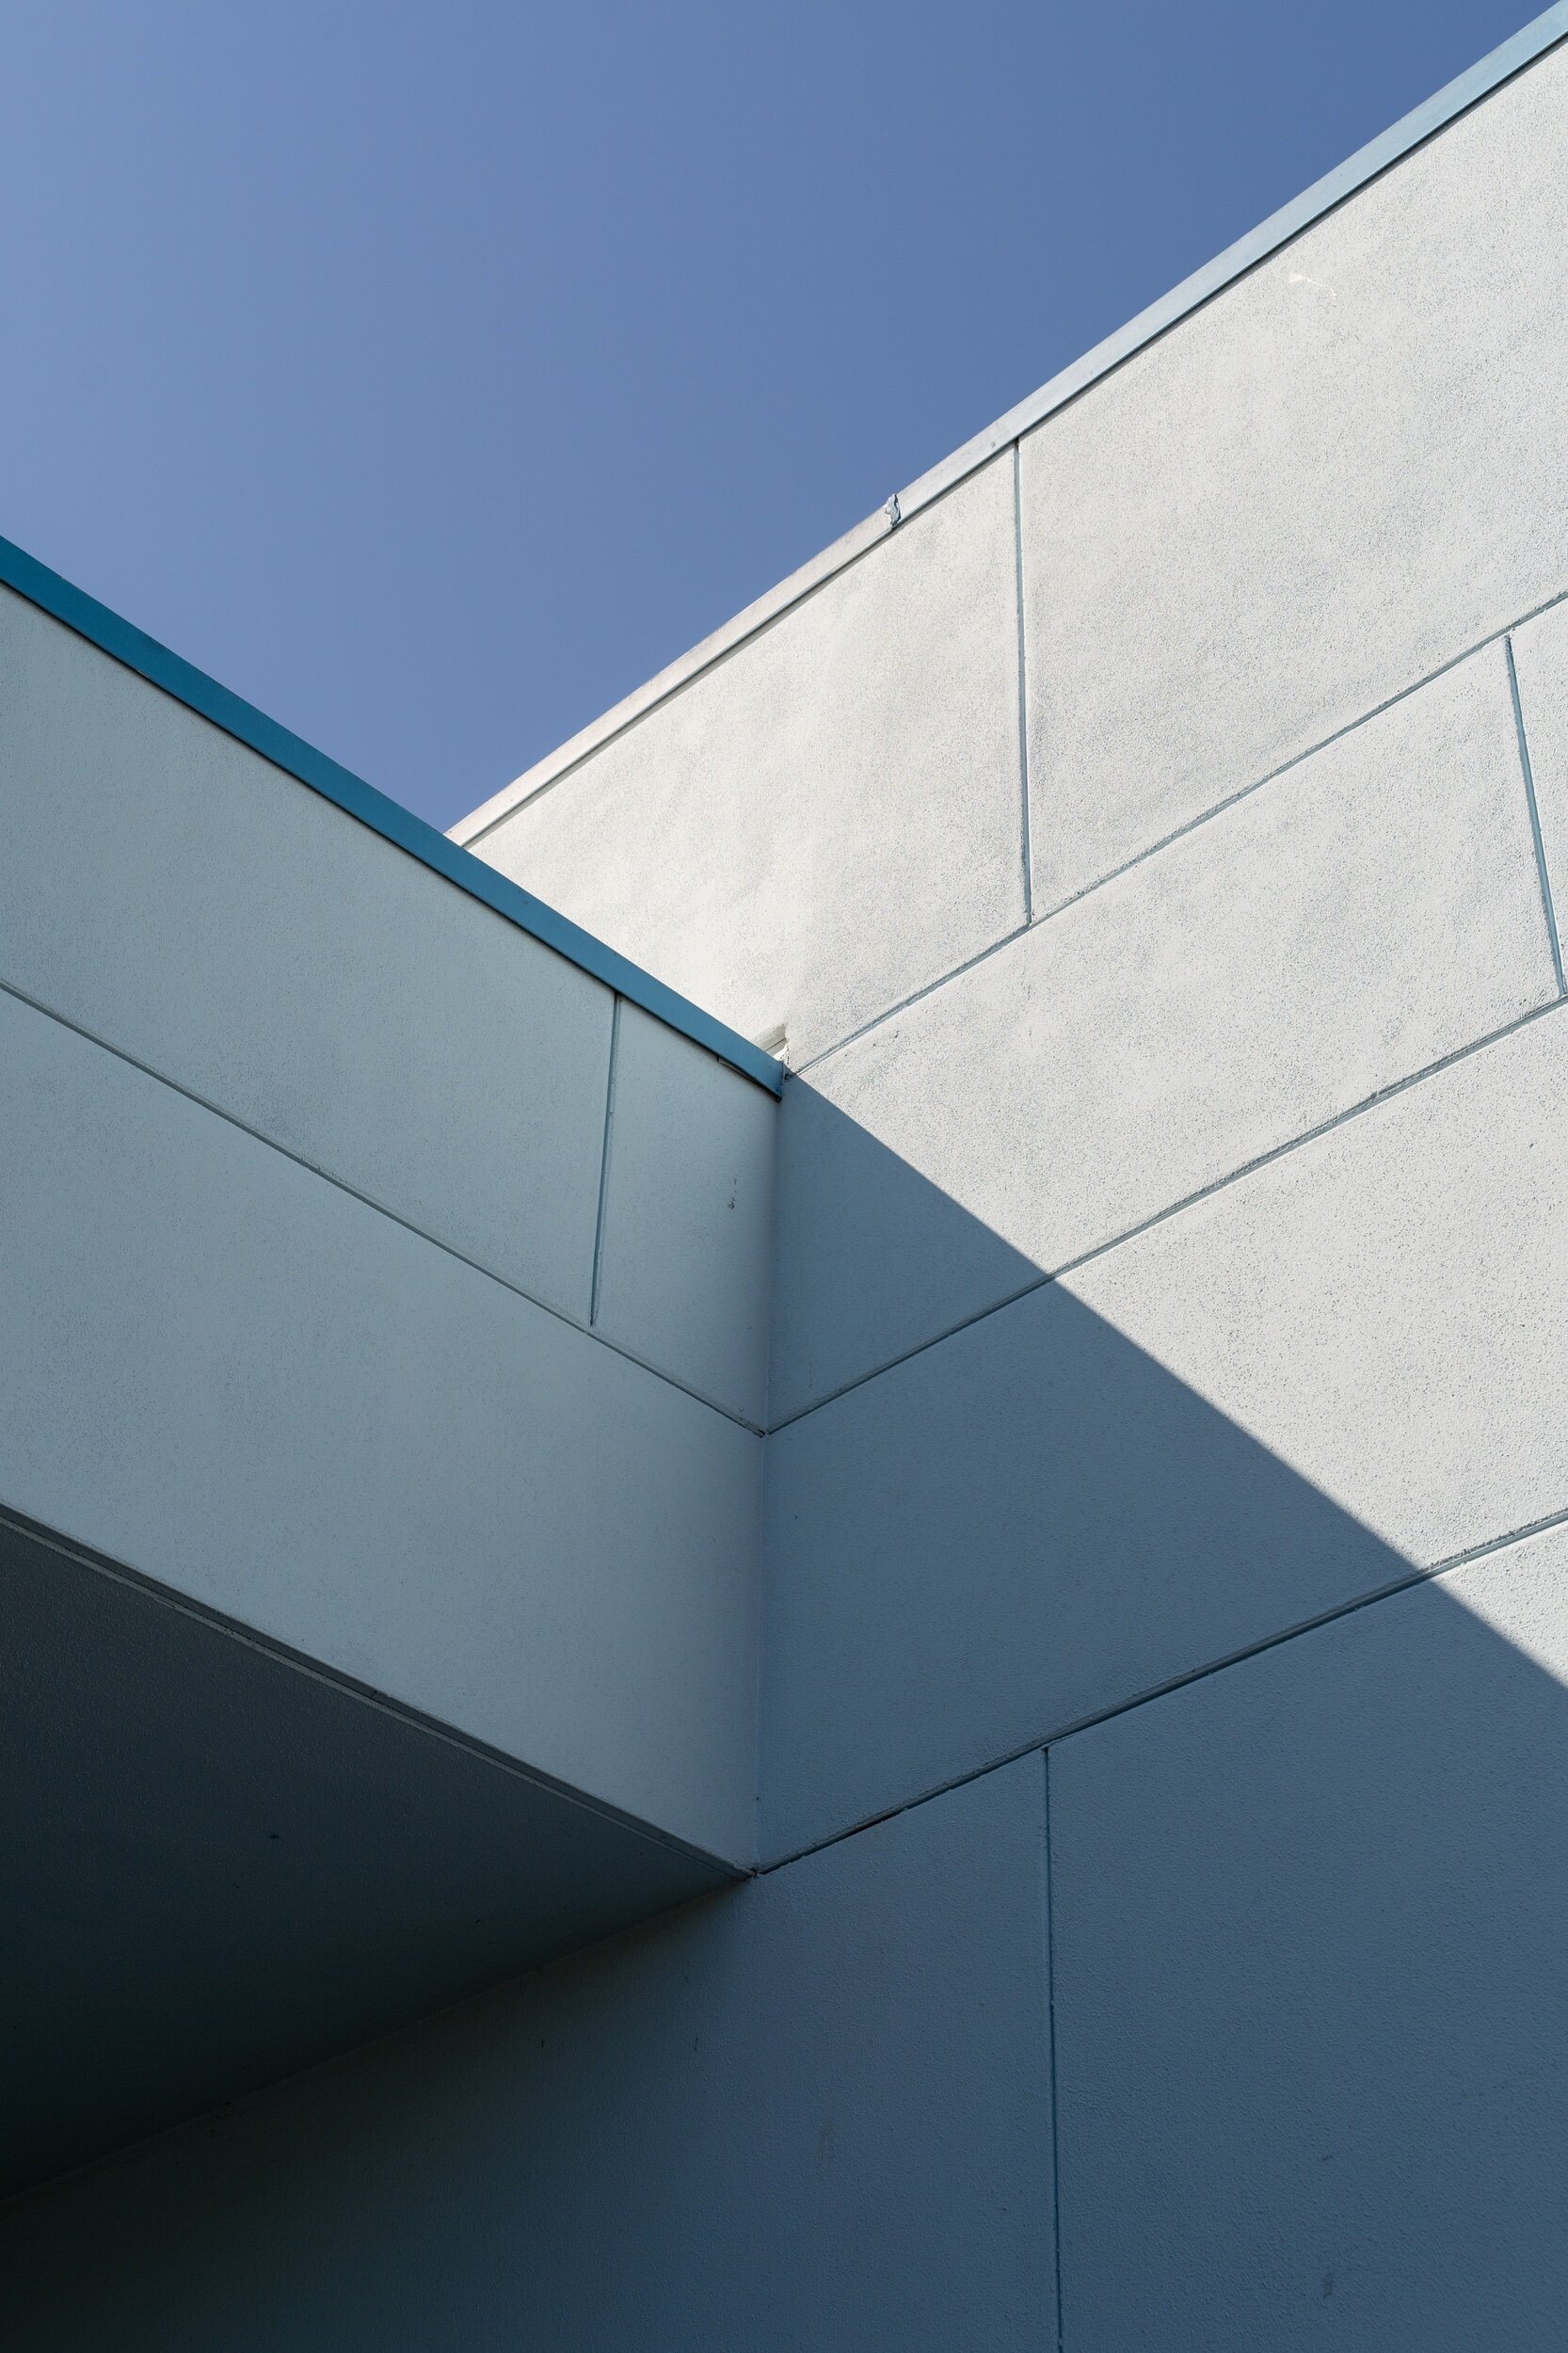
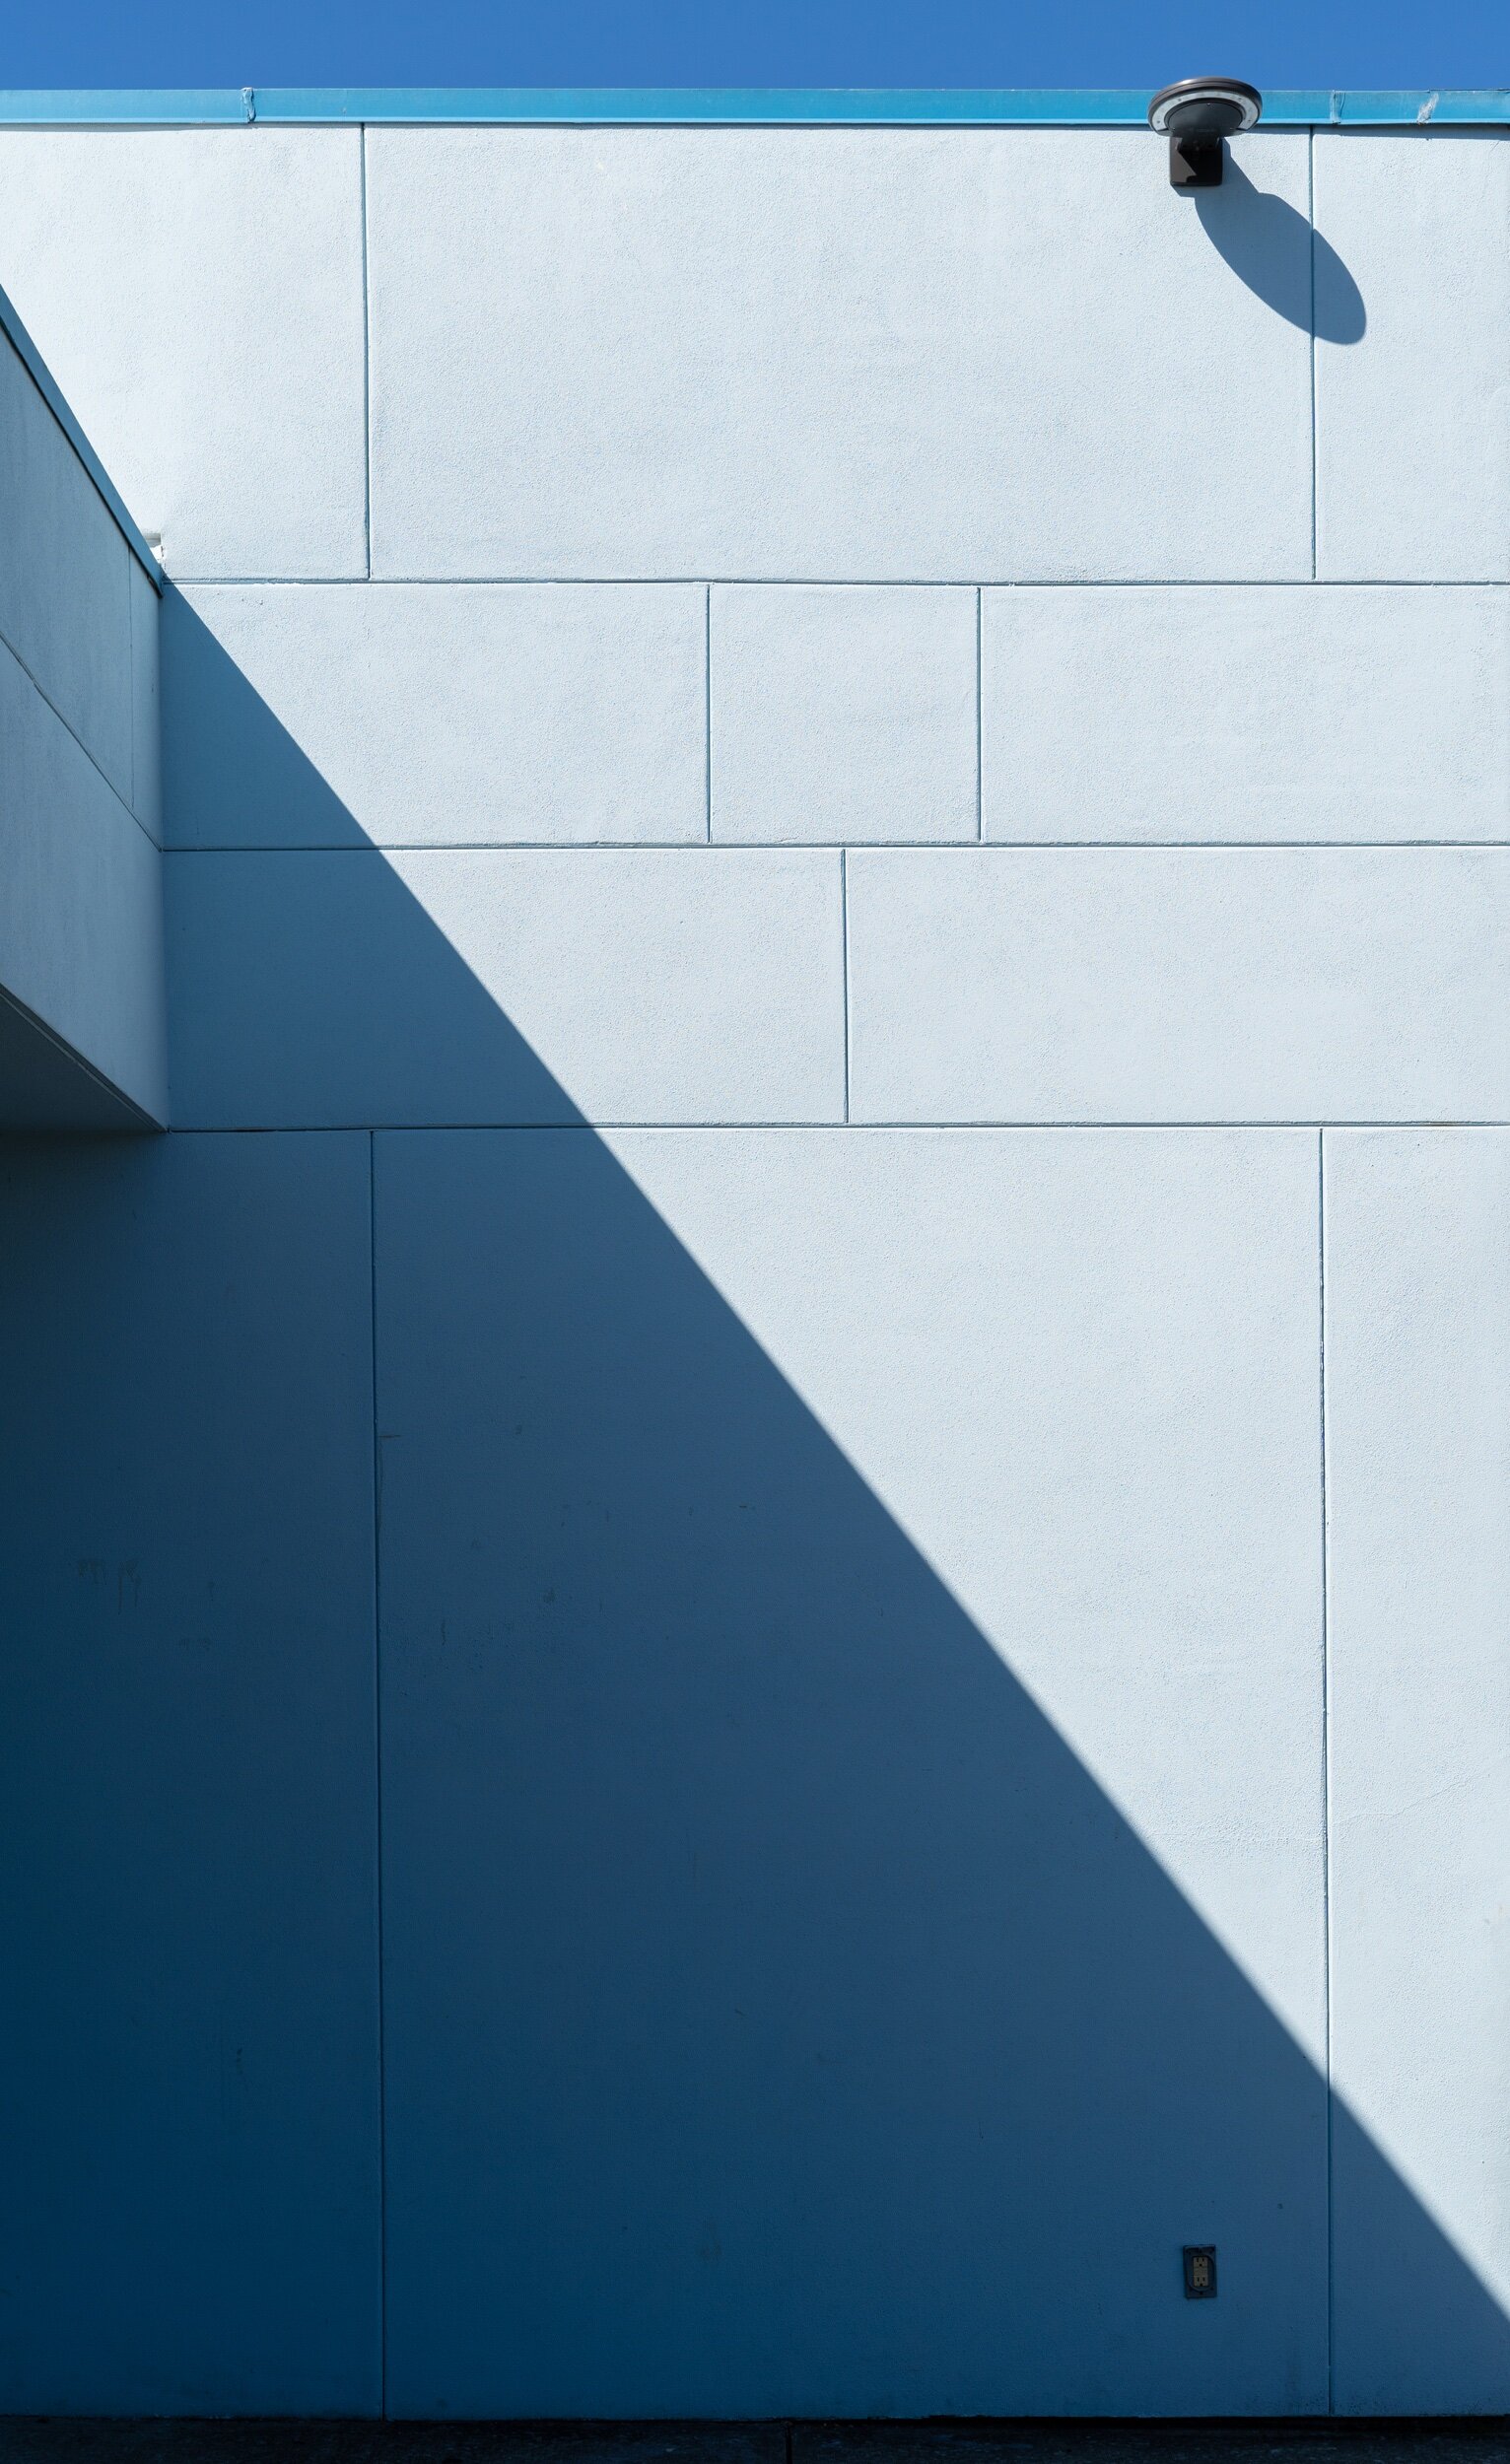
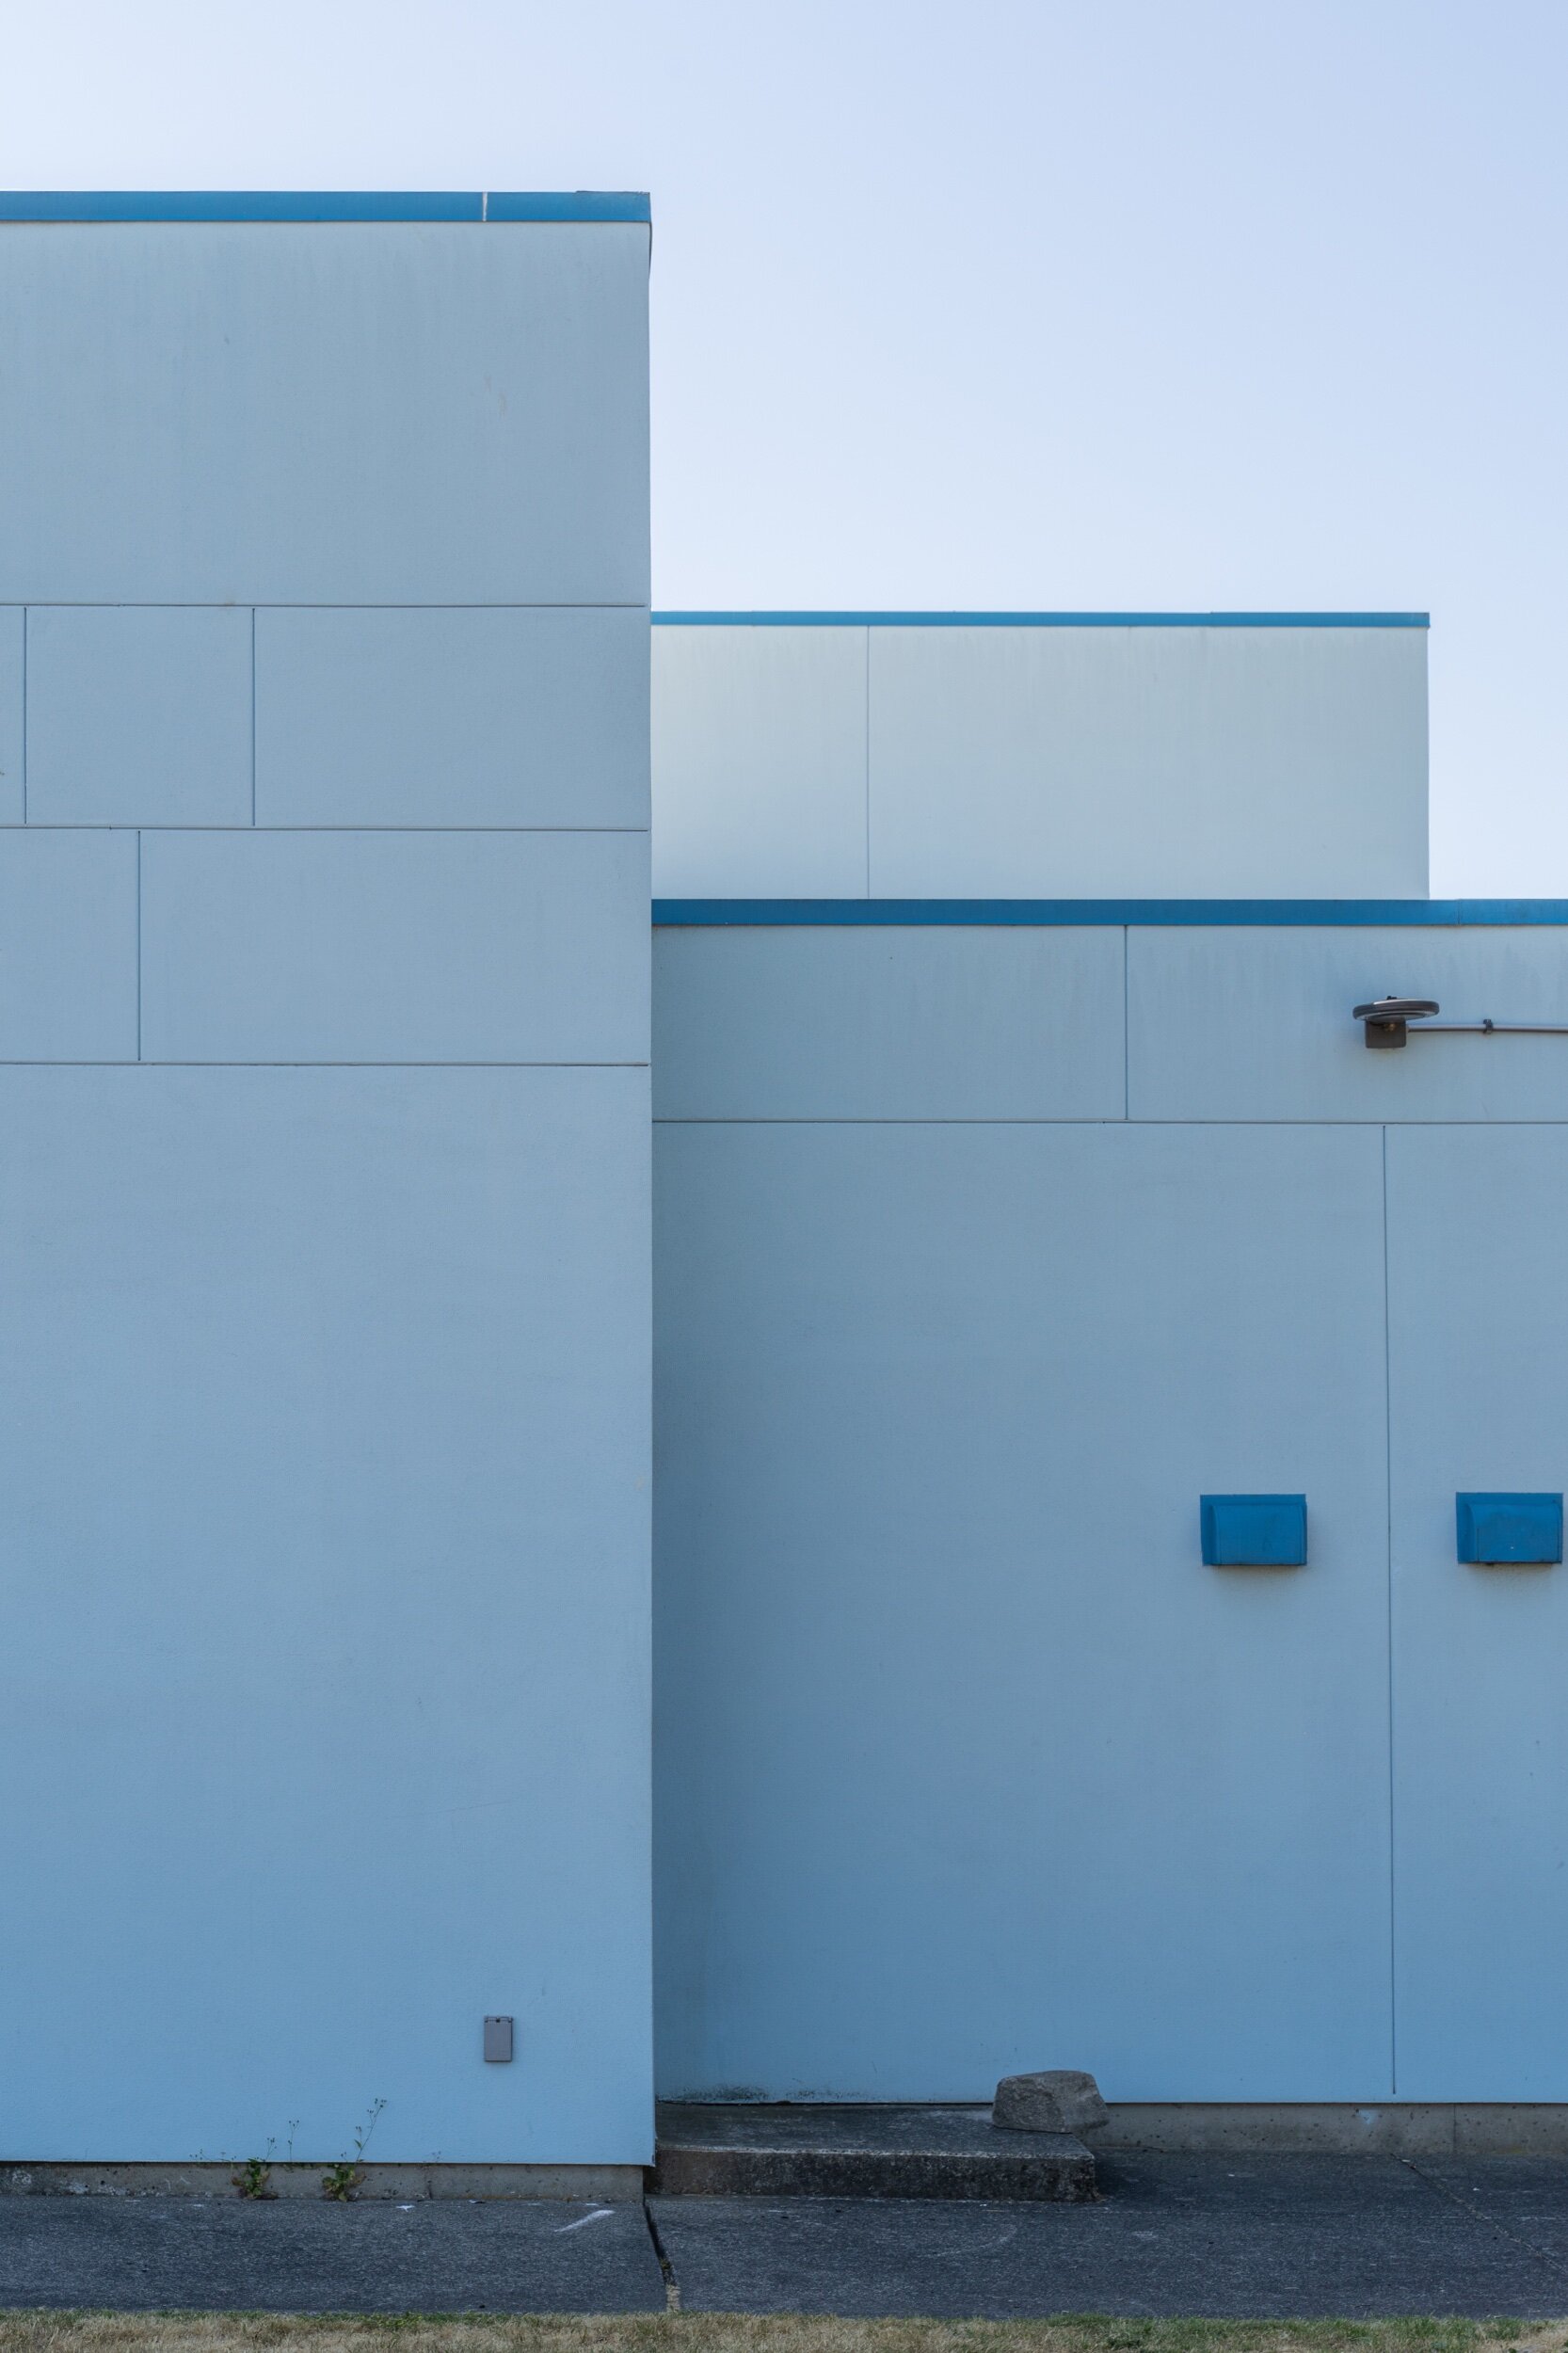
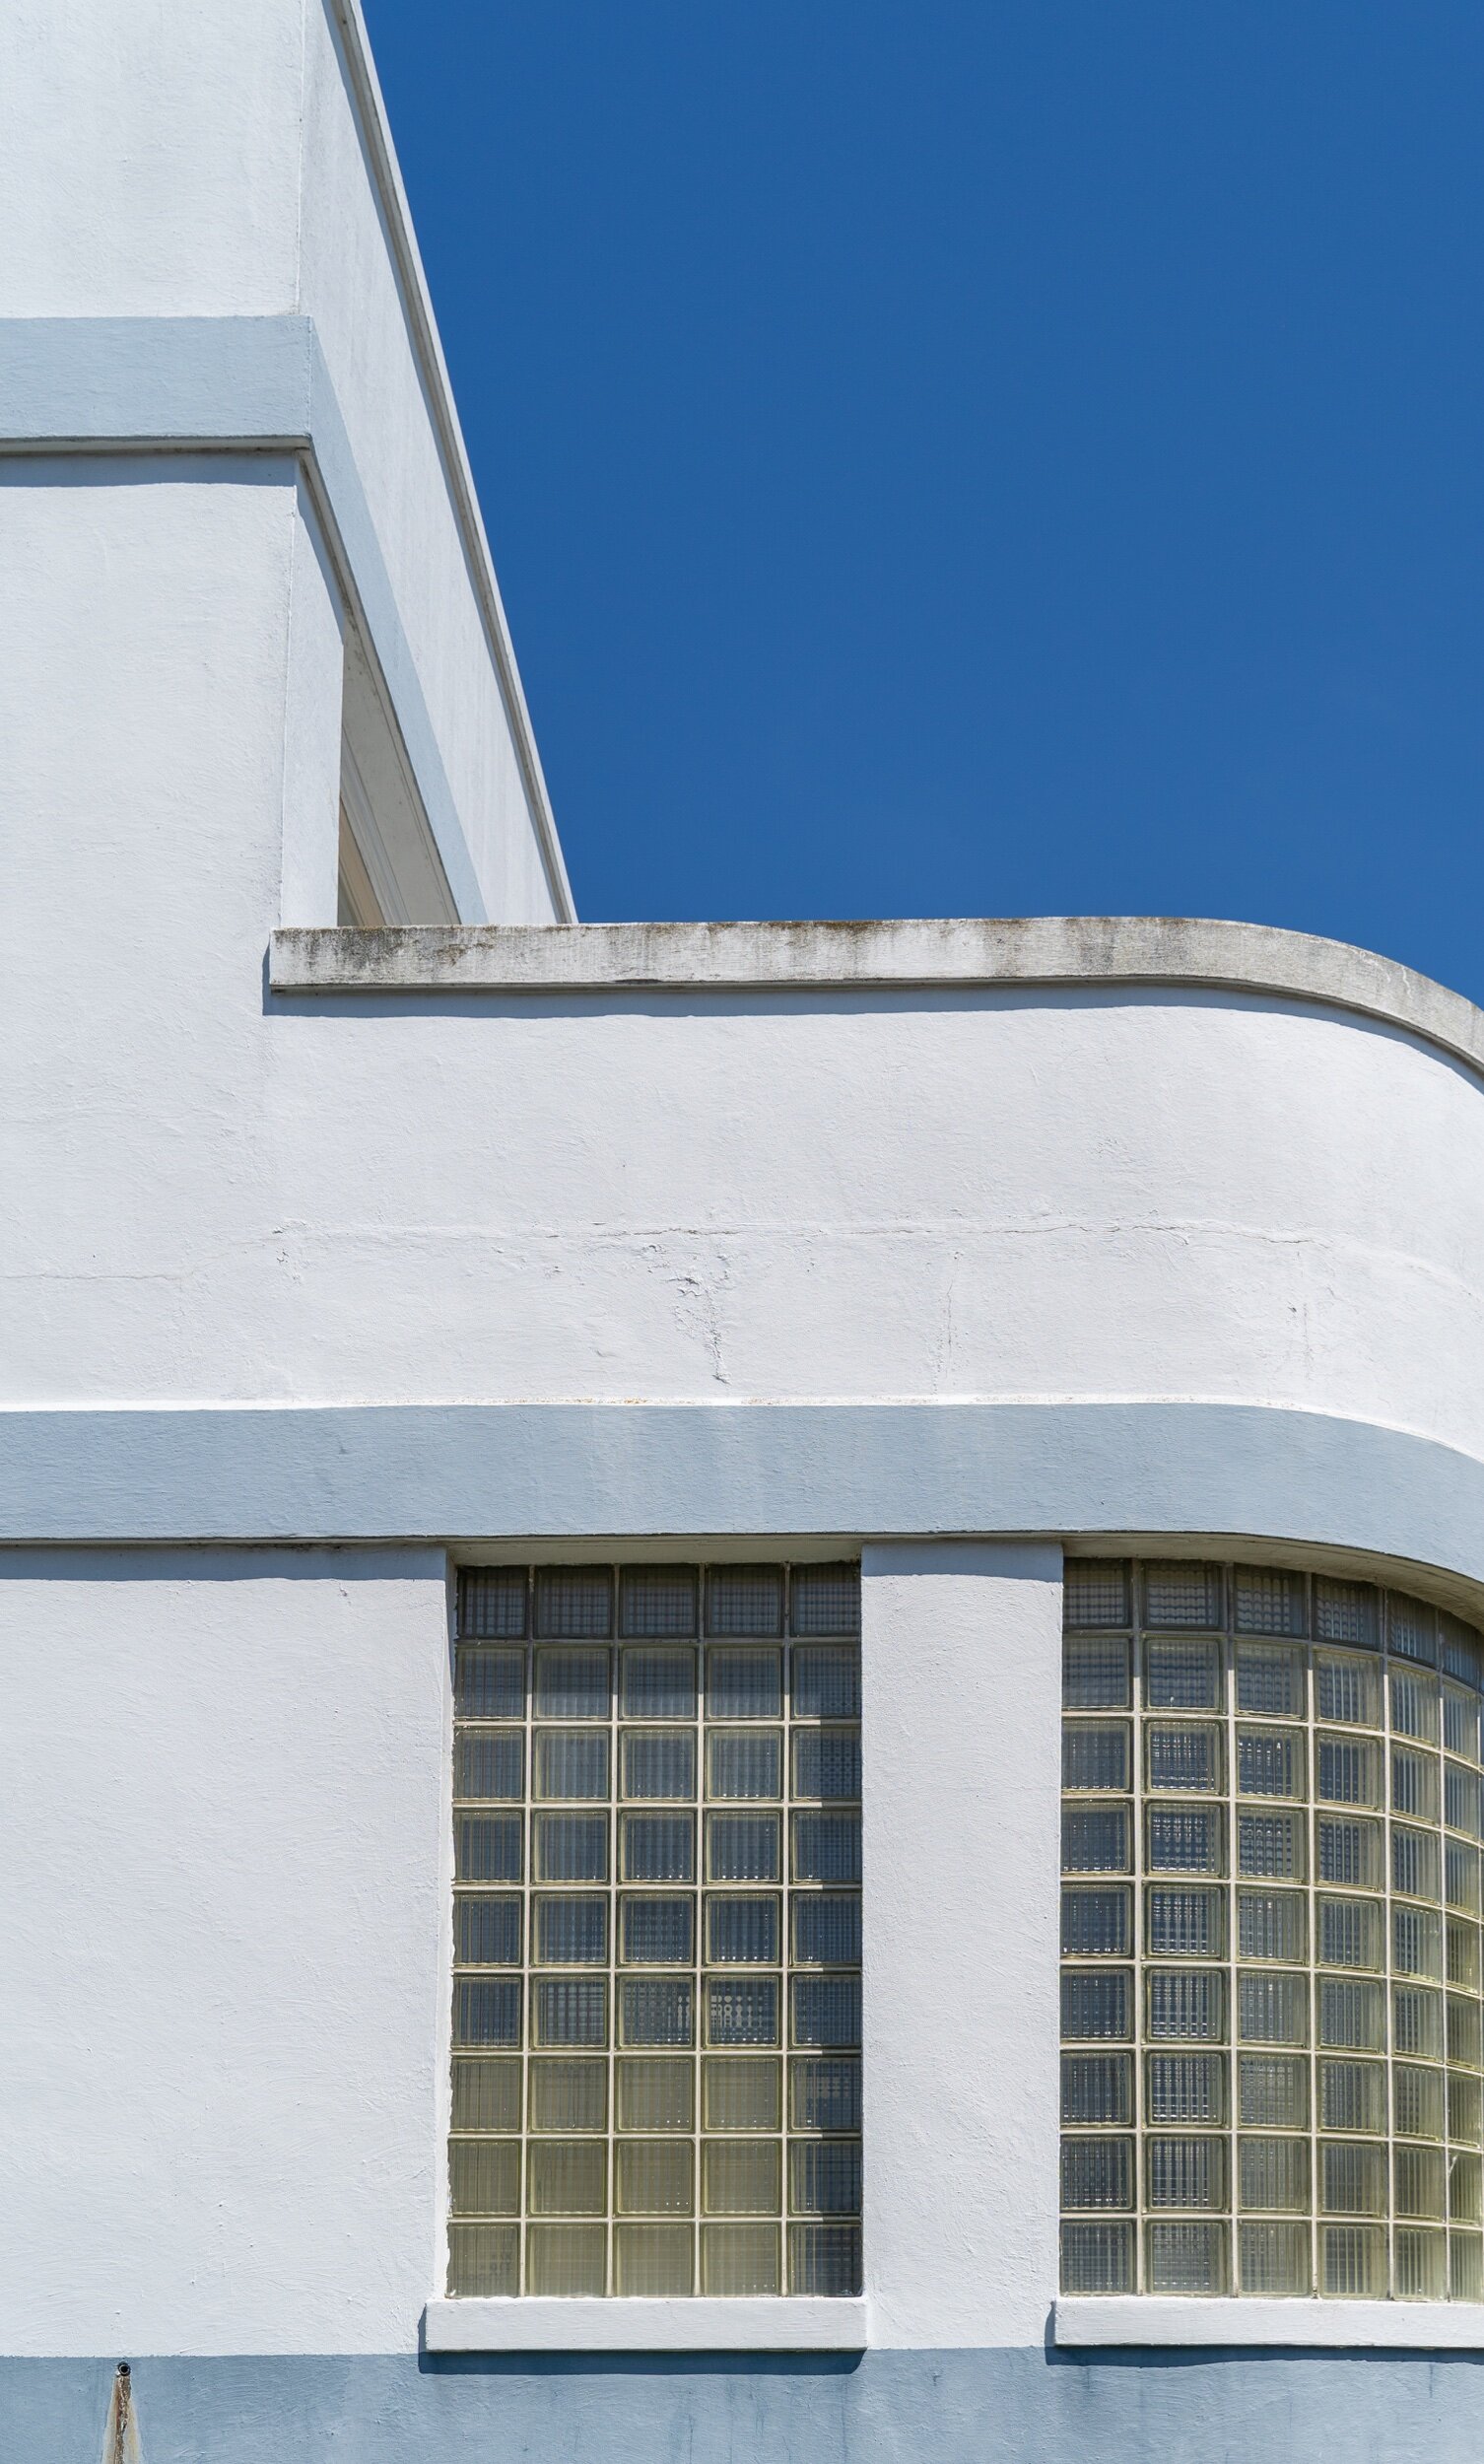
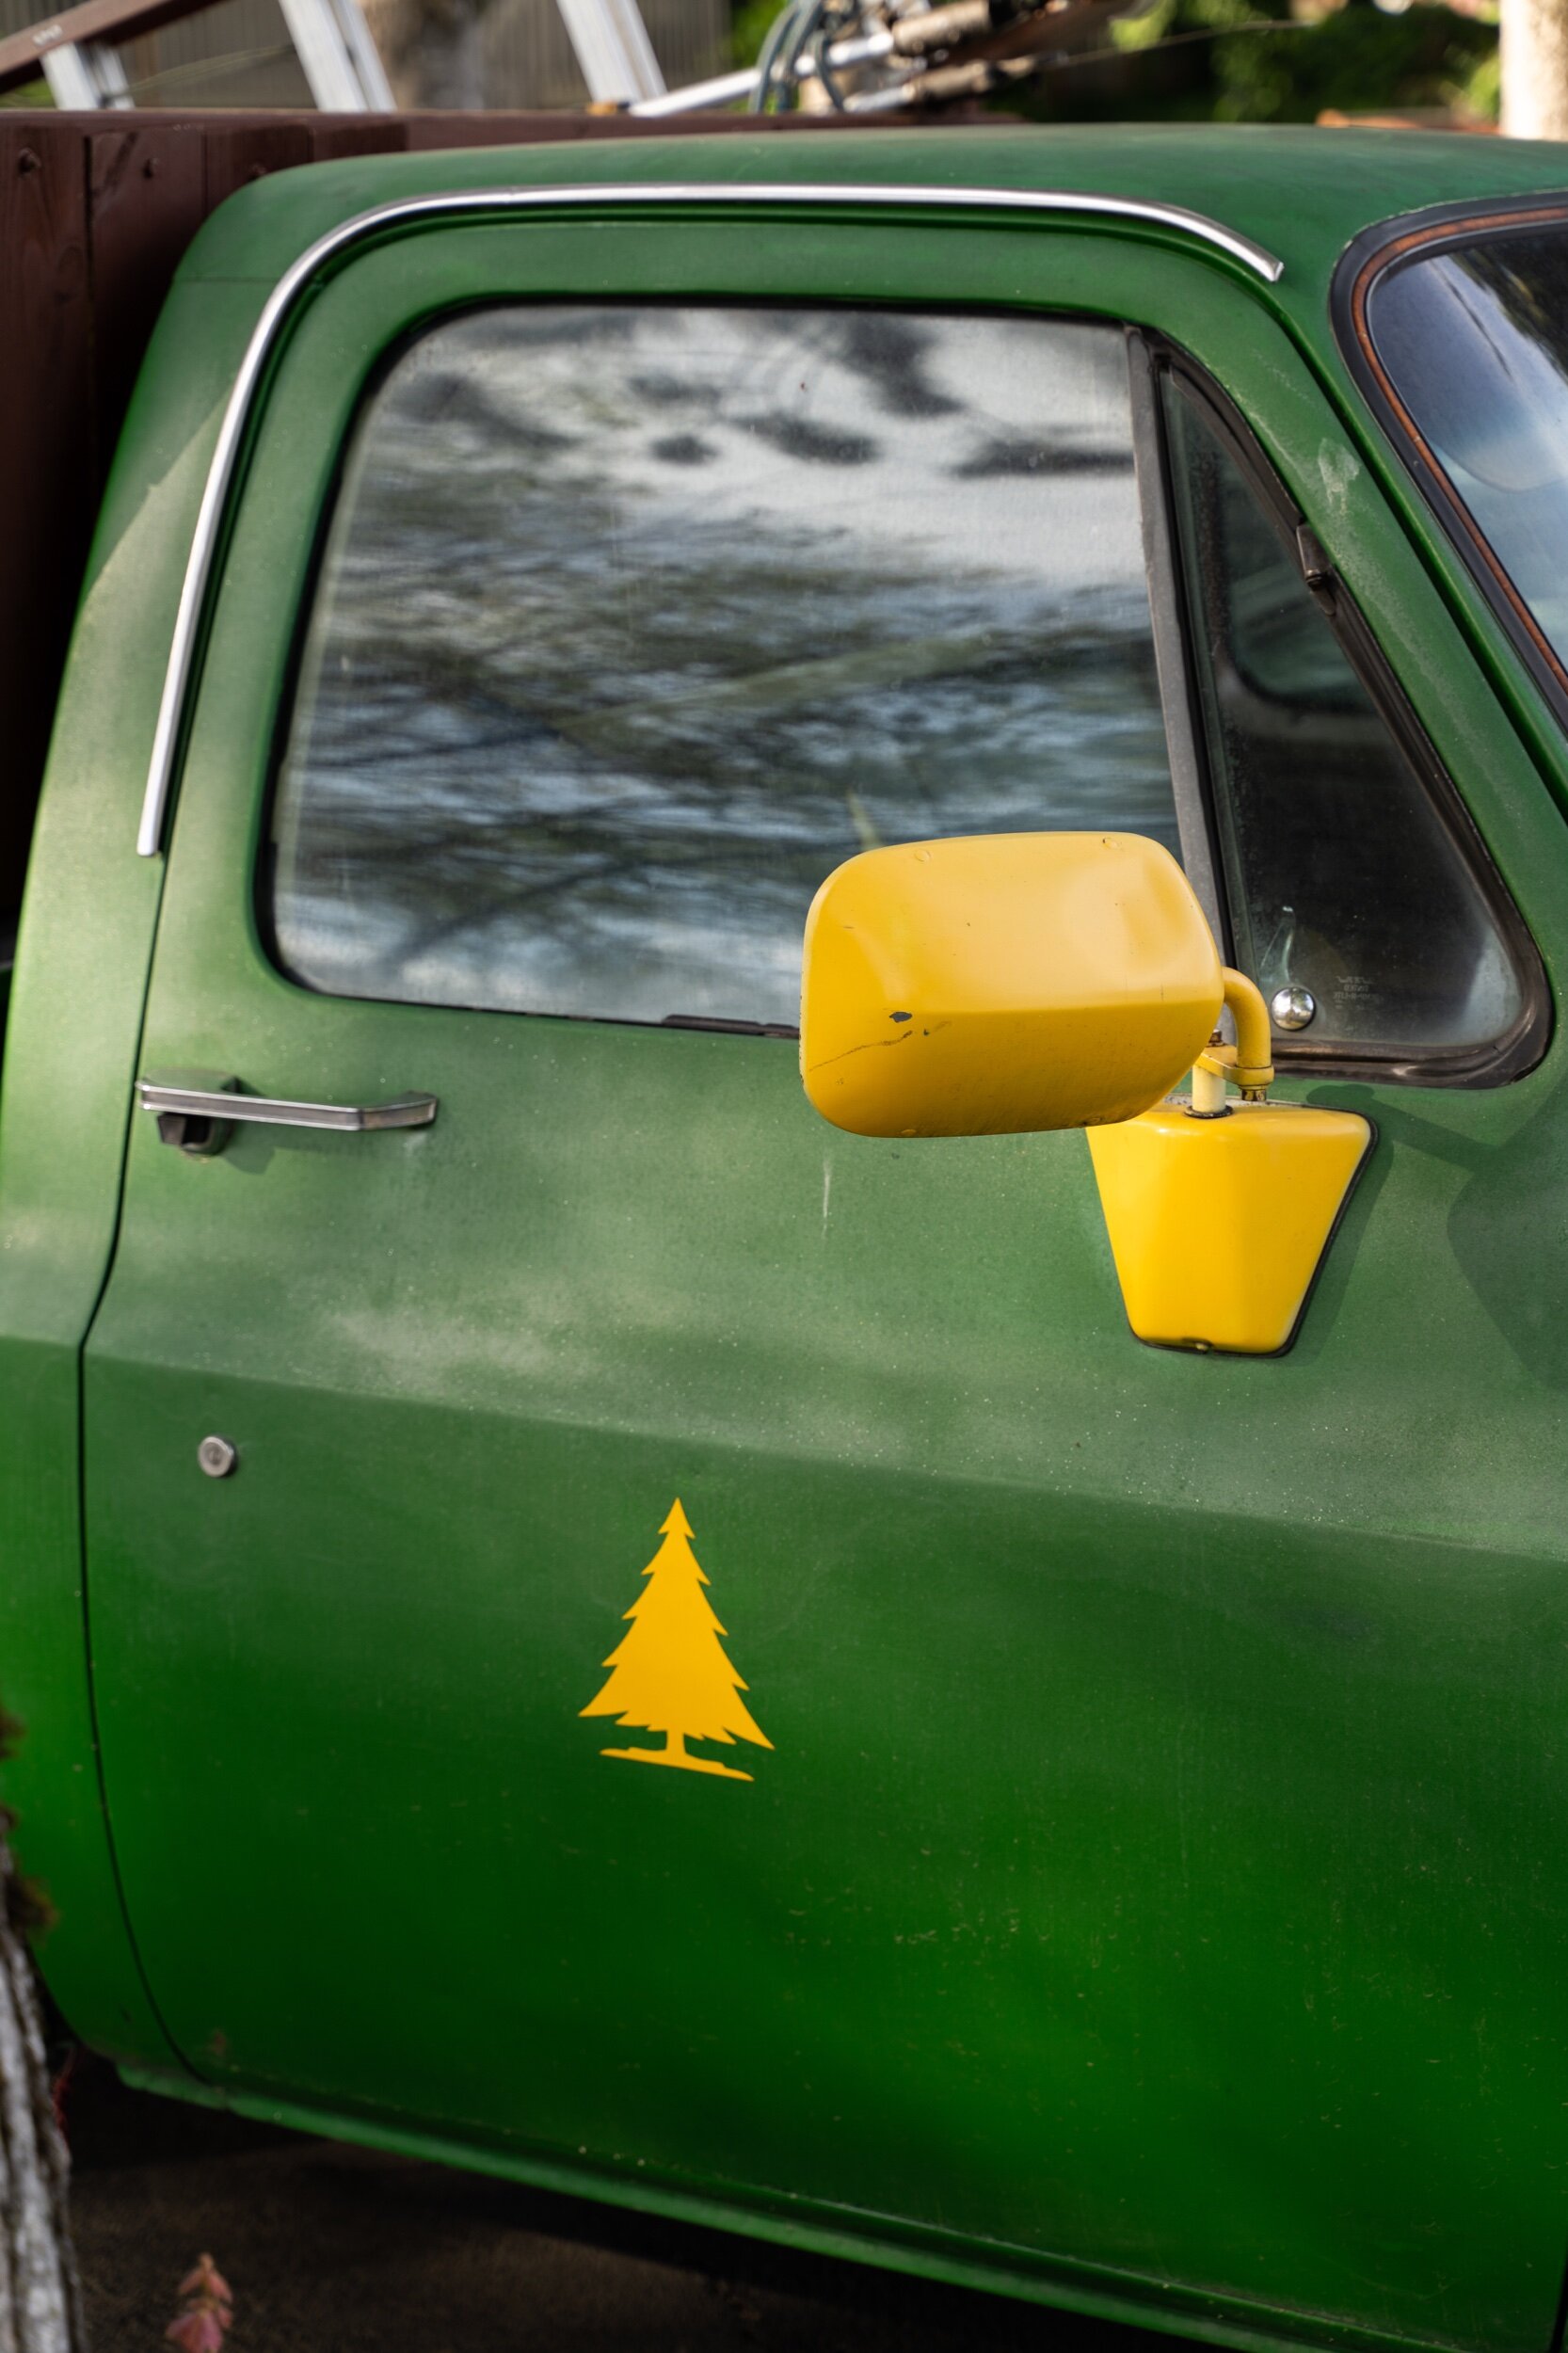
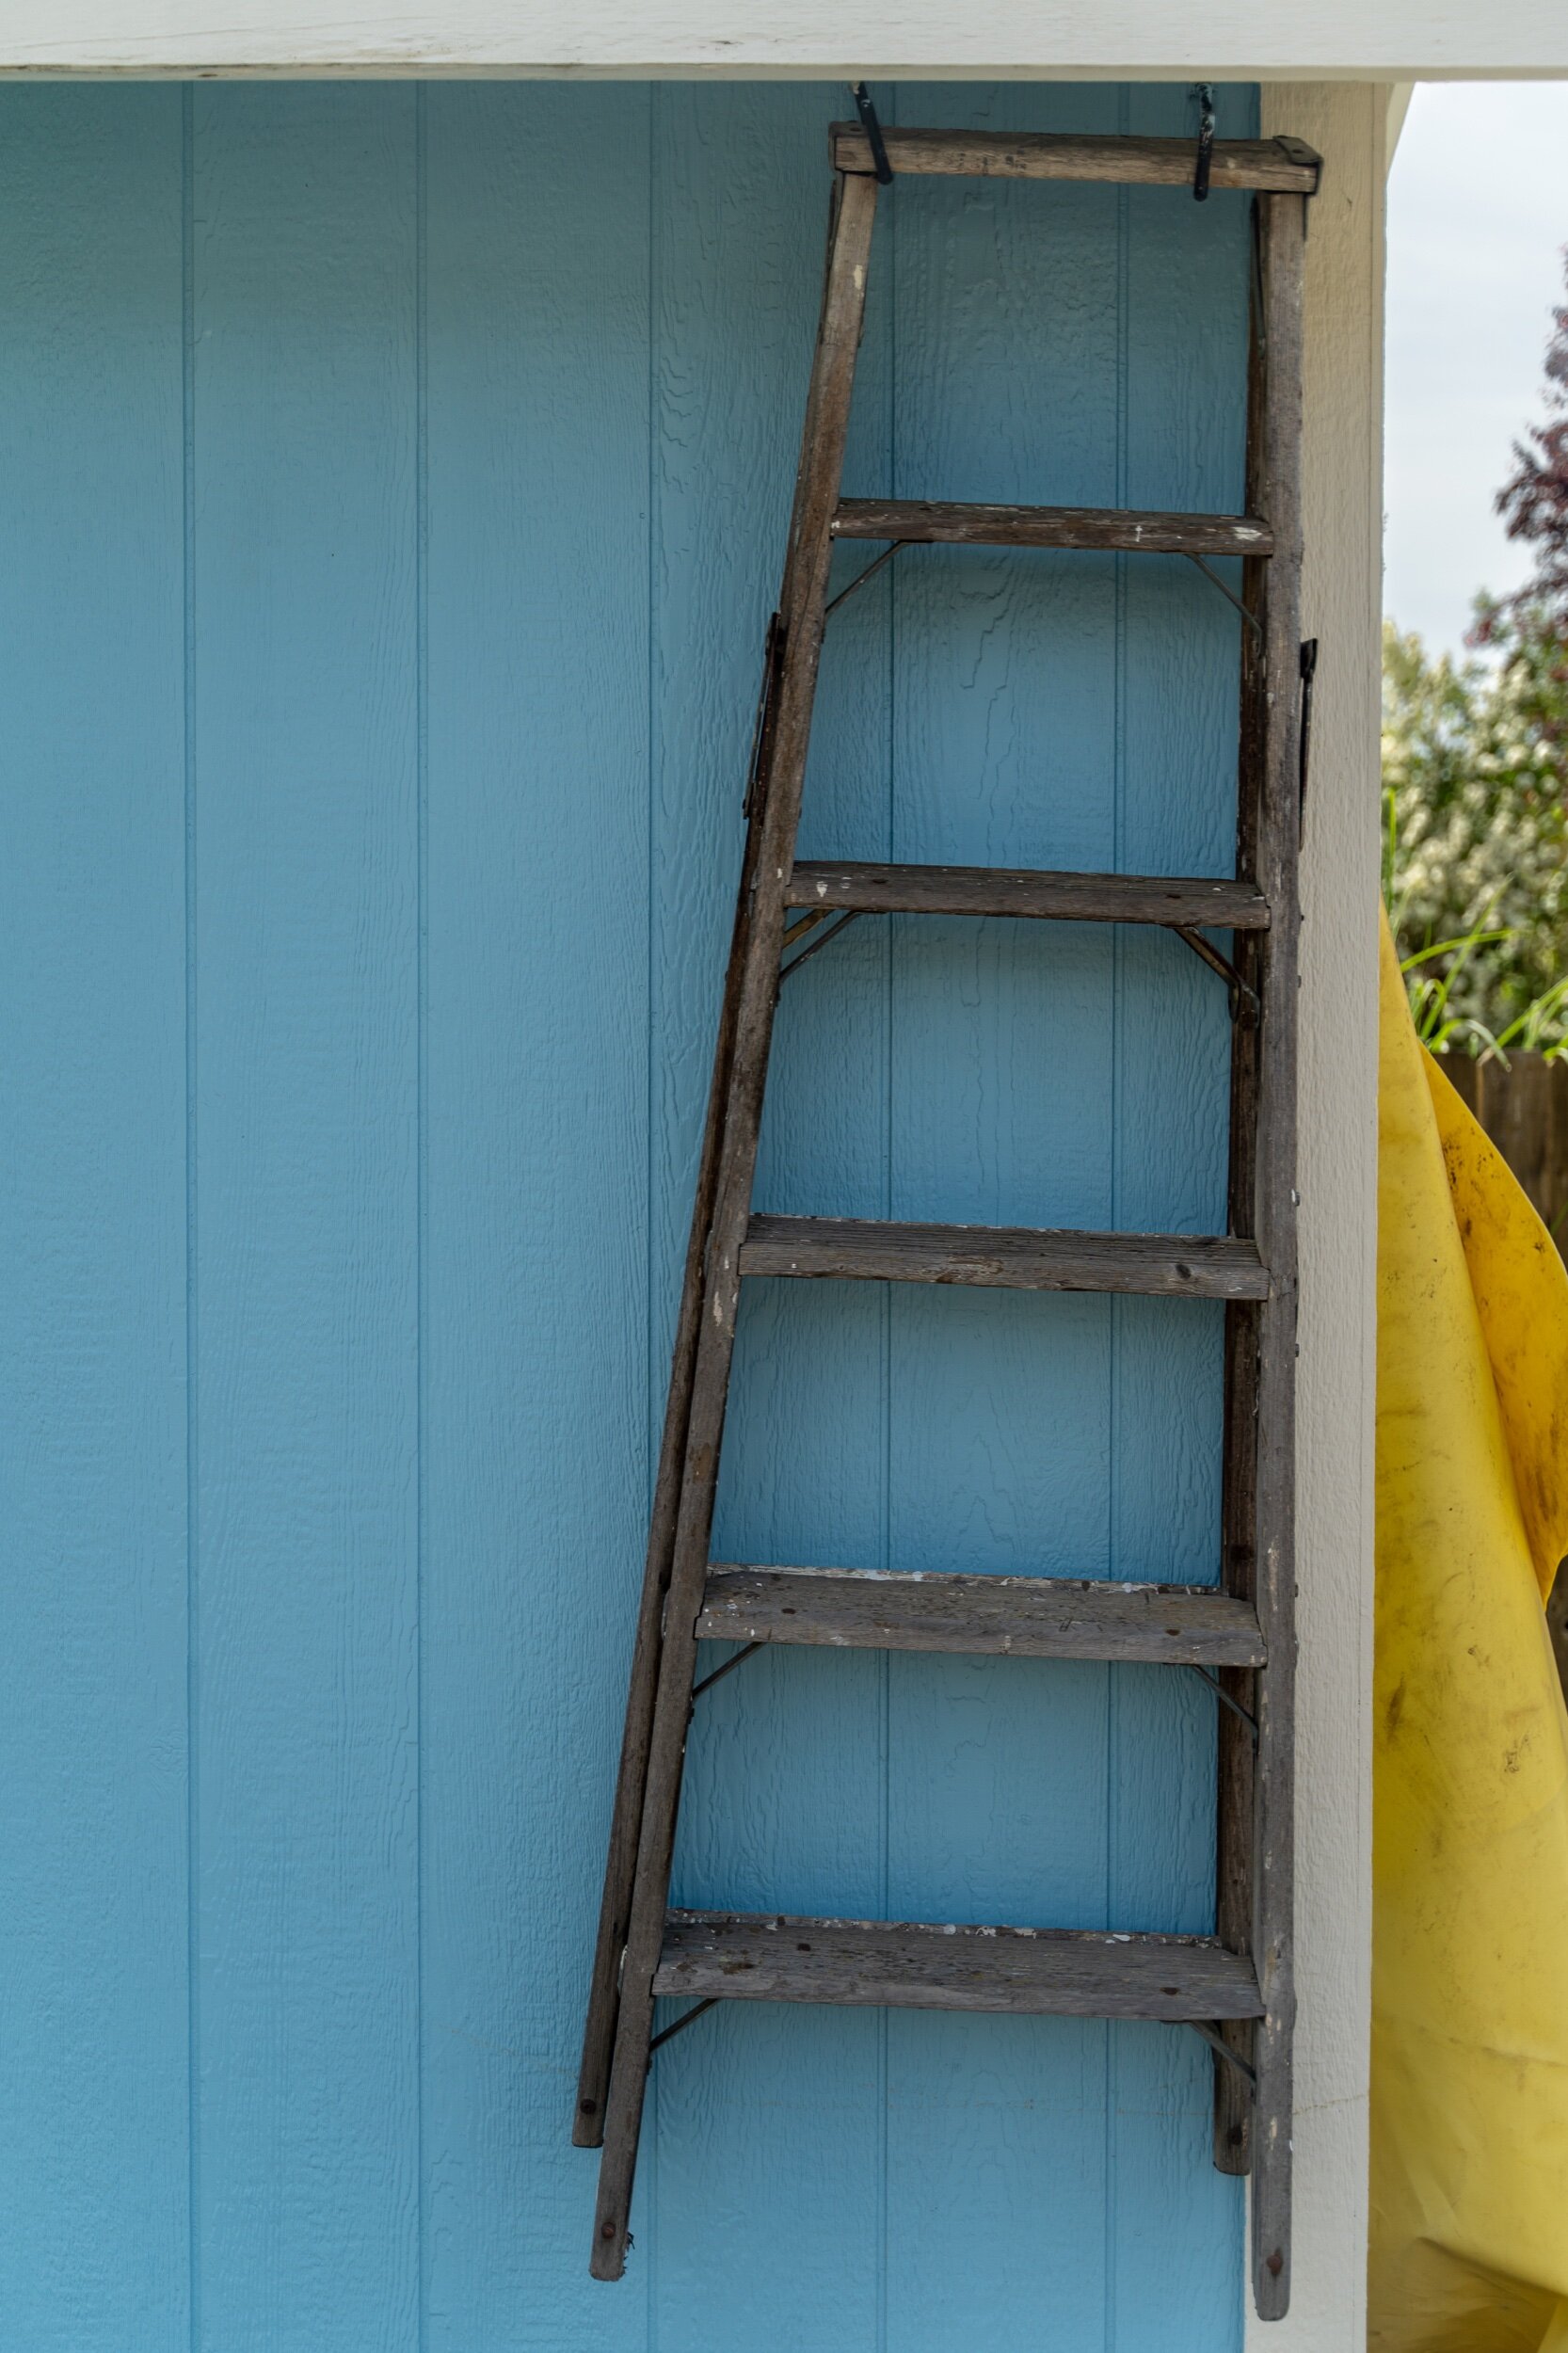
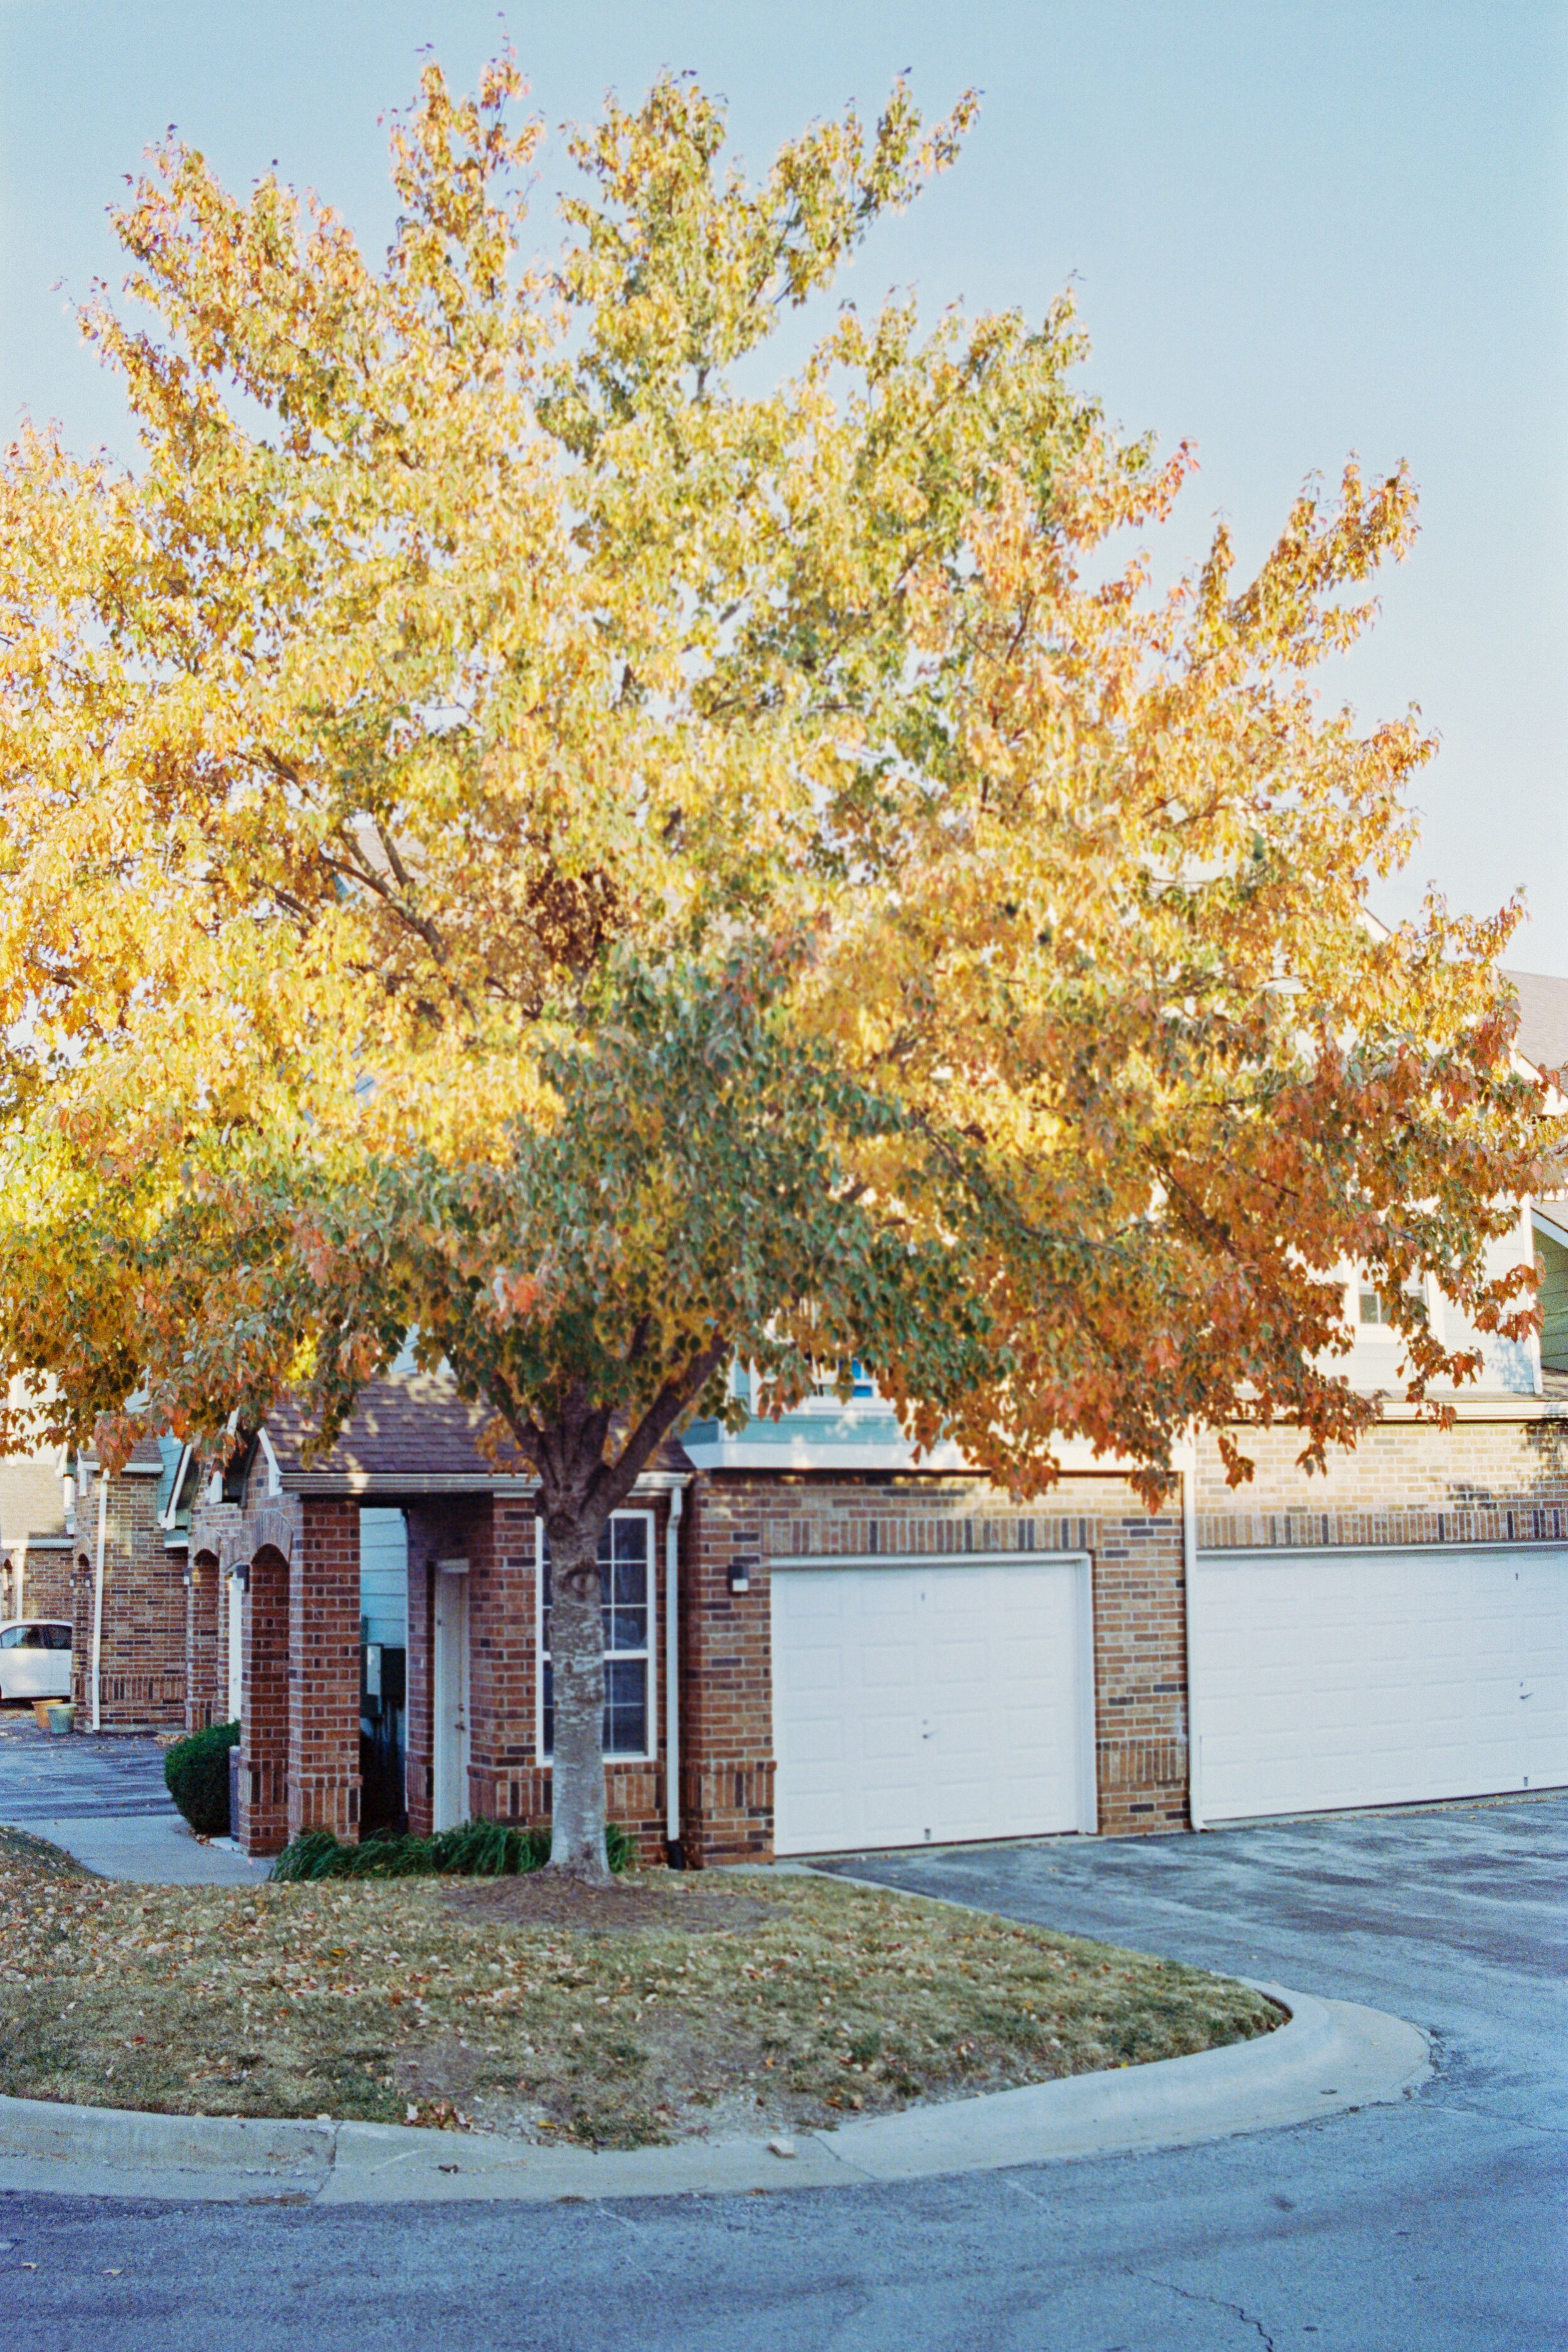
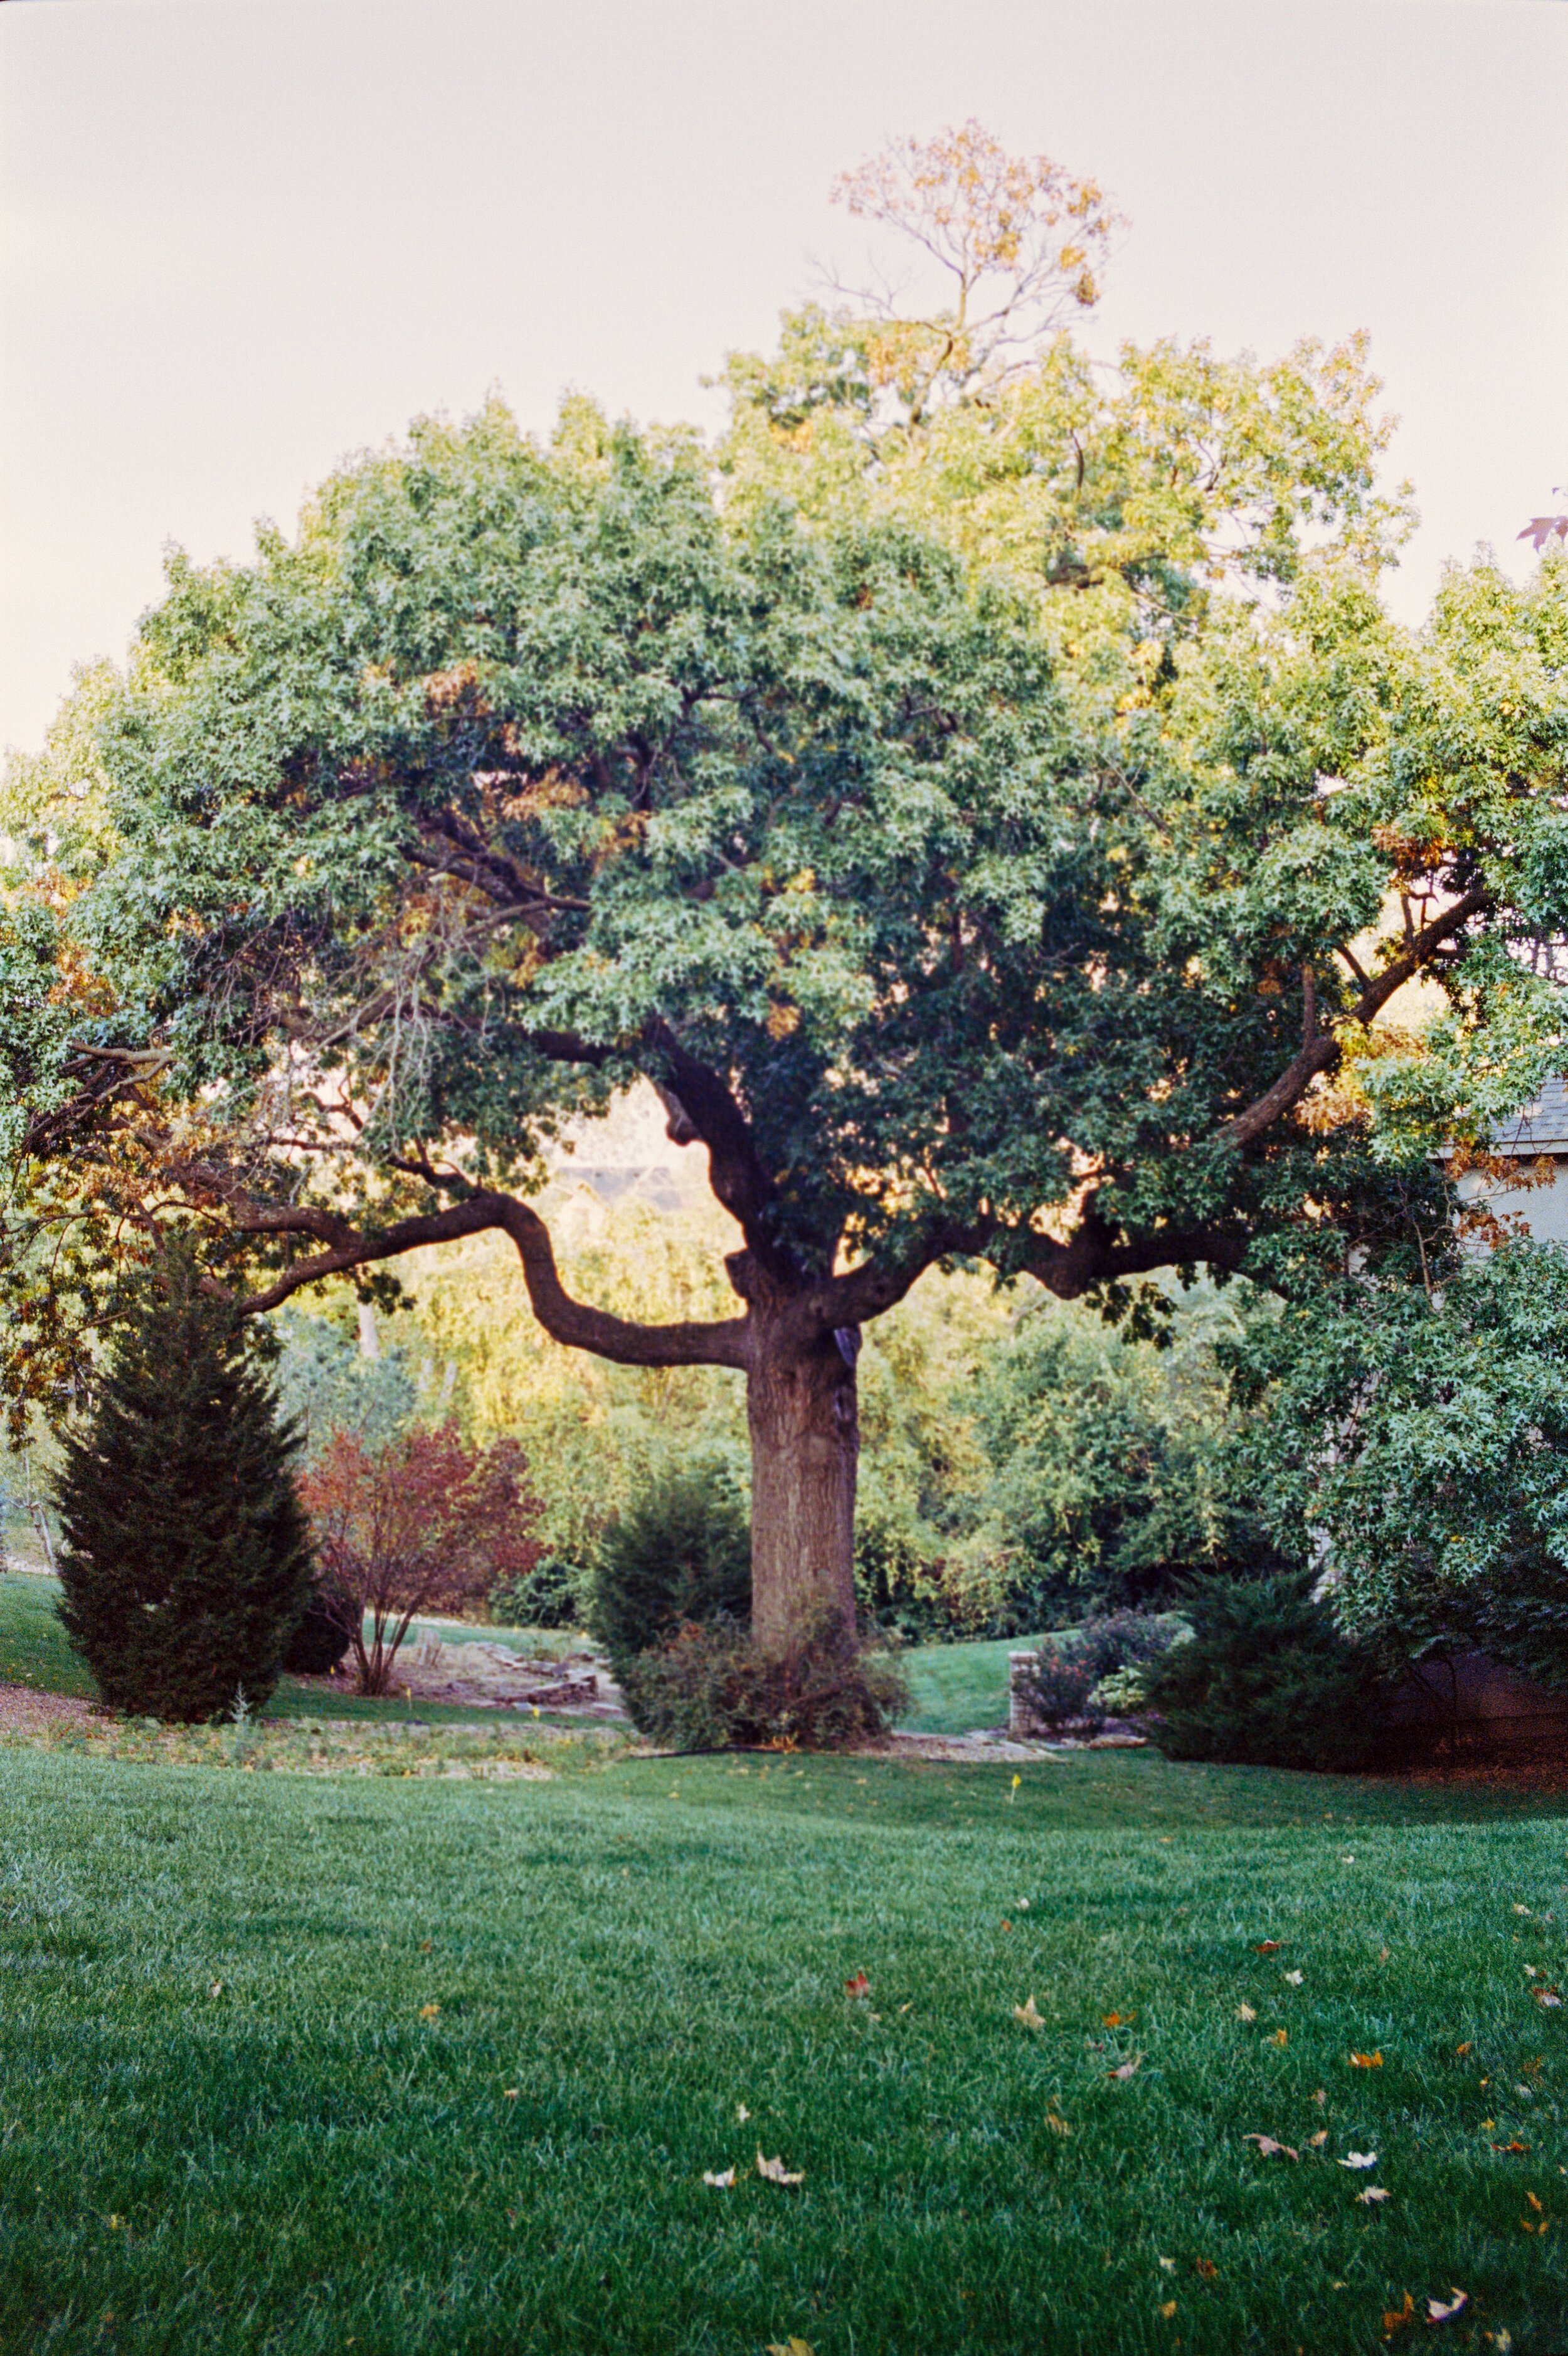
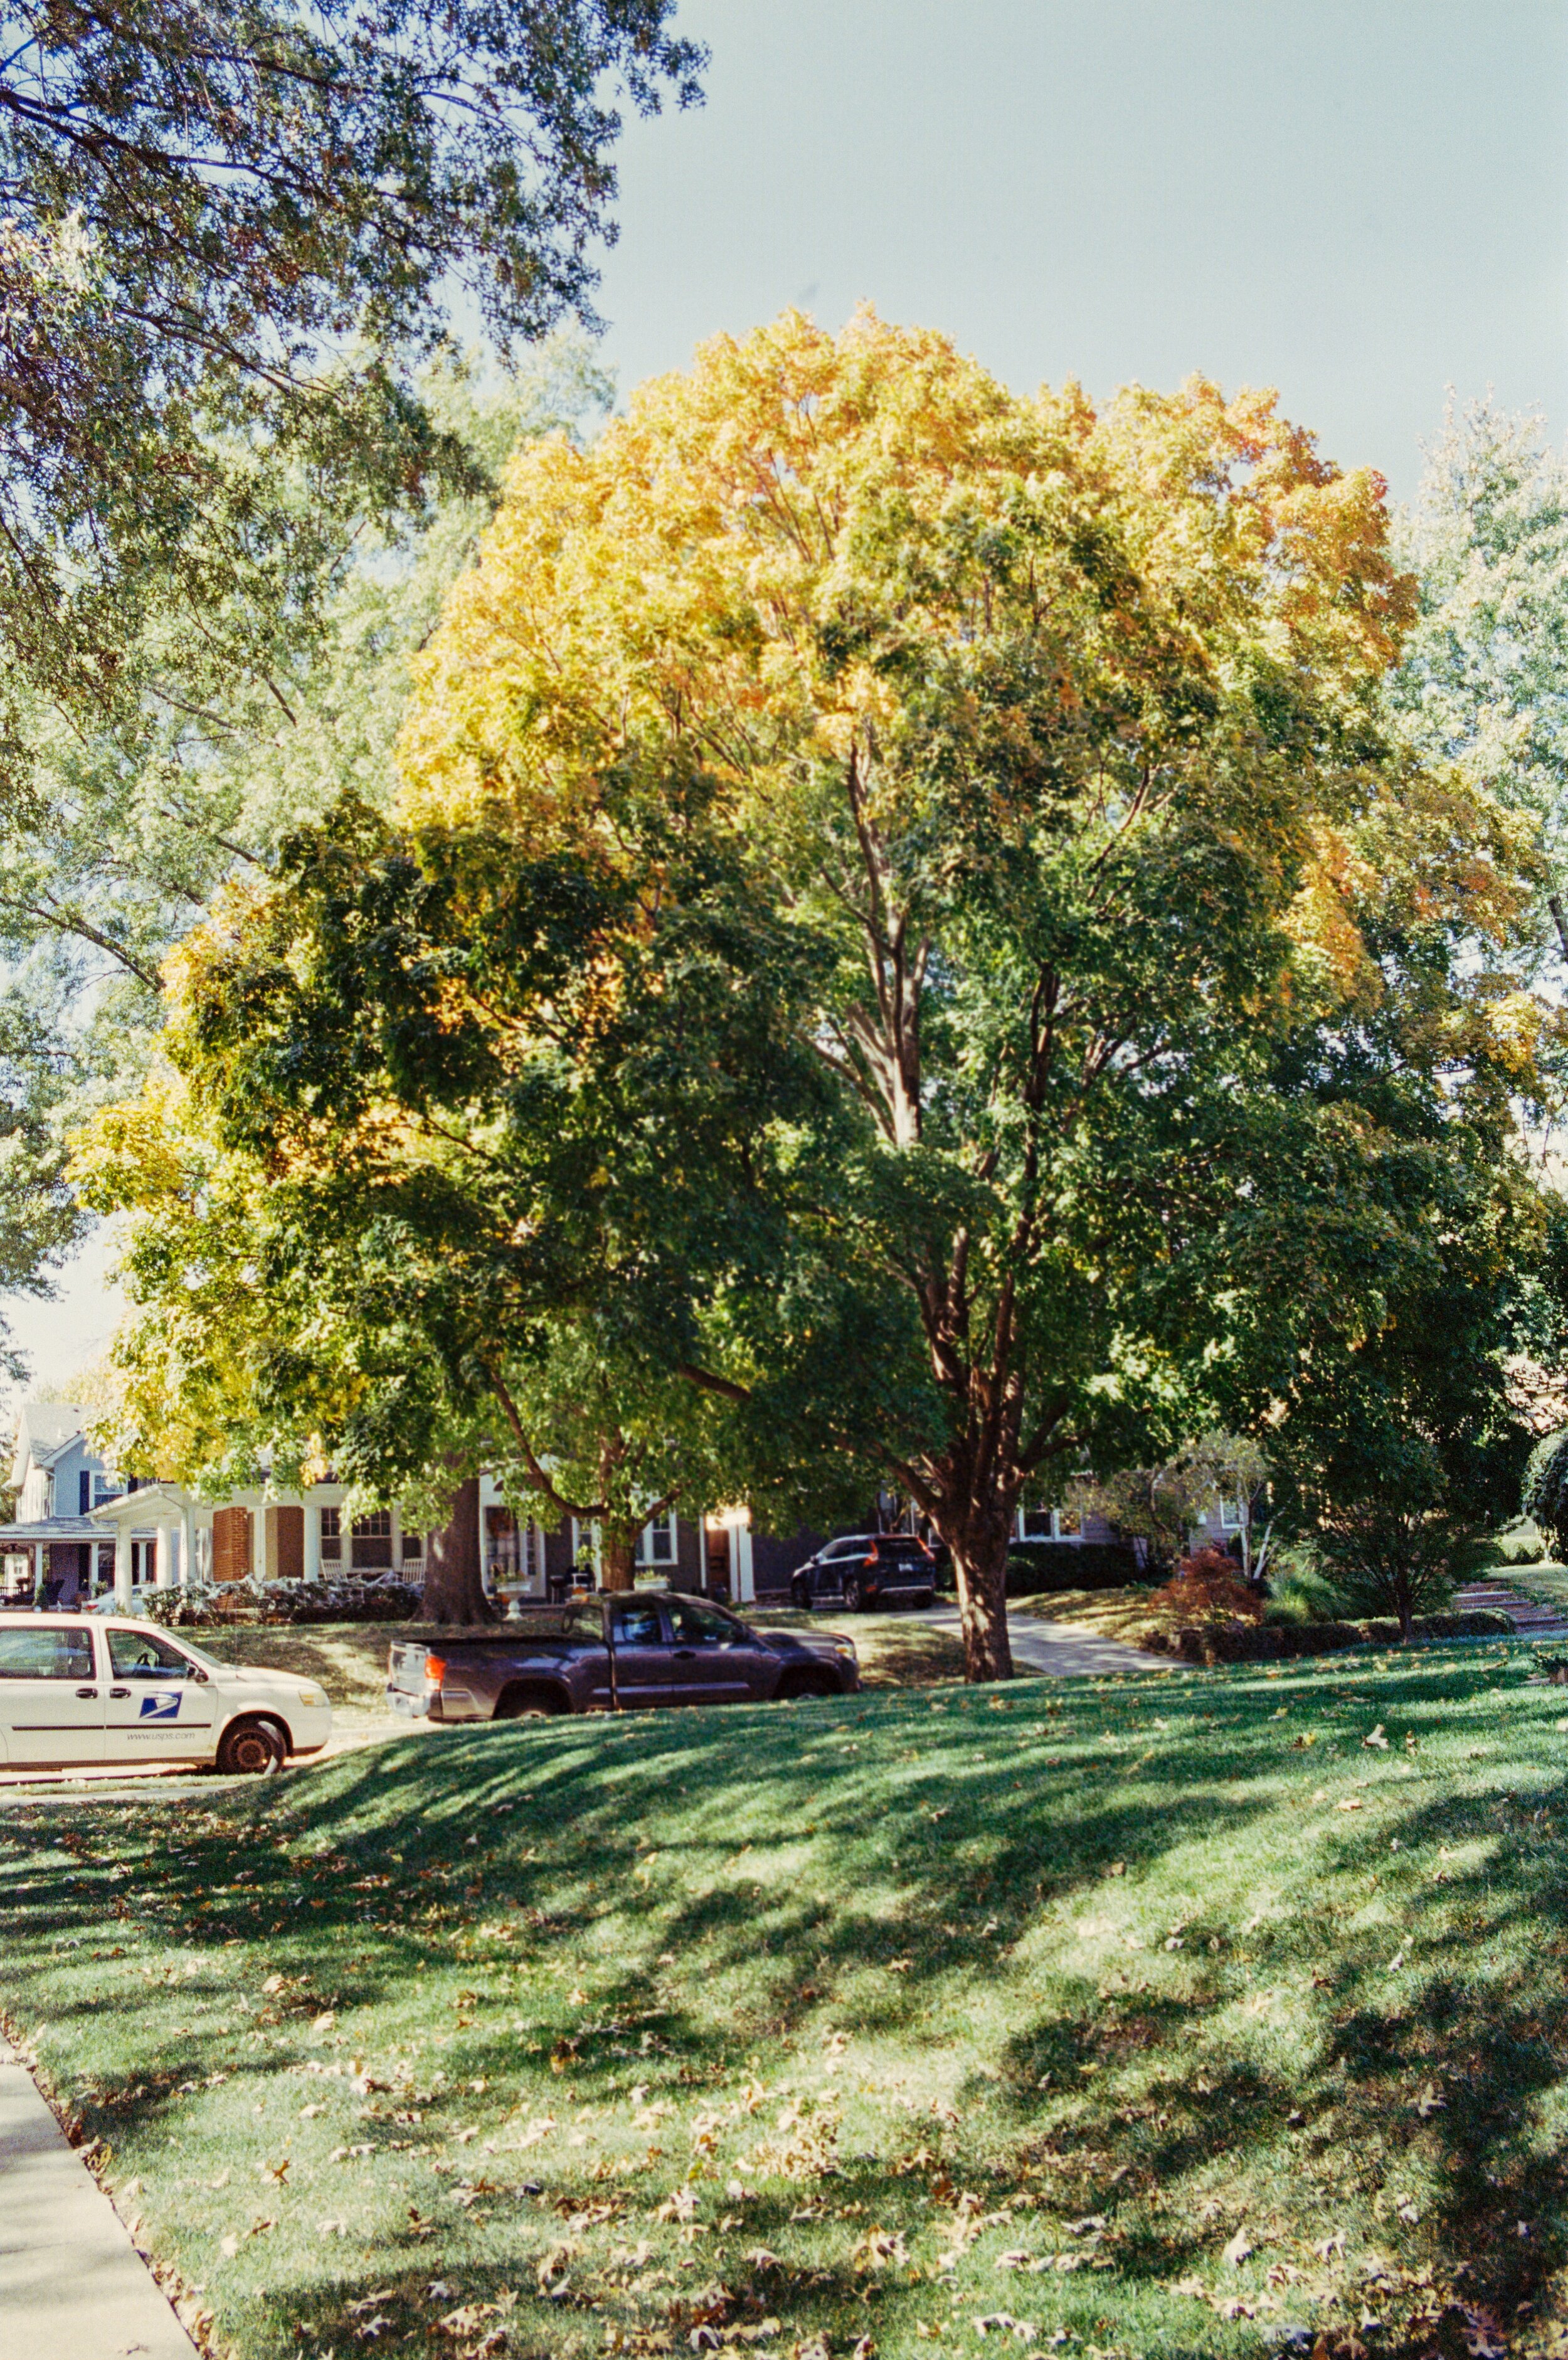
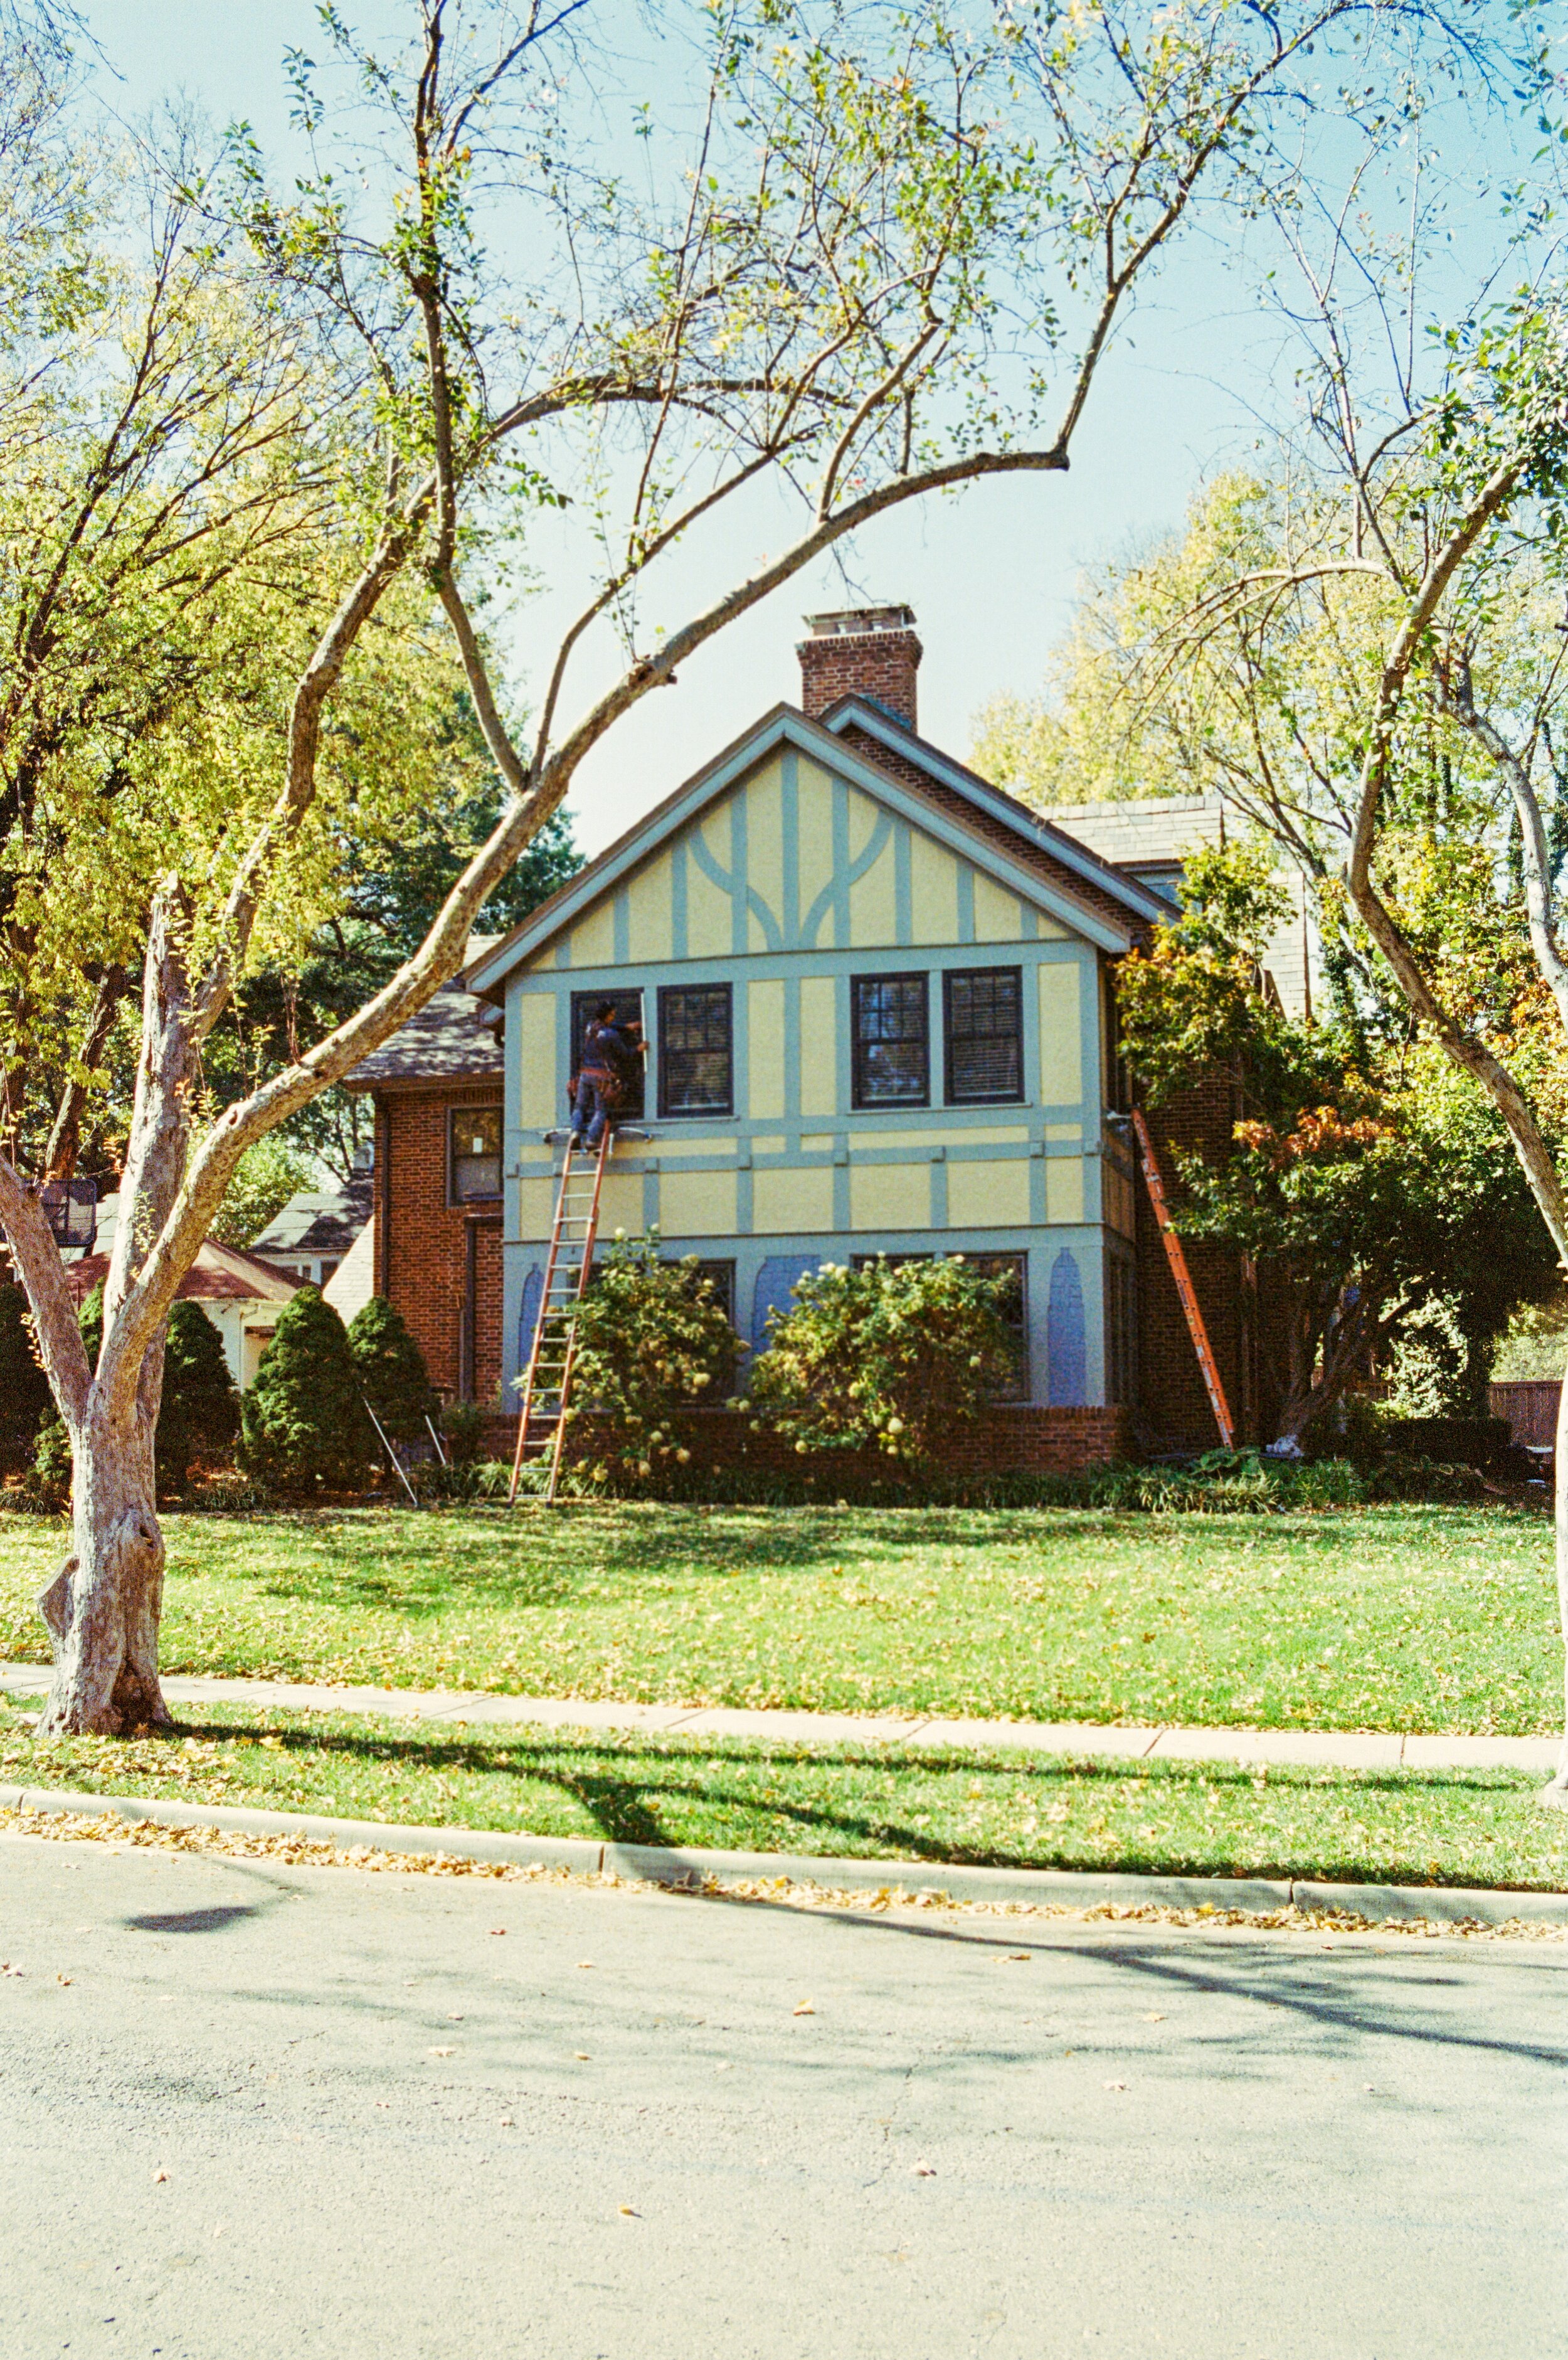
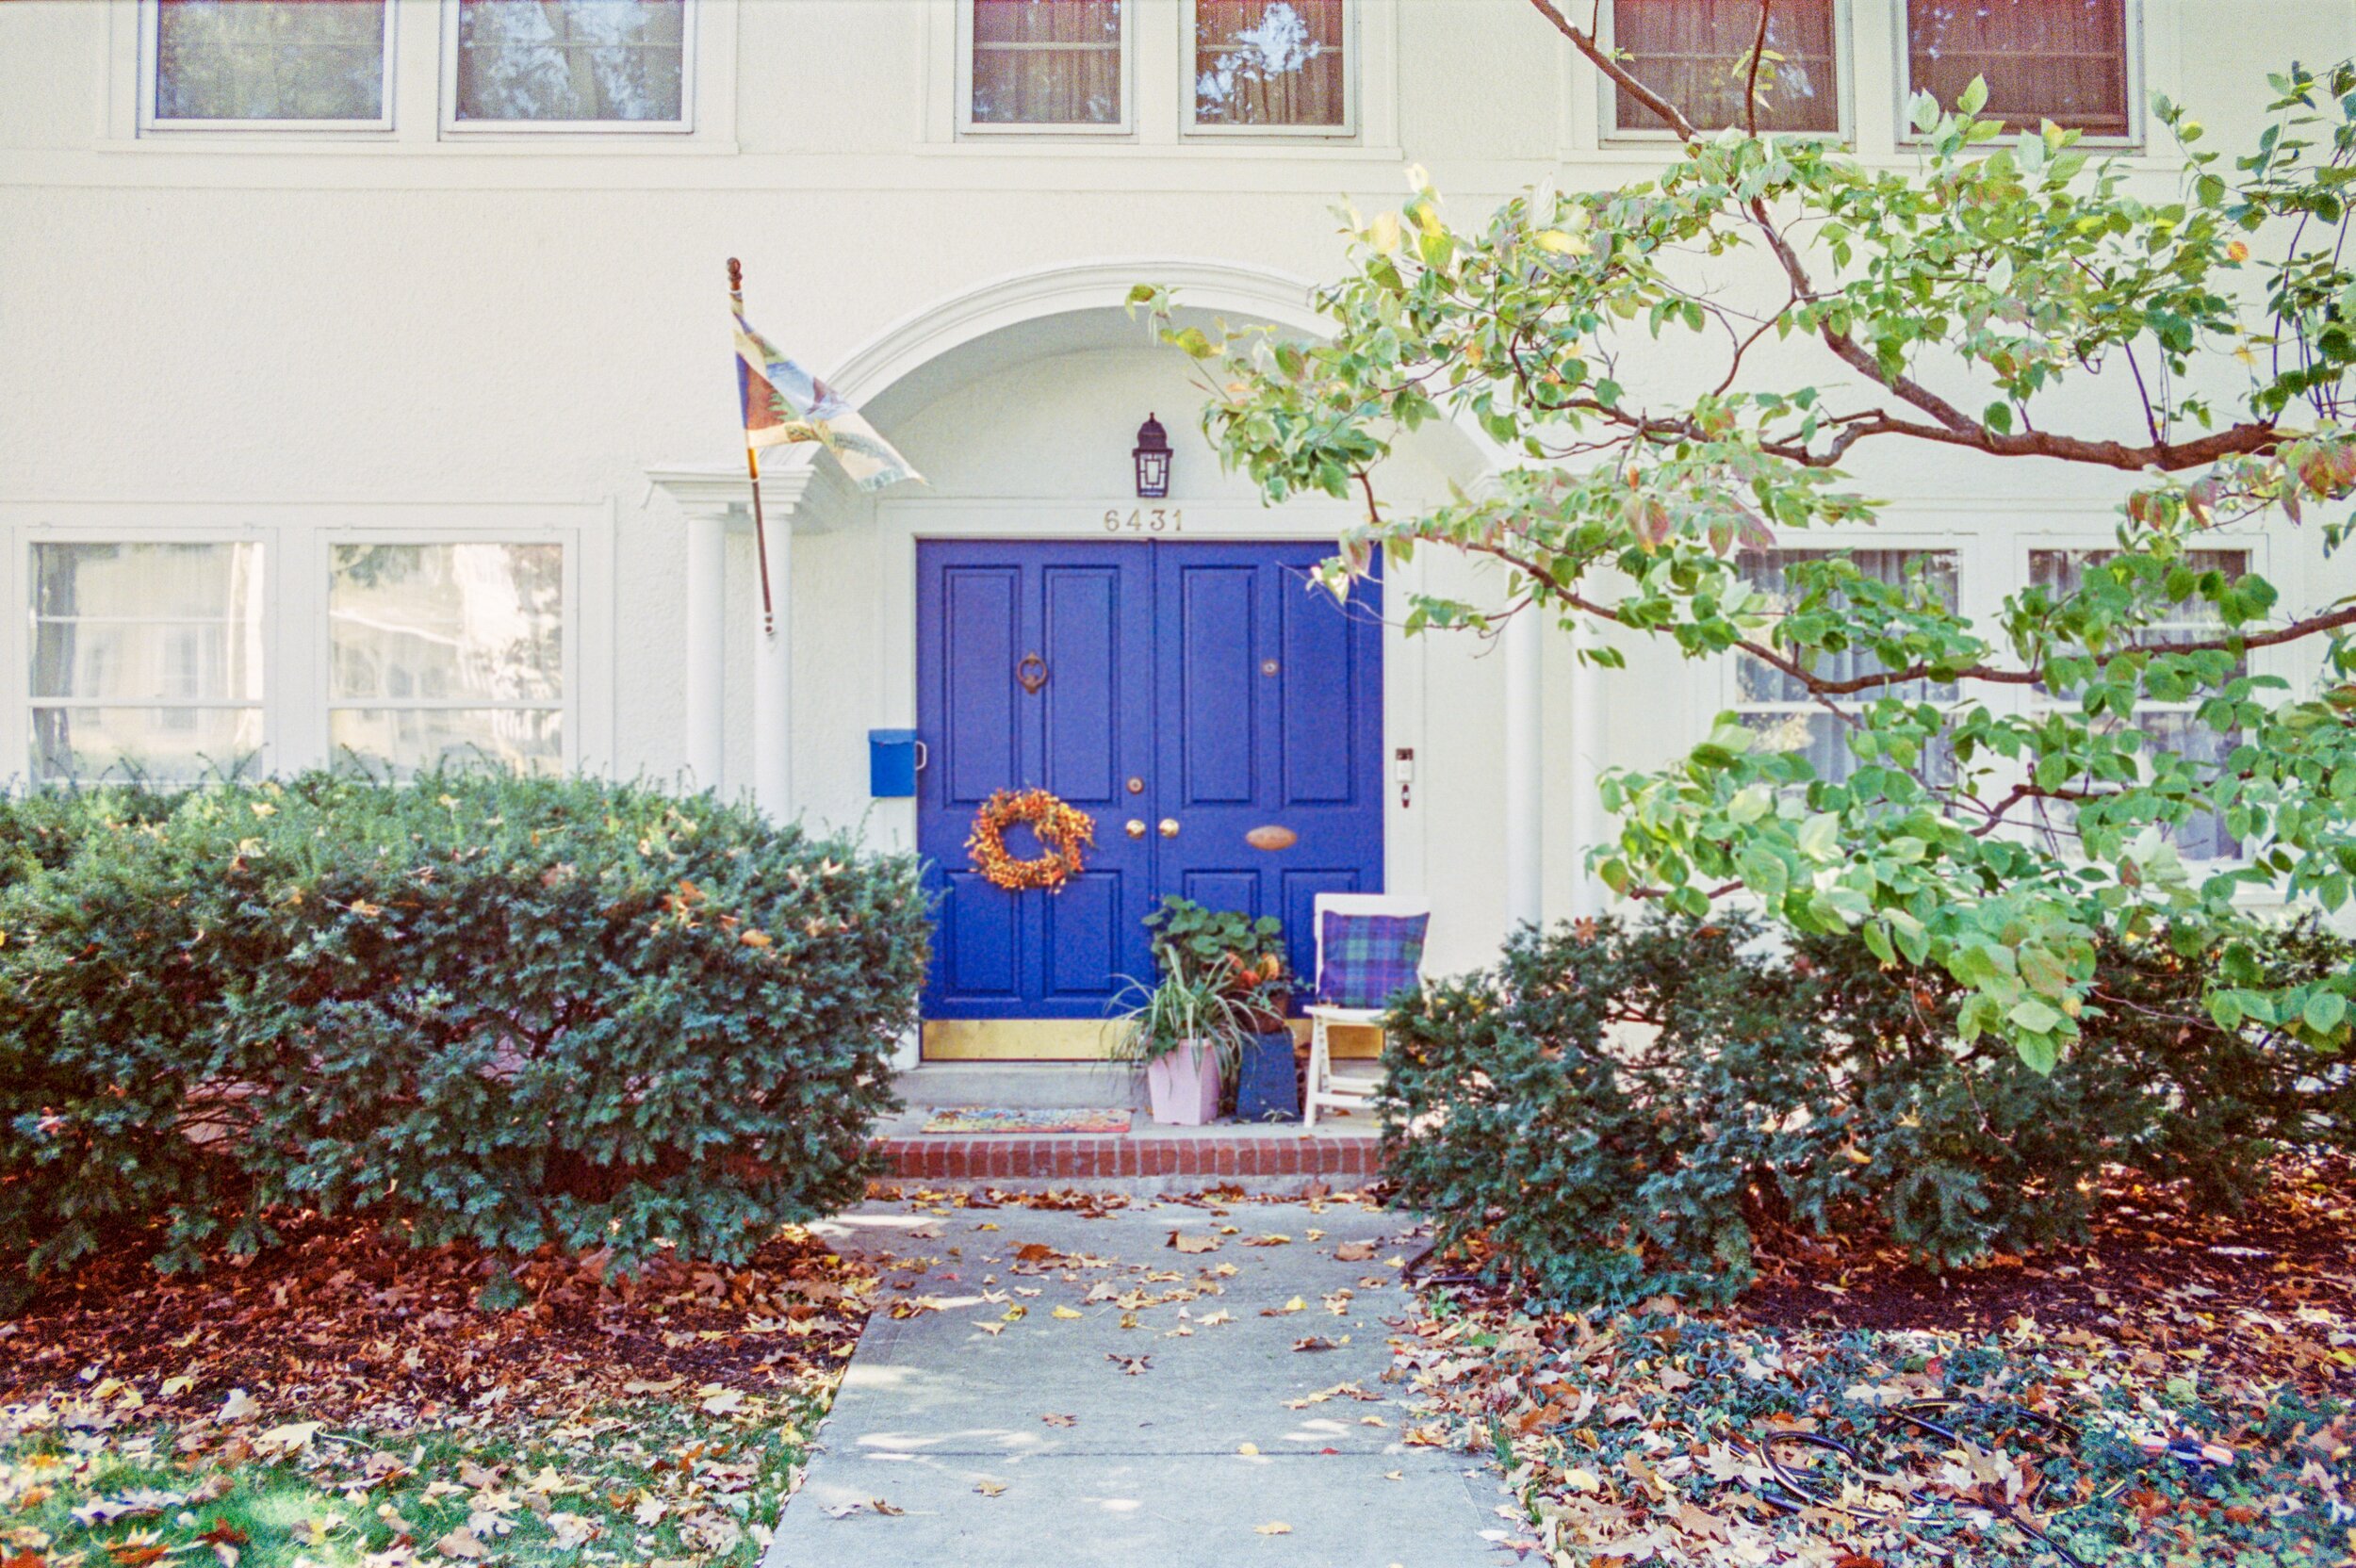
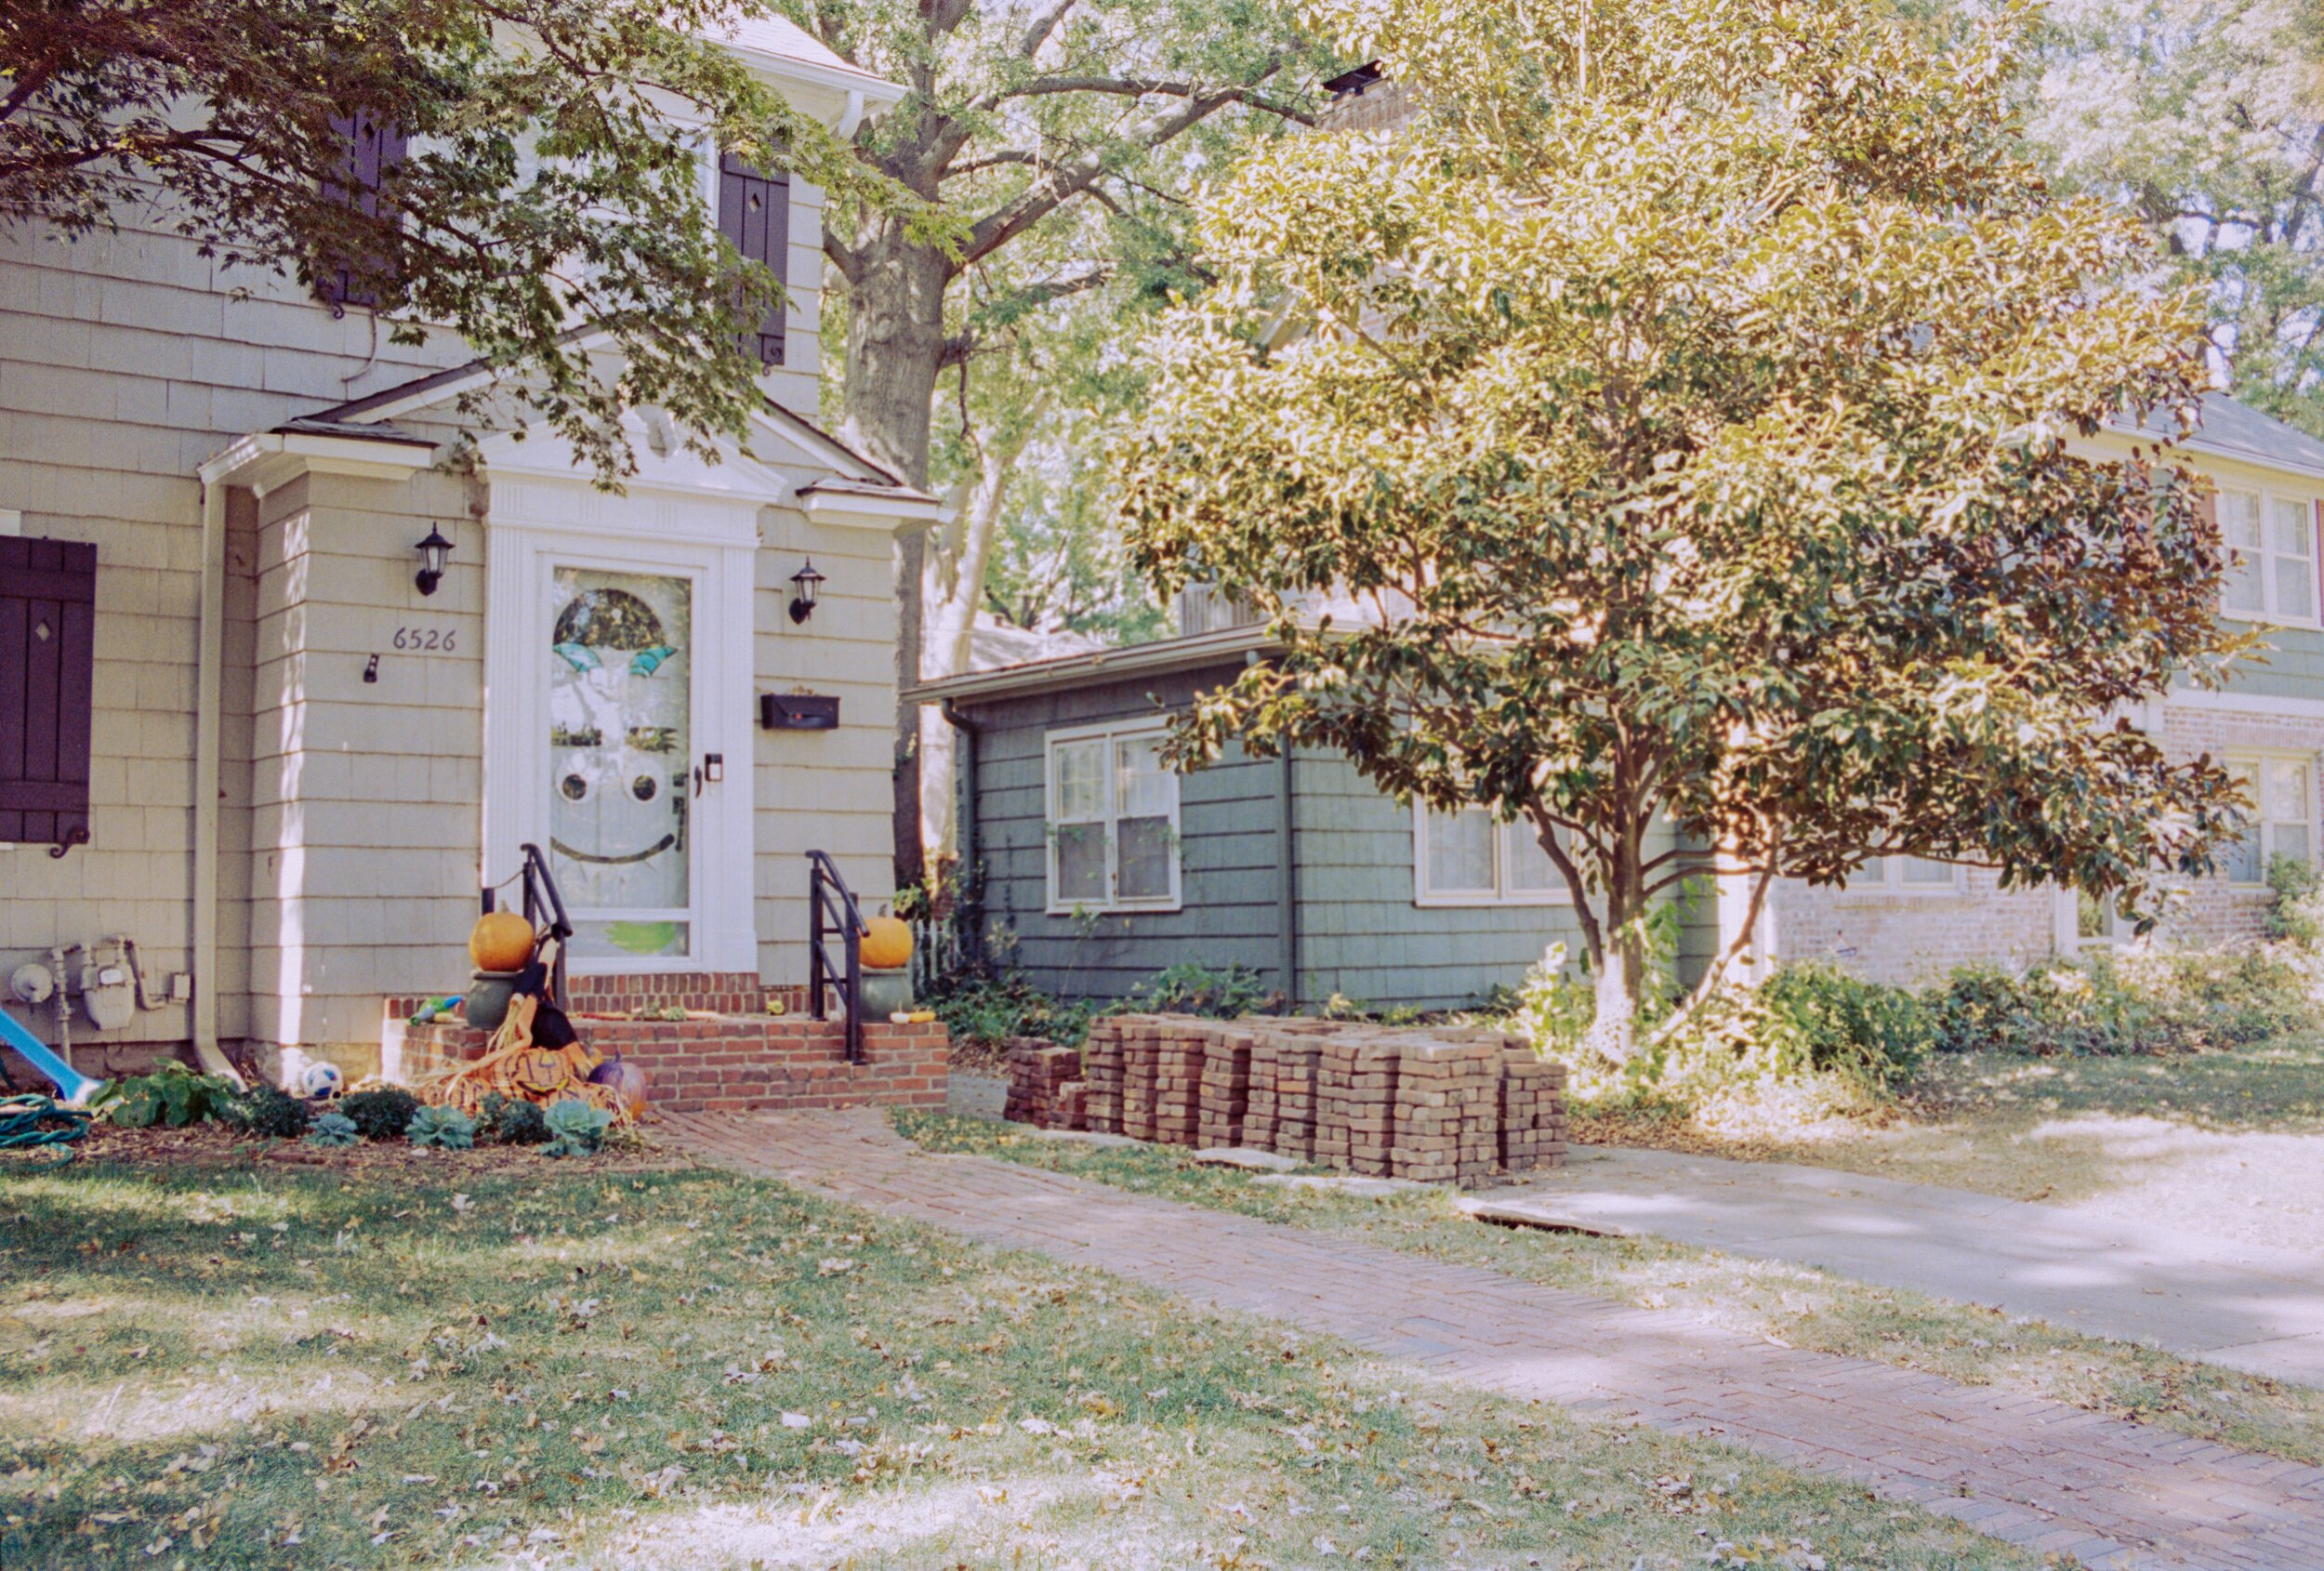
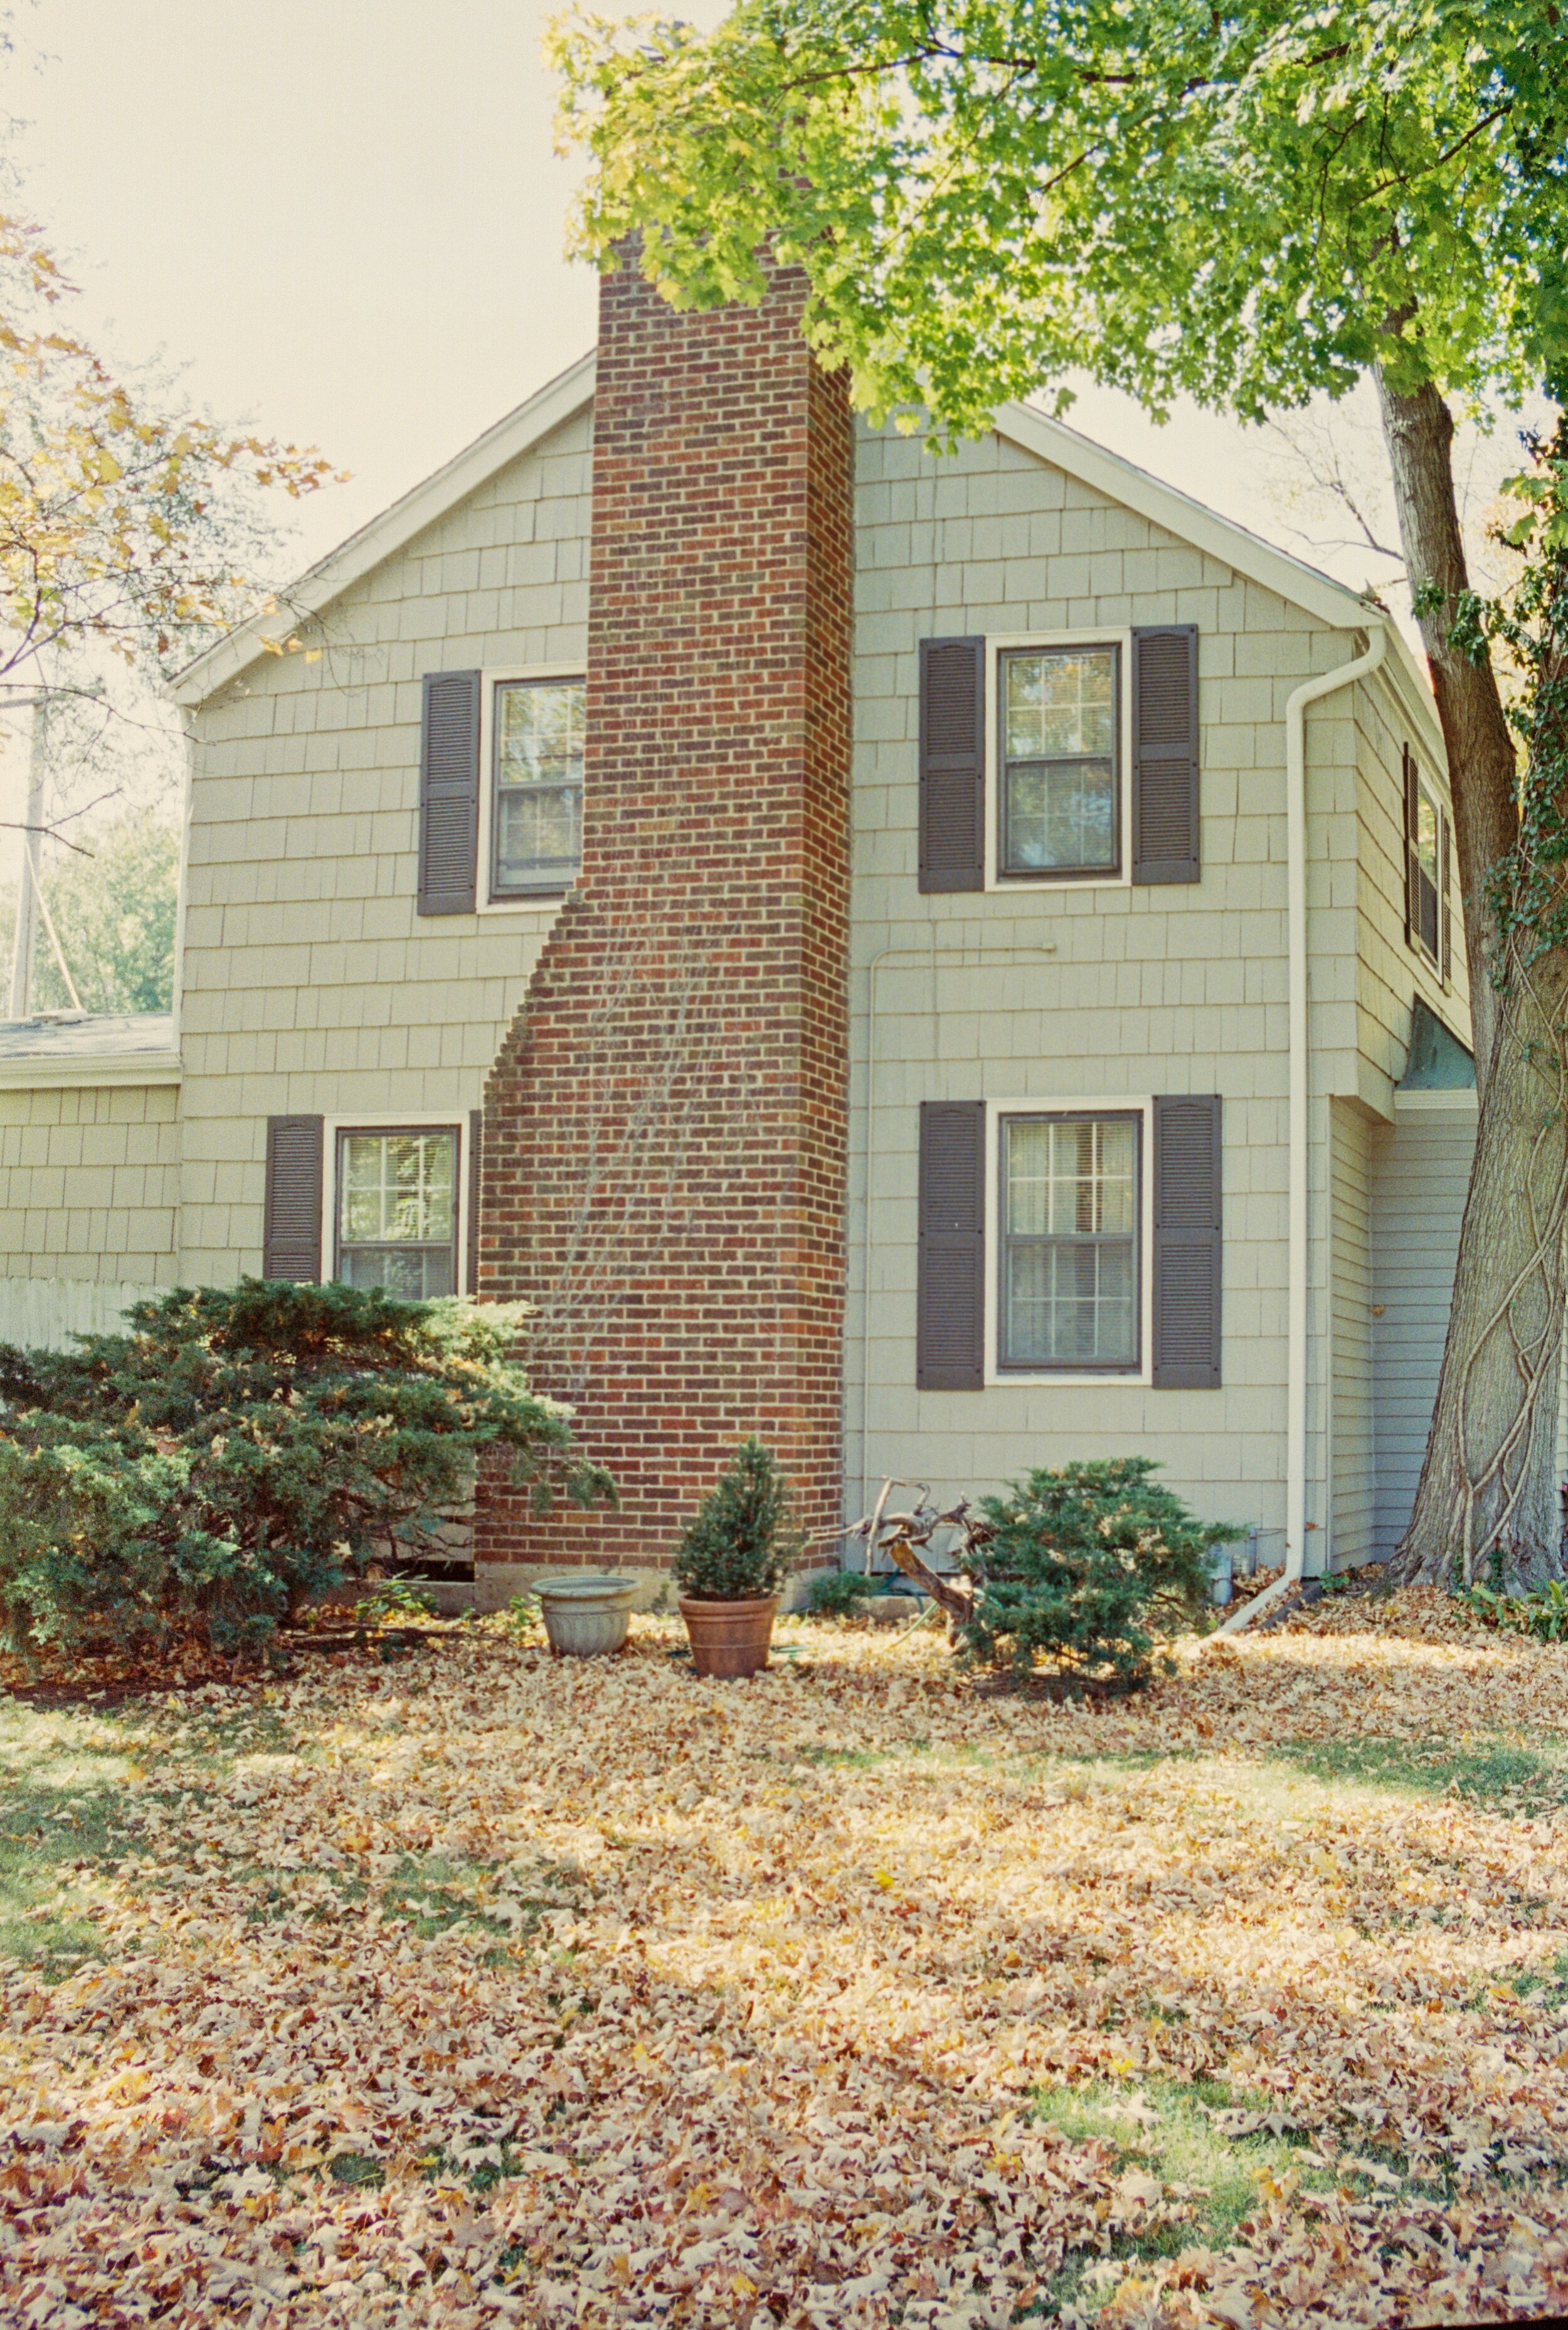
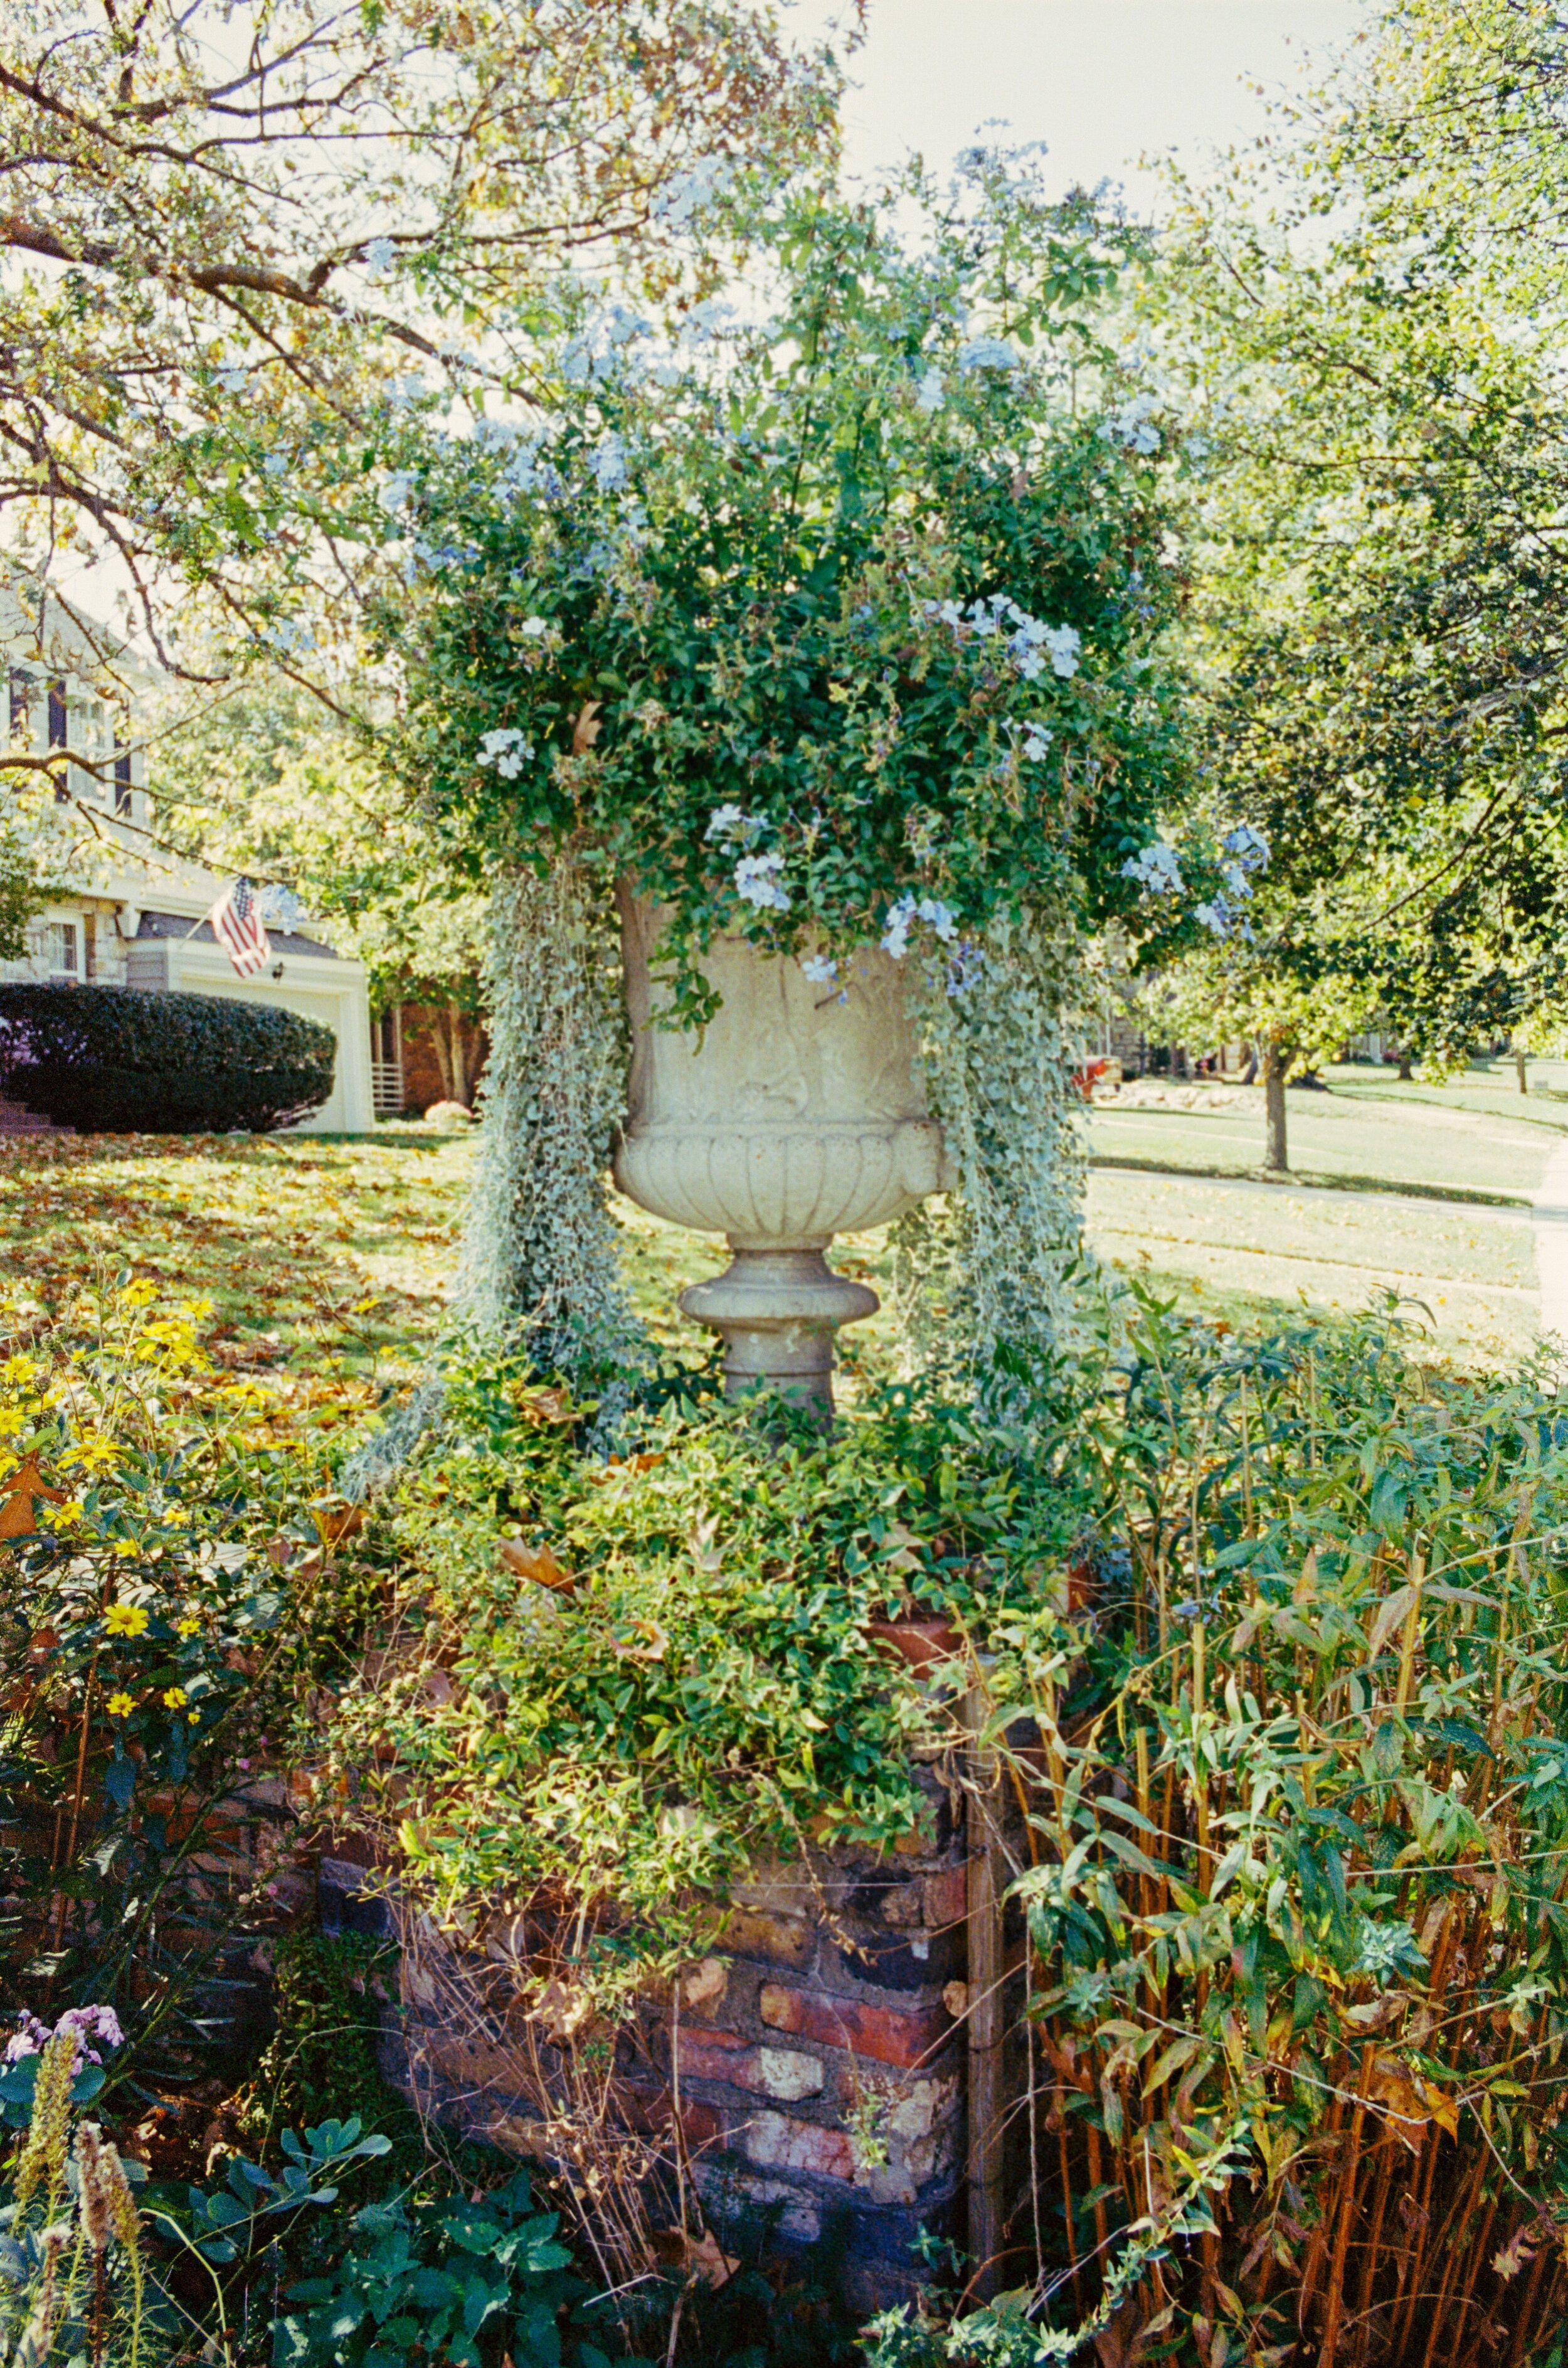
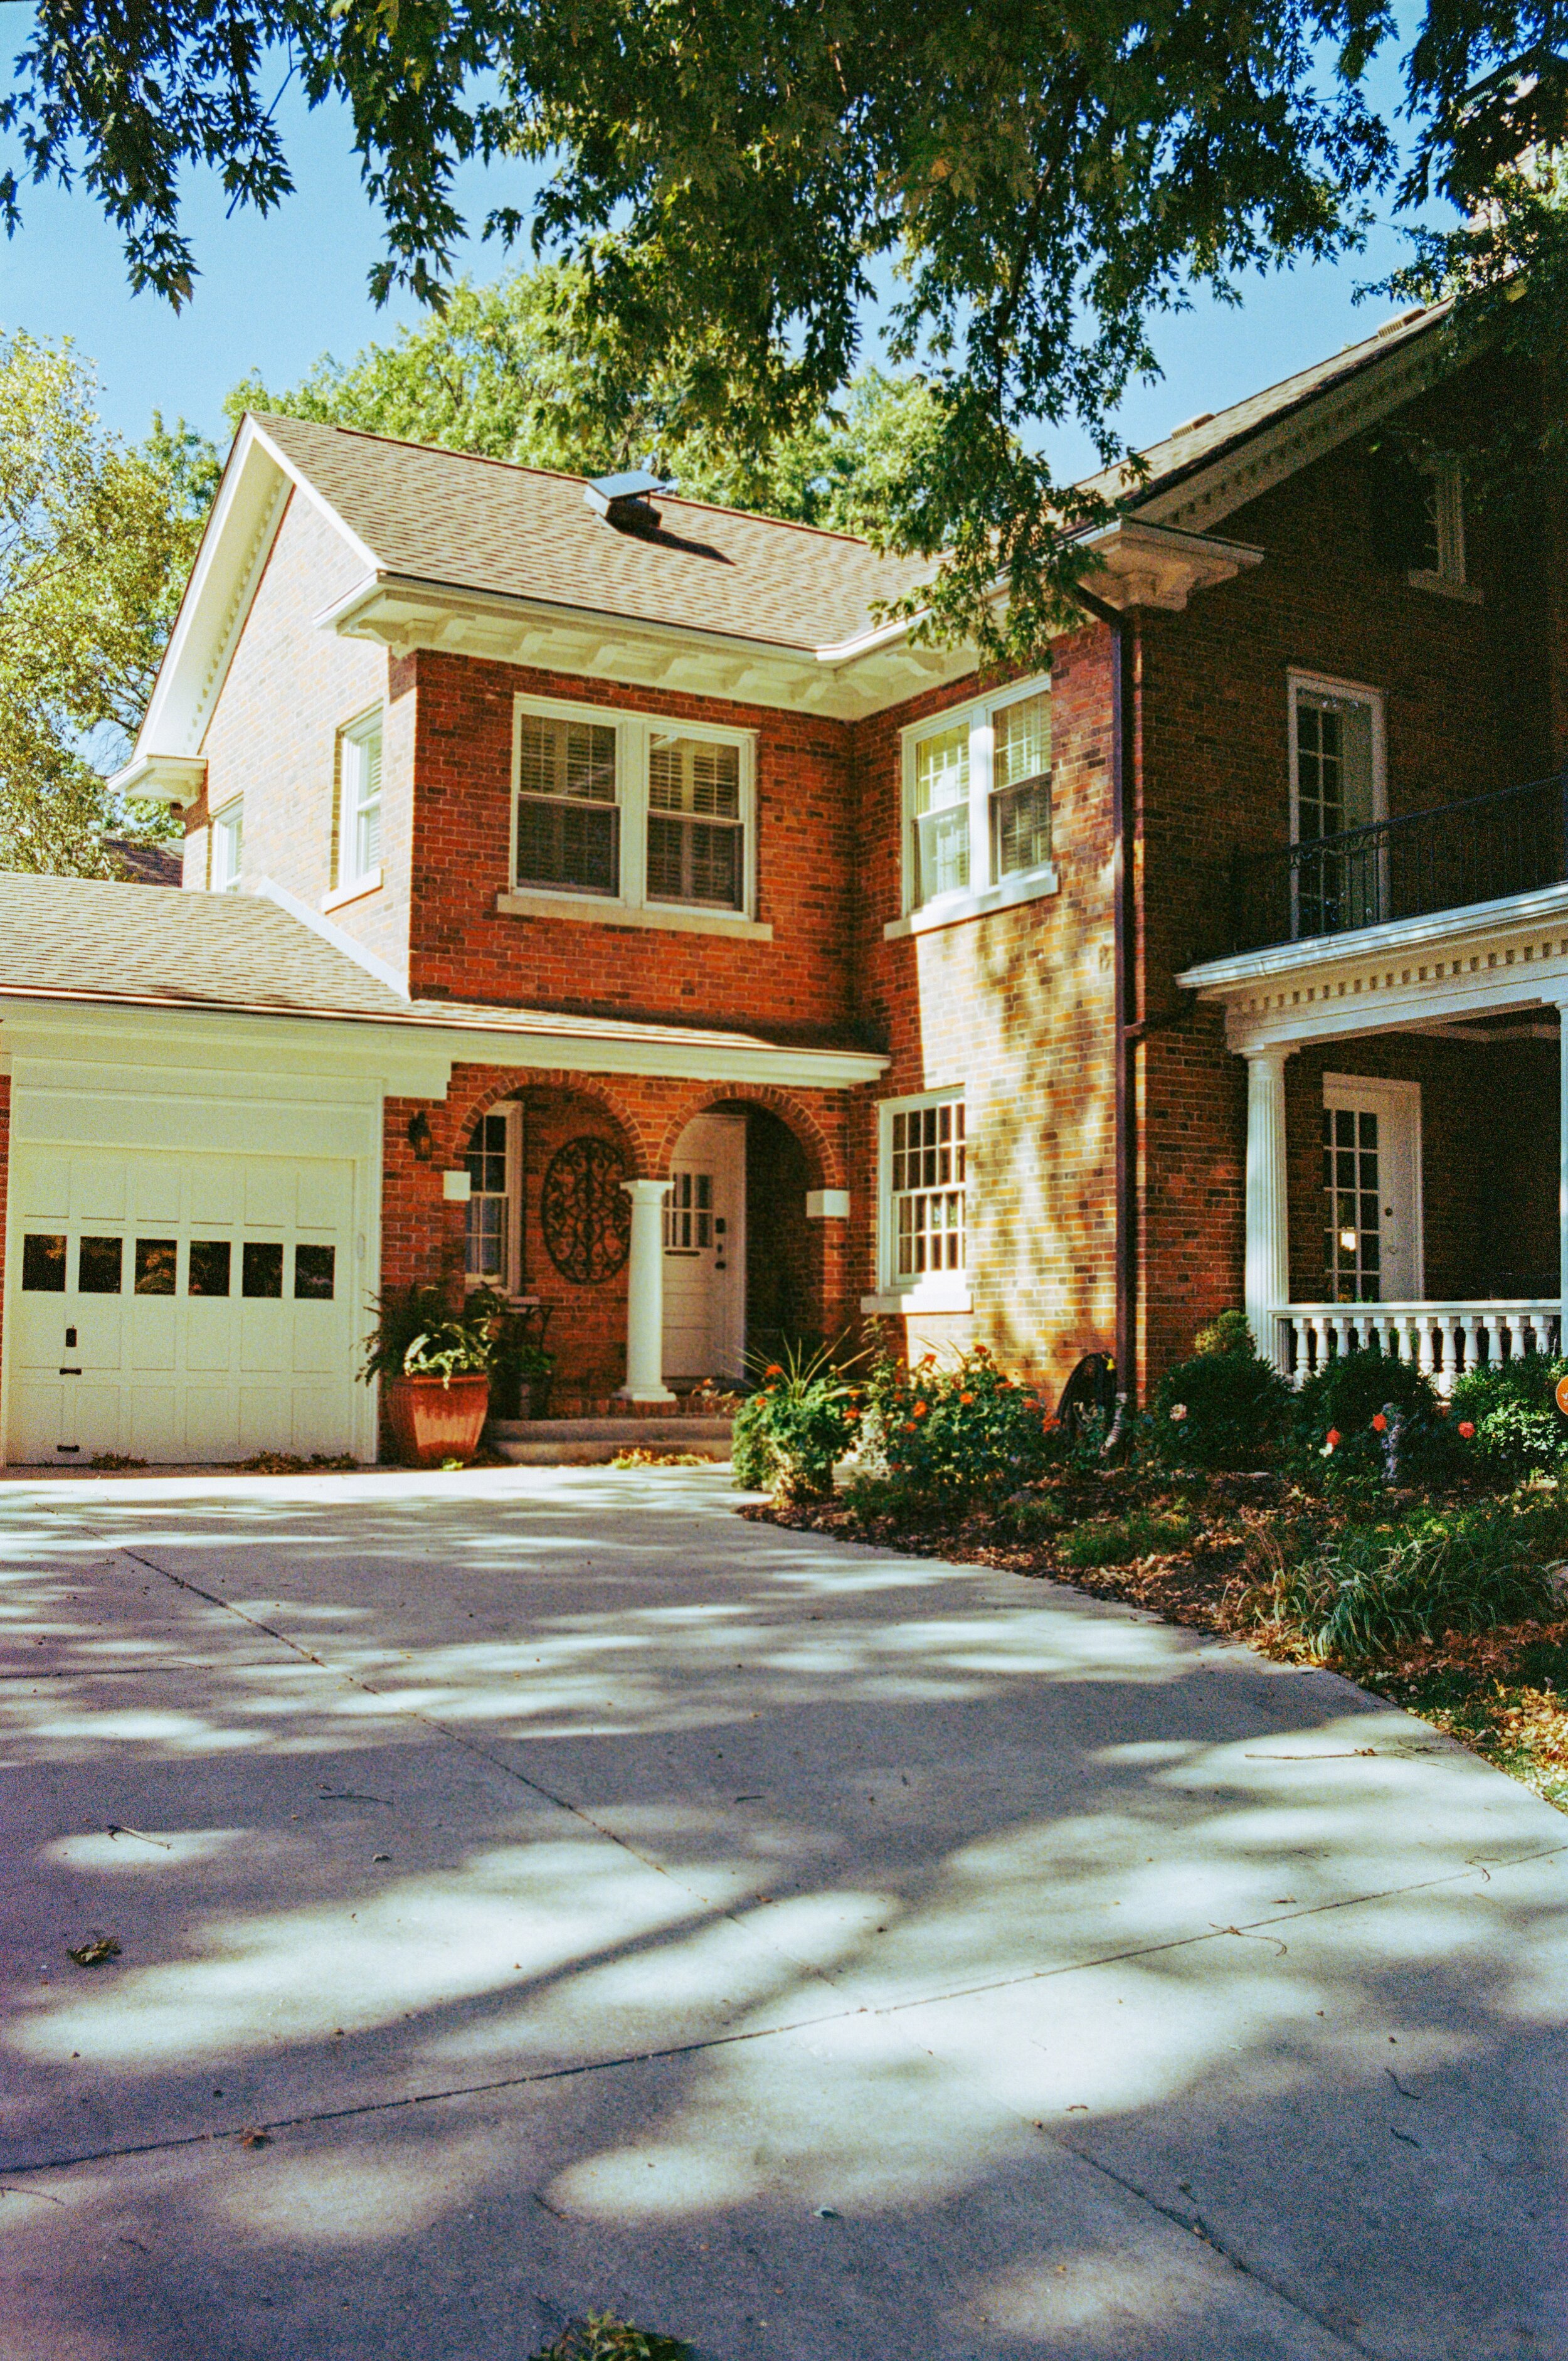
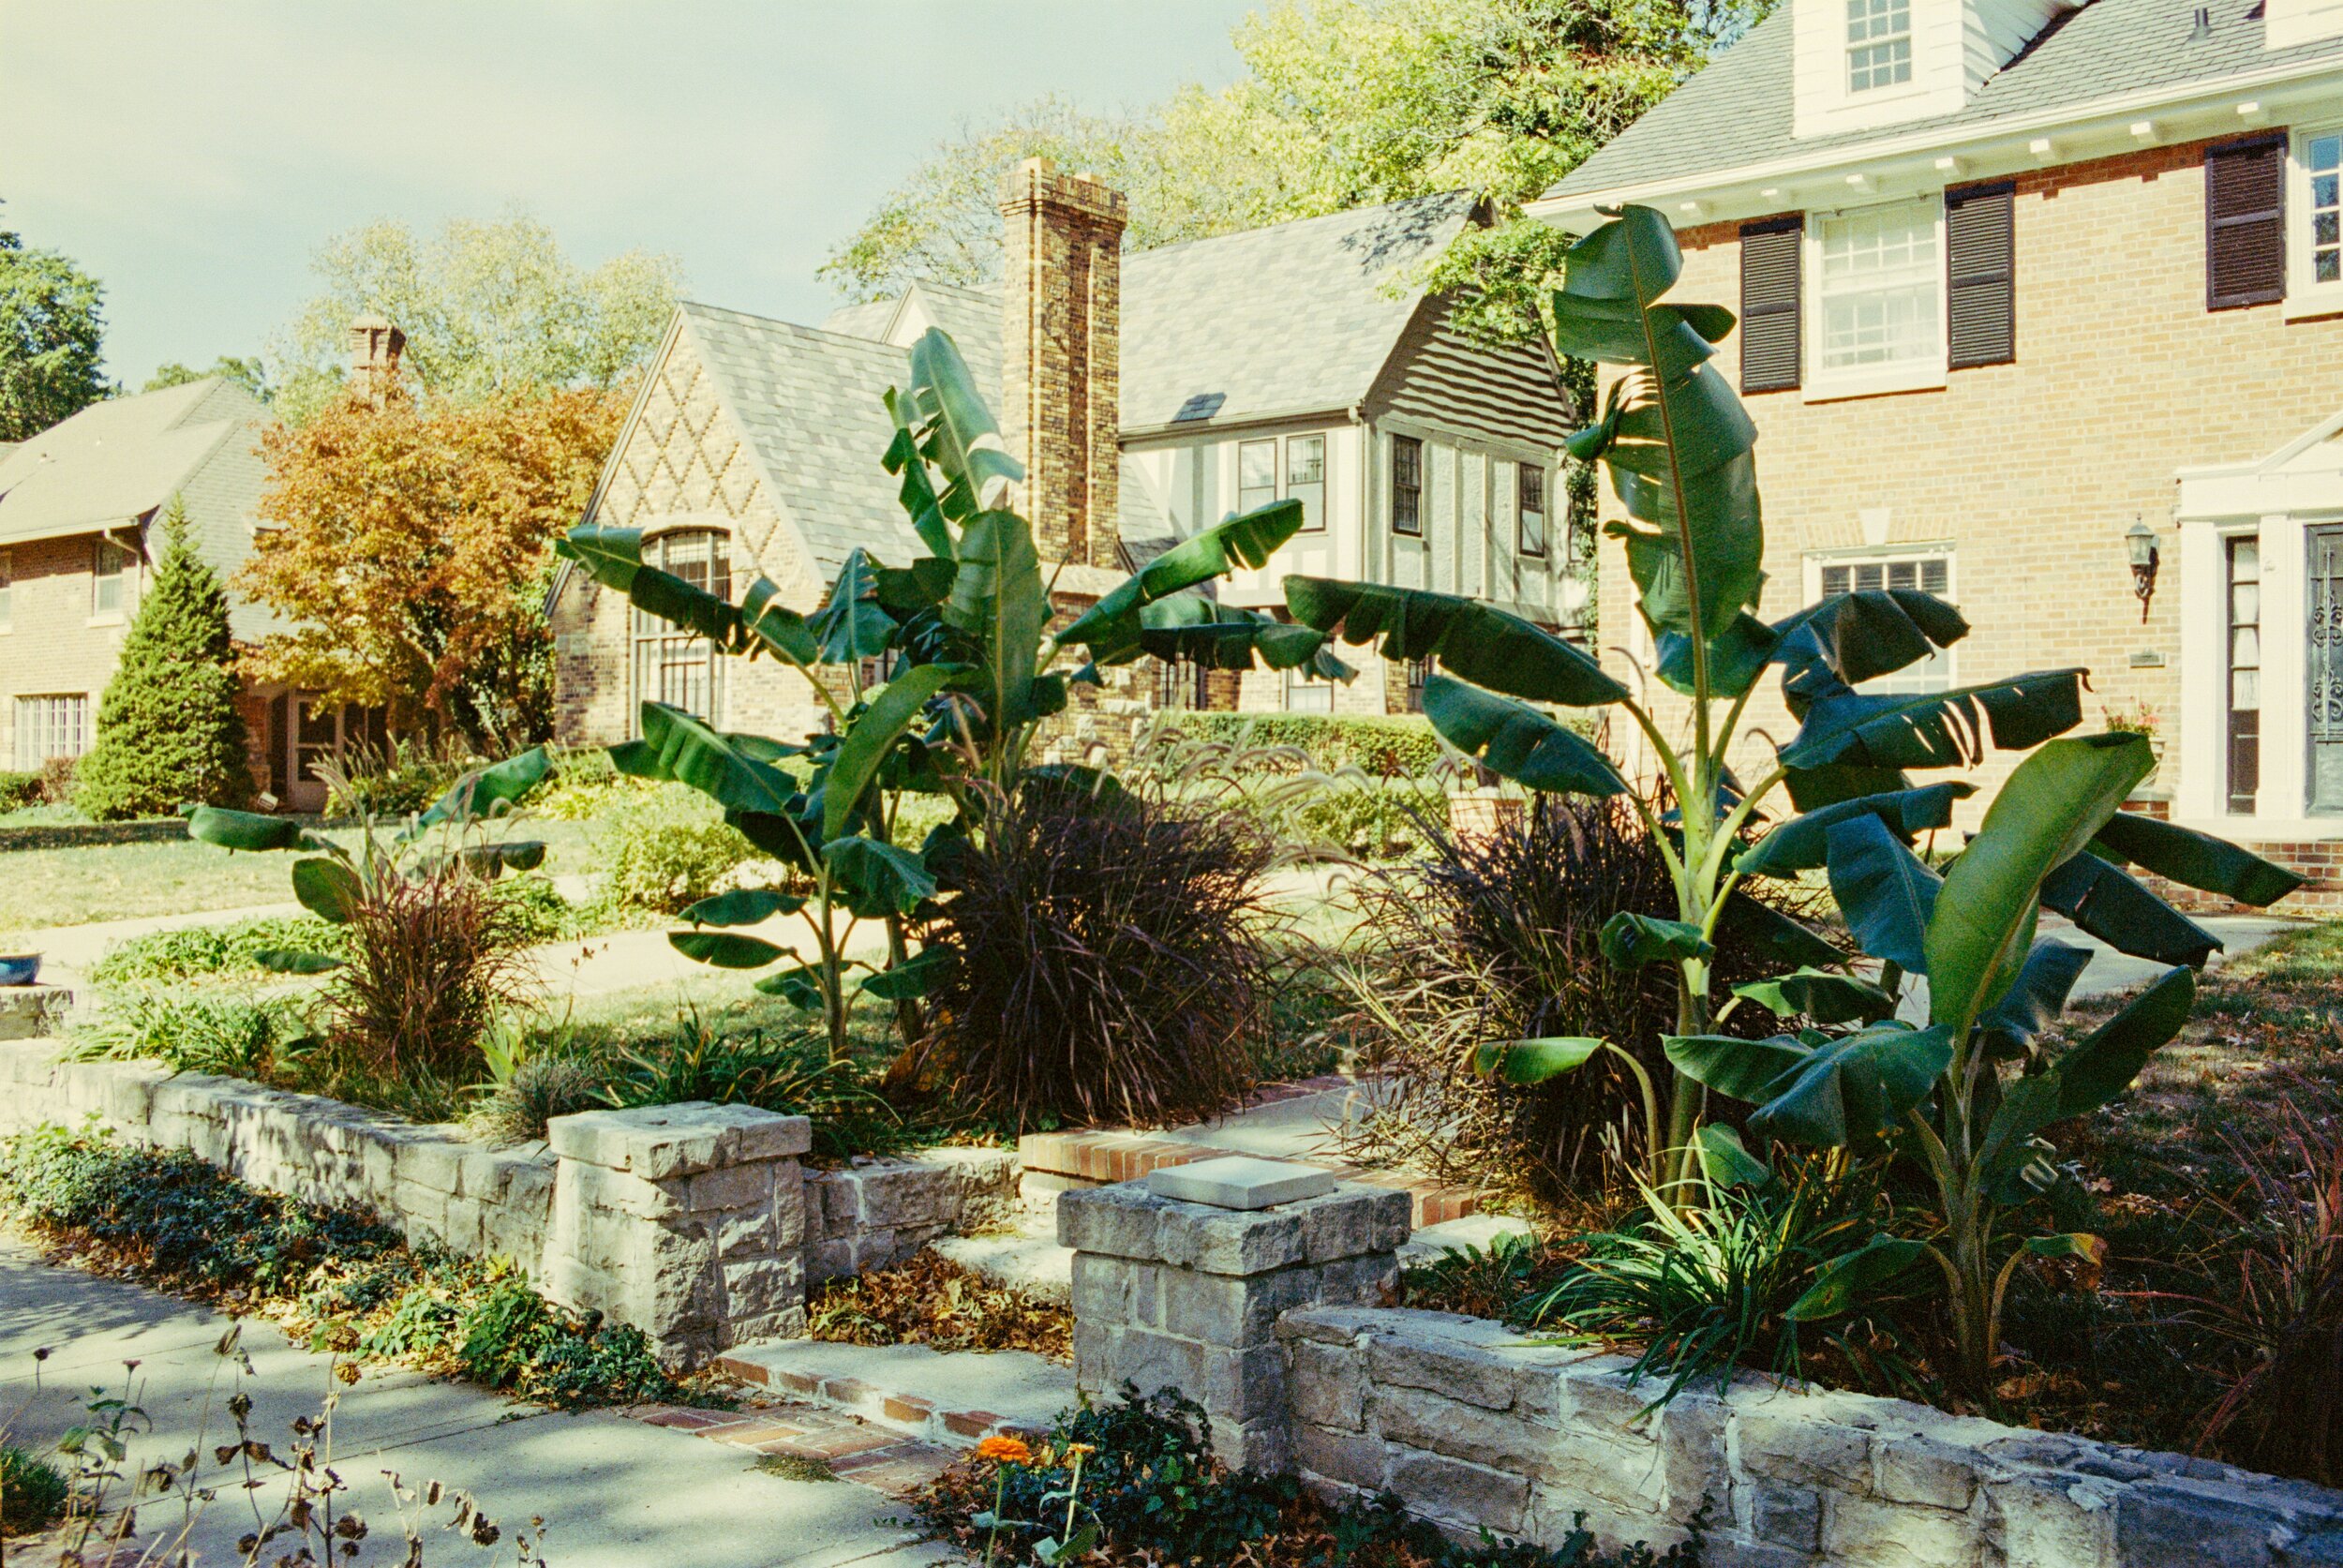
Leica M 240 Sample Images:

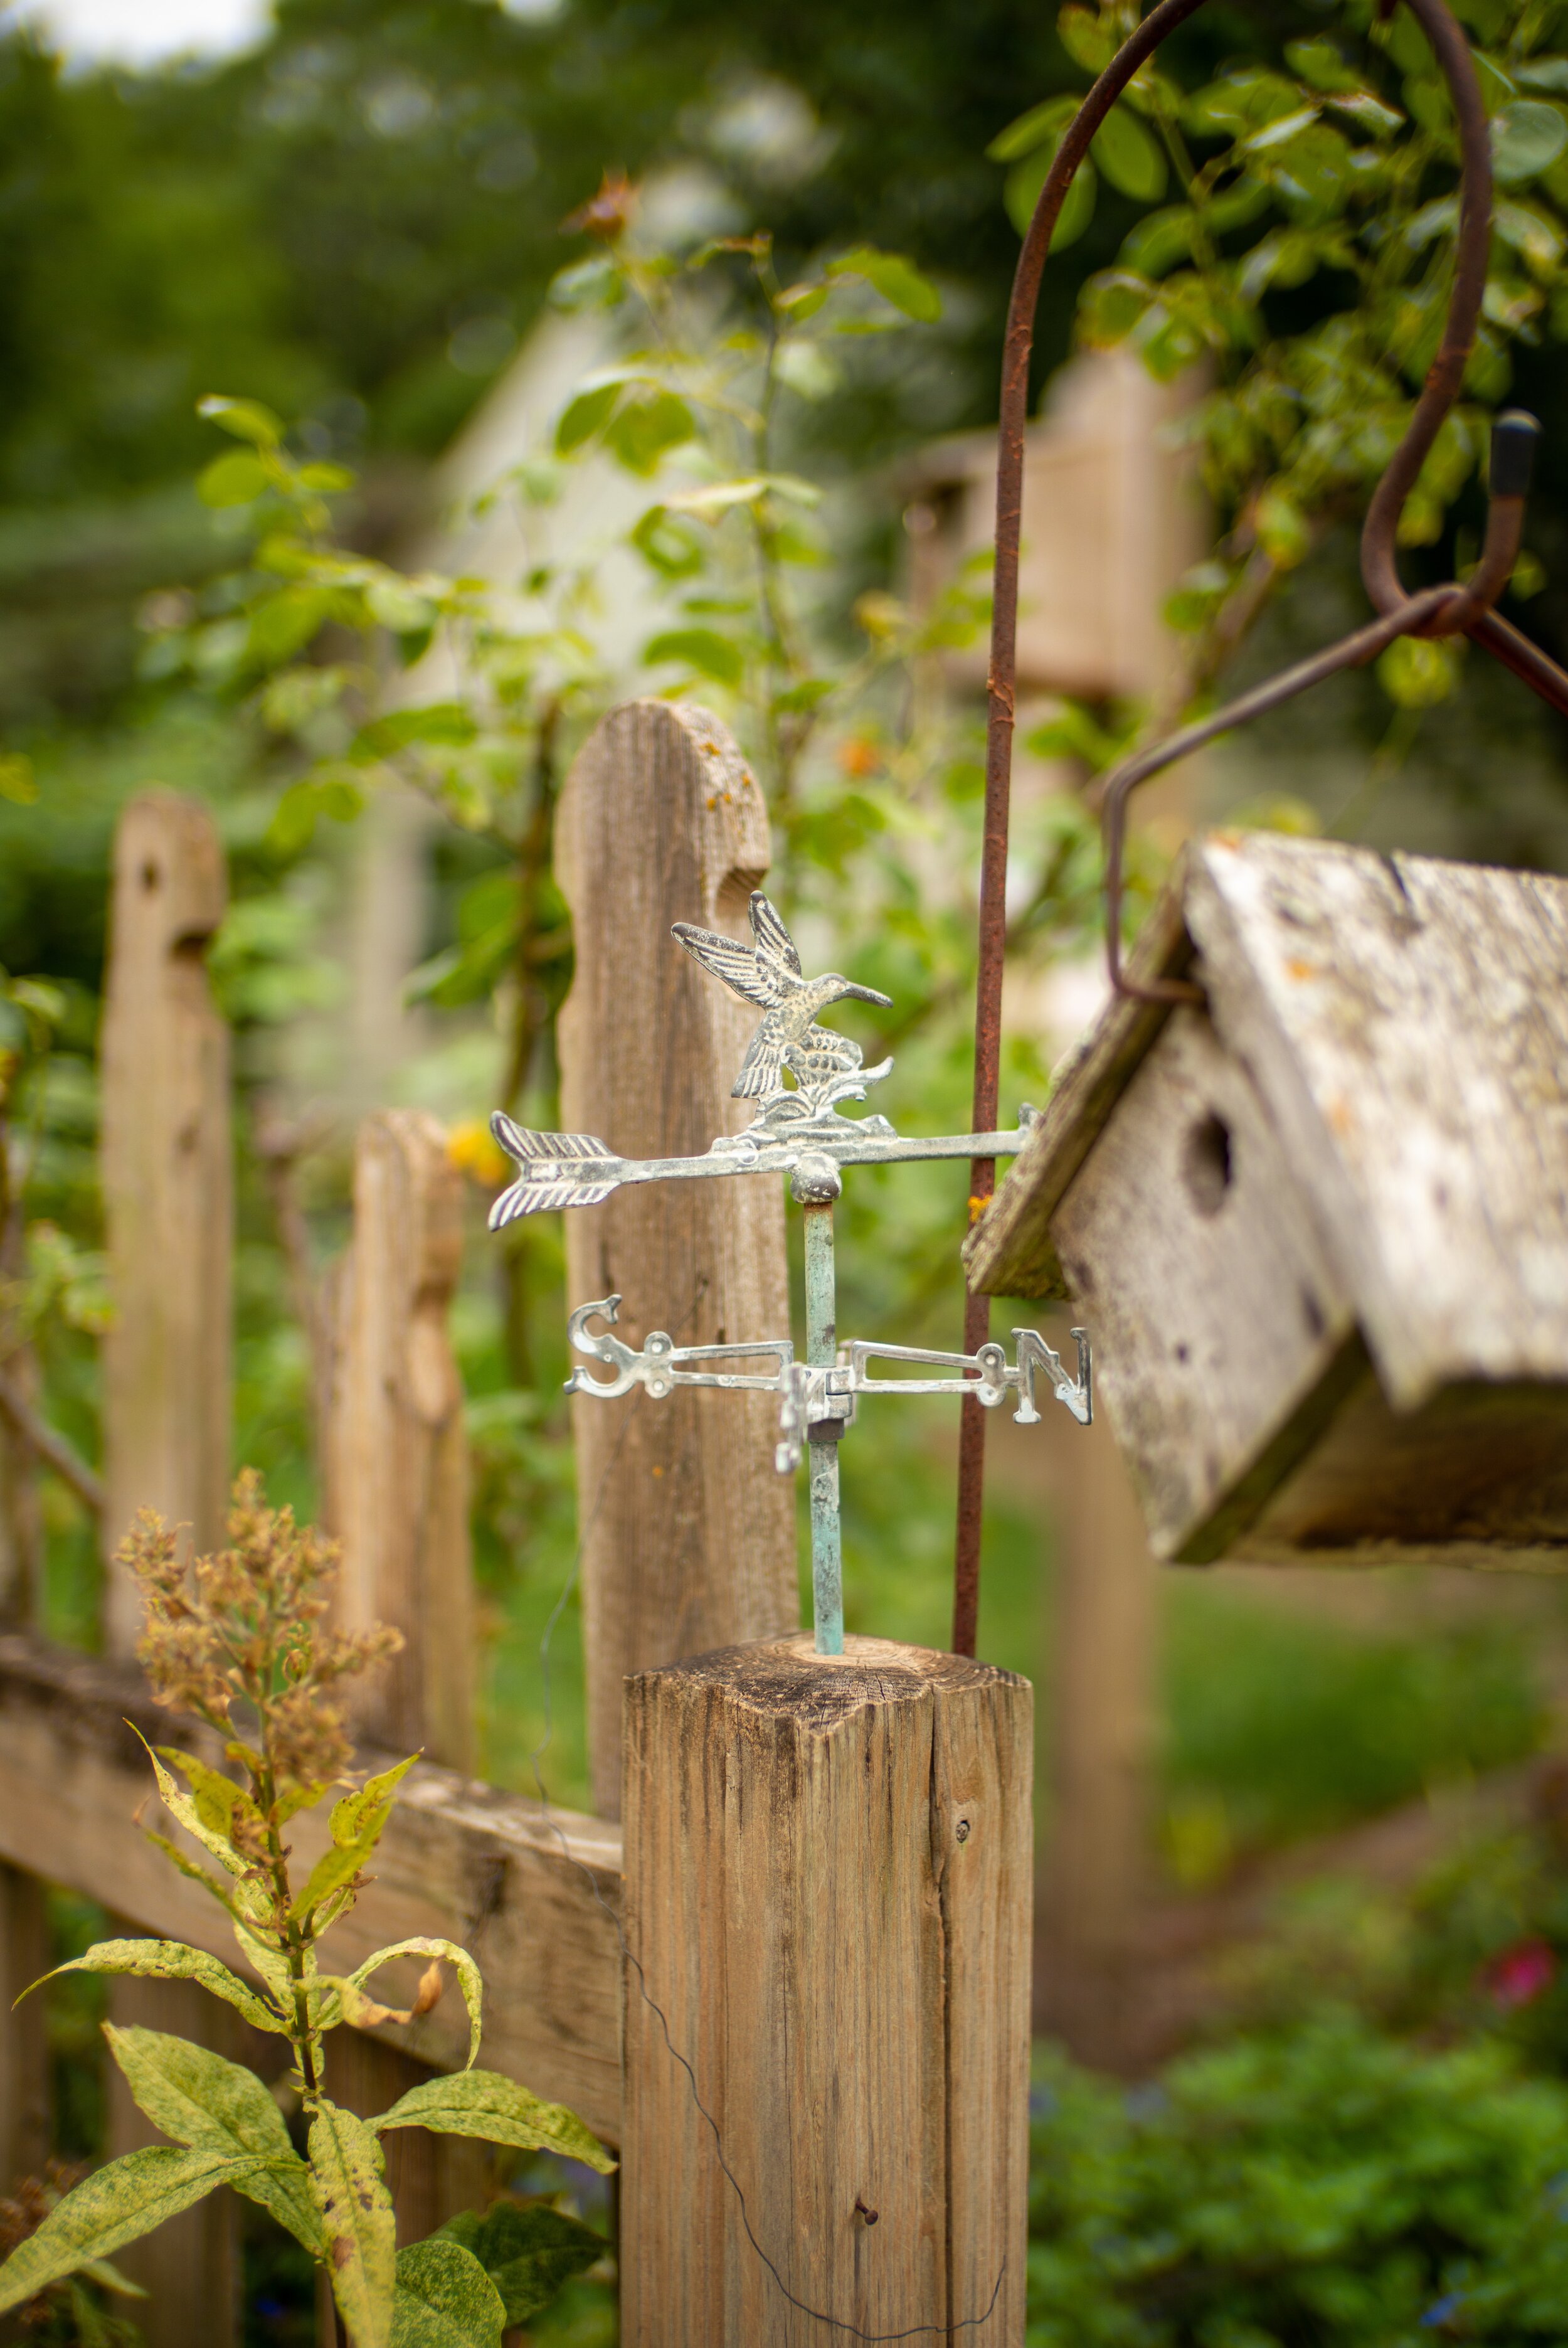
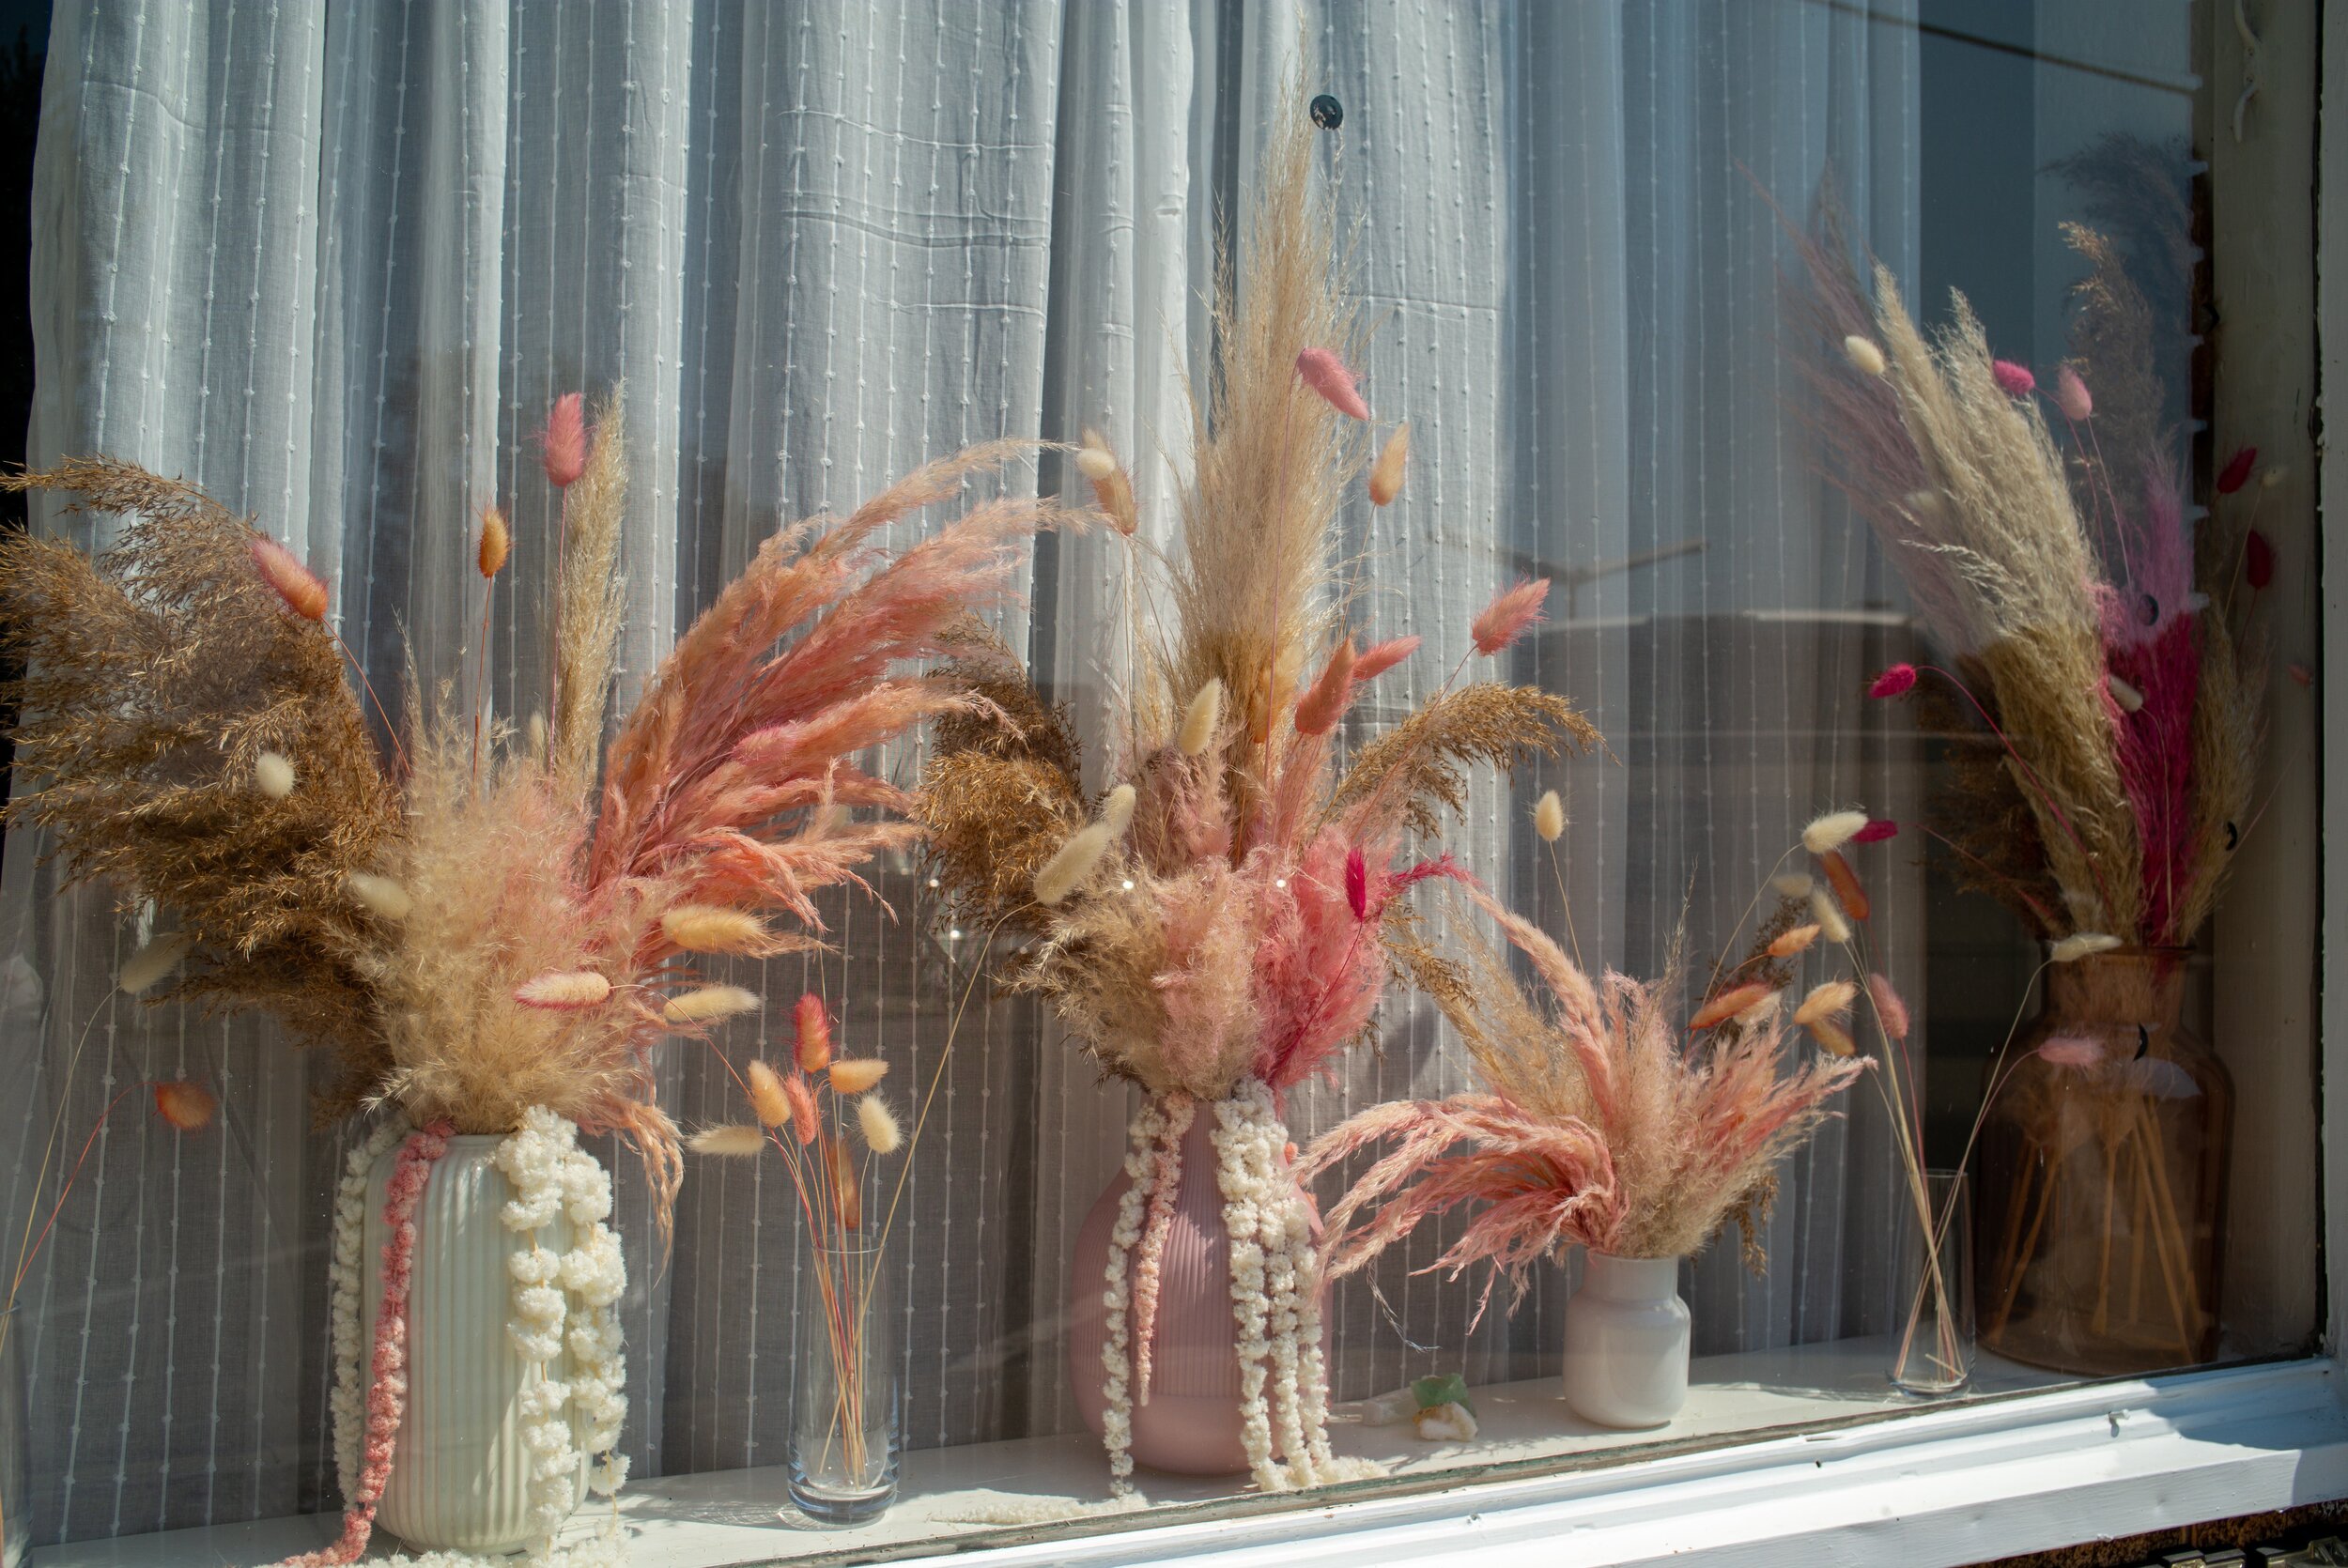
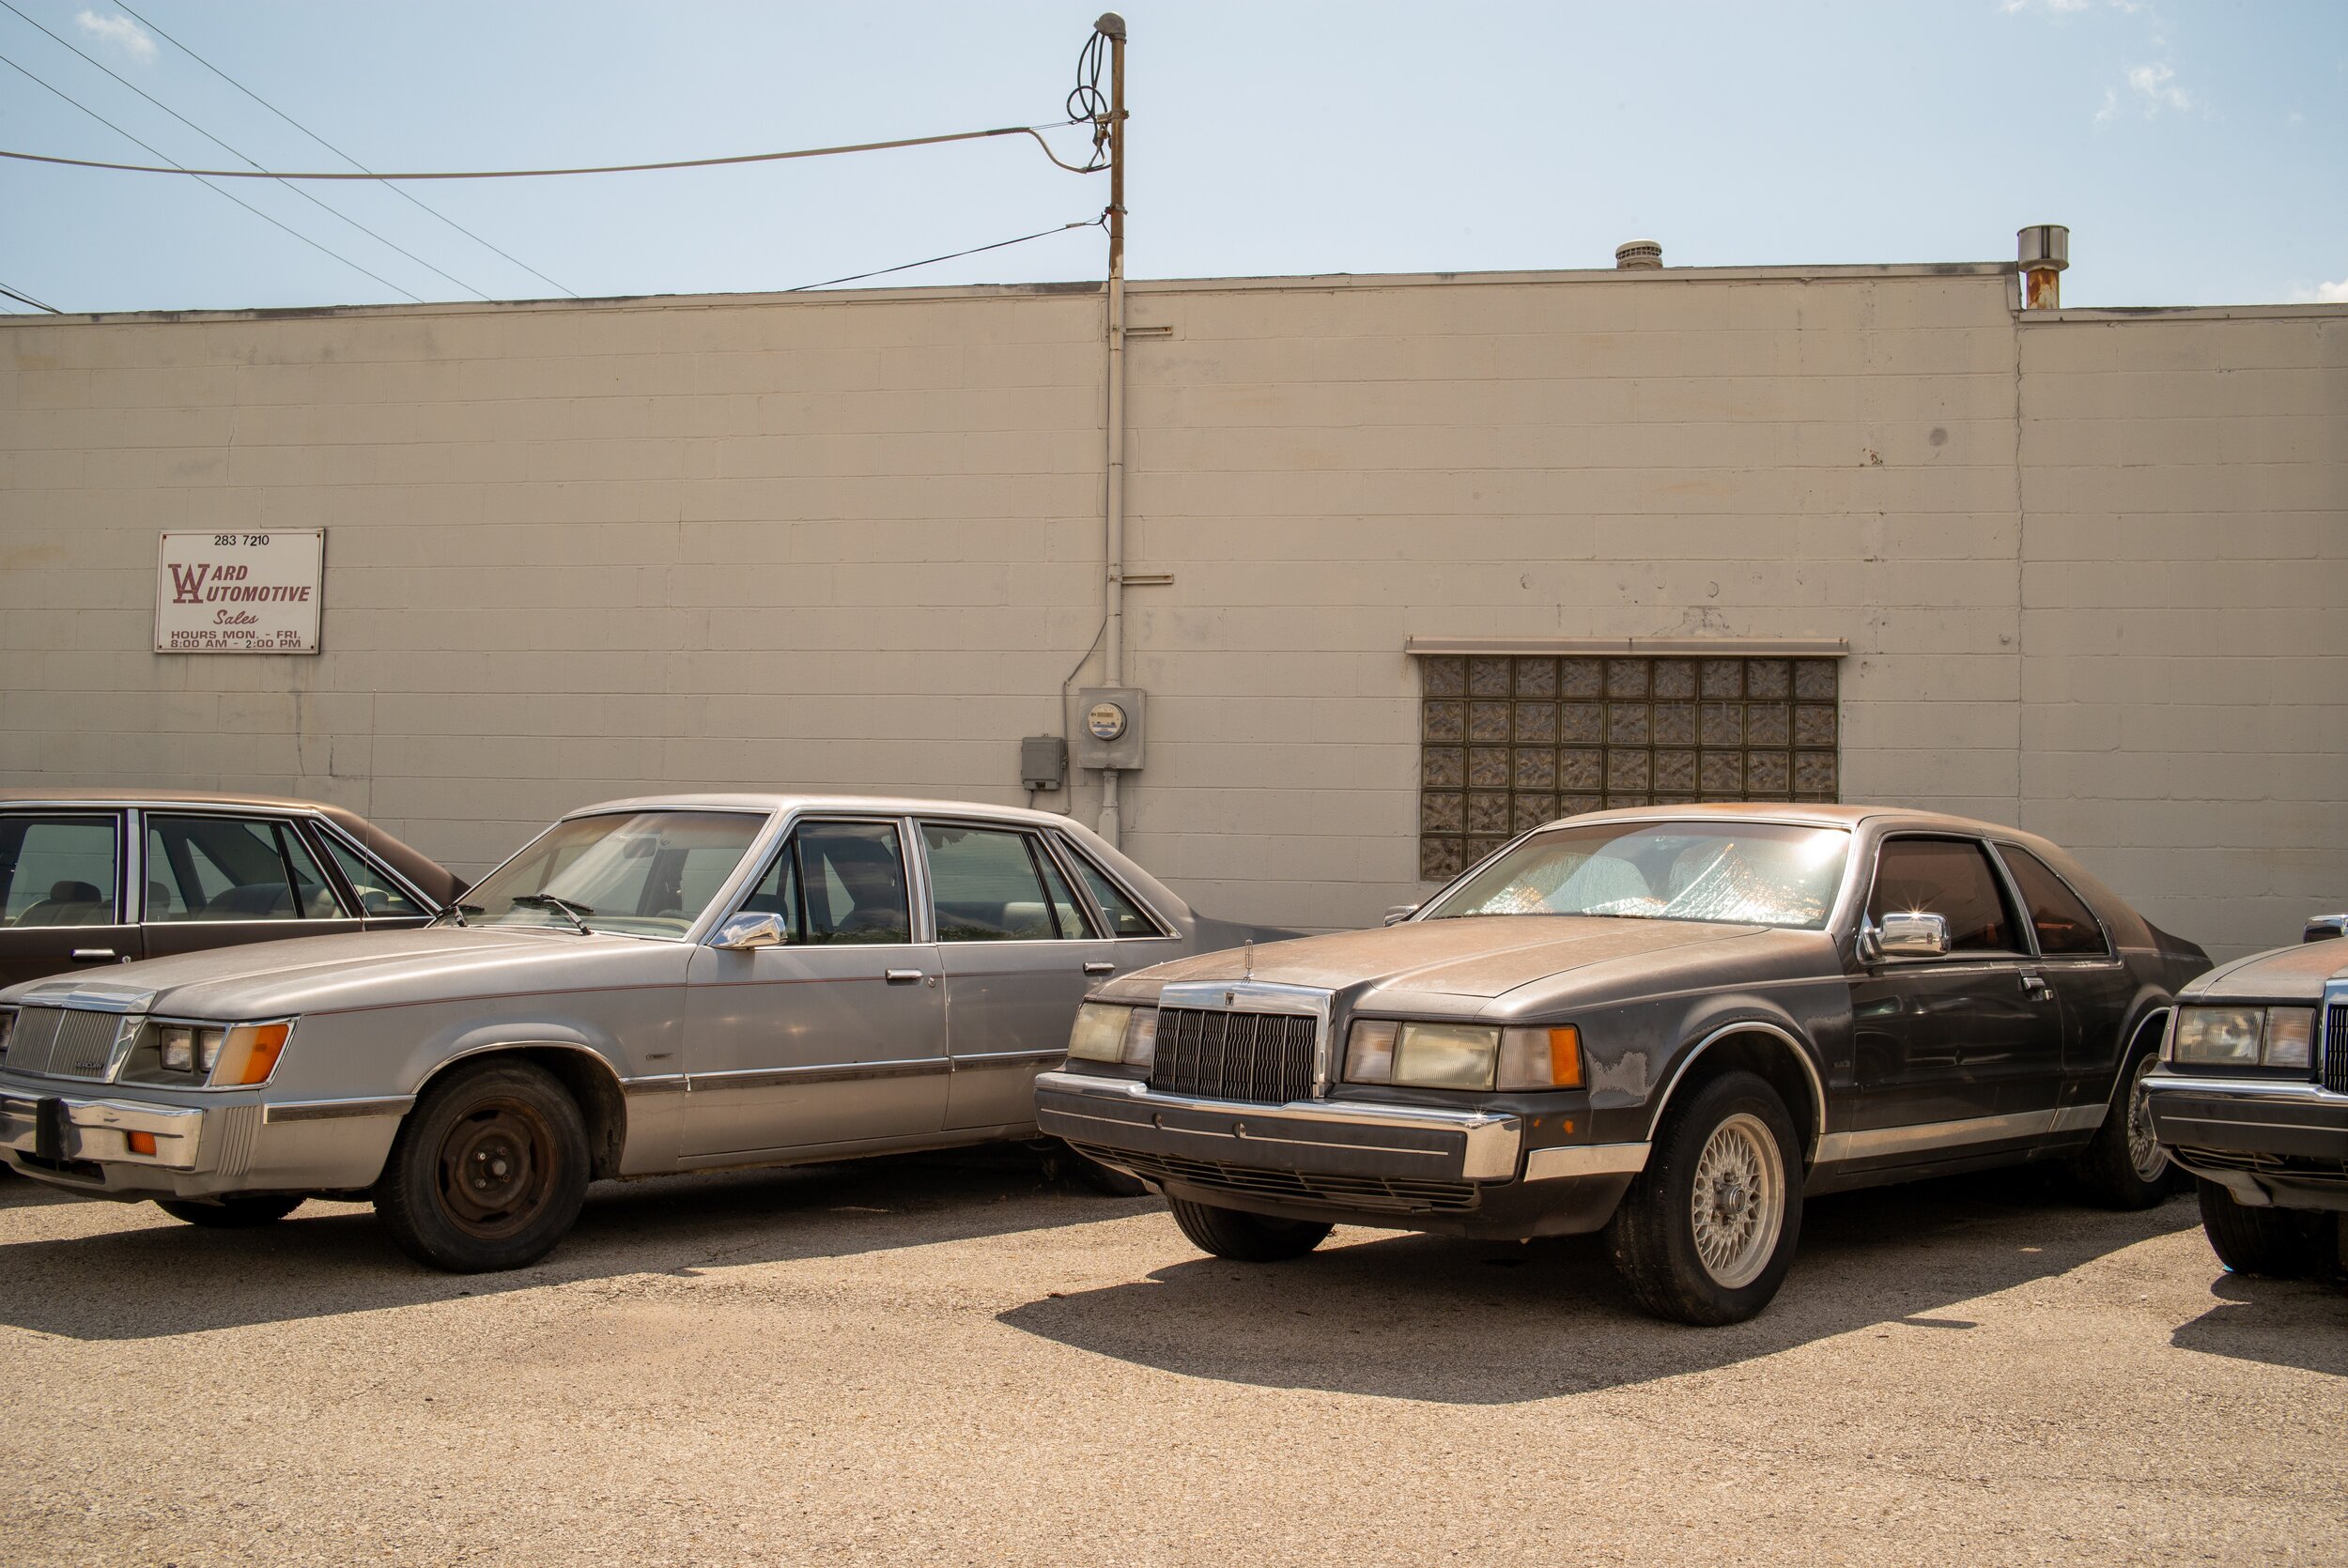
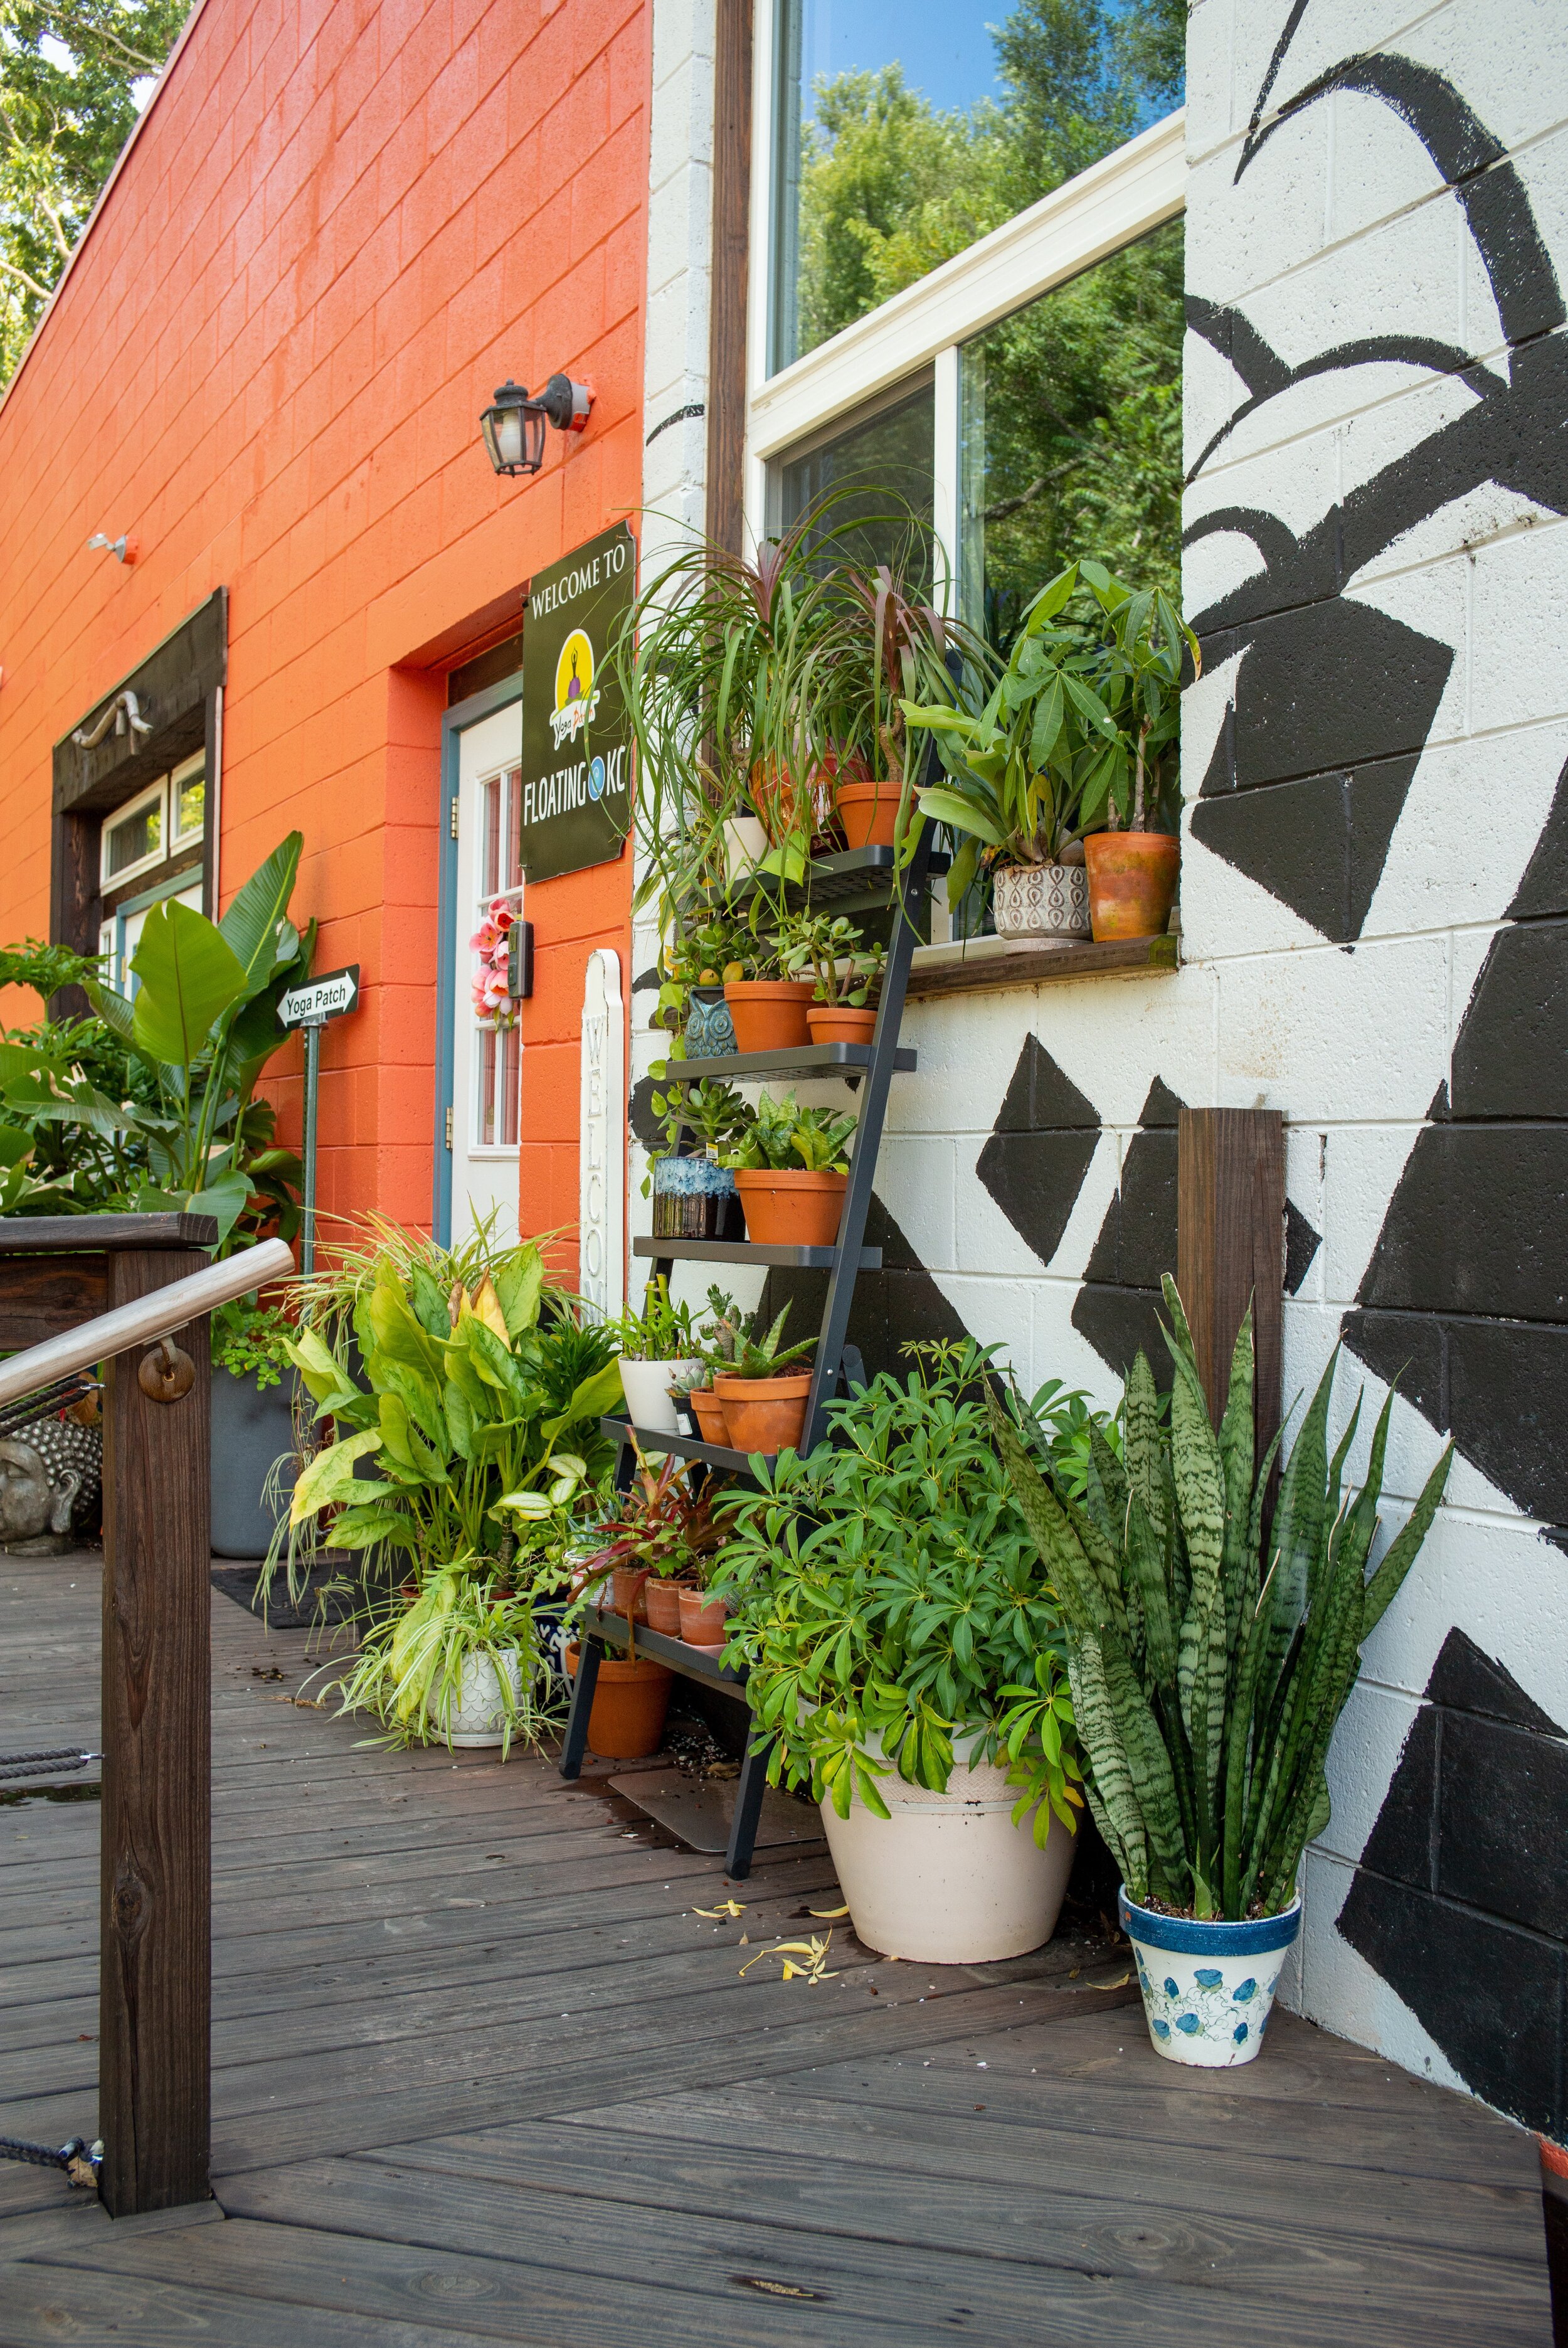
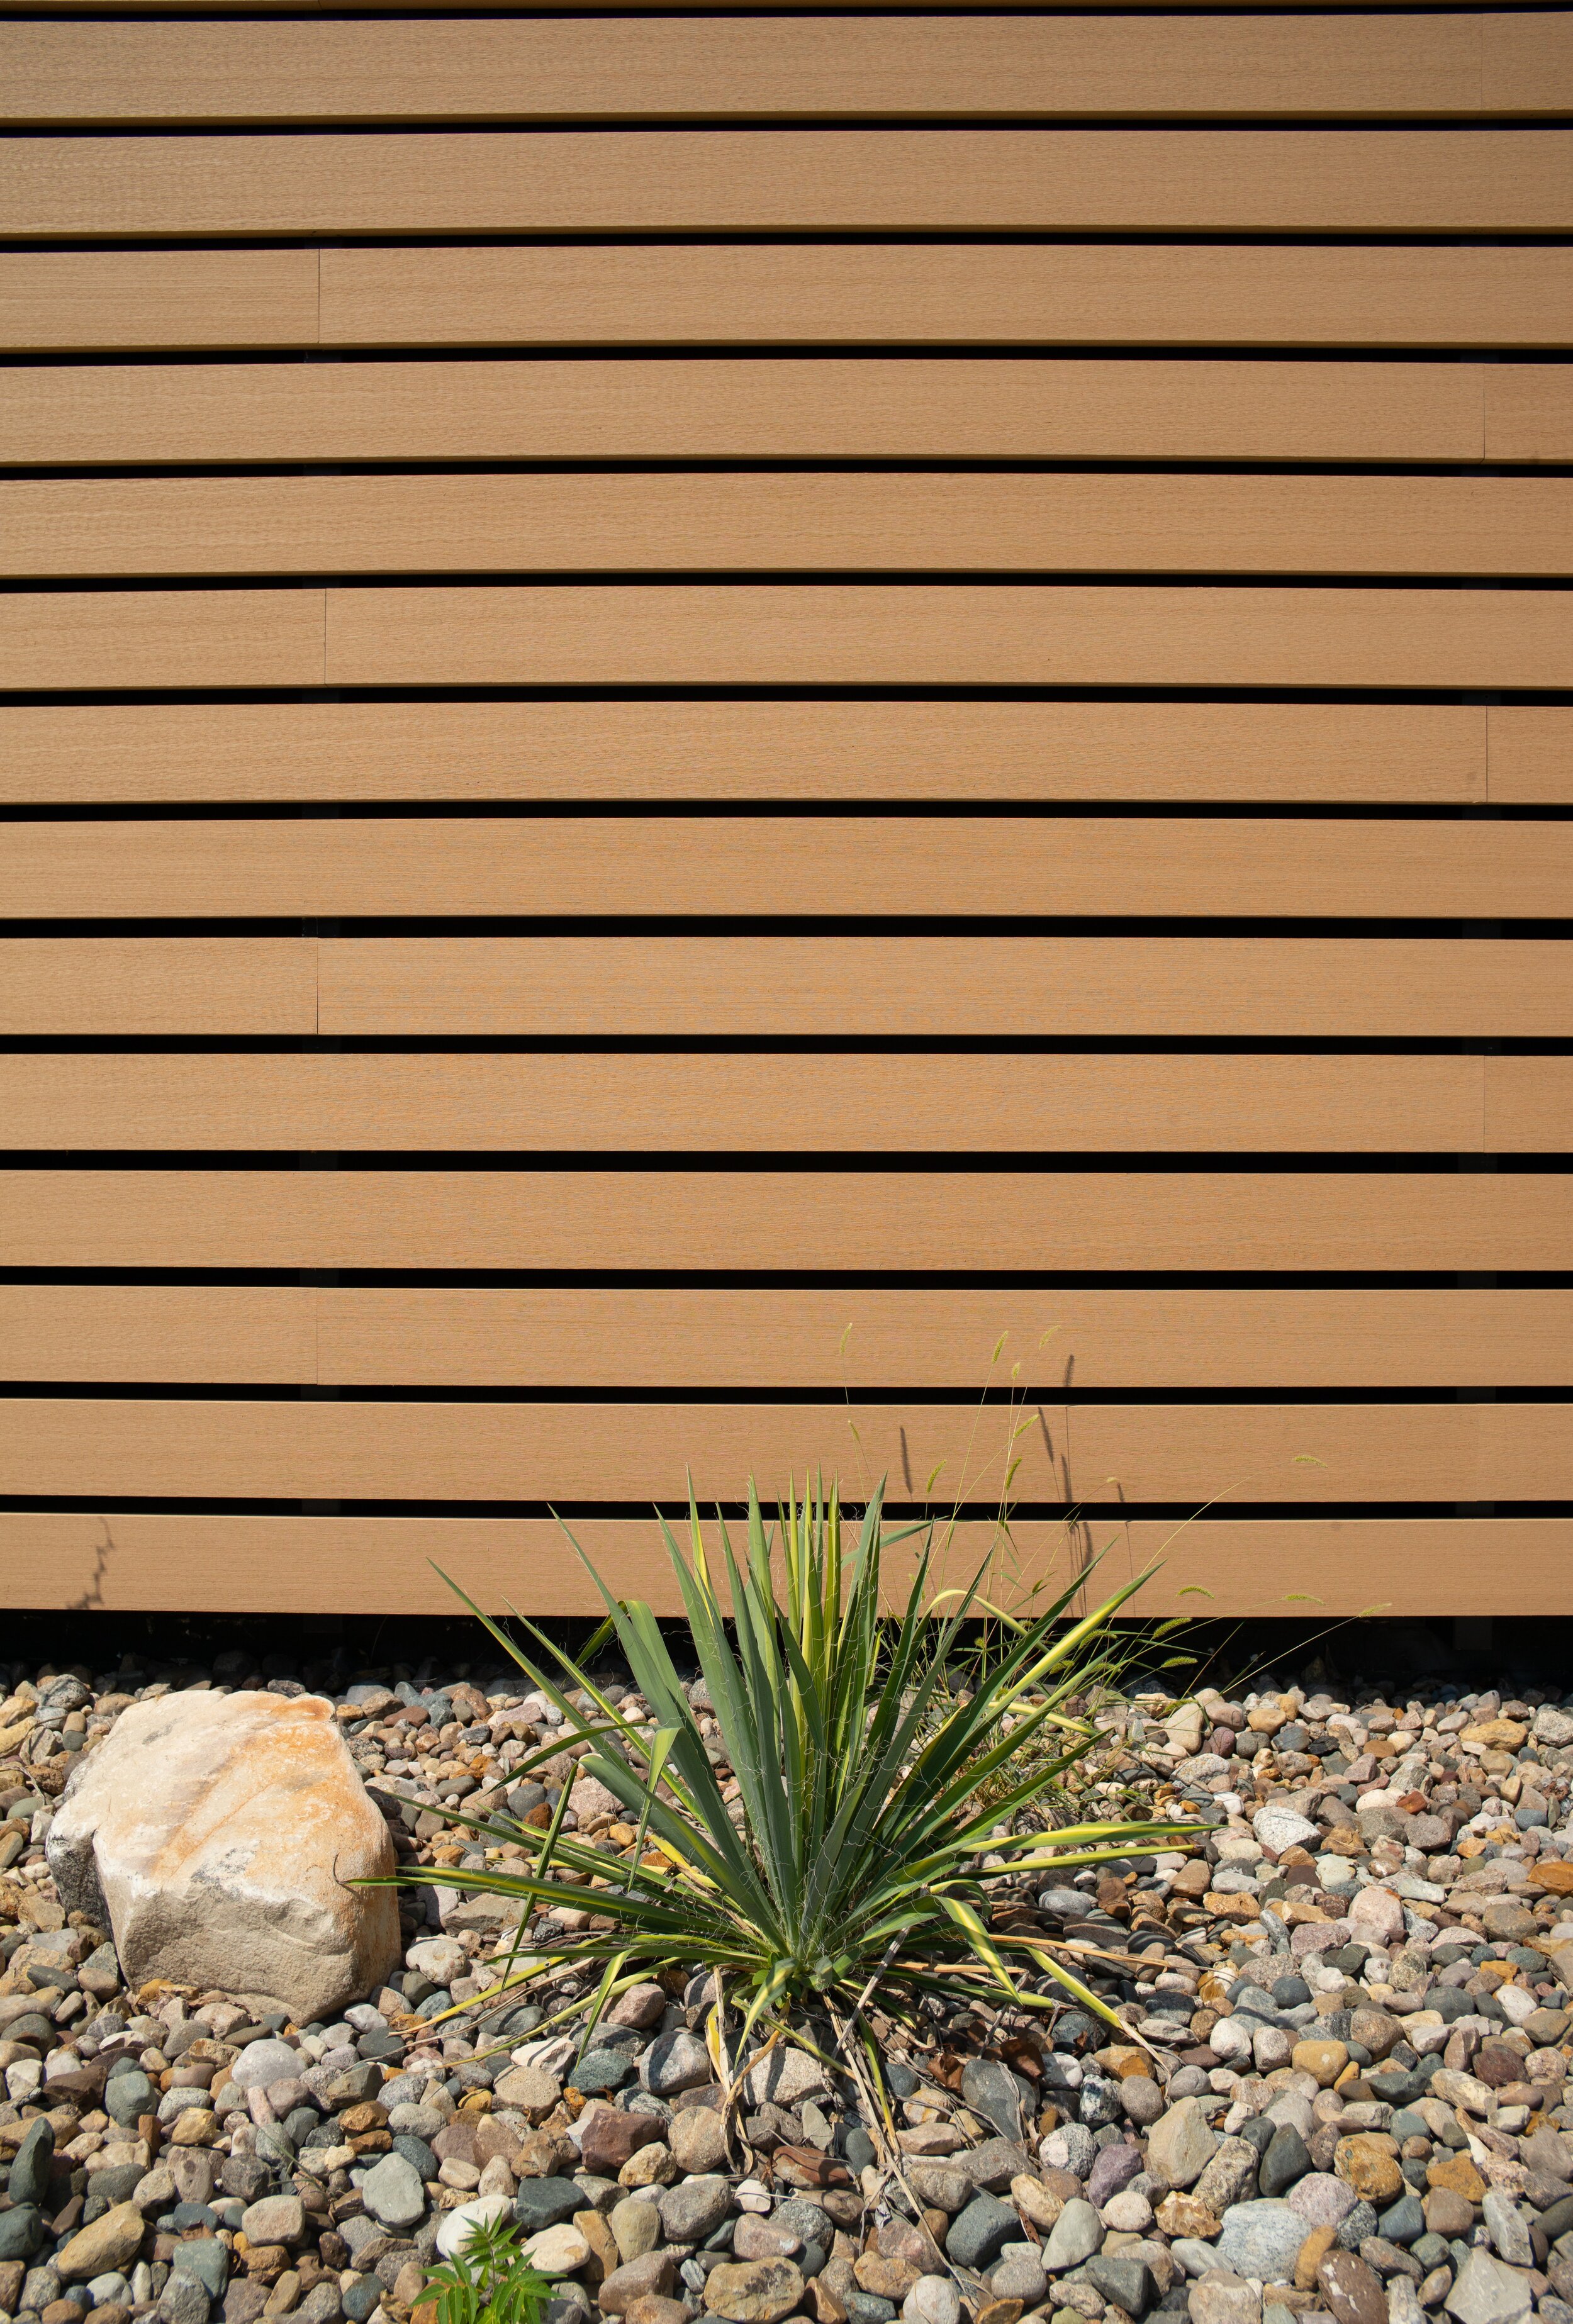
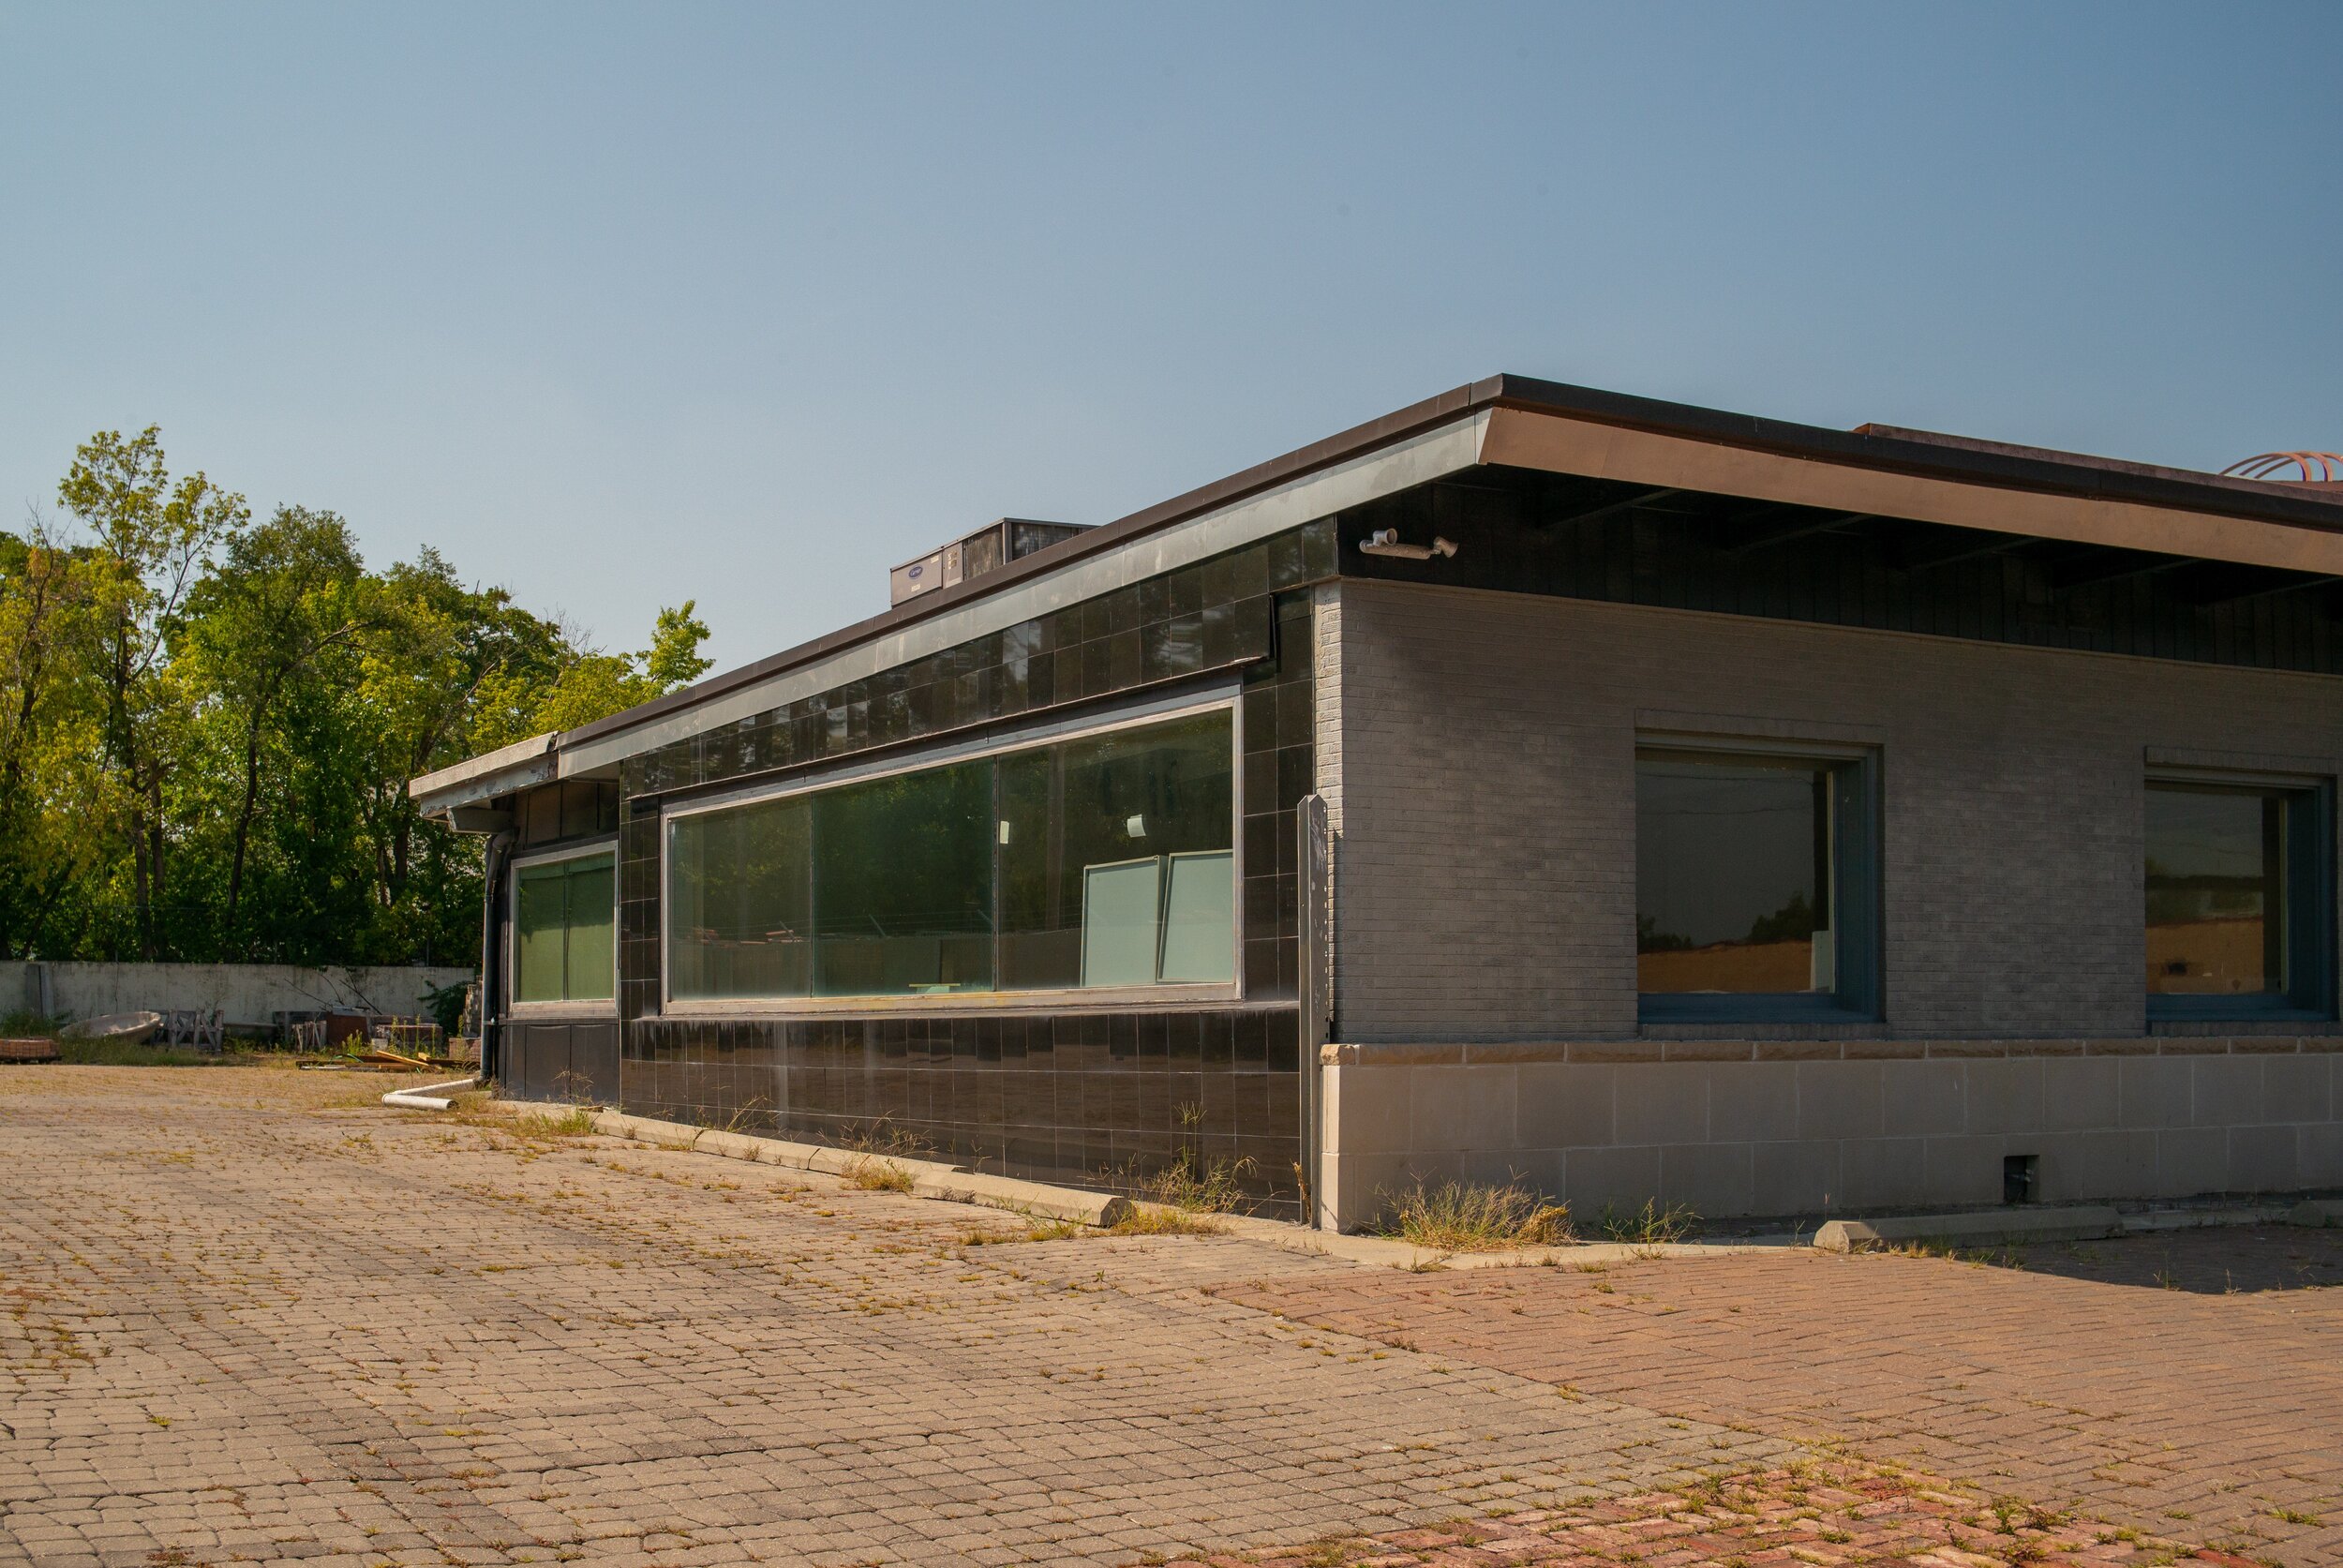
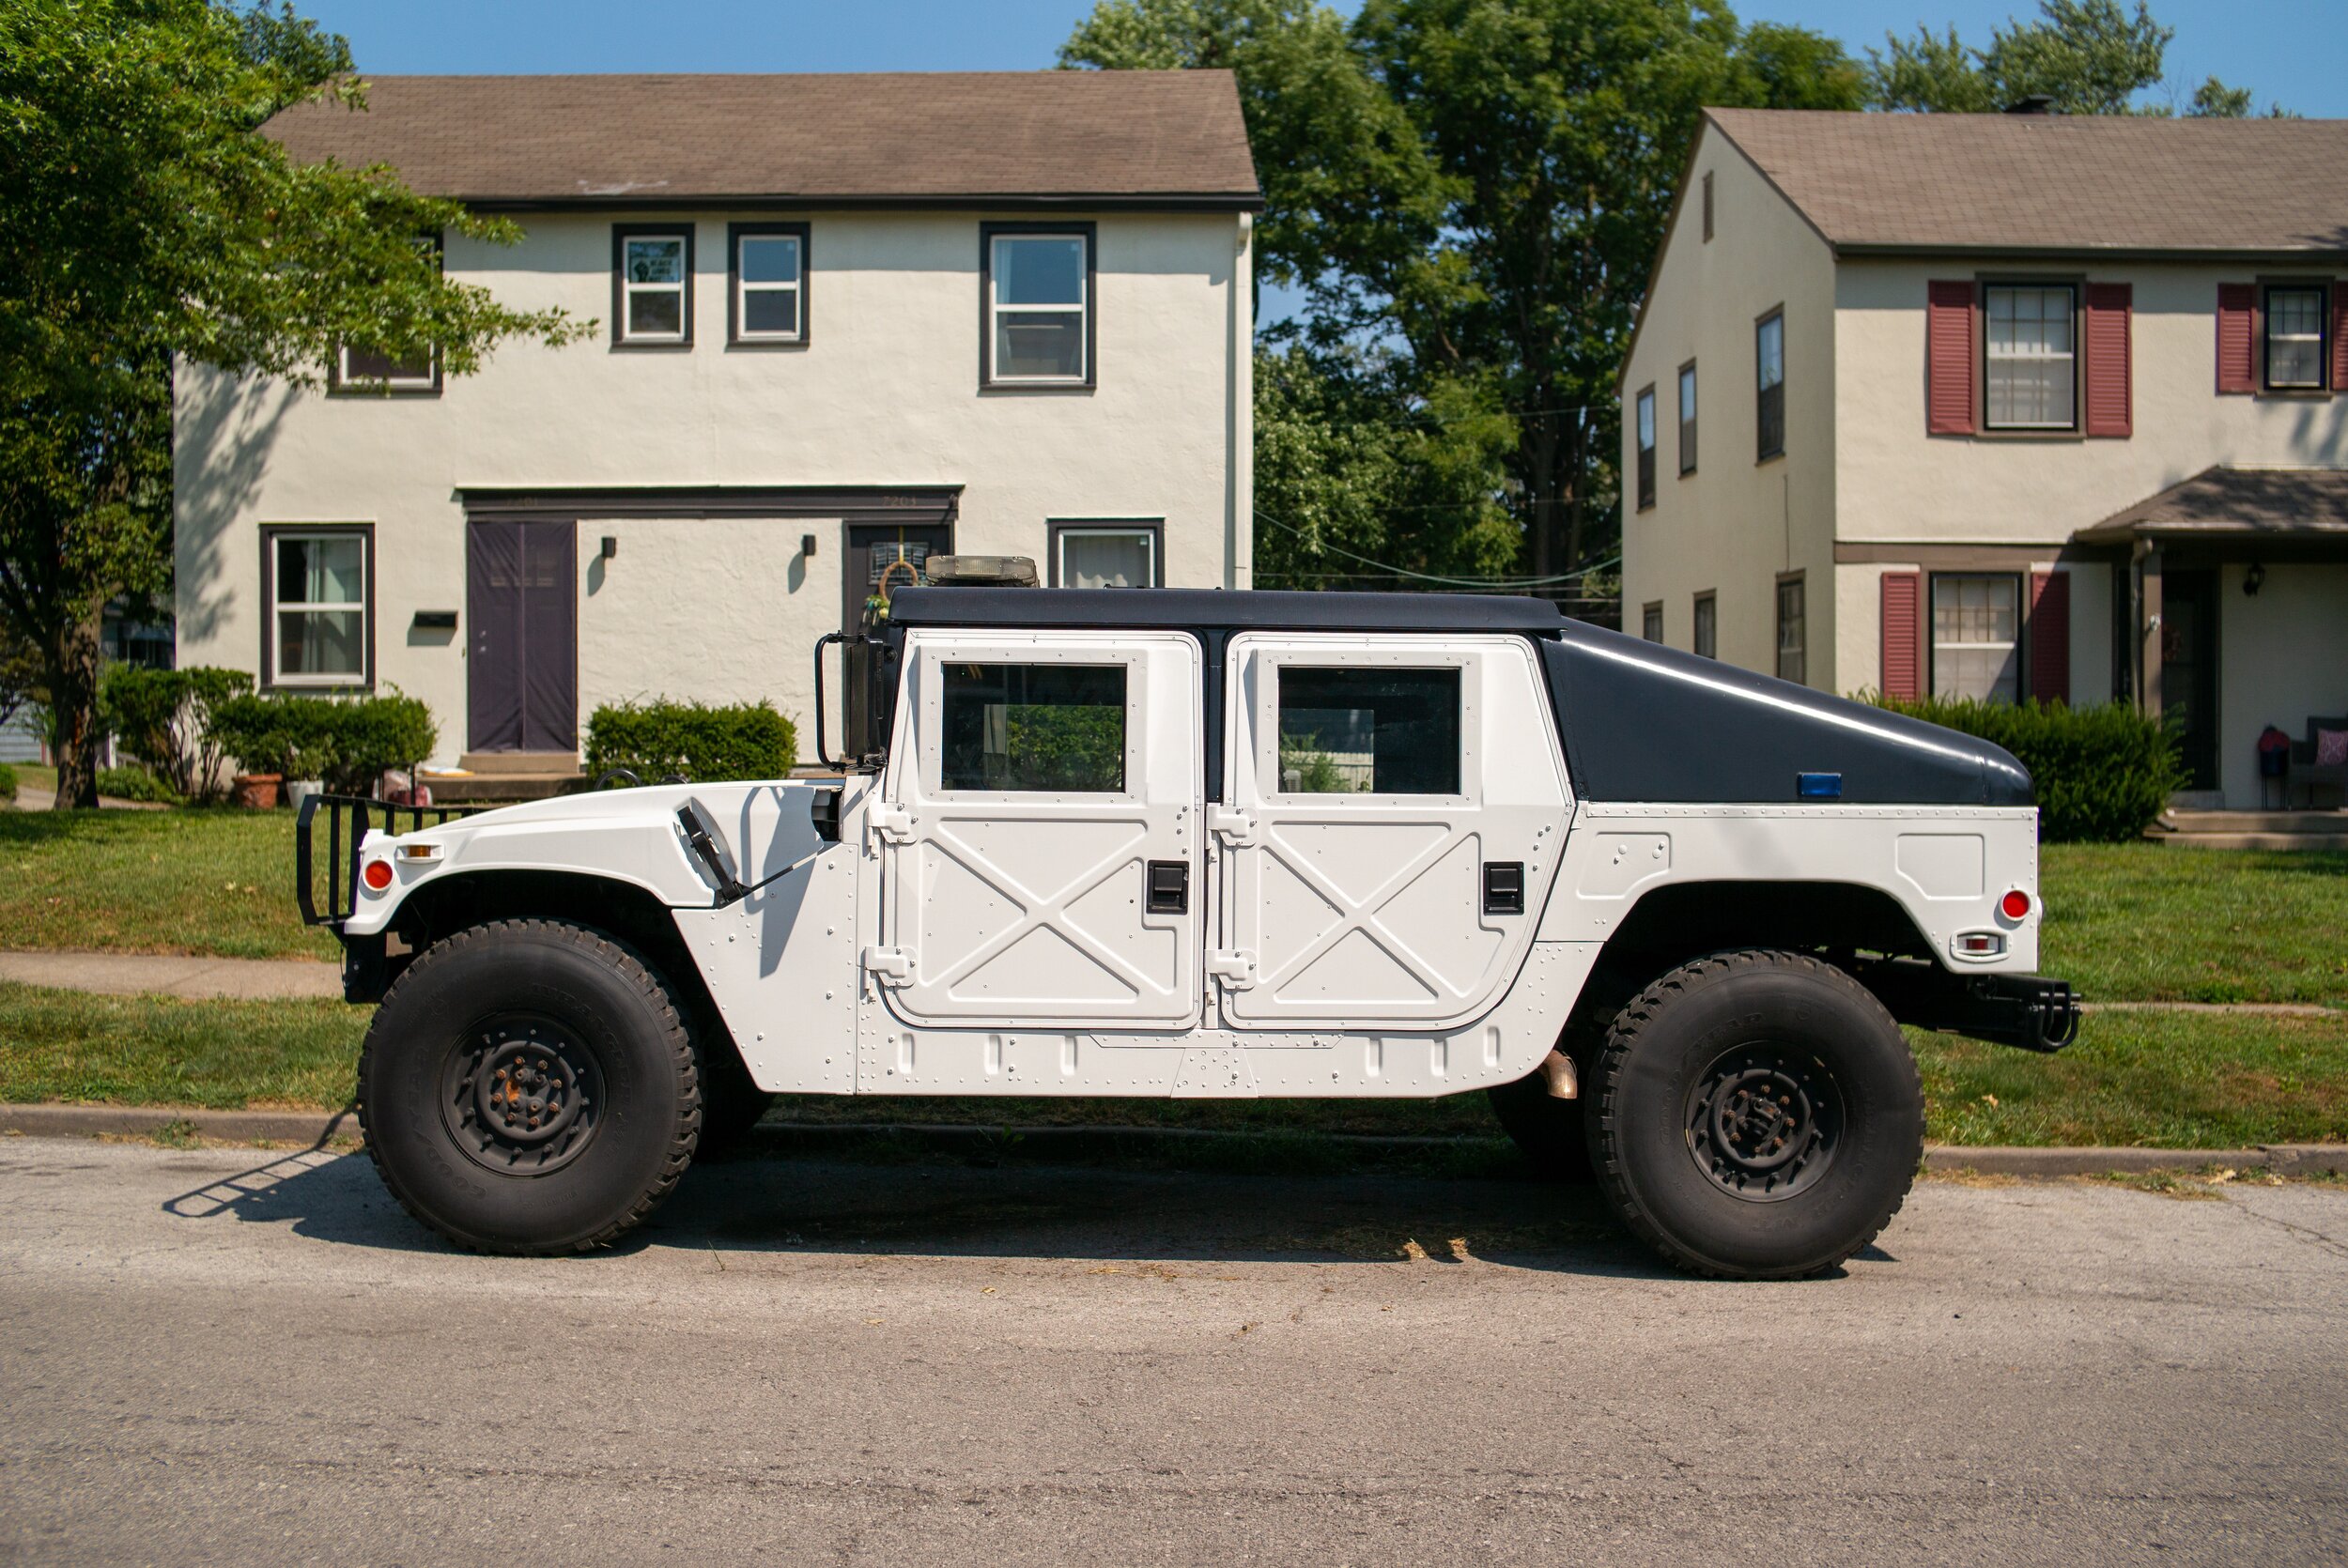
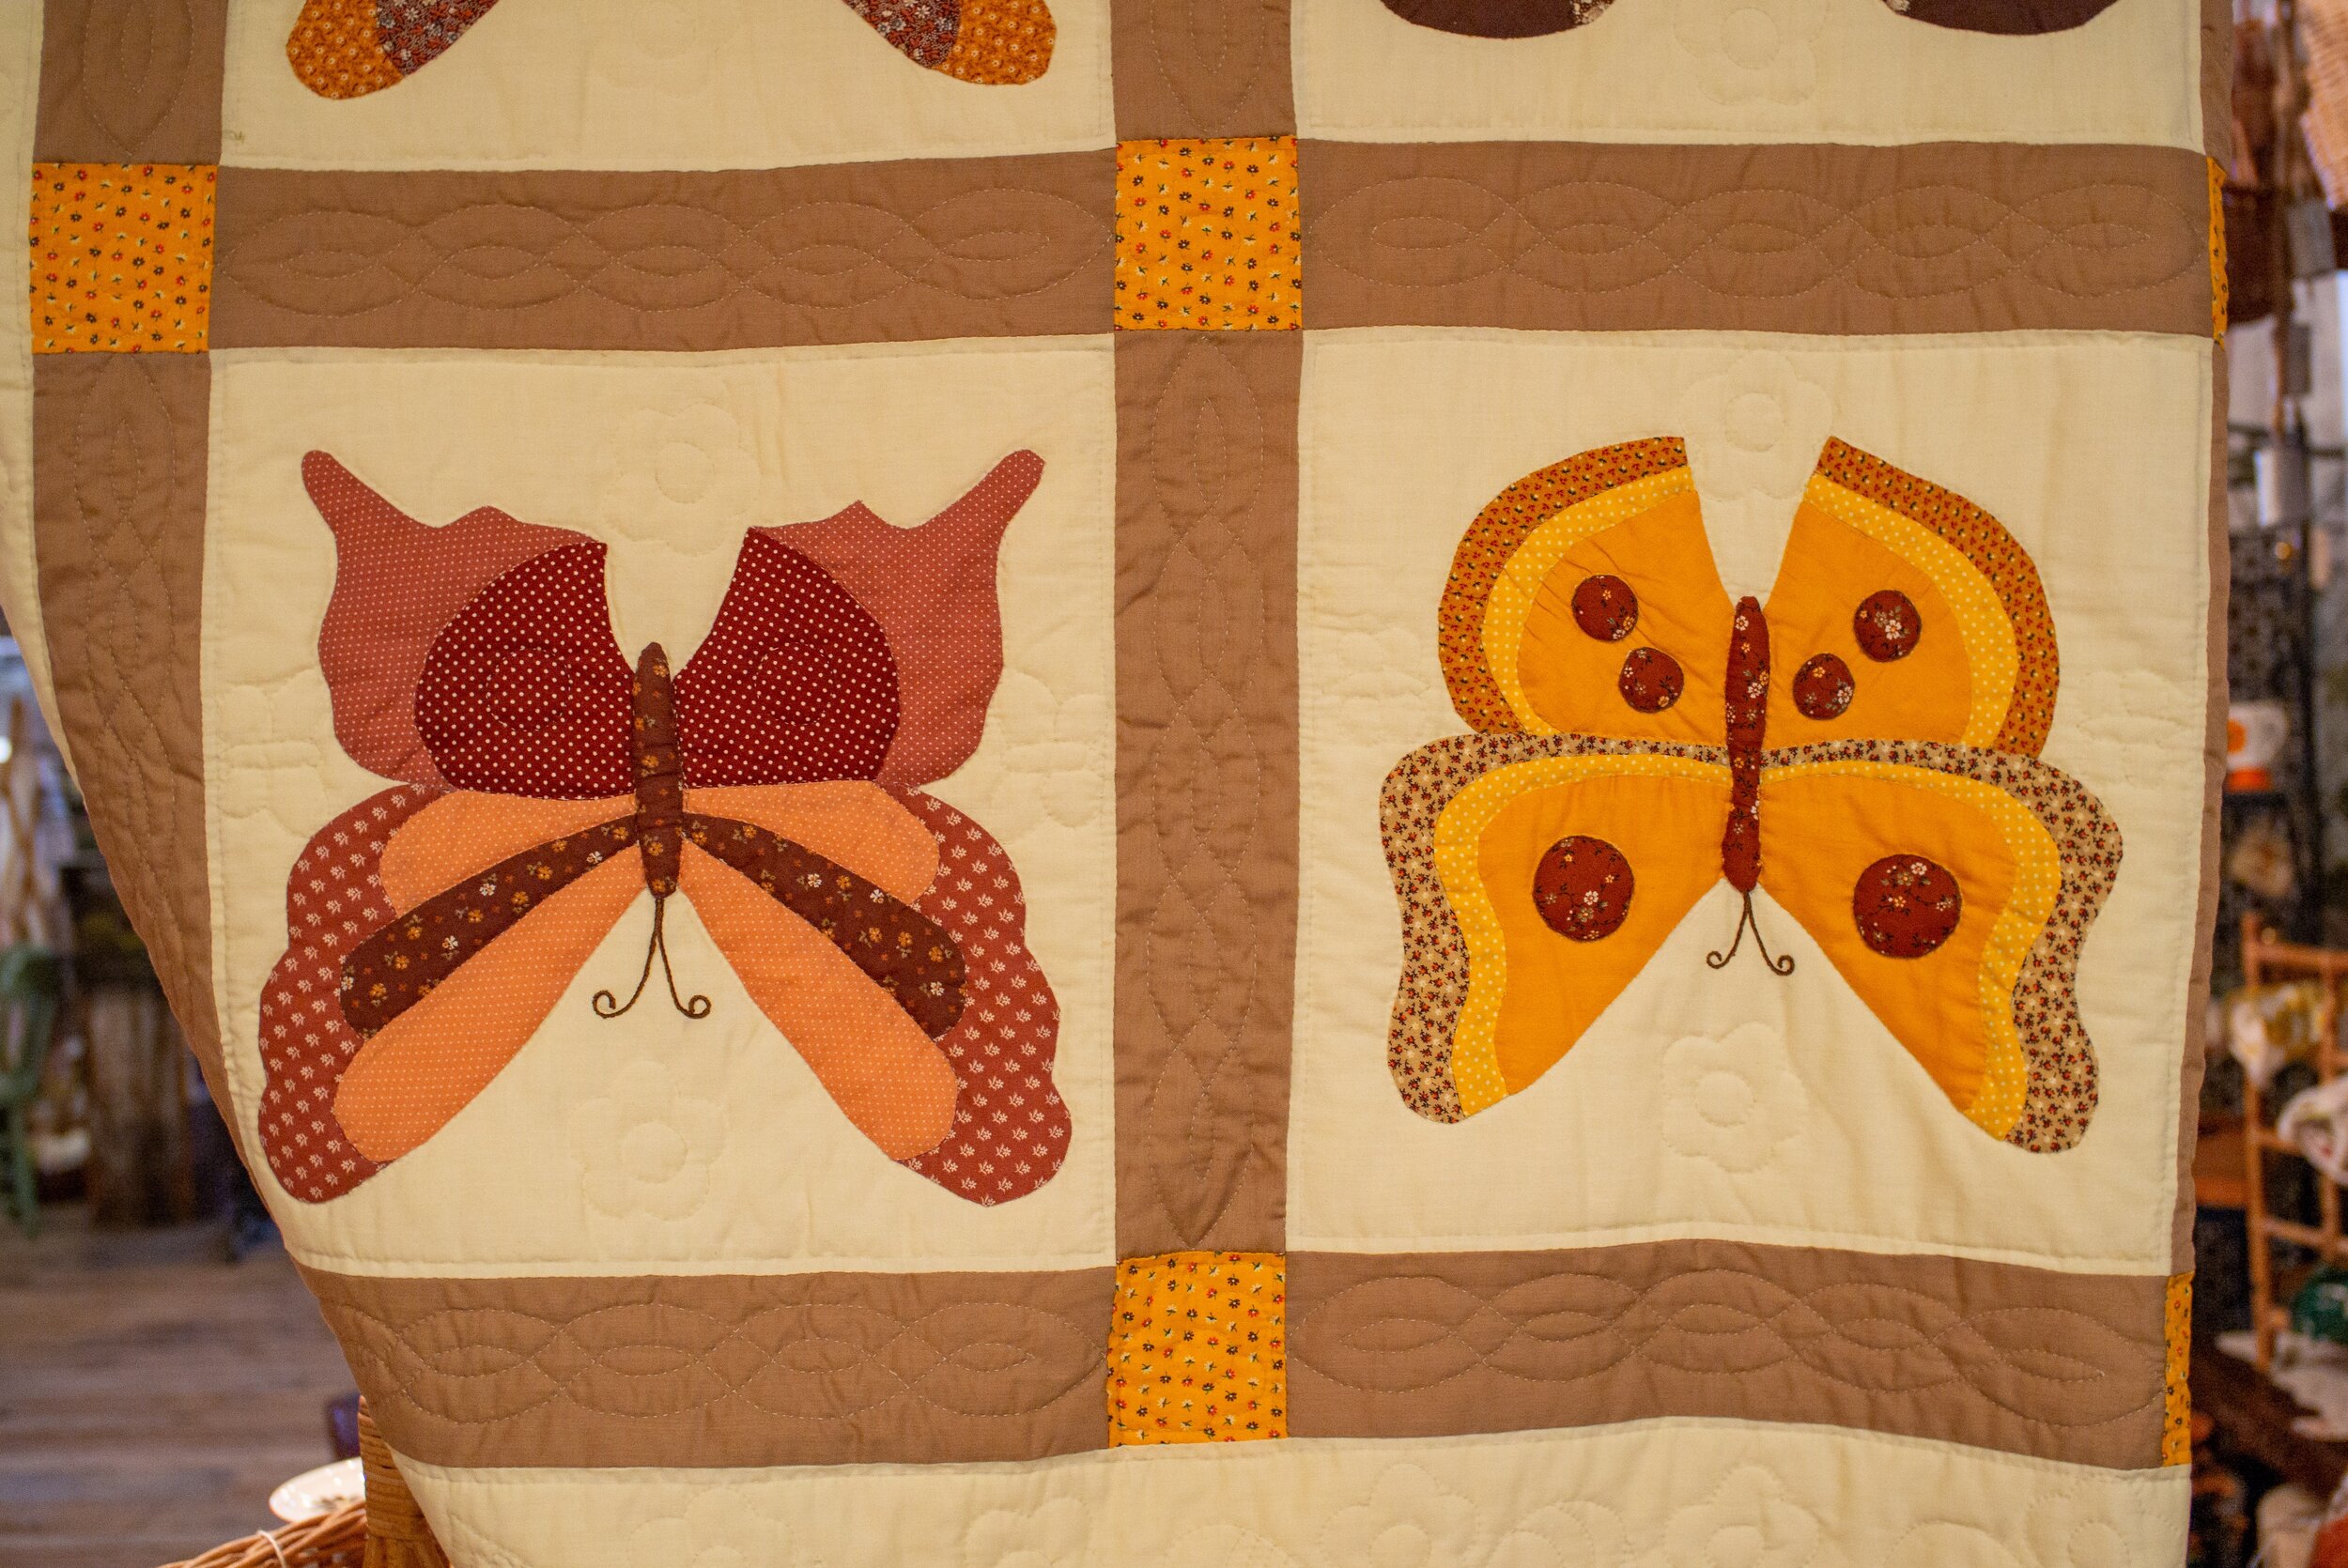
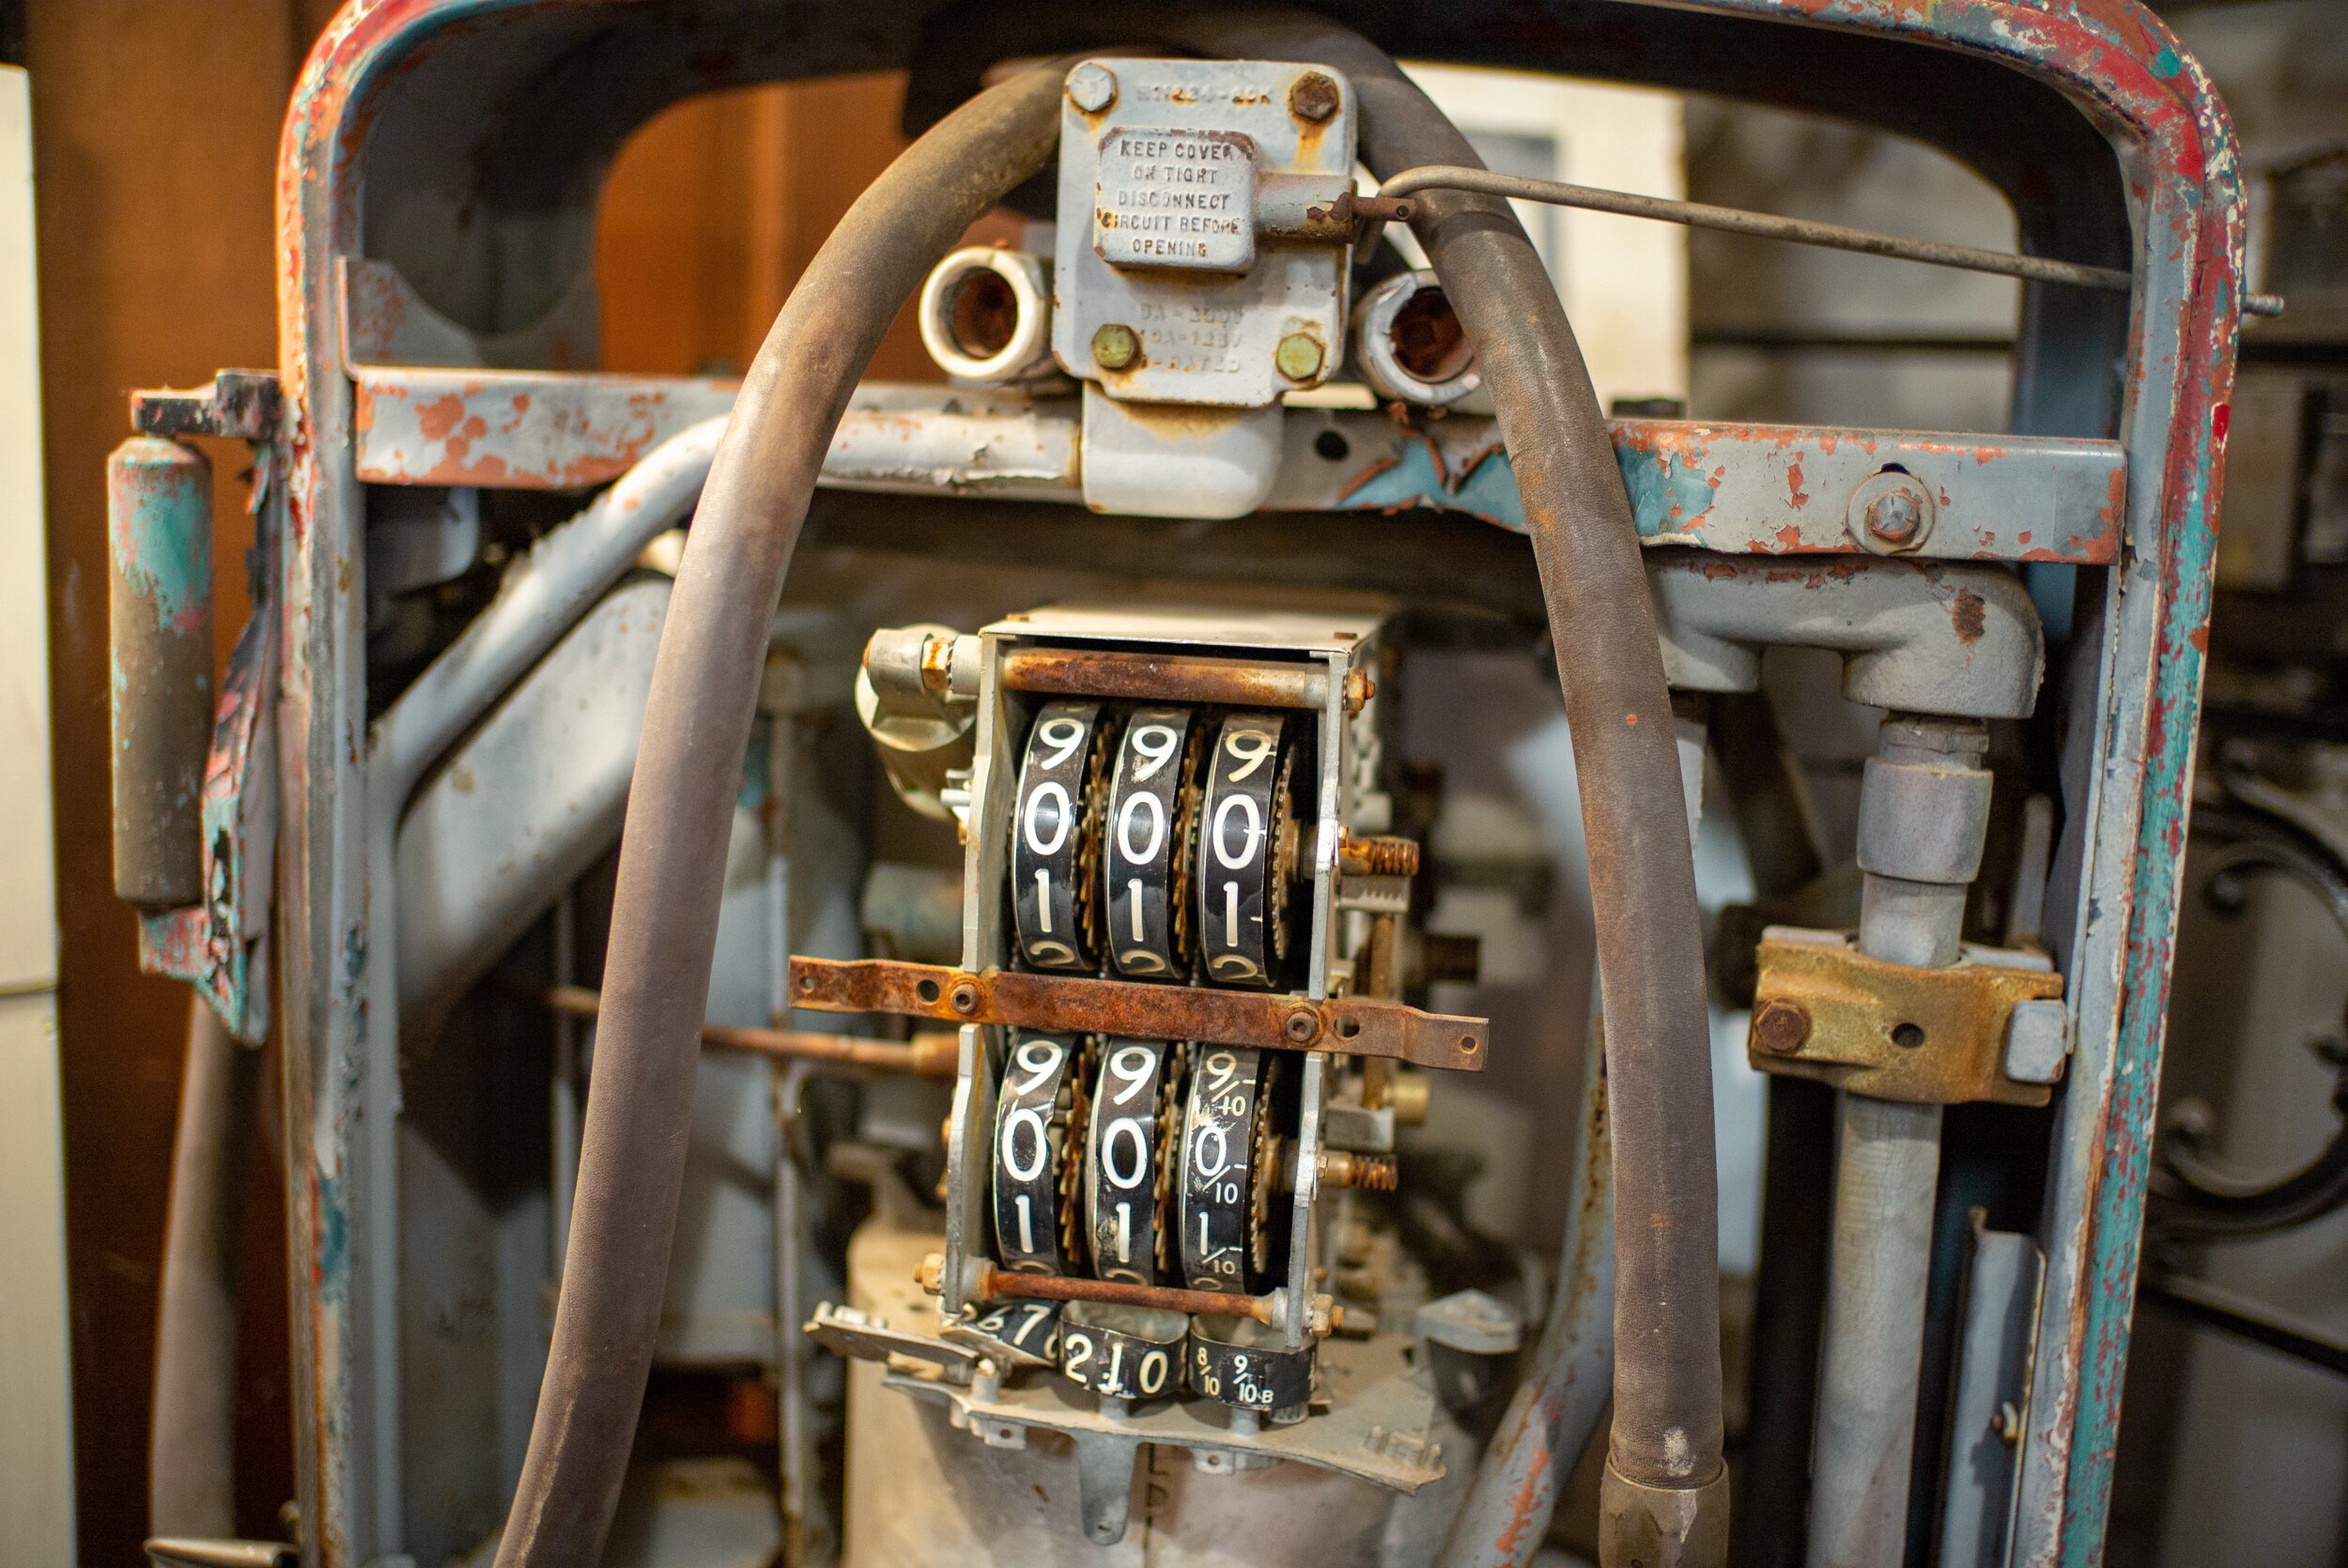
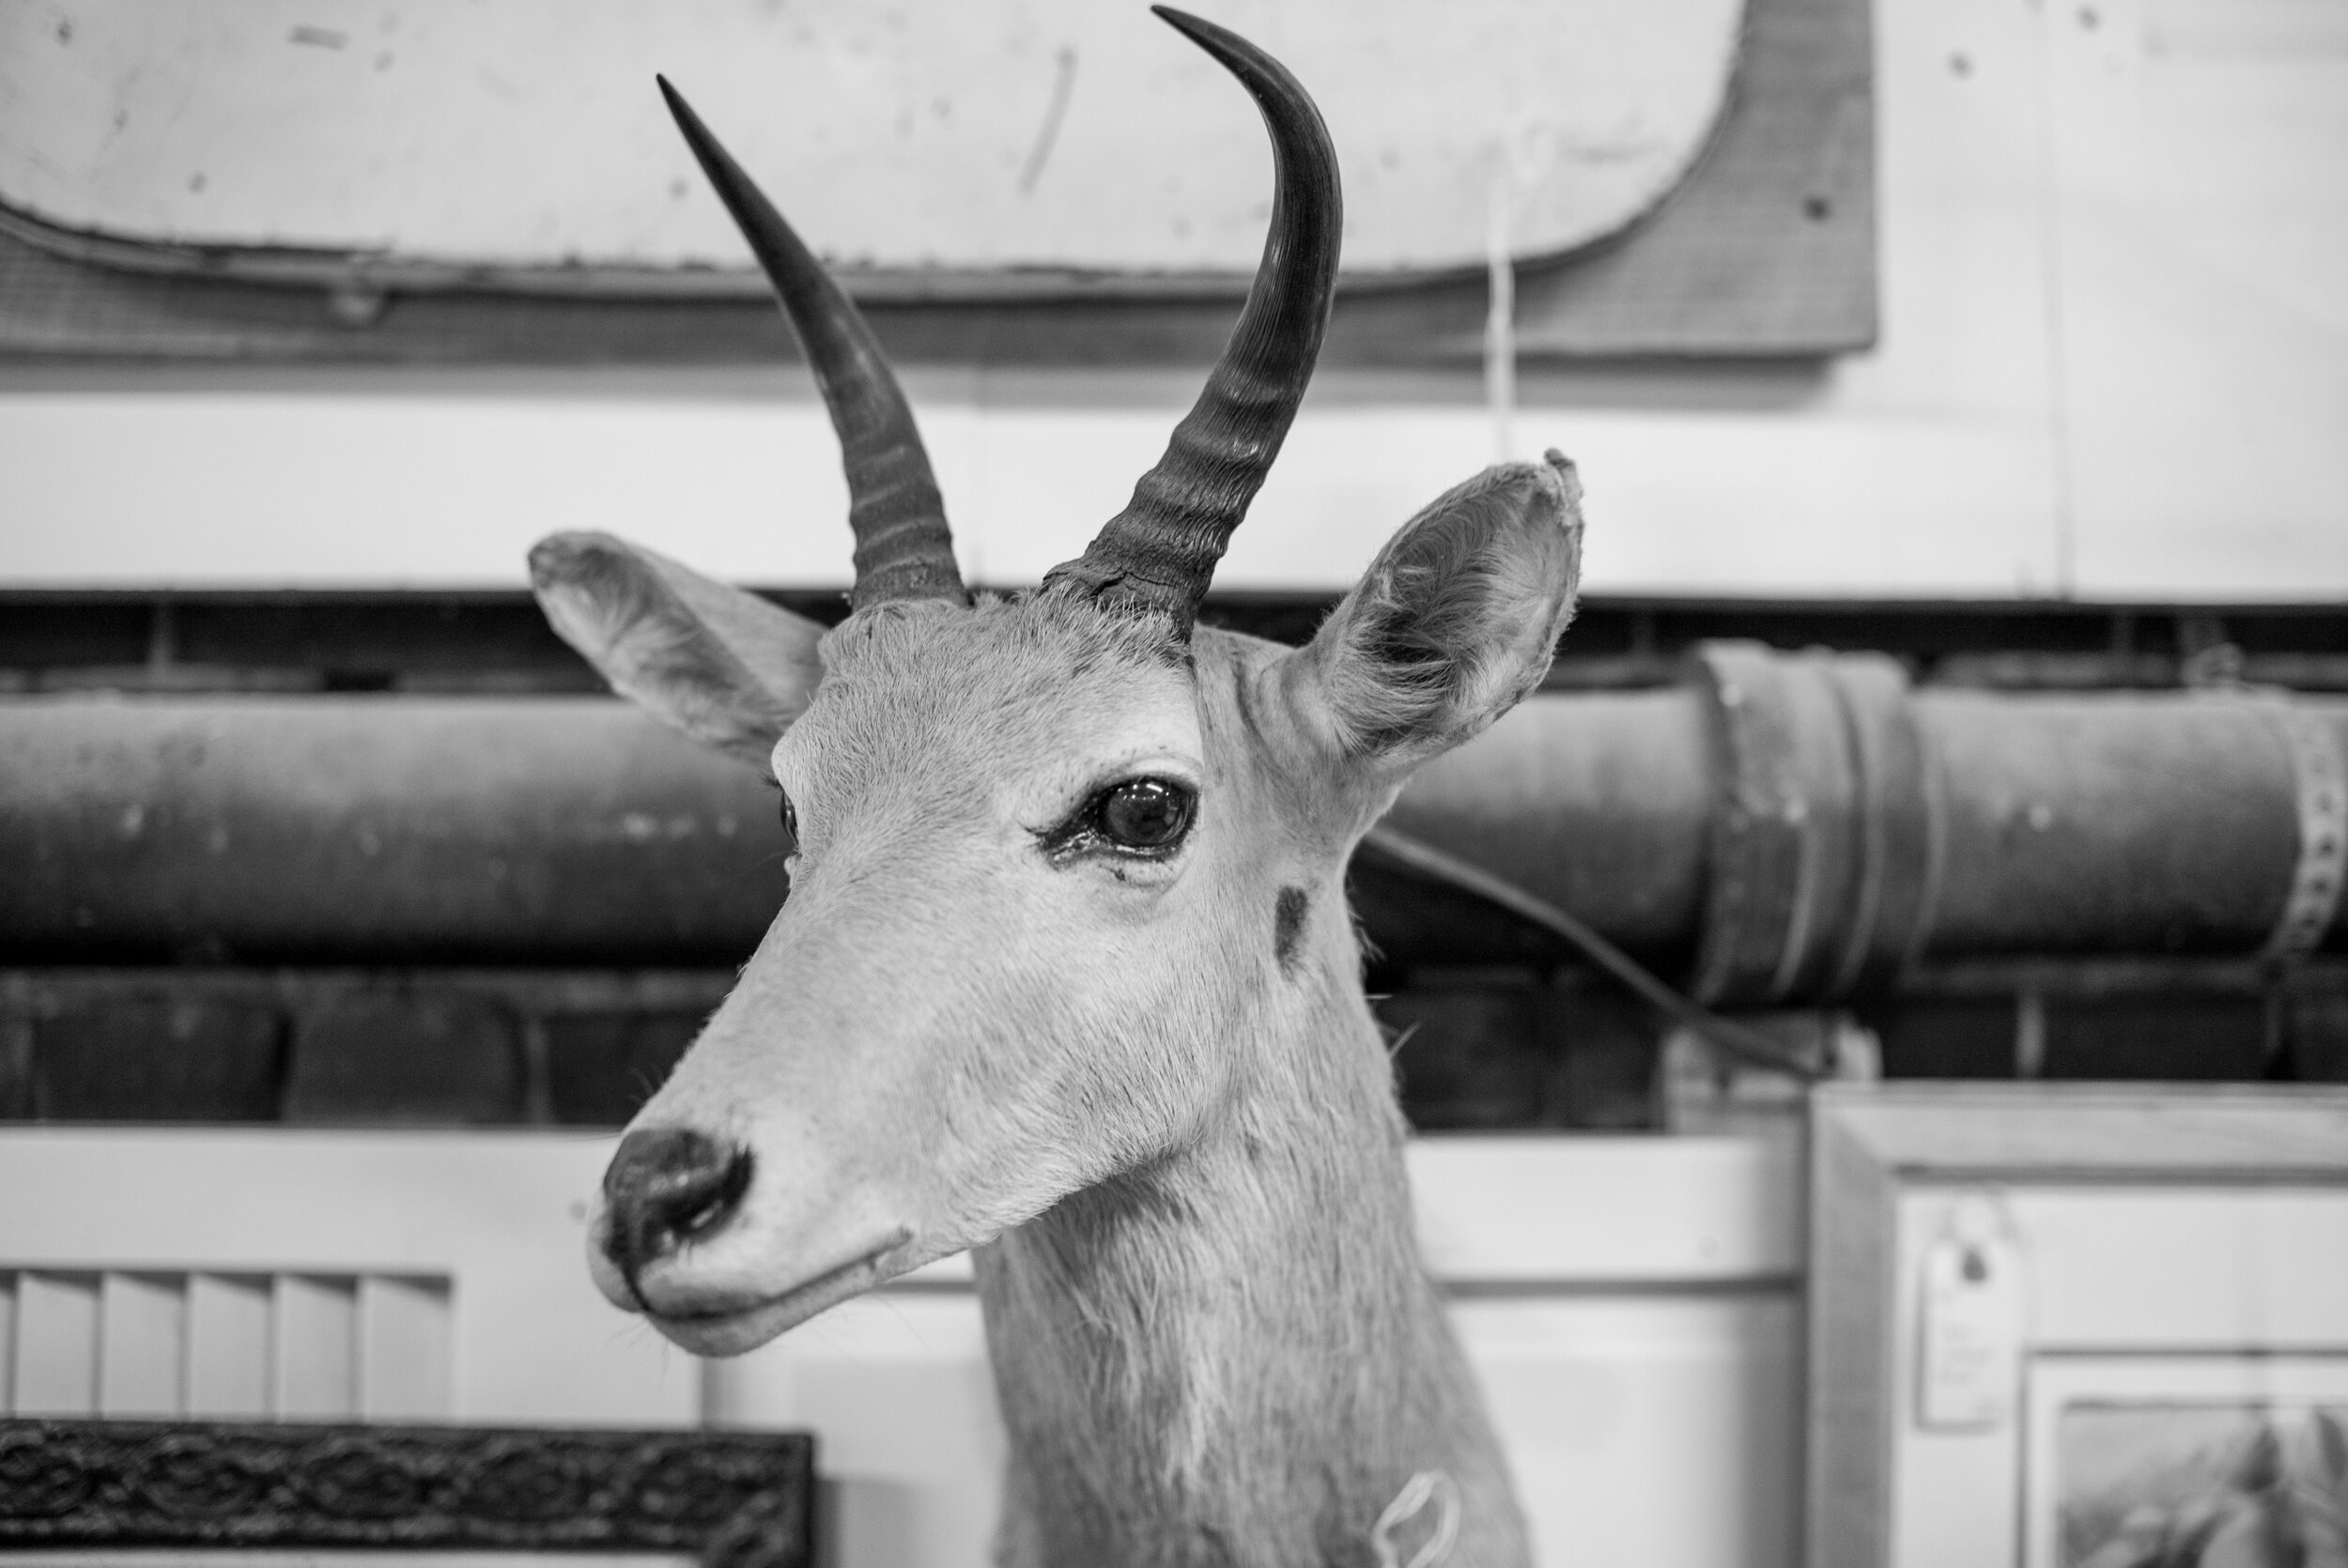
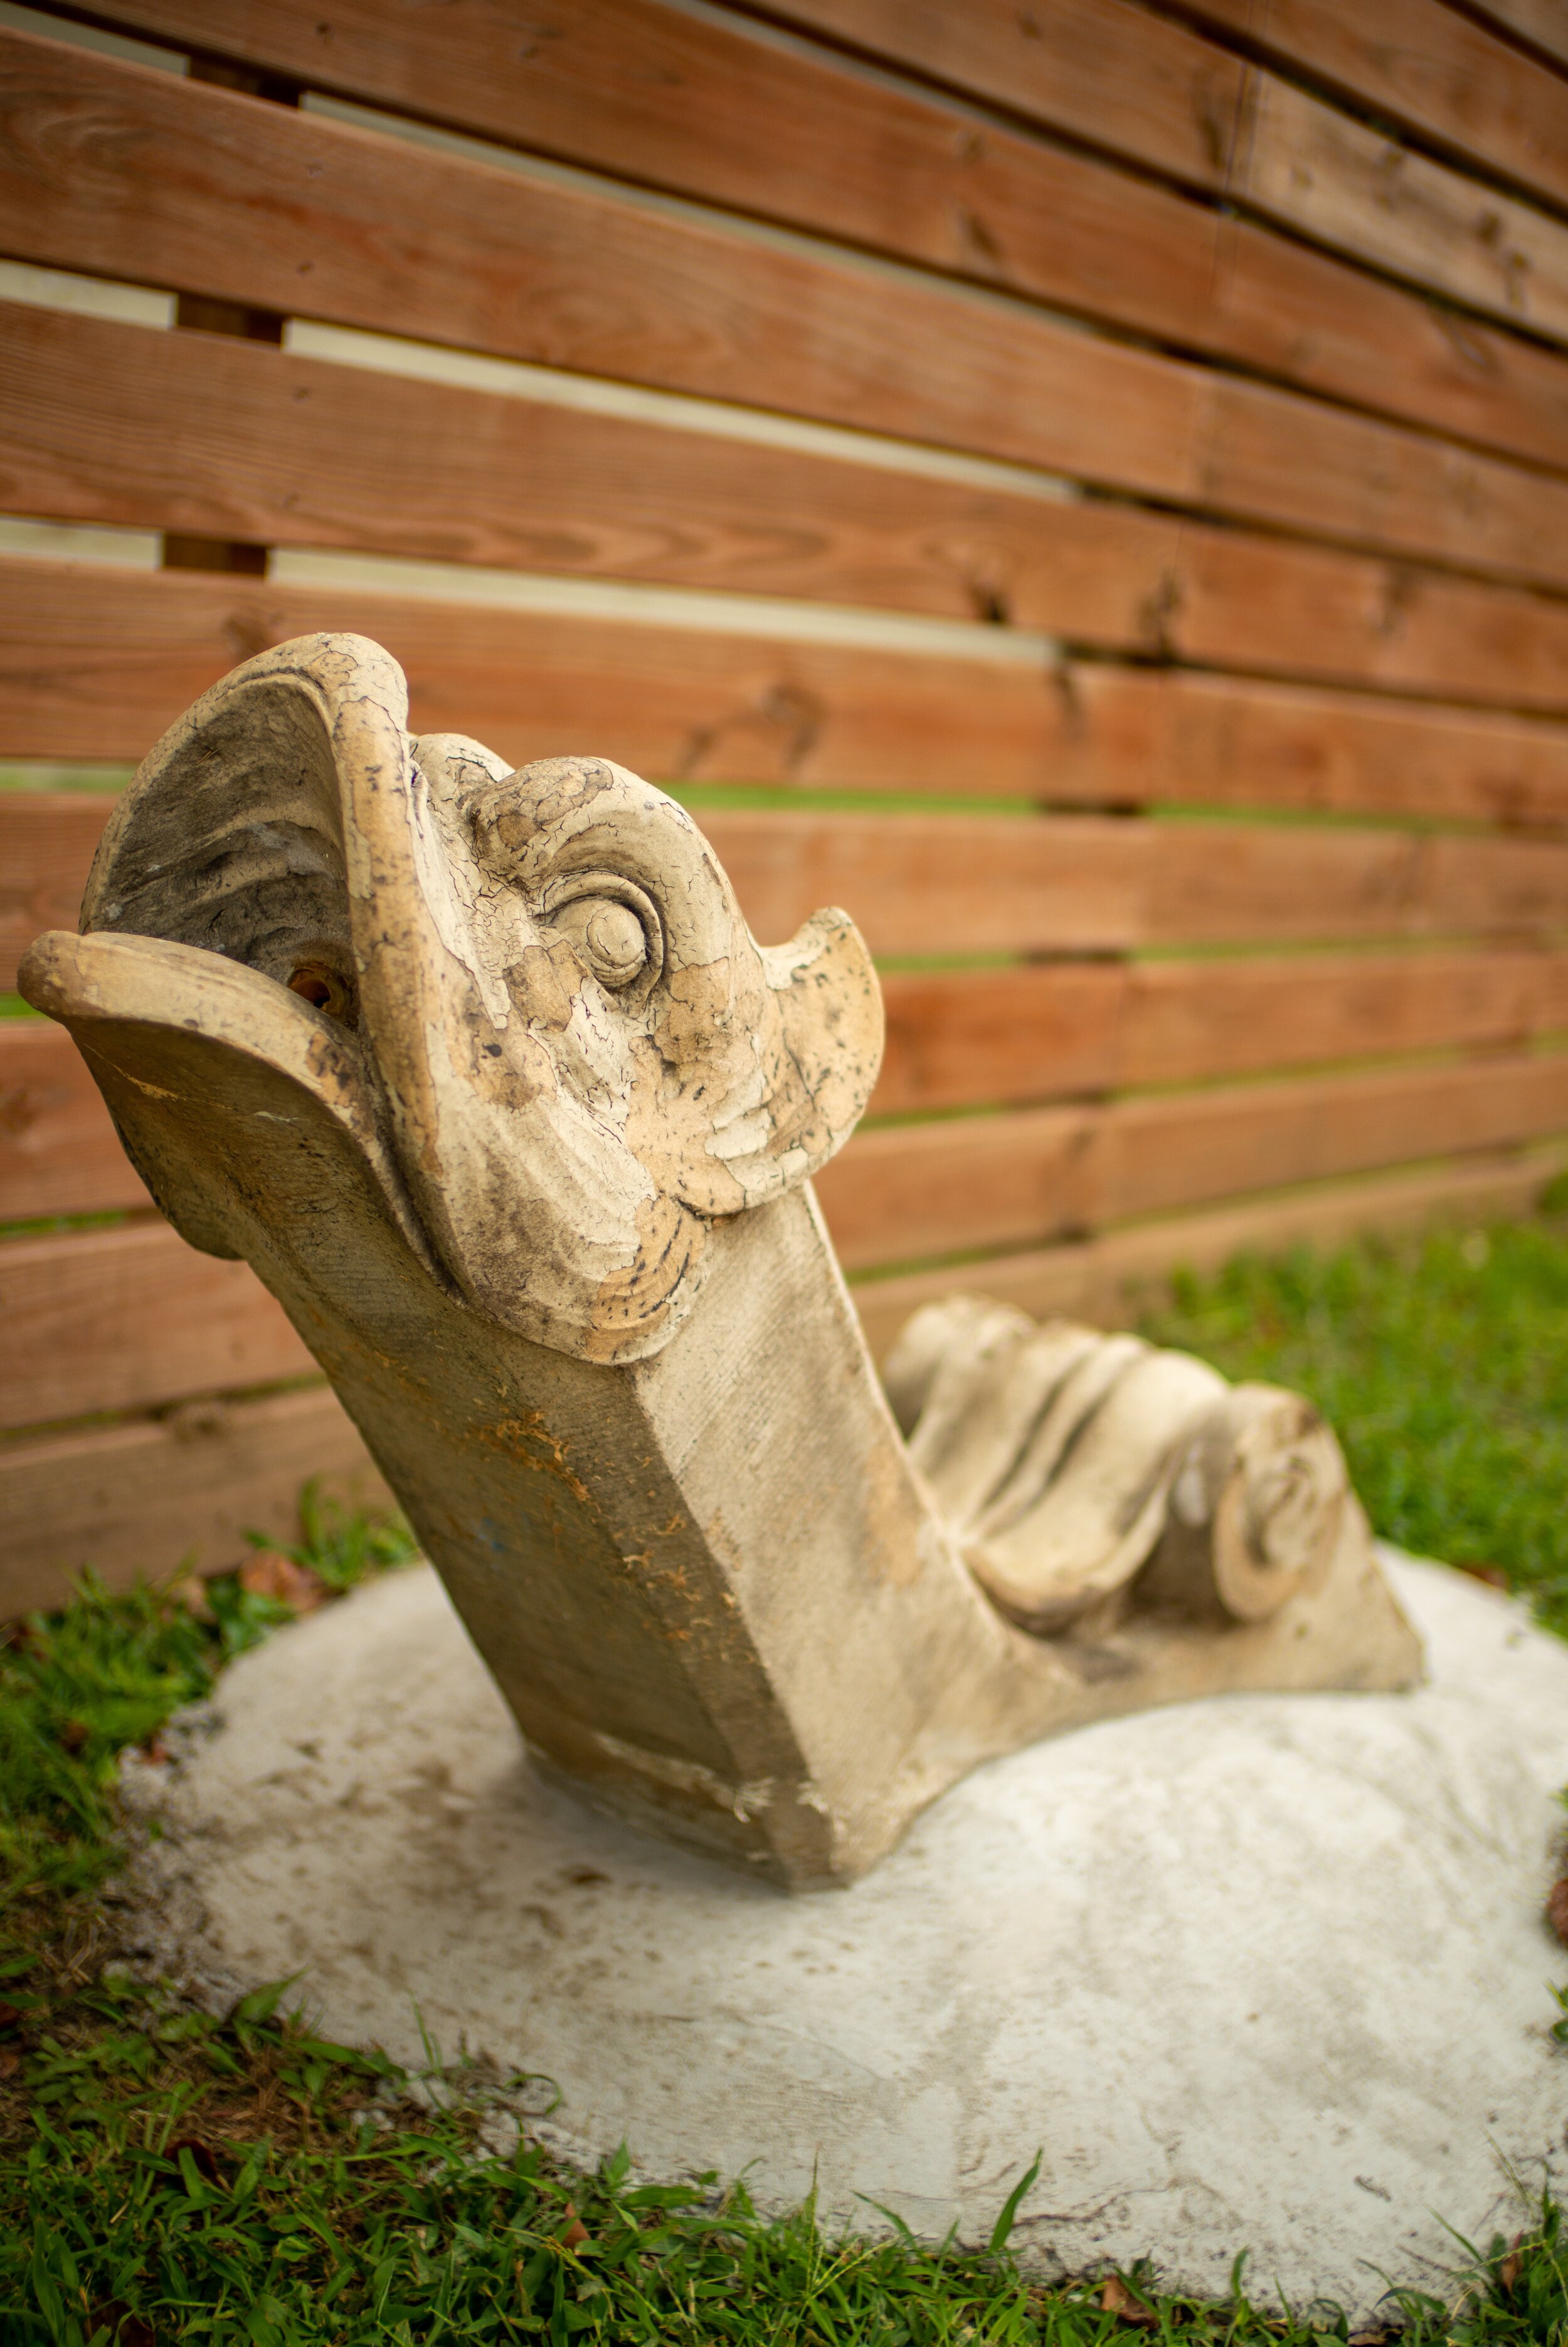
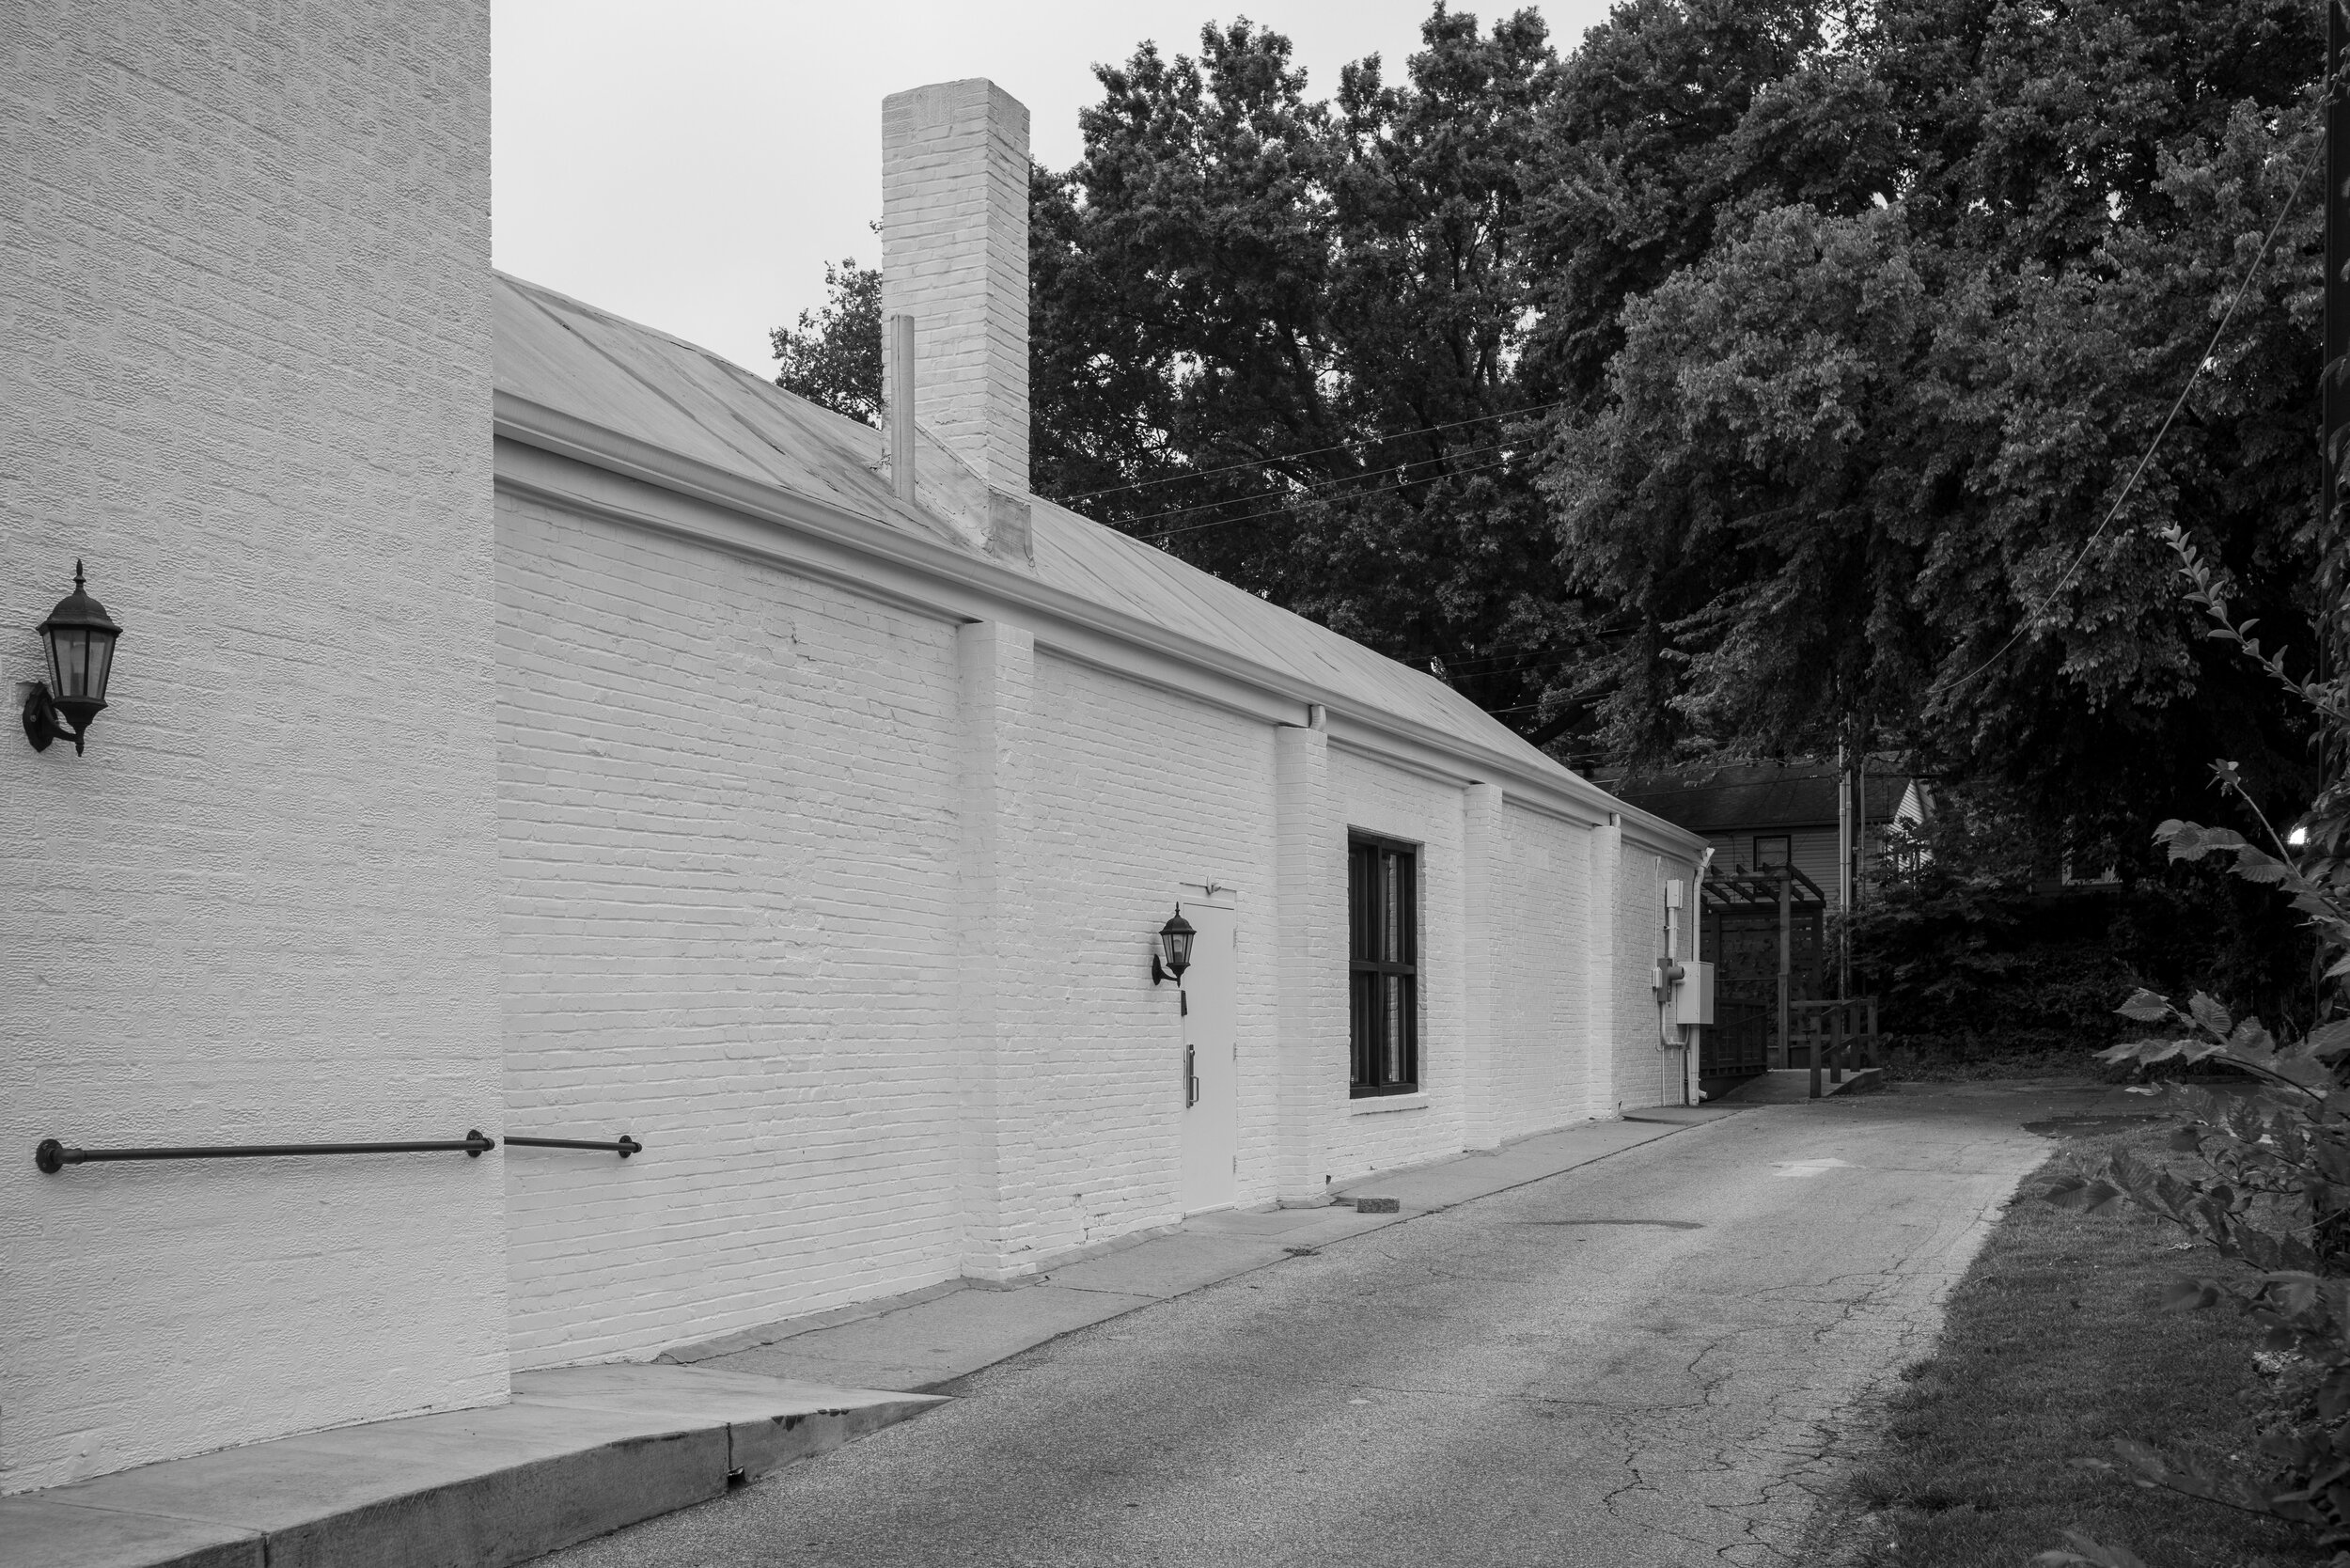
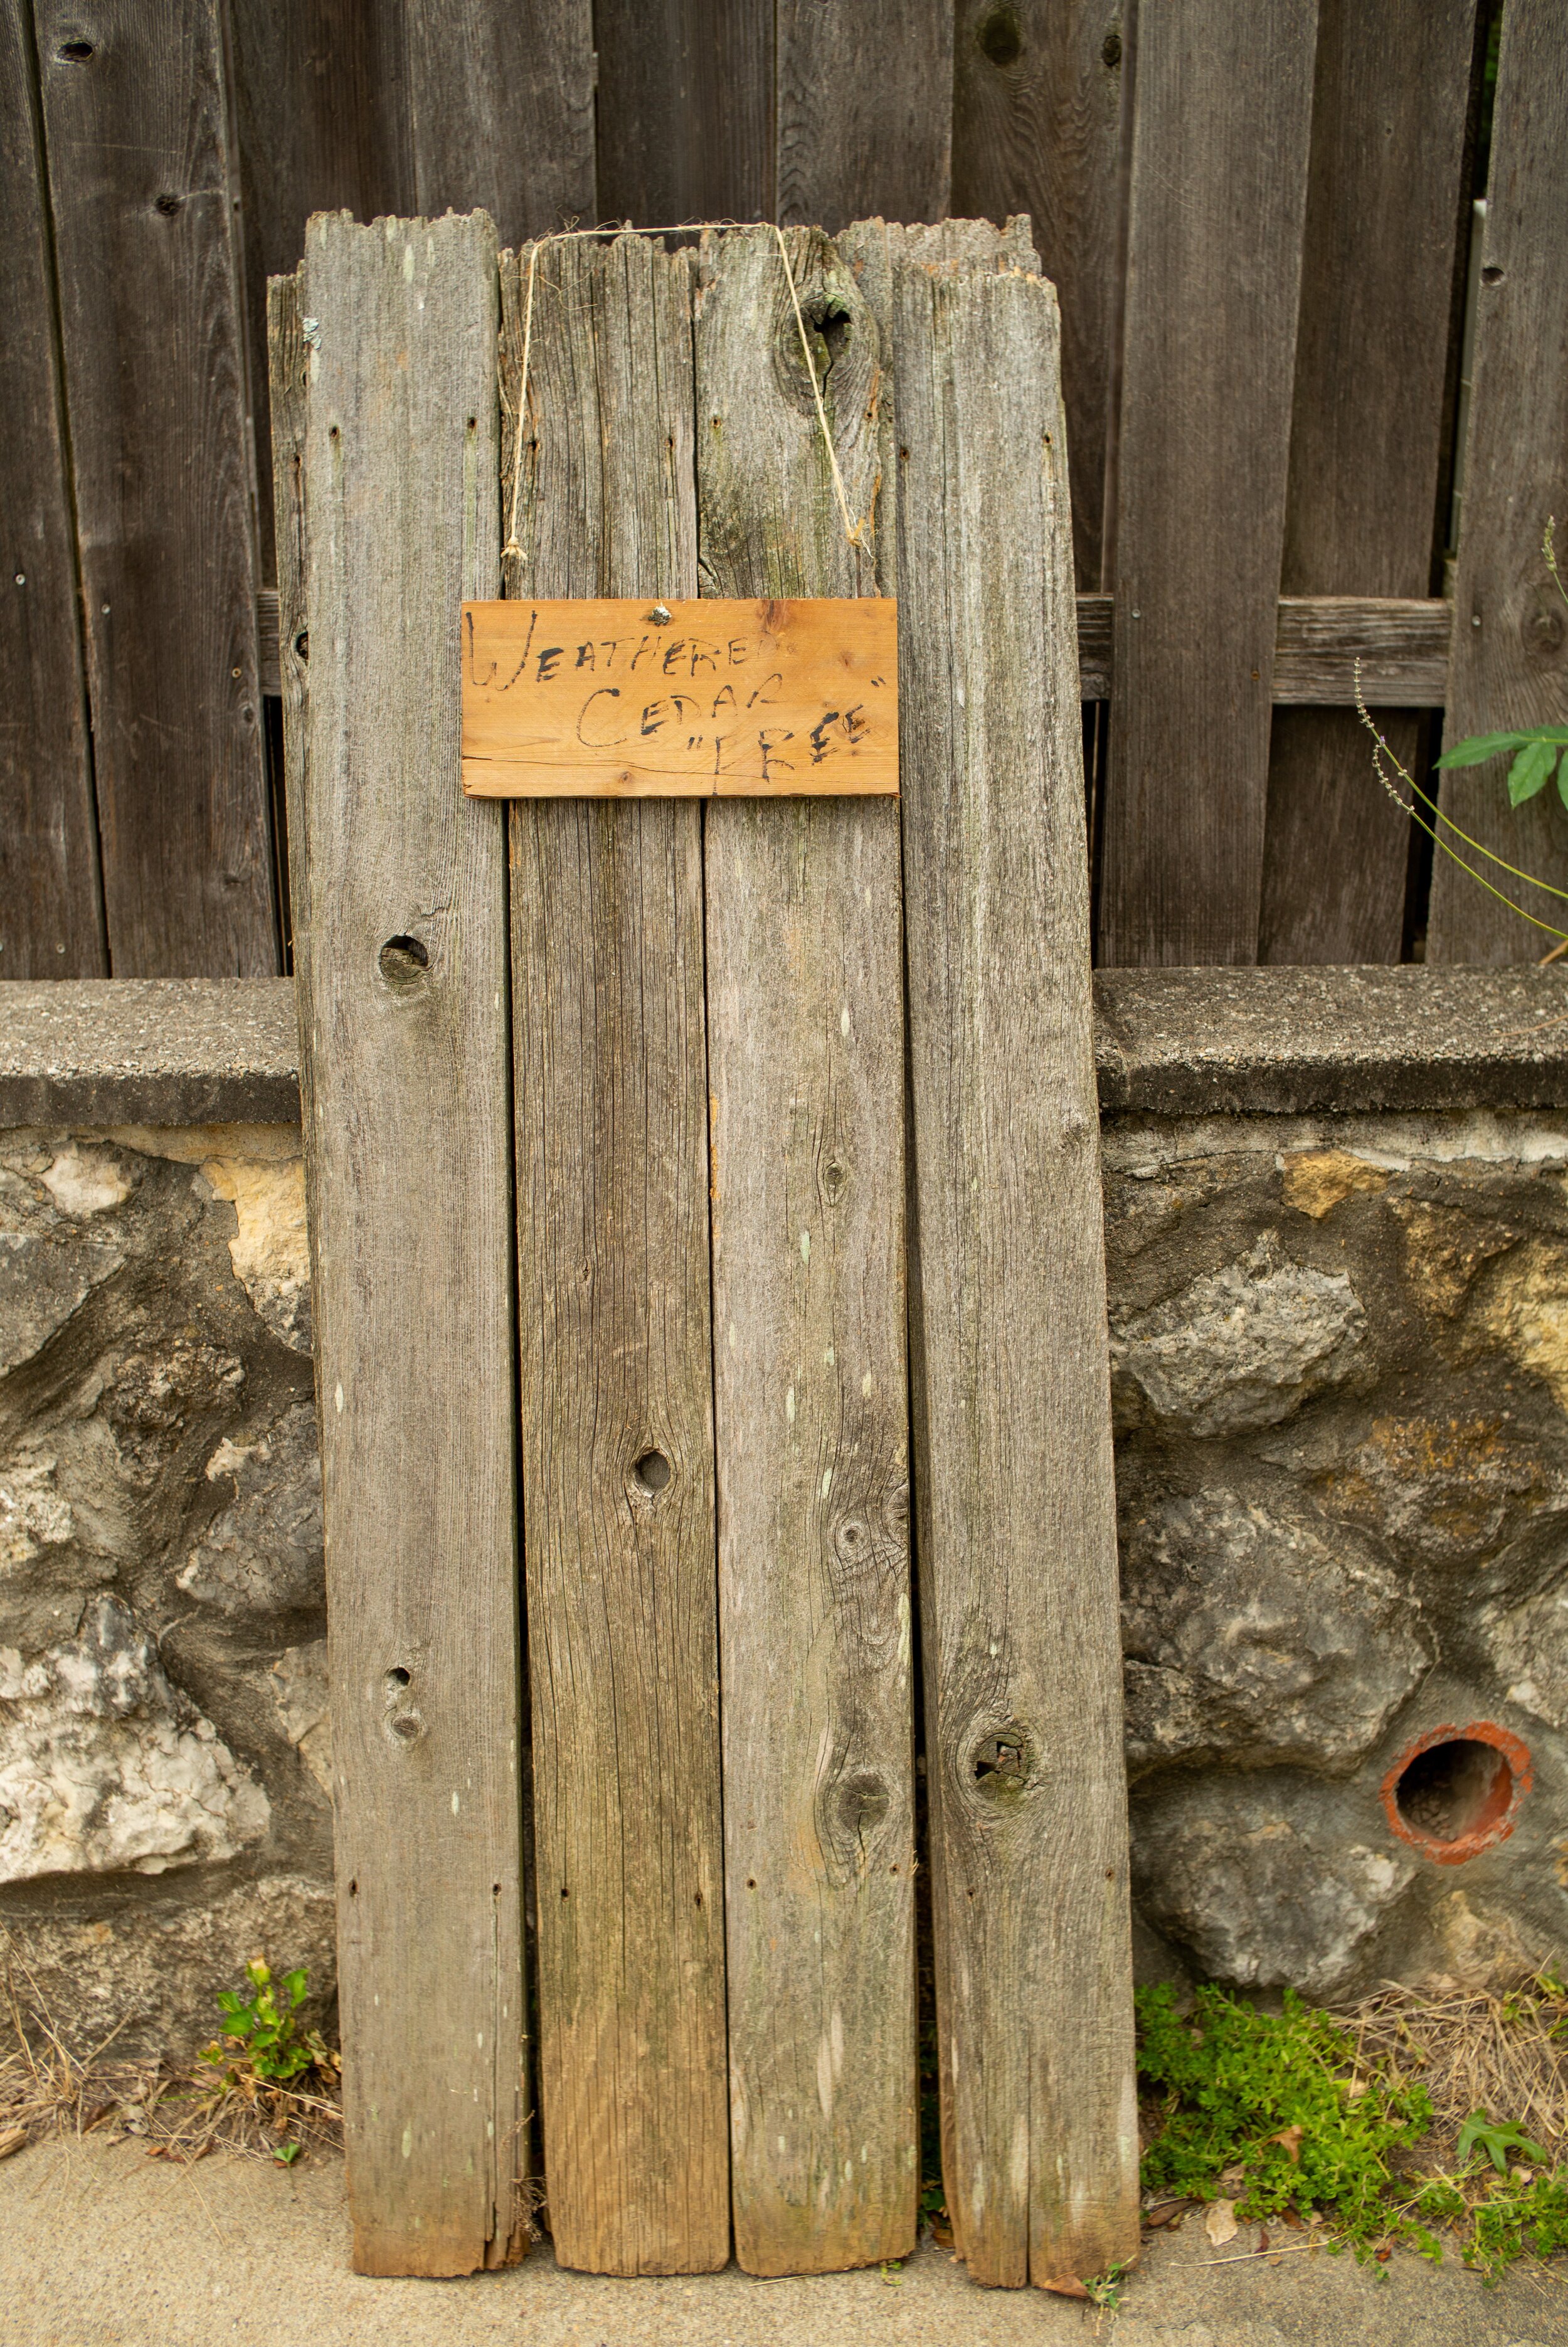
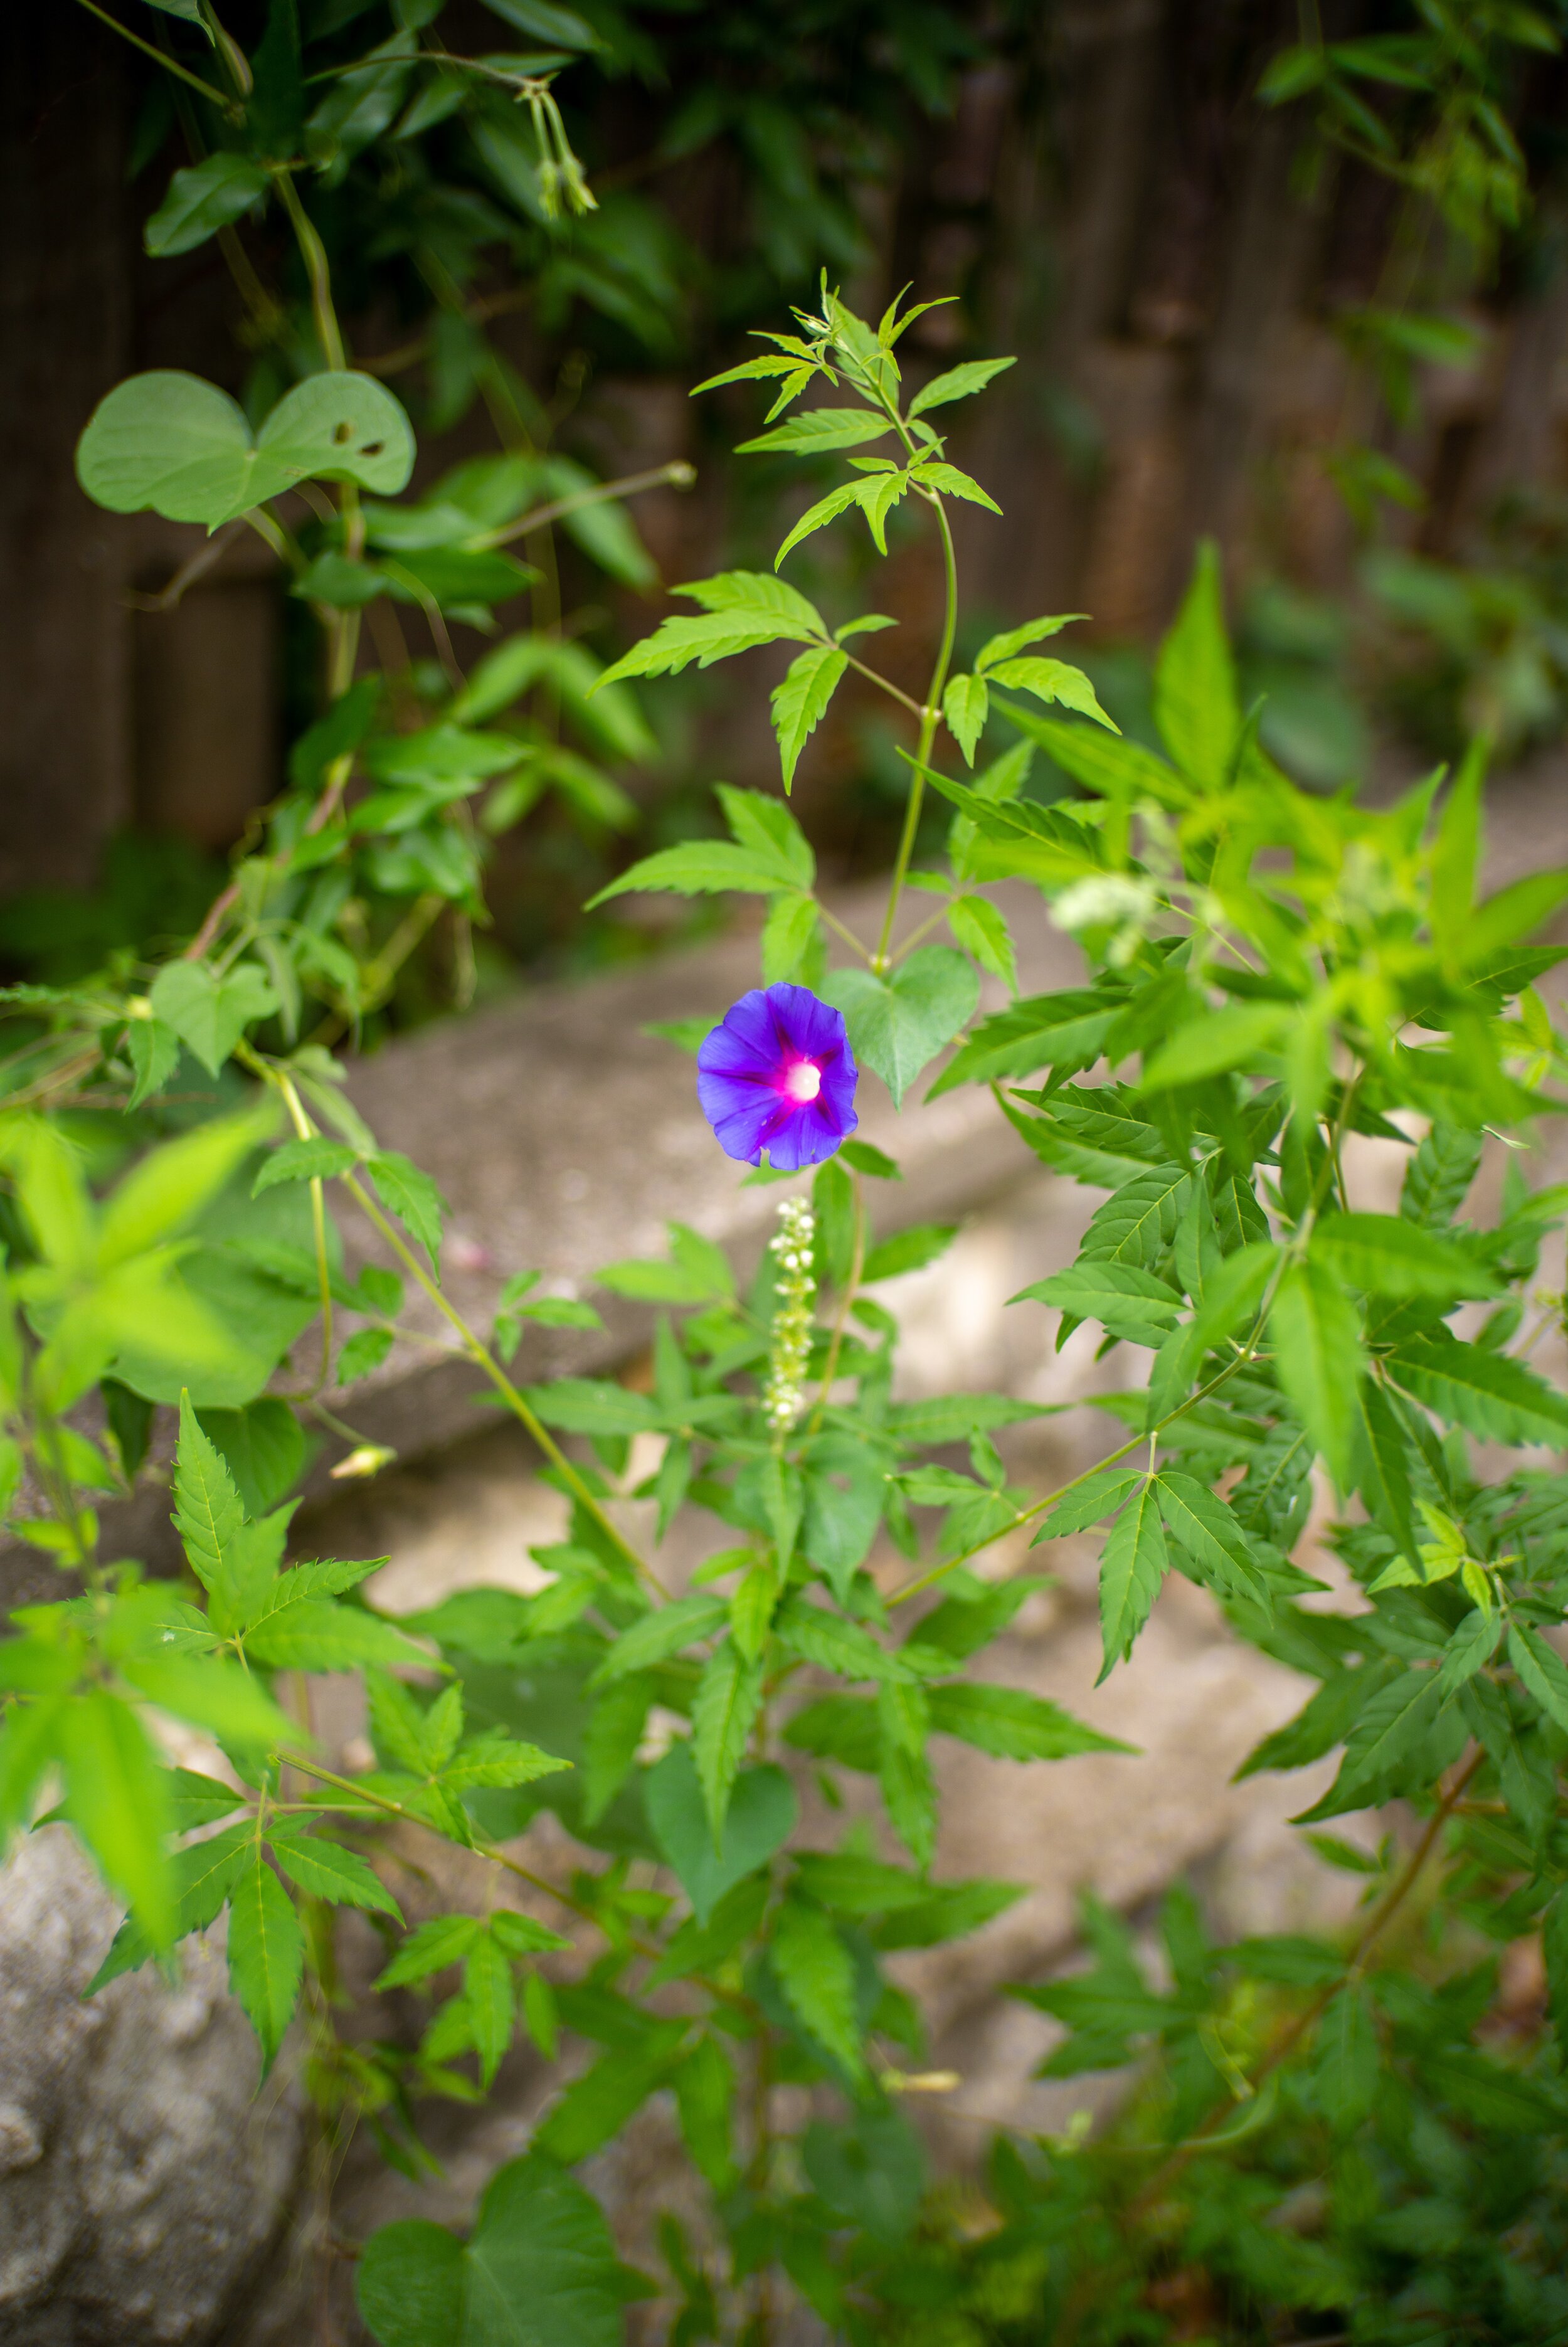
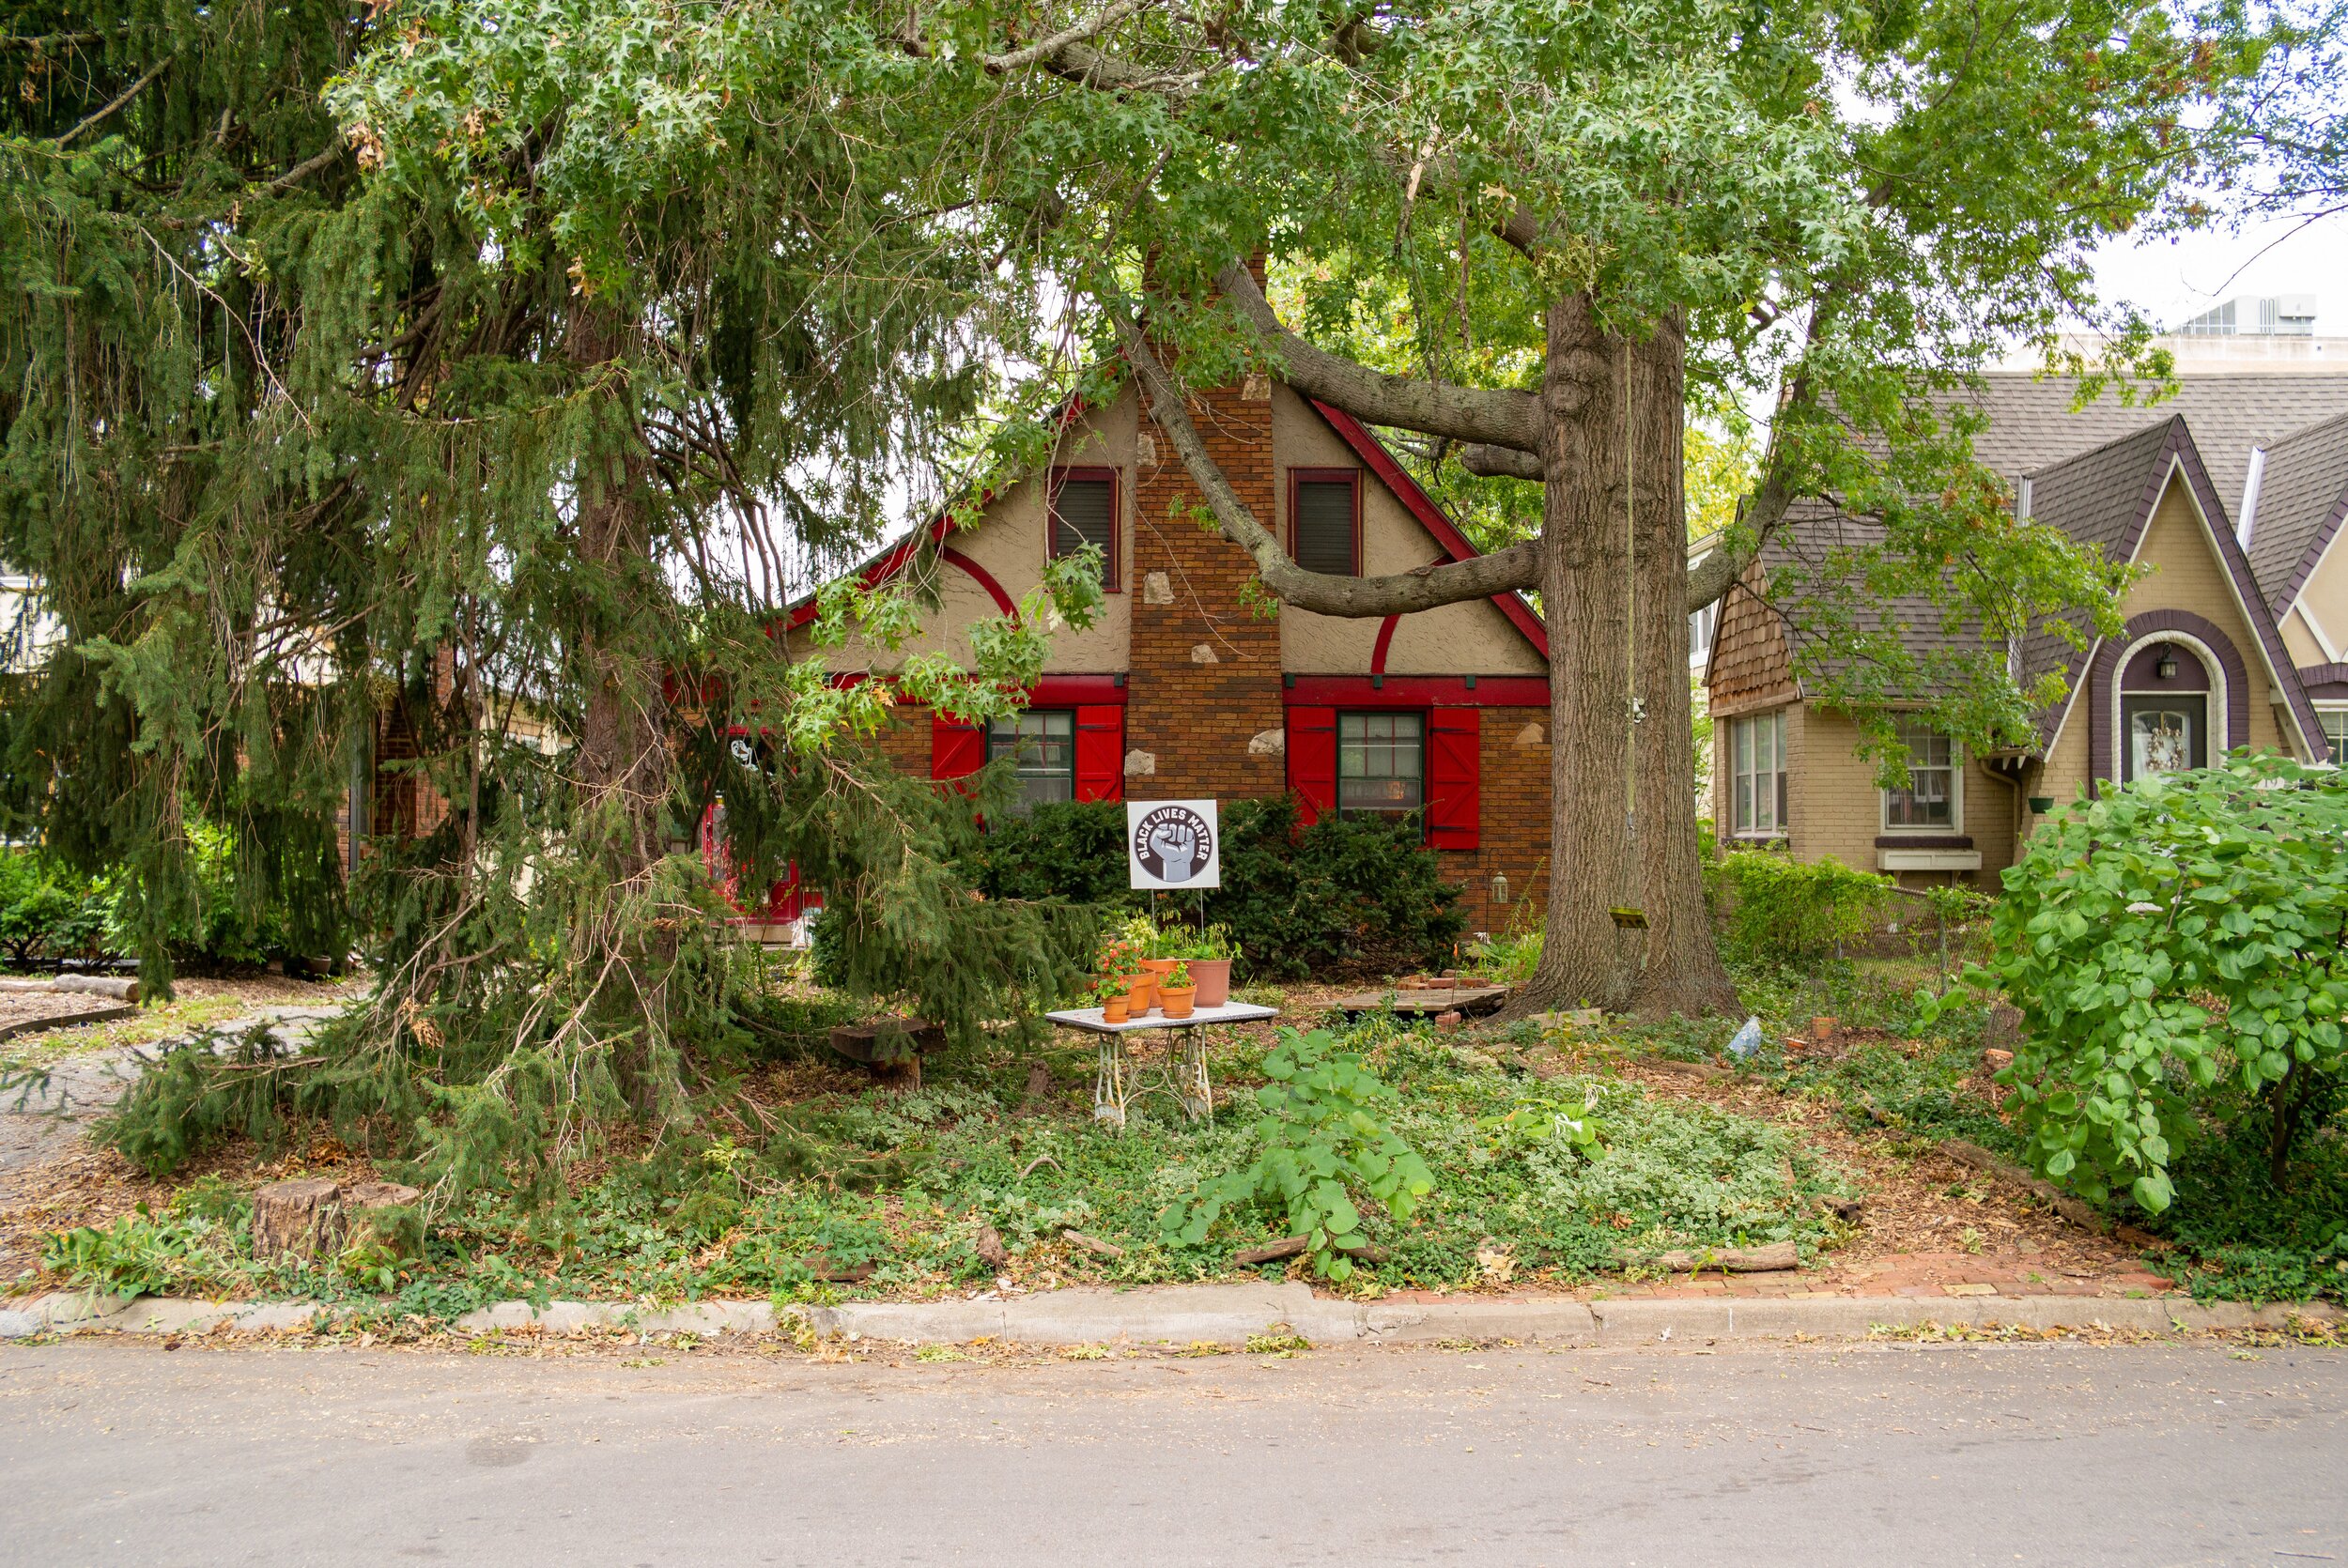
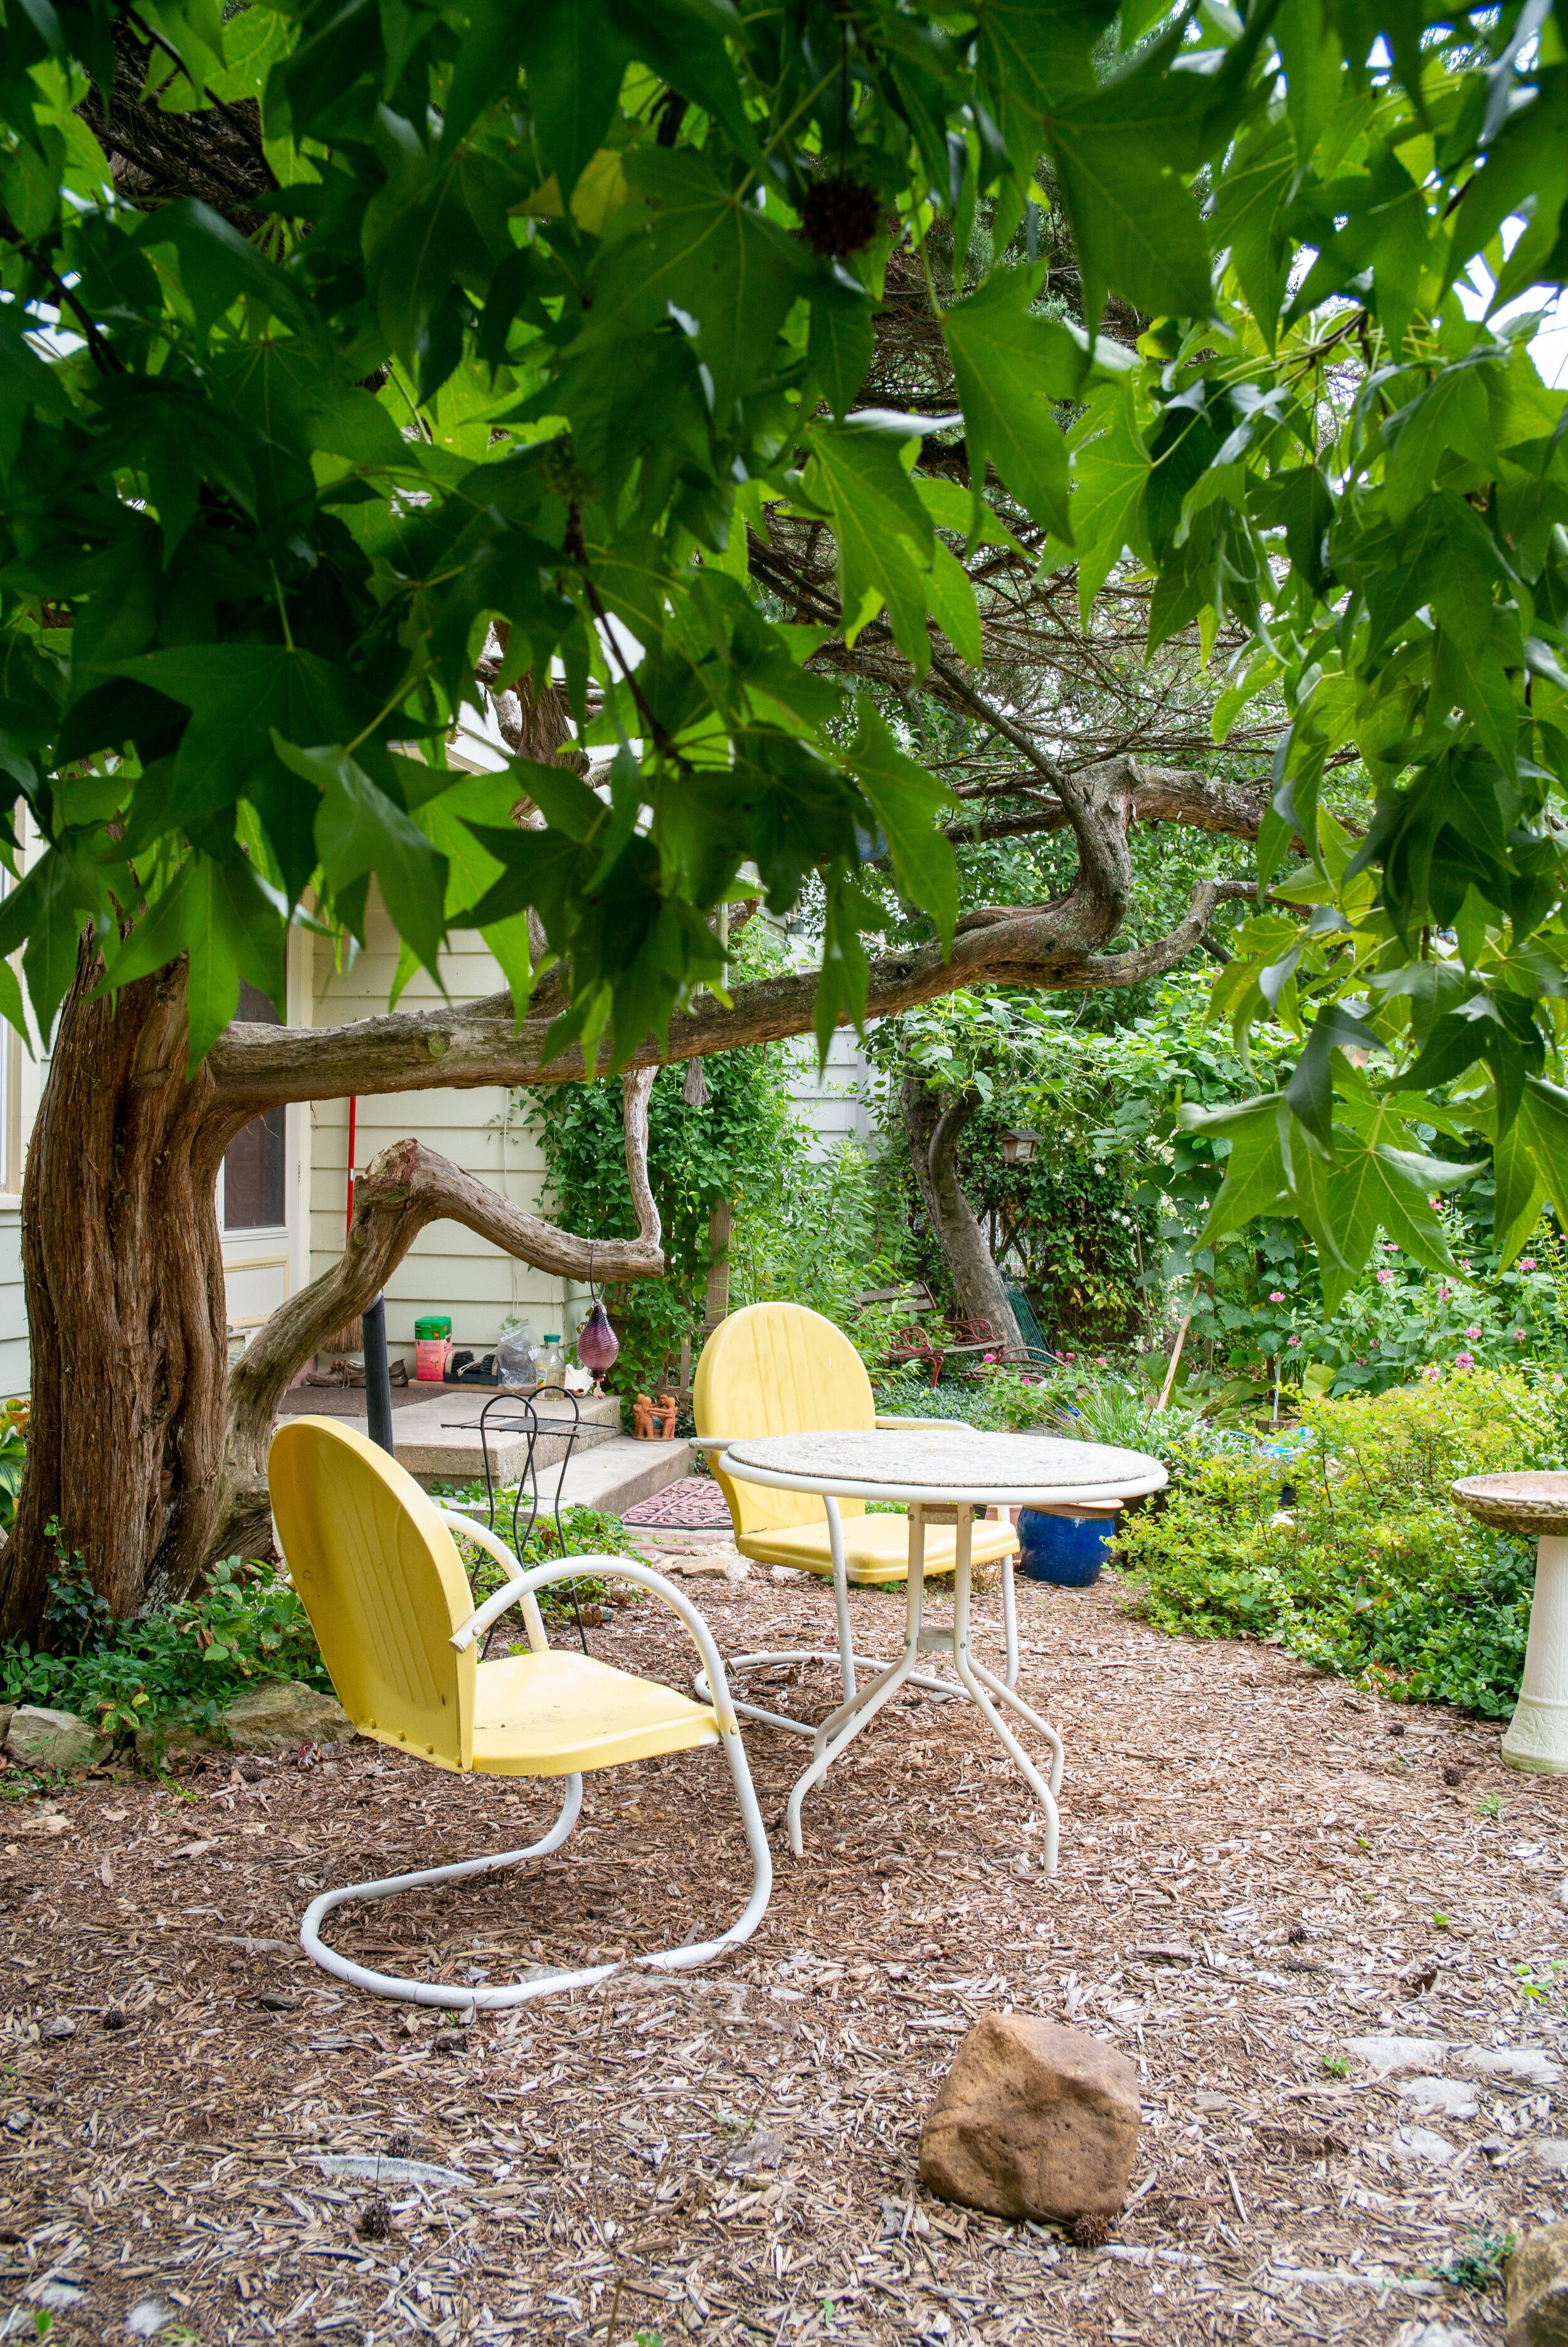
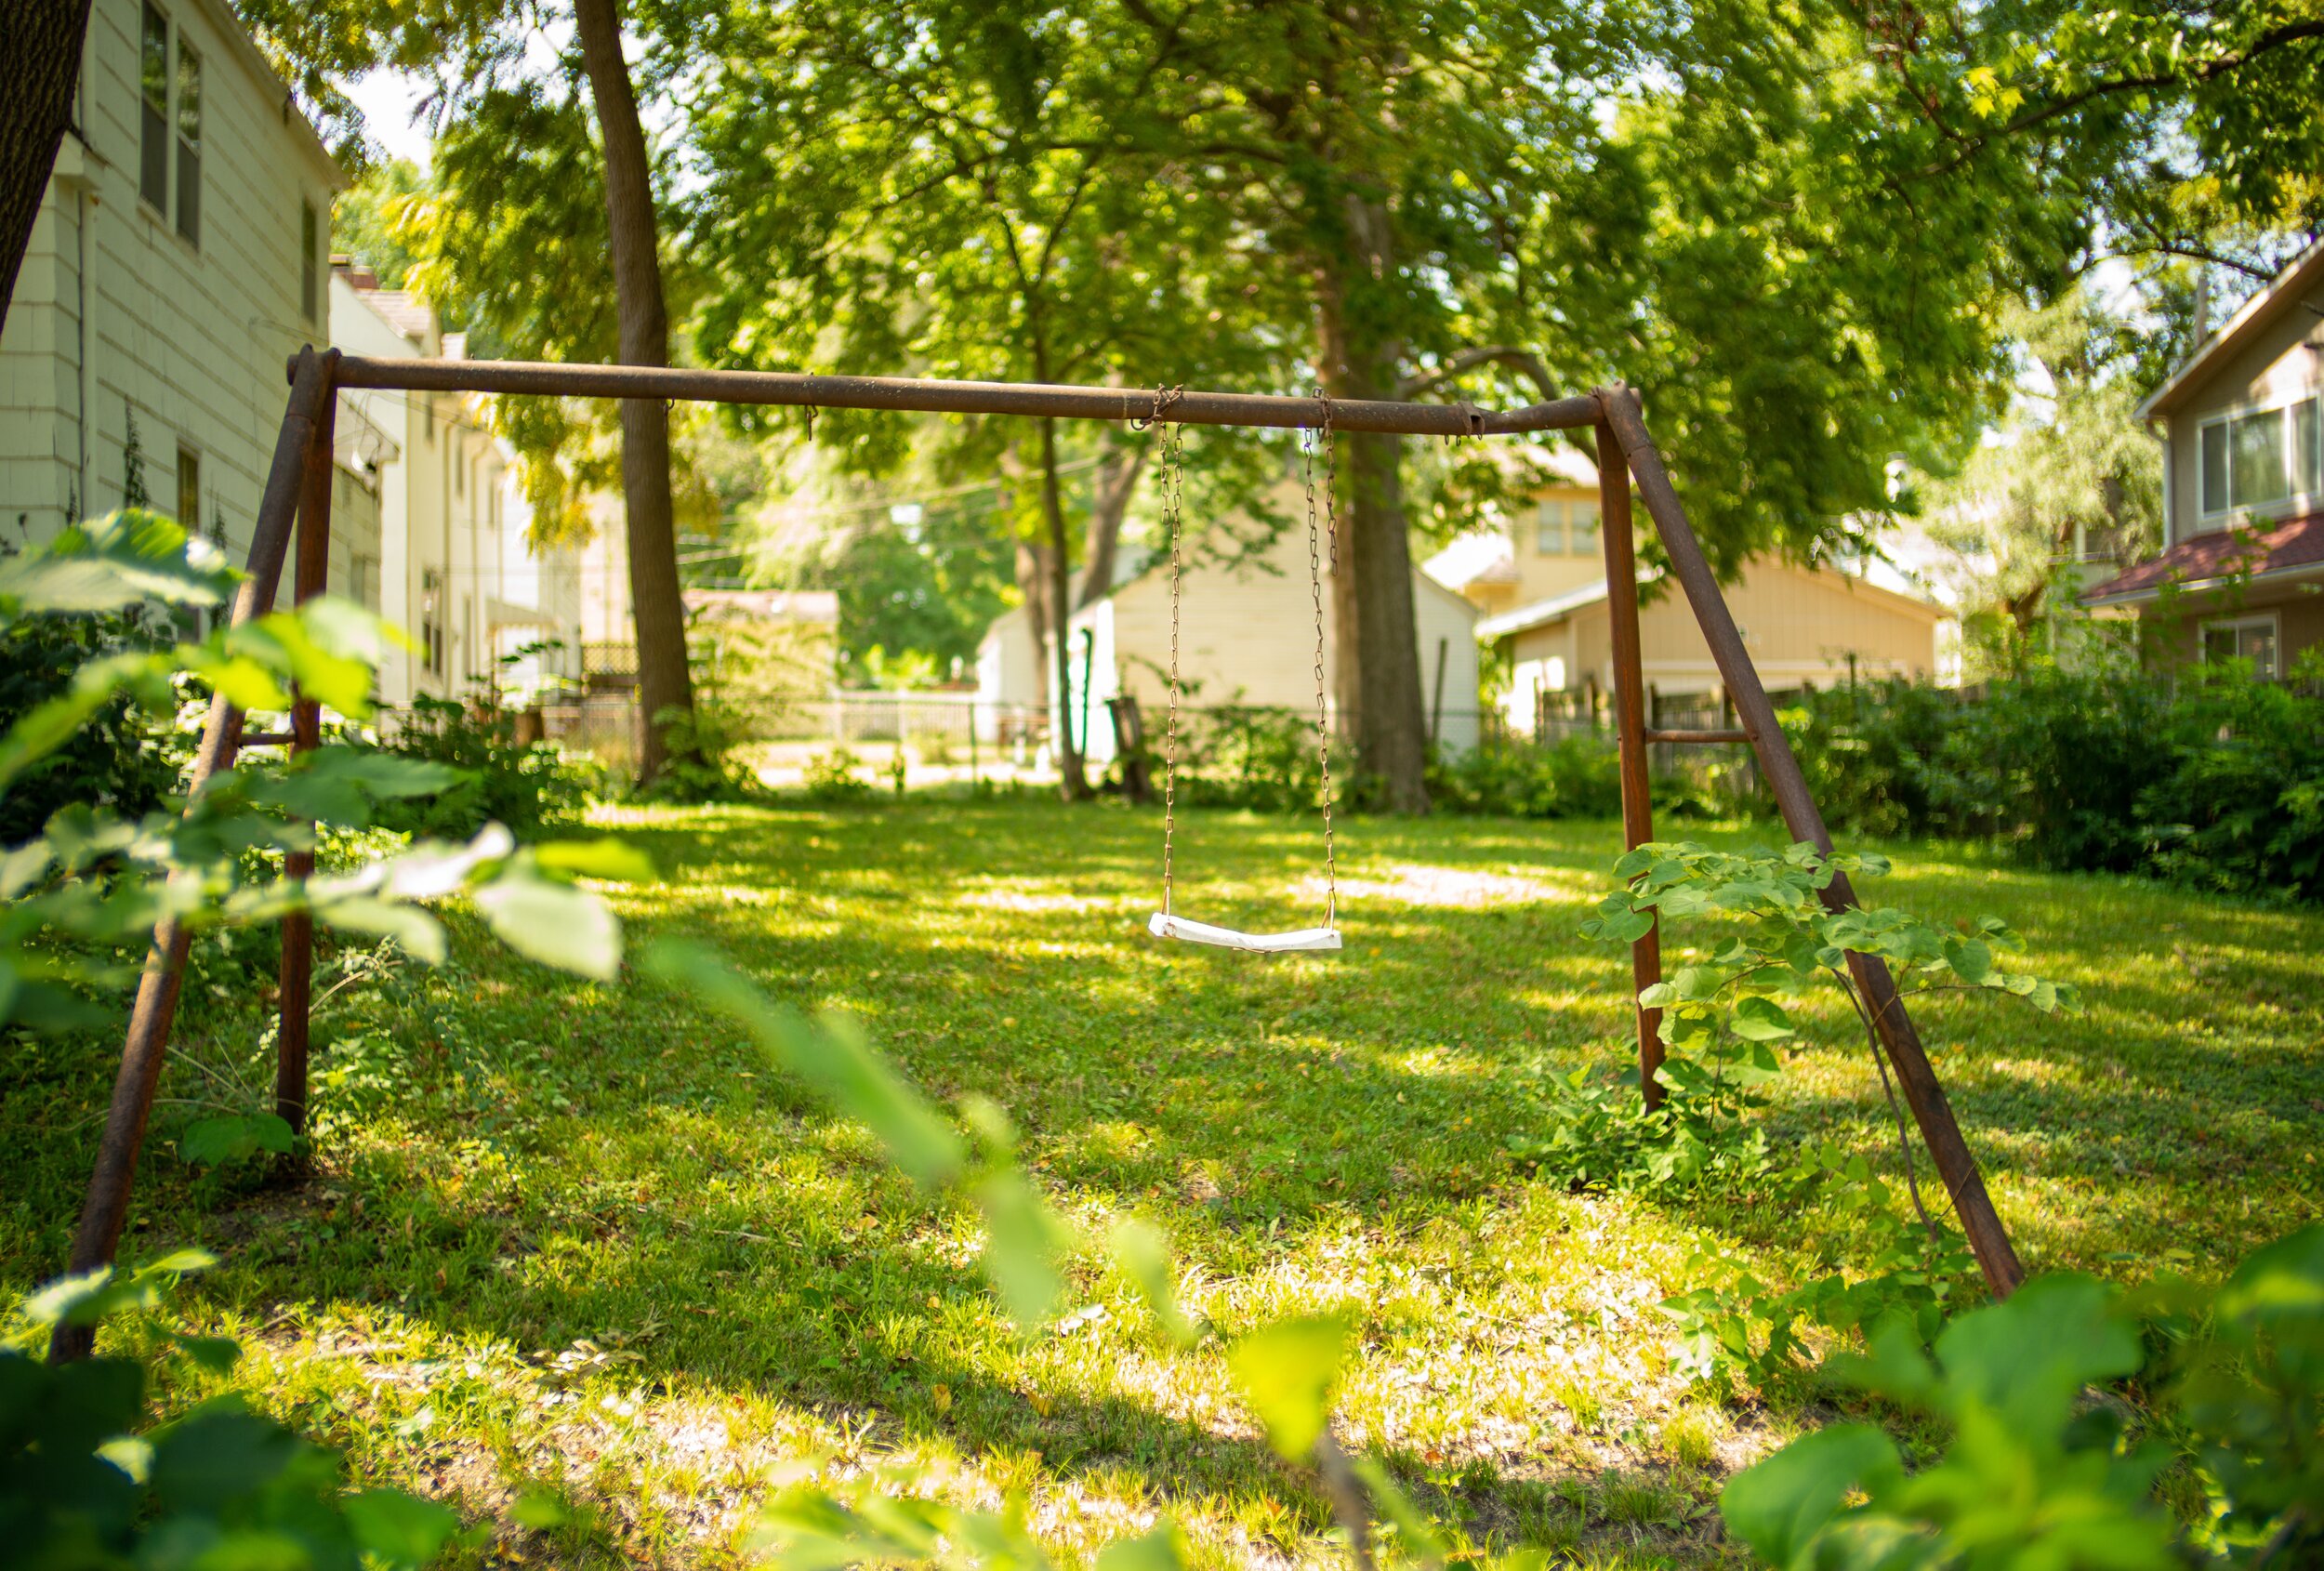
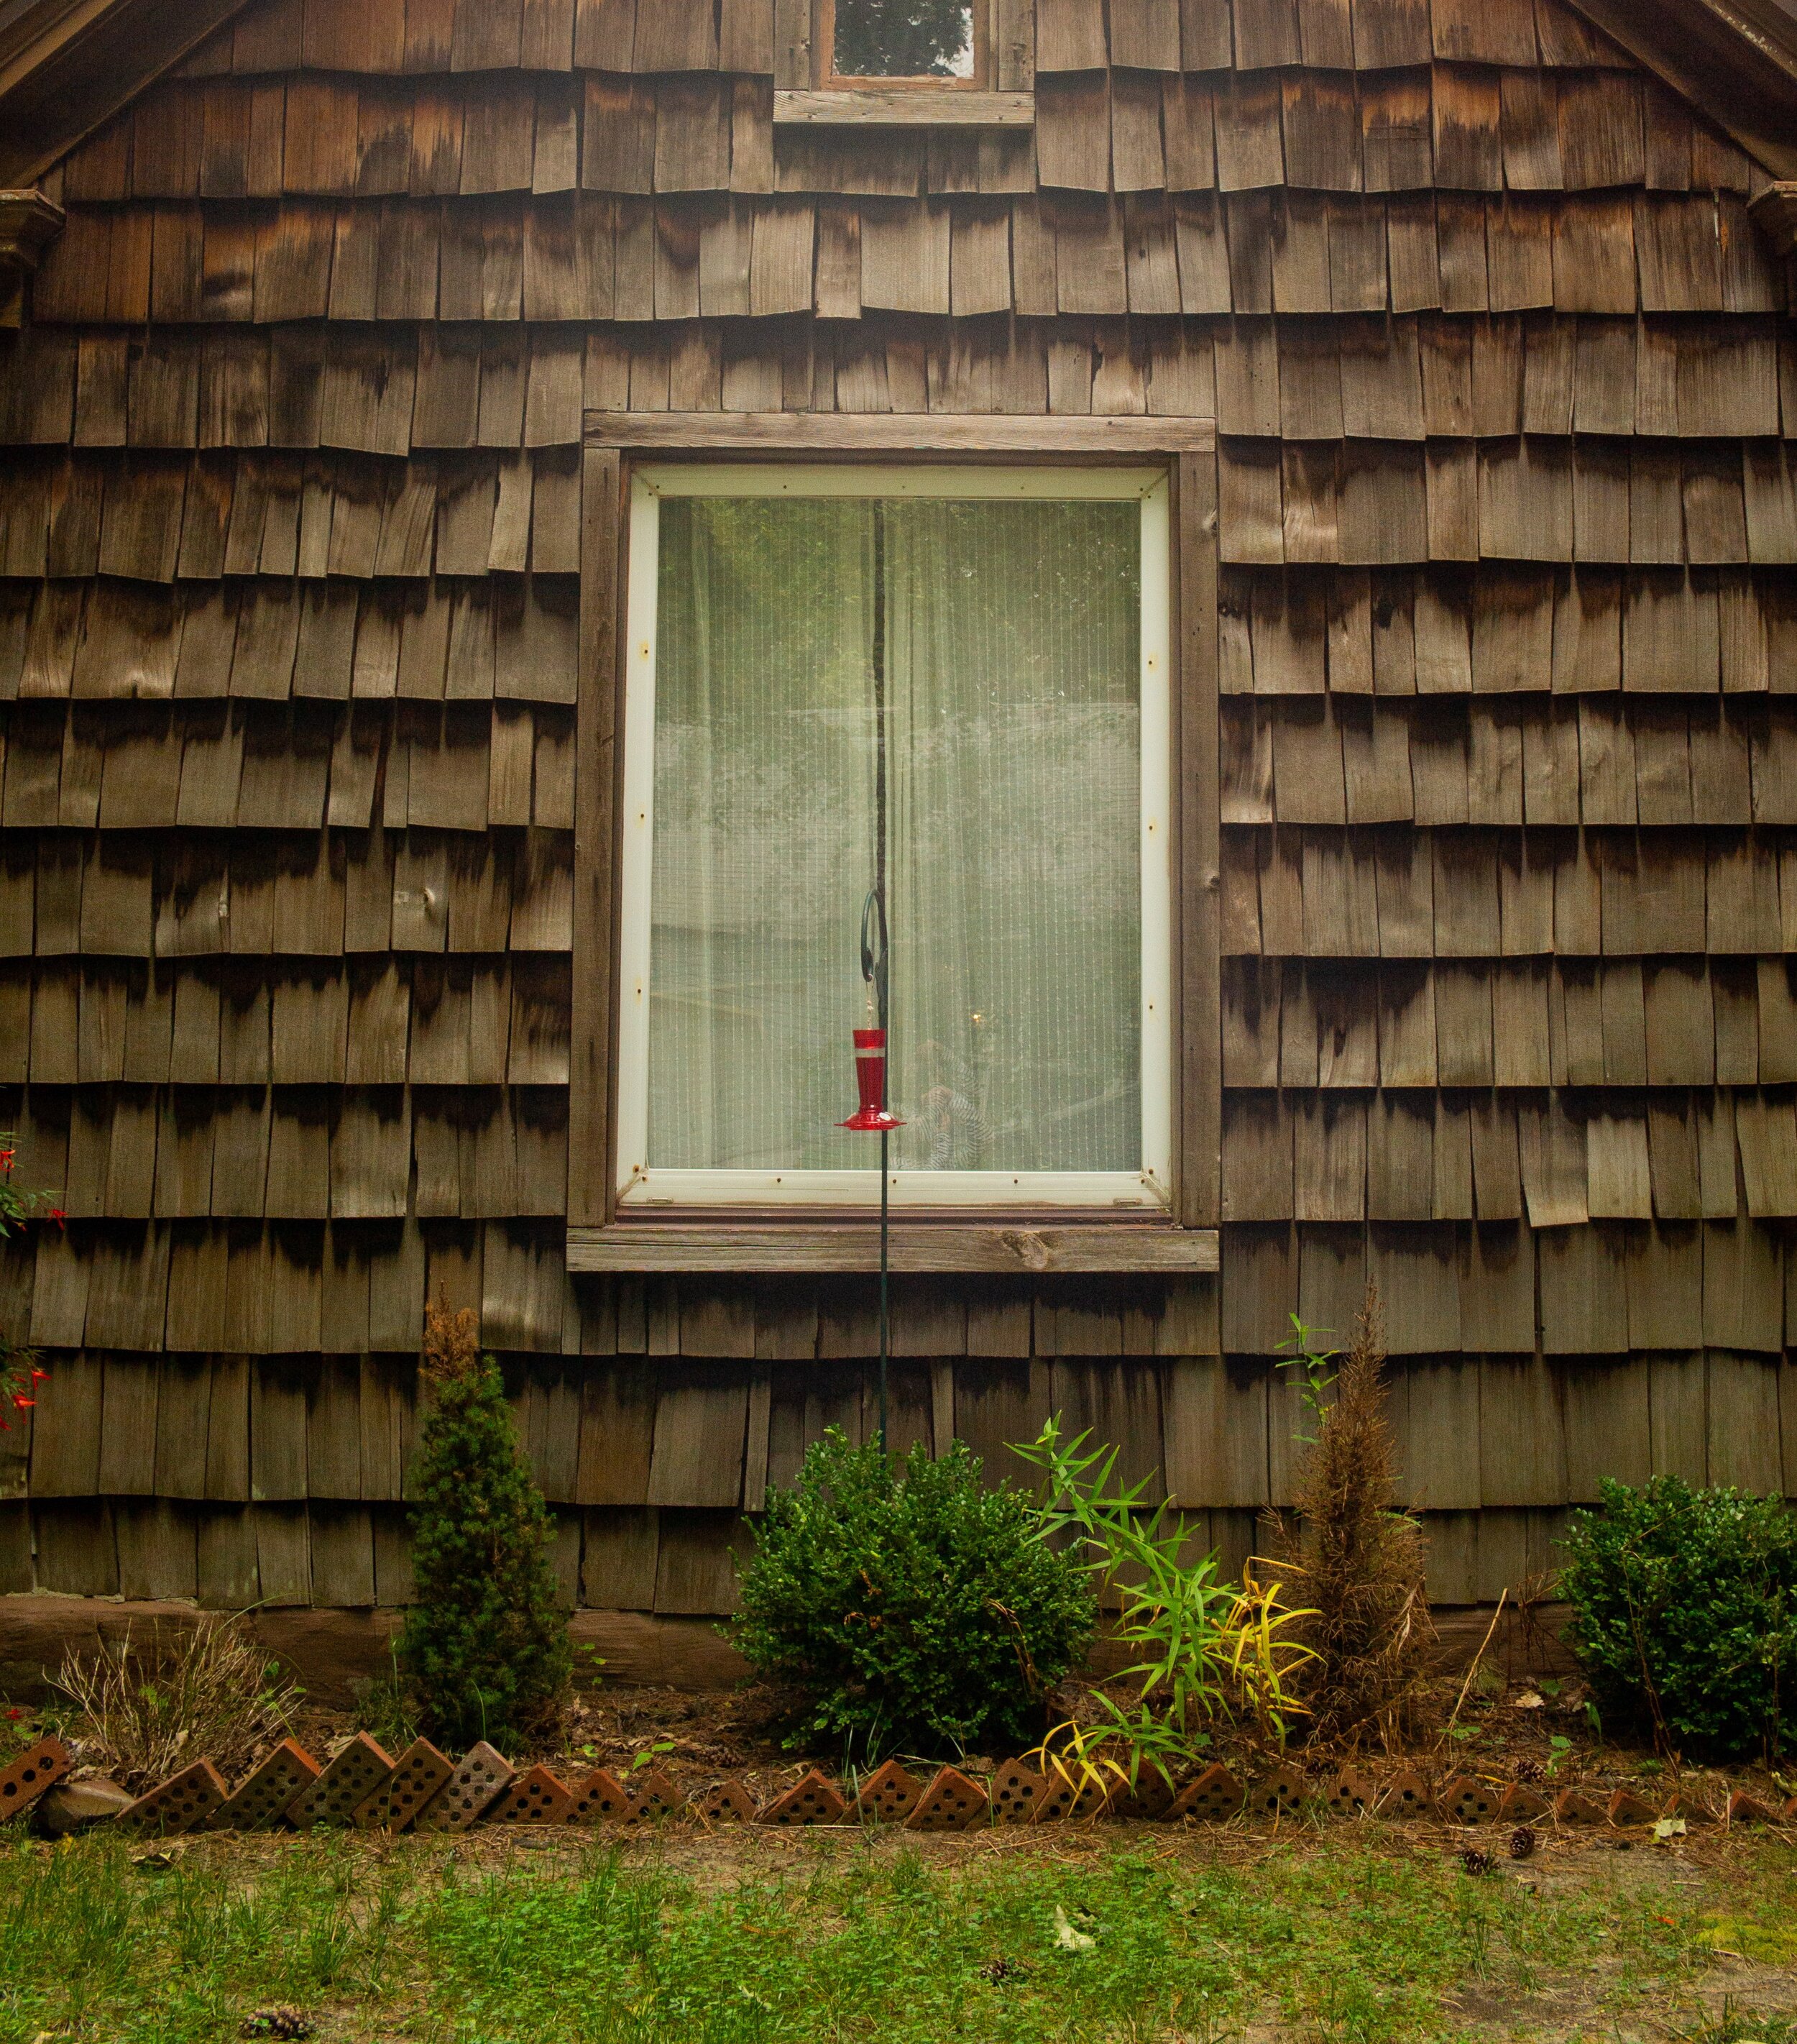
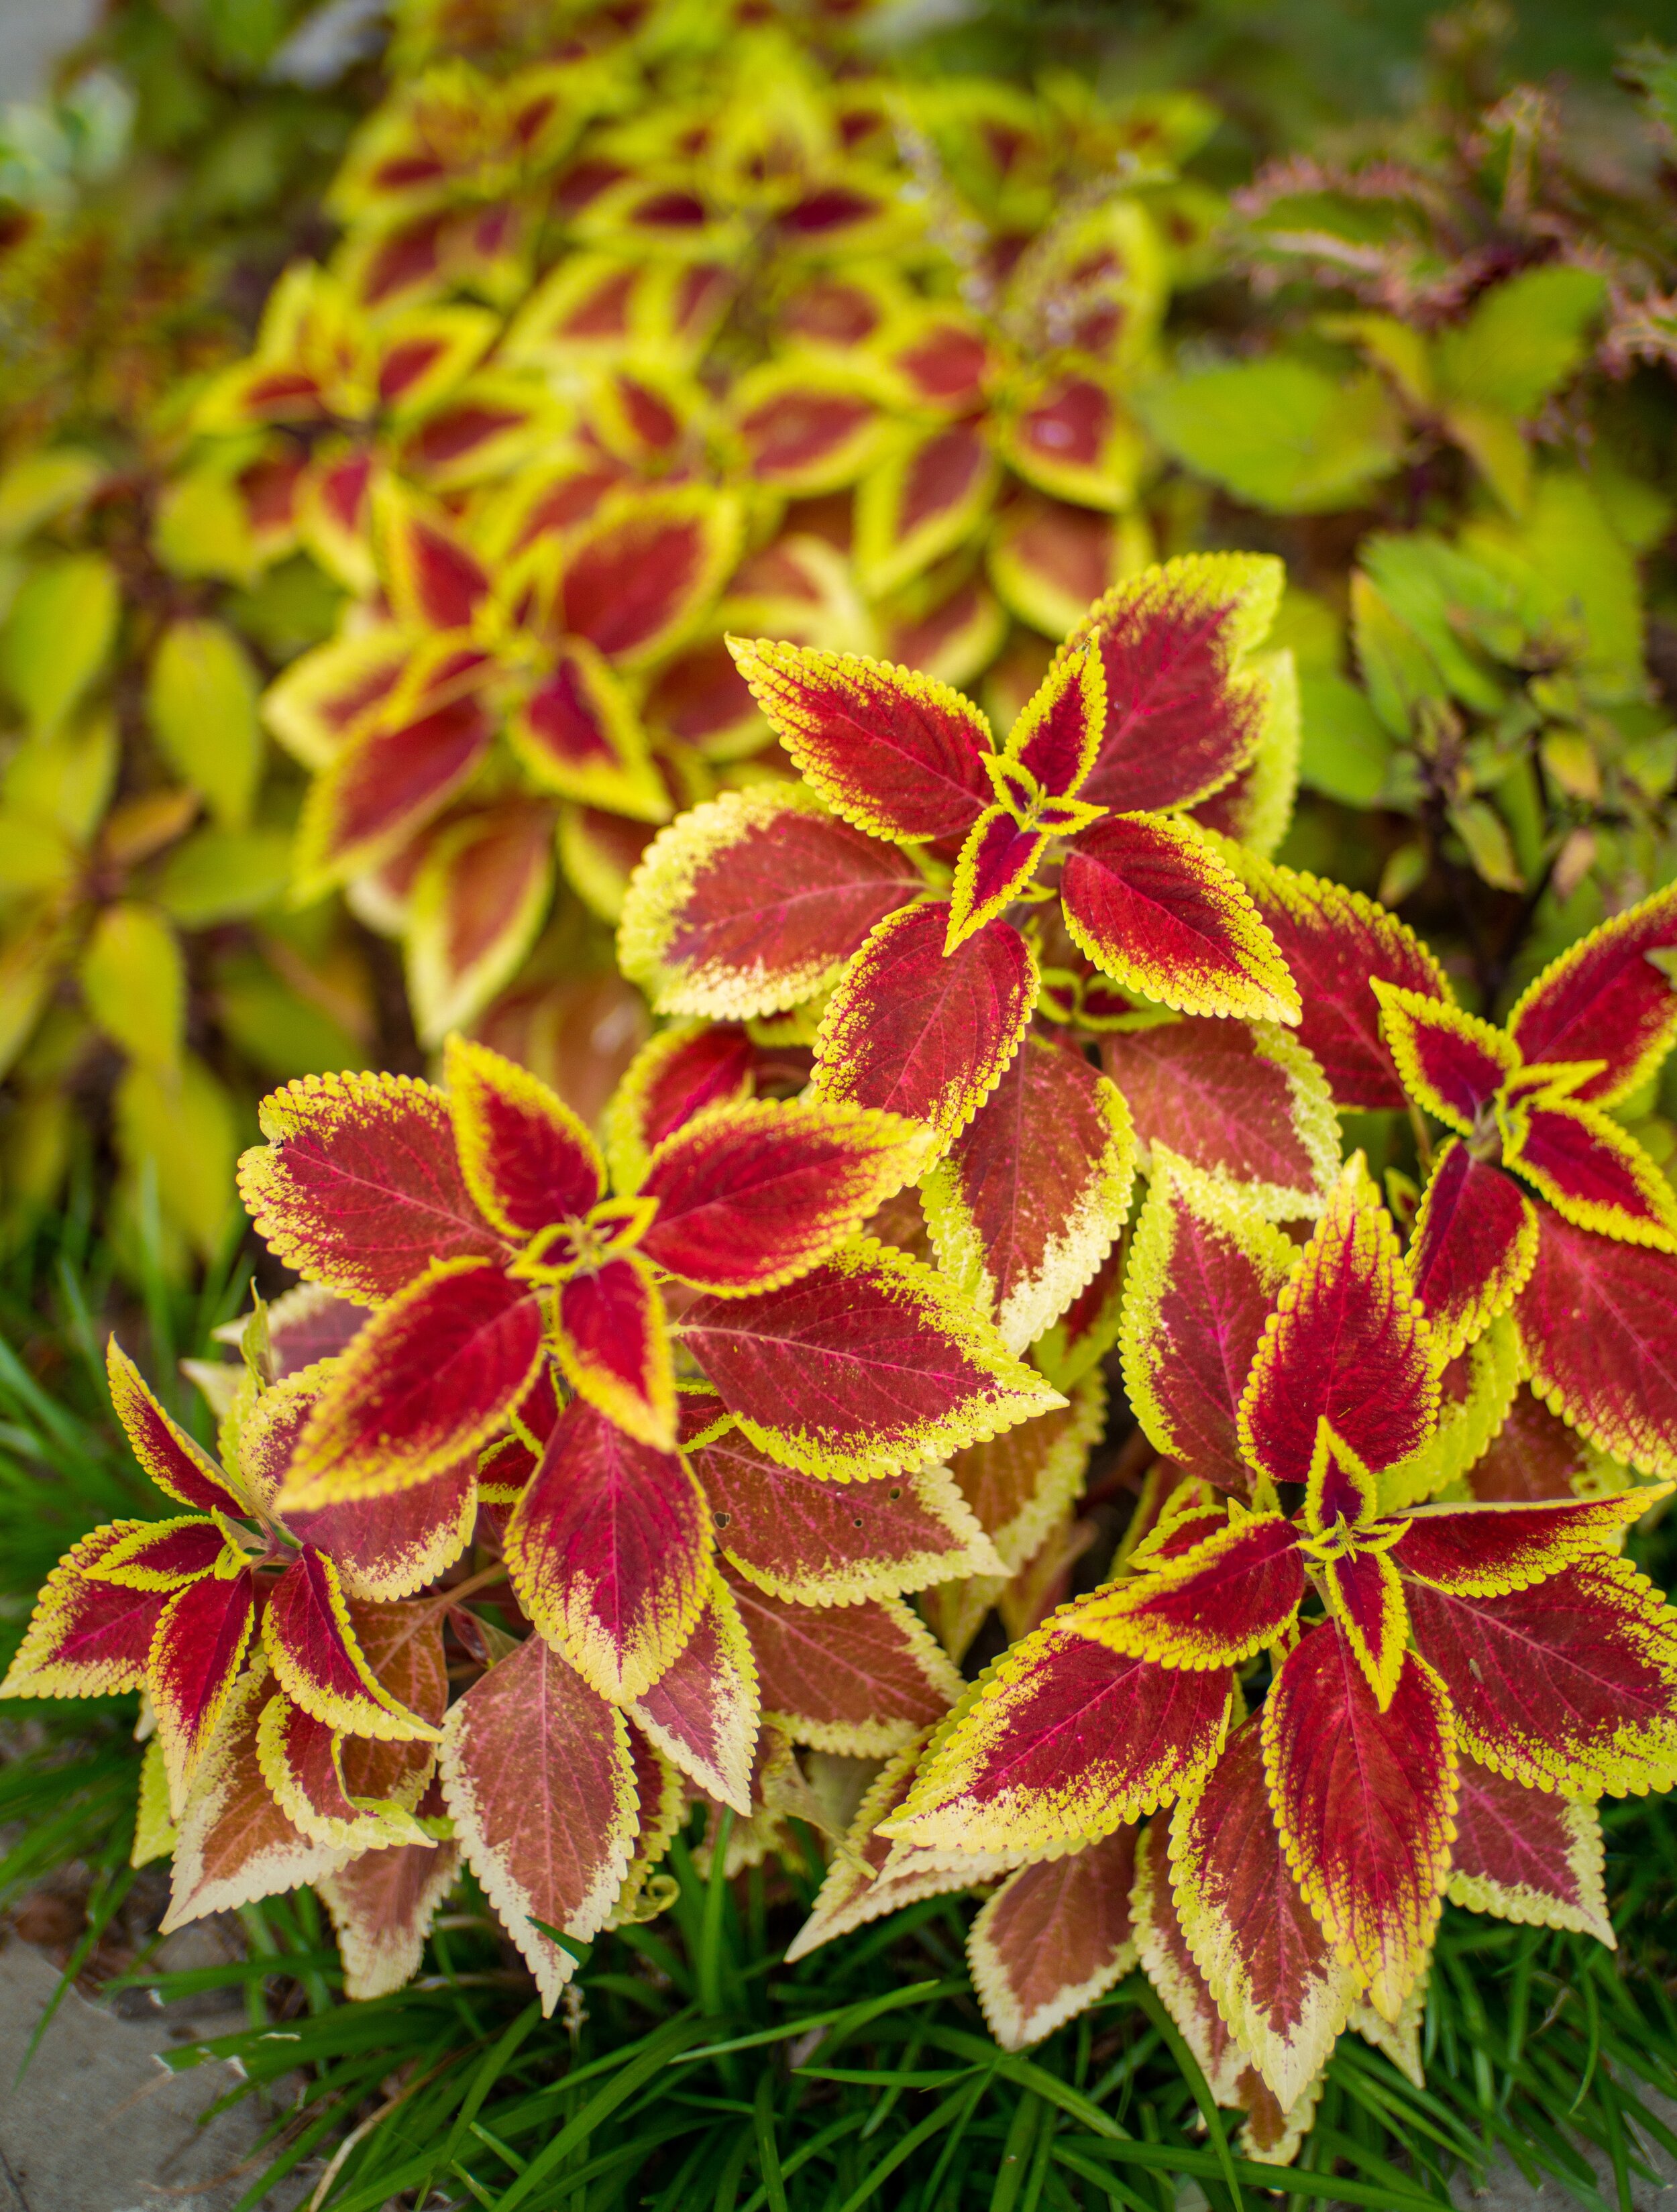
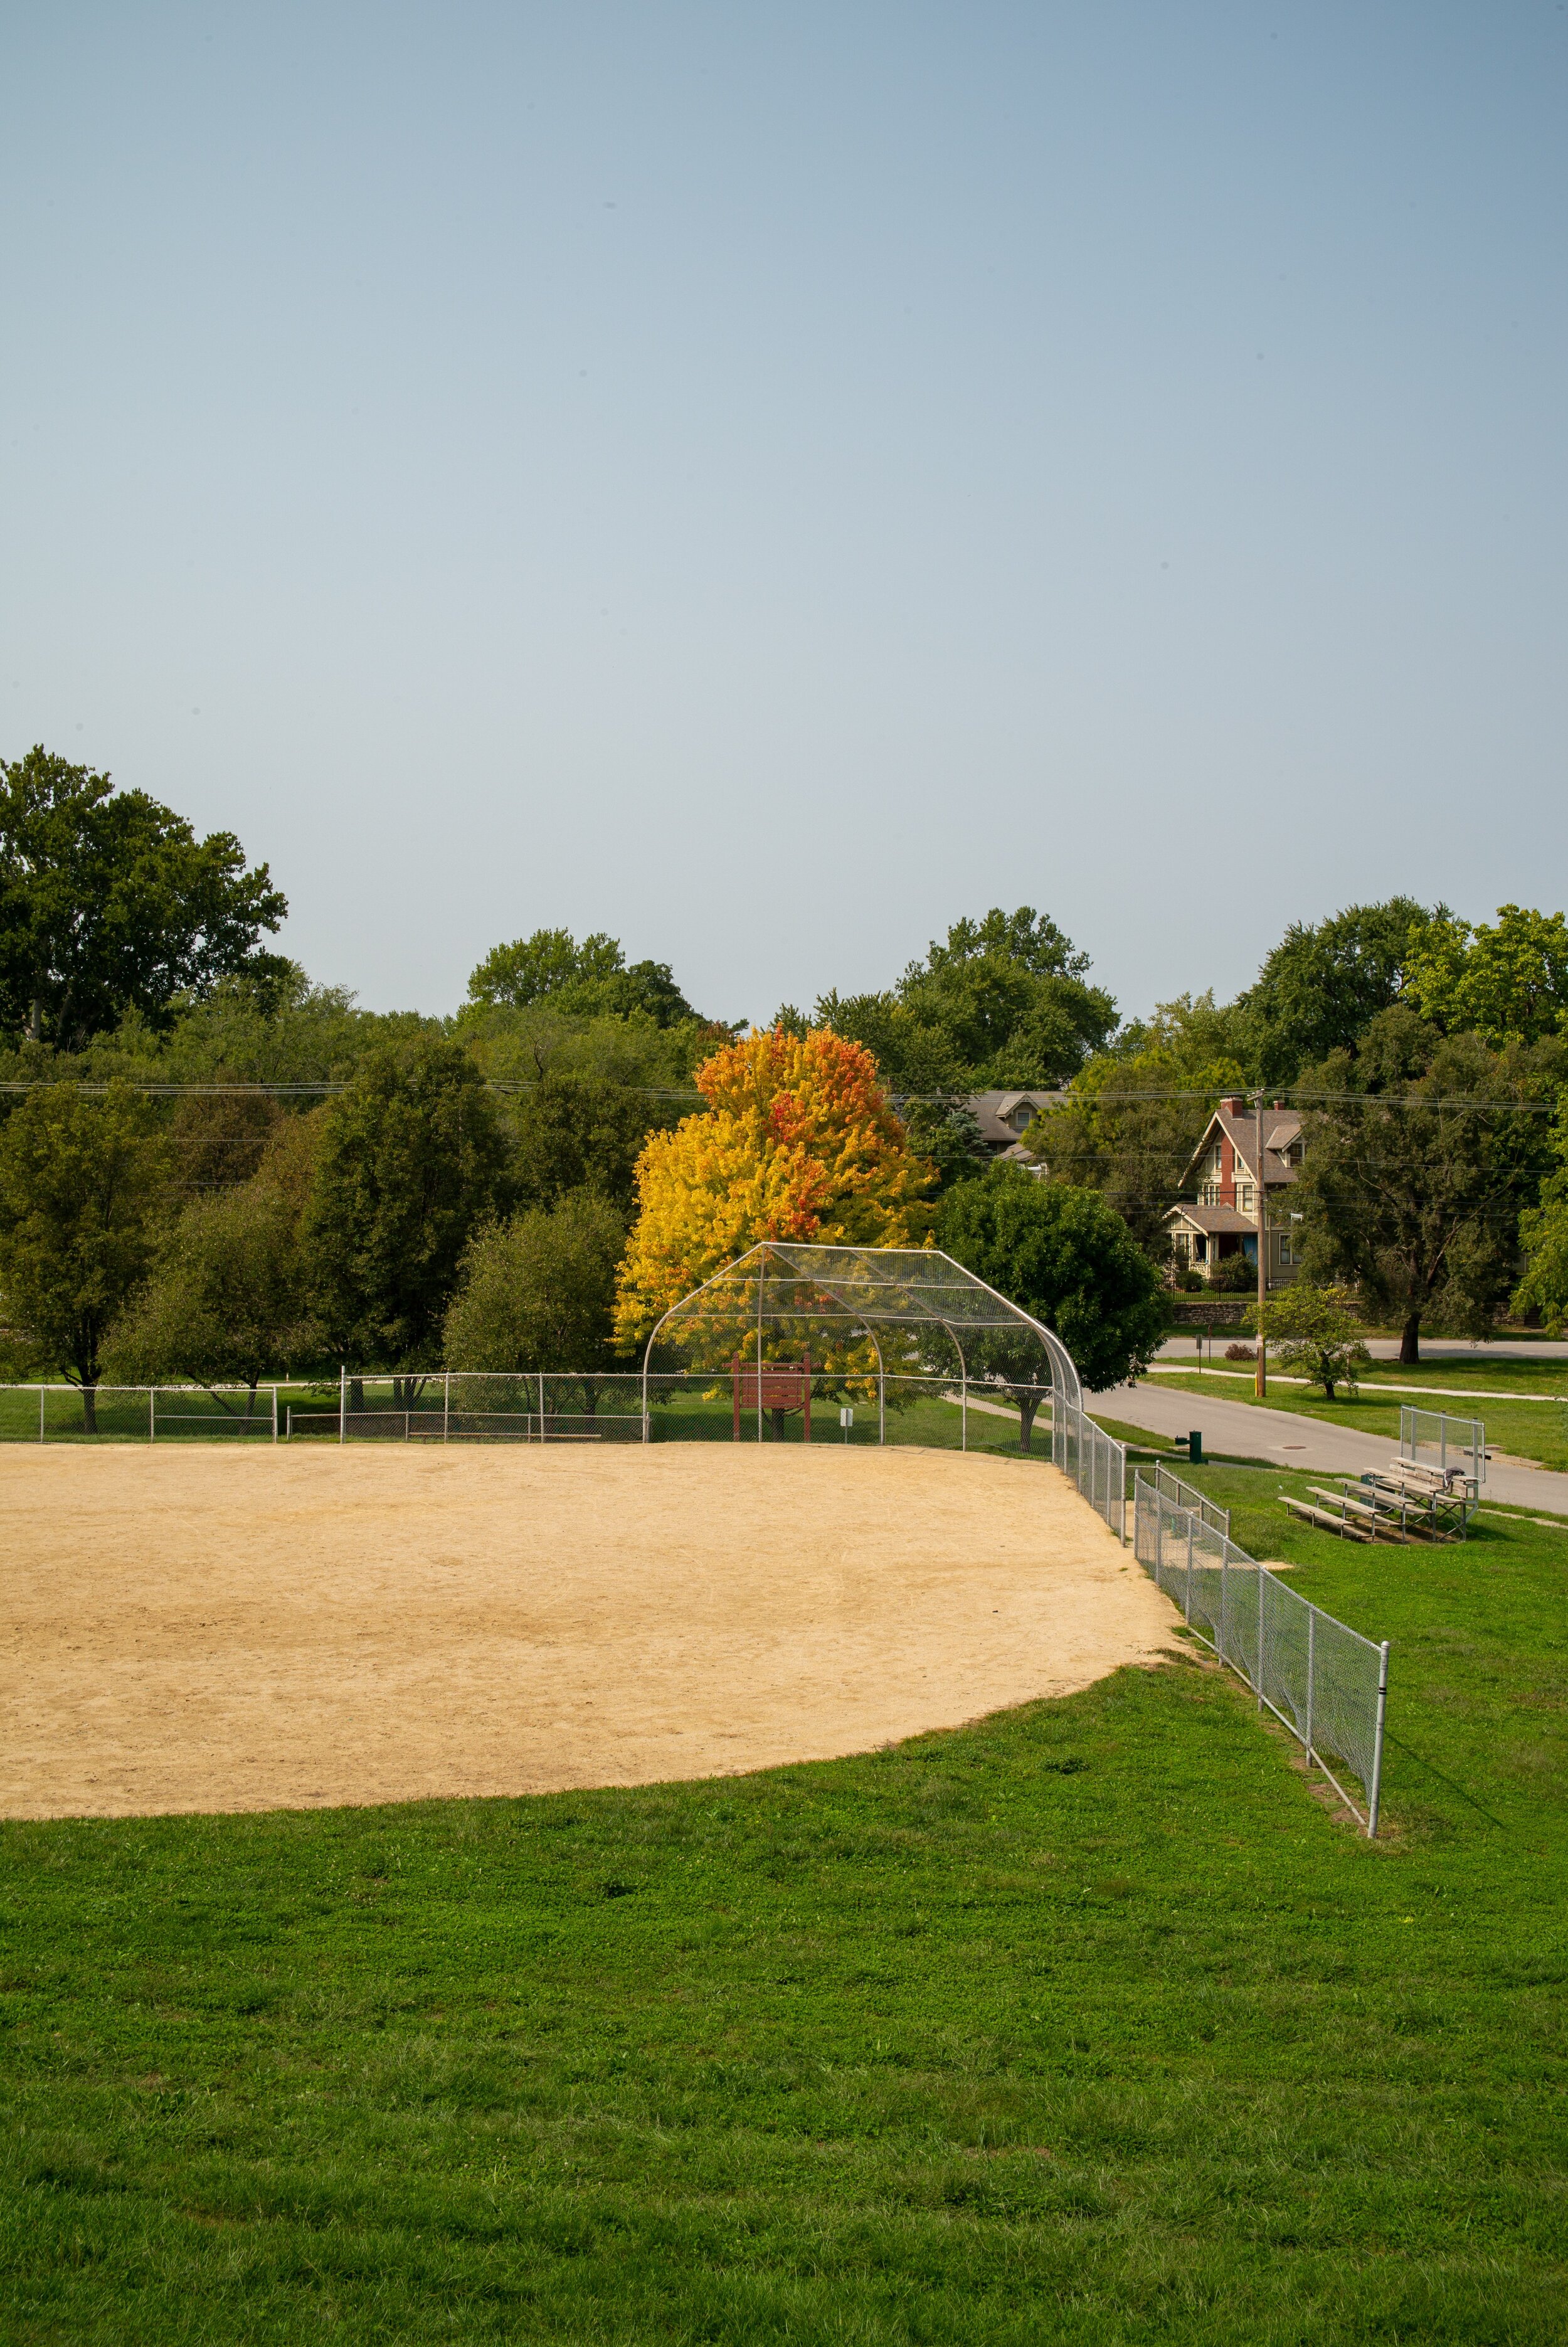
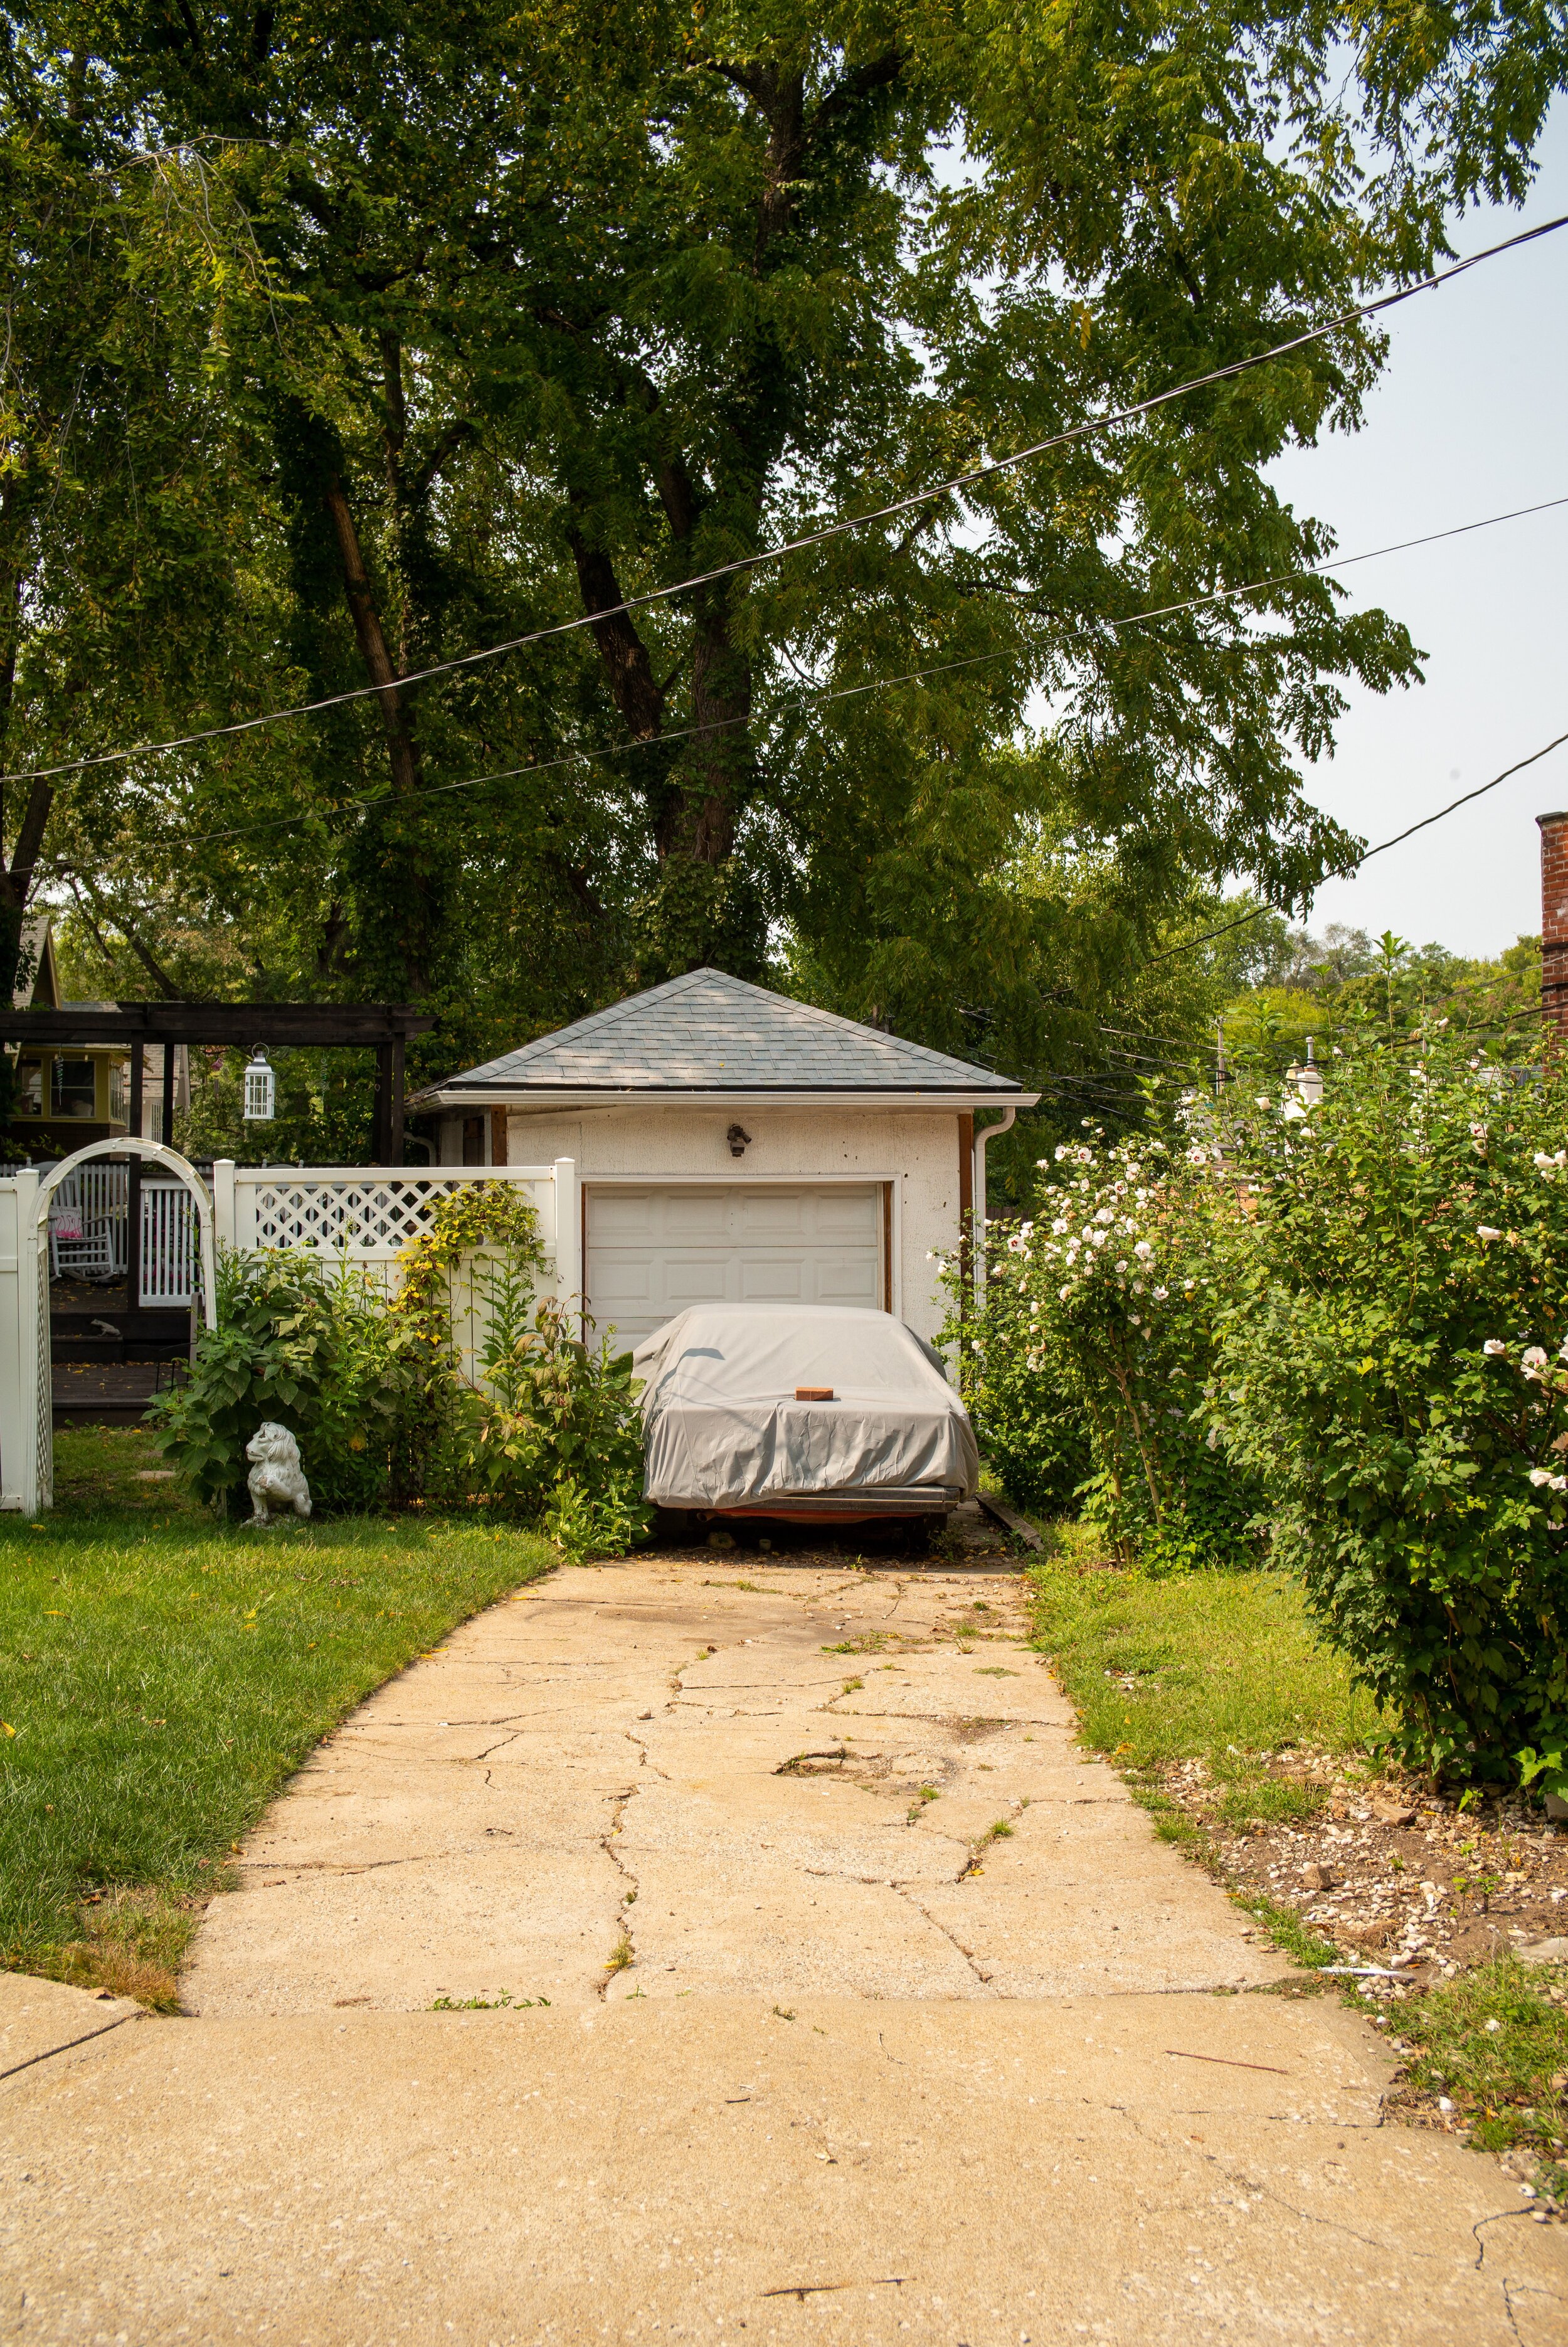
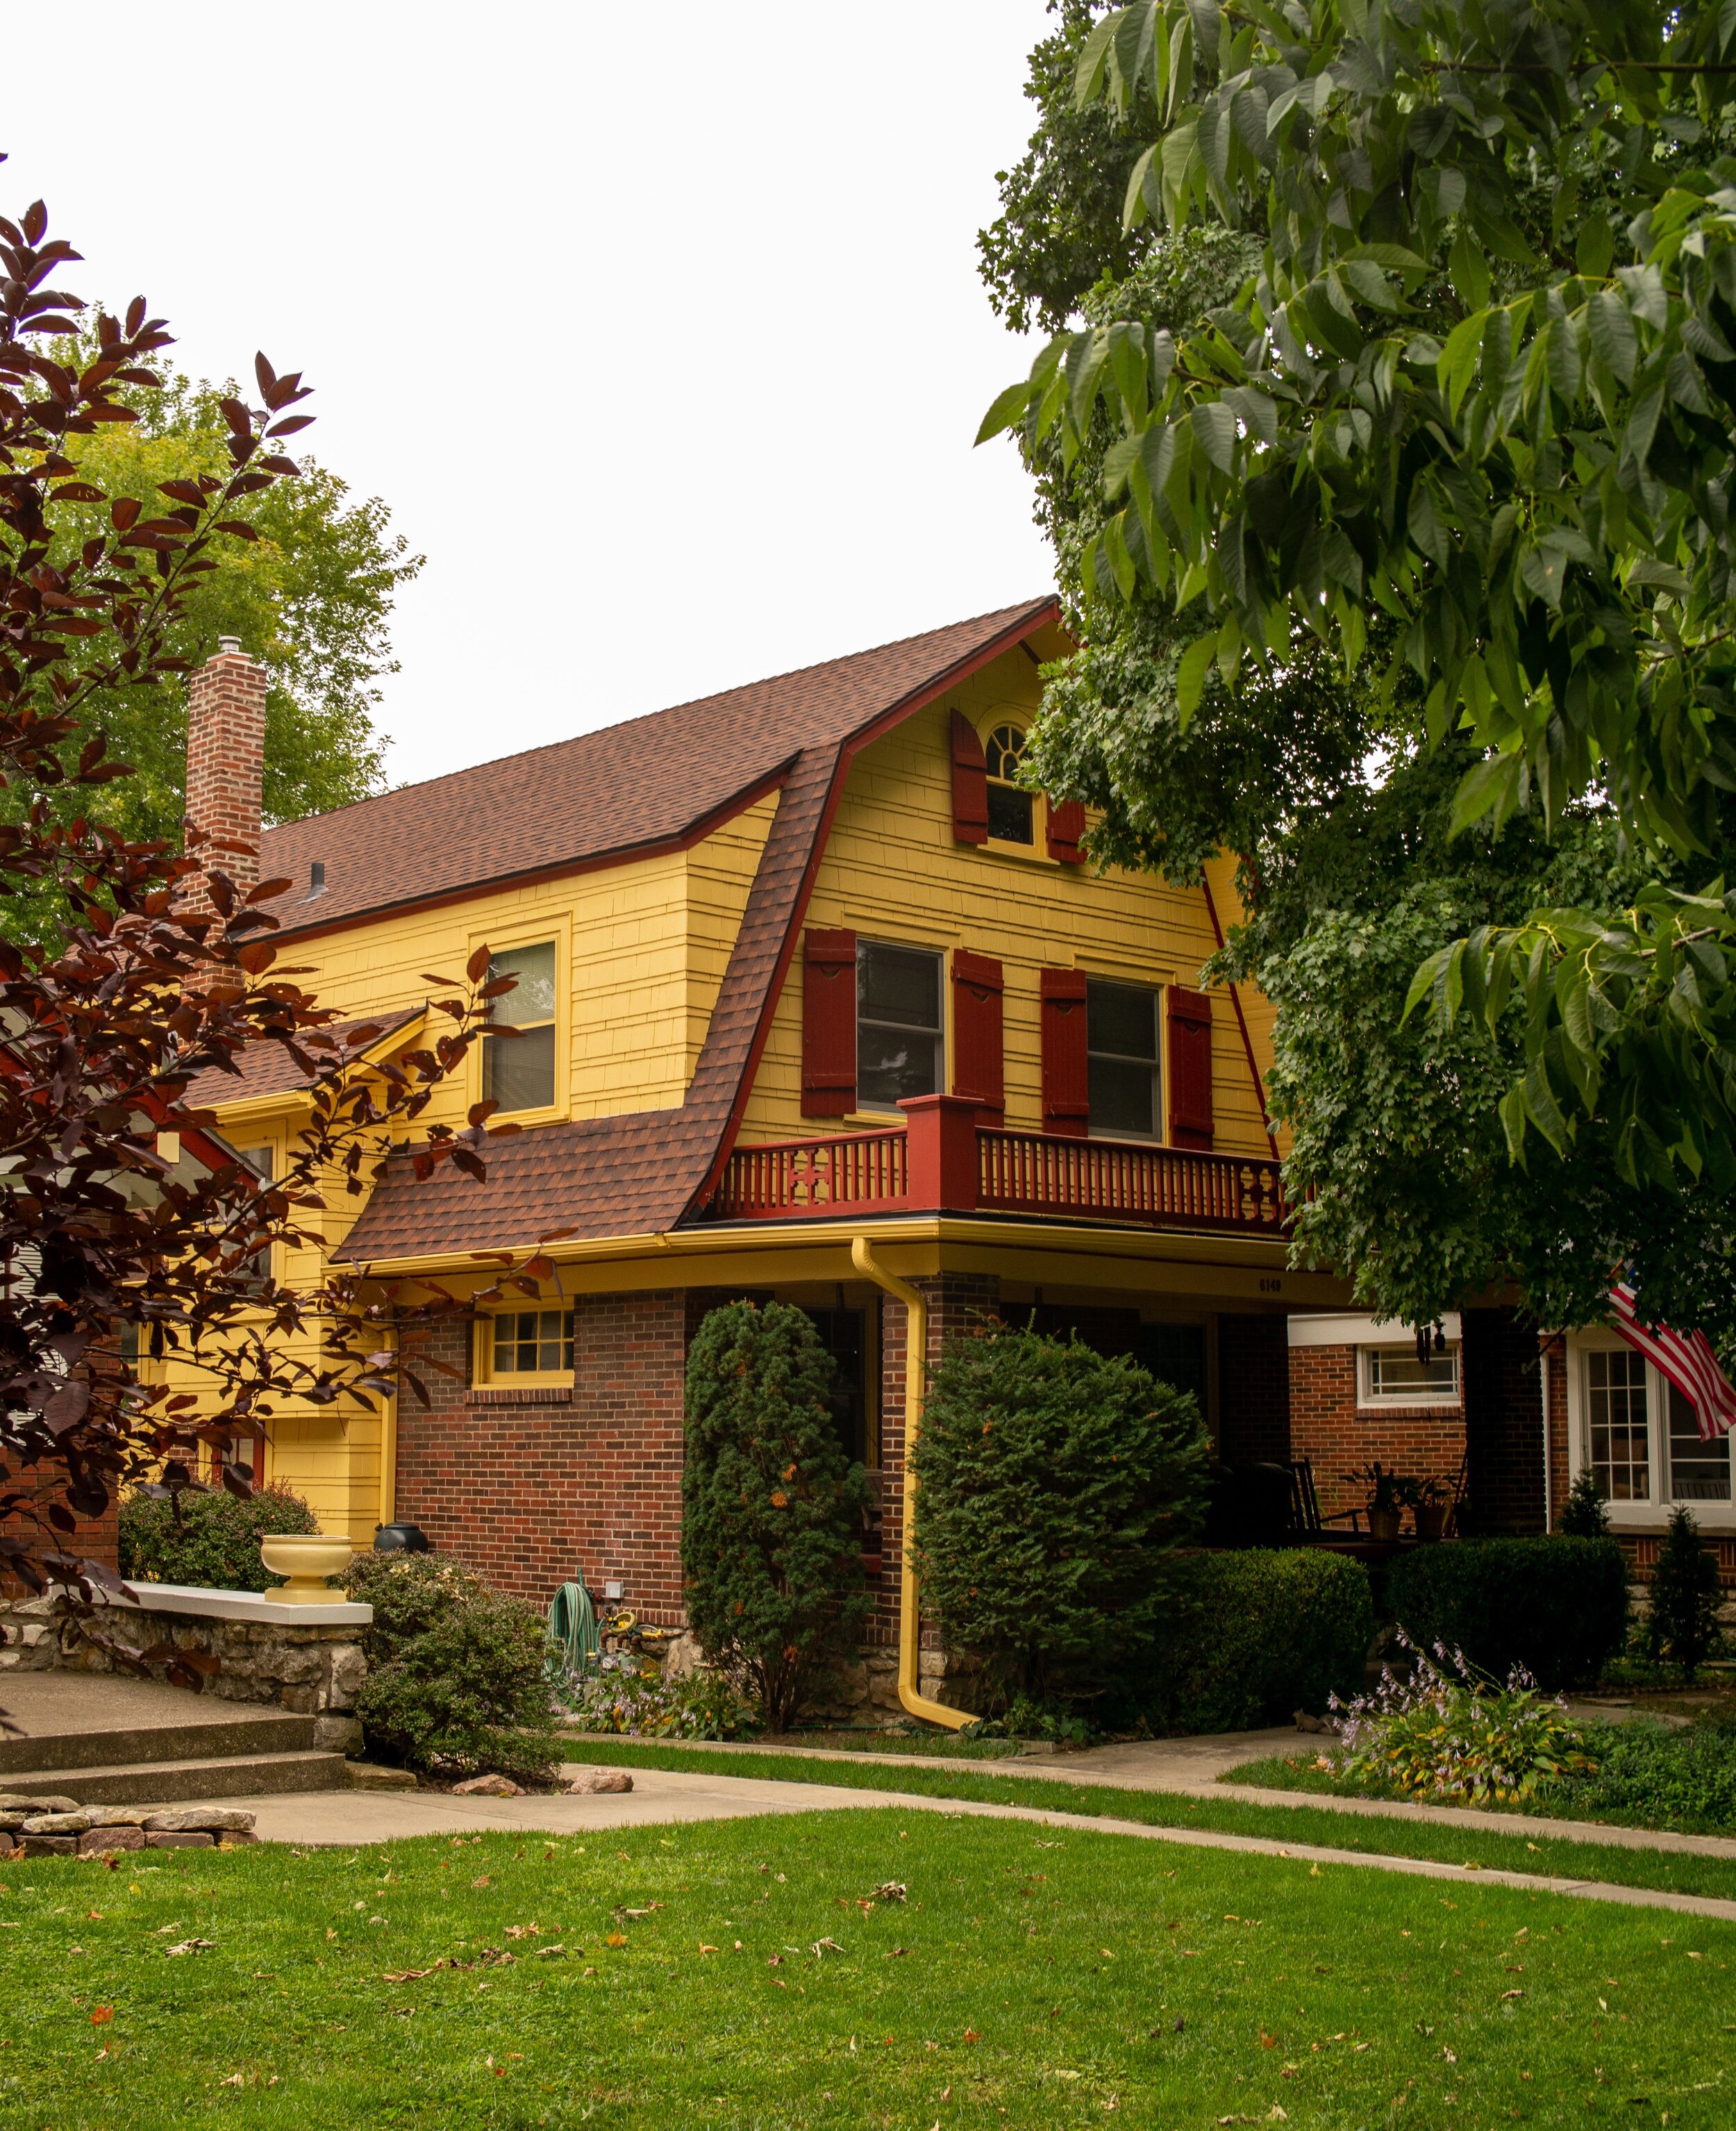
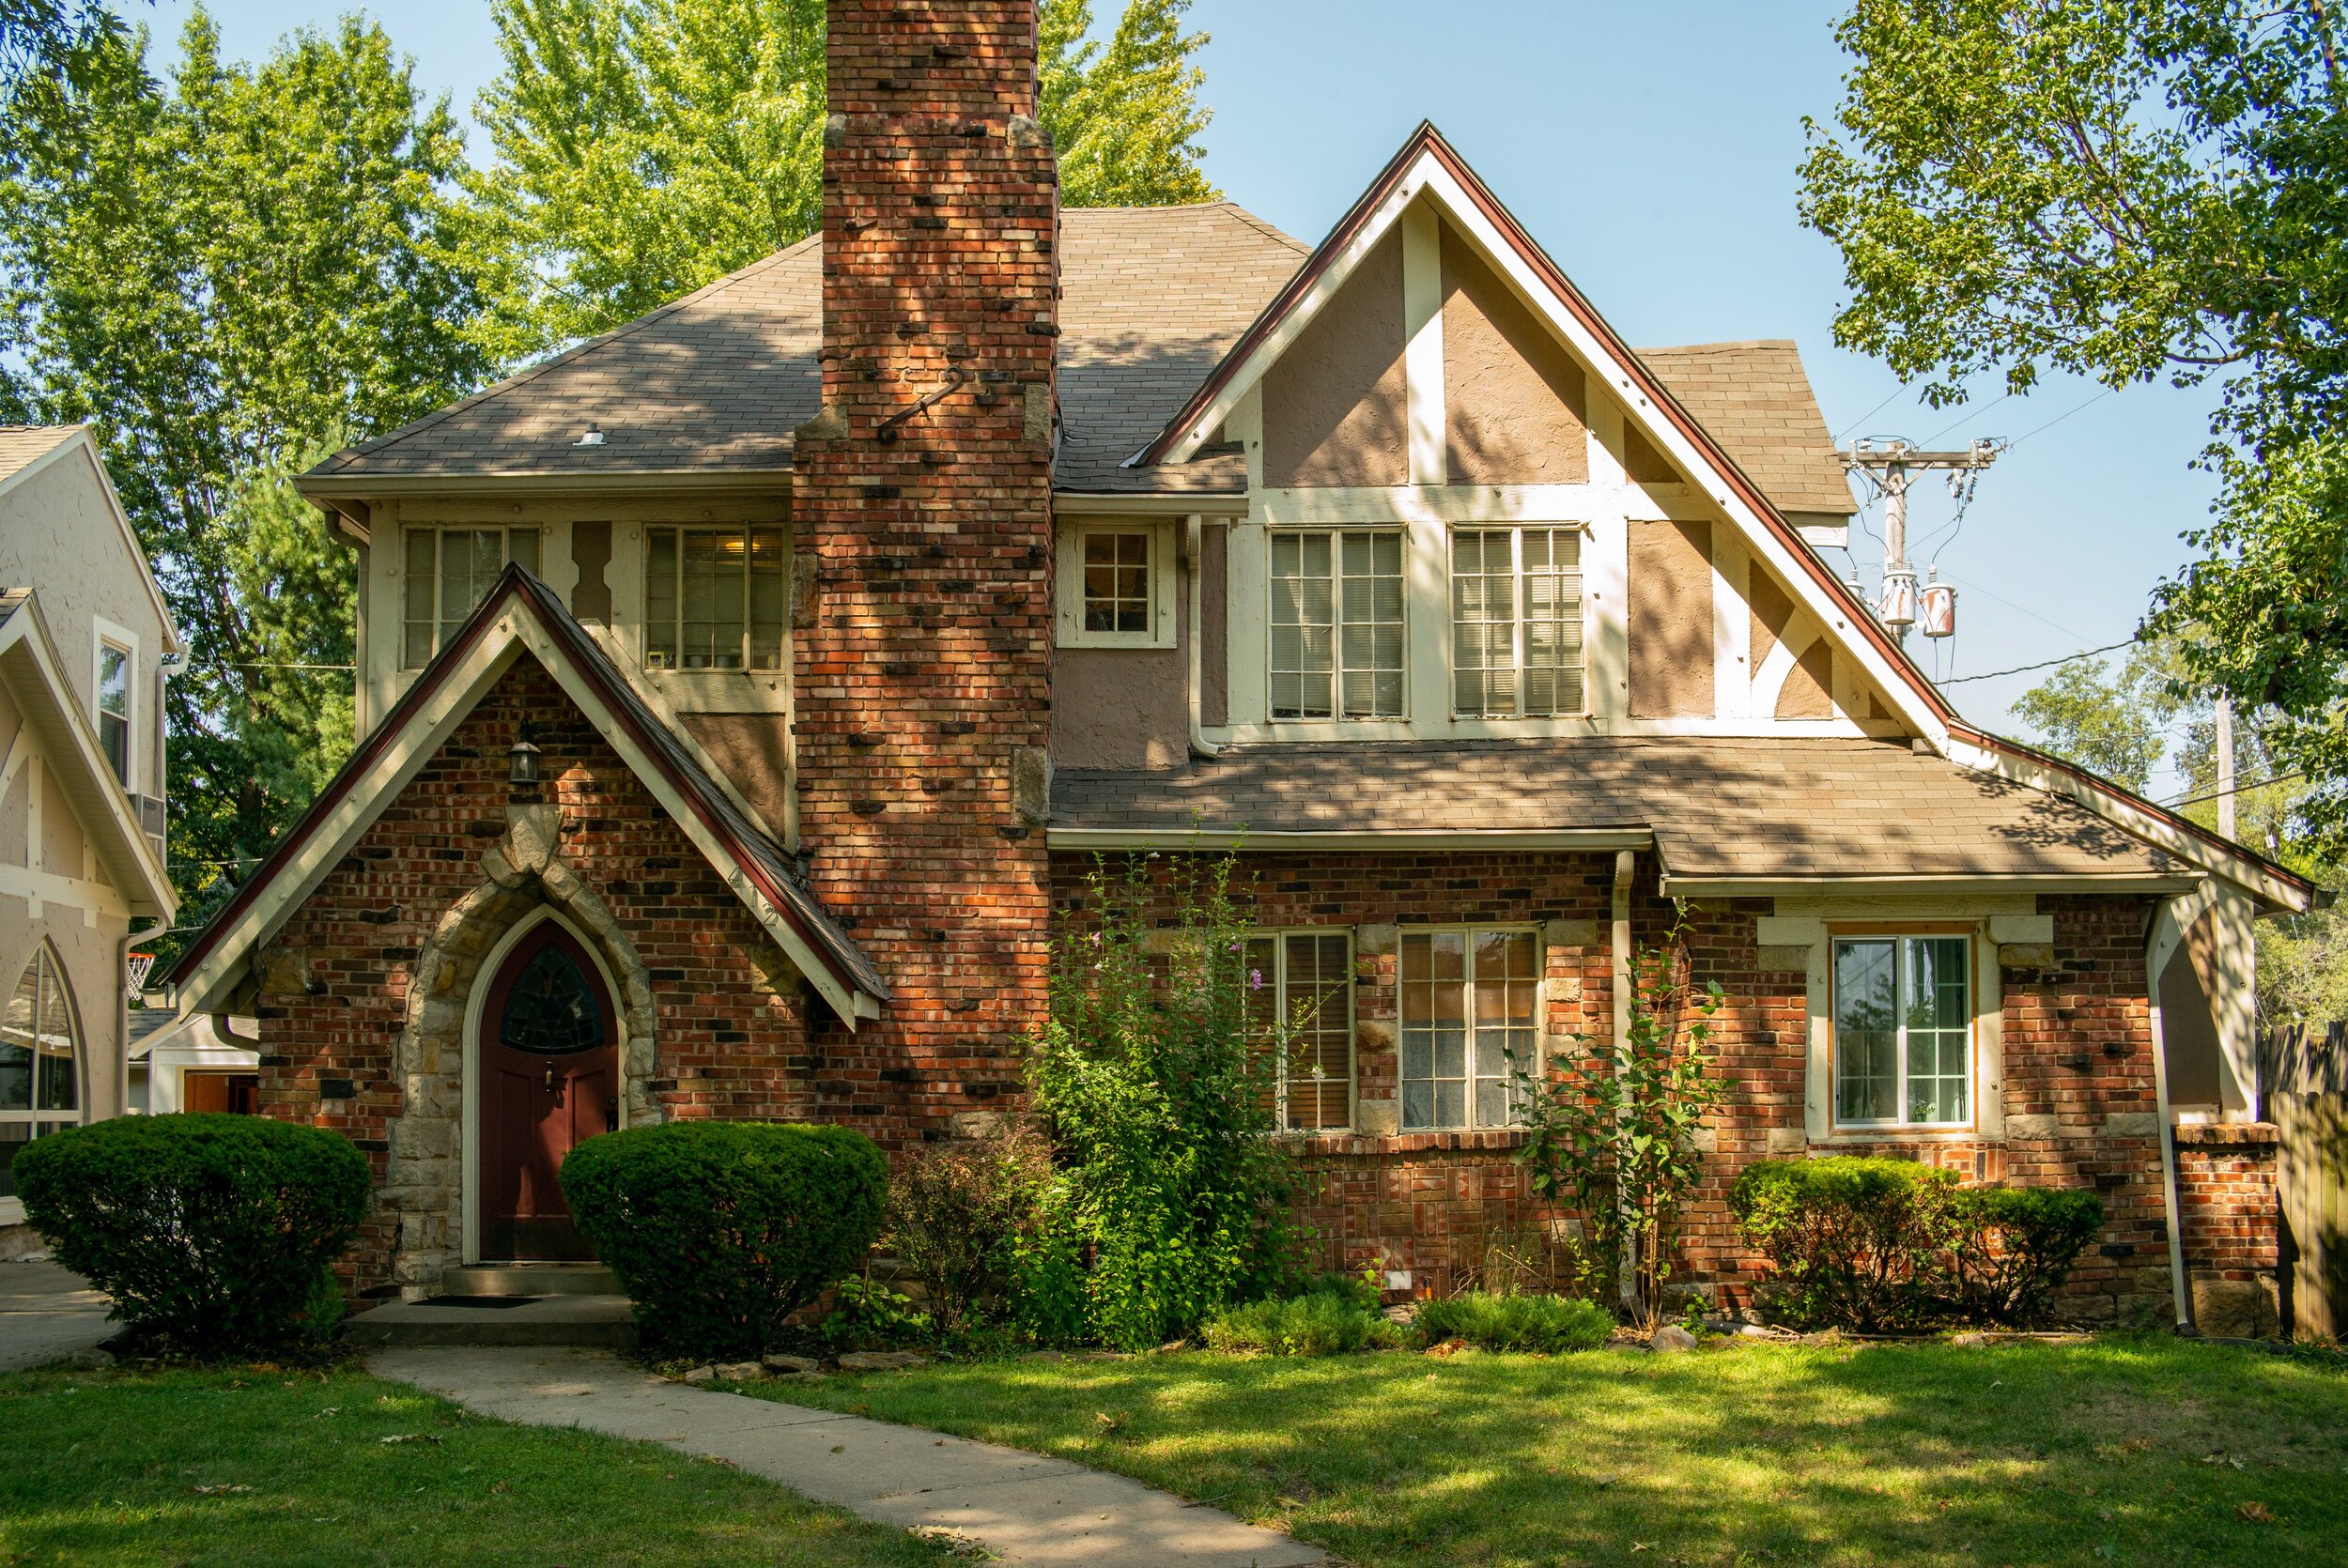
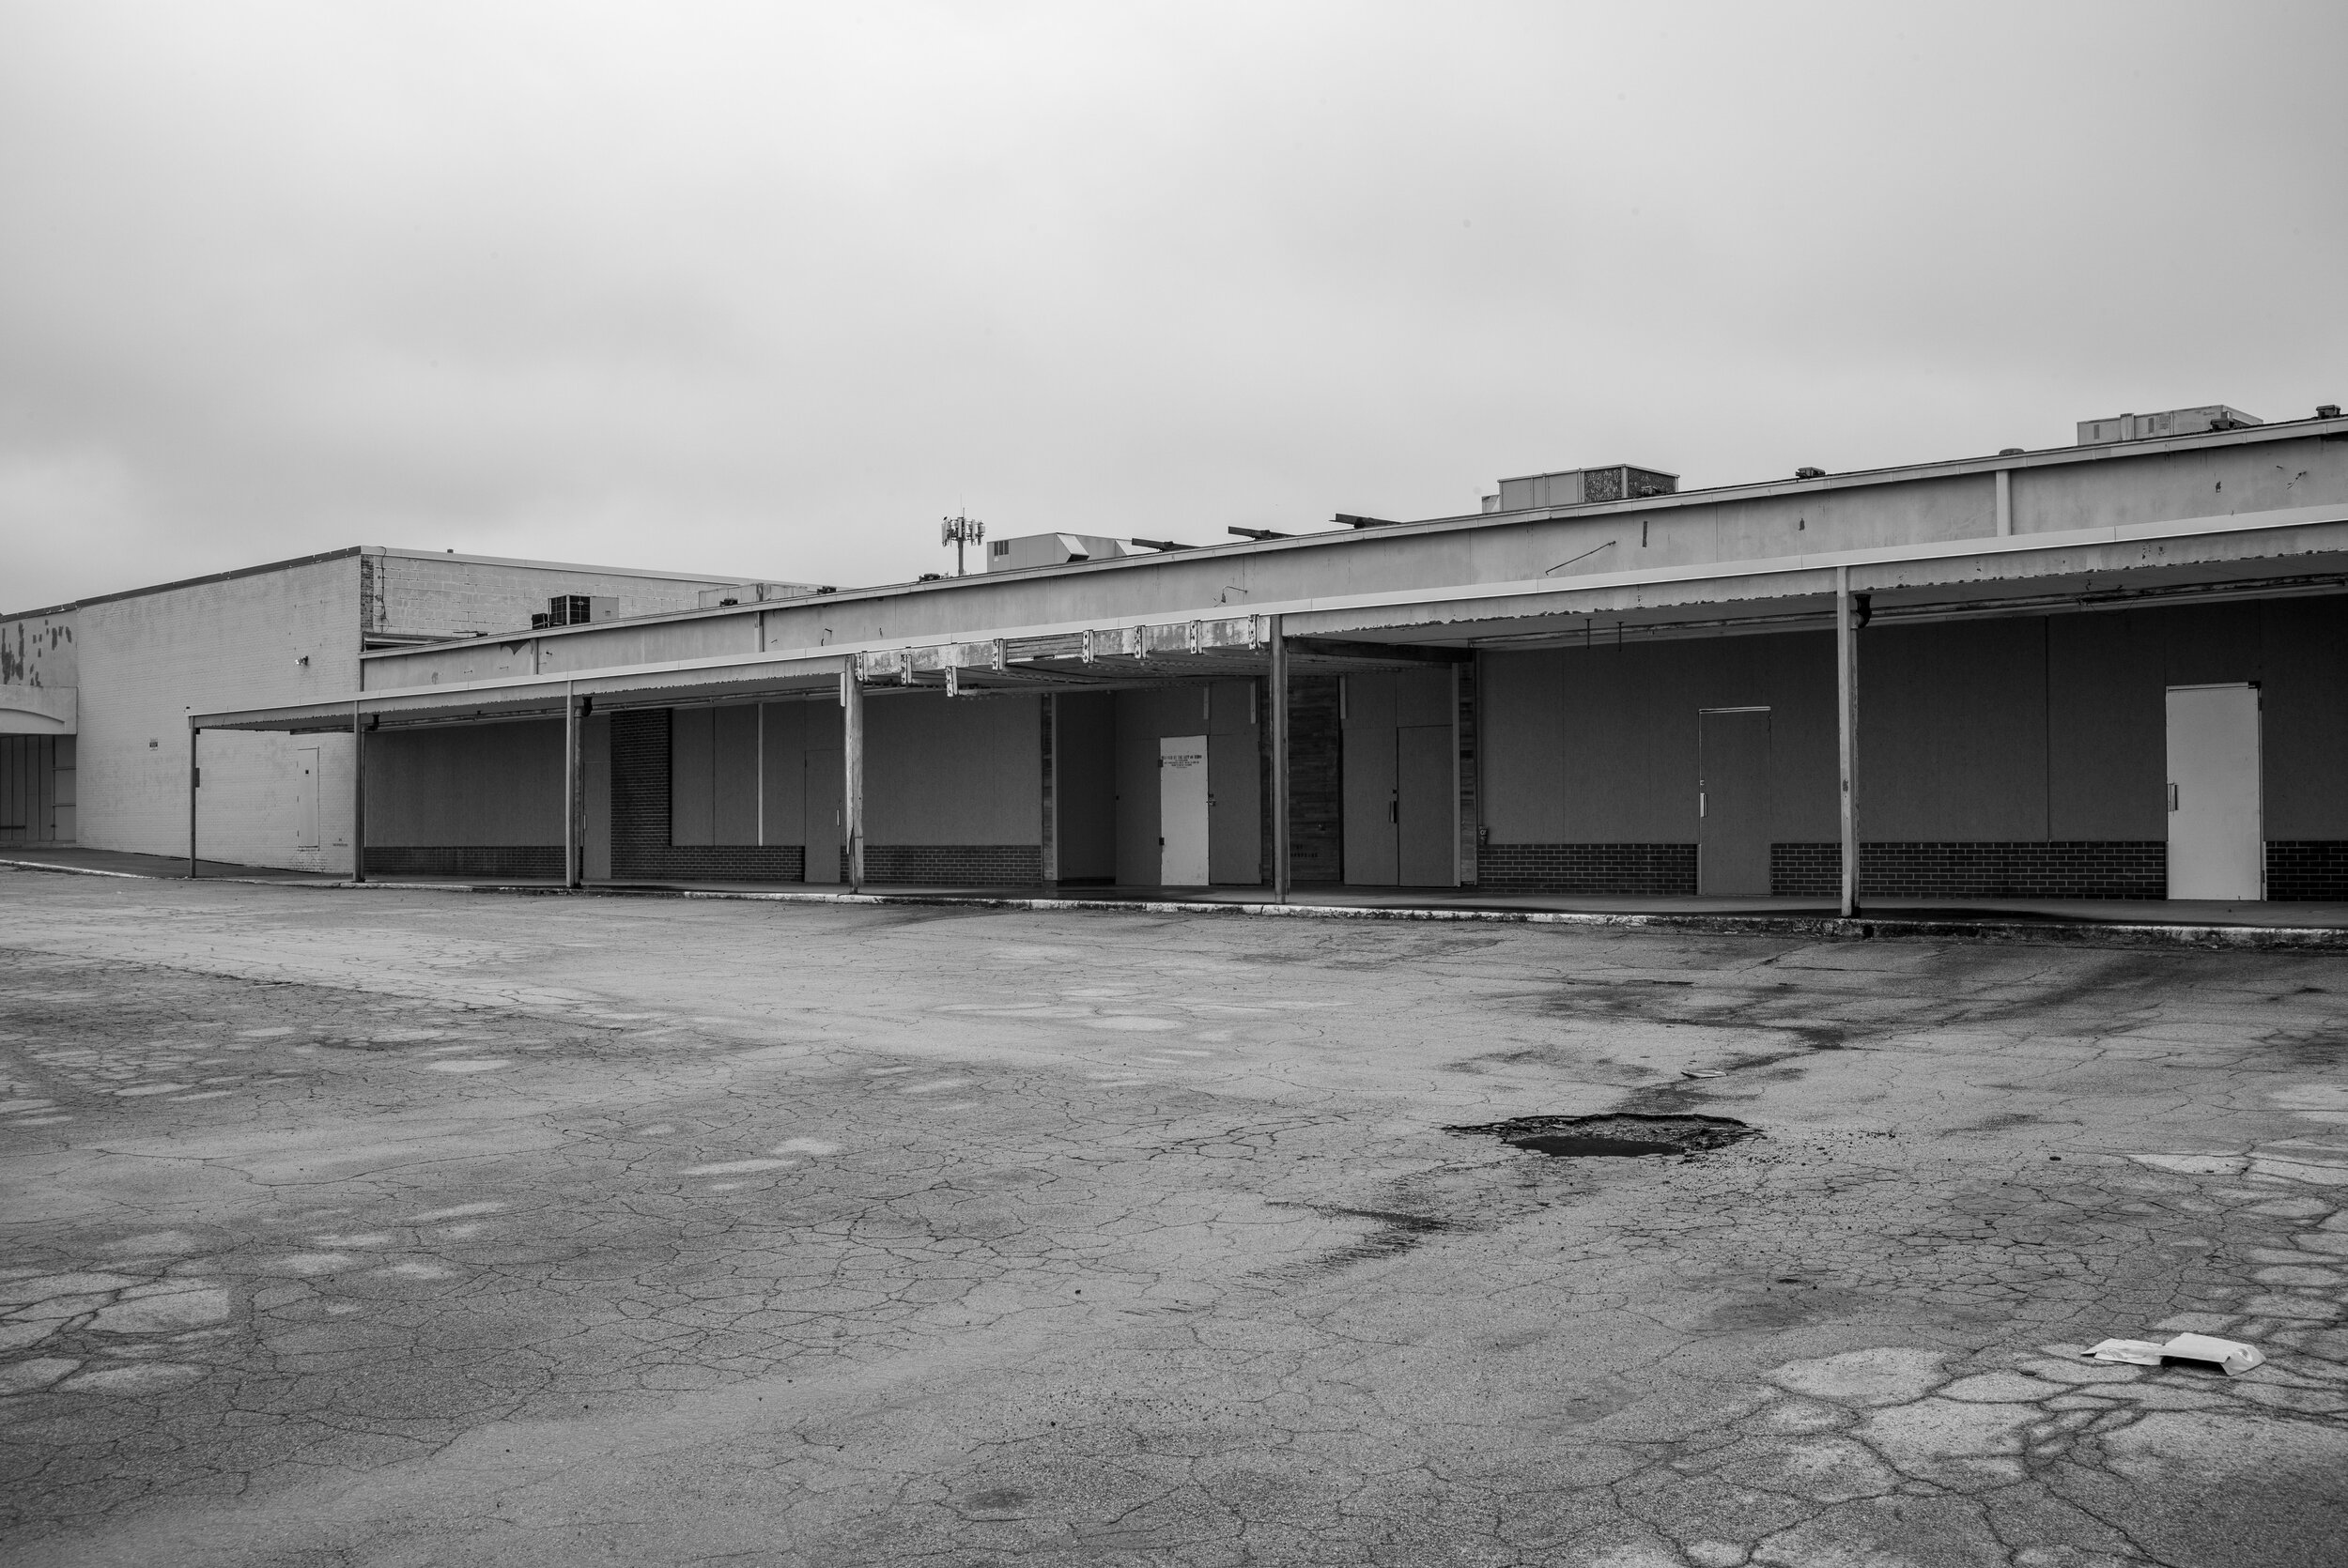
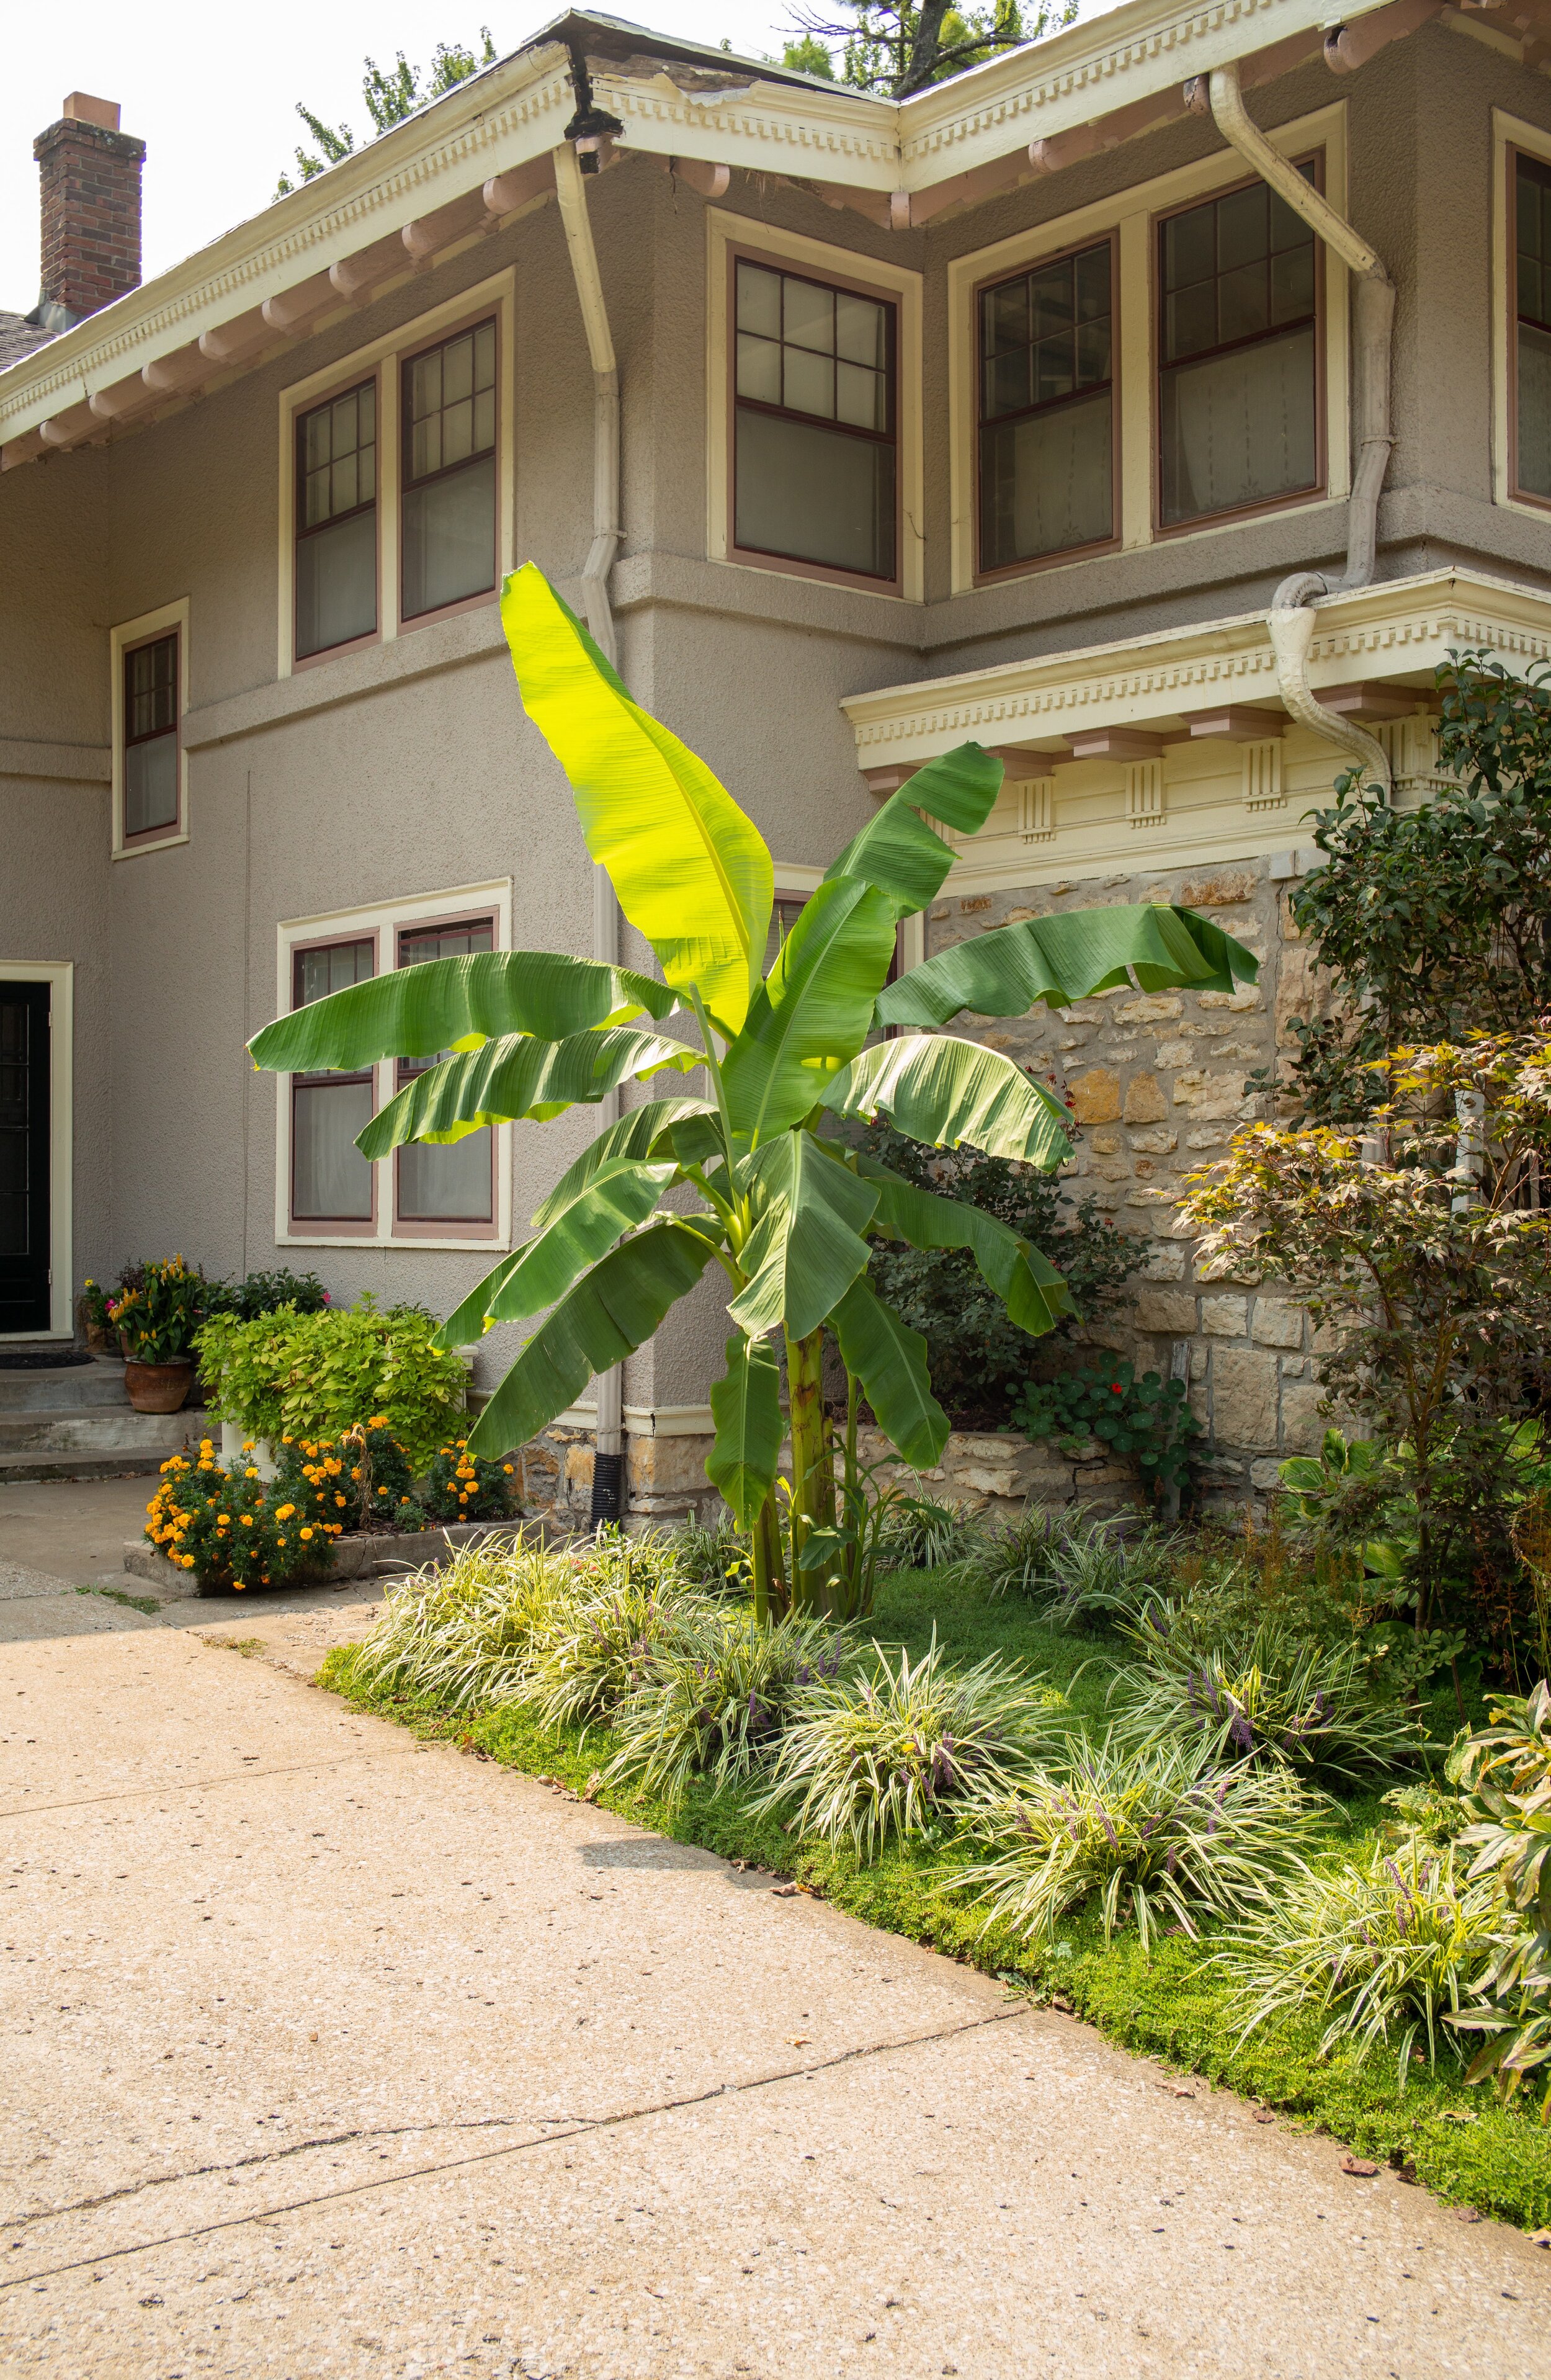
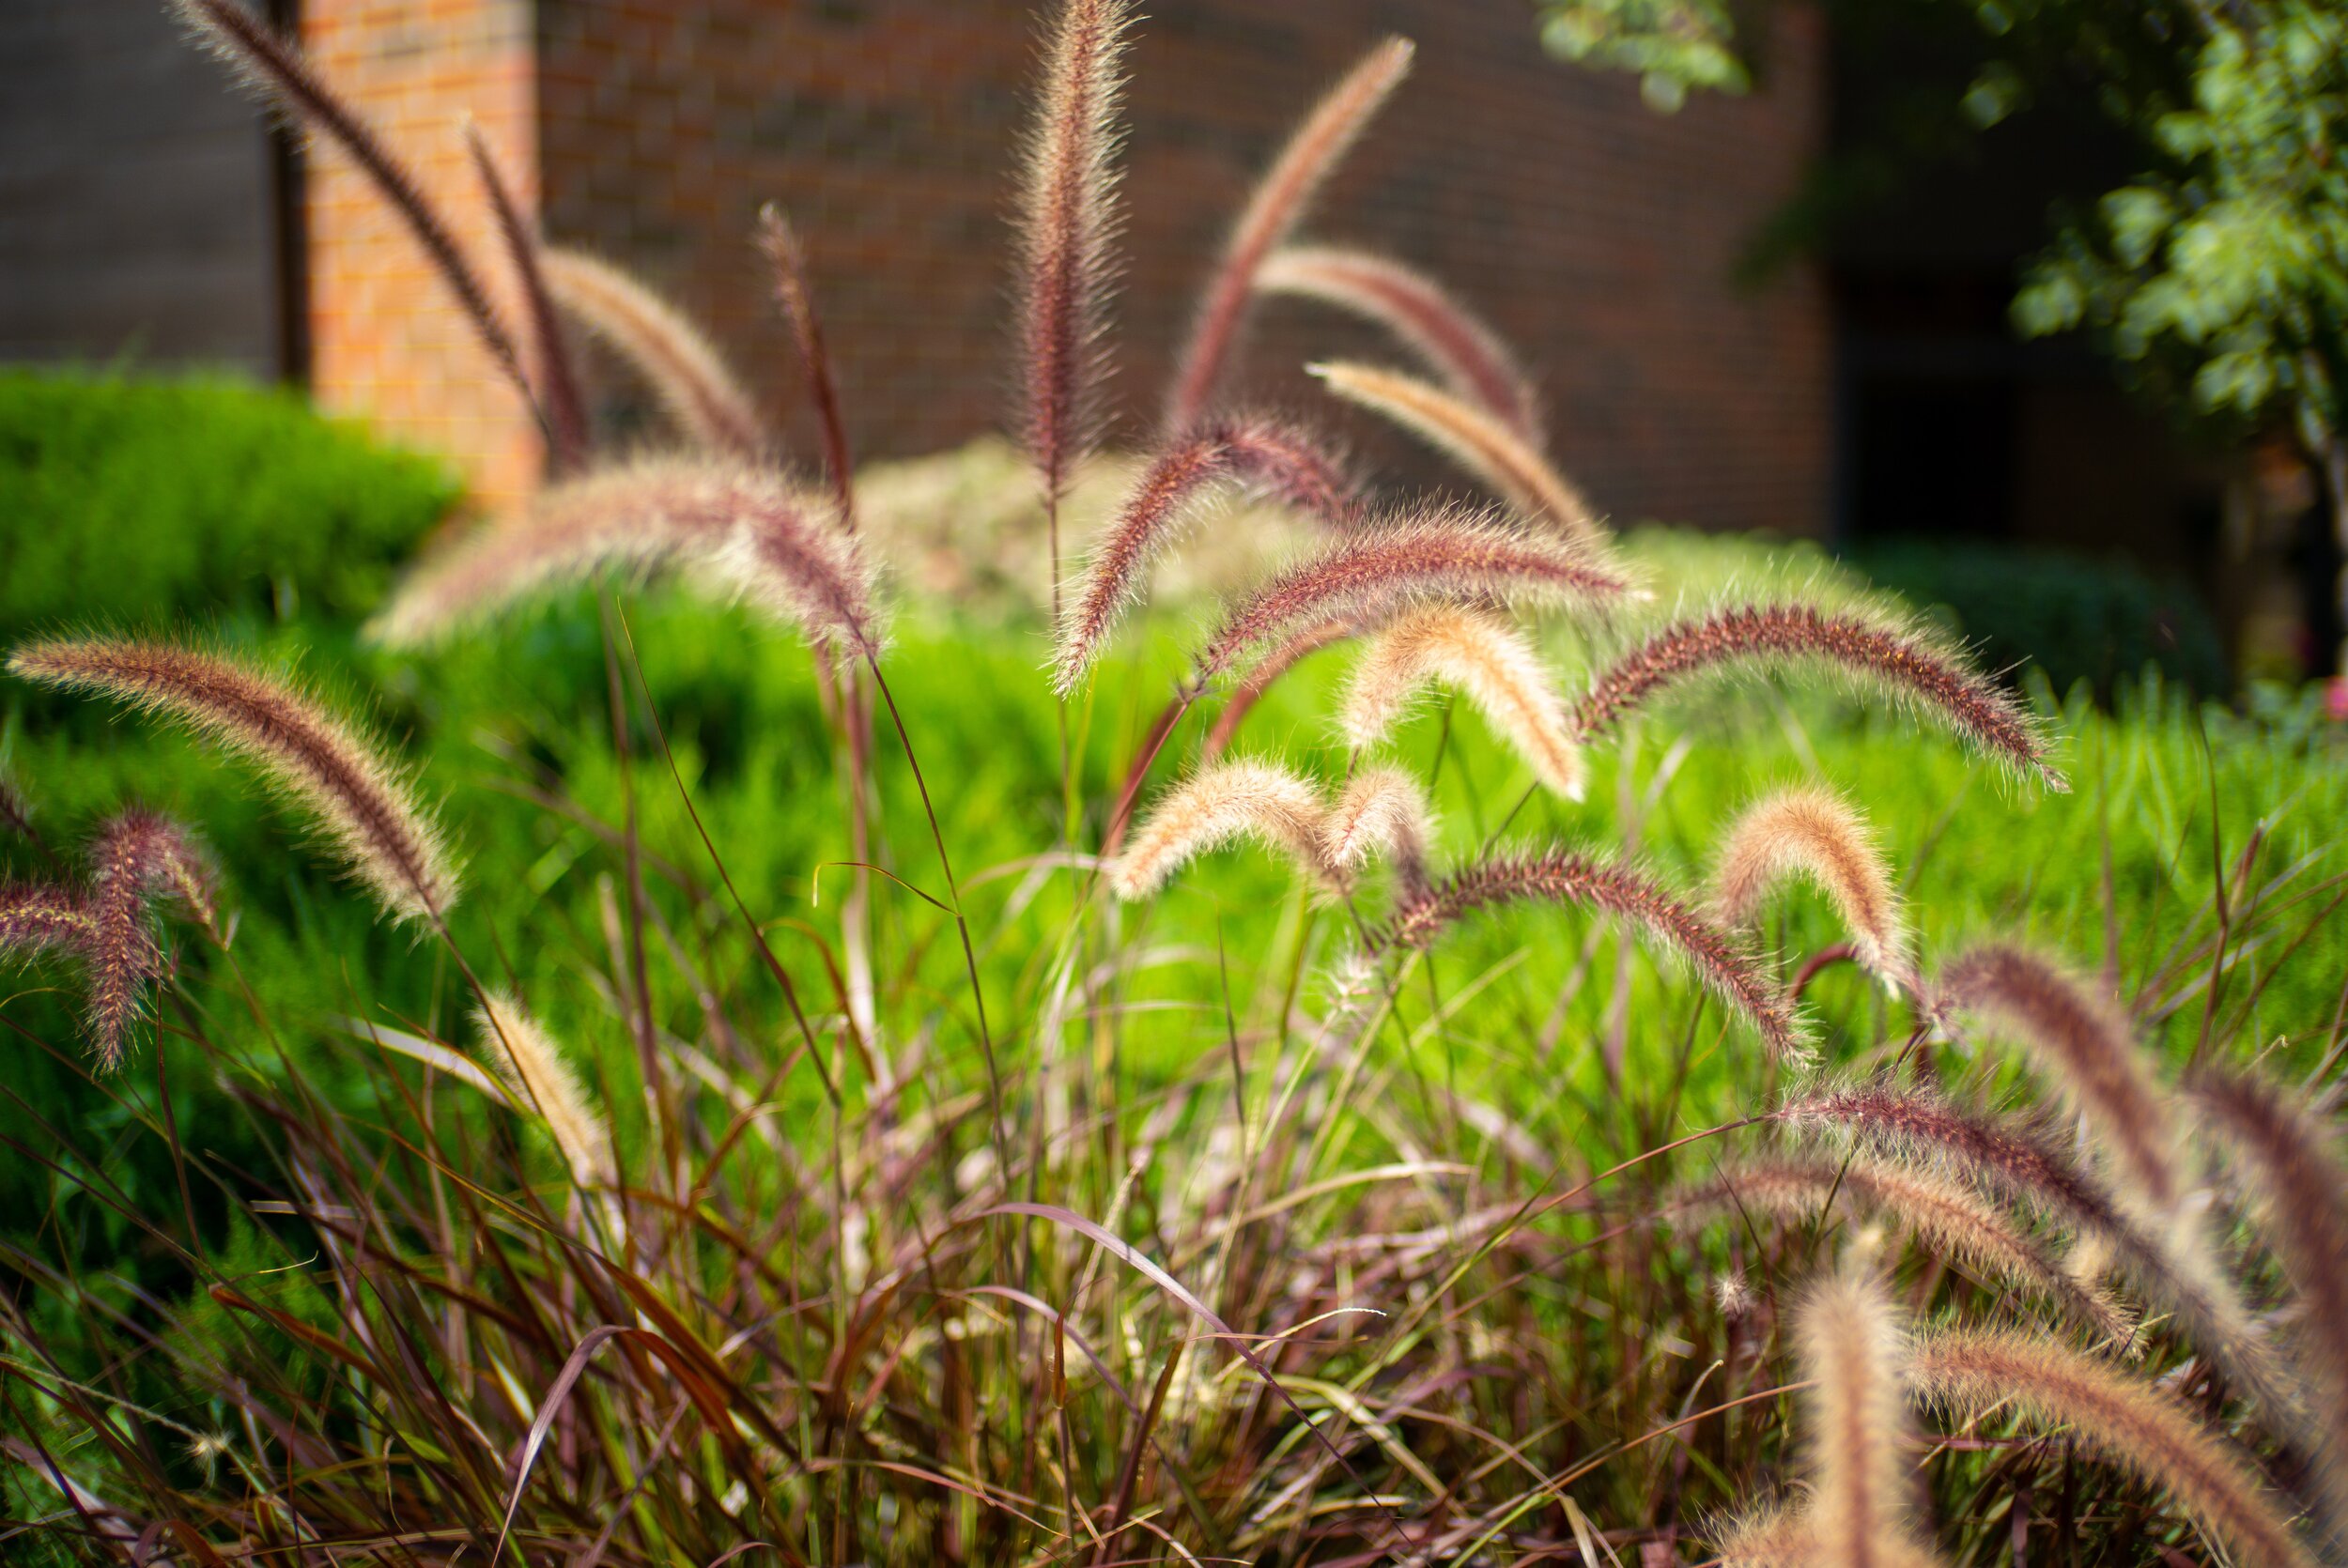
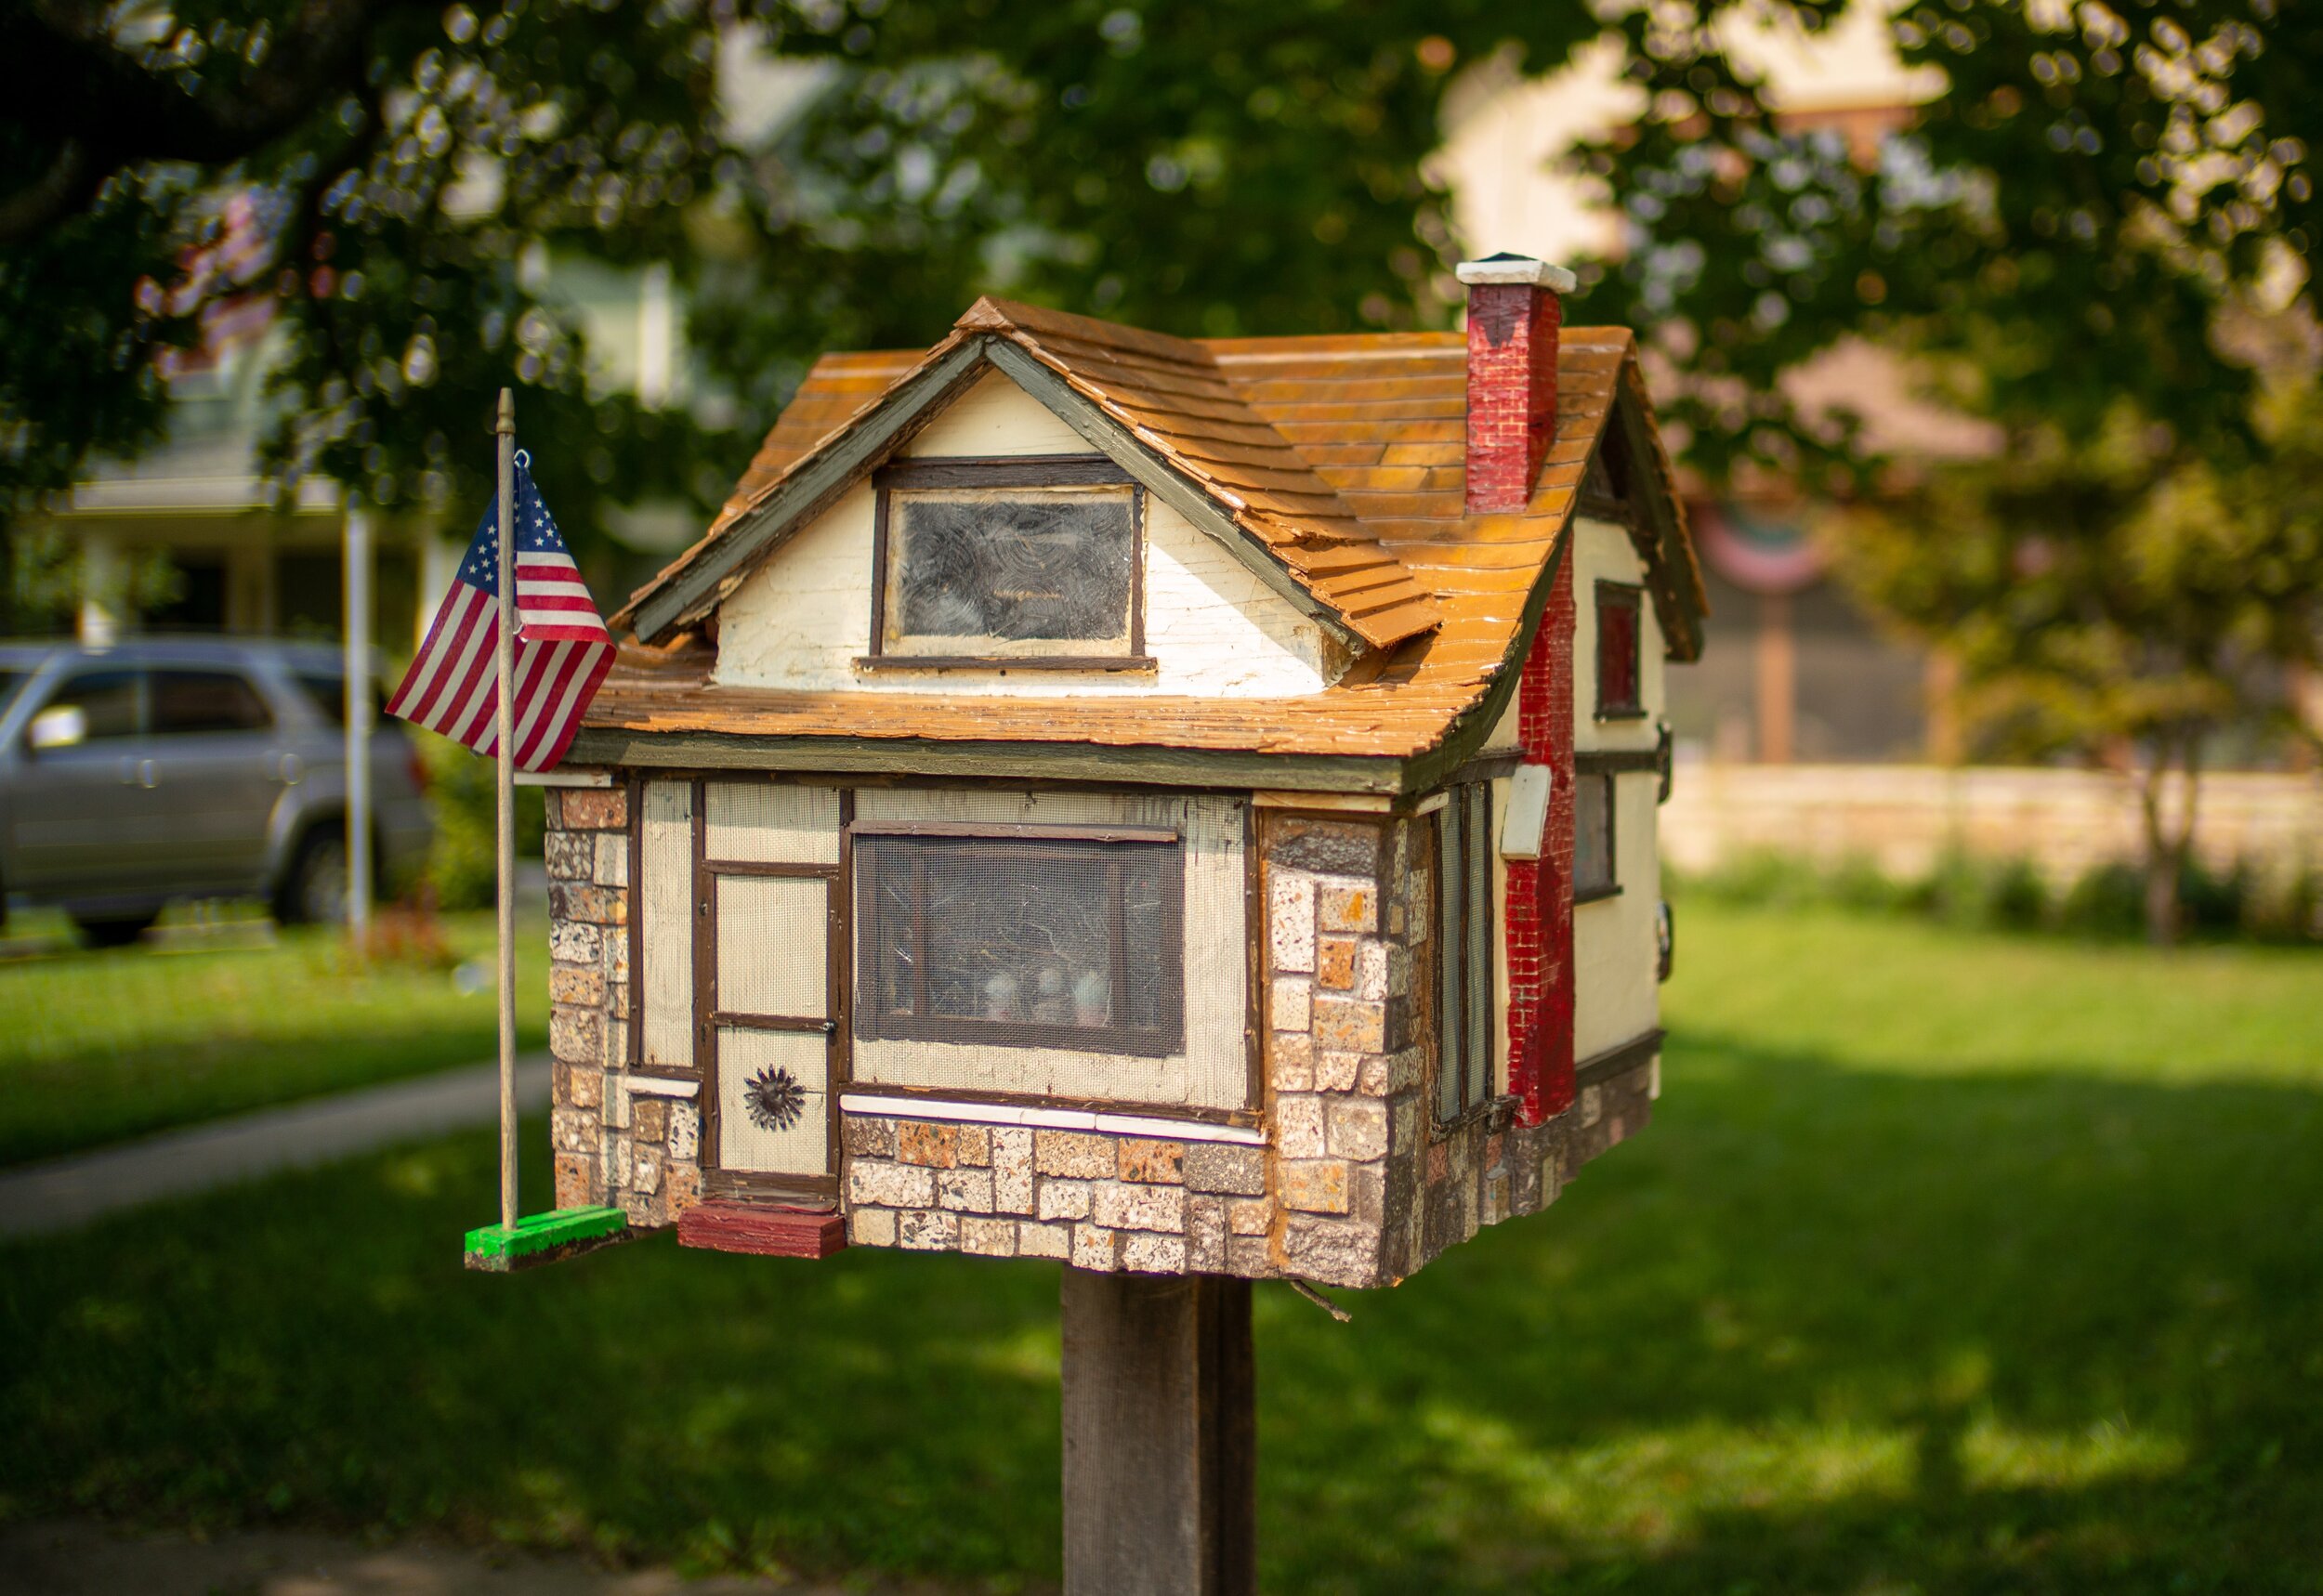
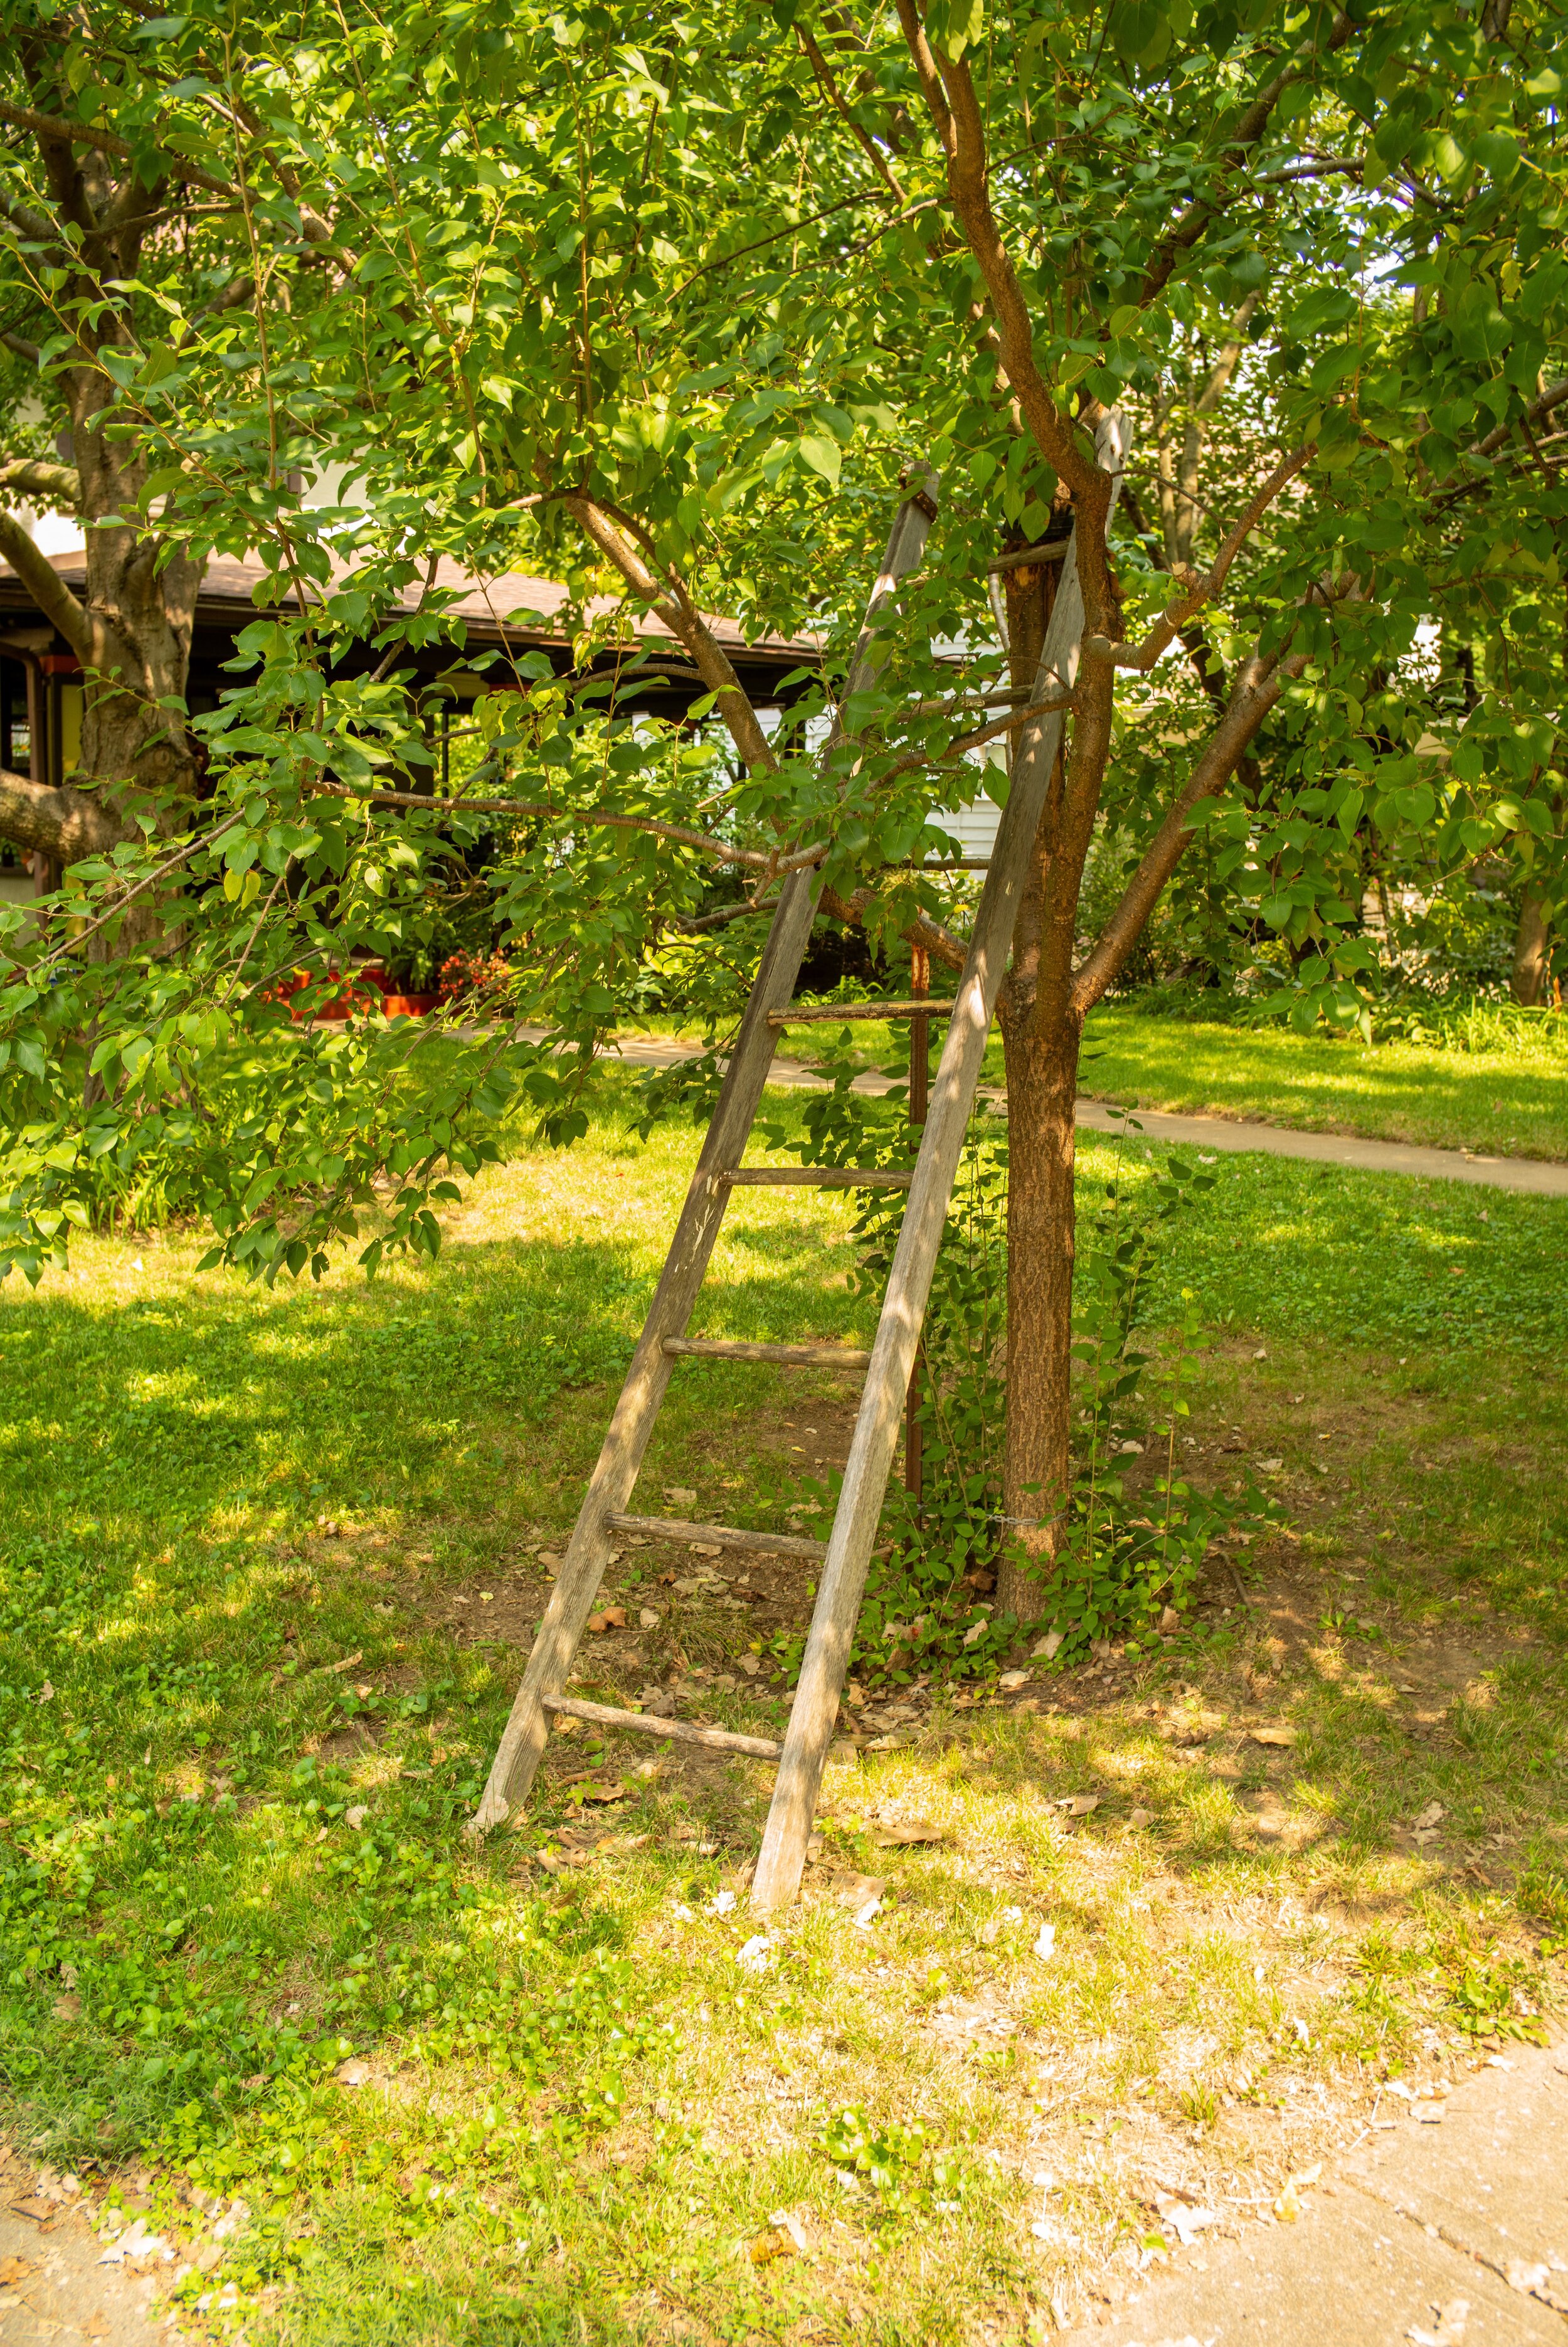
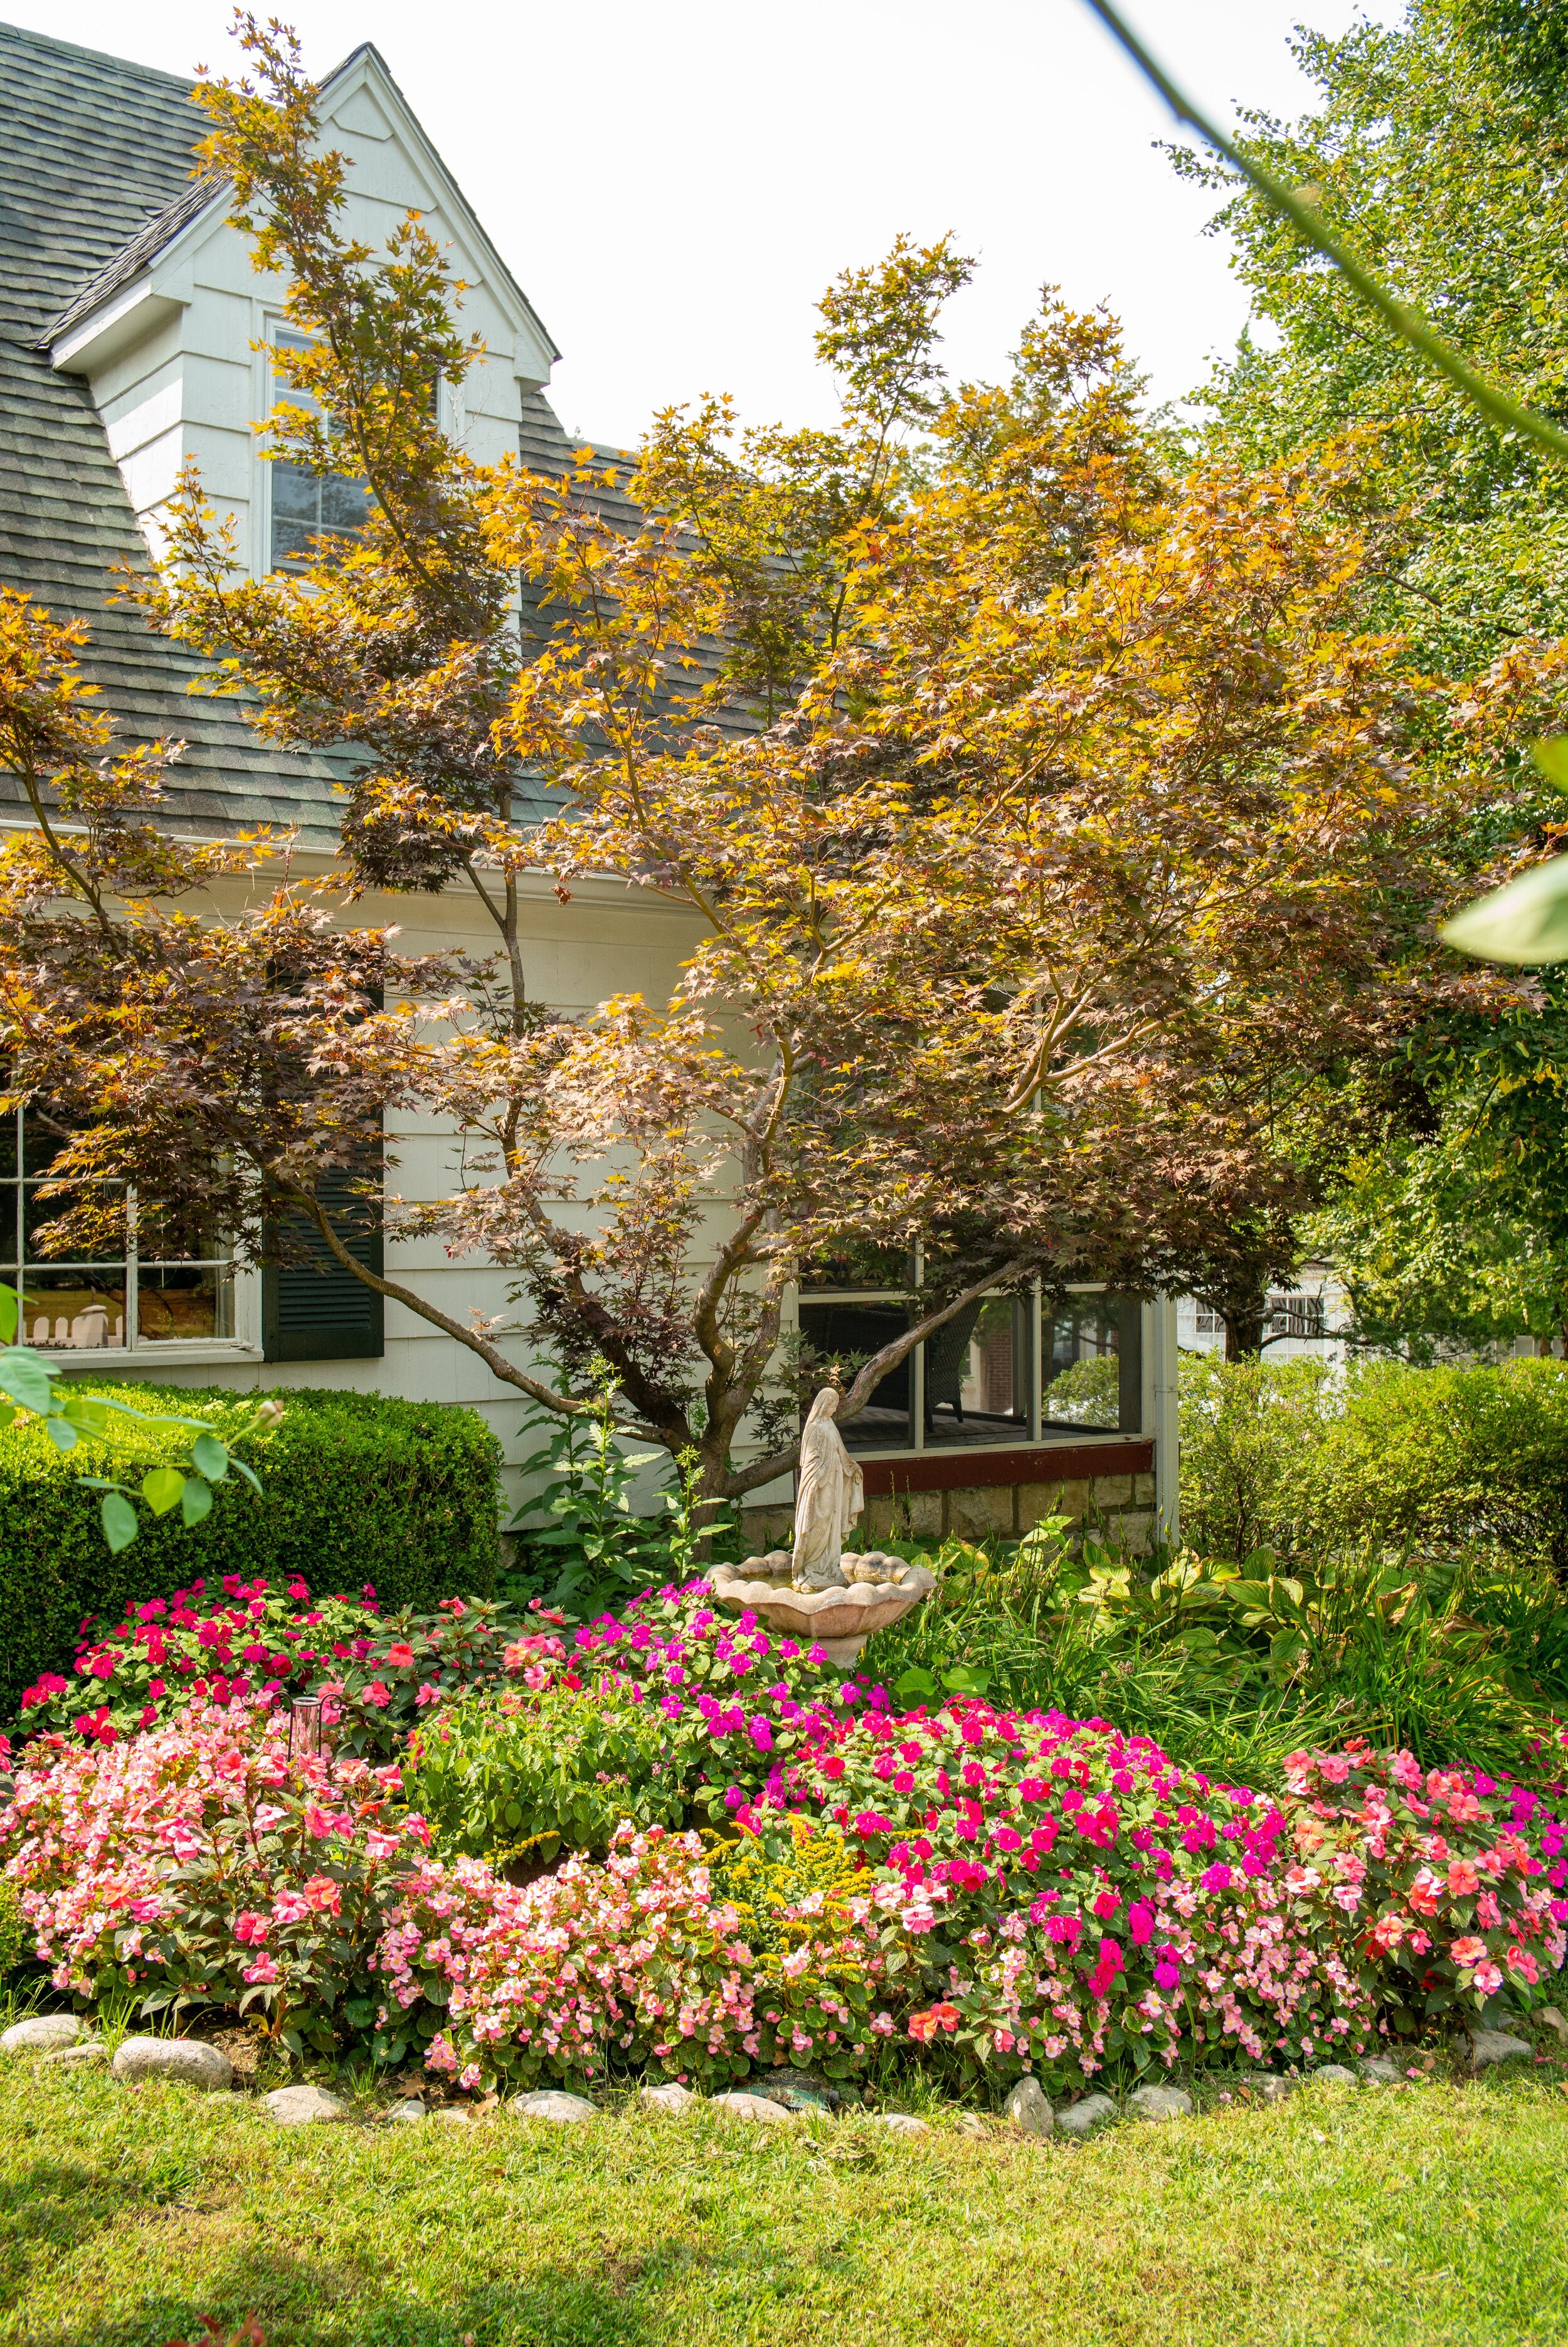
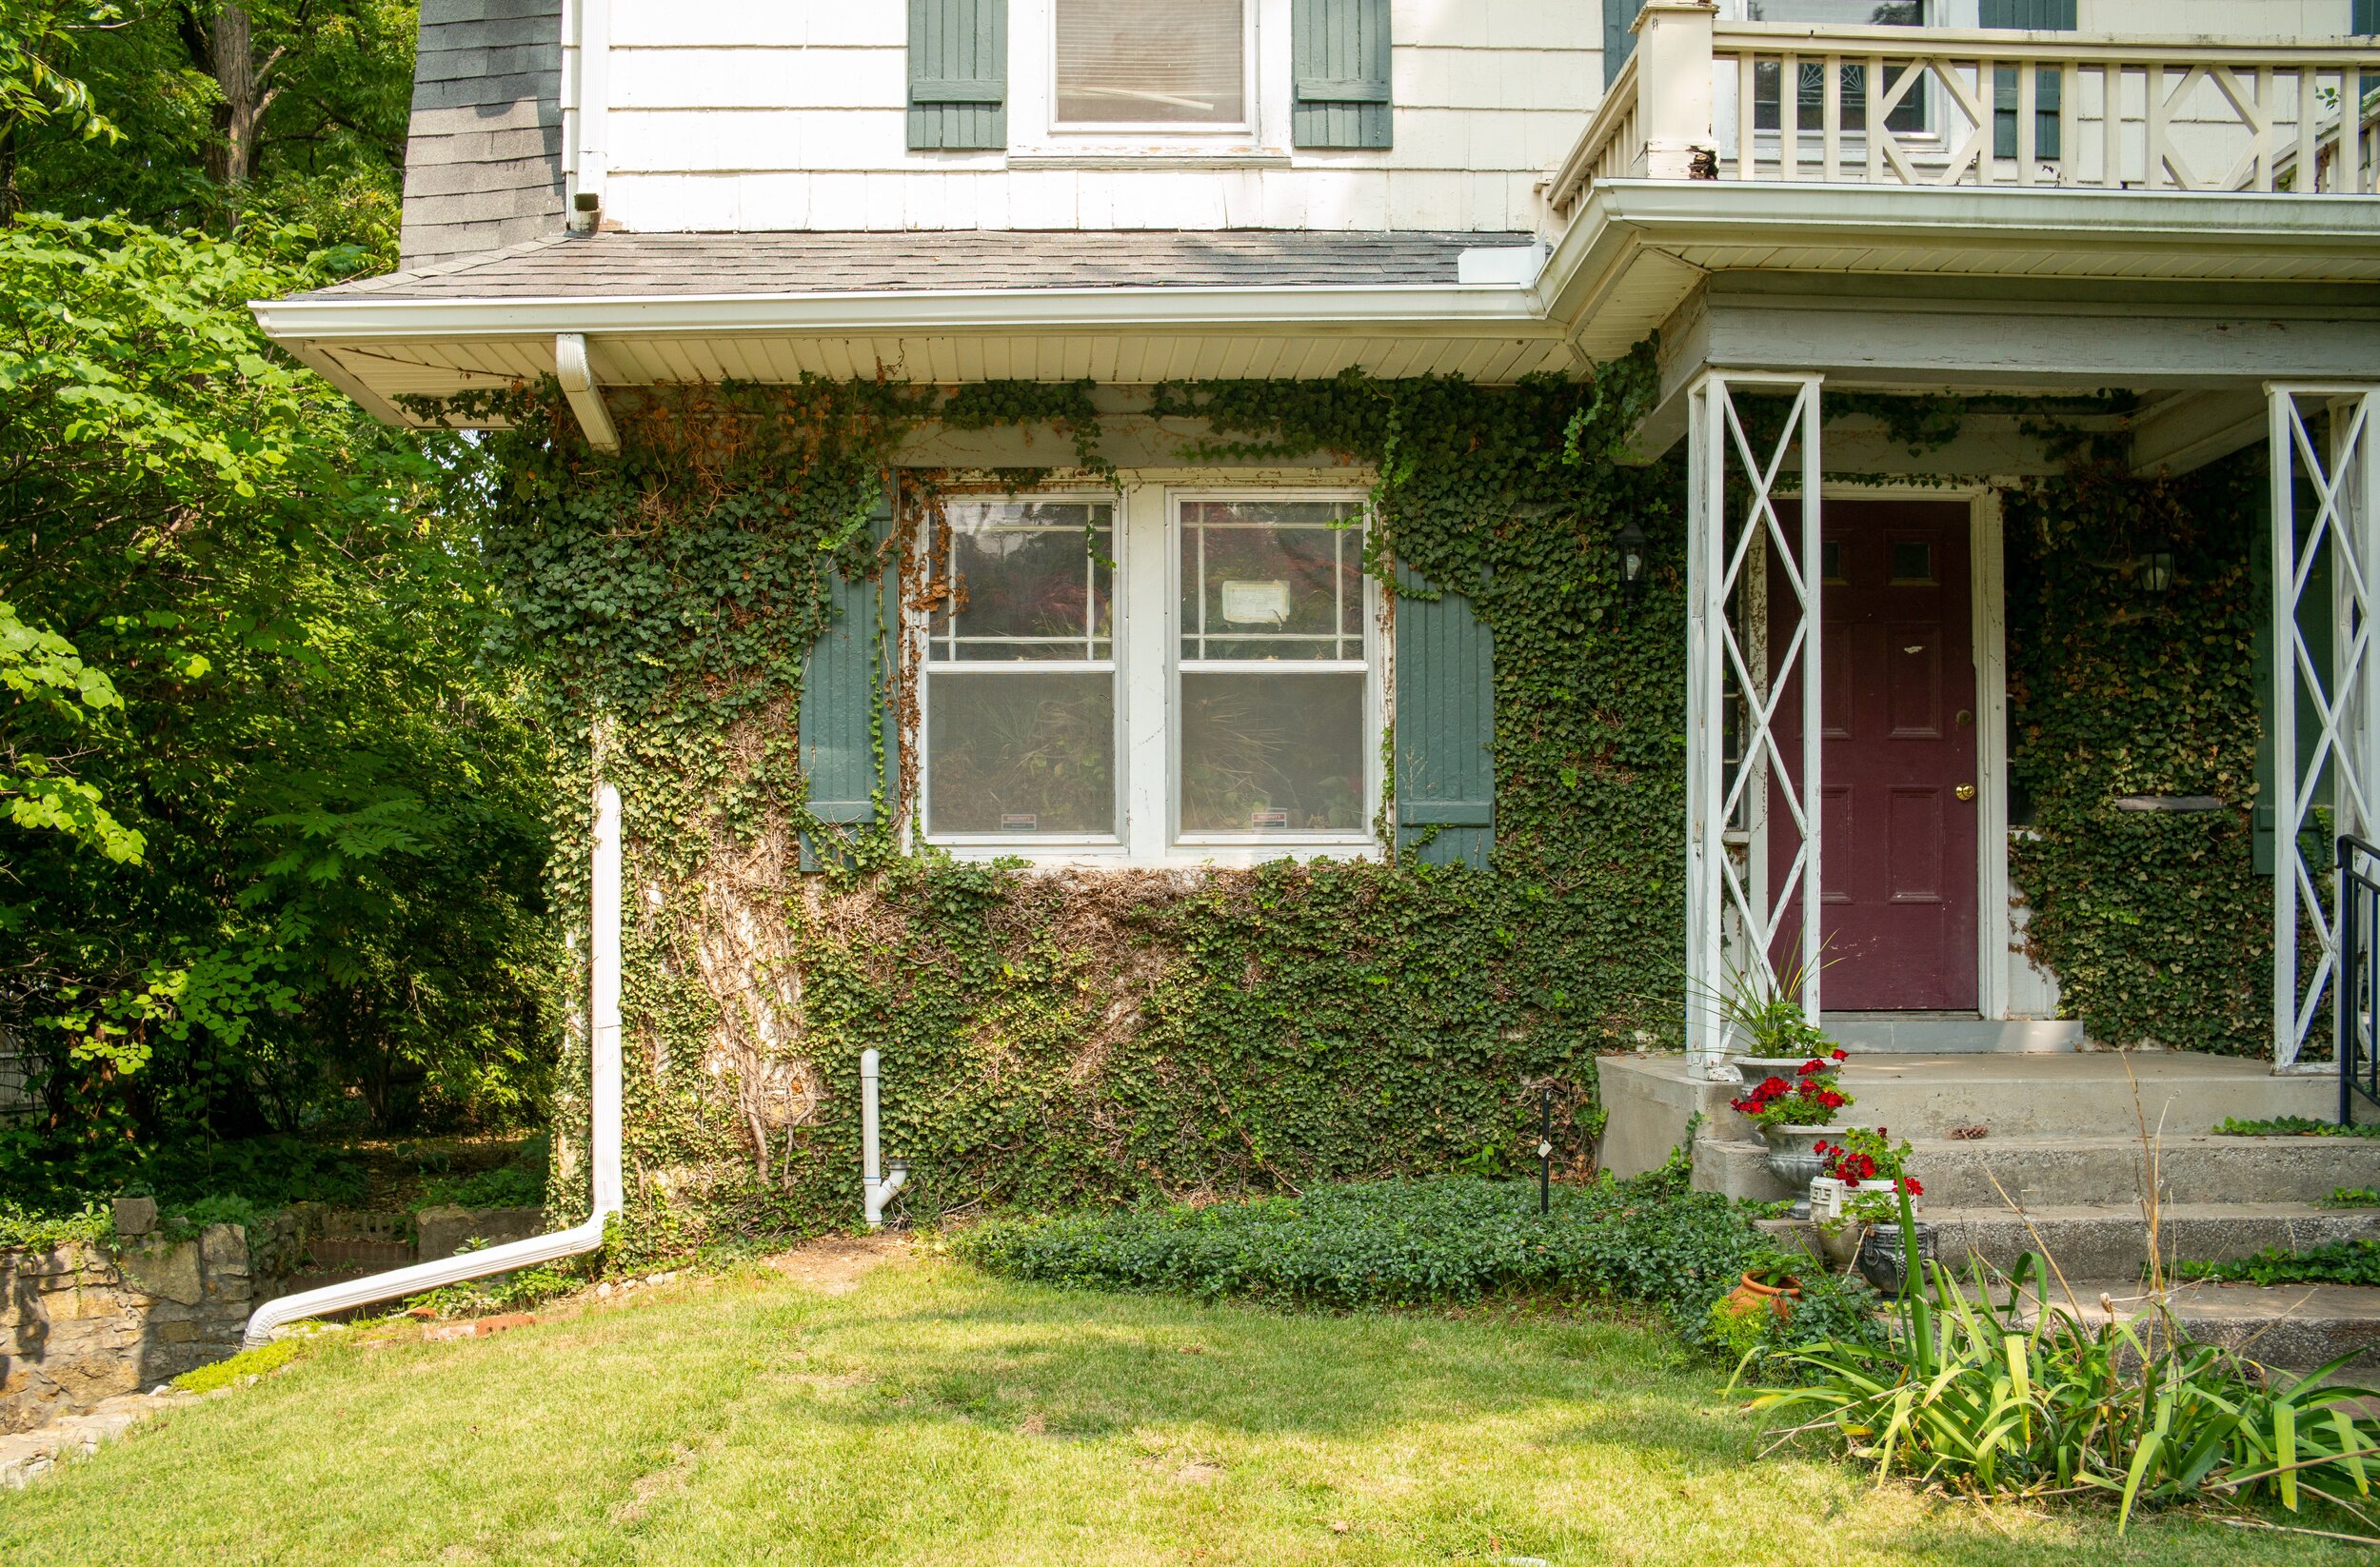
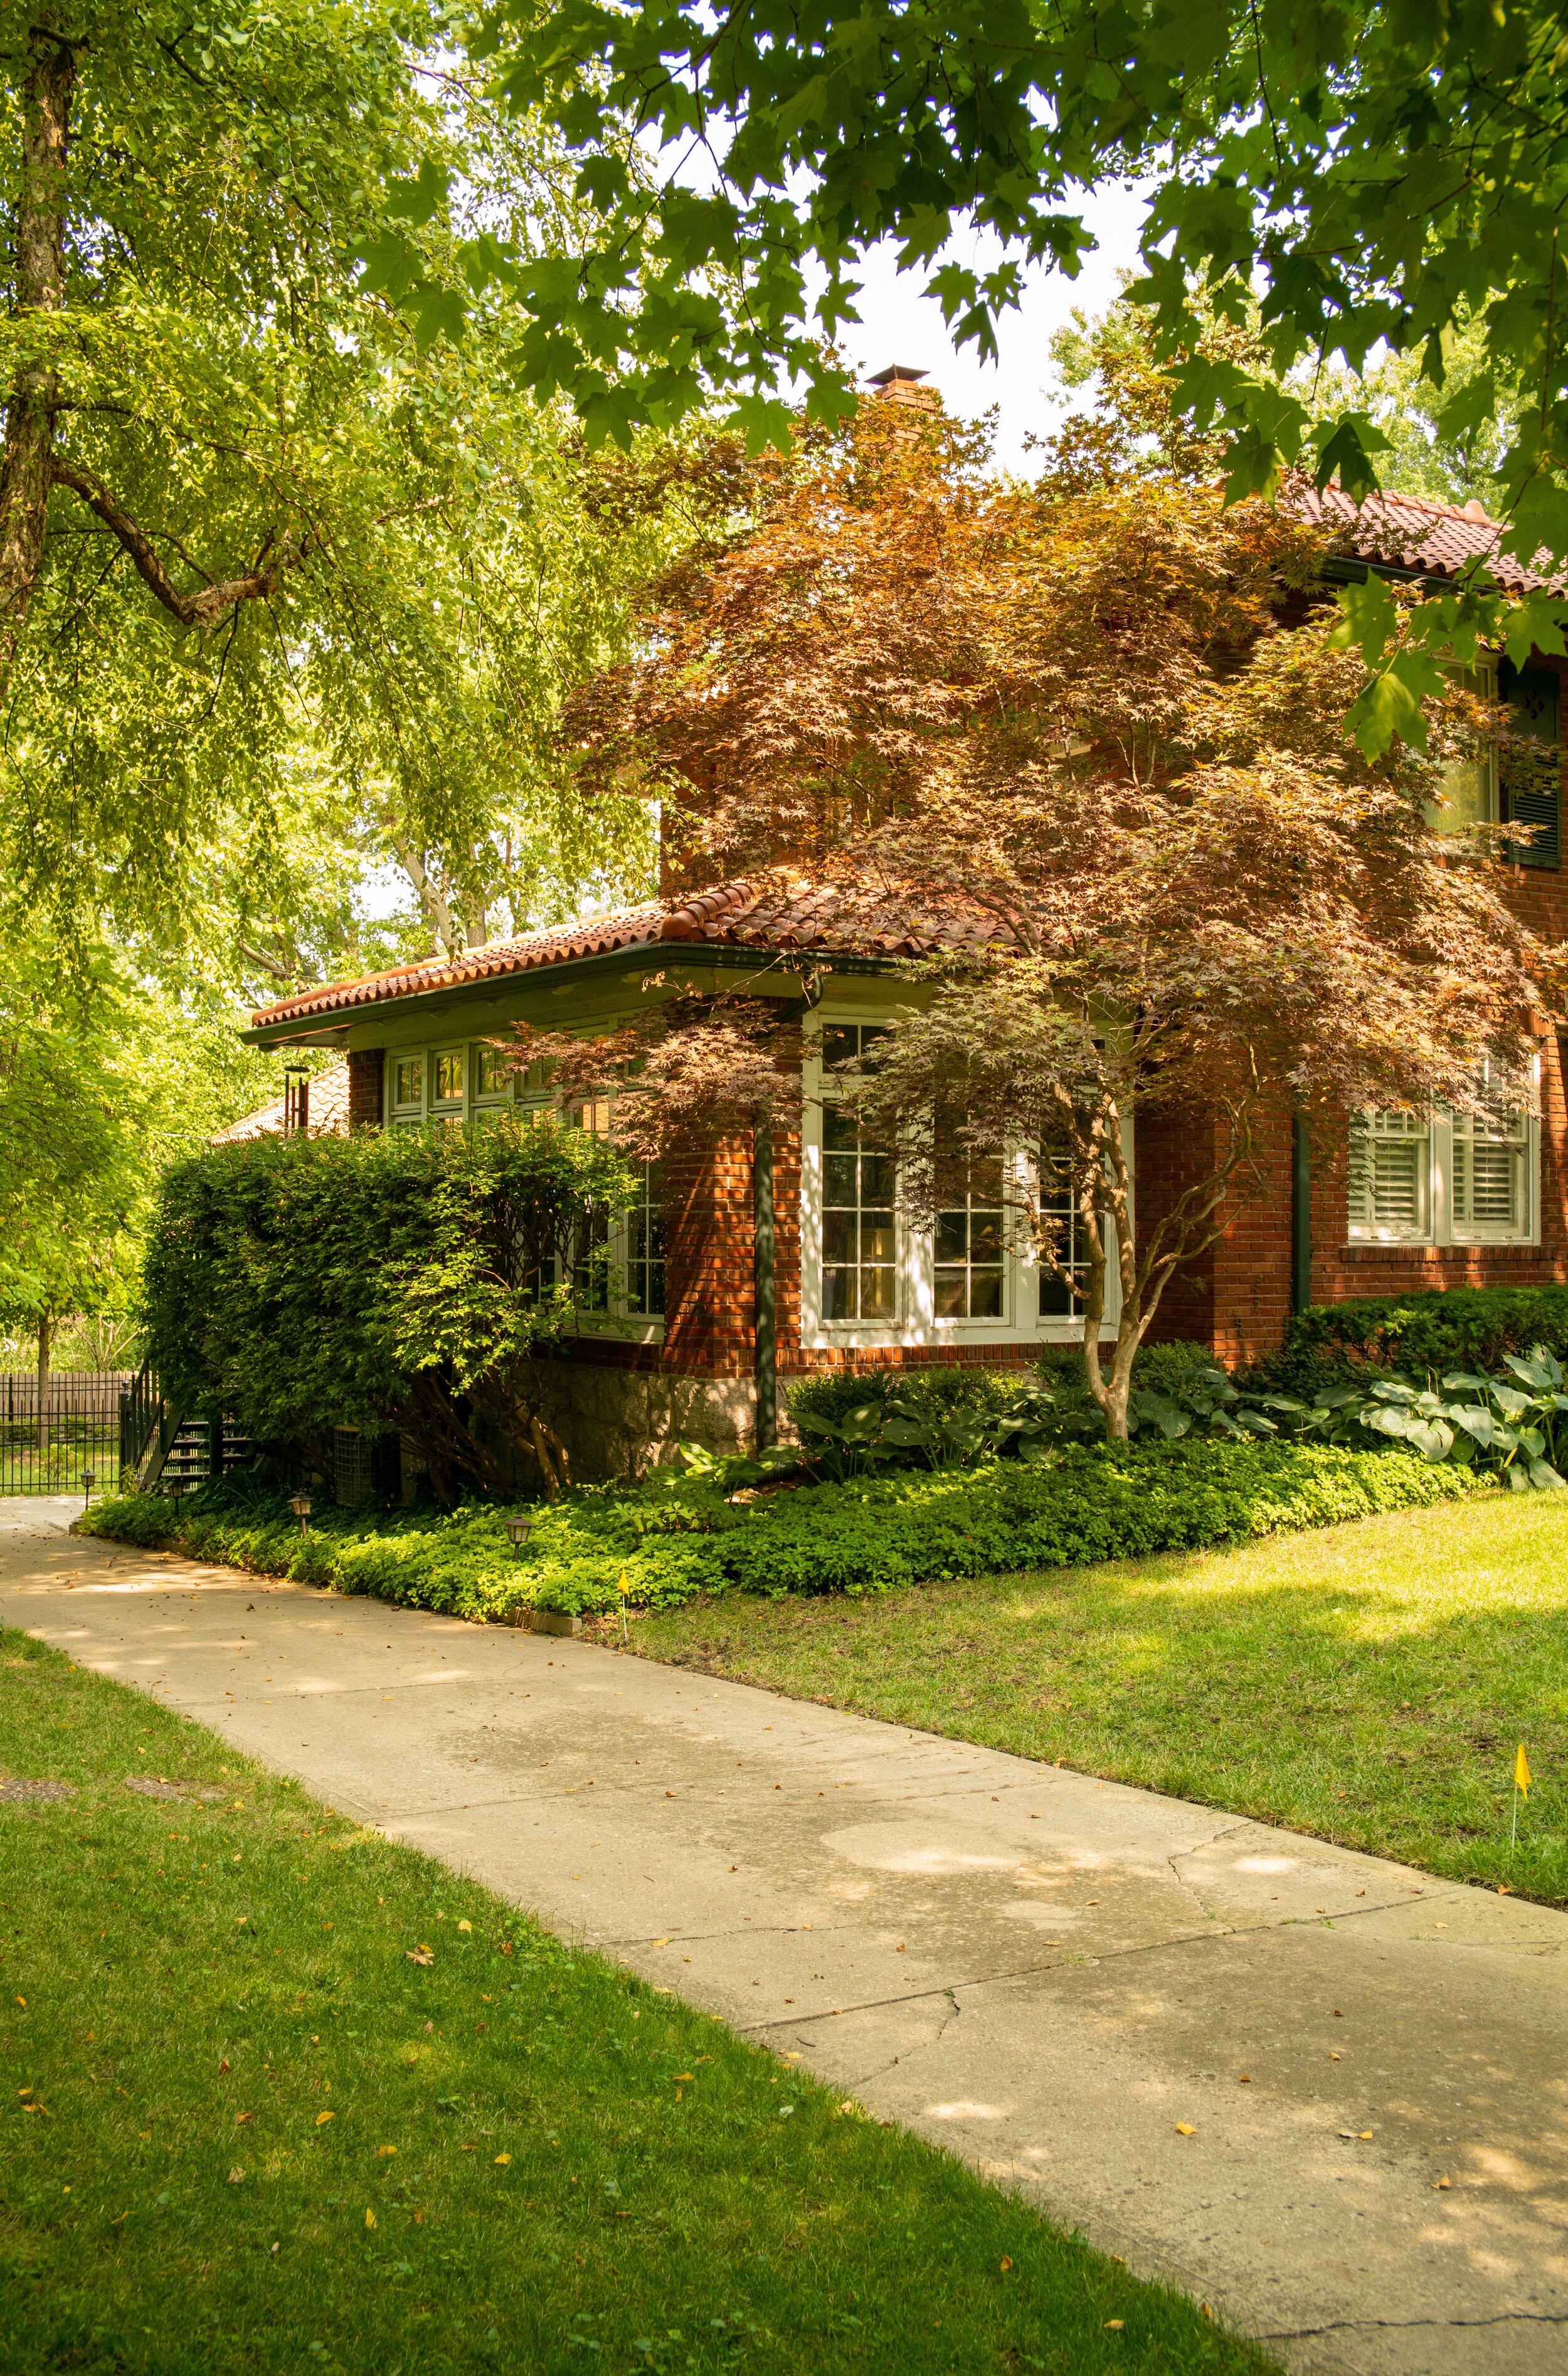
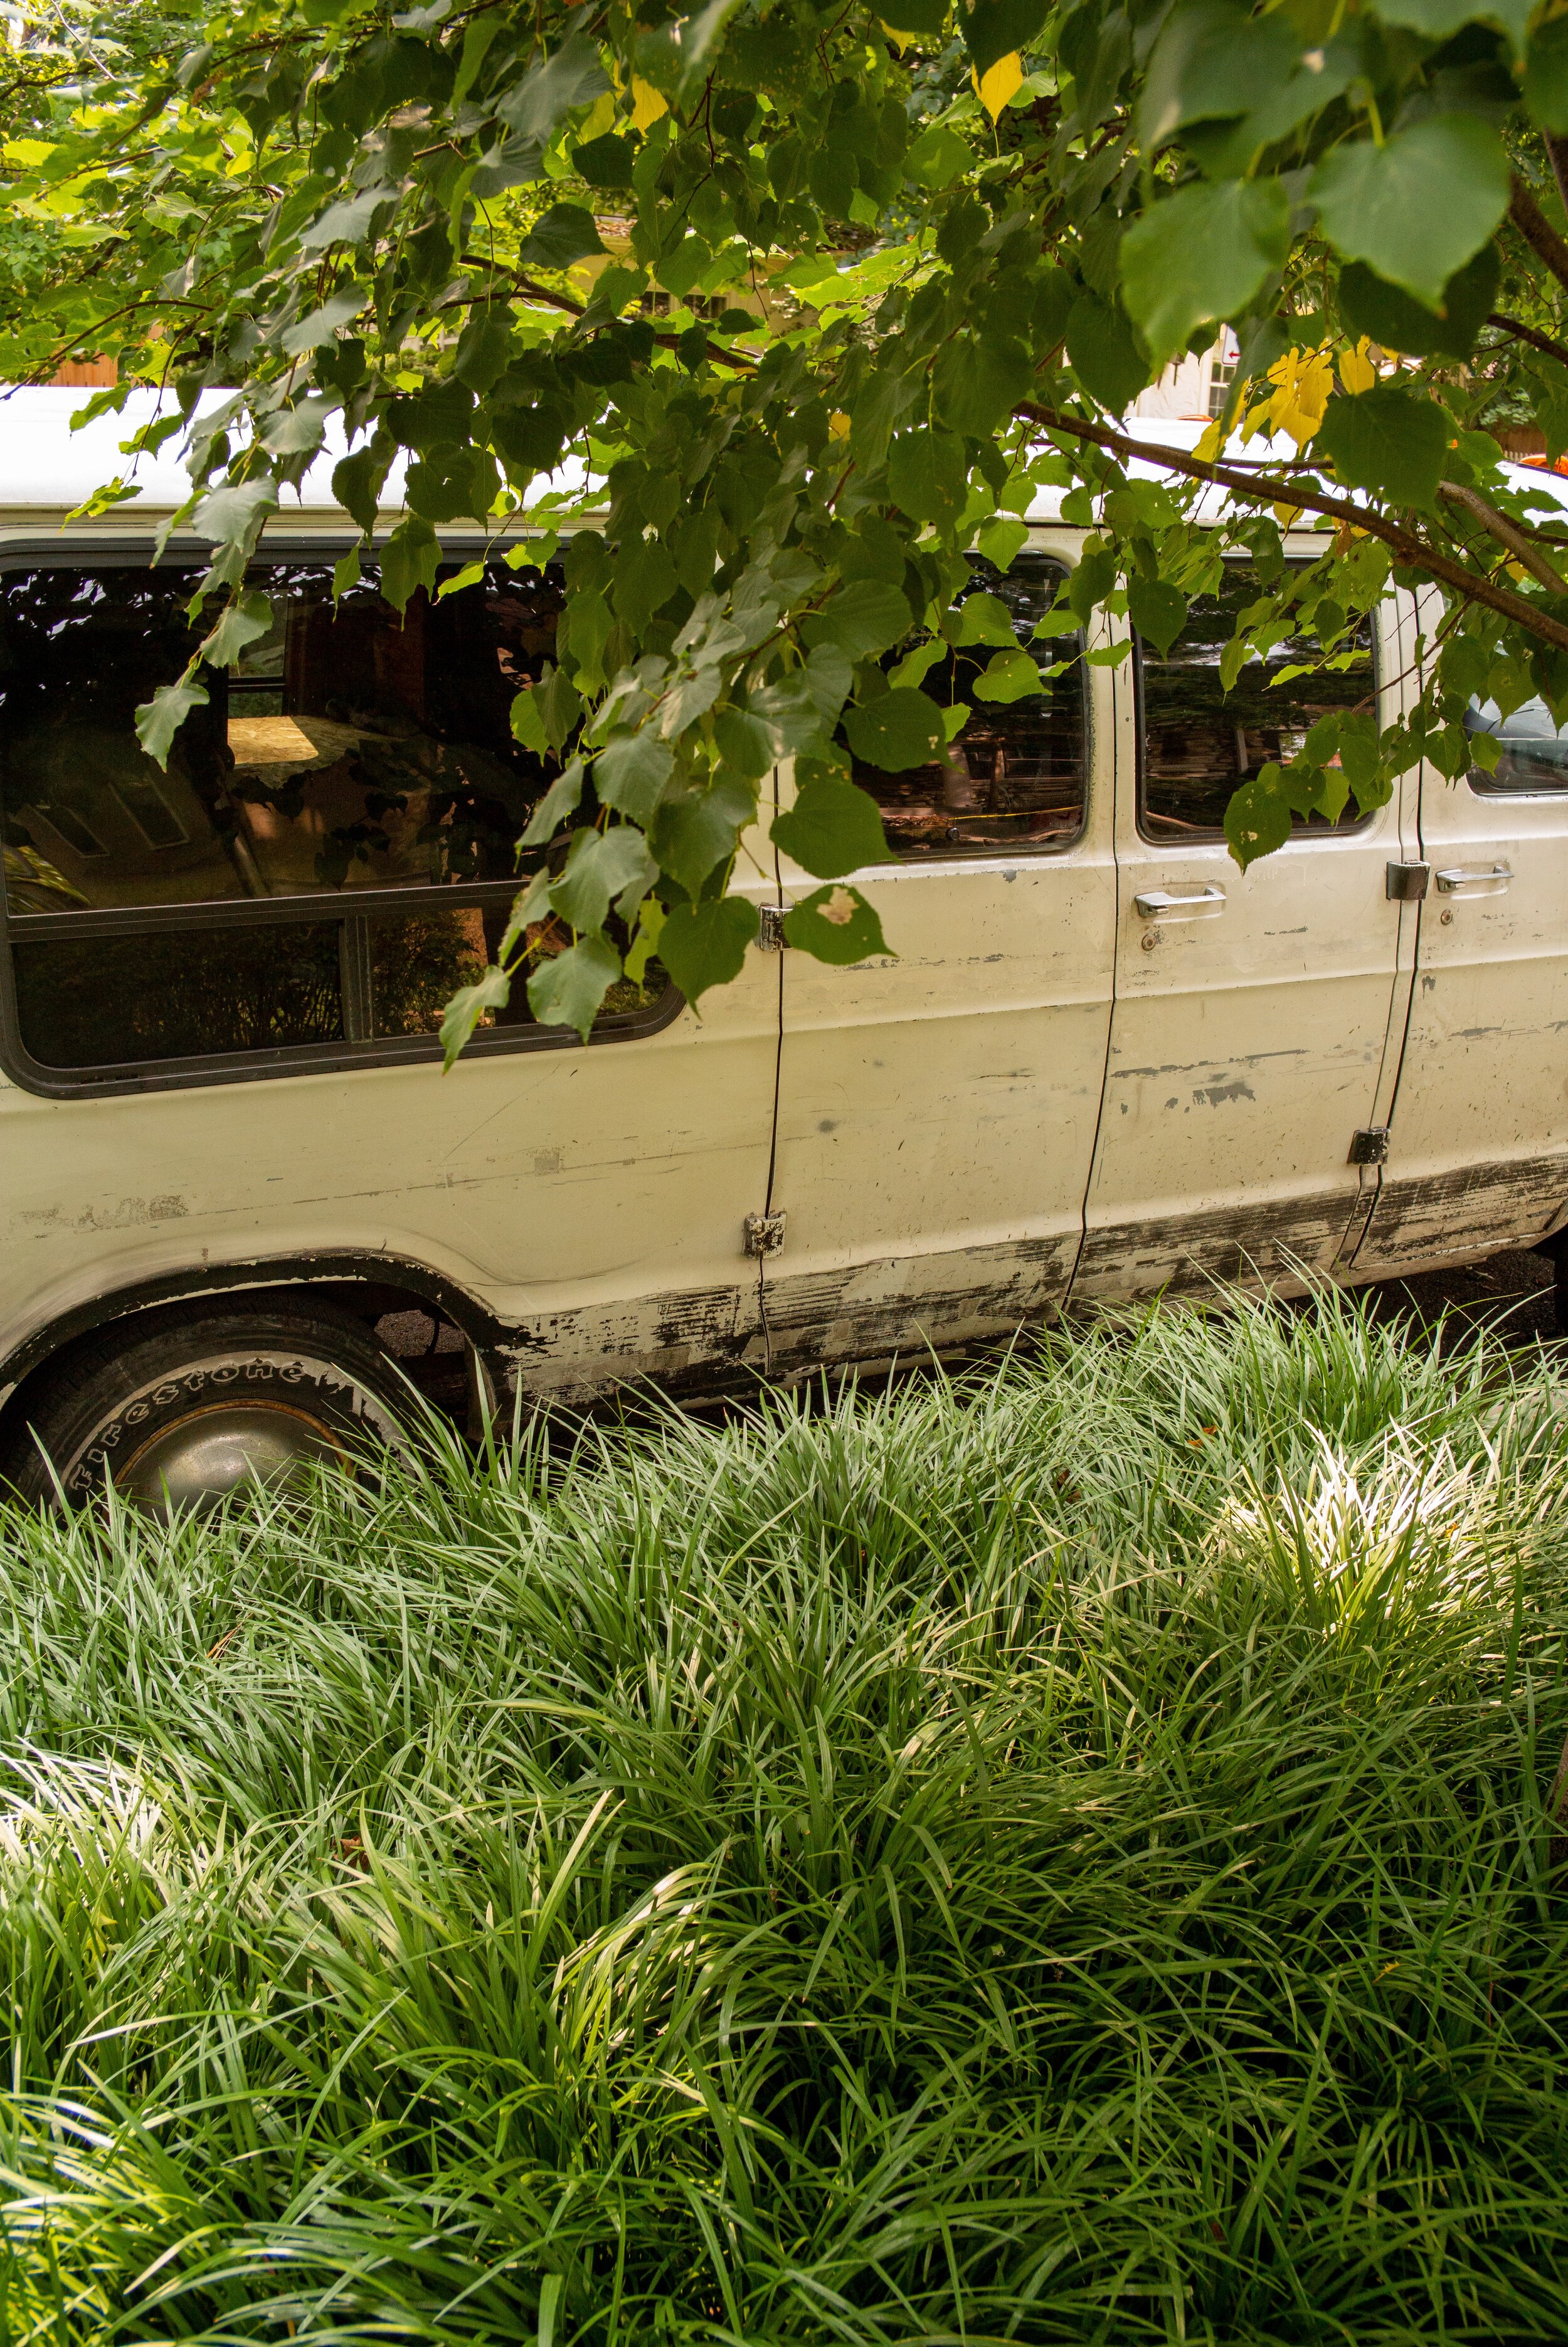
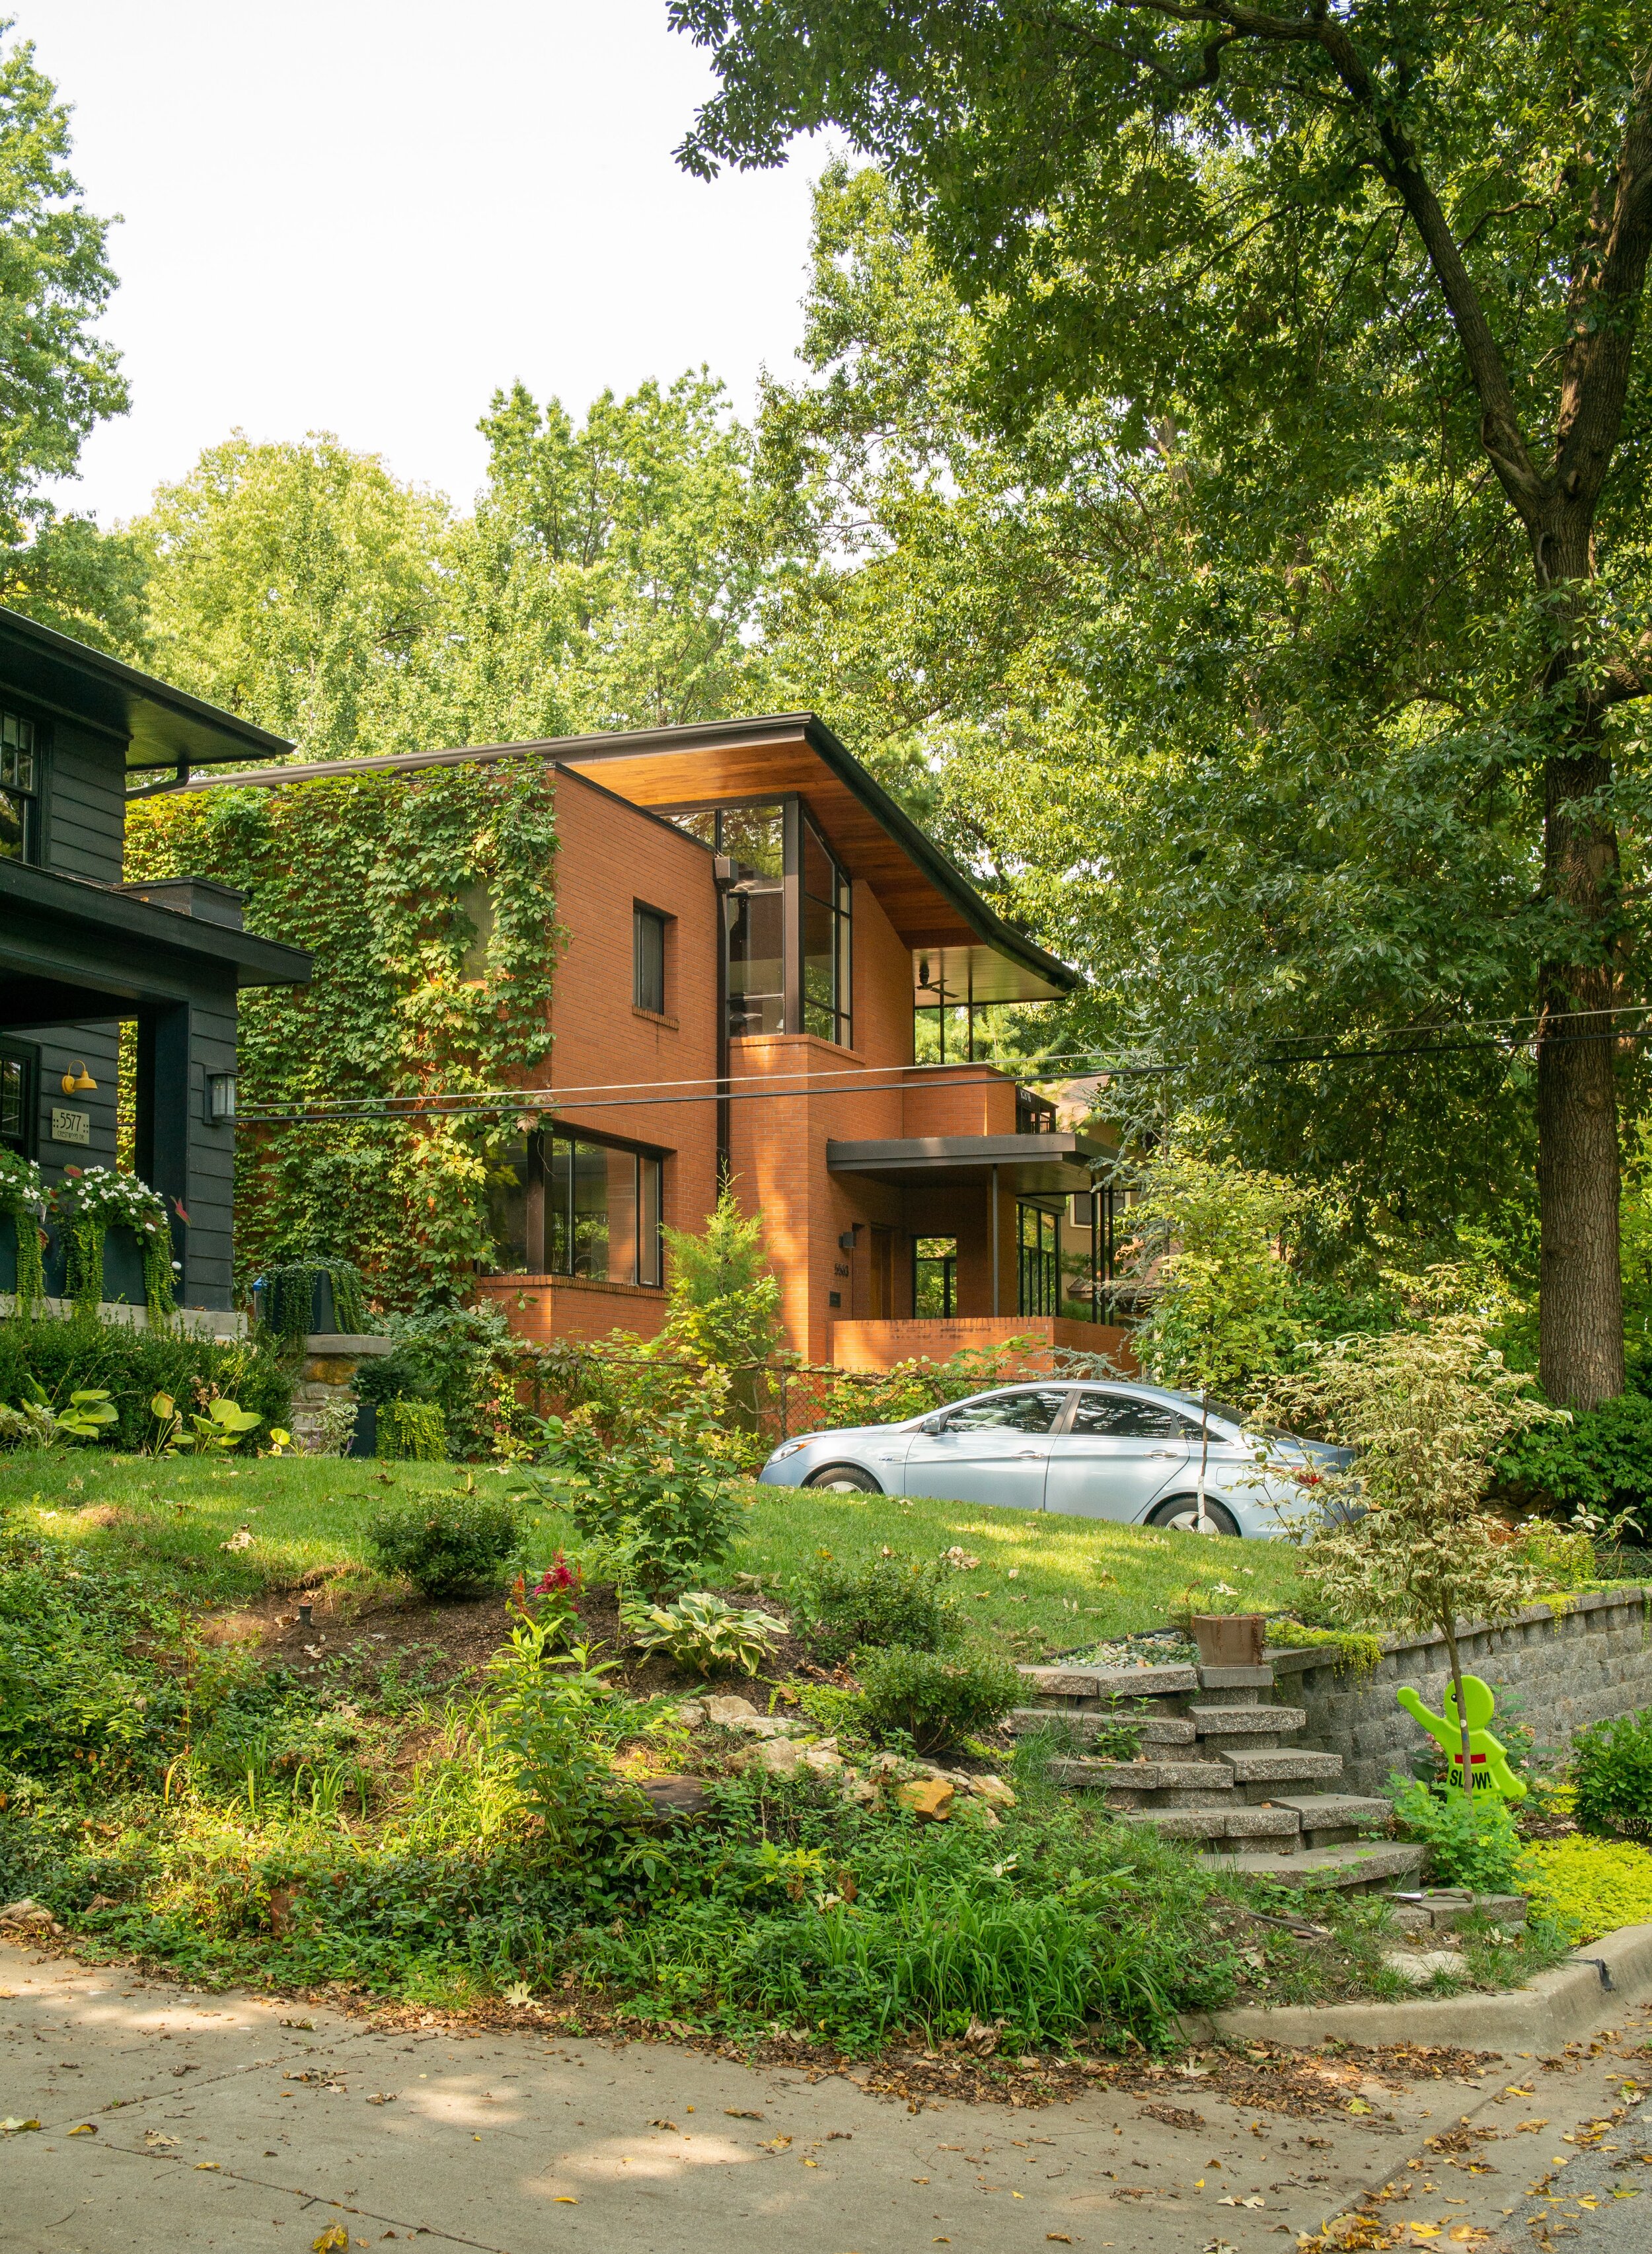
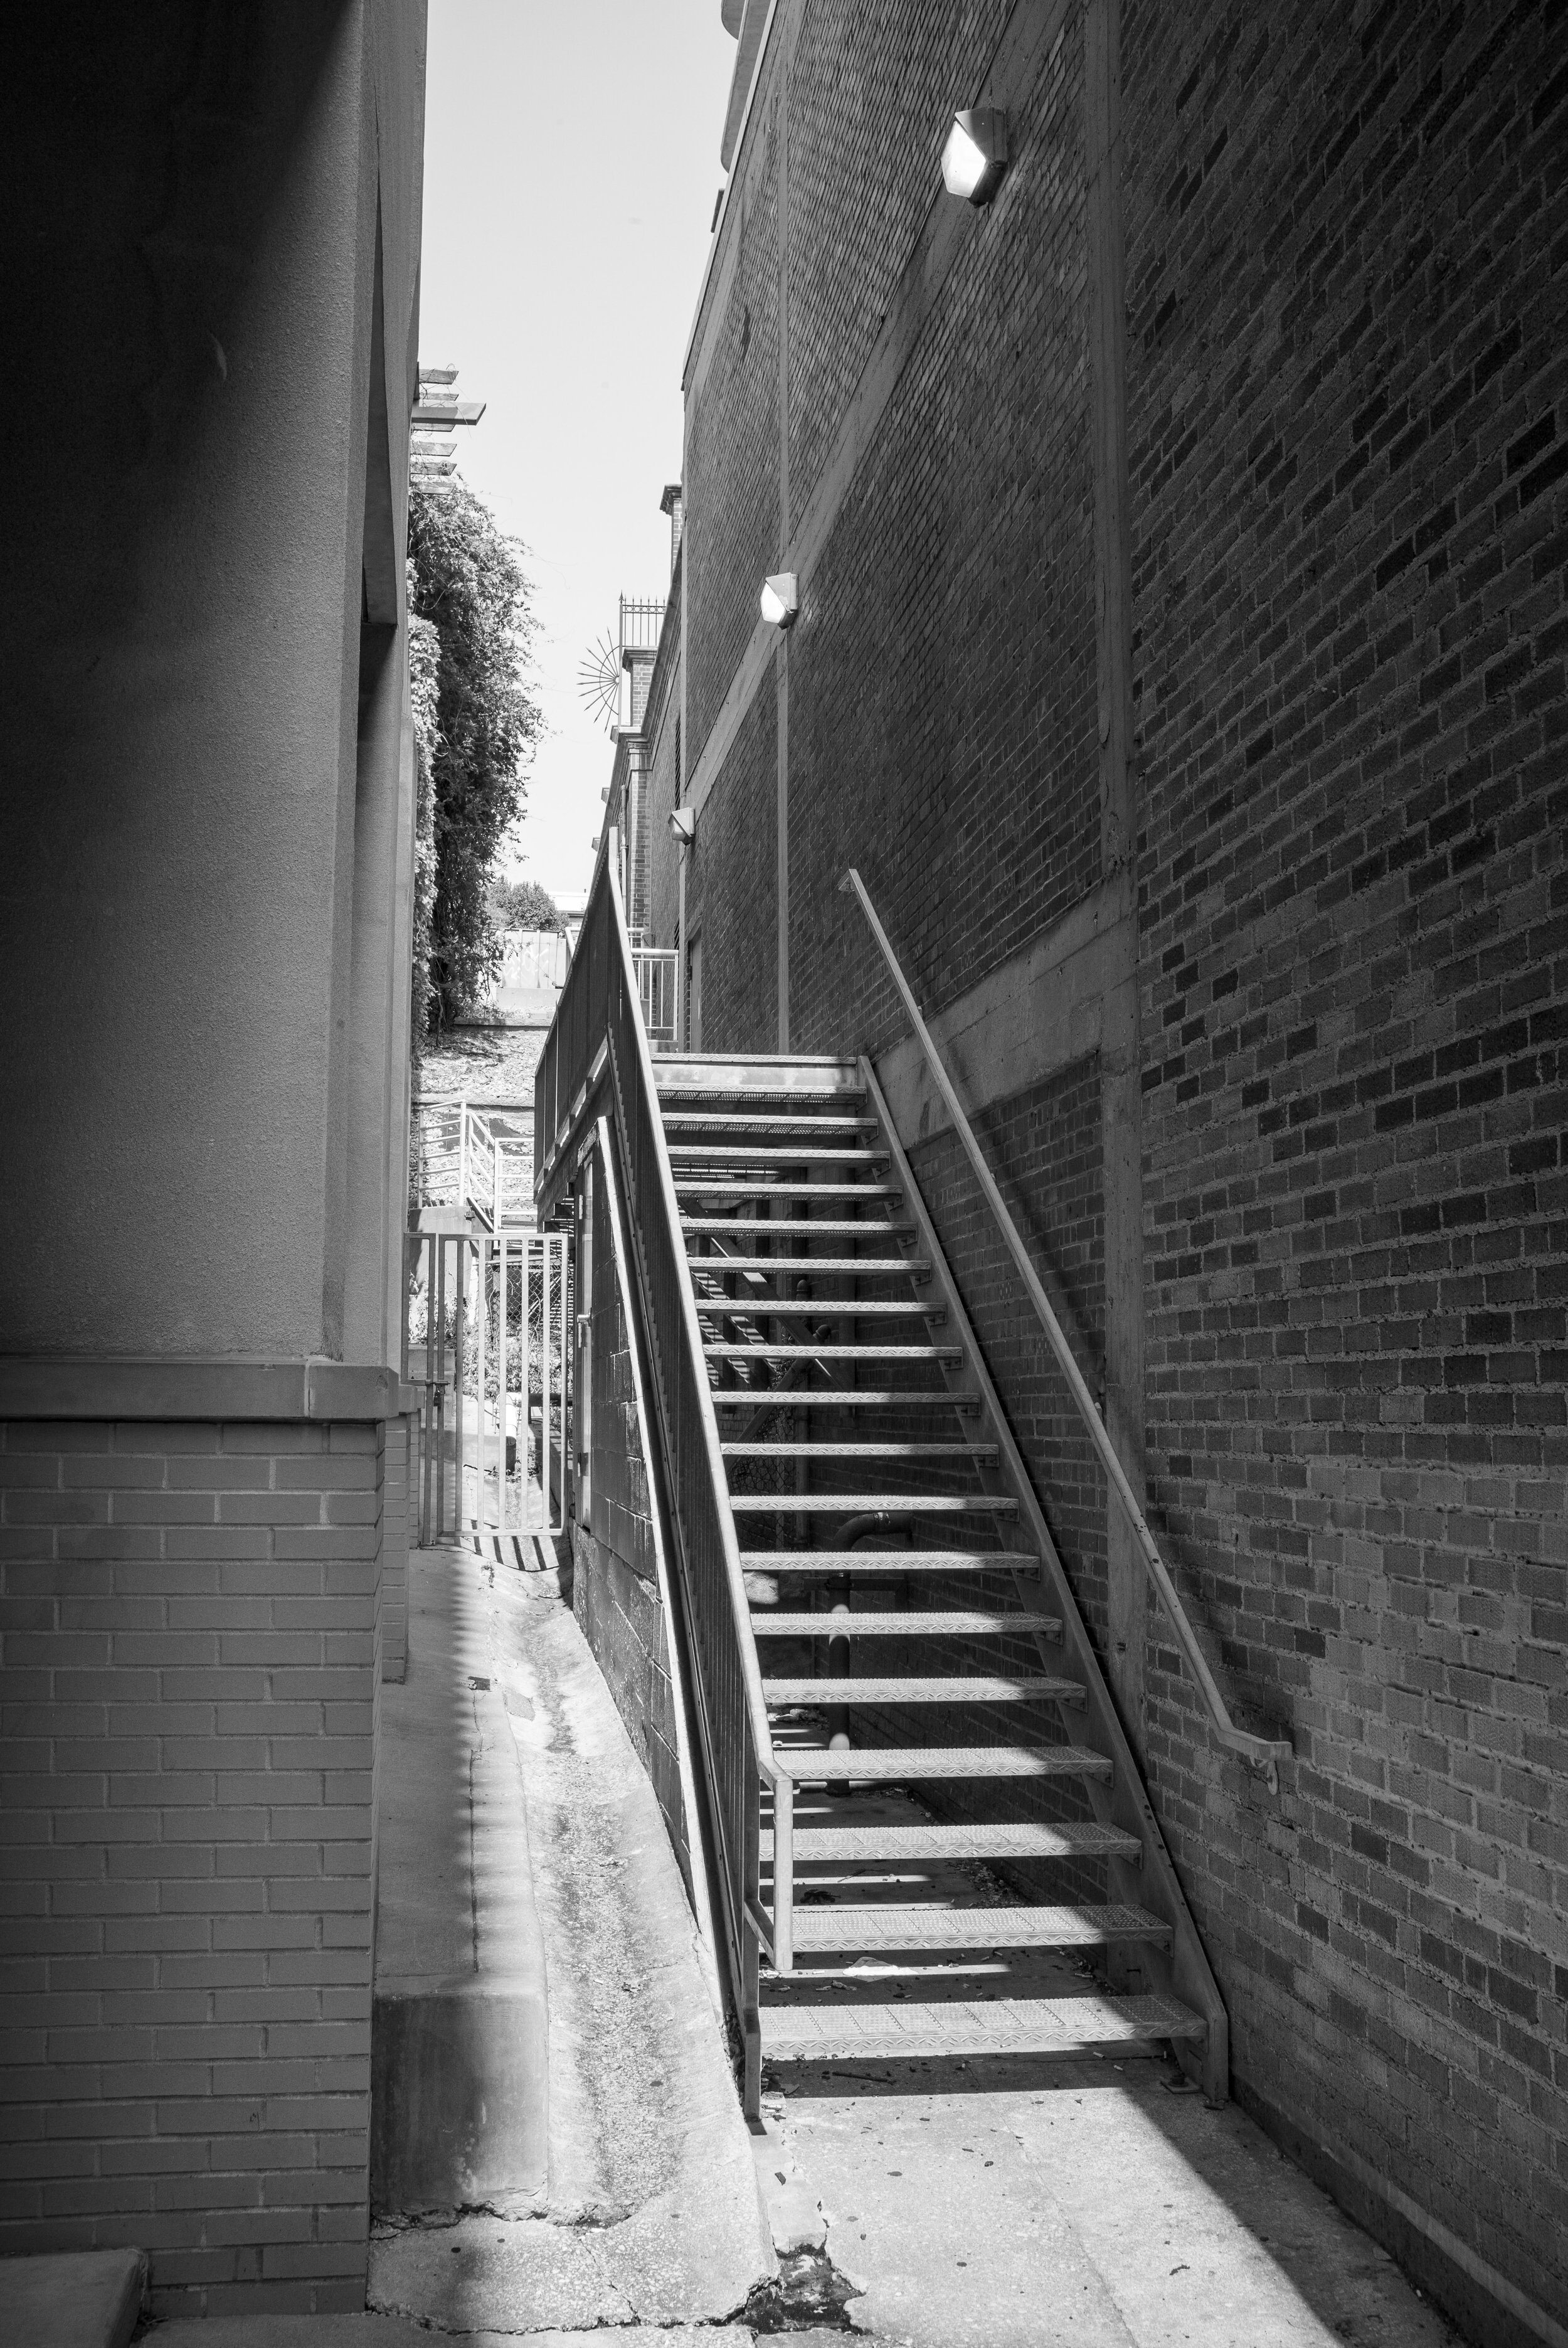
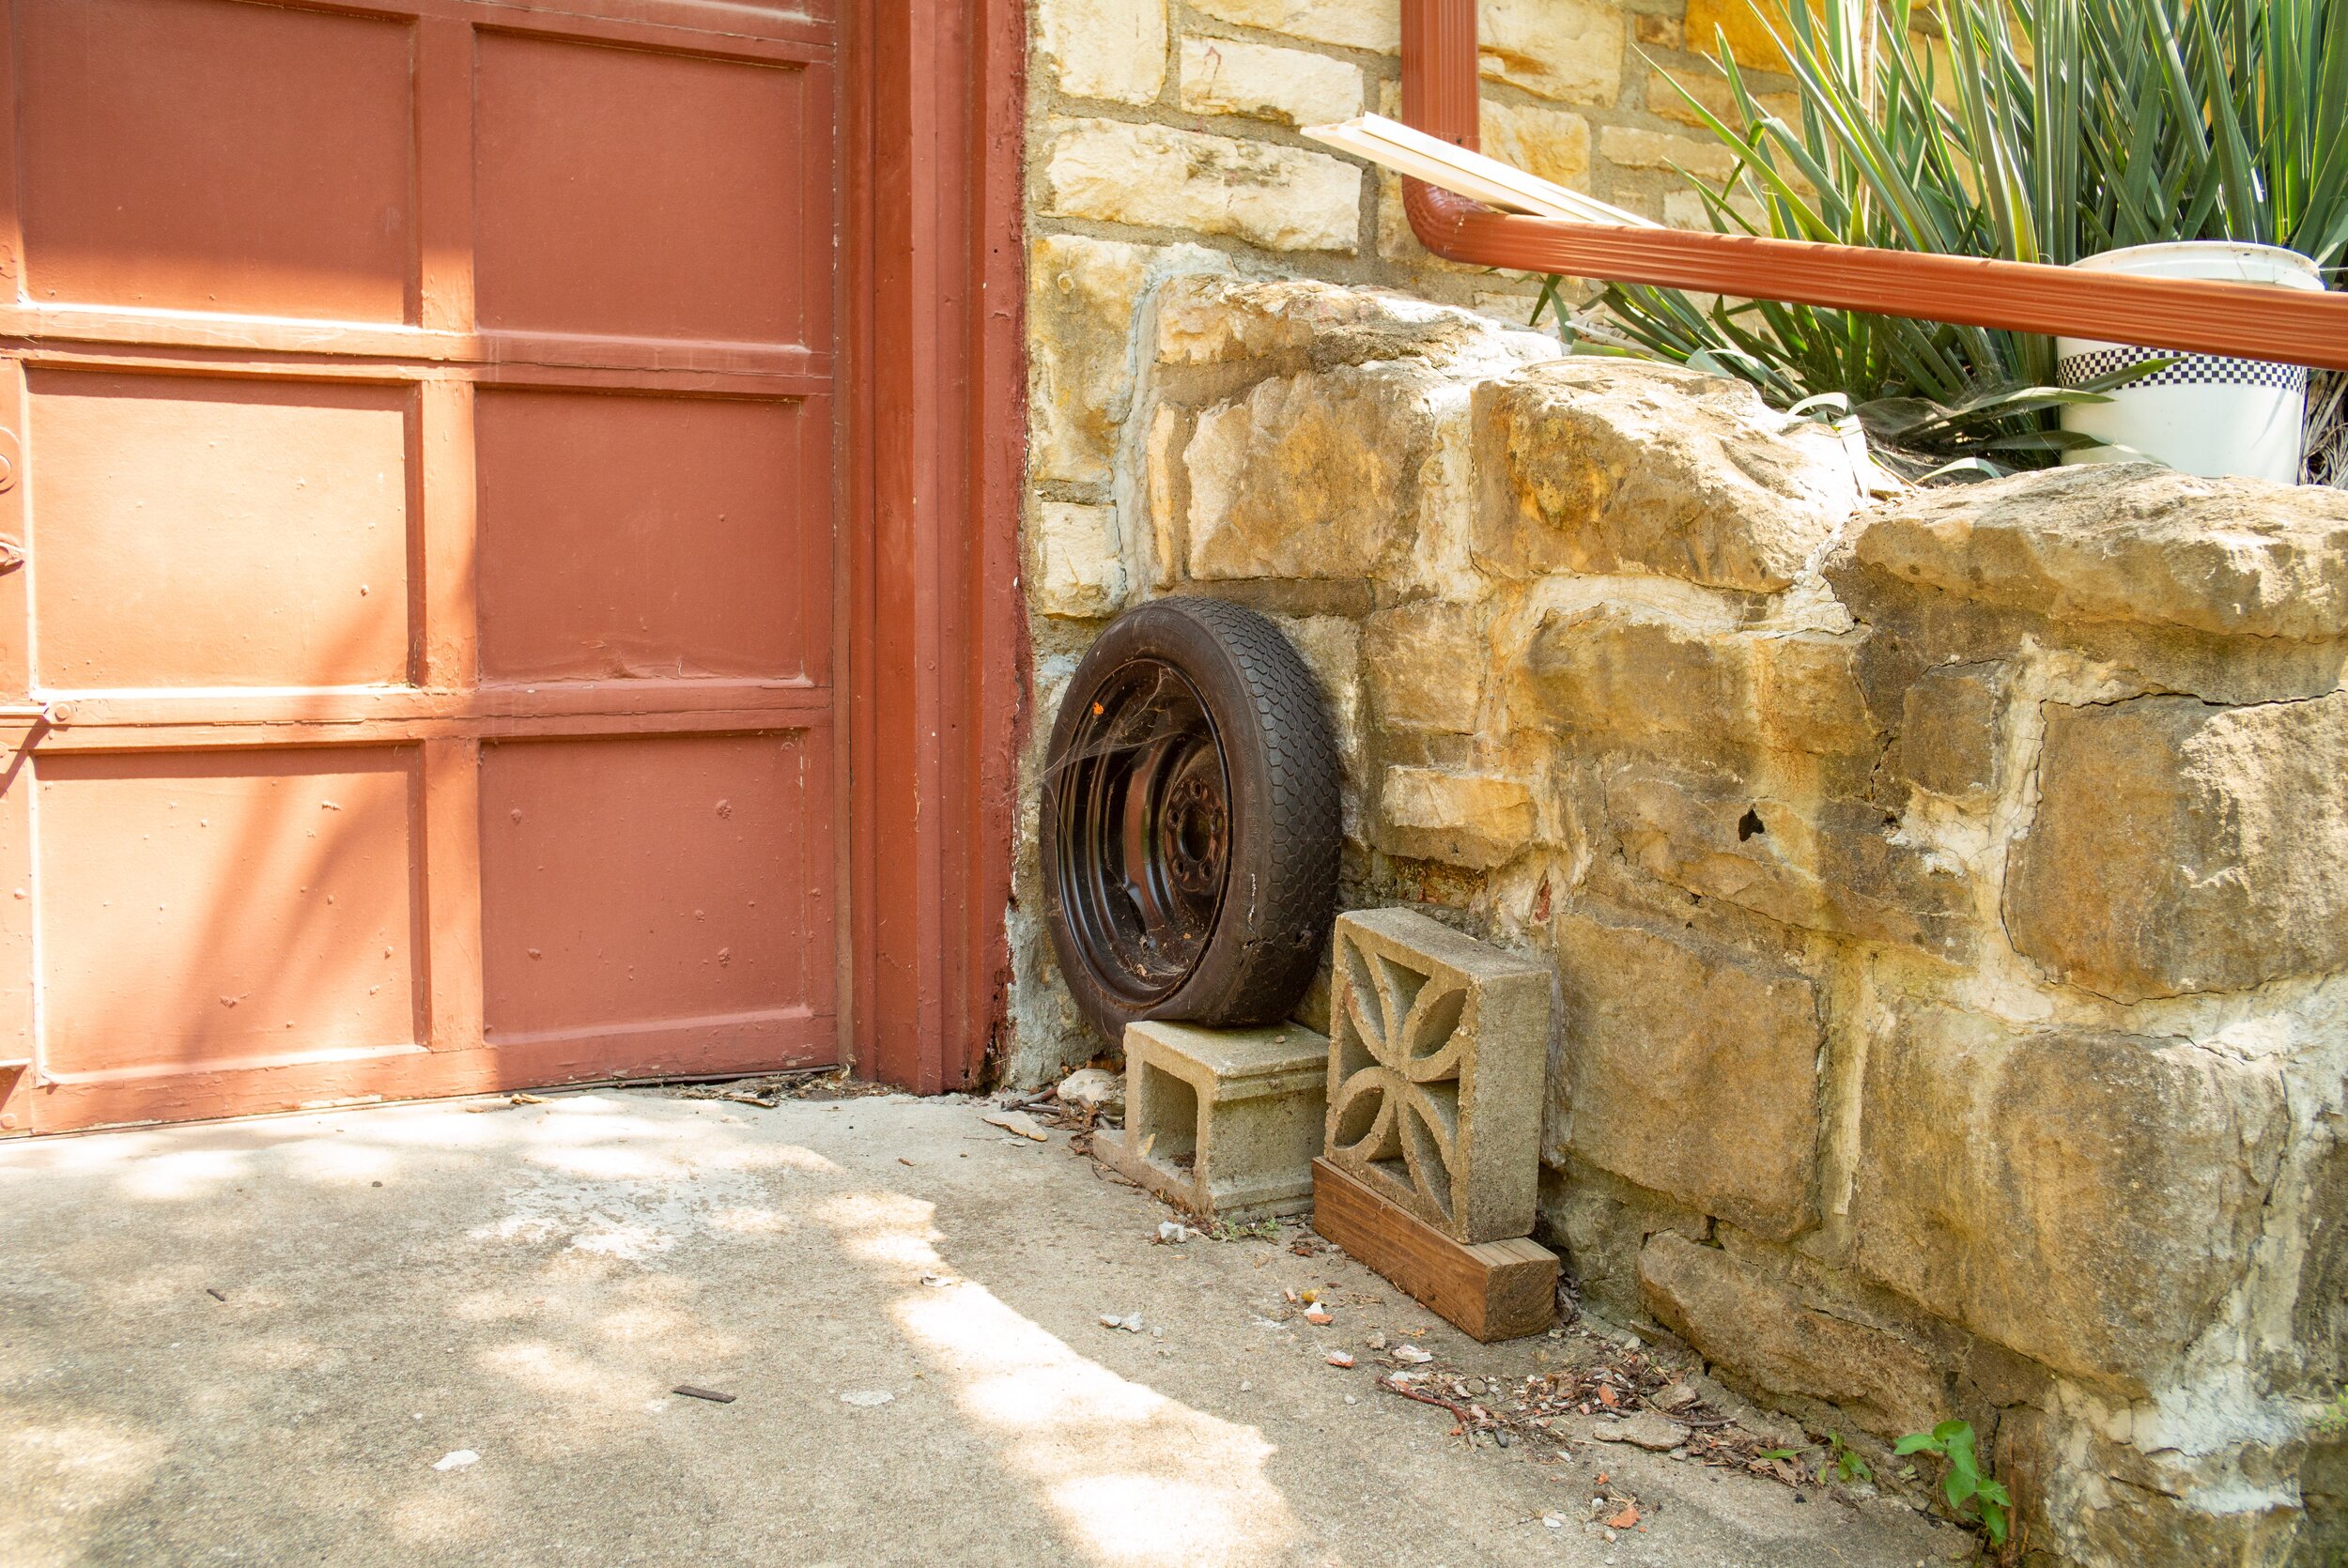
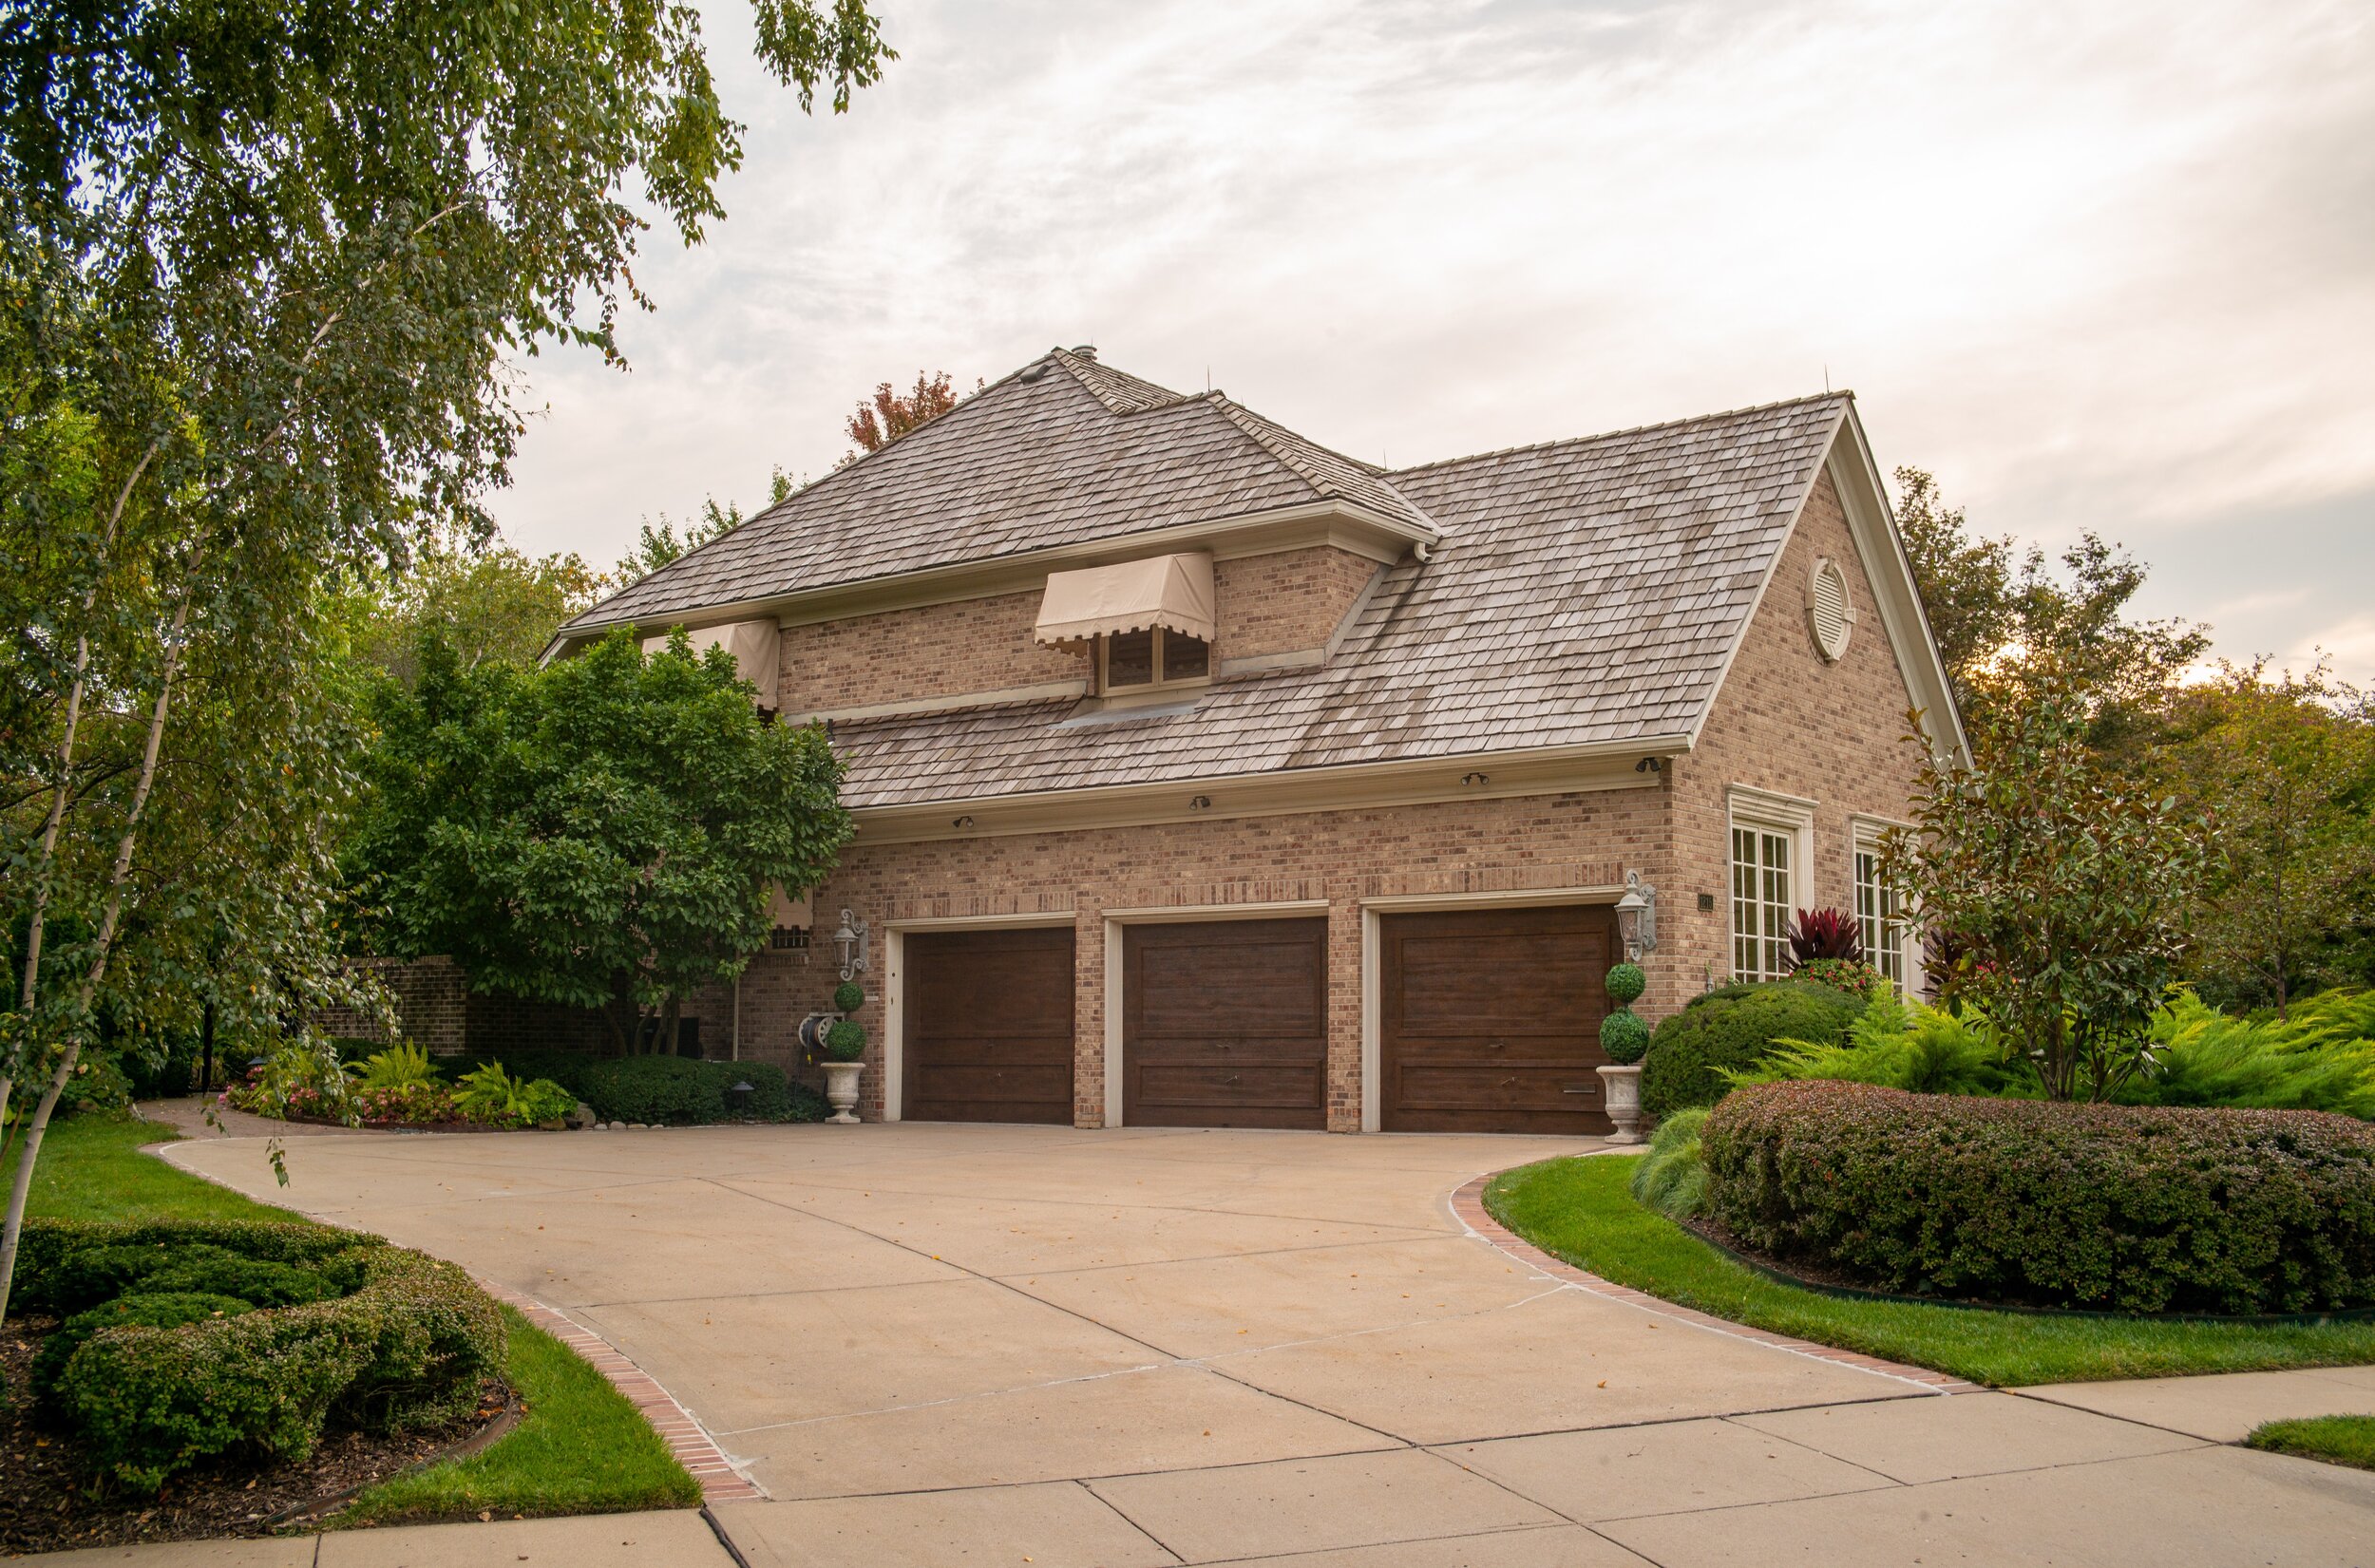
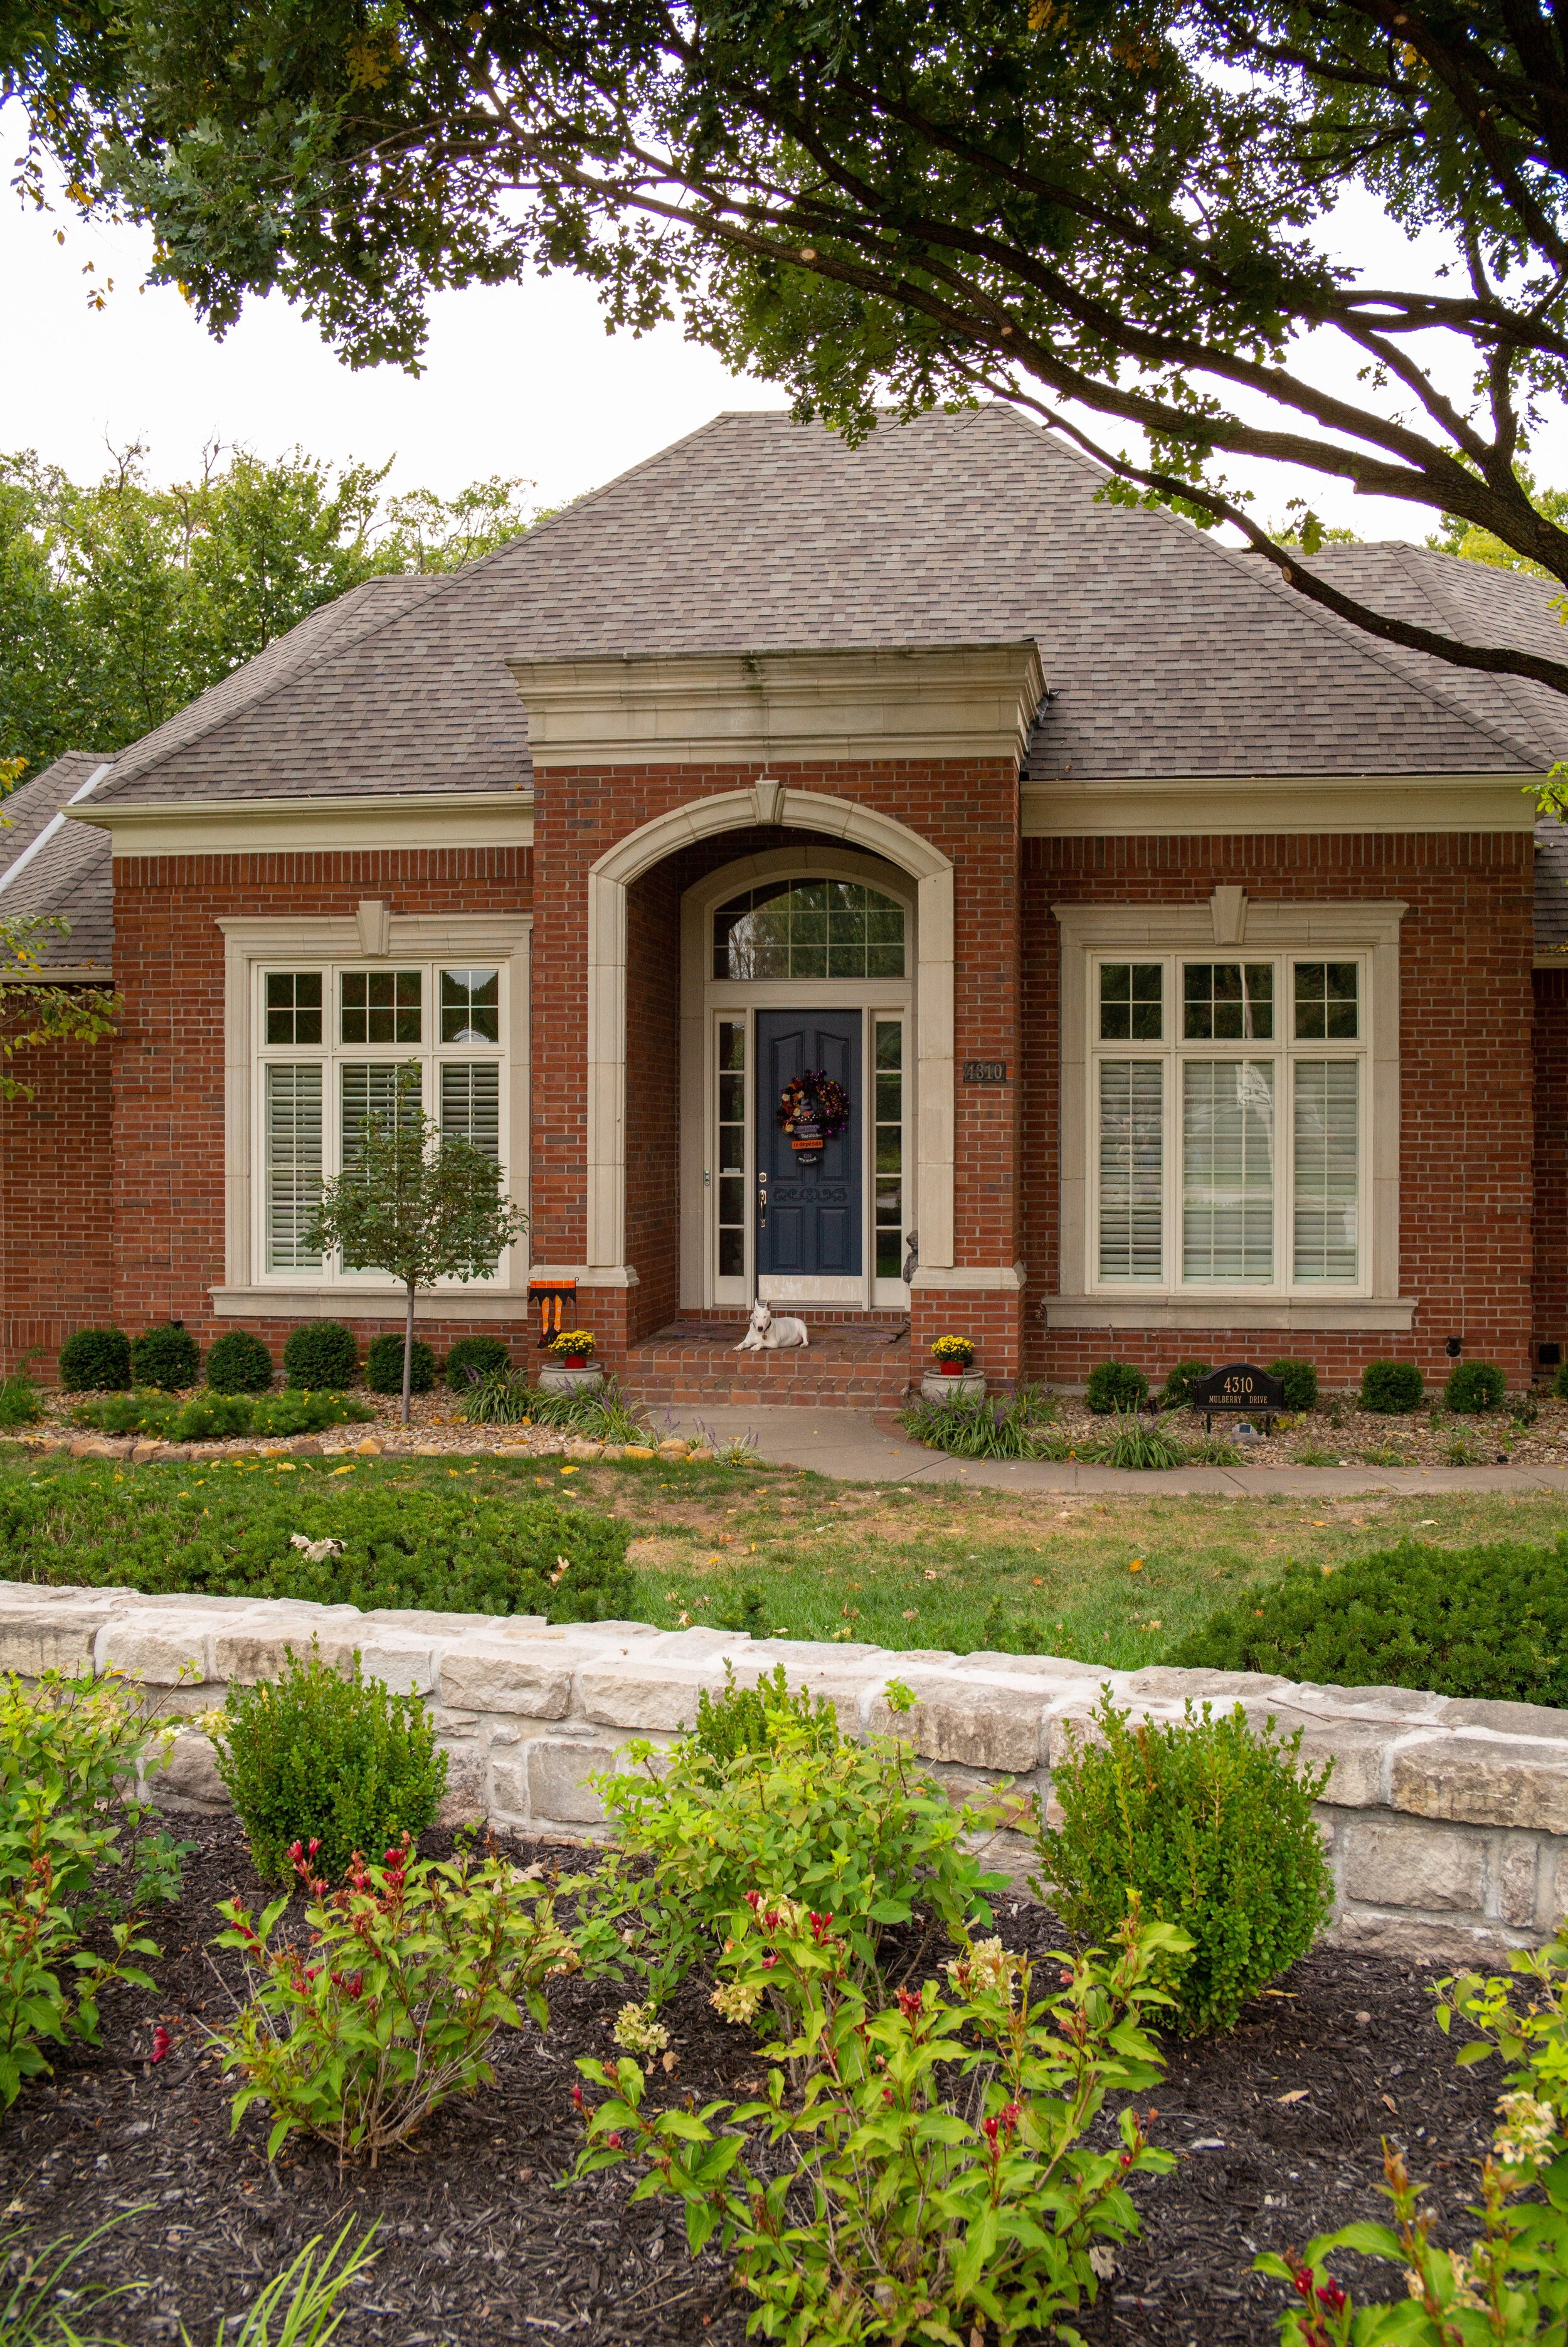
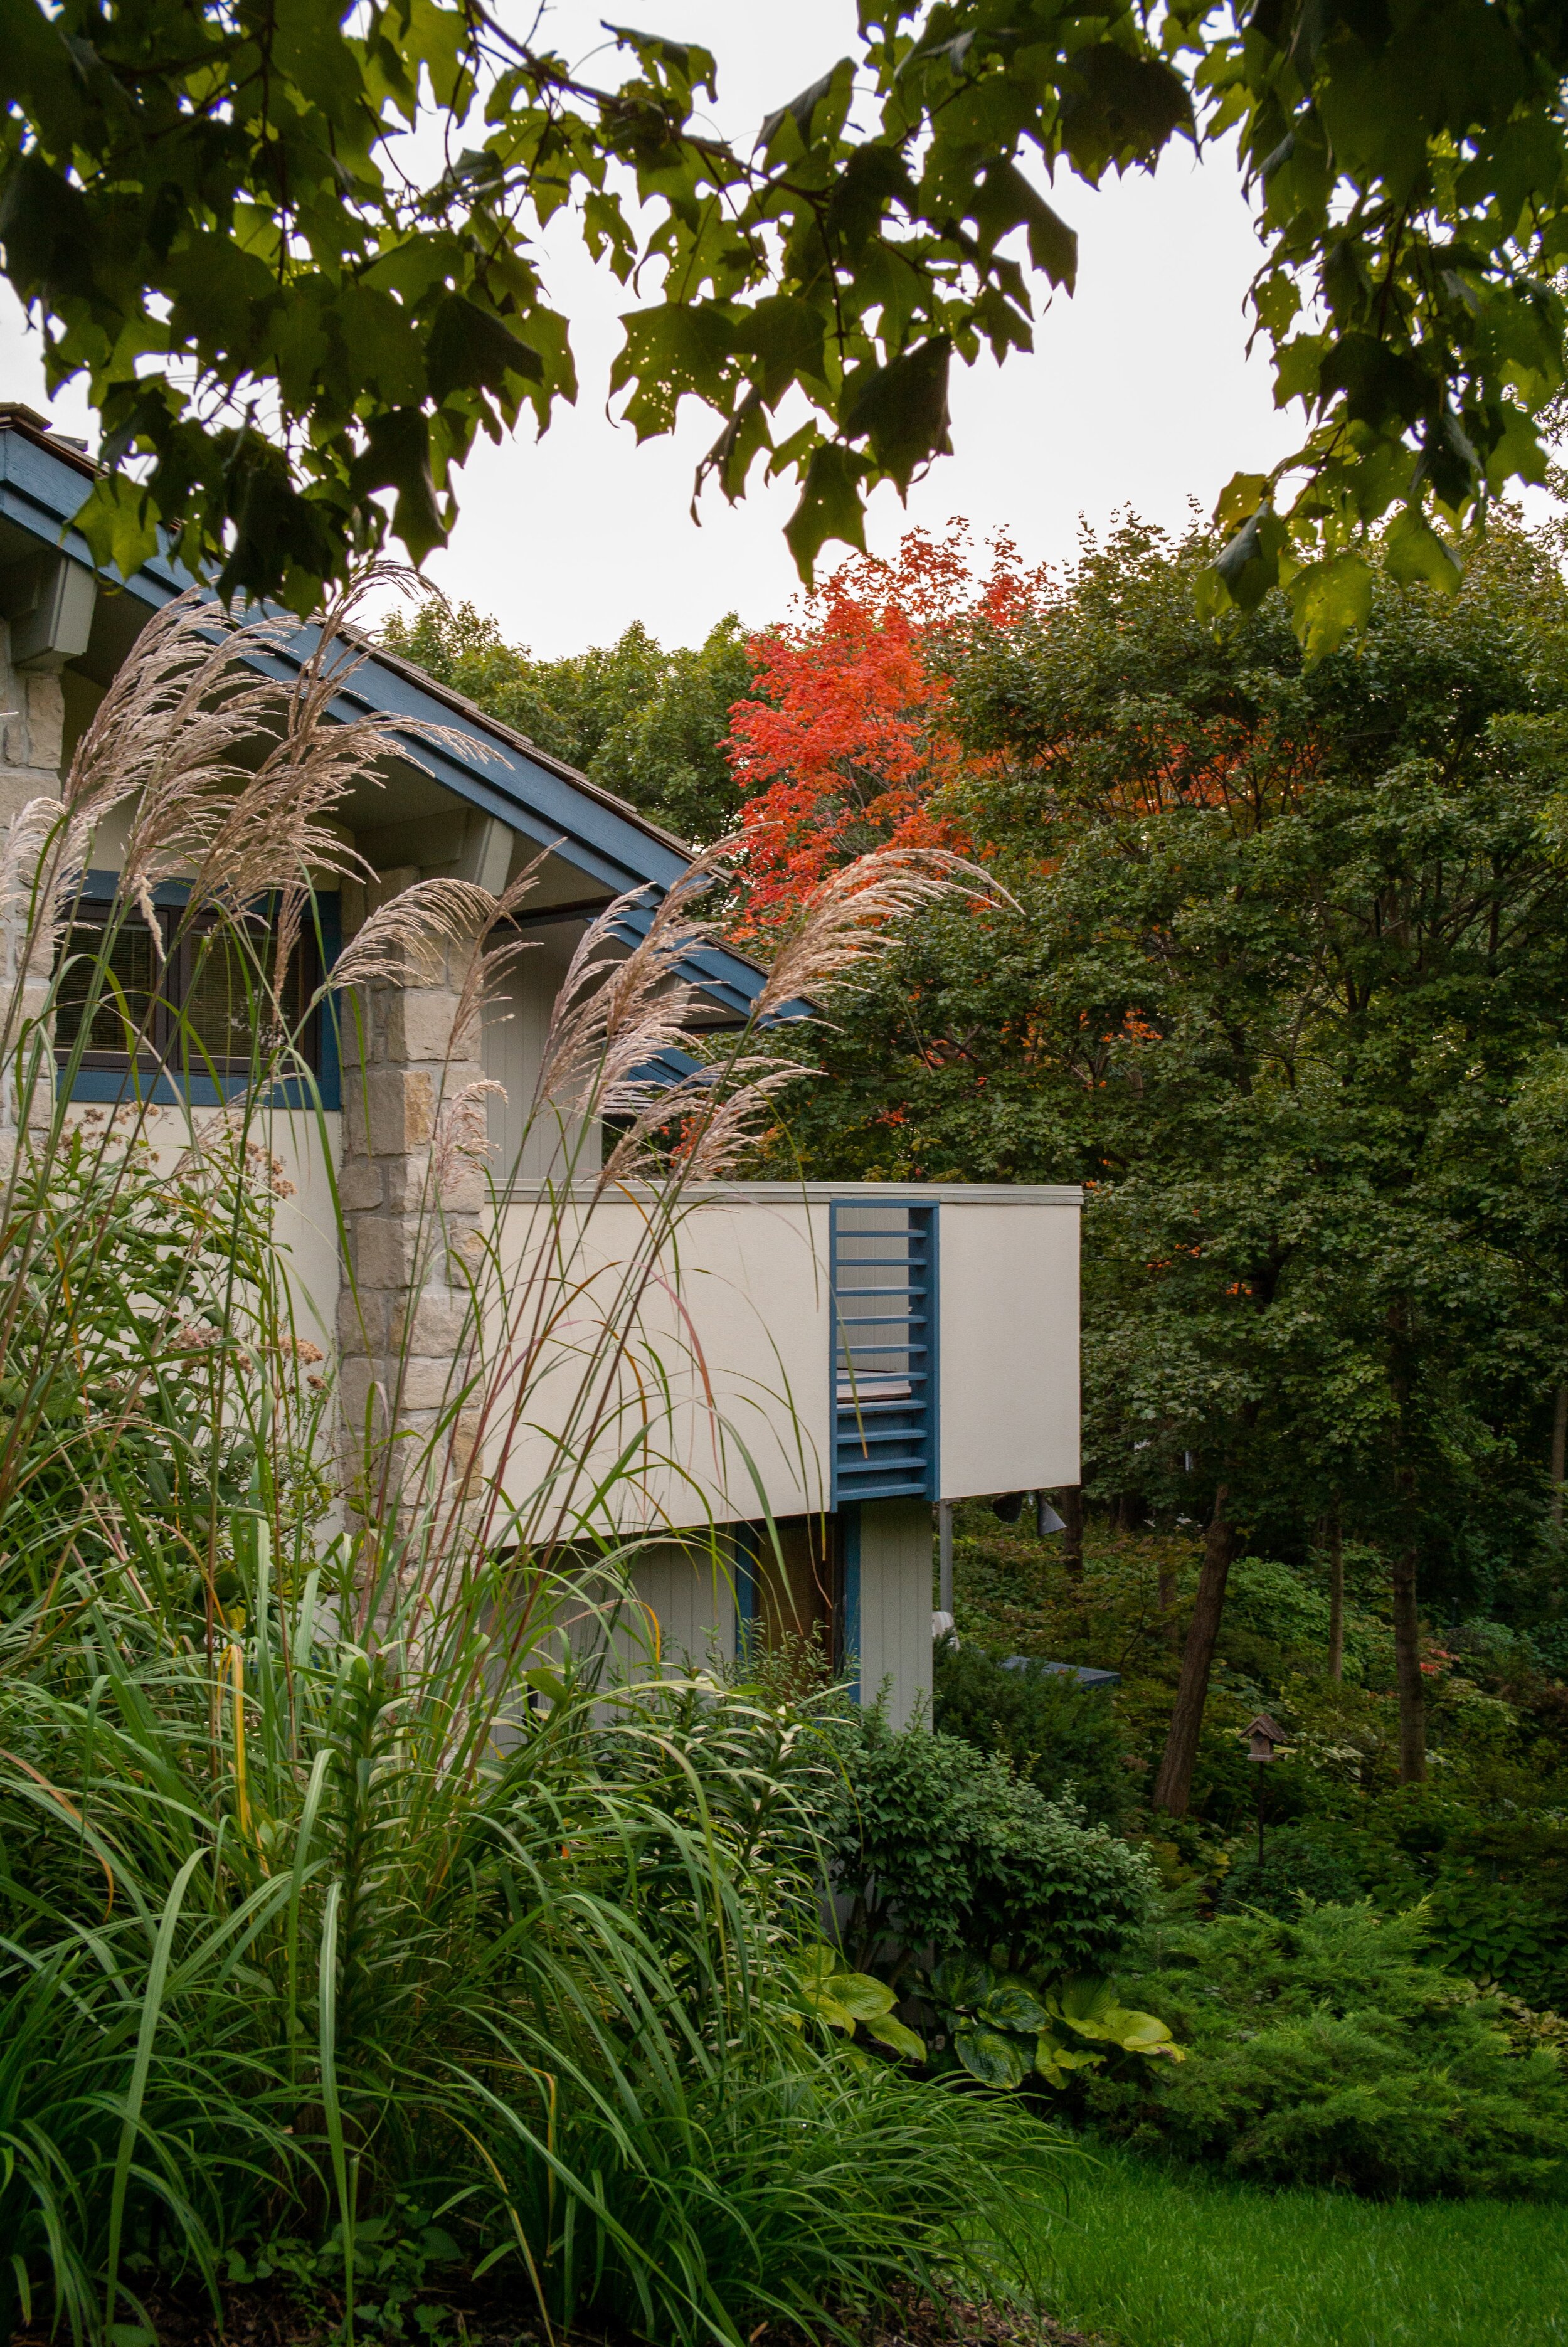
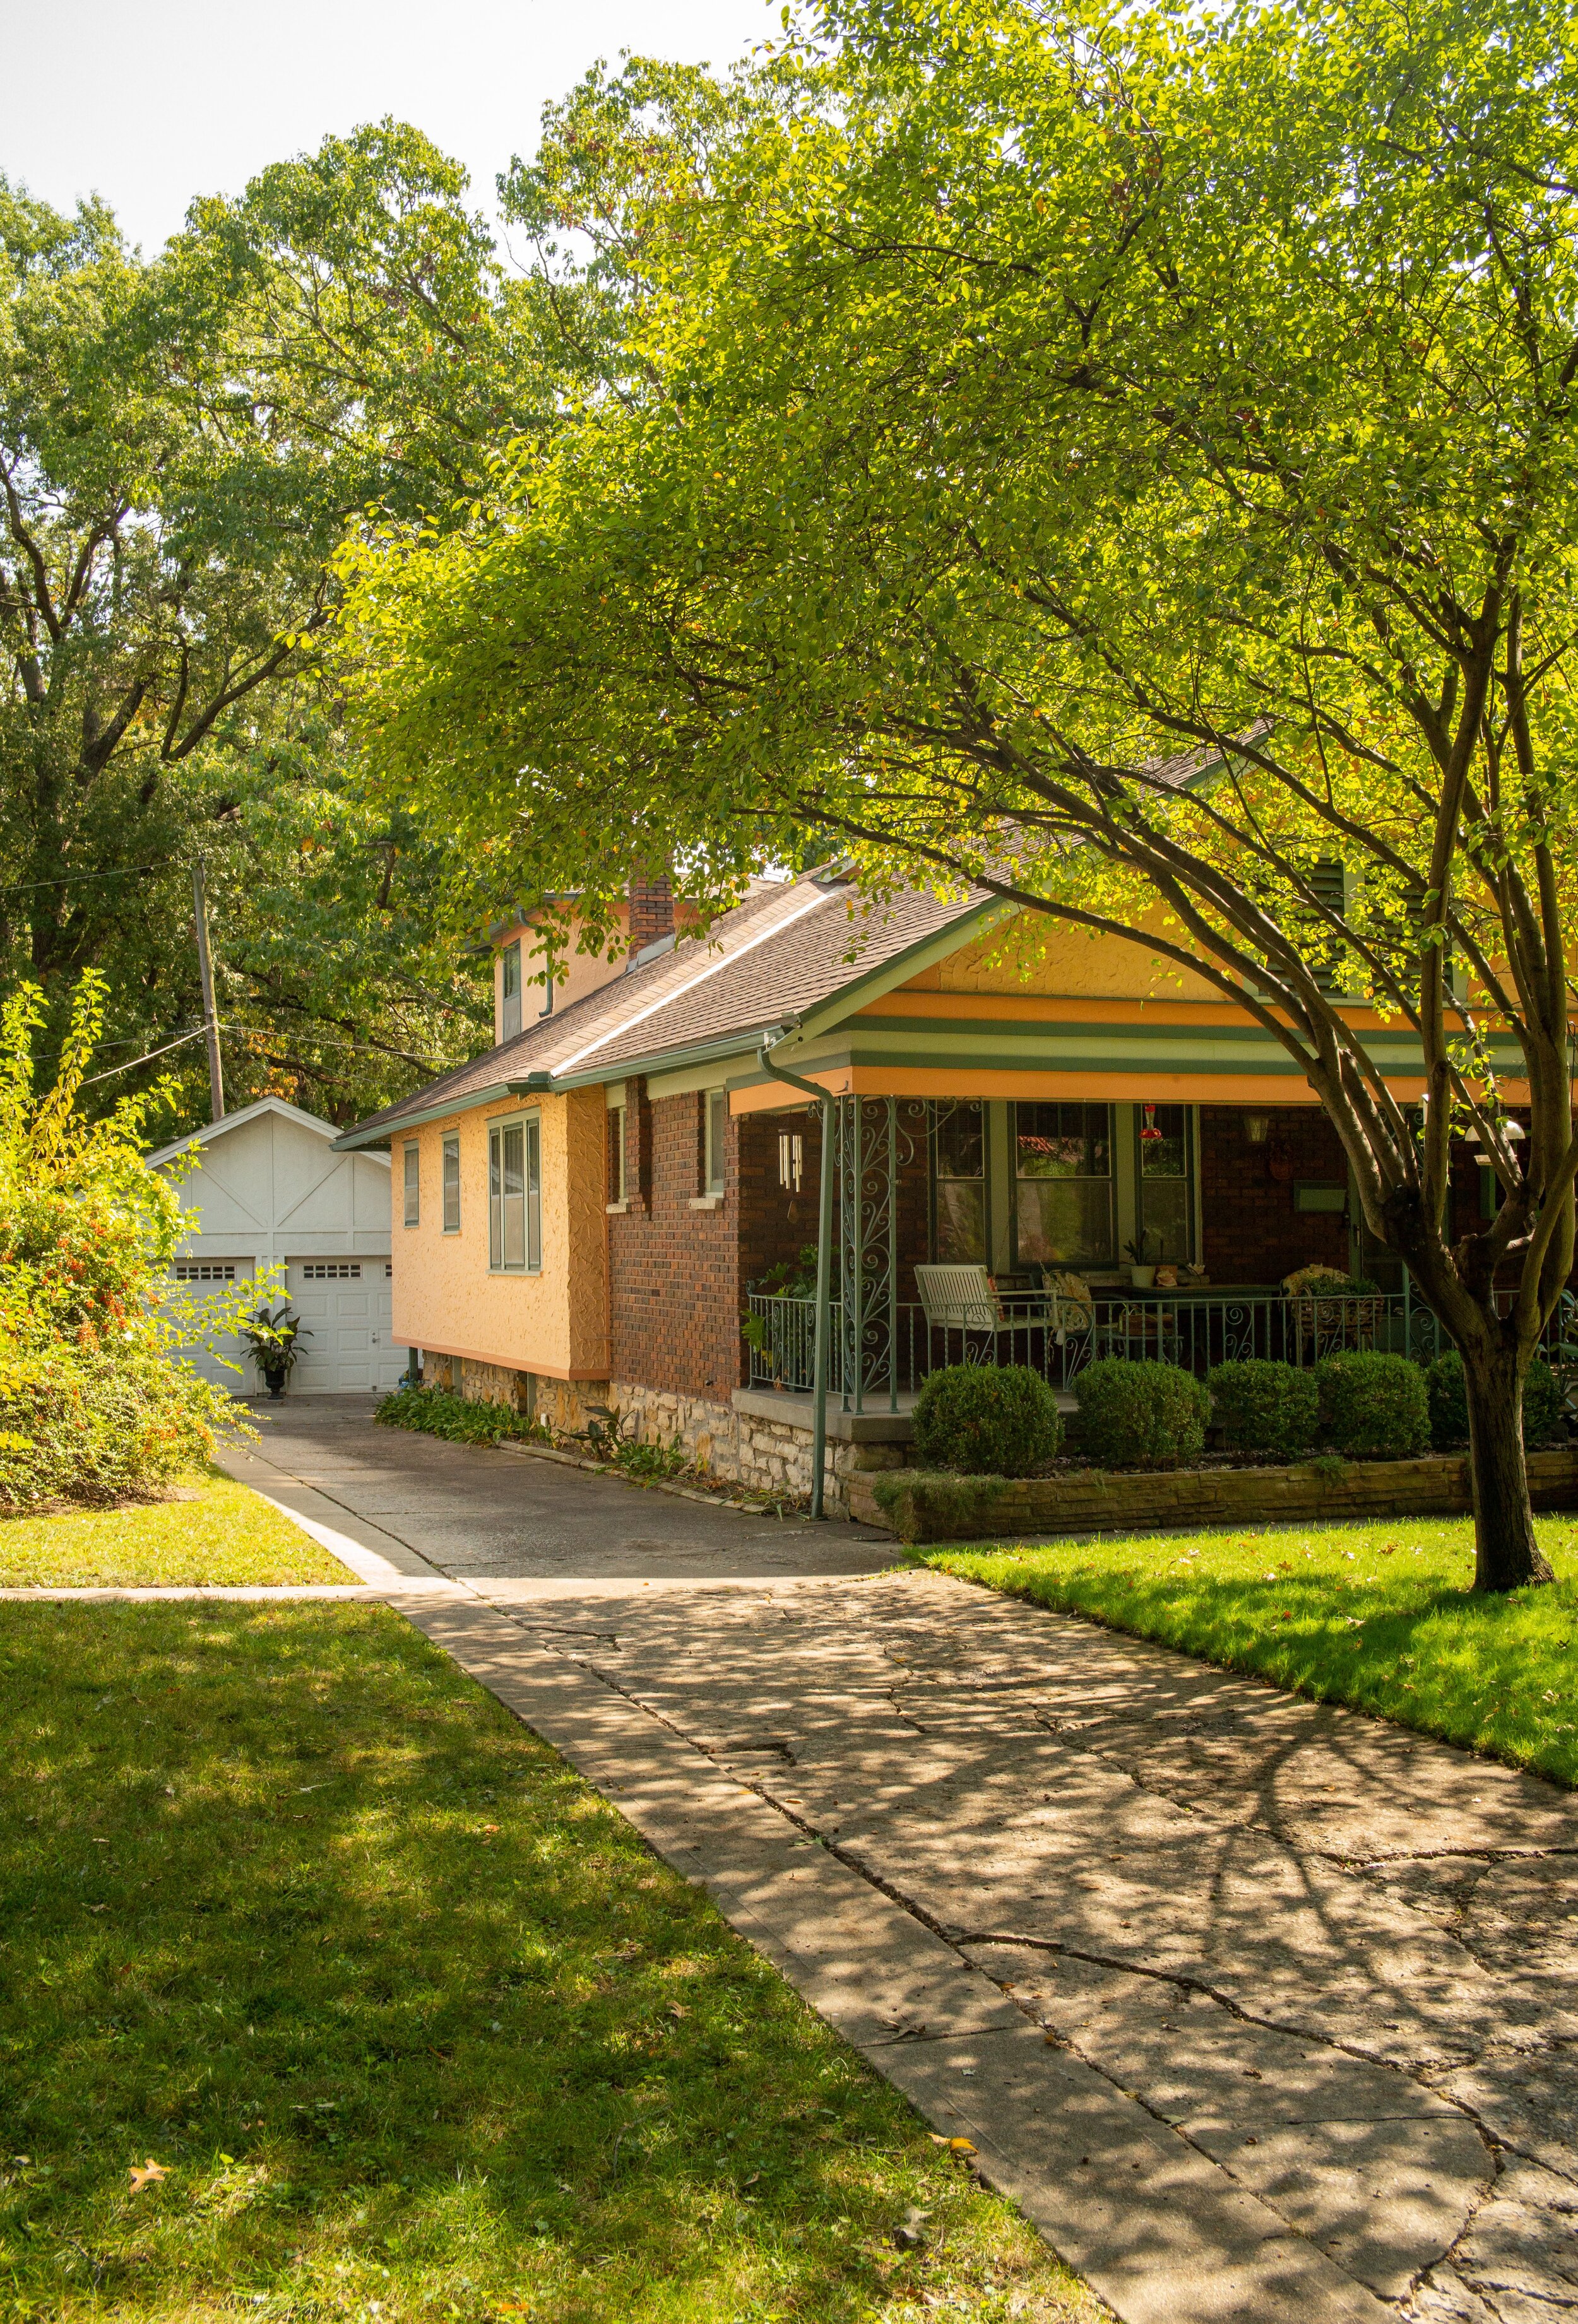
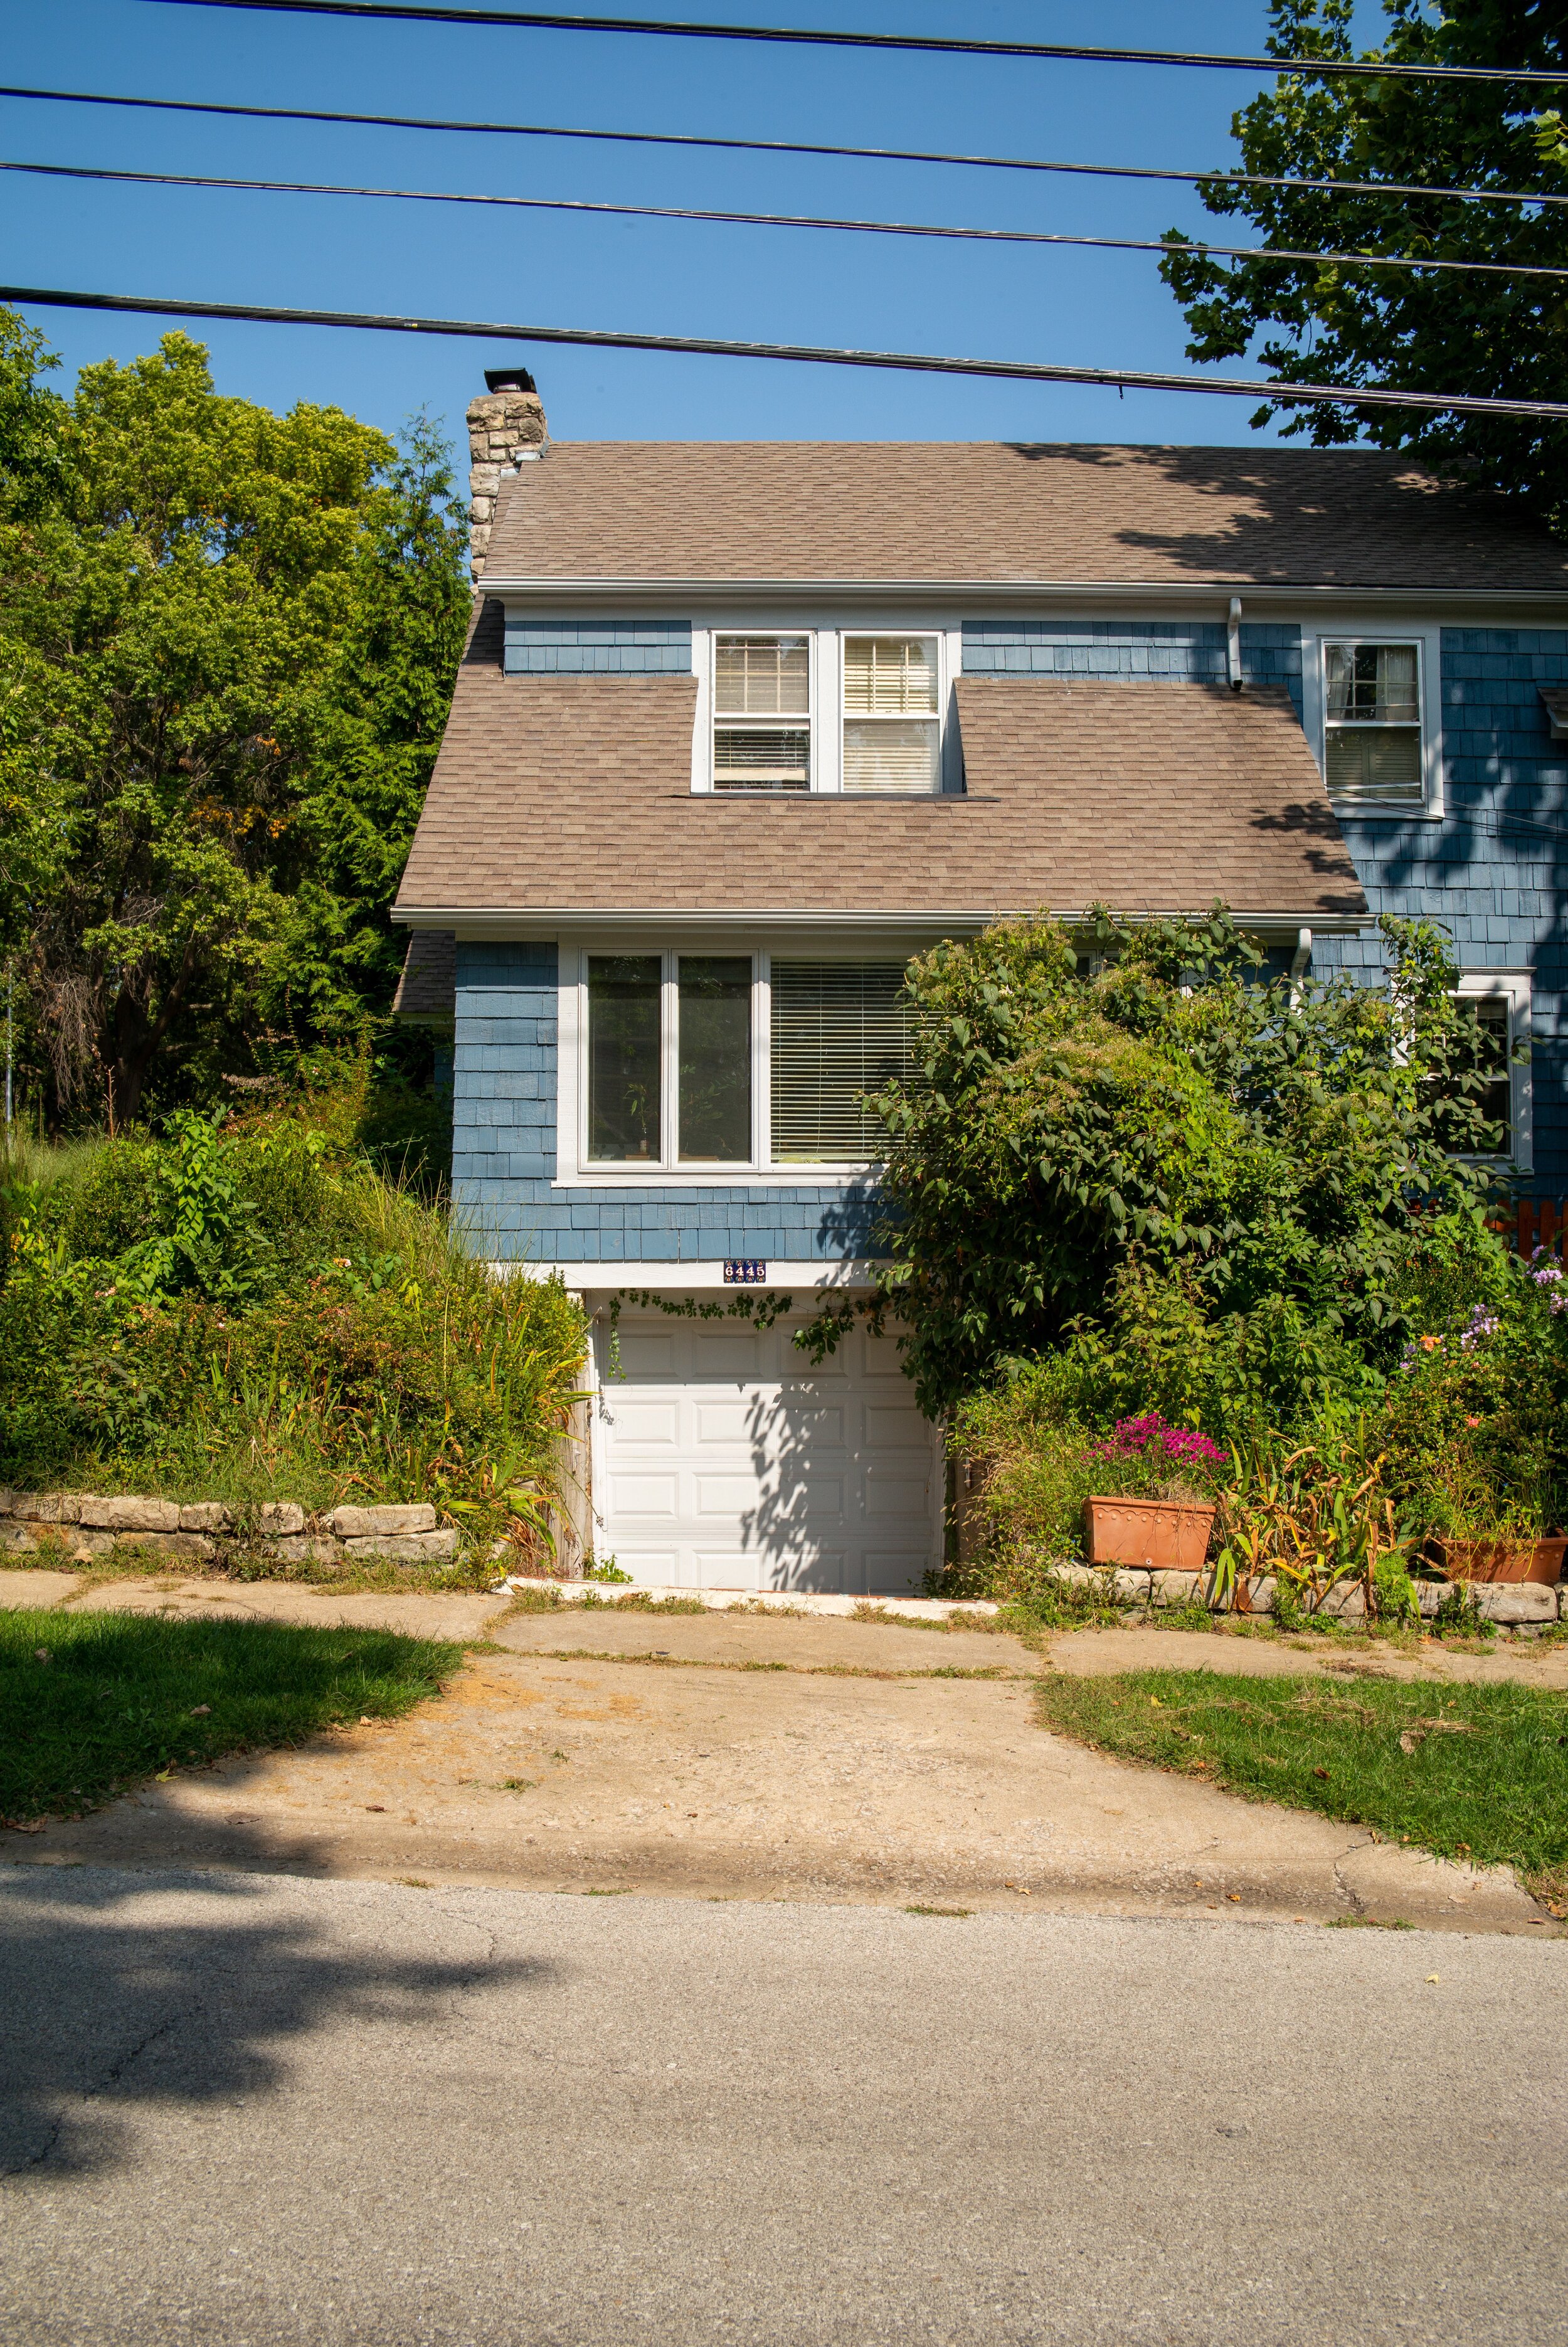
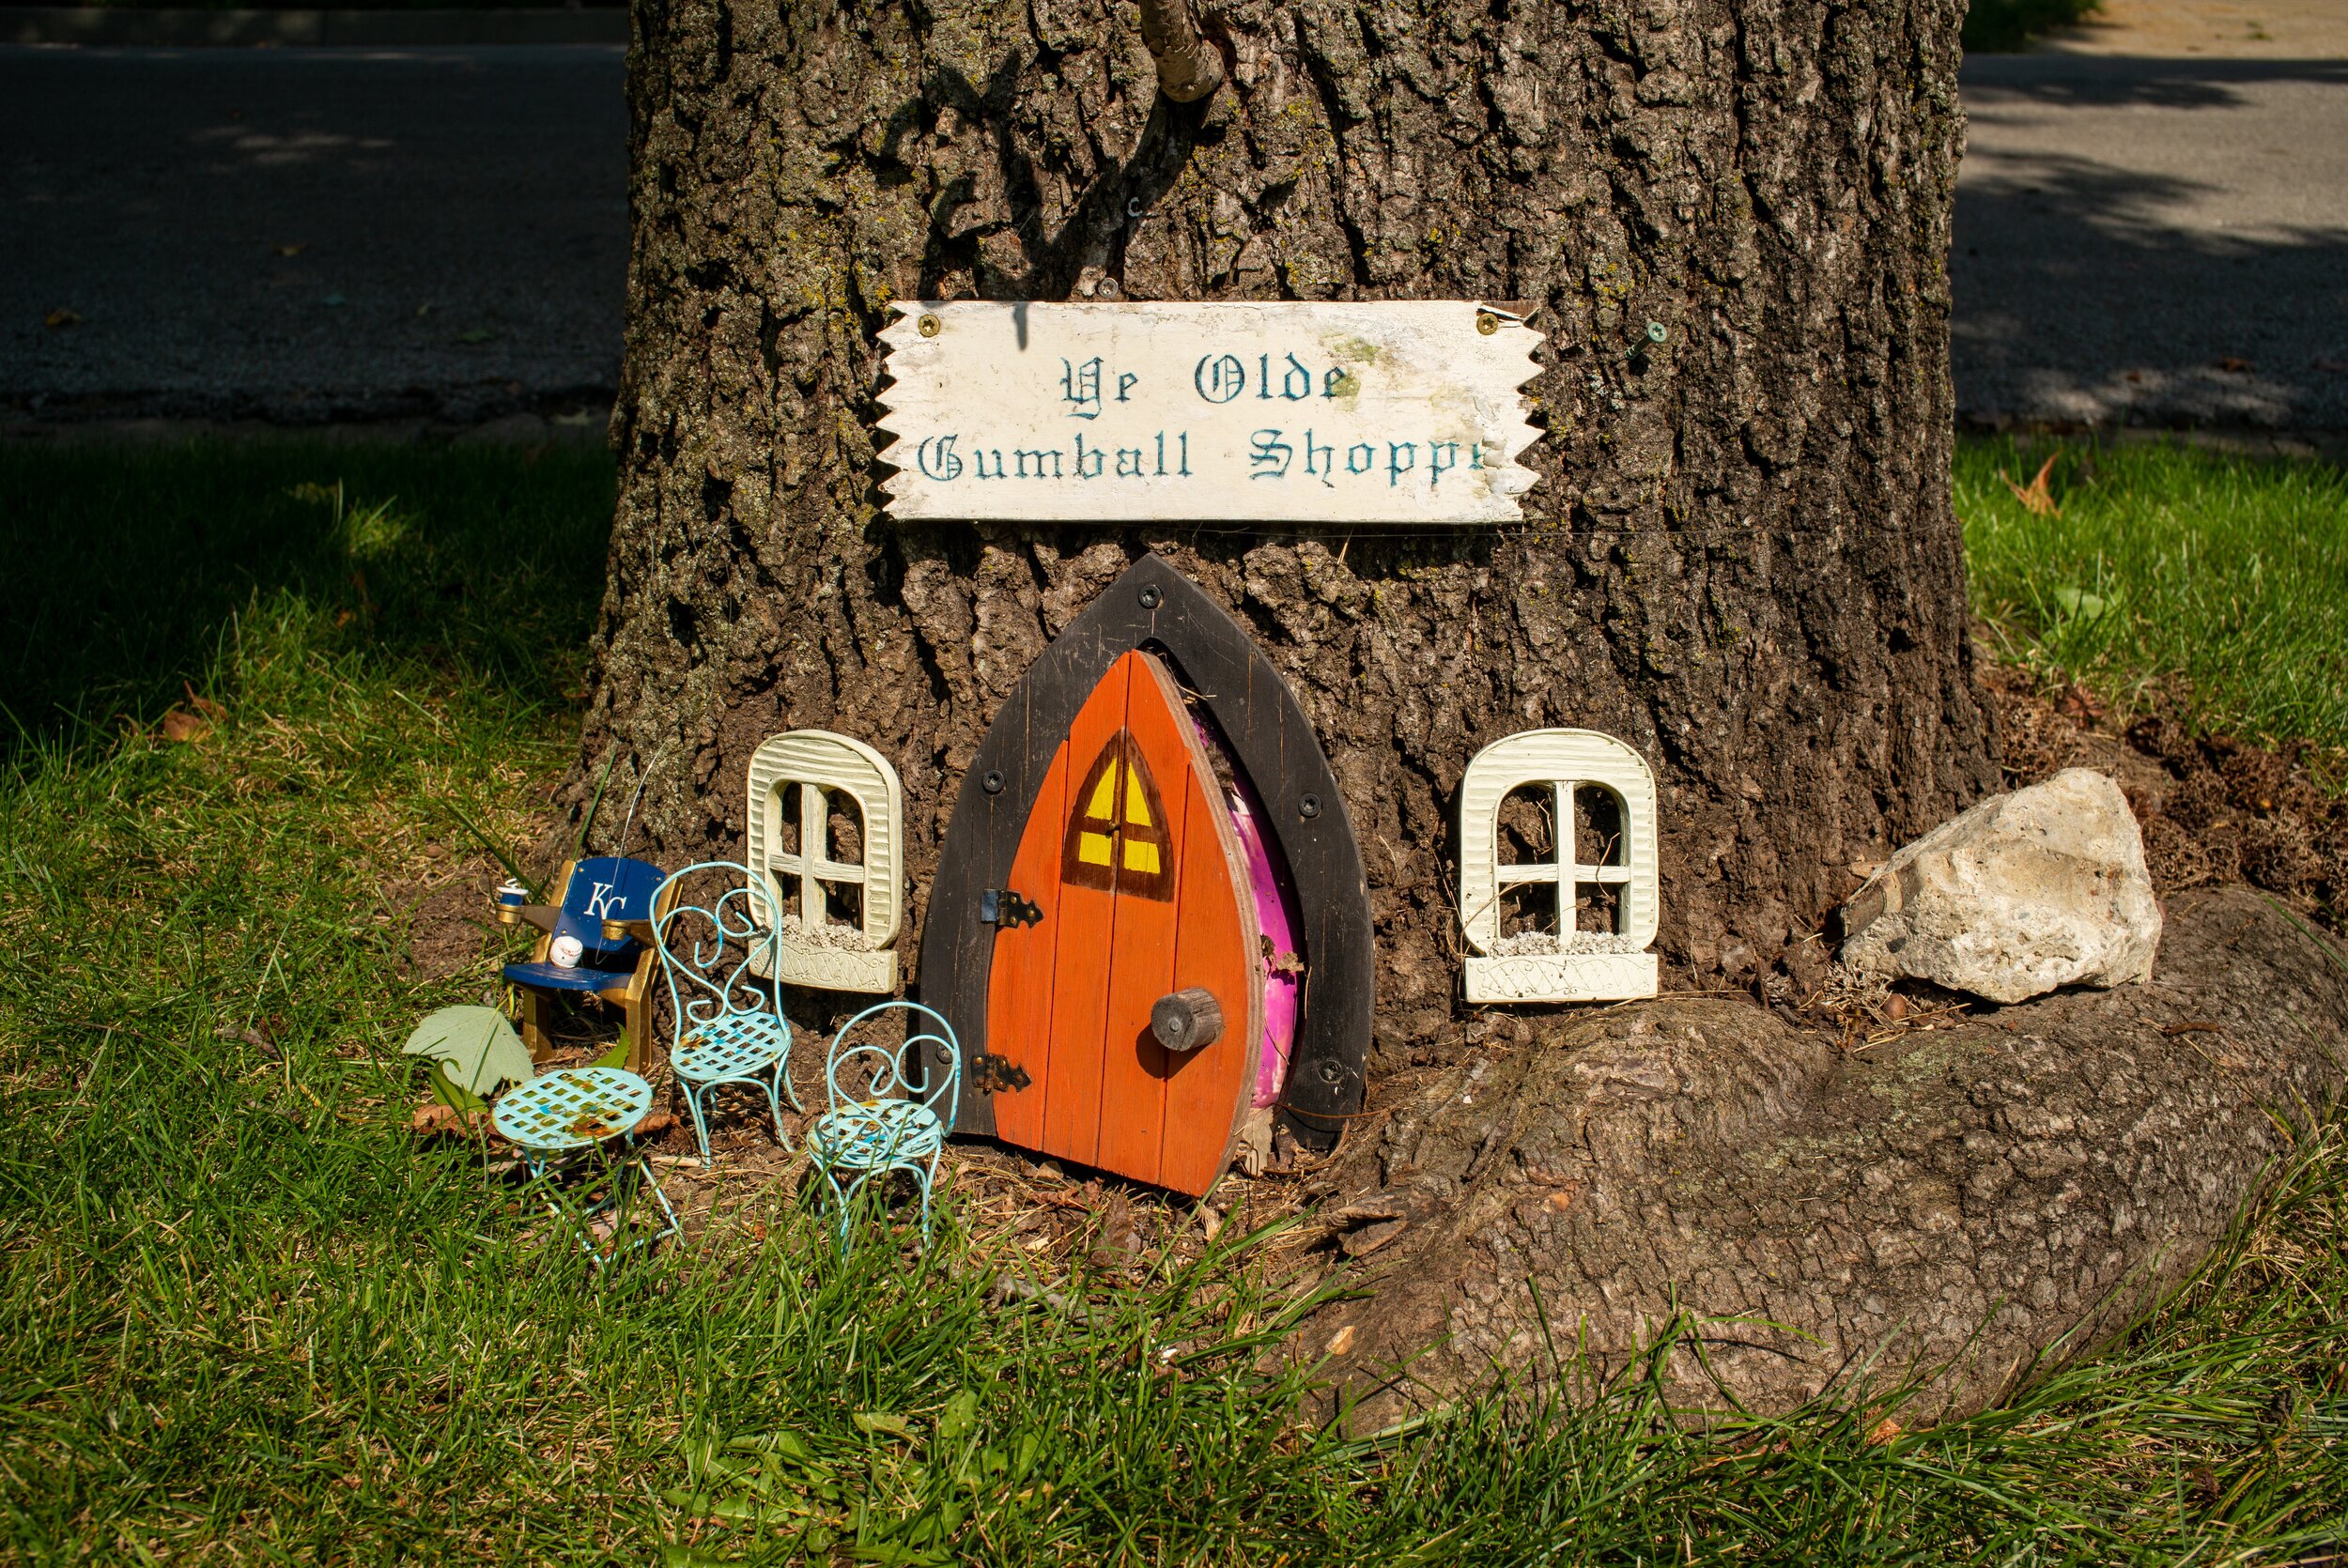
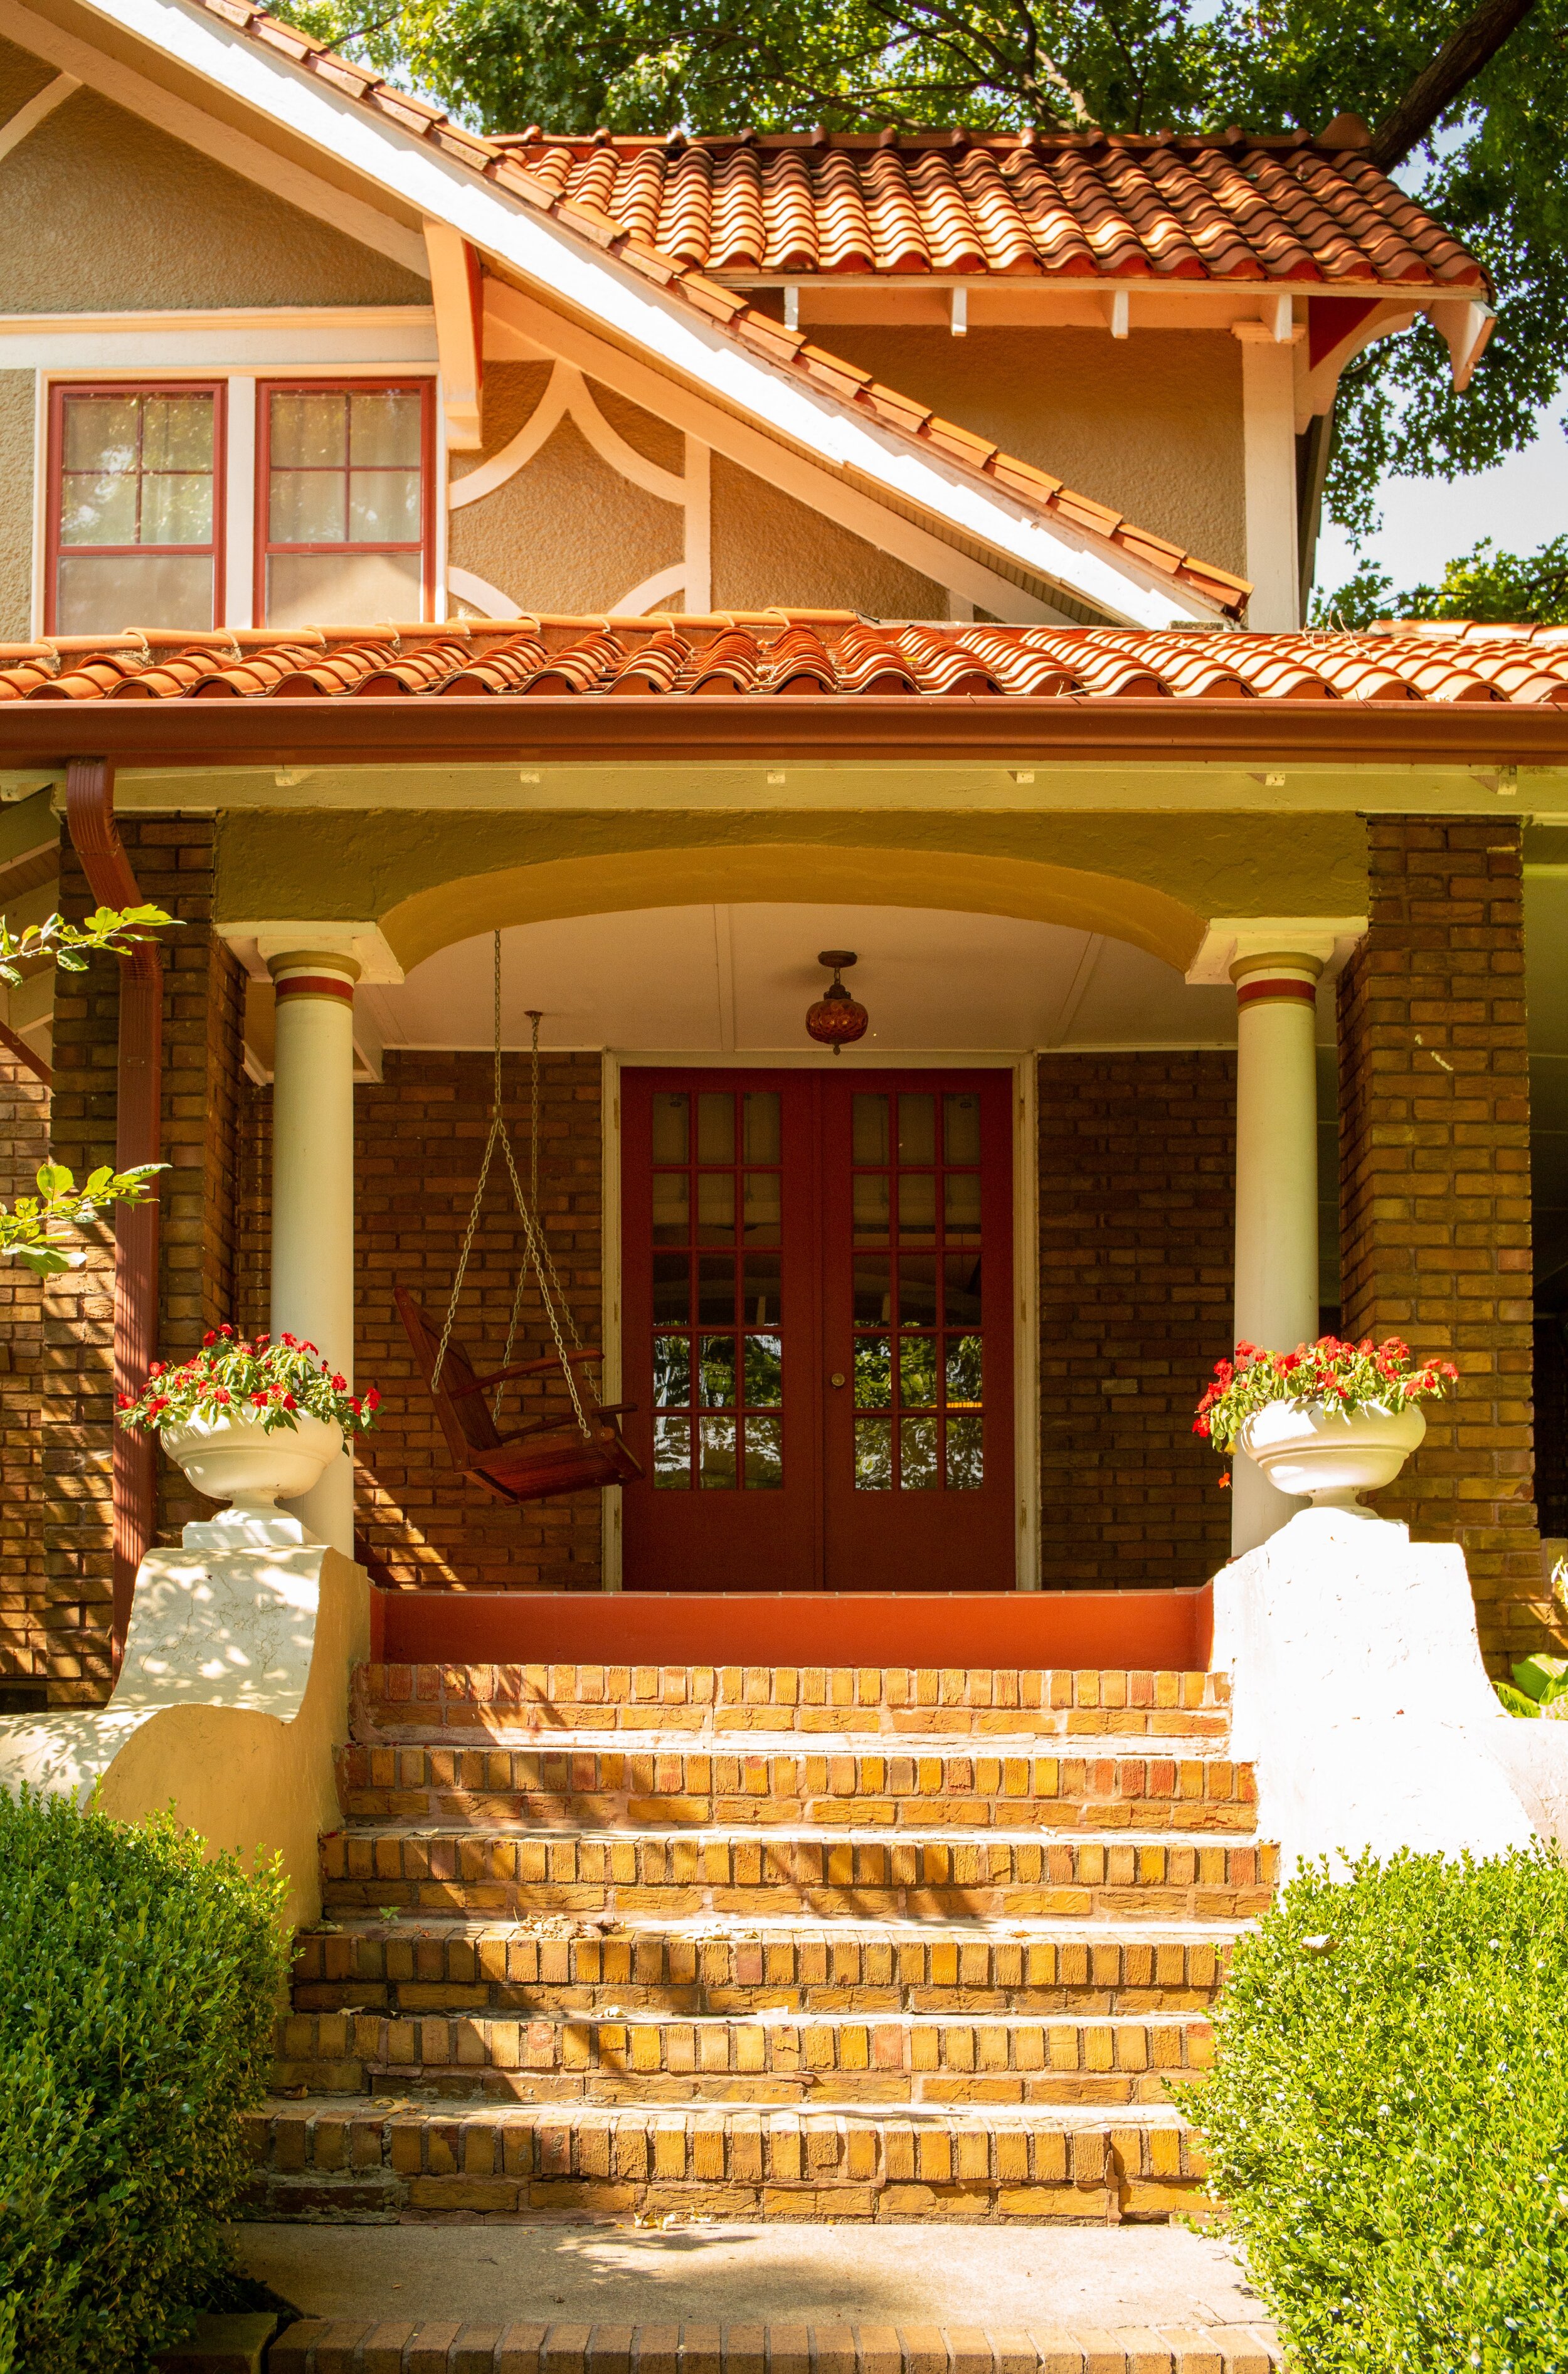
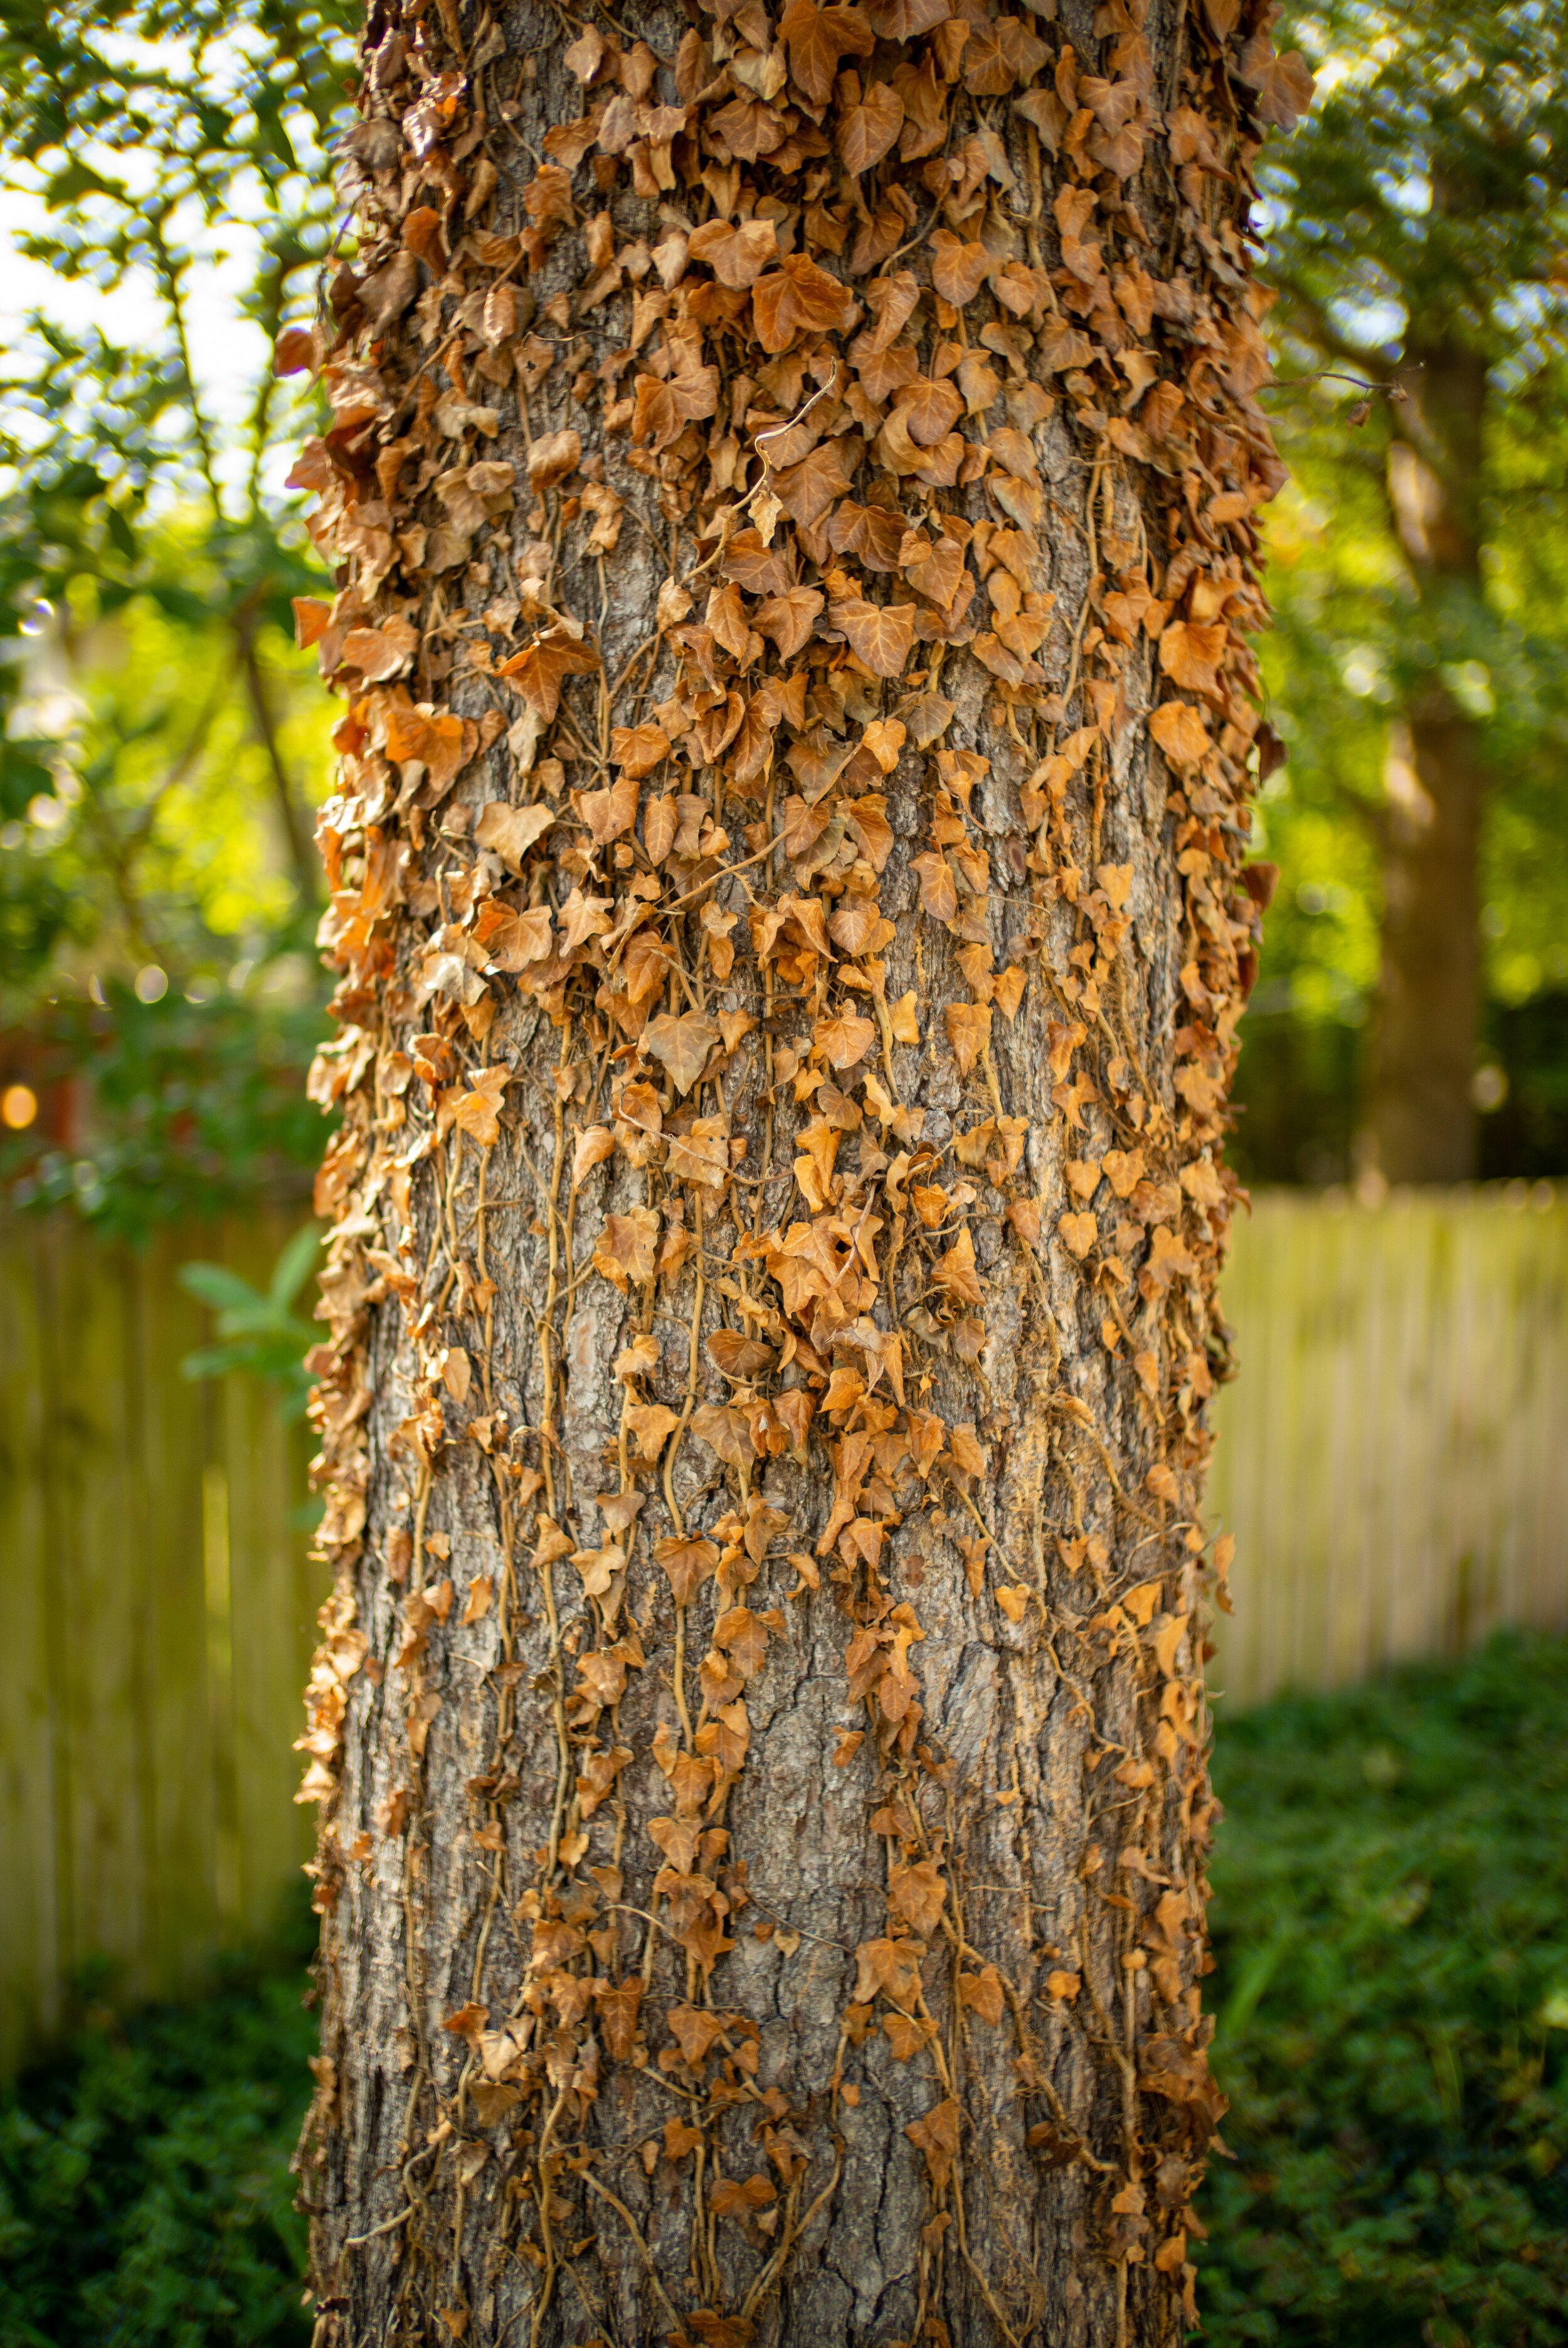
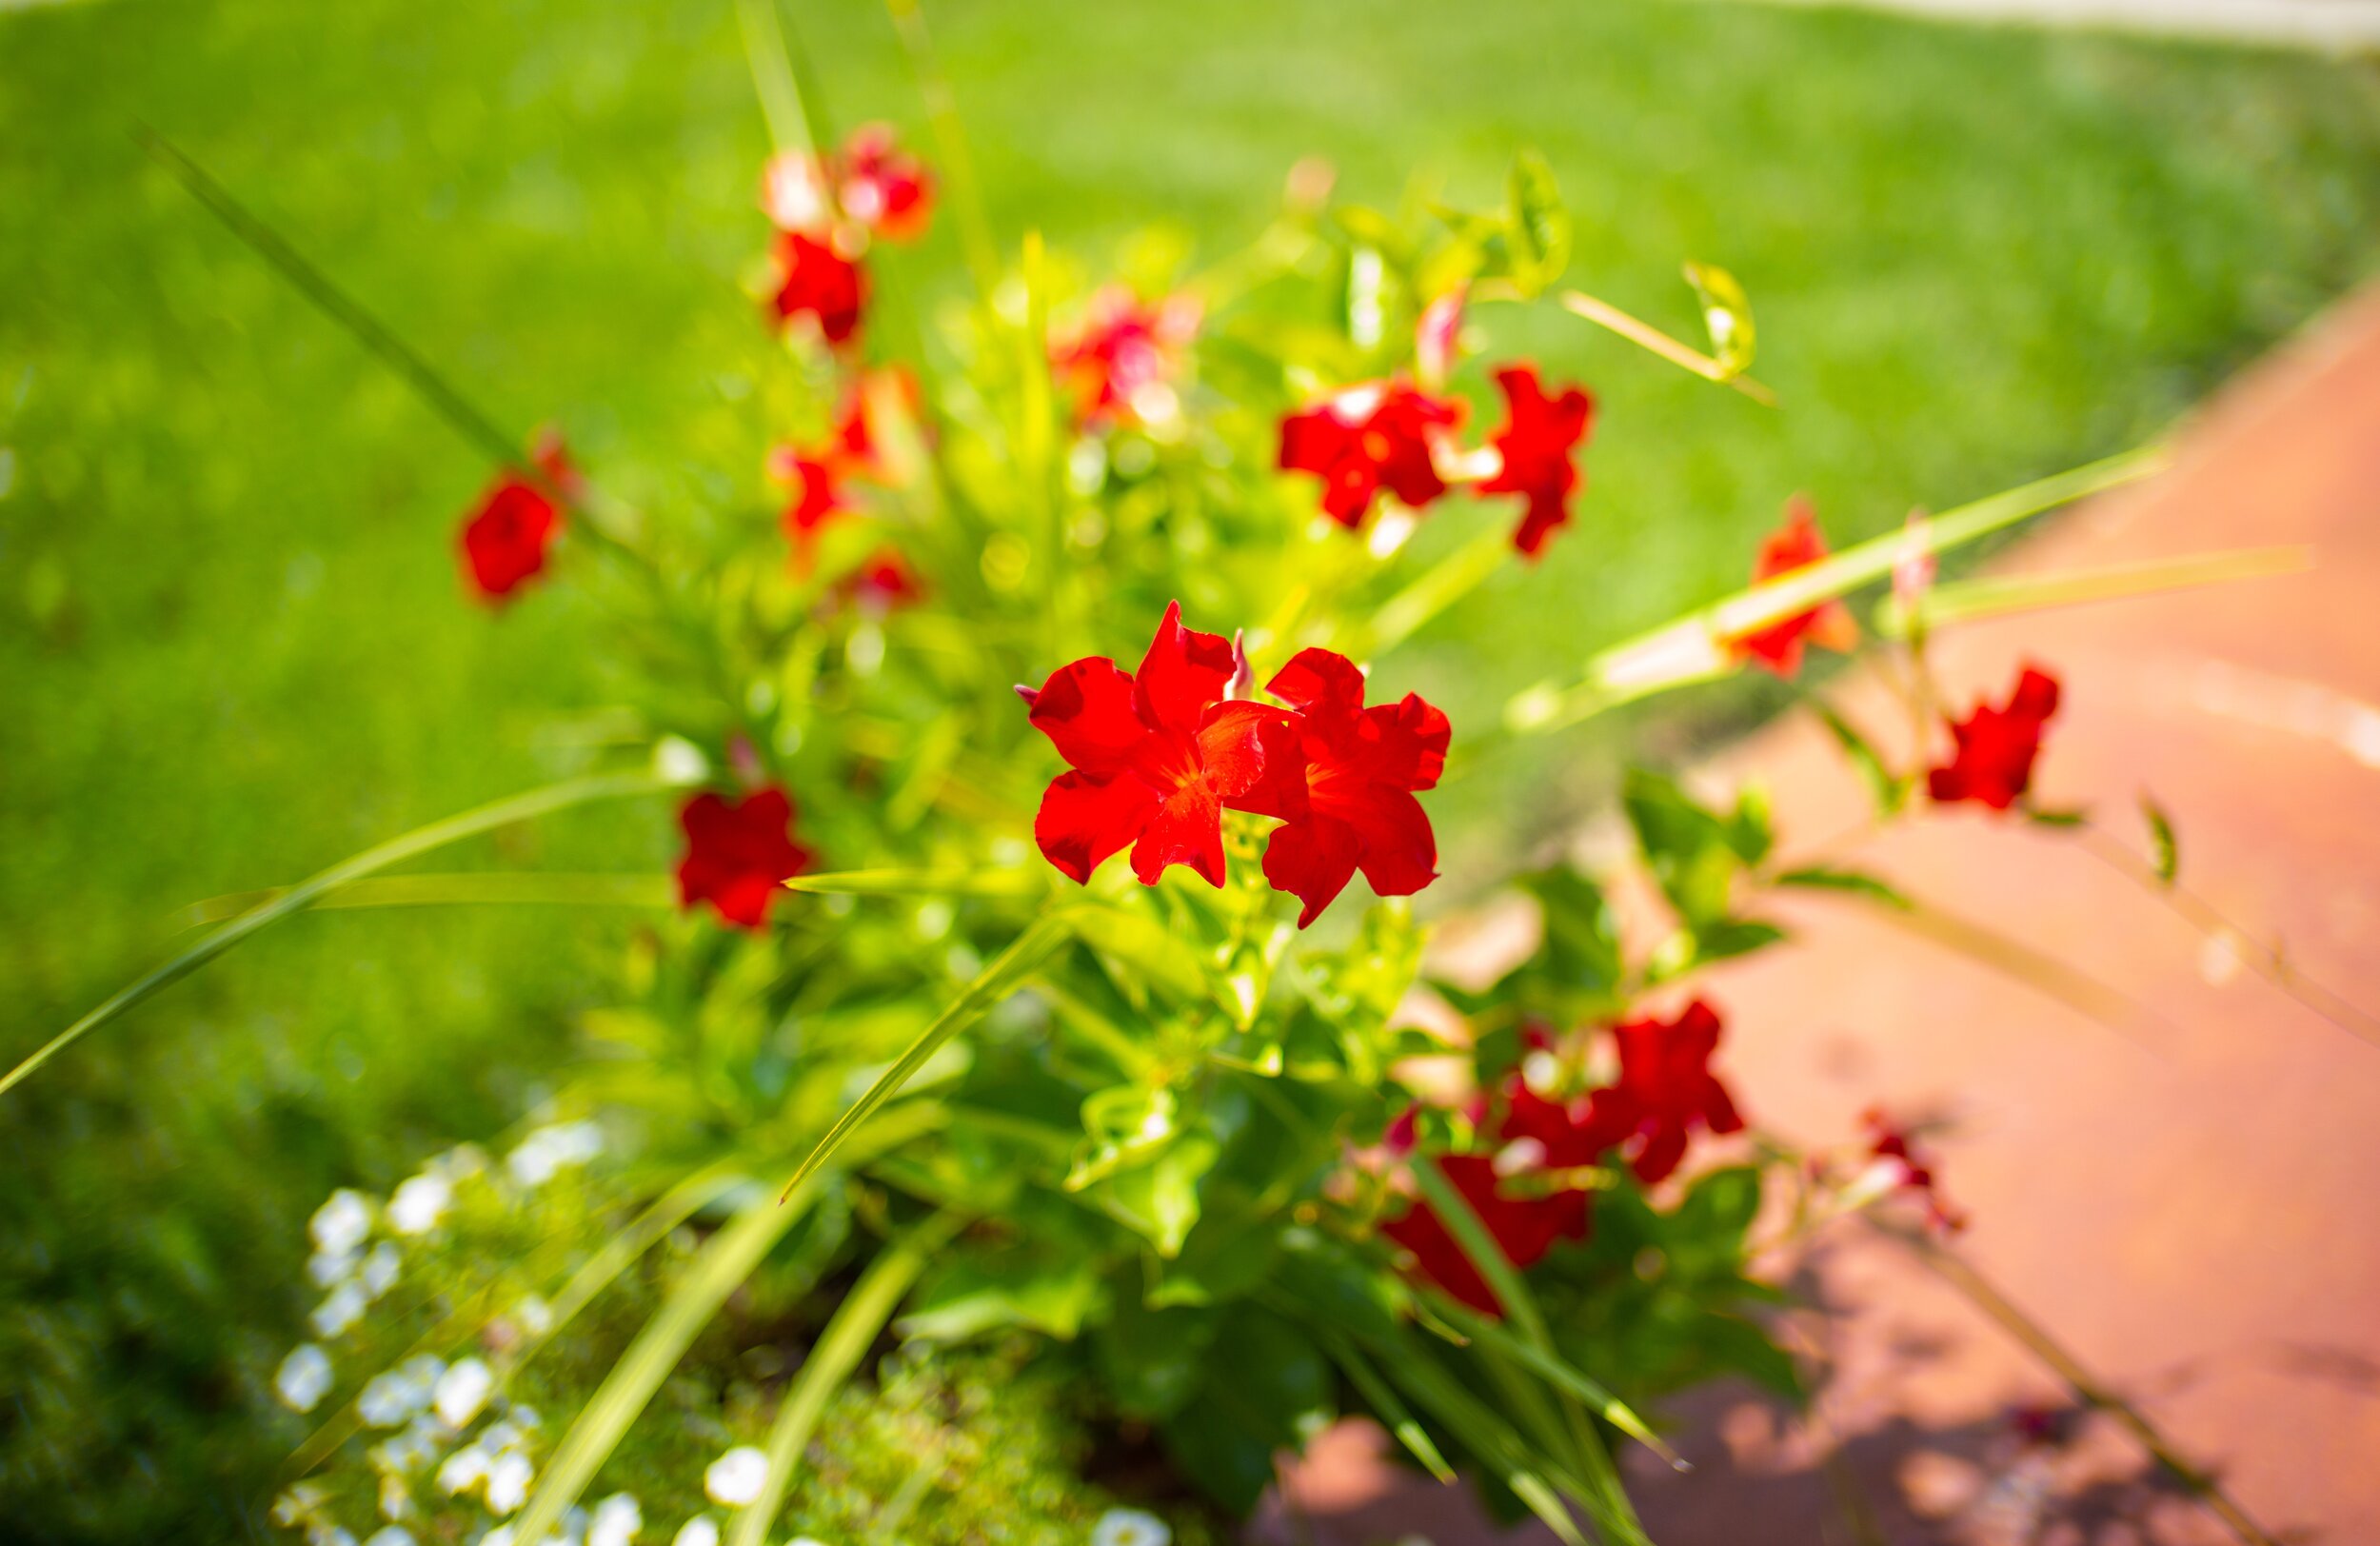
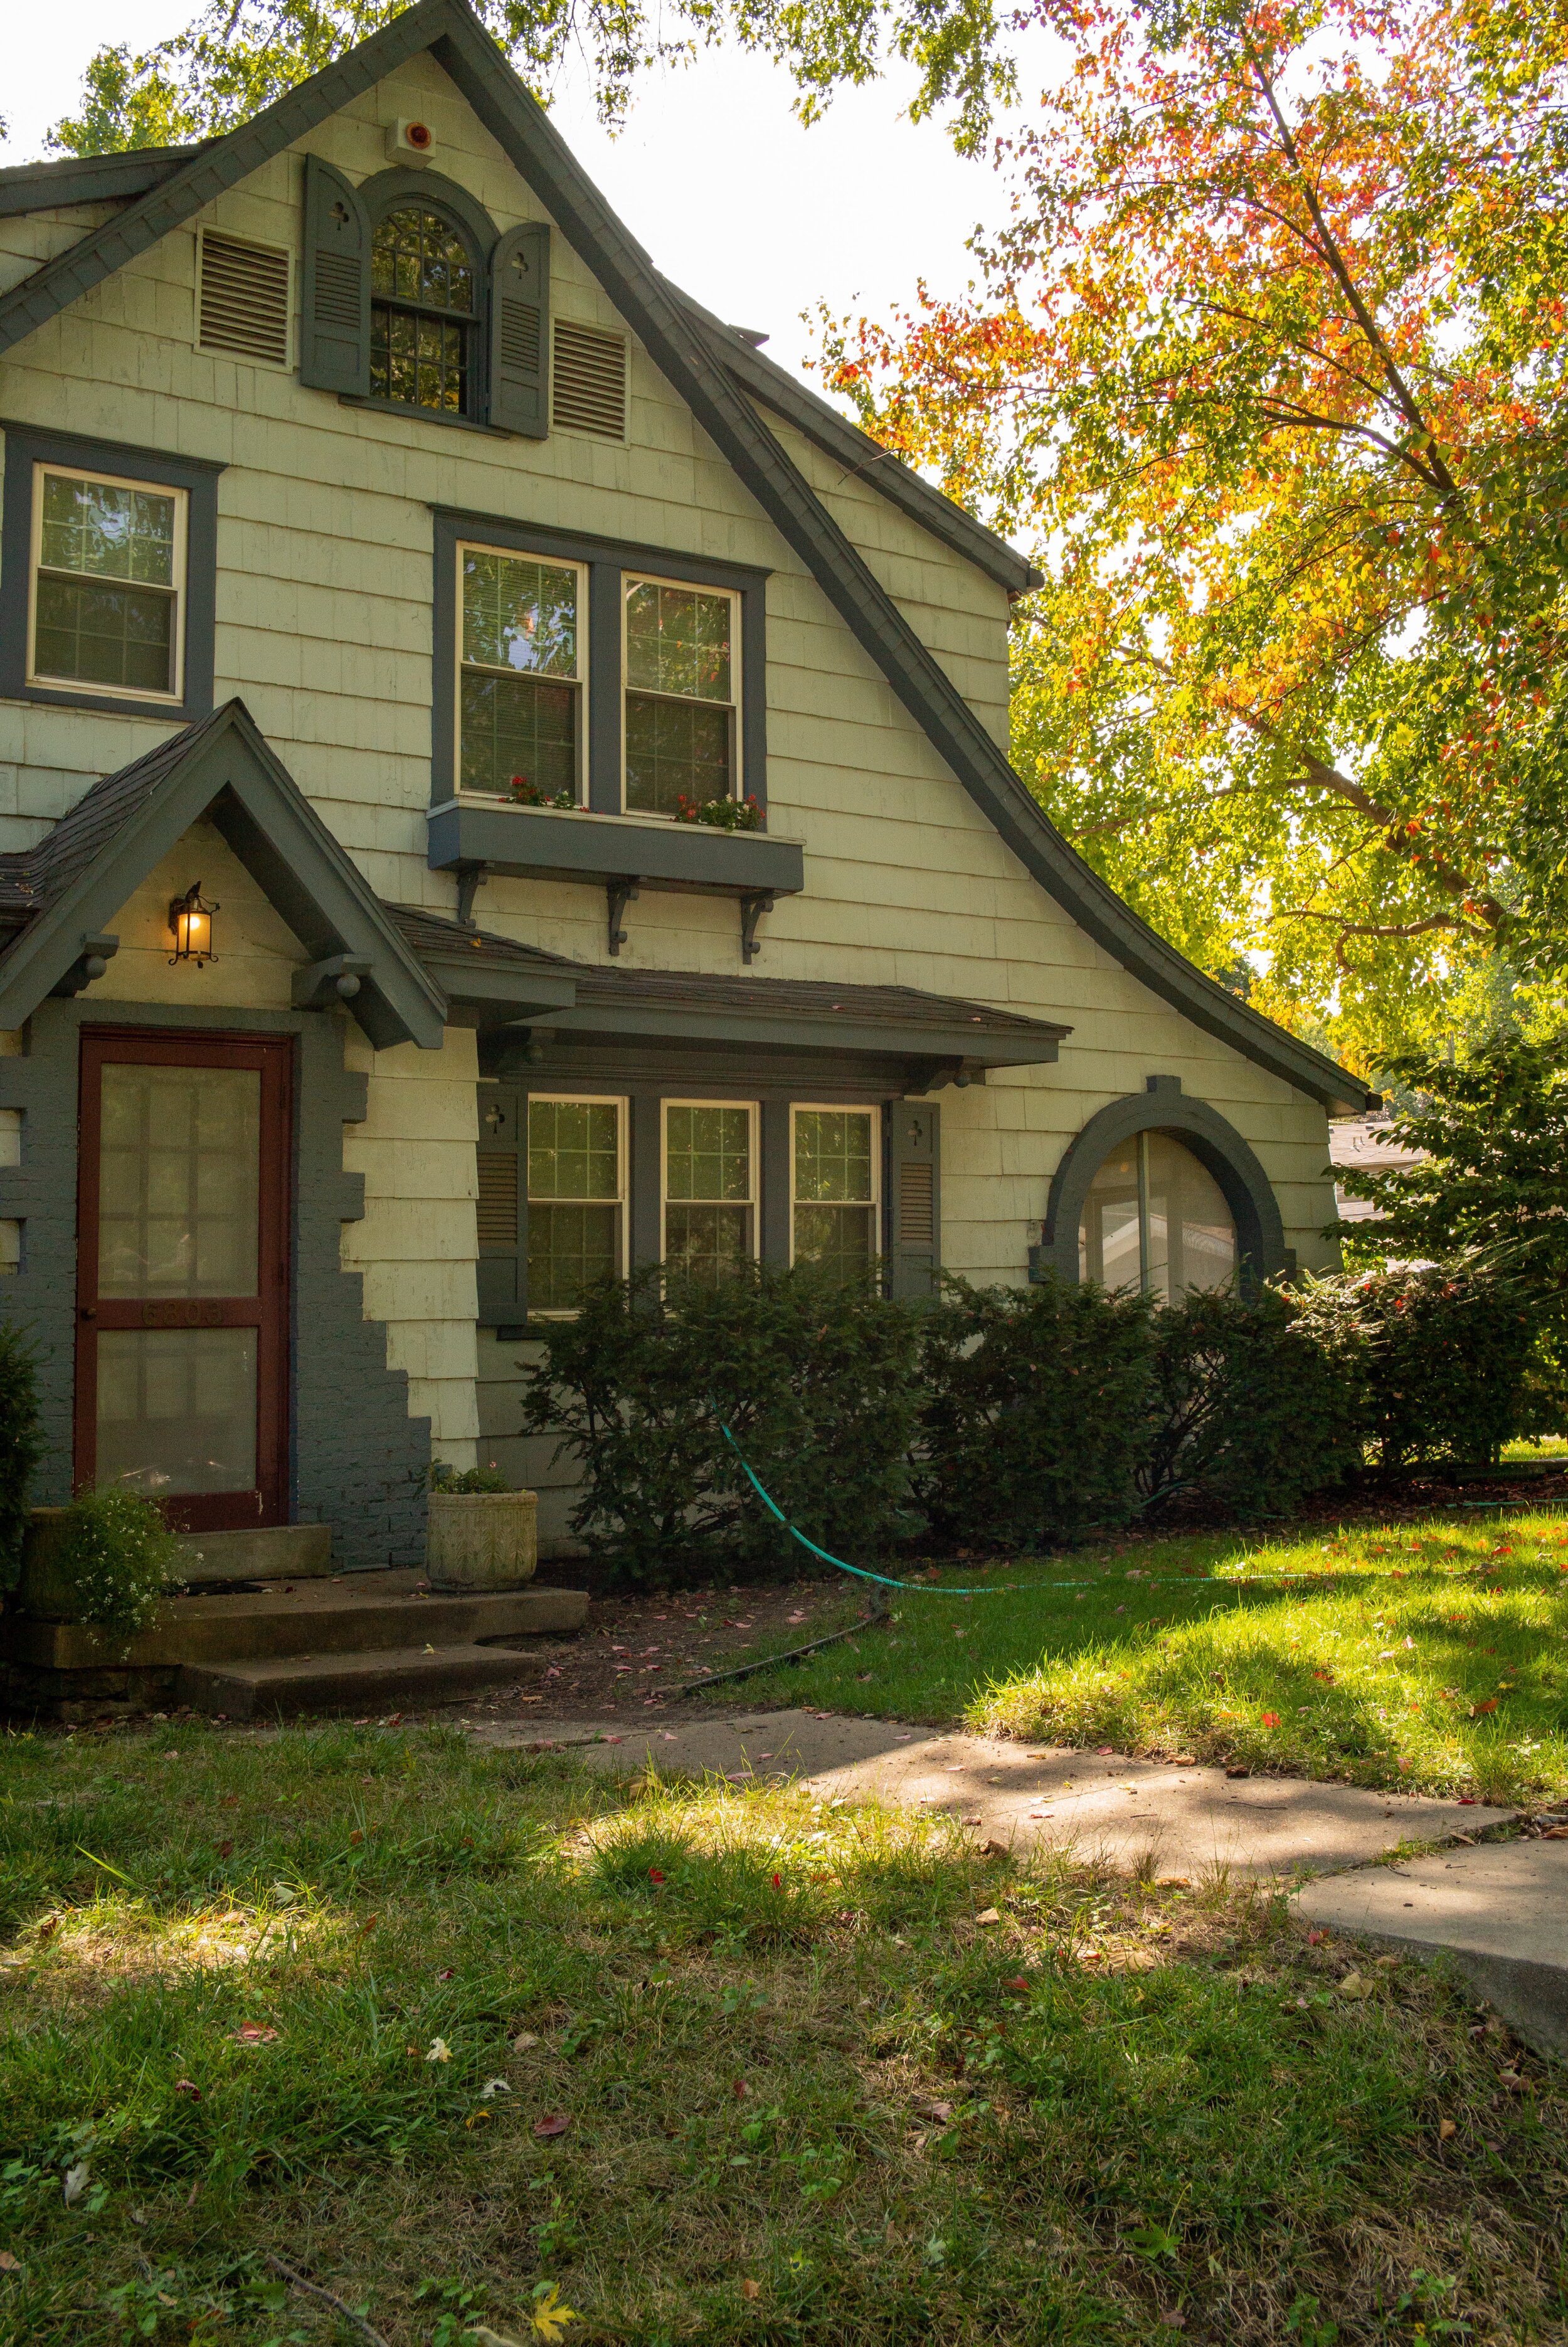
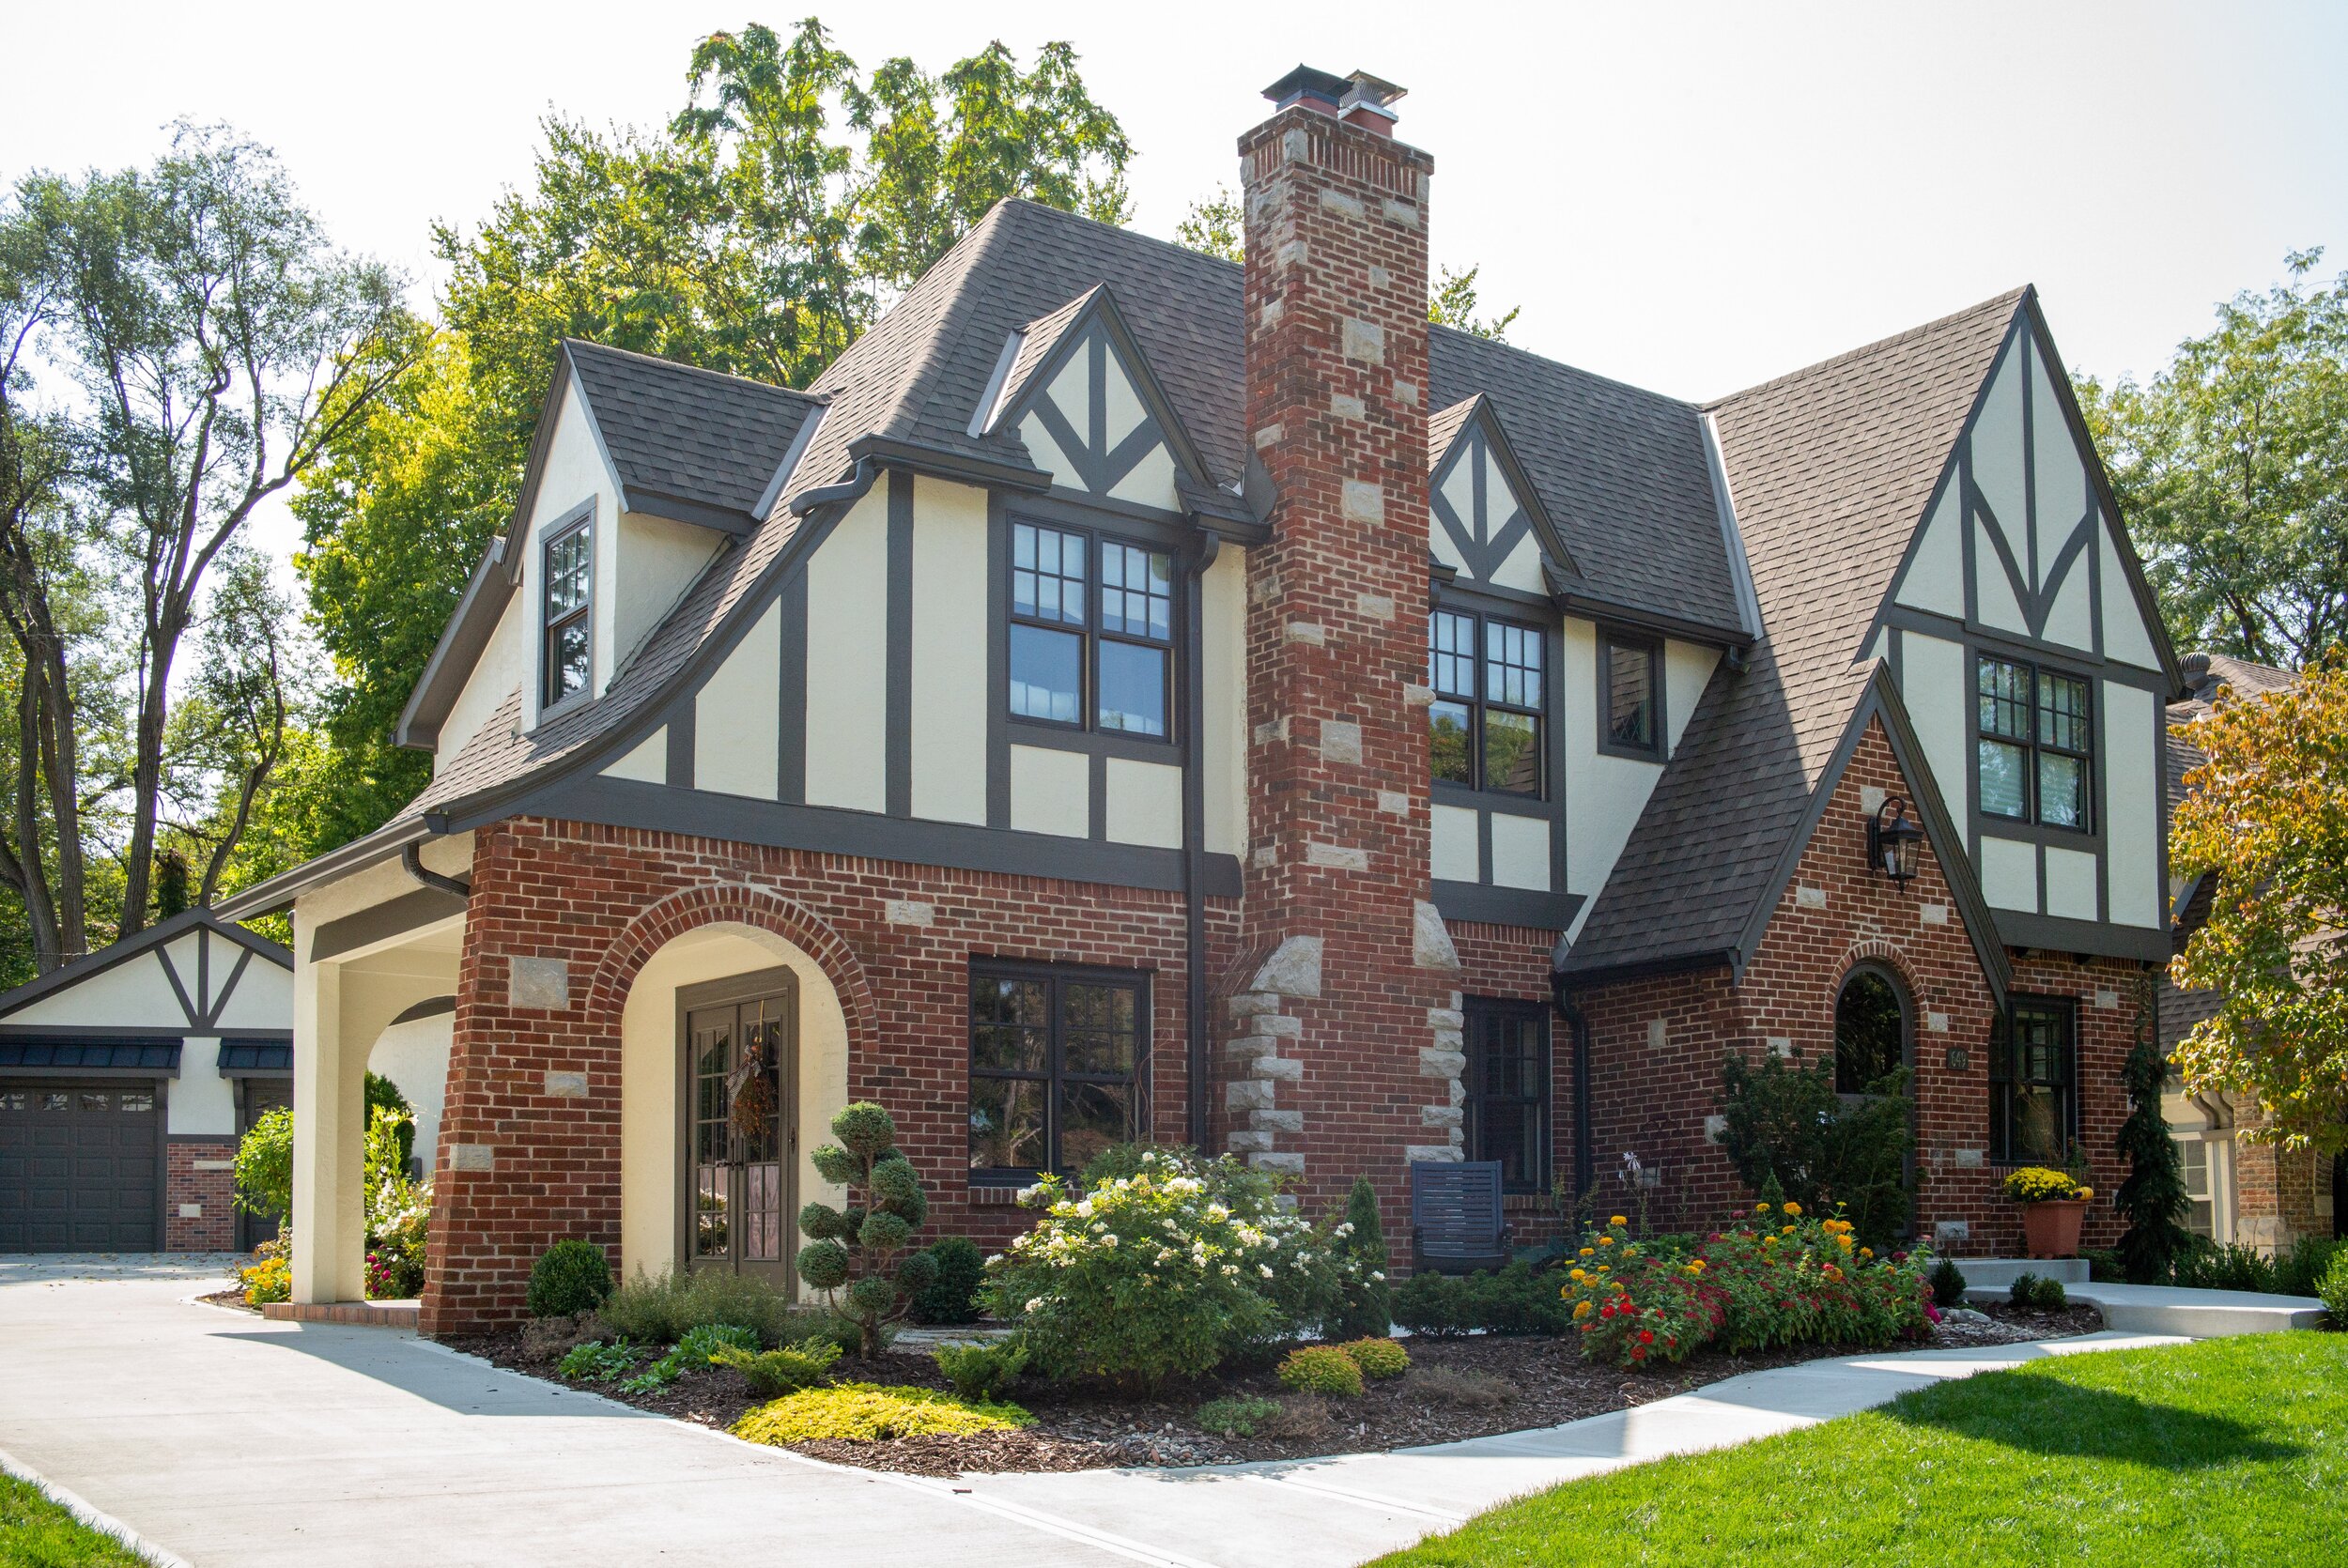
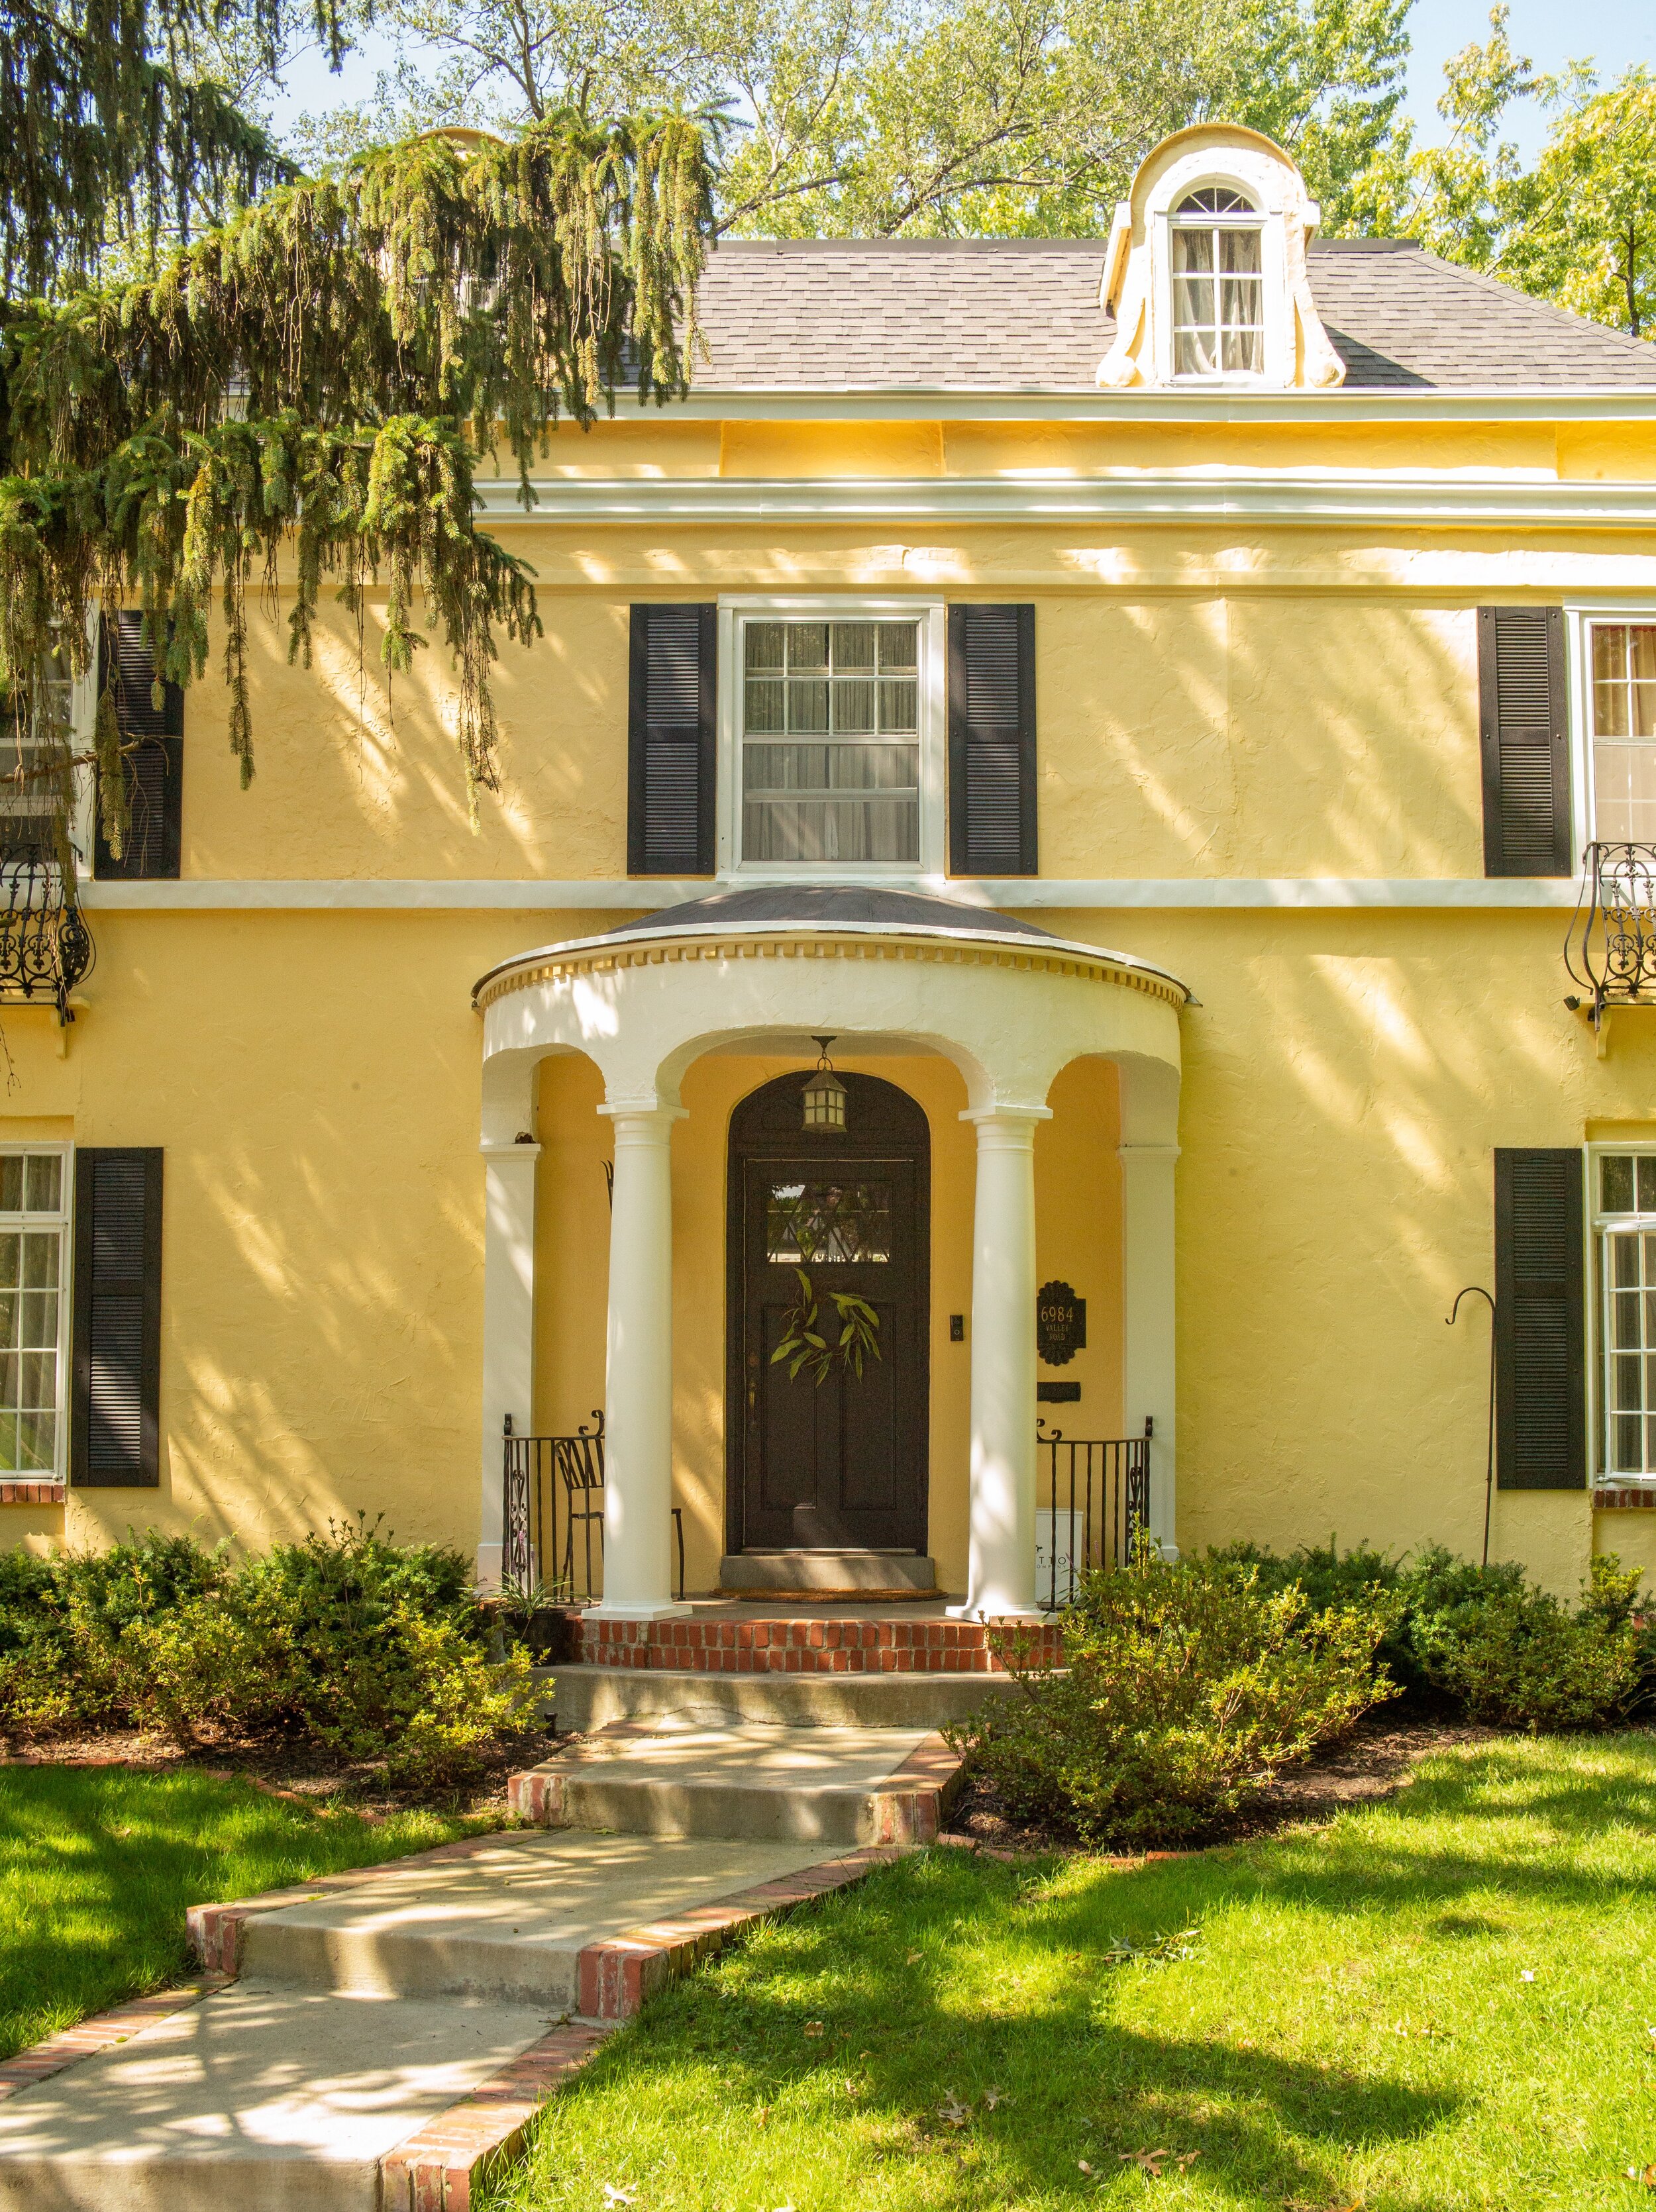
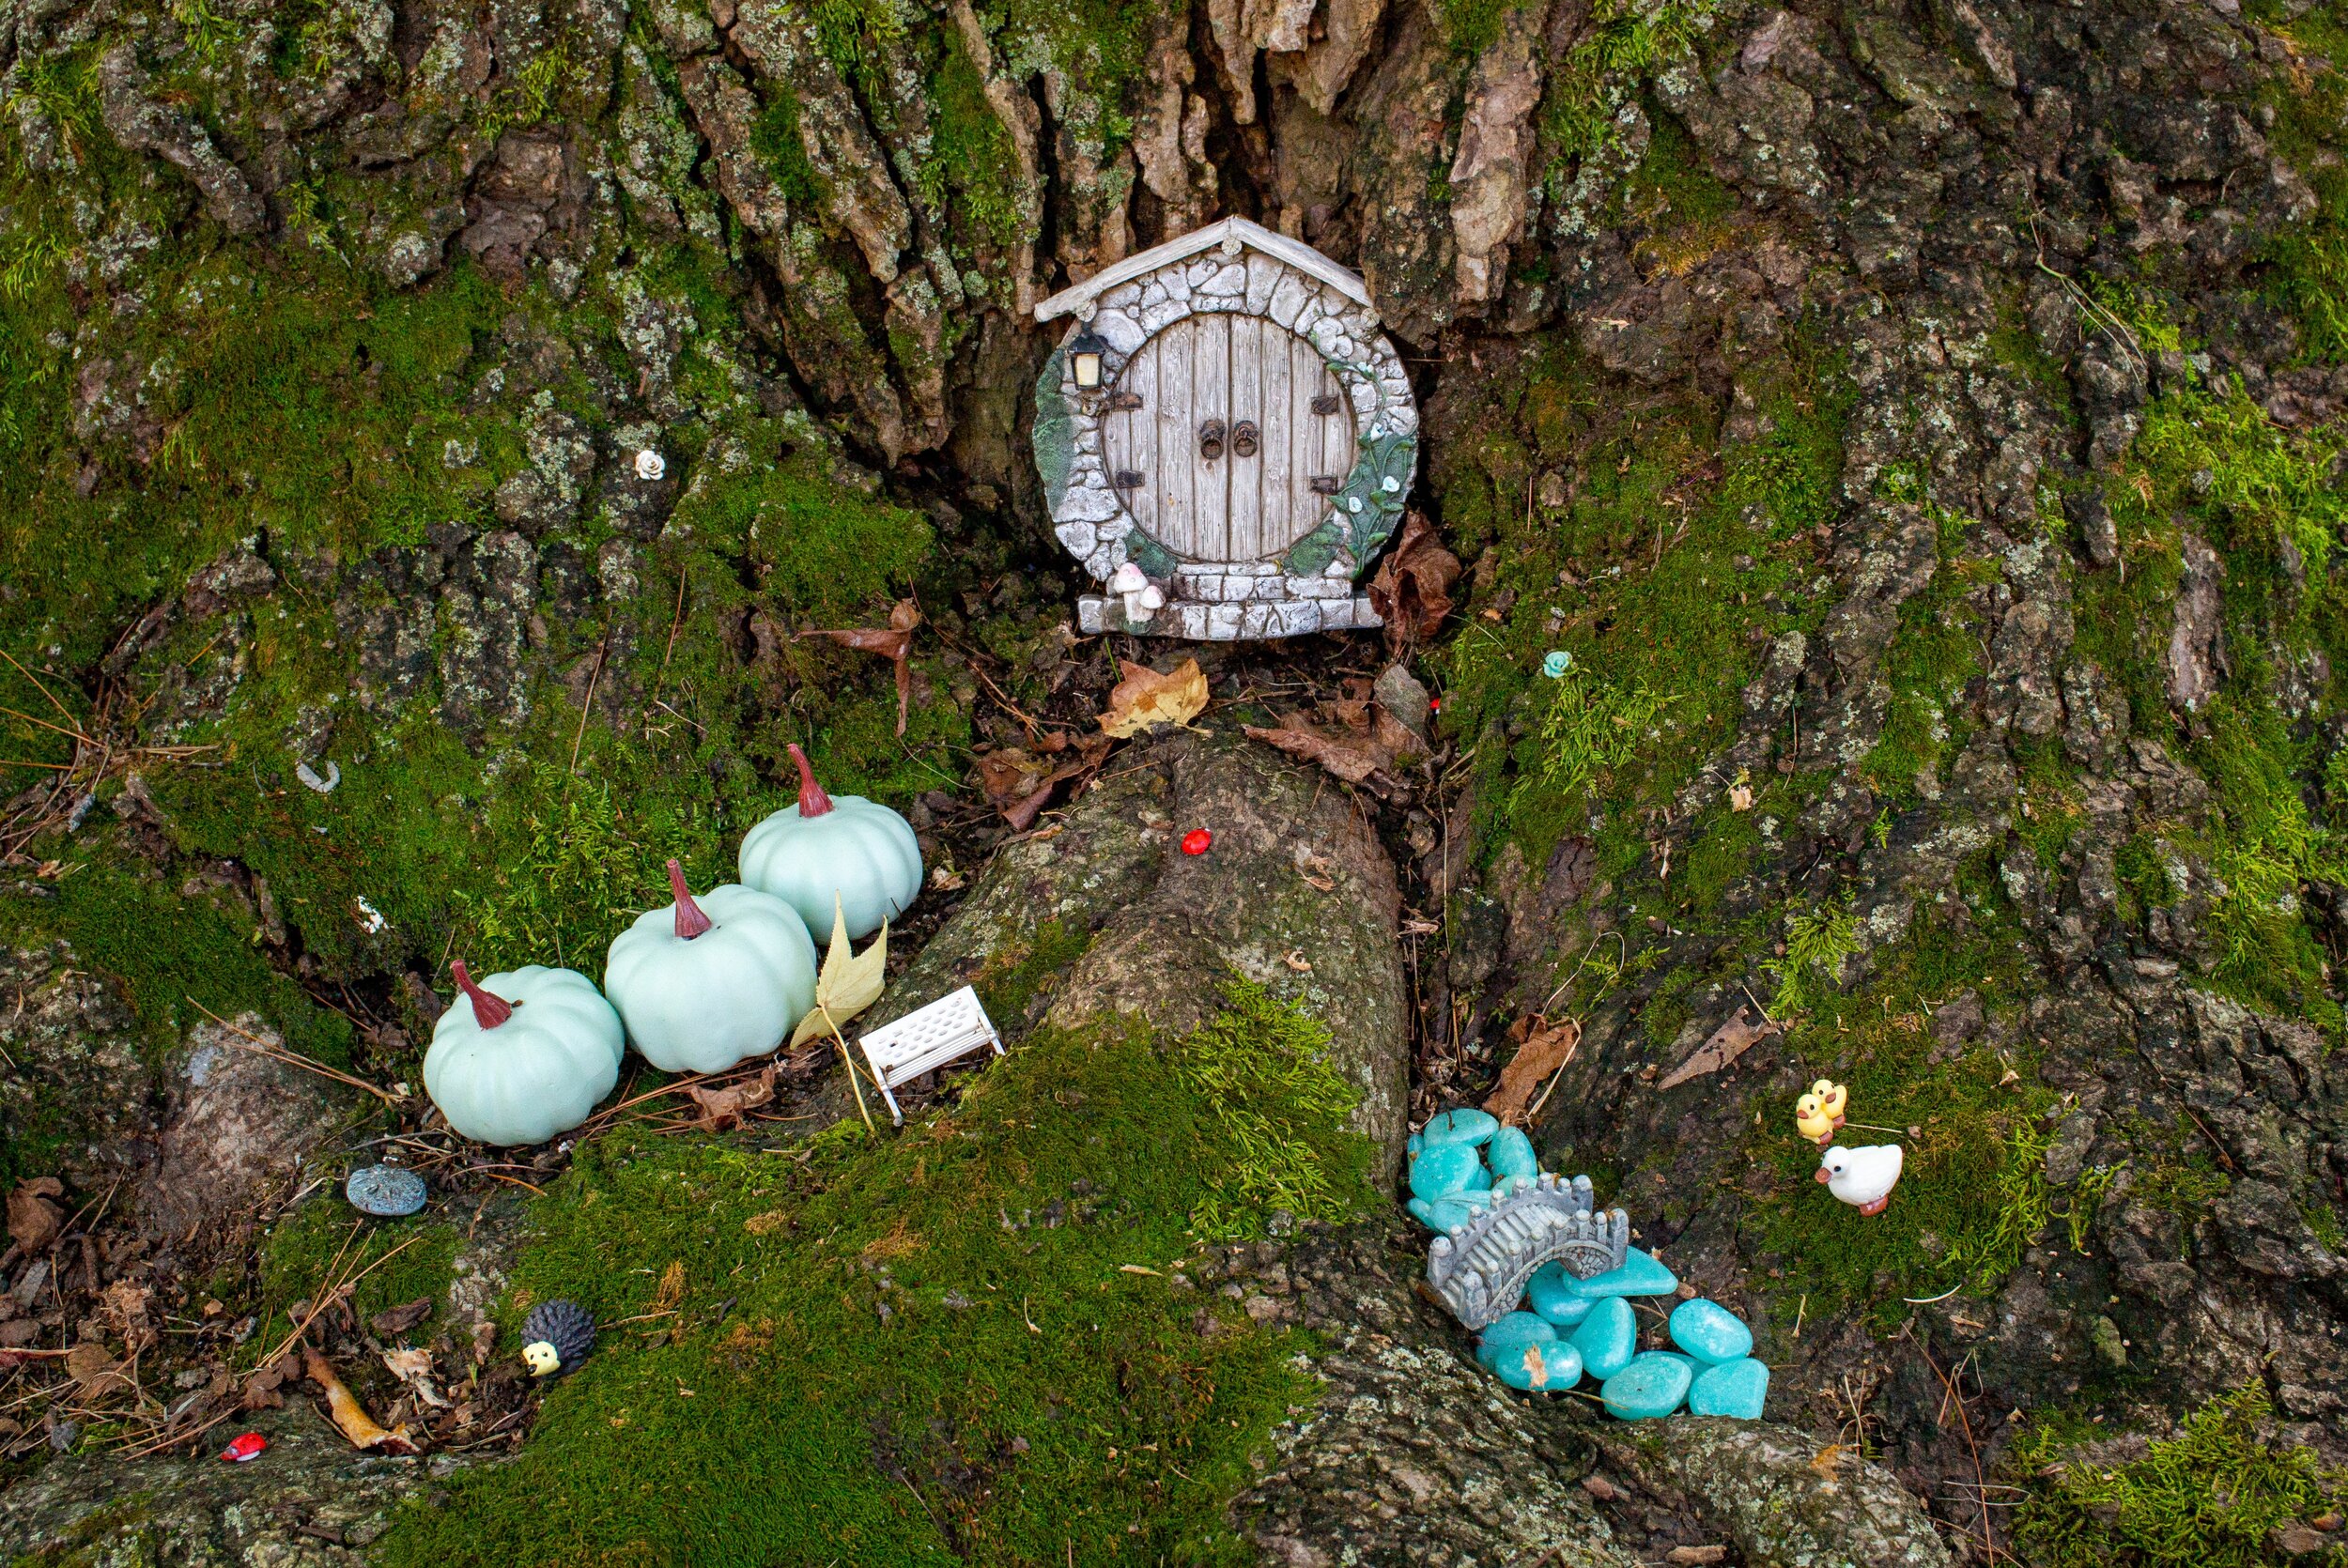
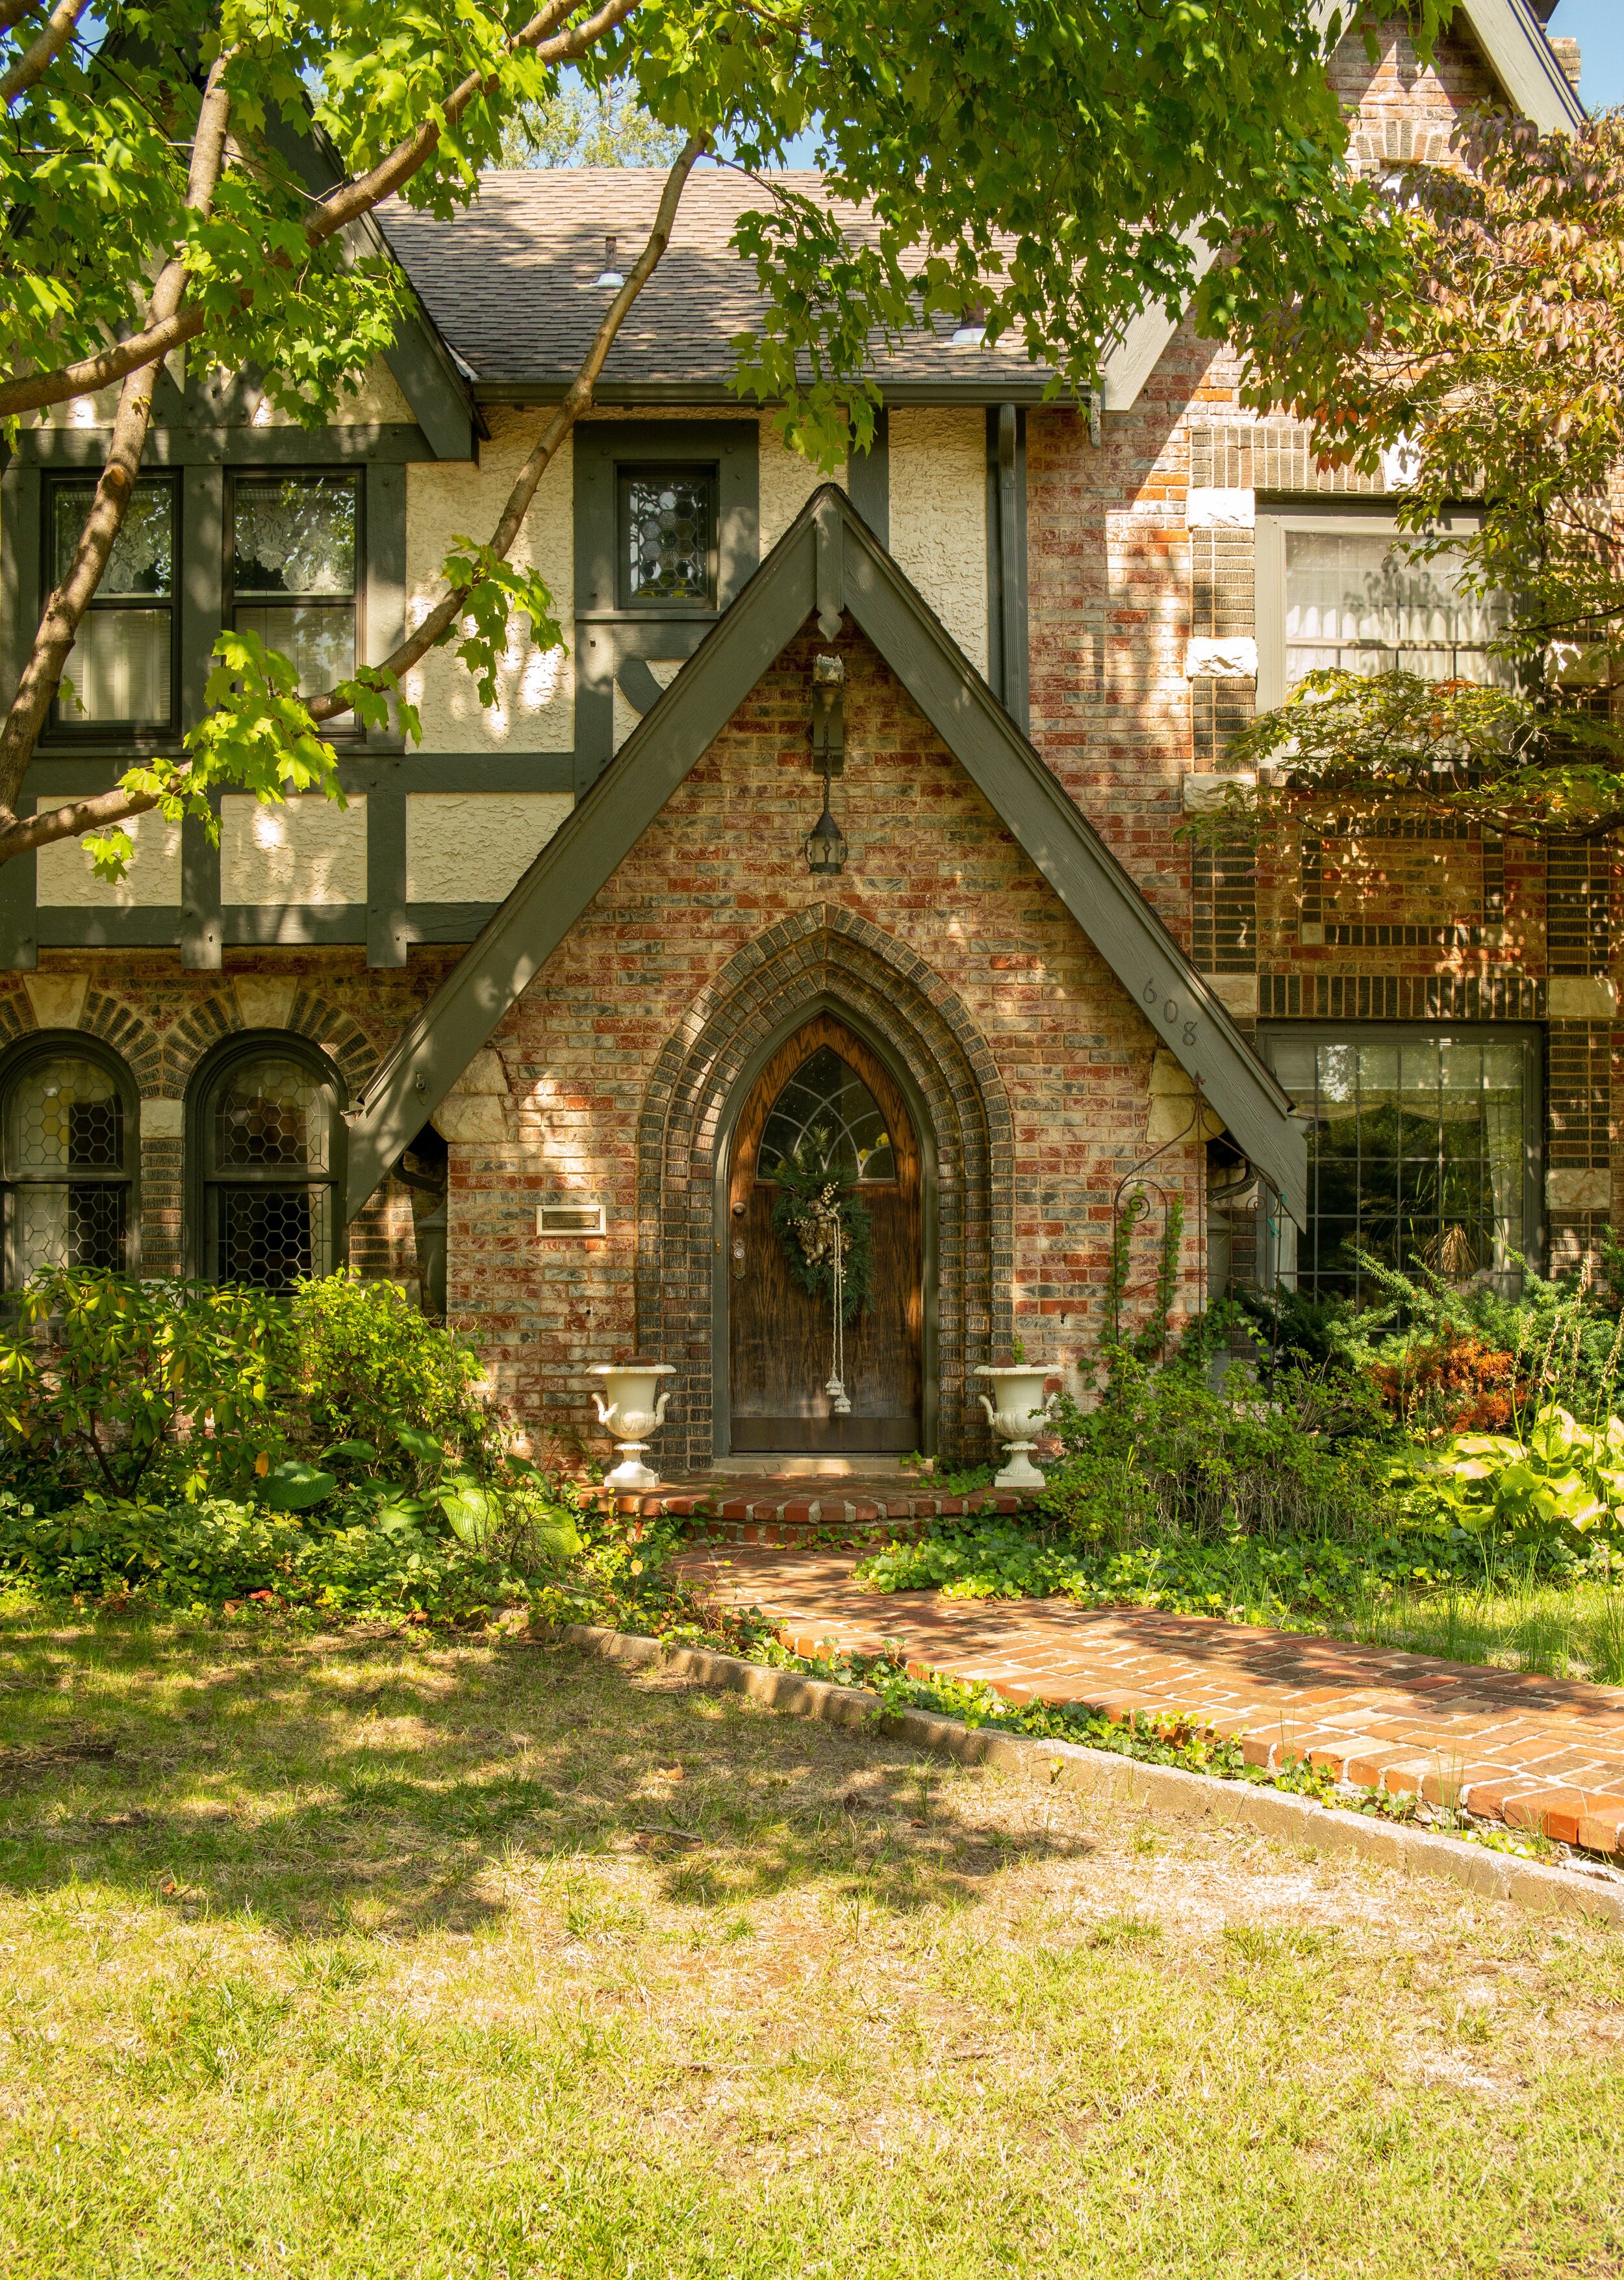
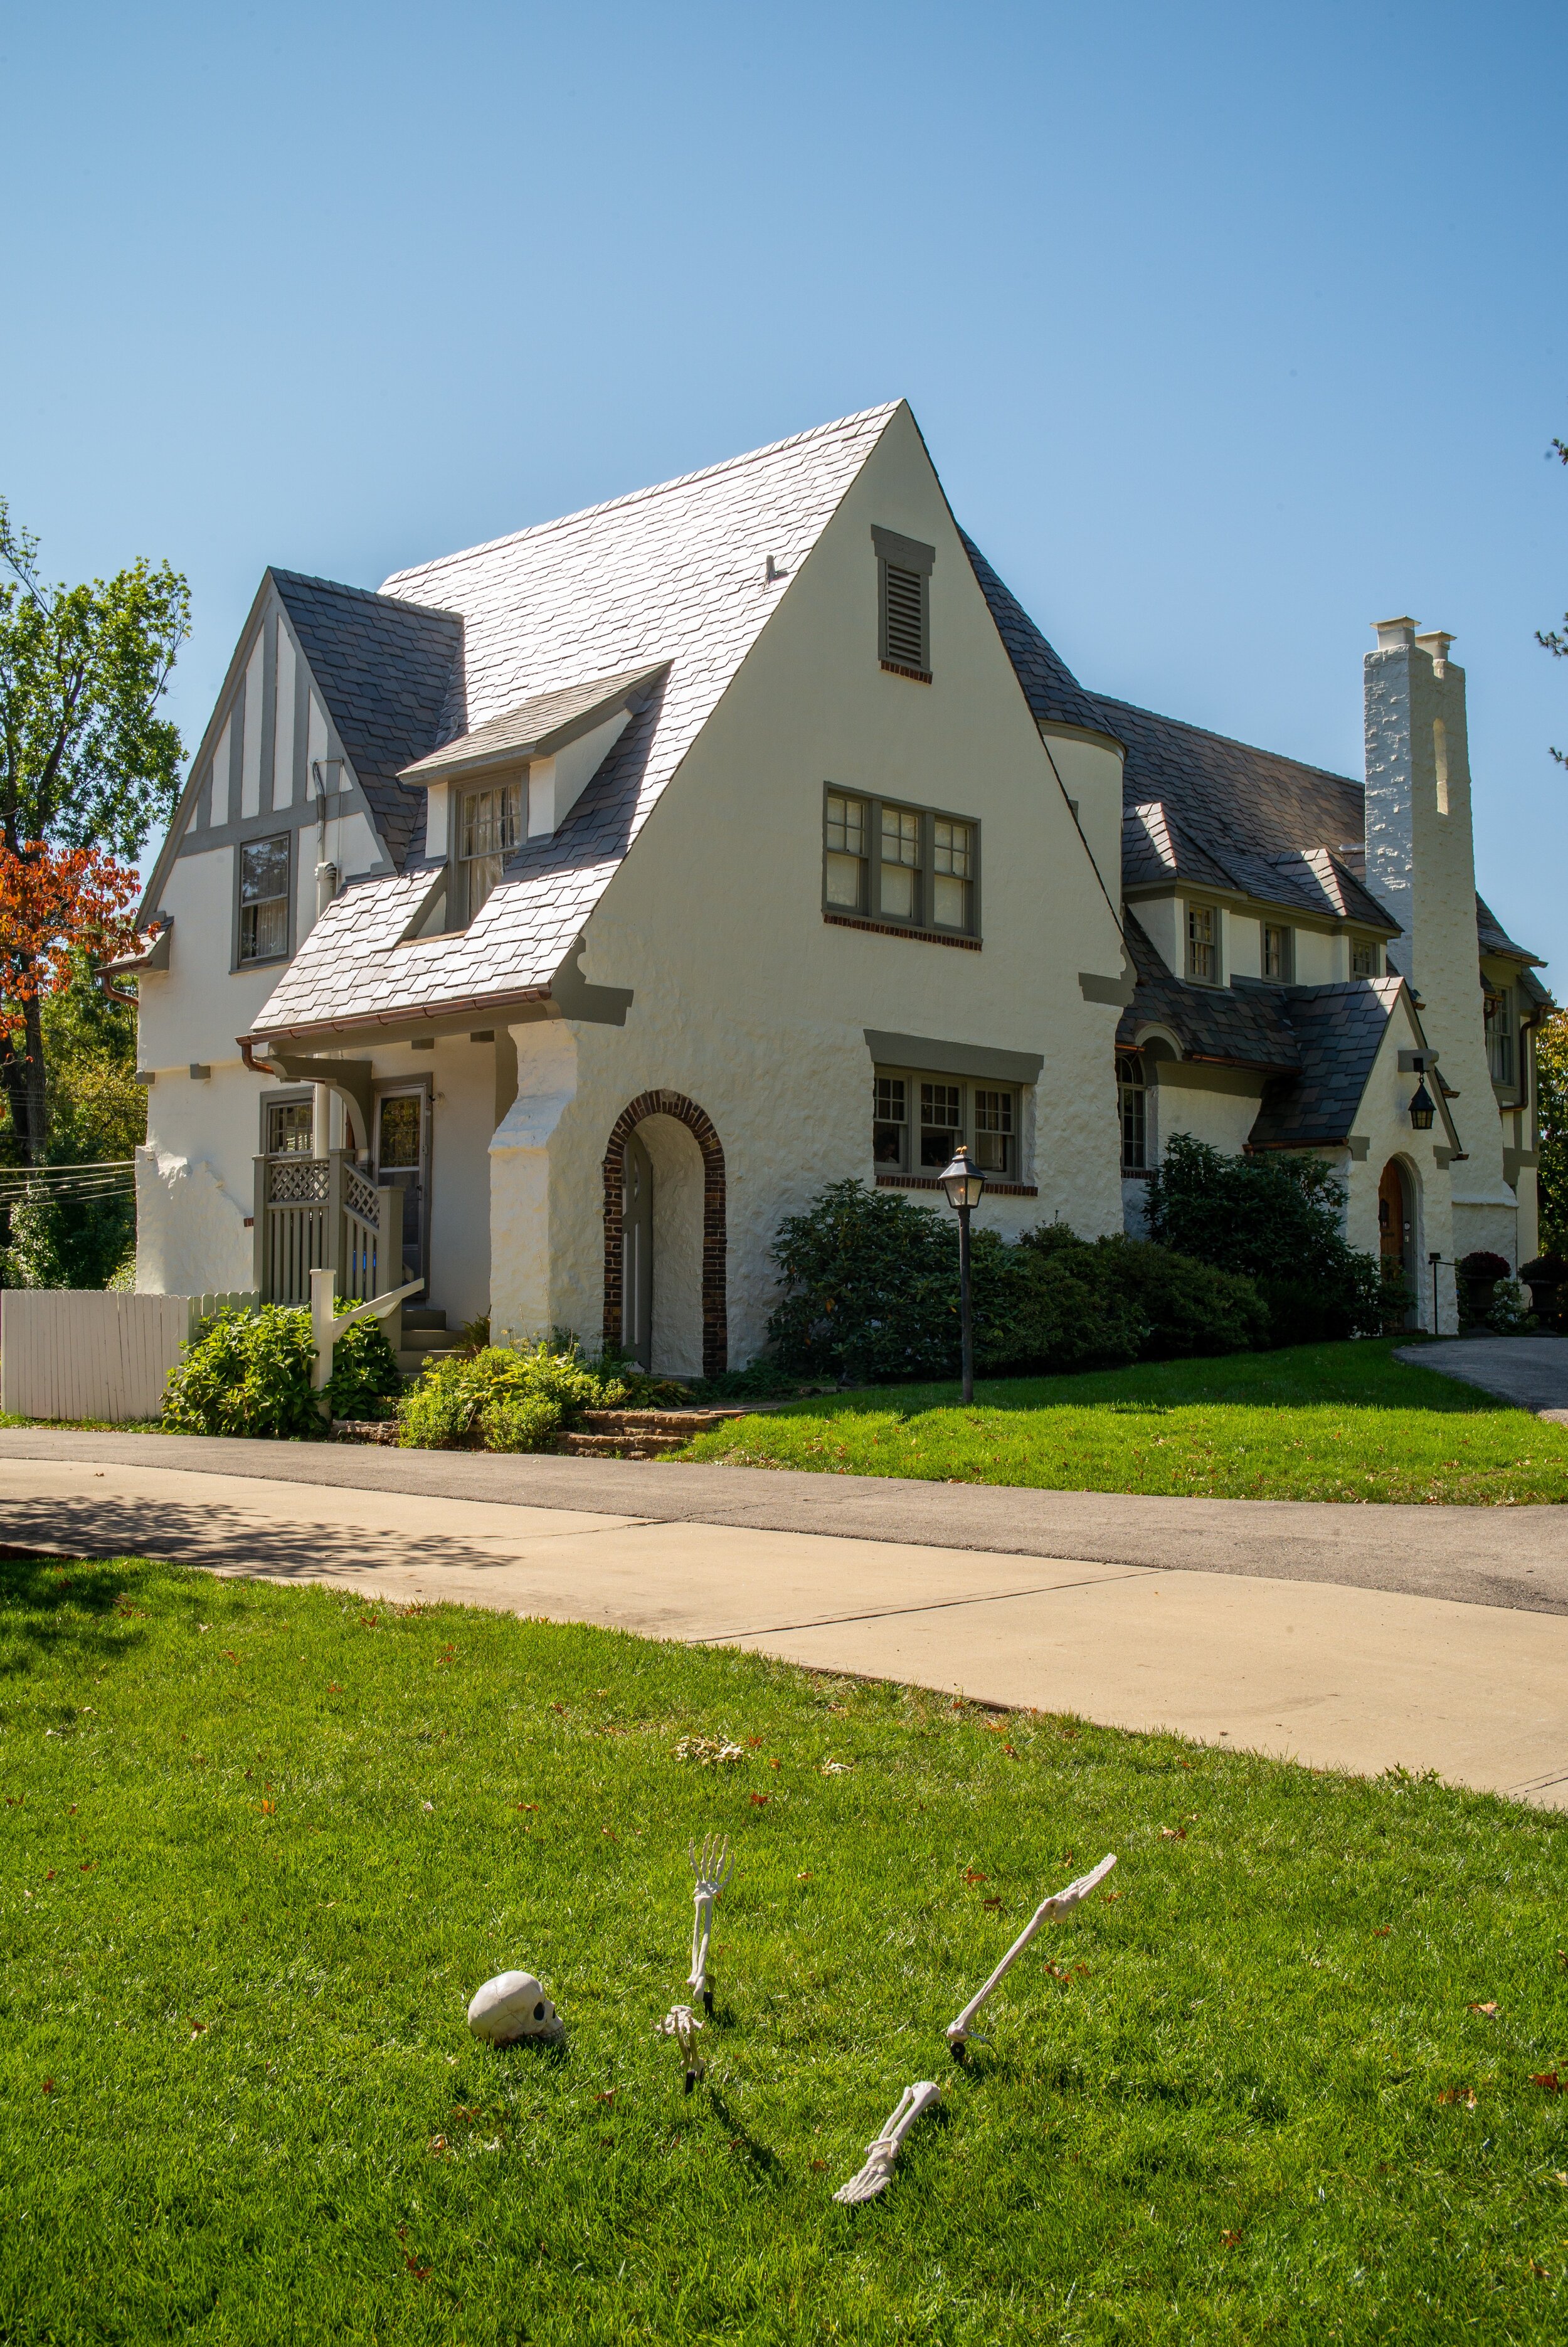
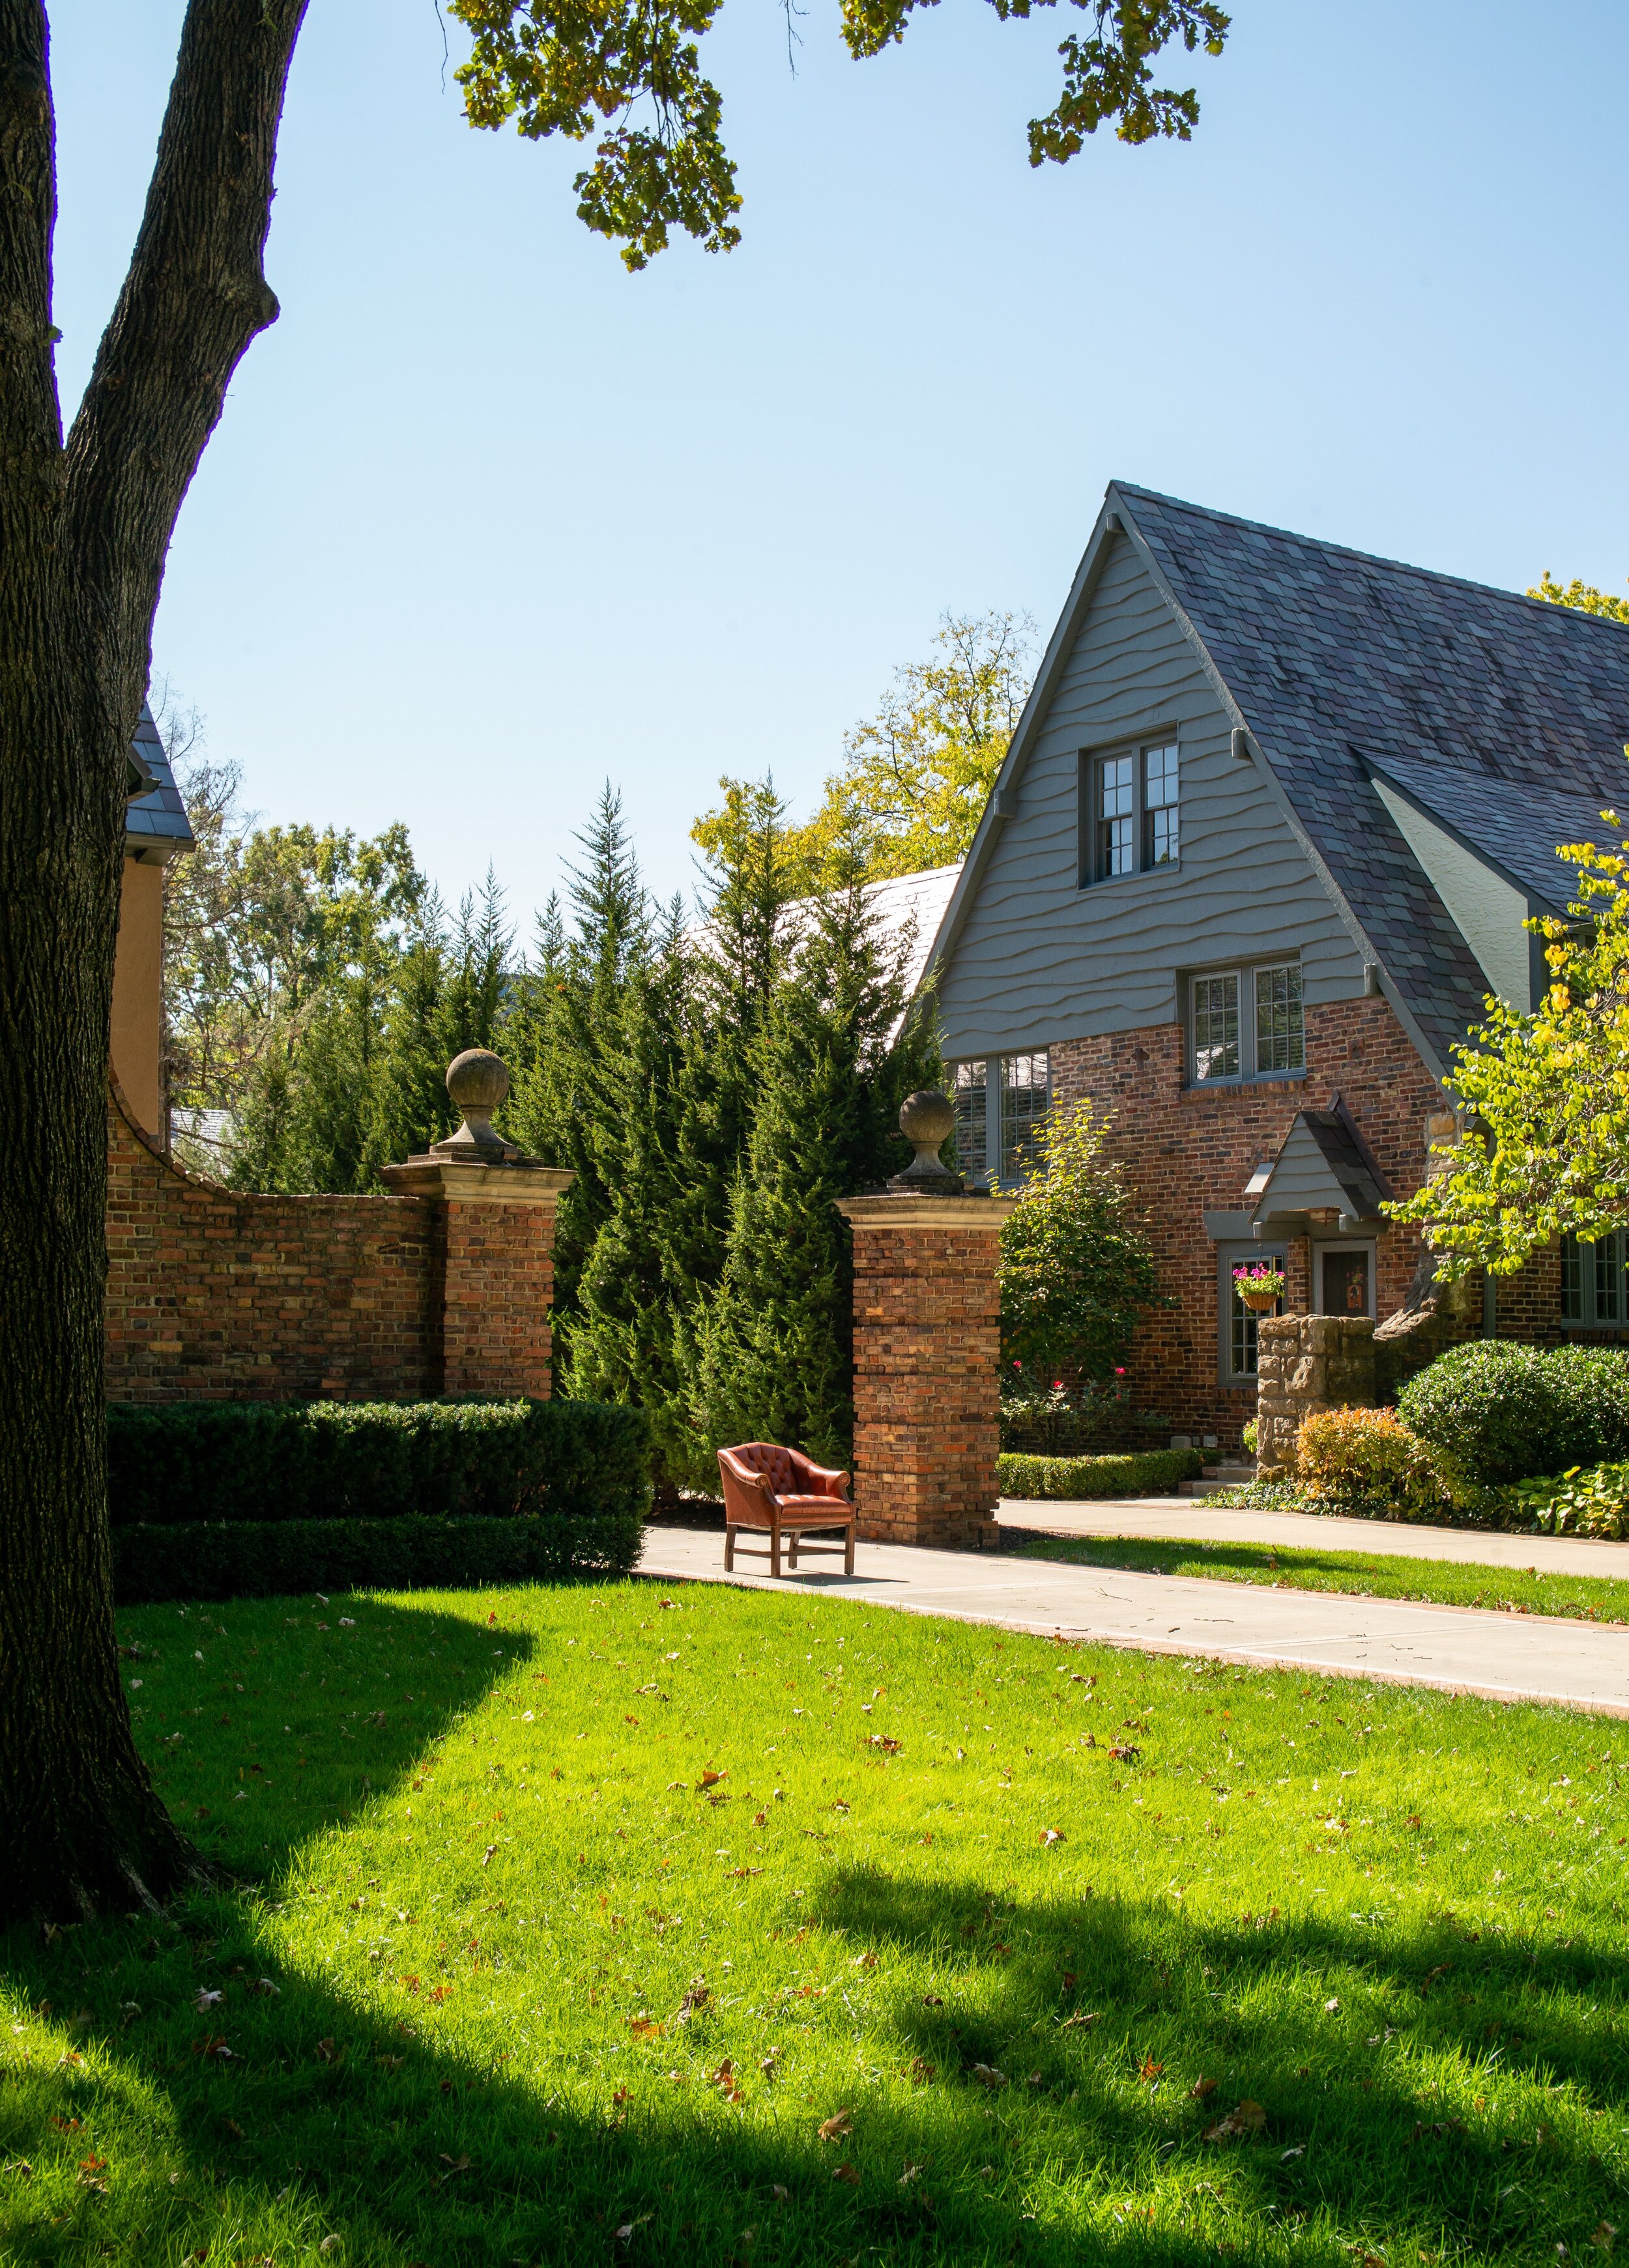
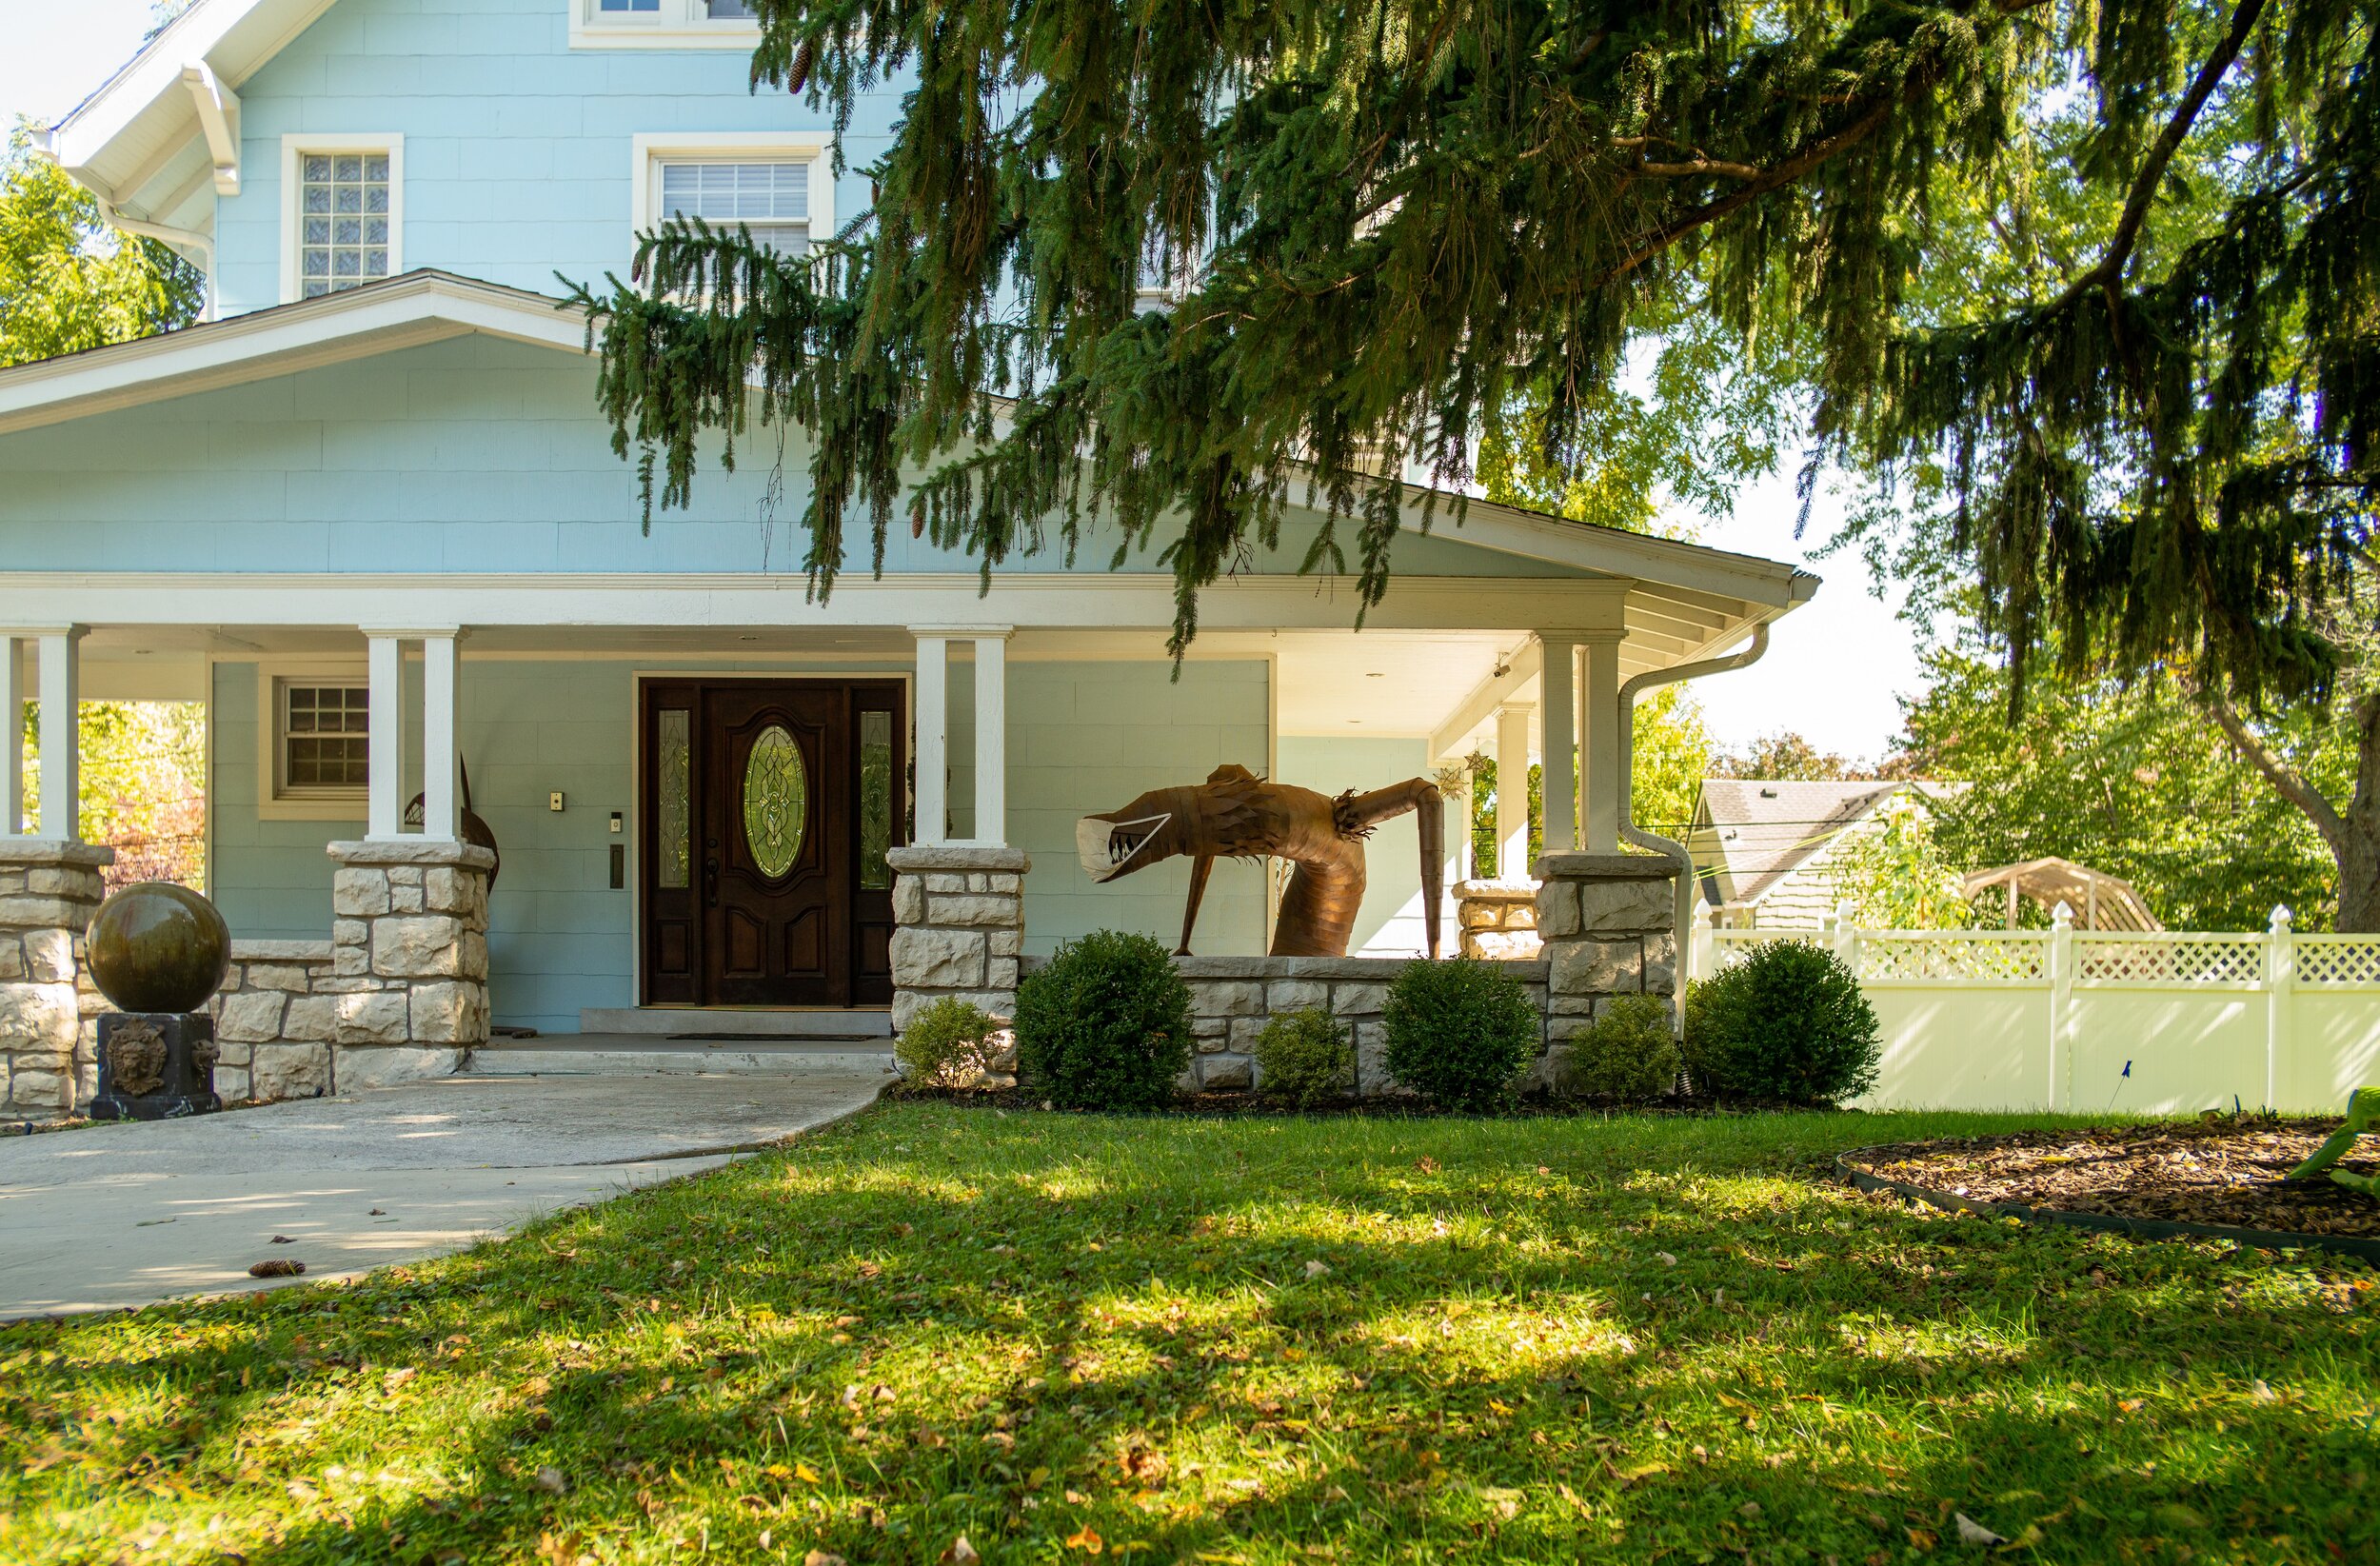
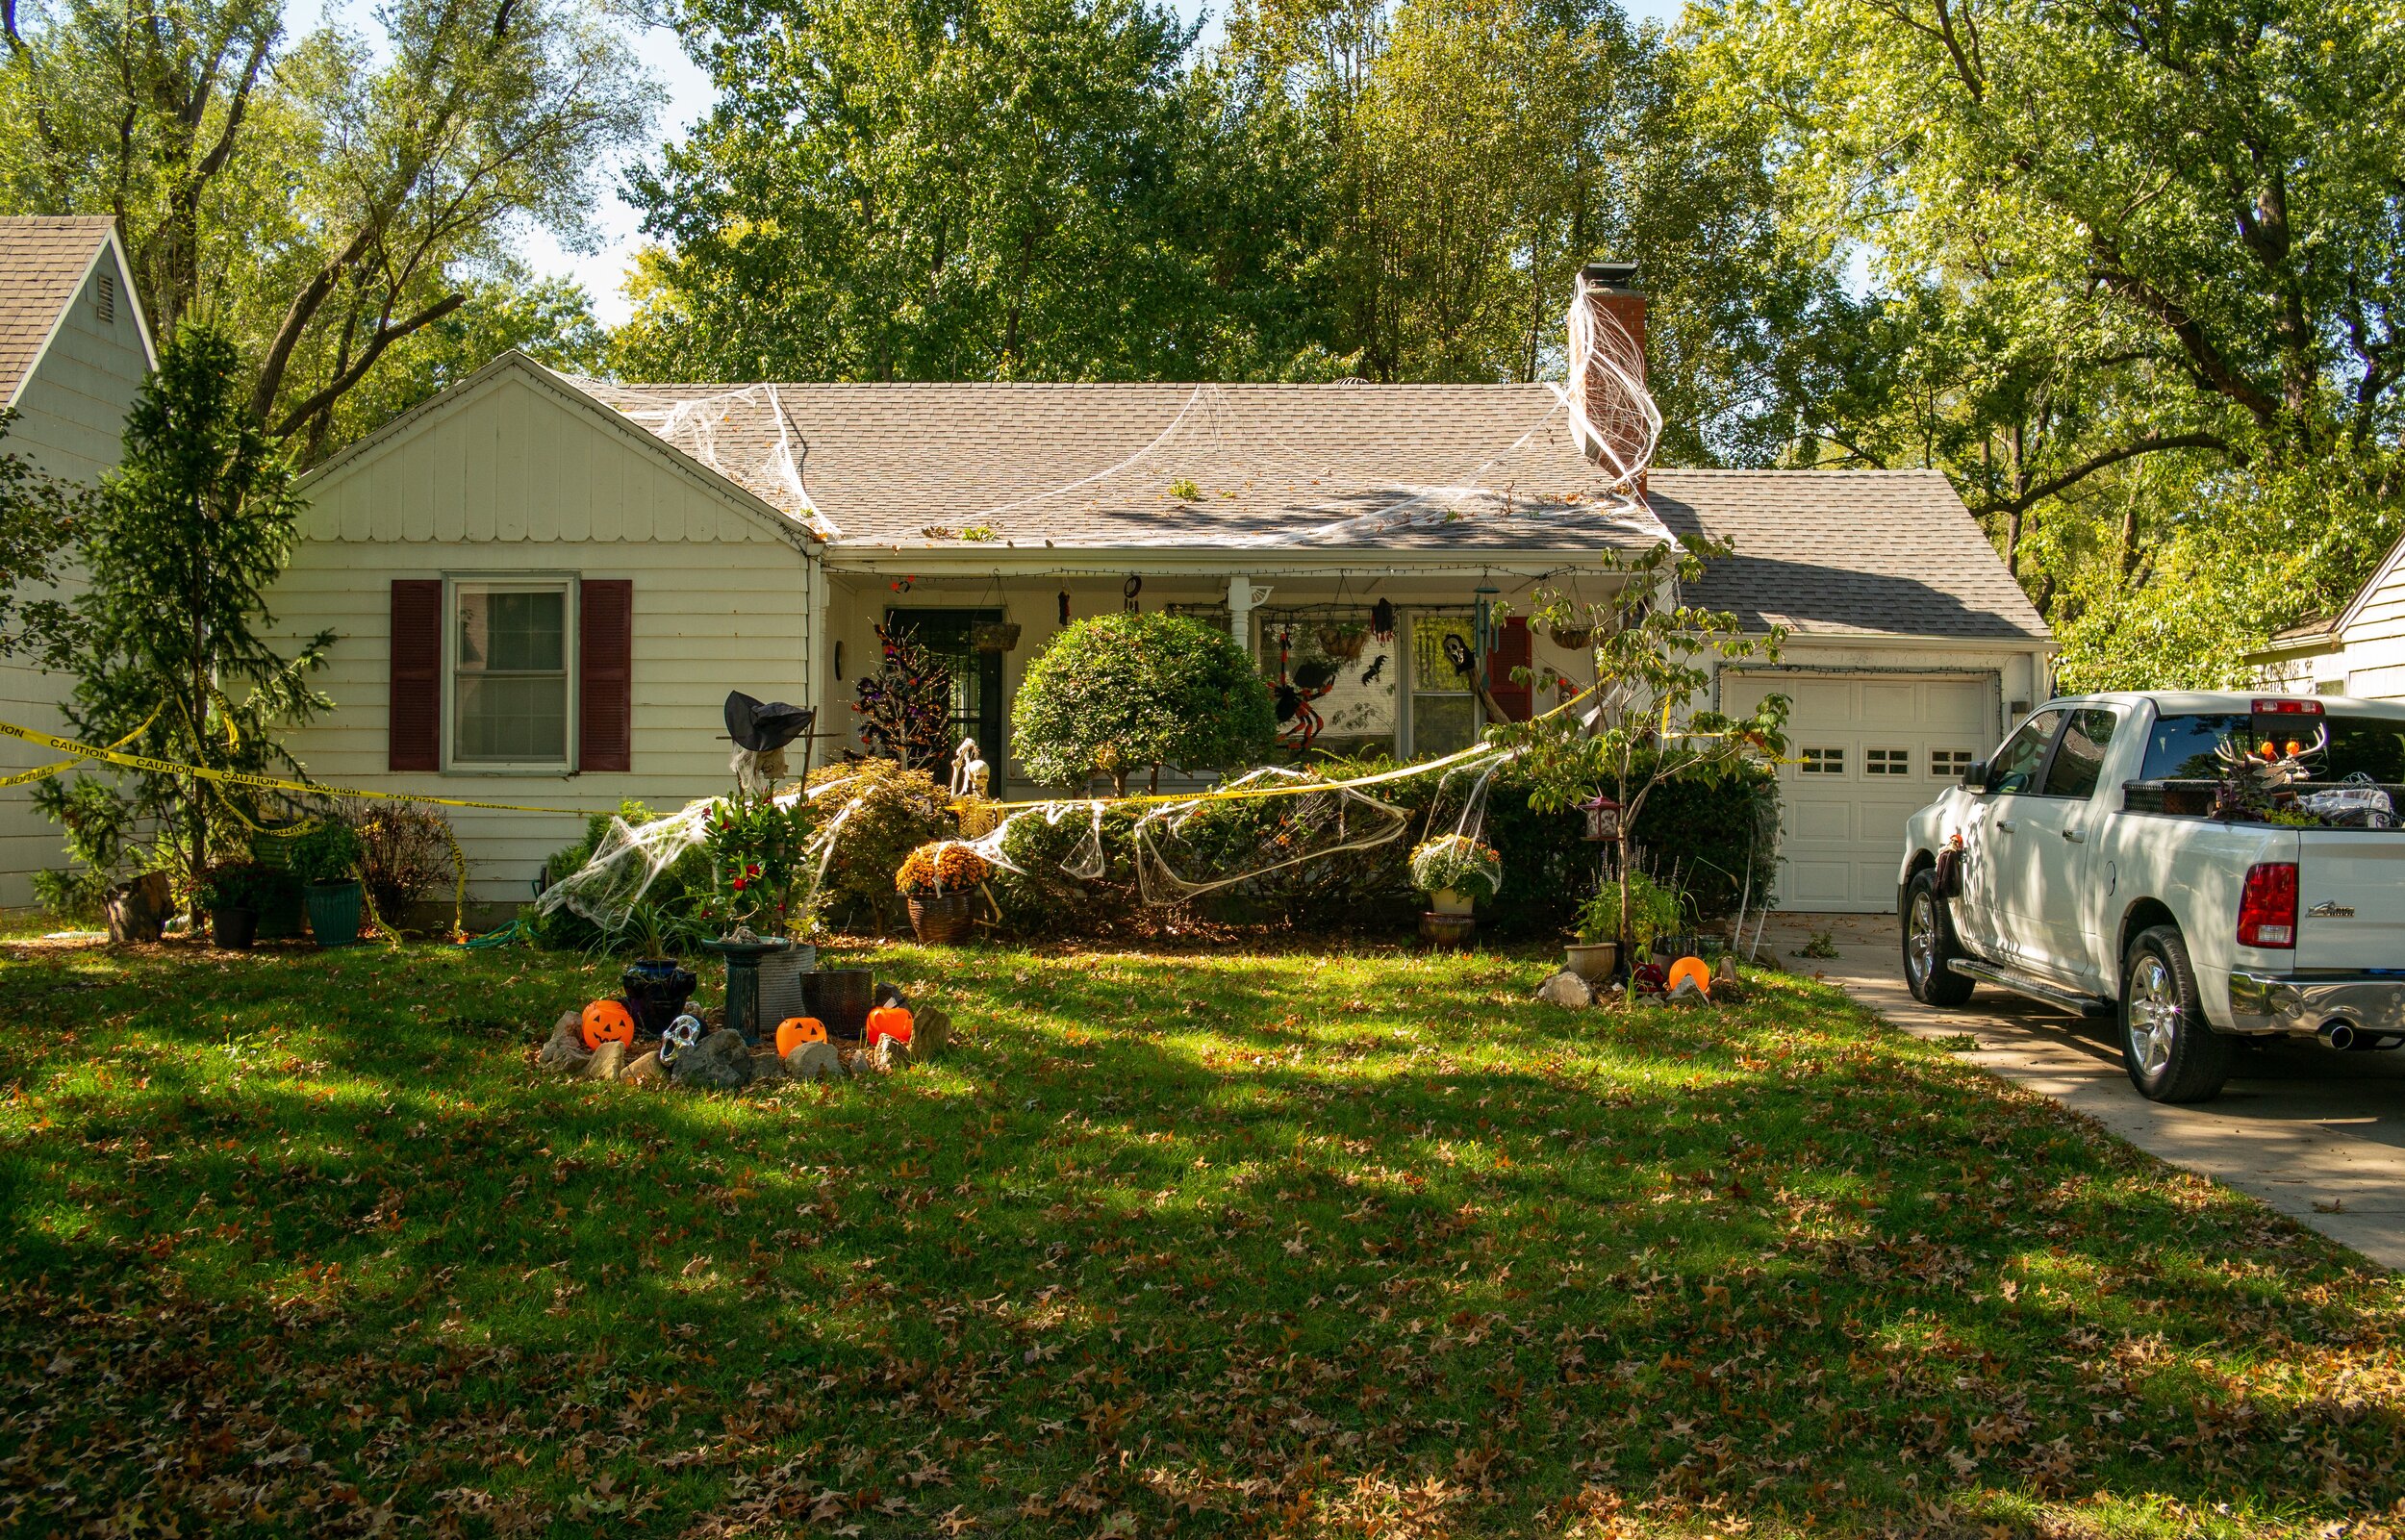
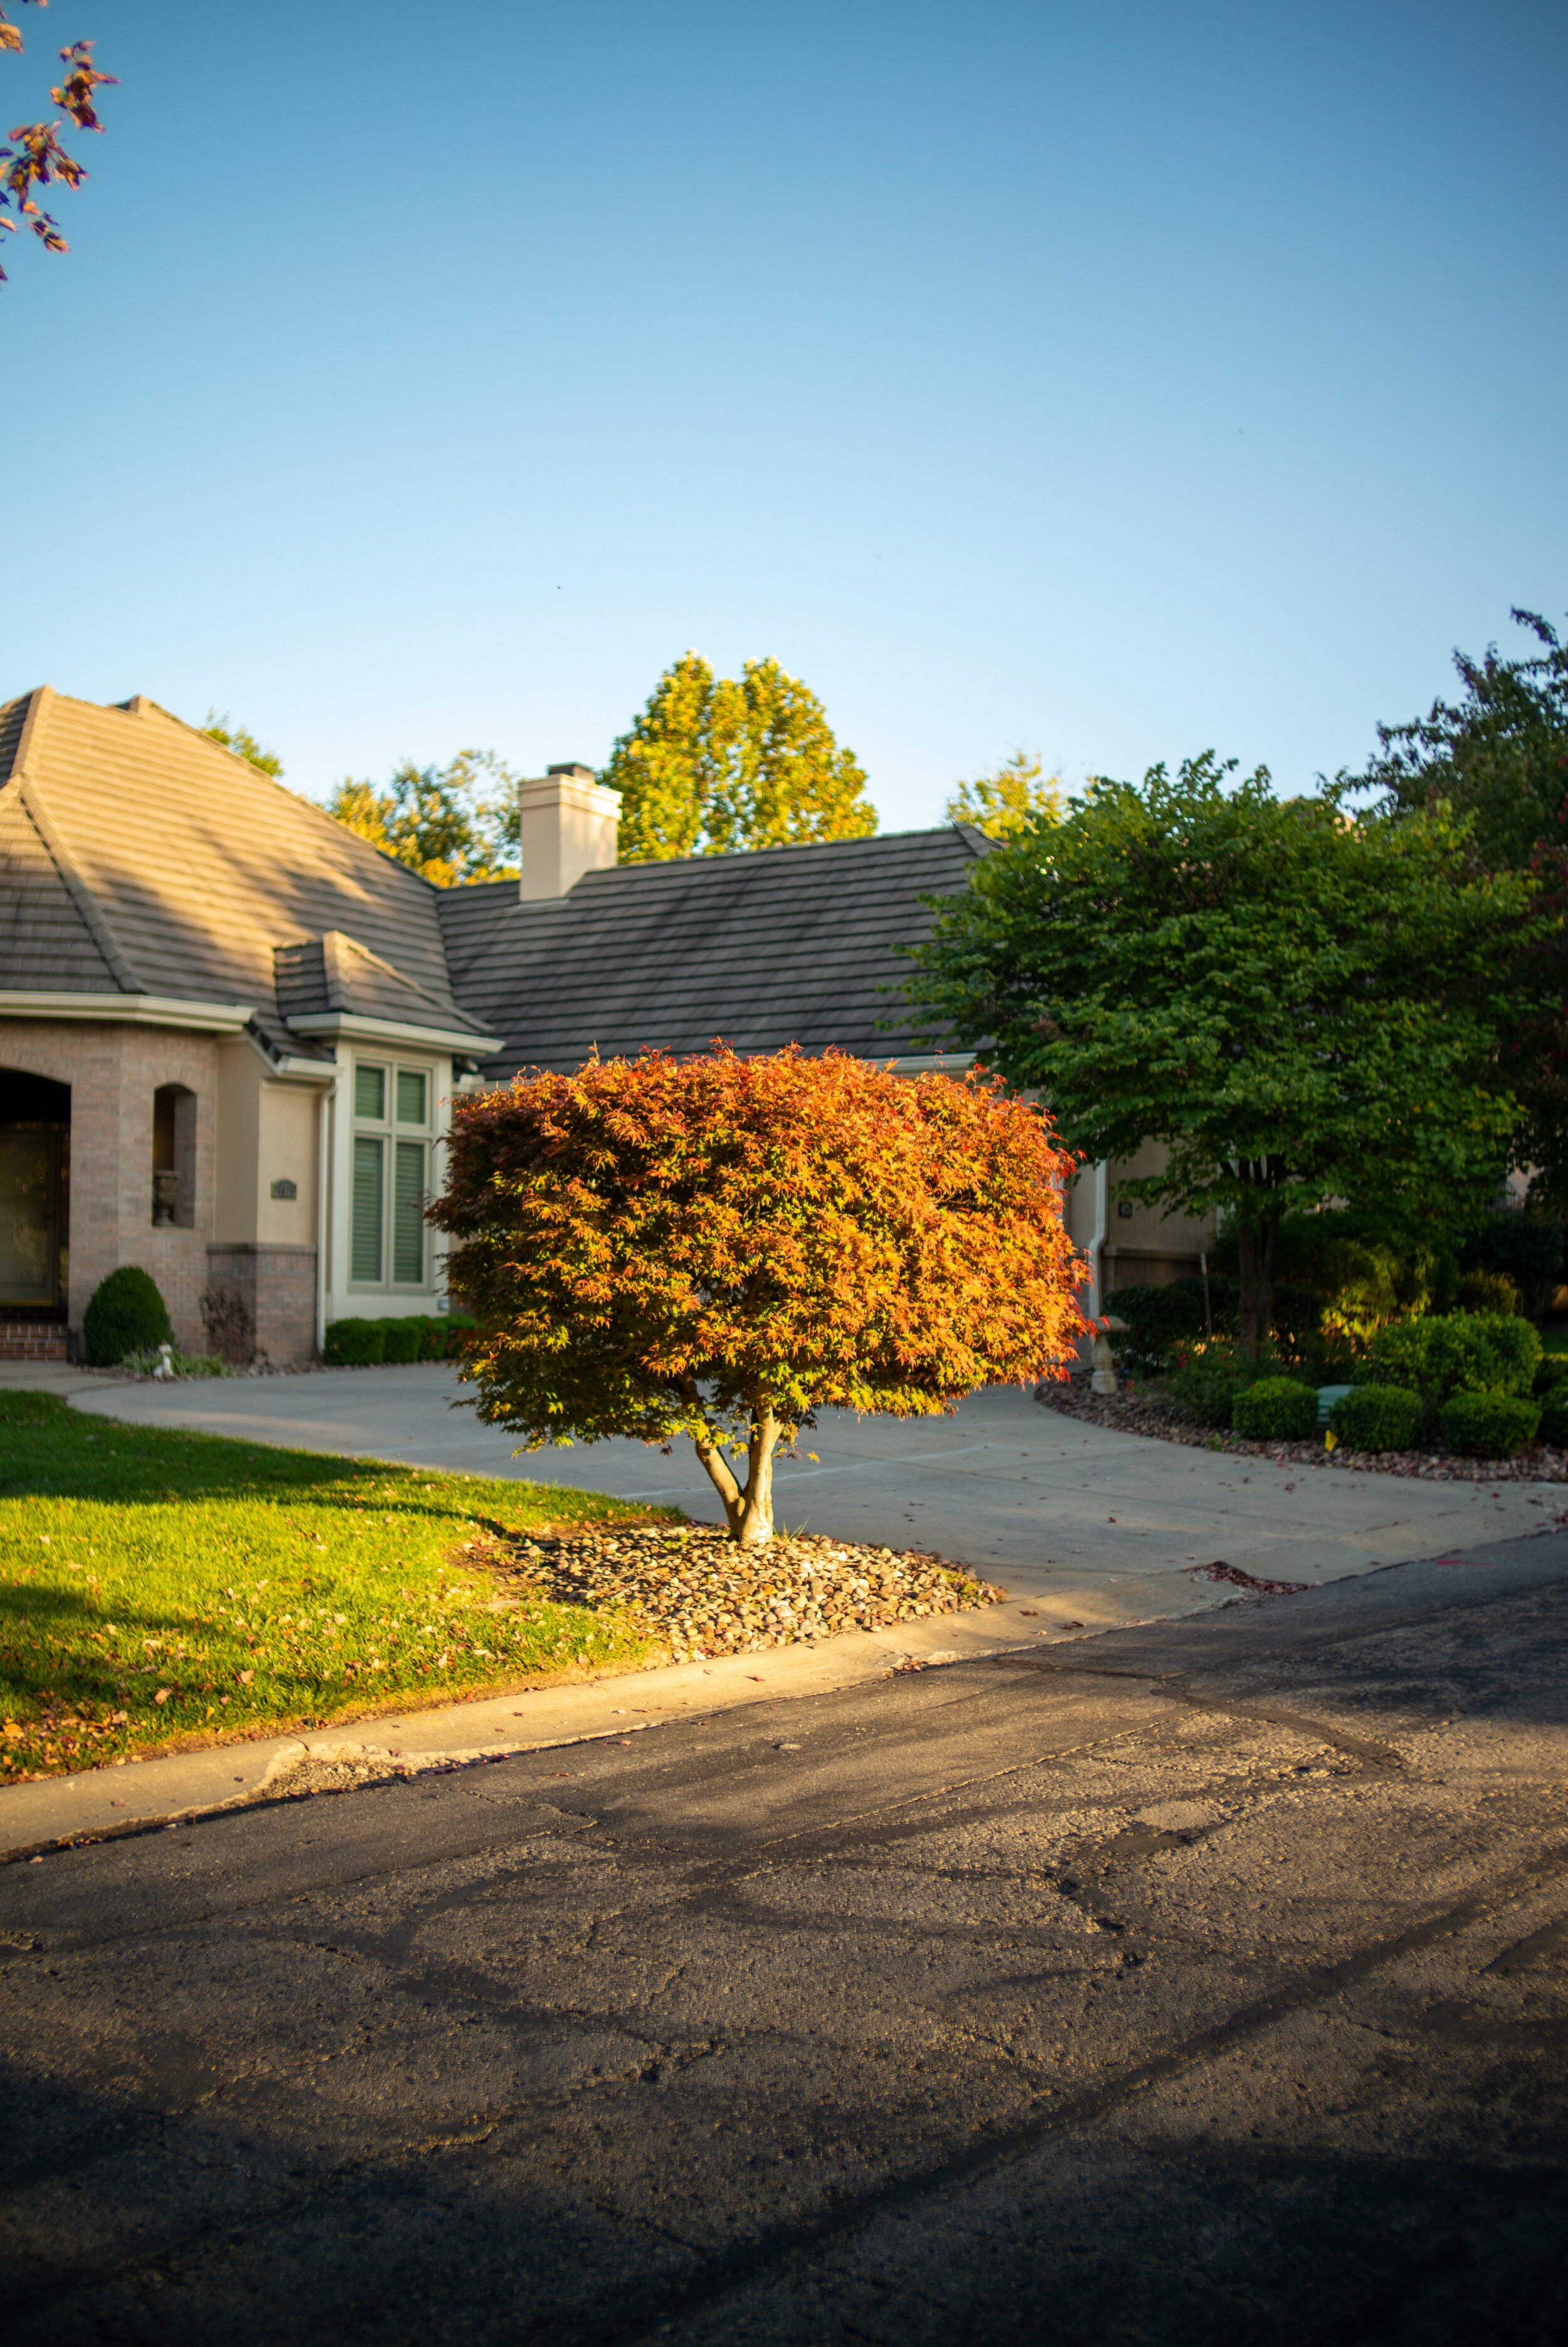
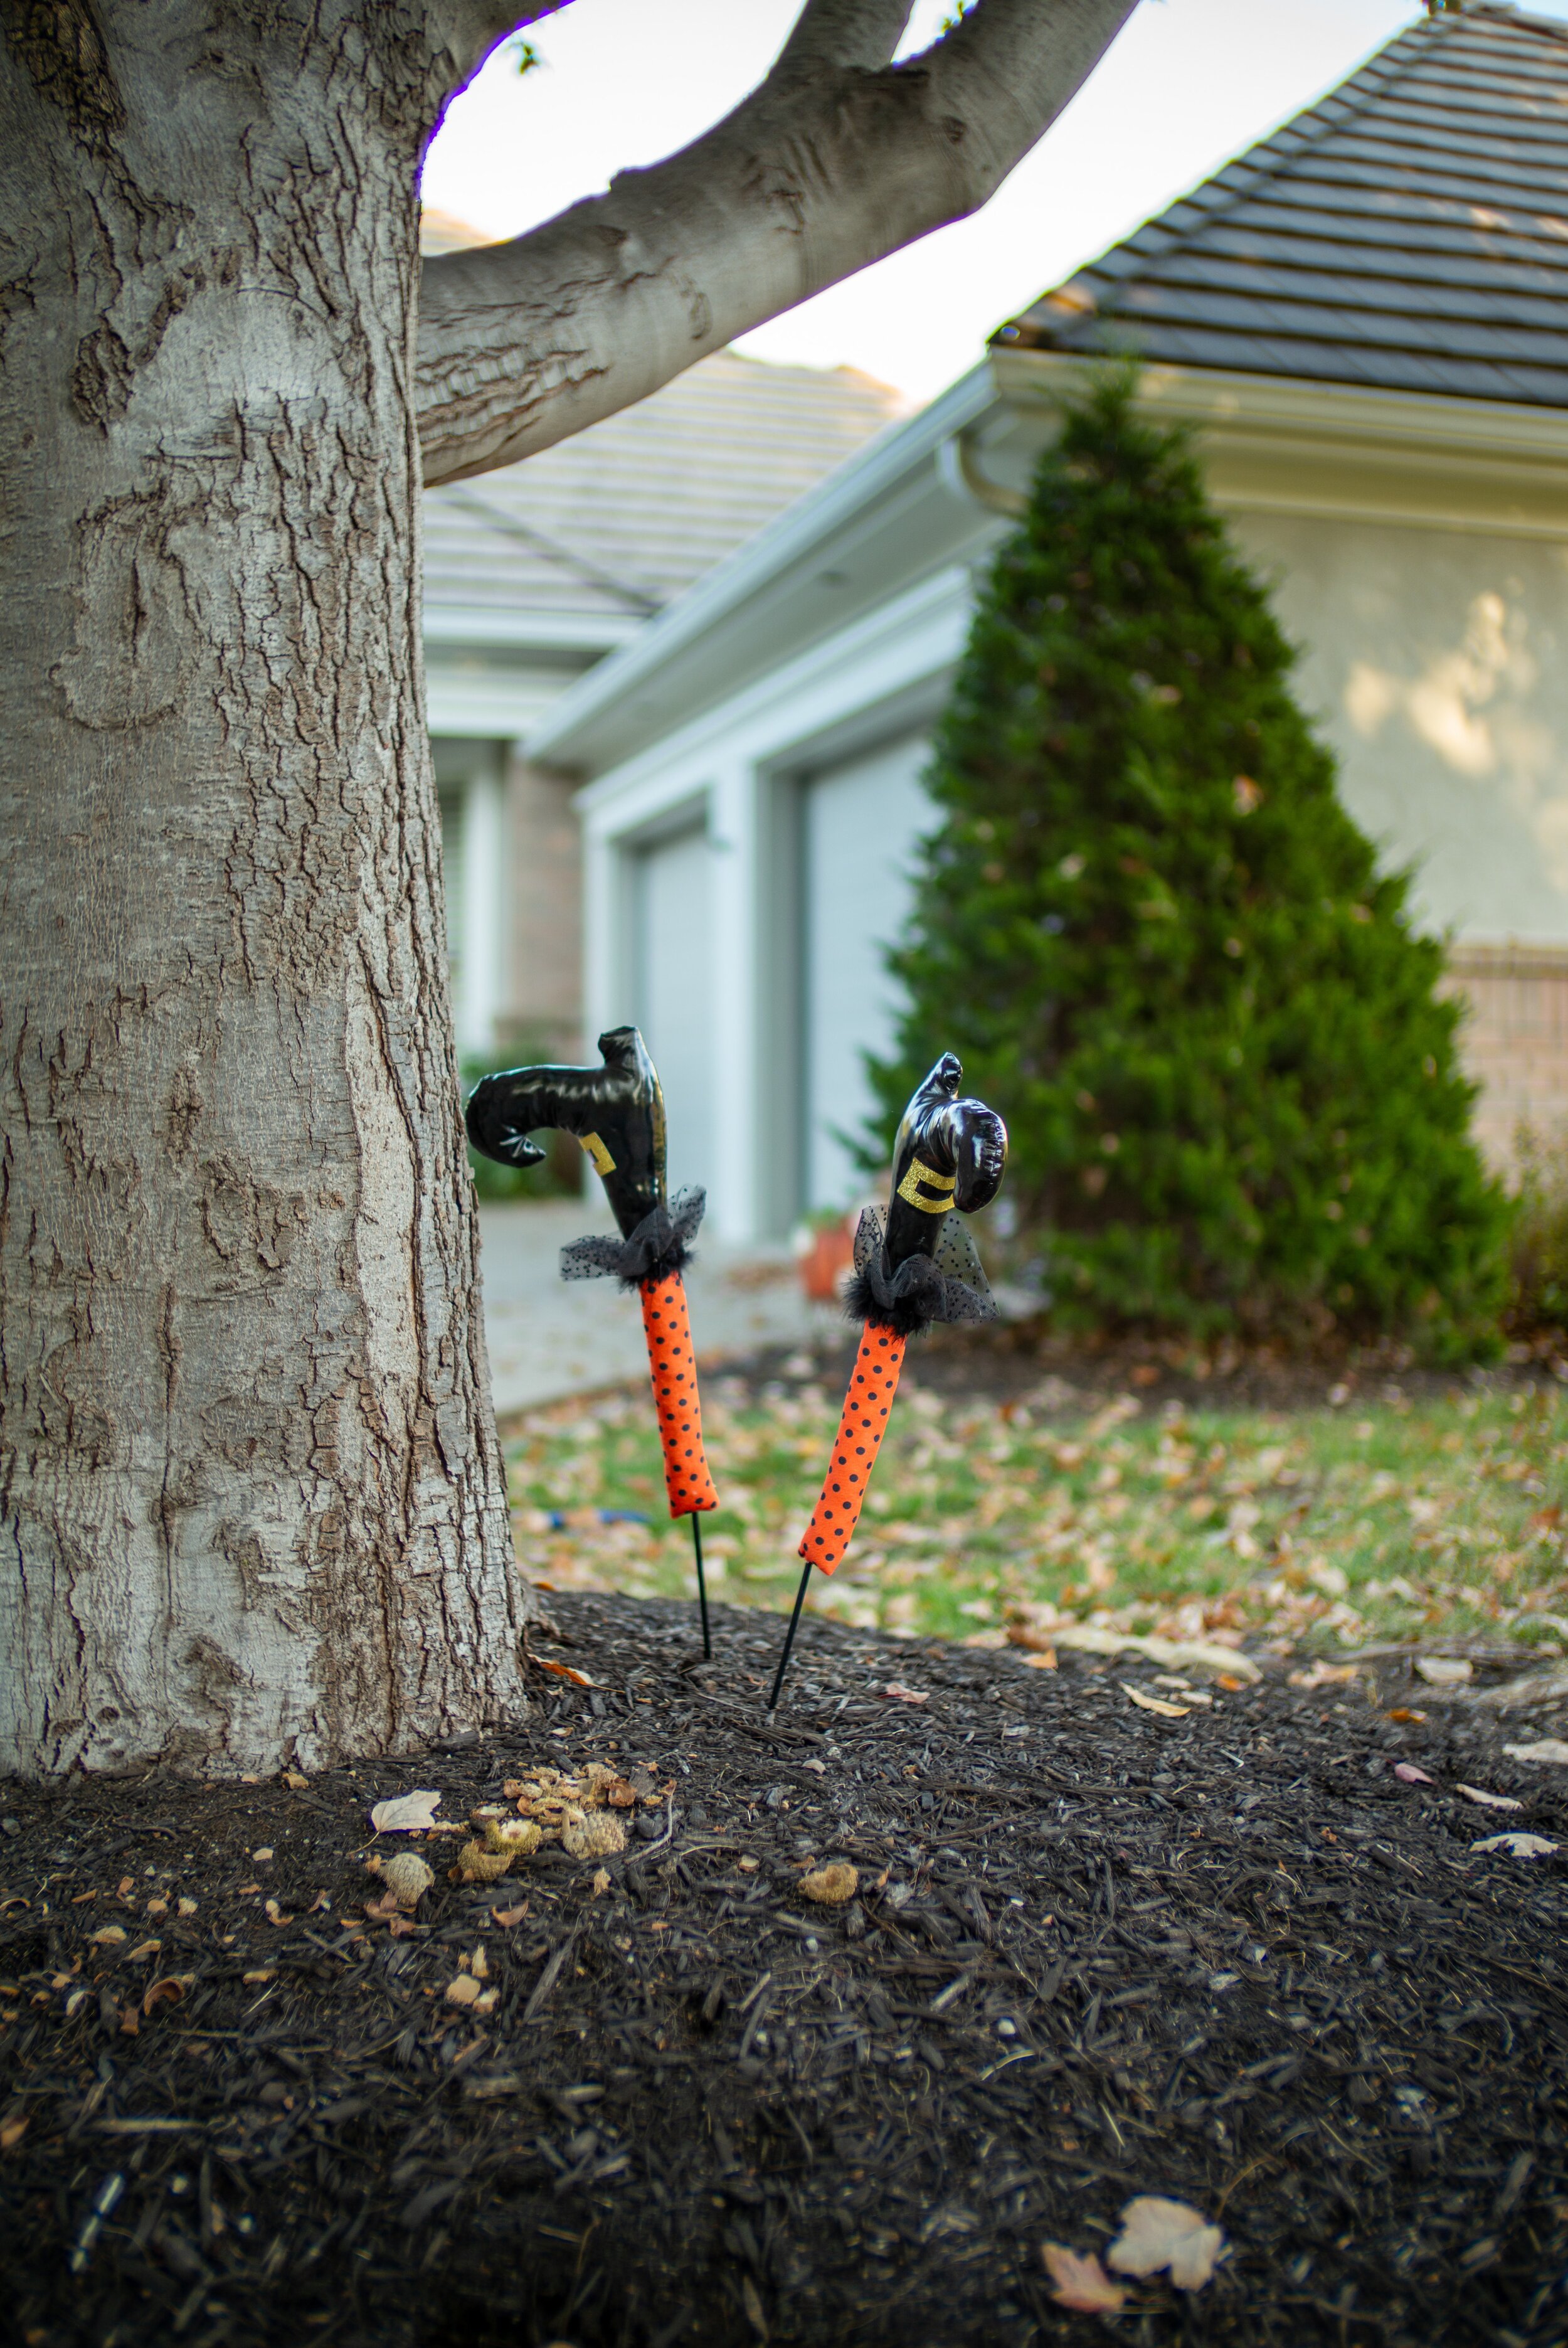
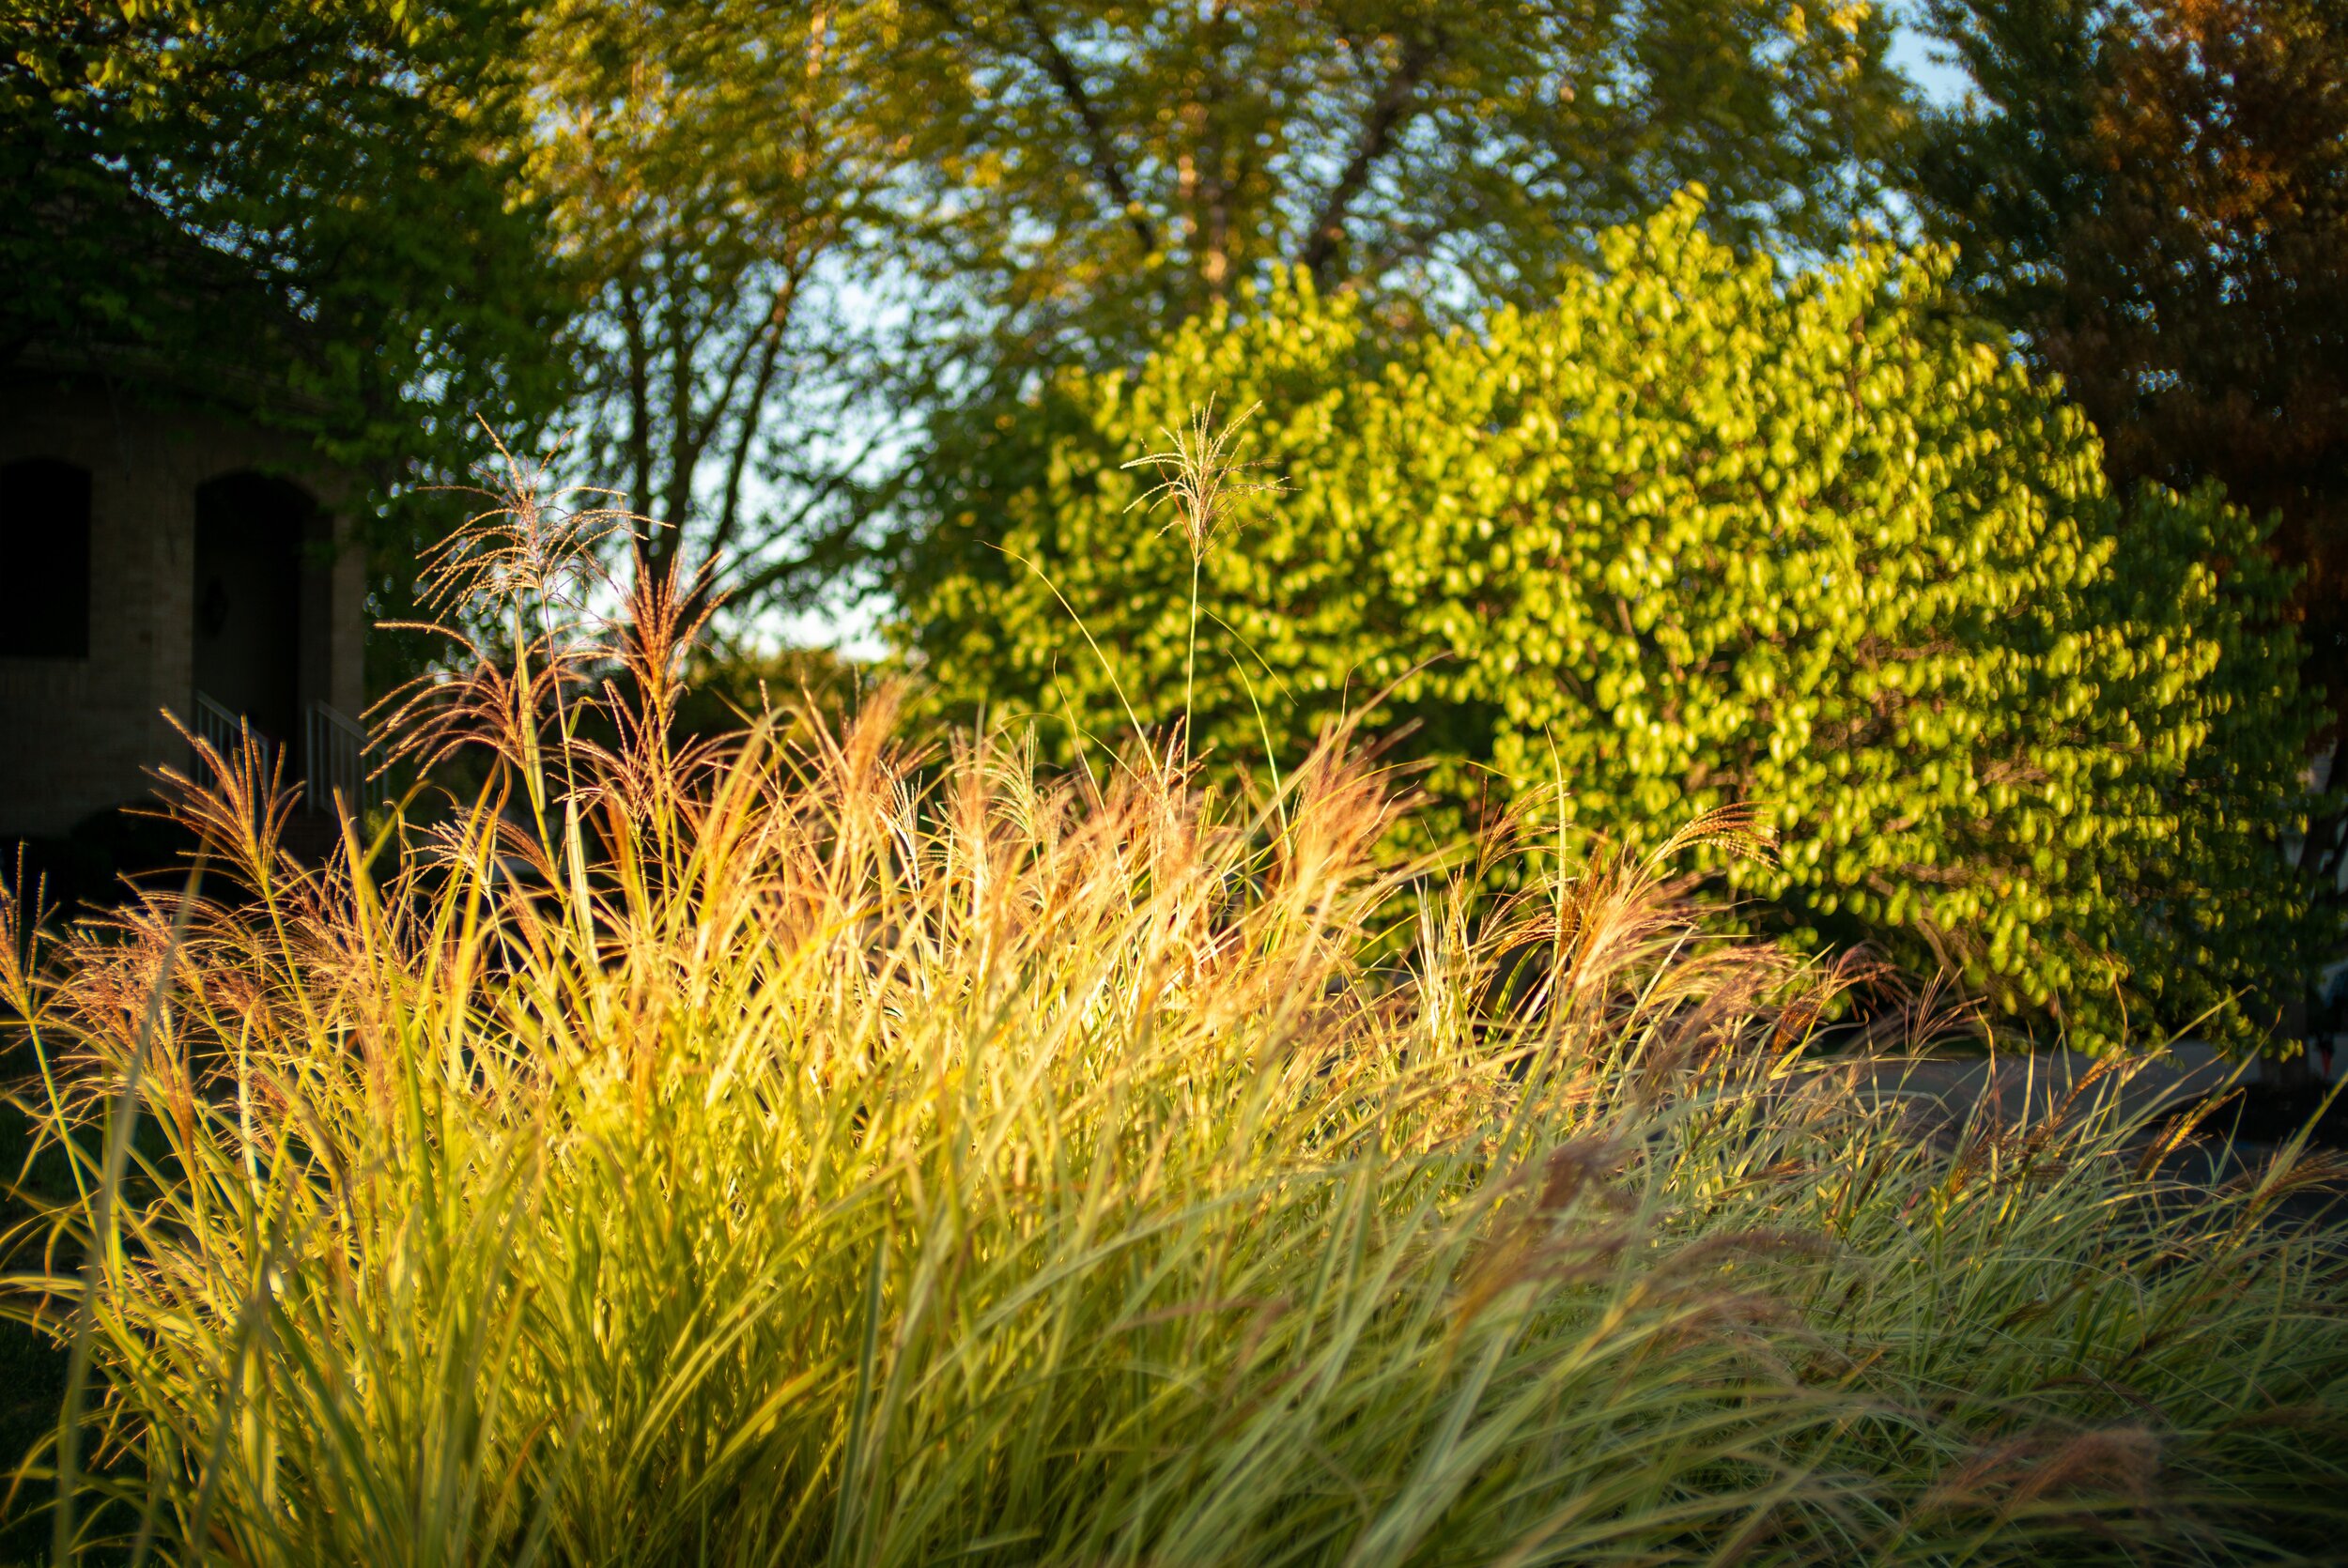
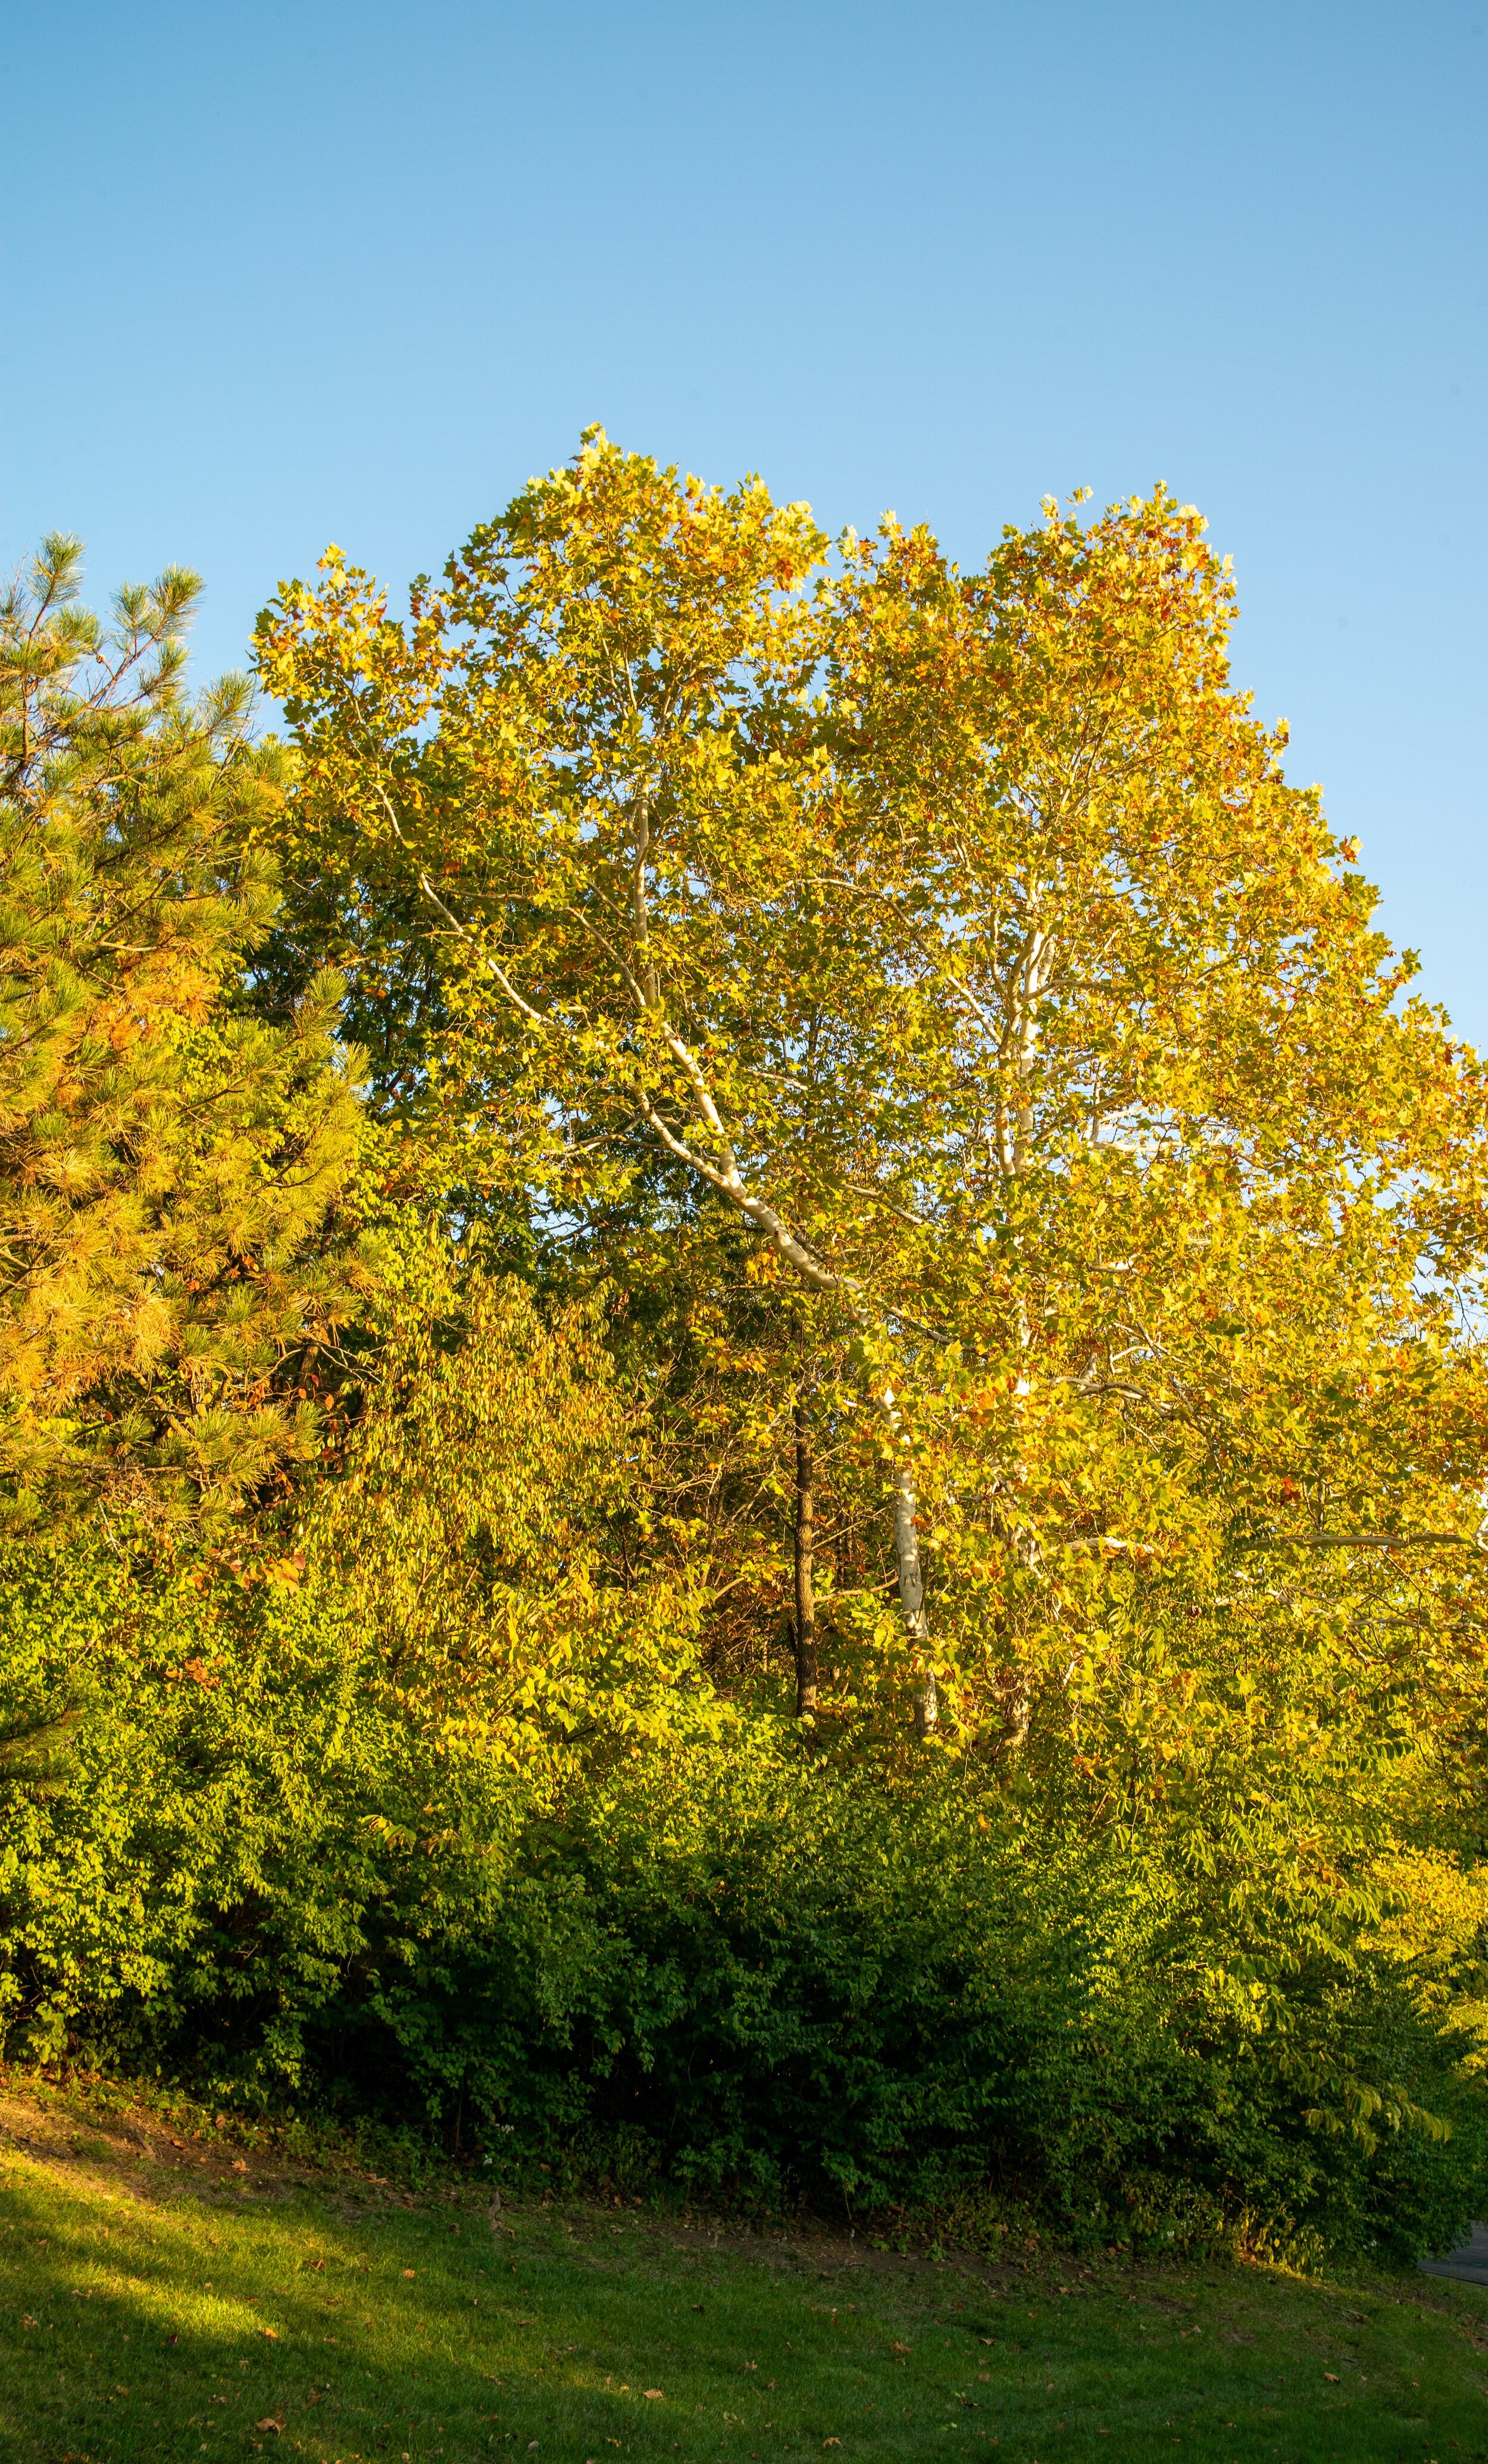
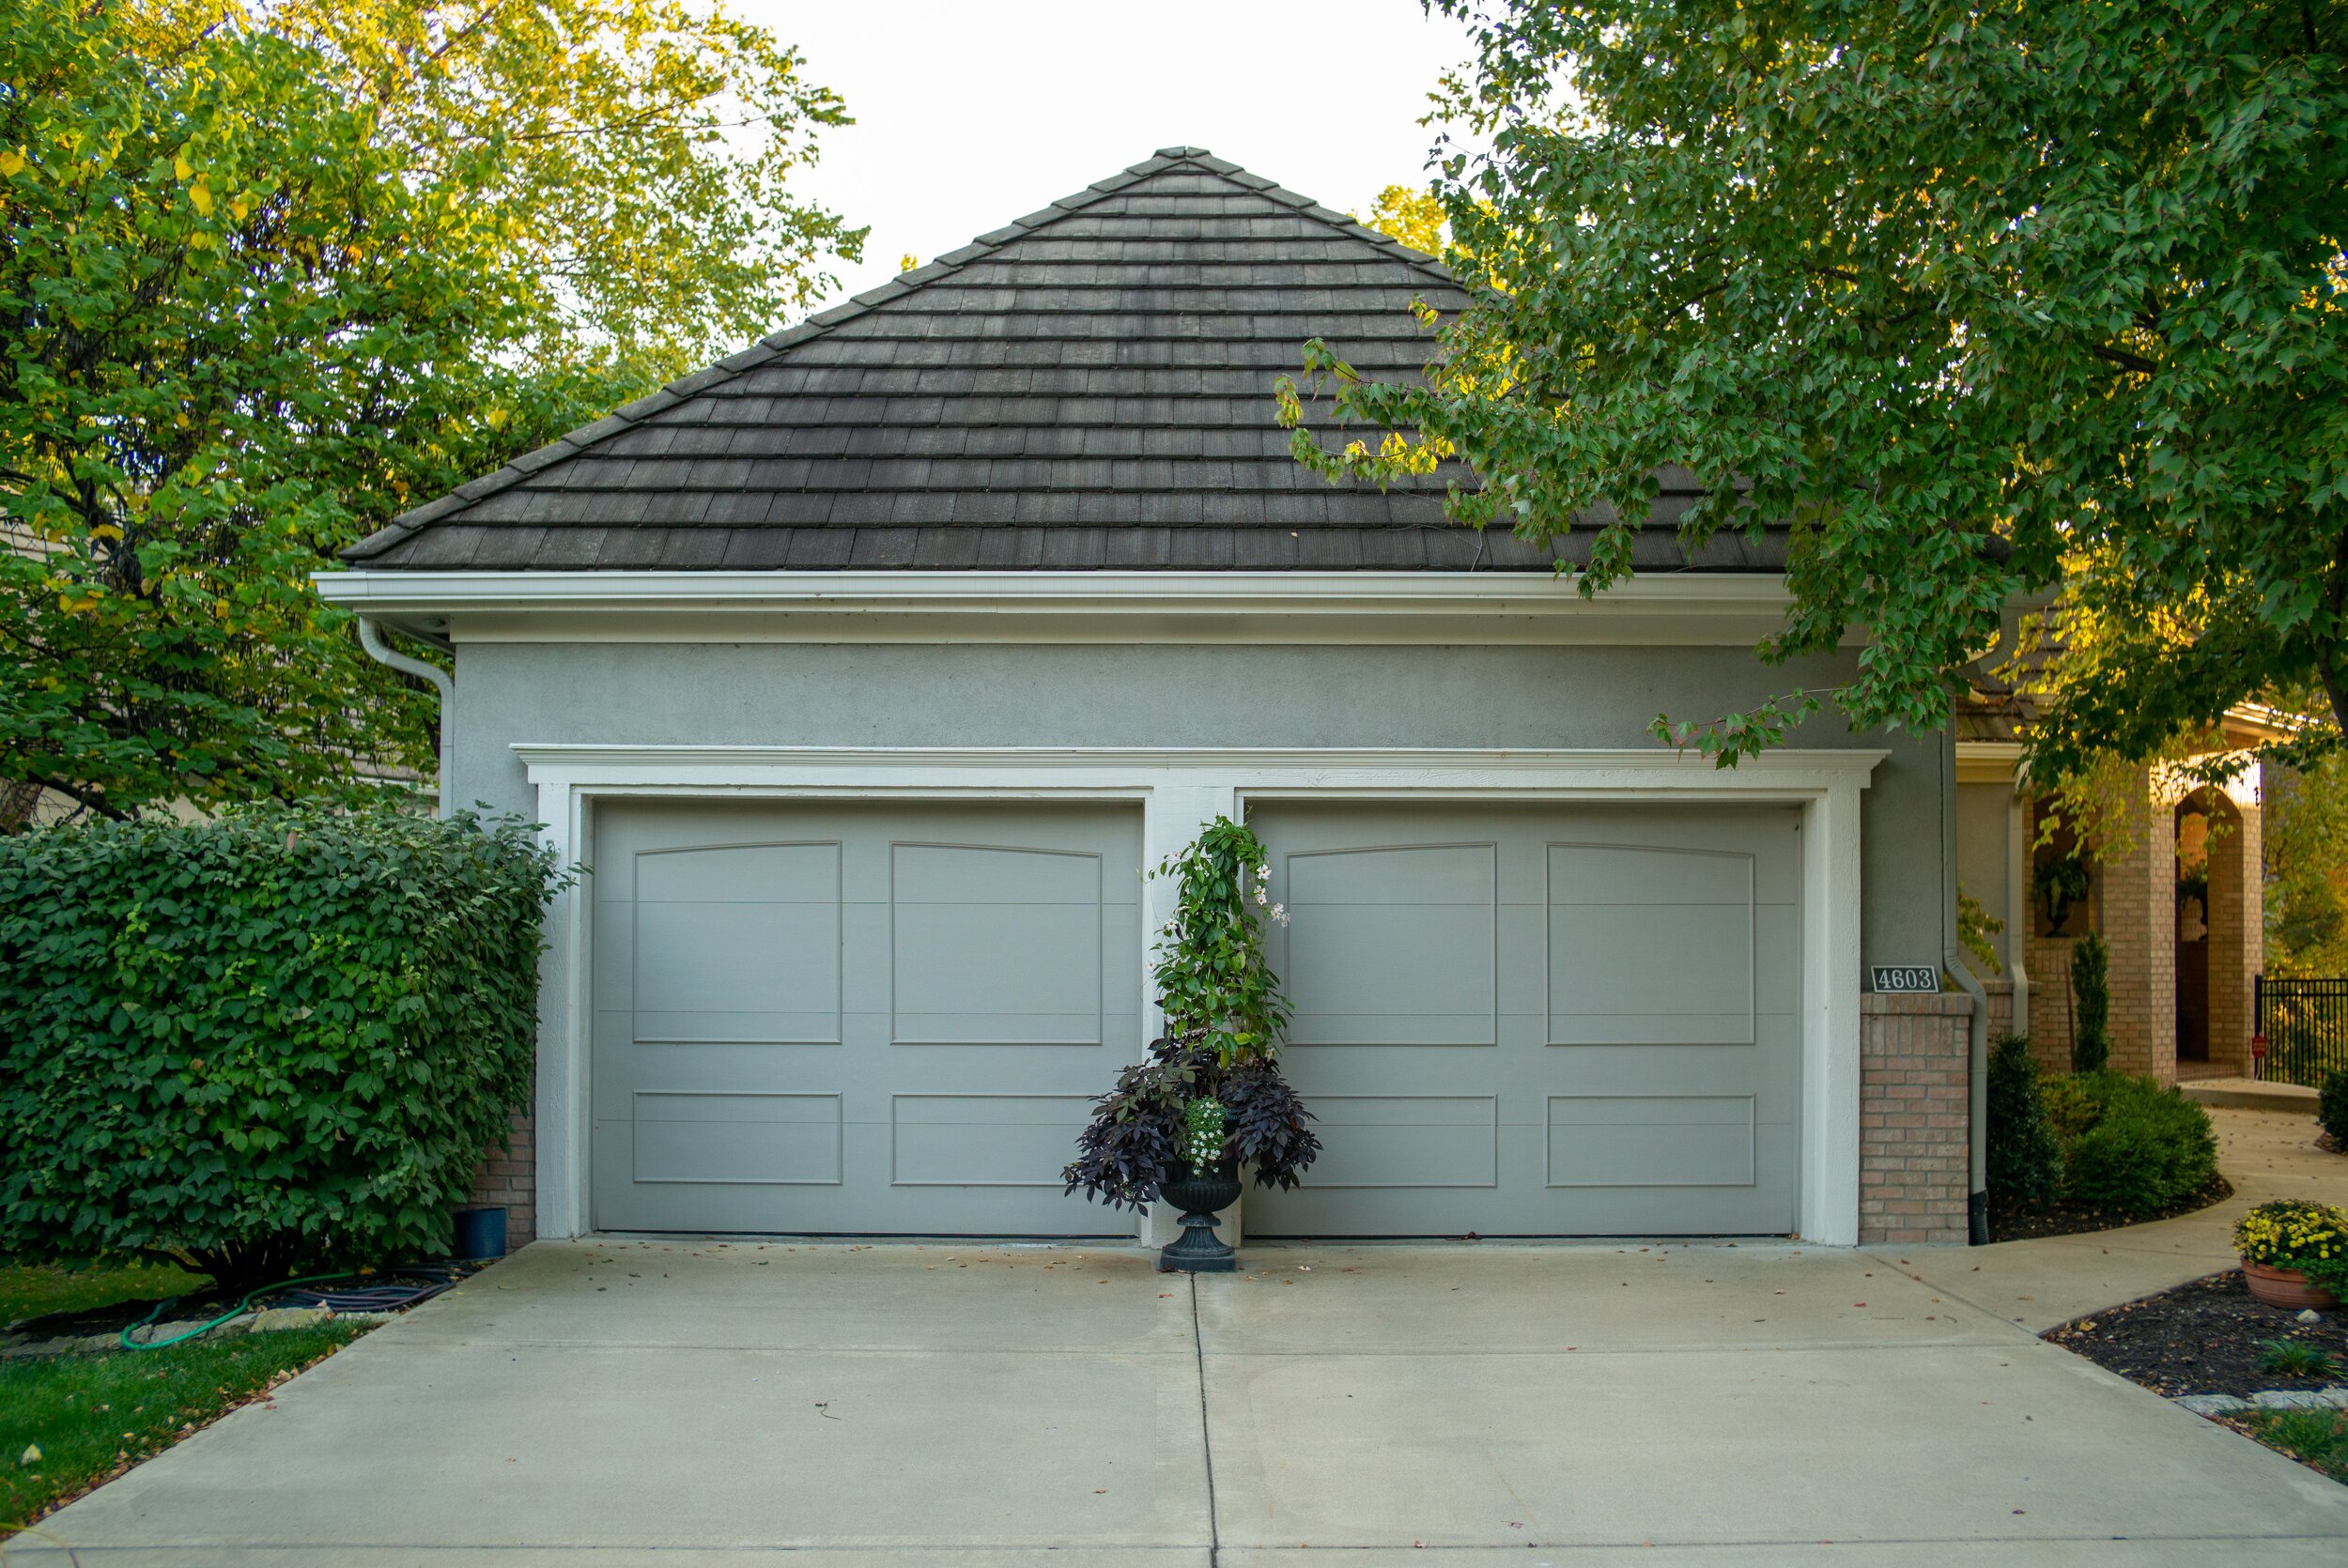
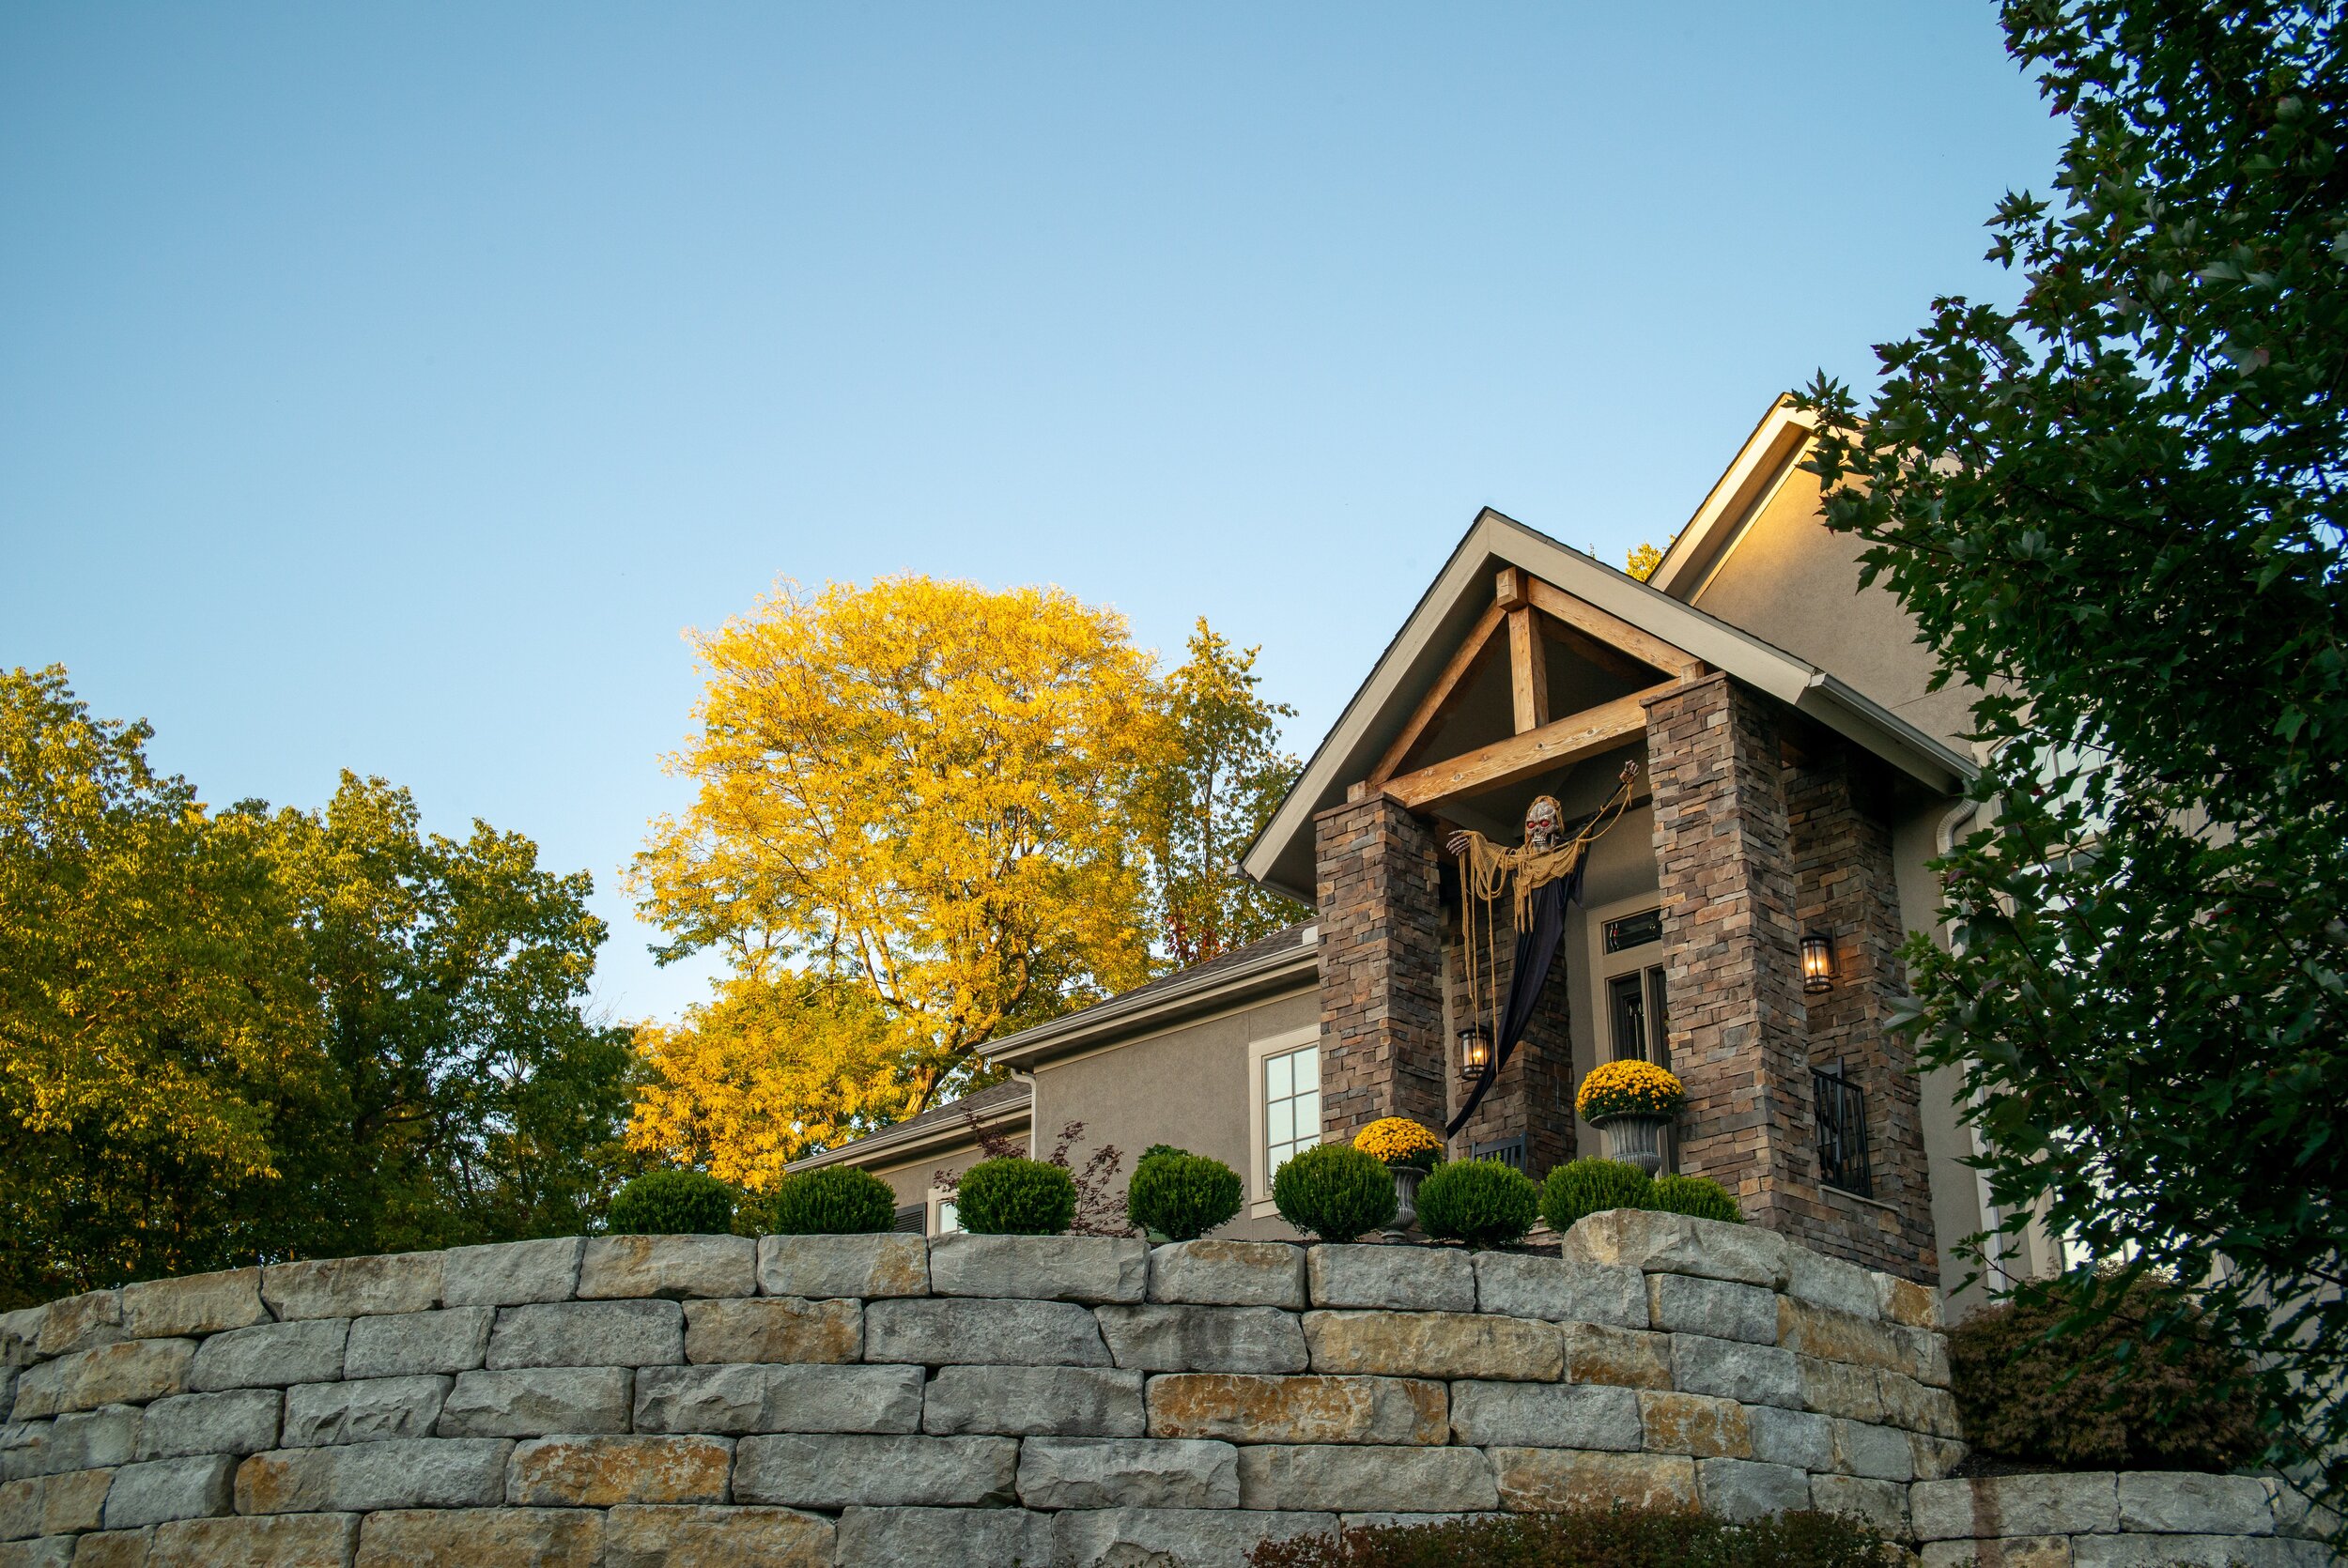
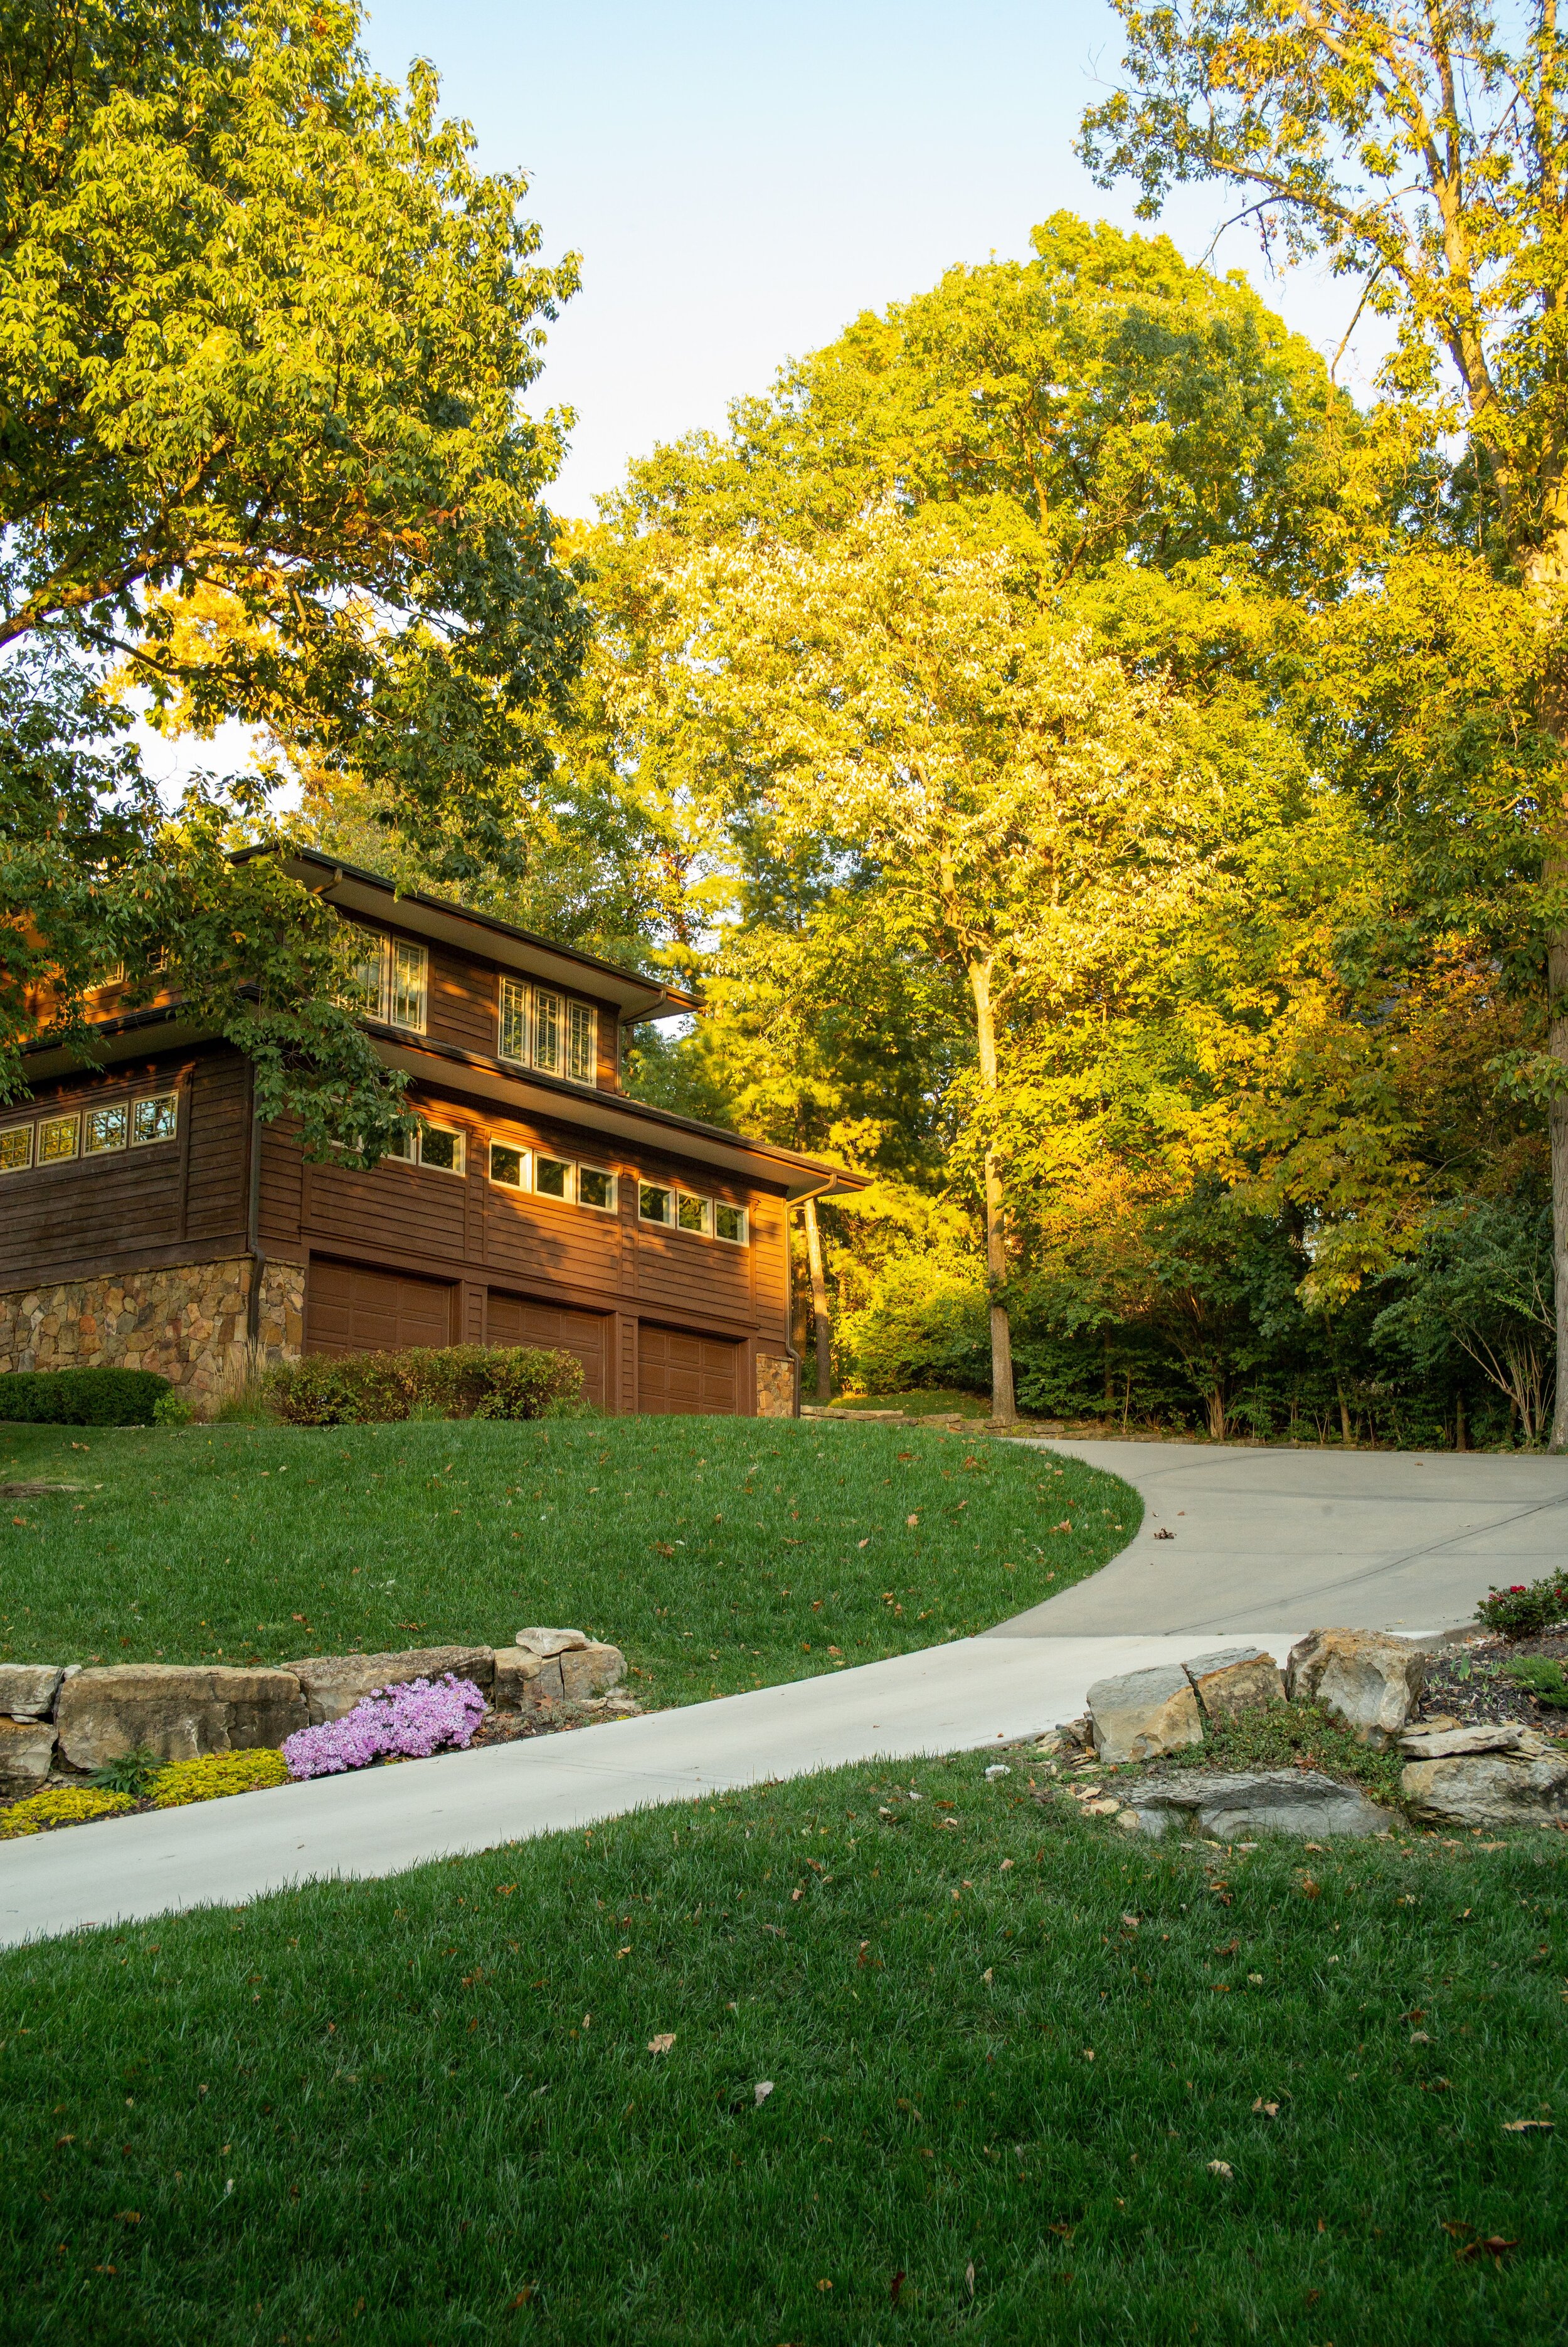
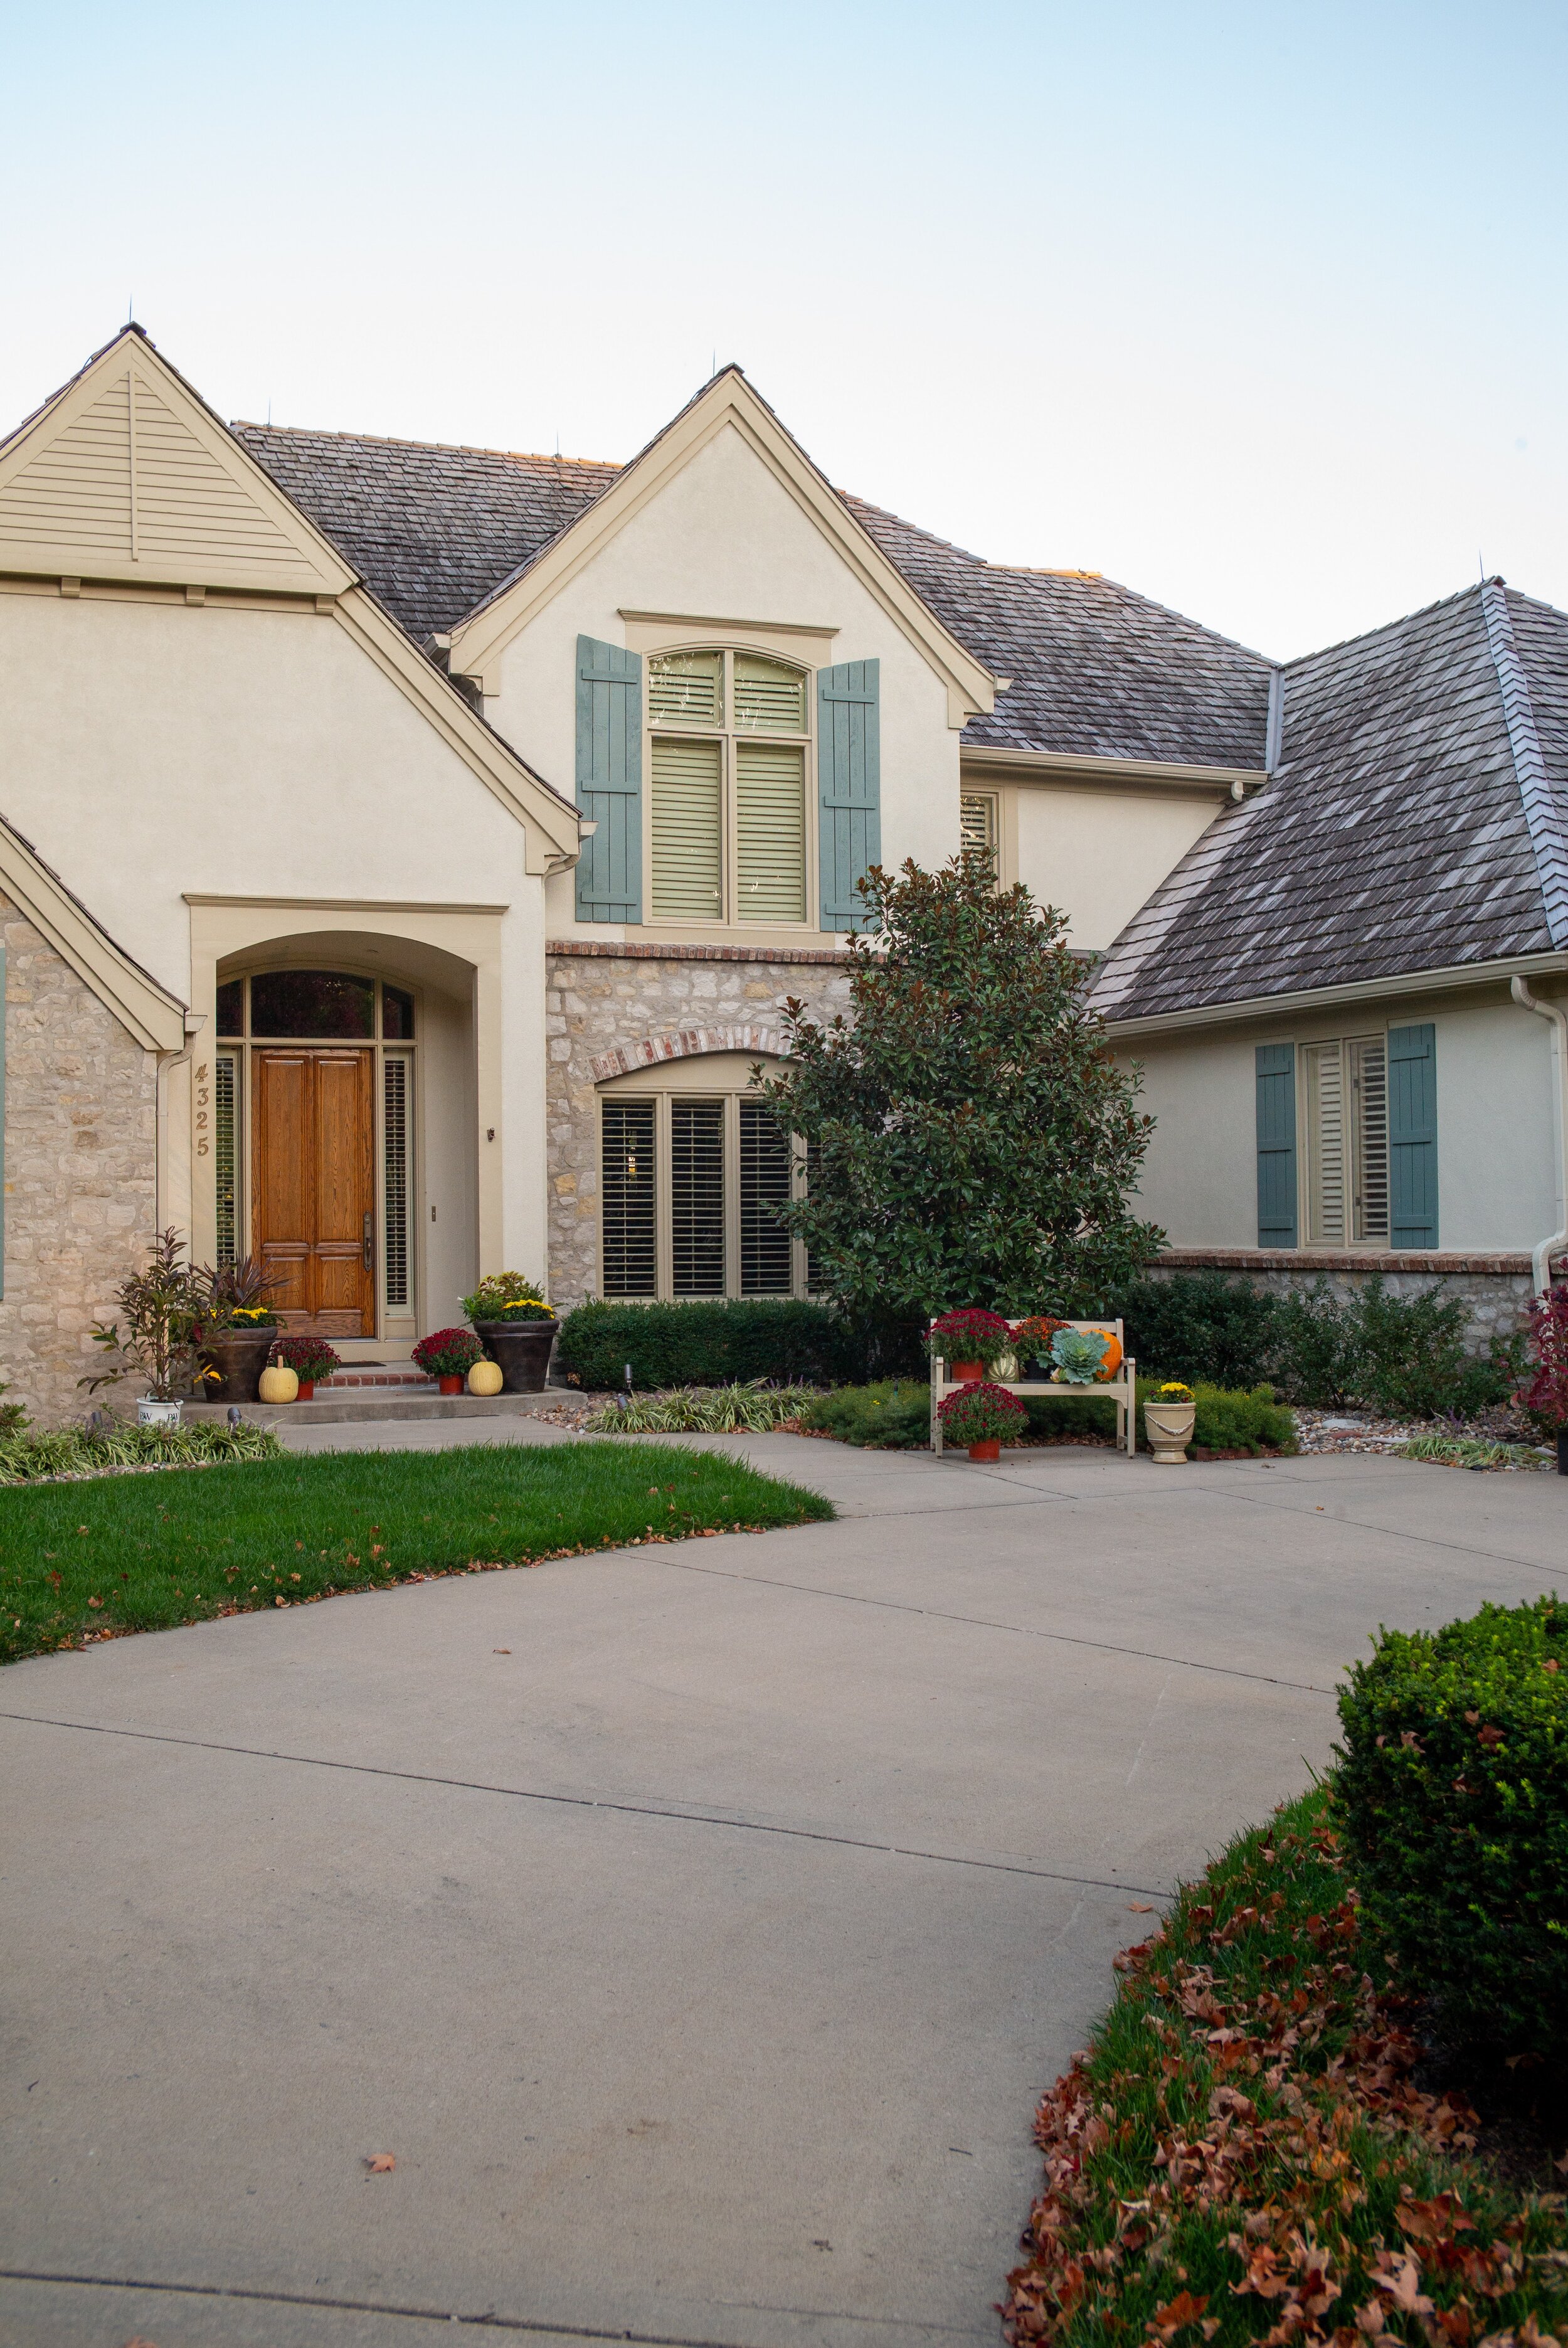
I really like the images I got from this lens. The transition from in focus to out of focus is so lovely. The bokeh is very pleasing! This really is the kind of lens that I can leave on my M6 and work with in almost all shooting scenarios and lighting conditions.

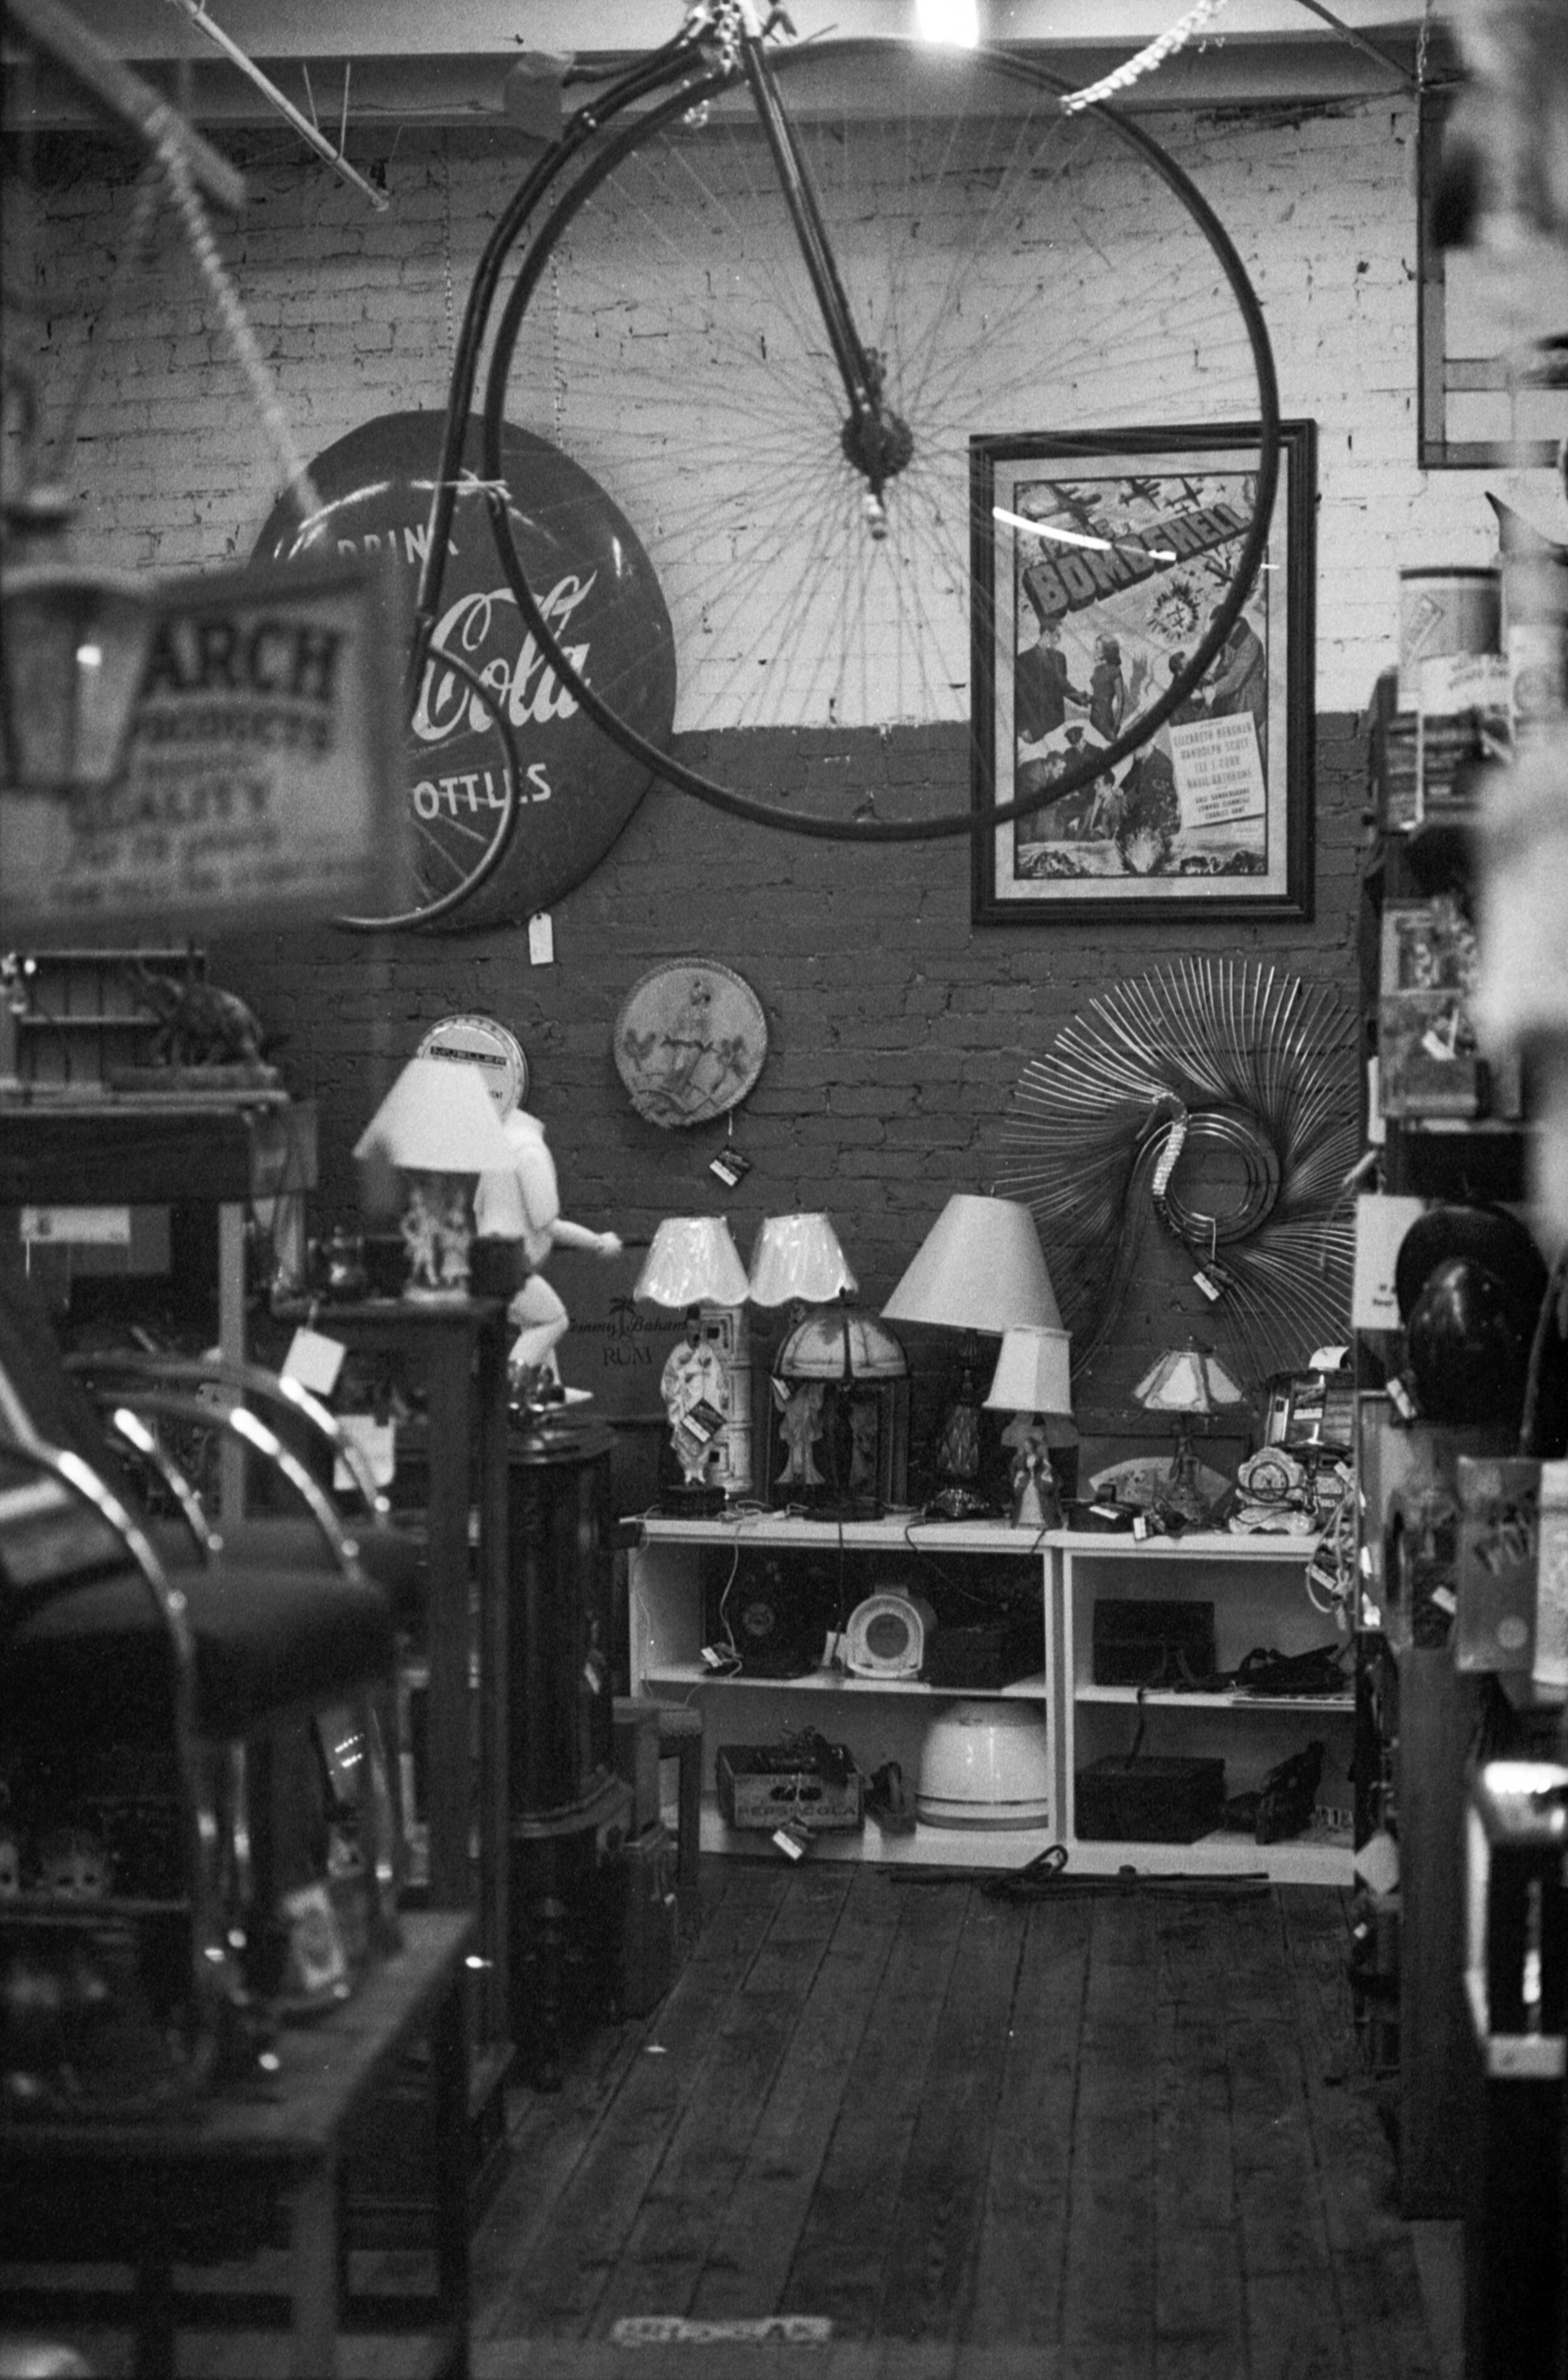
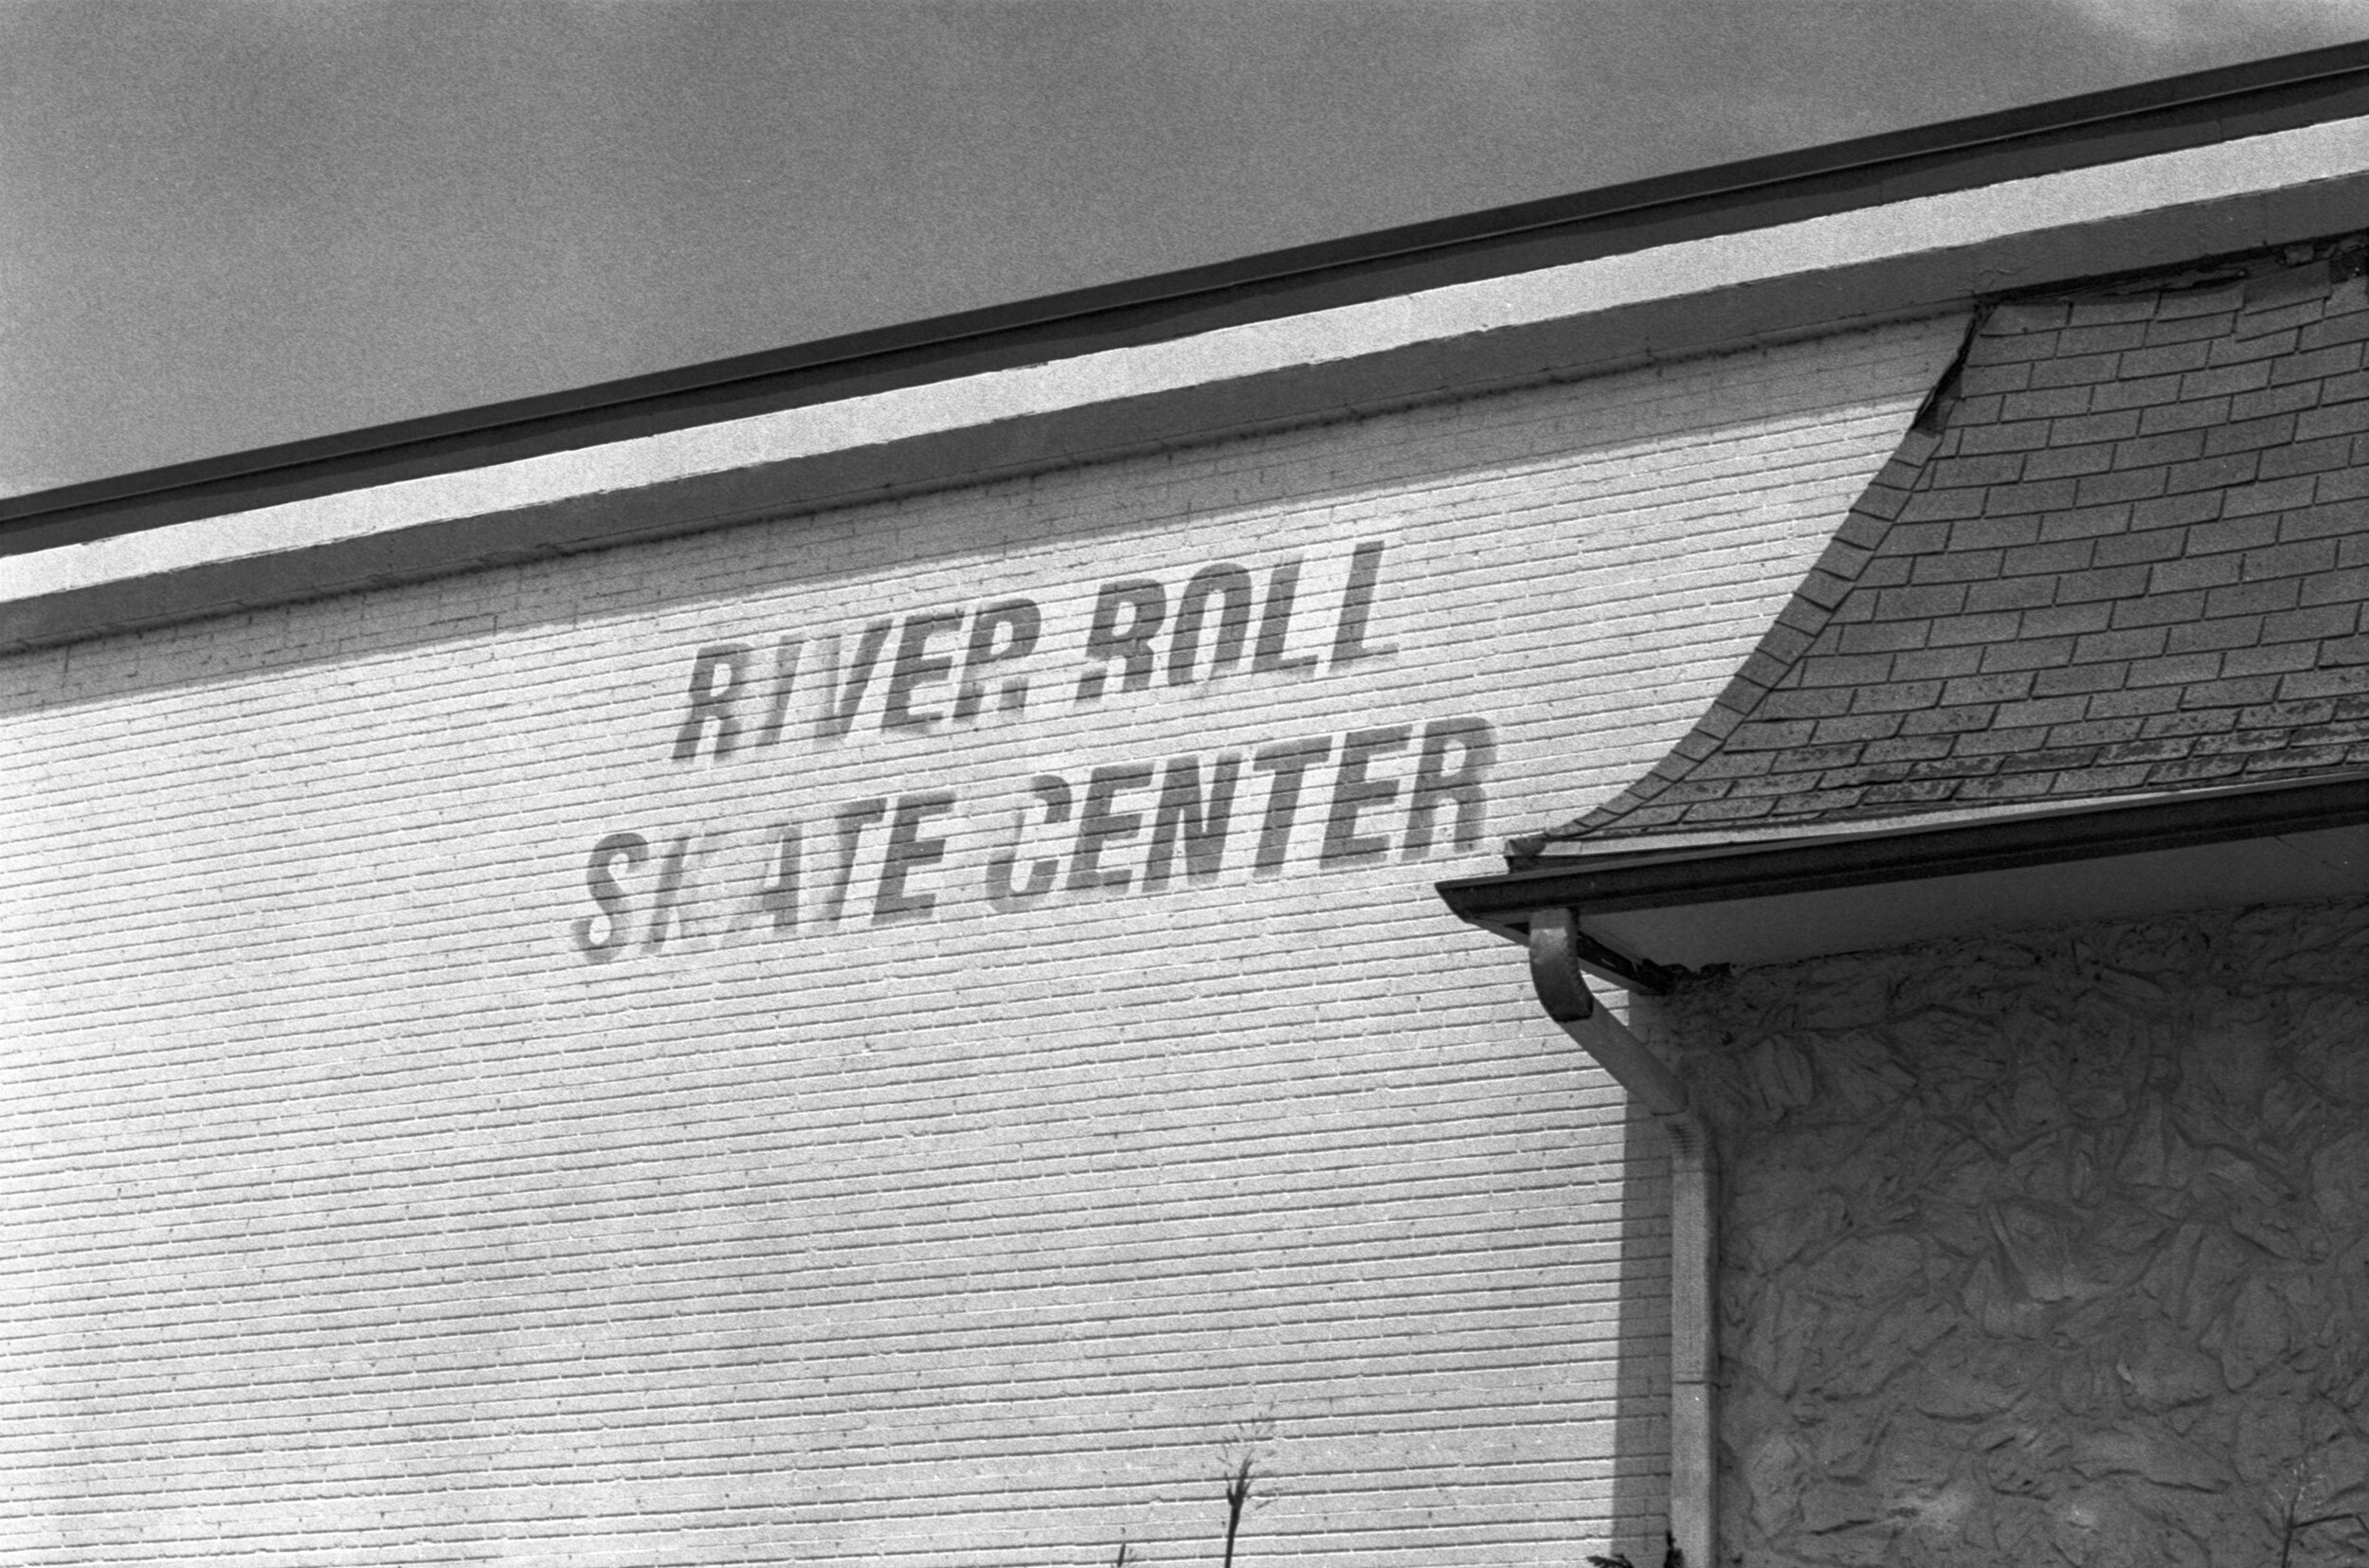
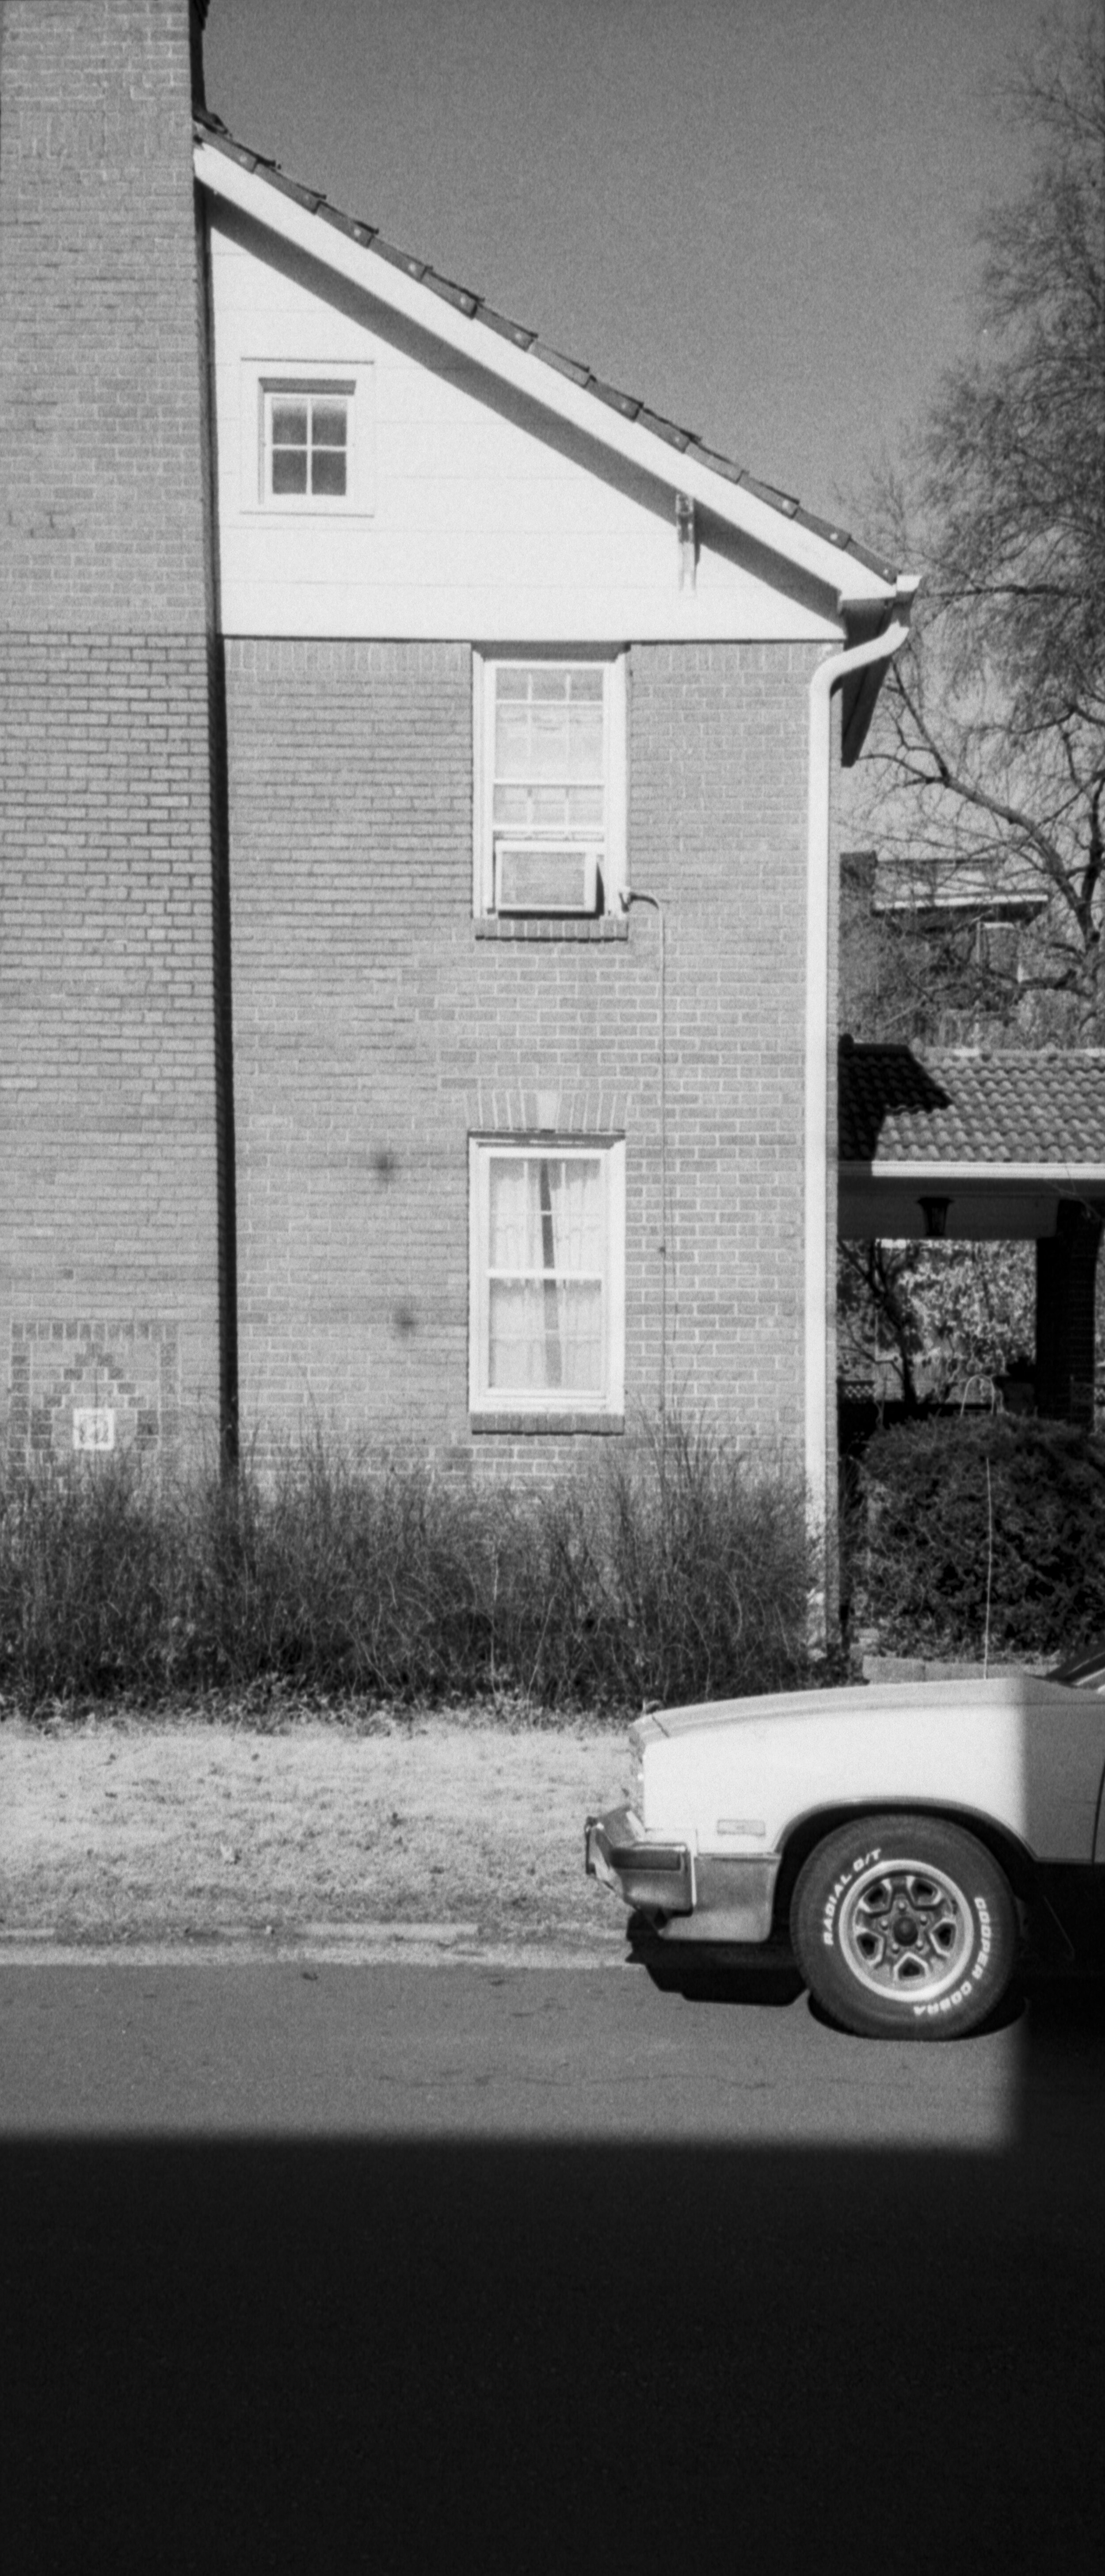
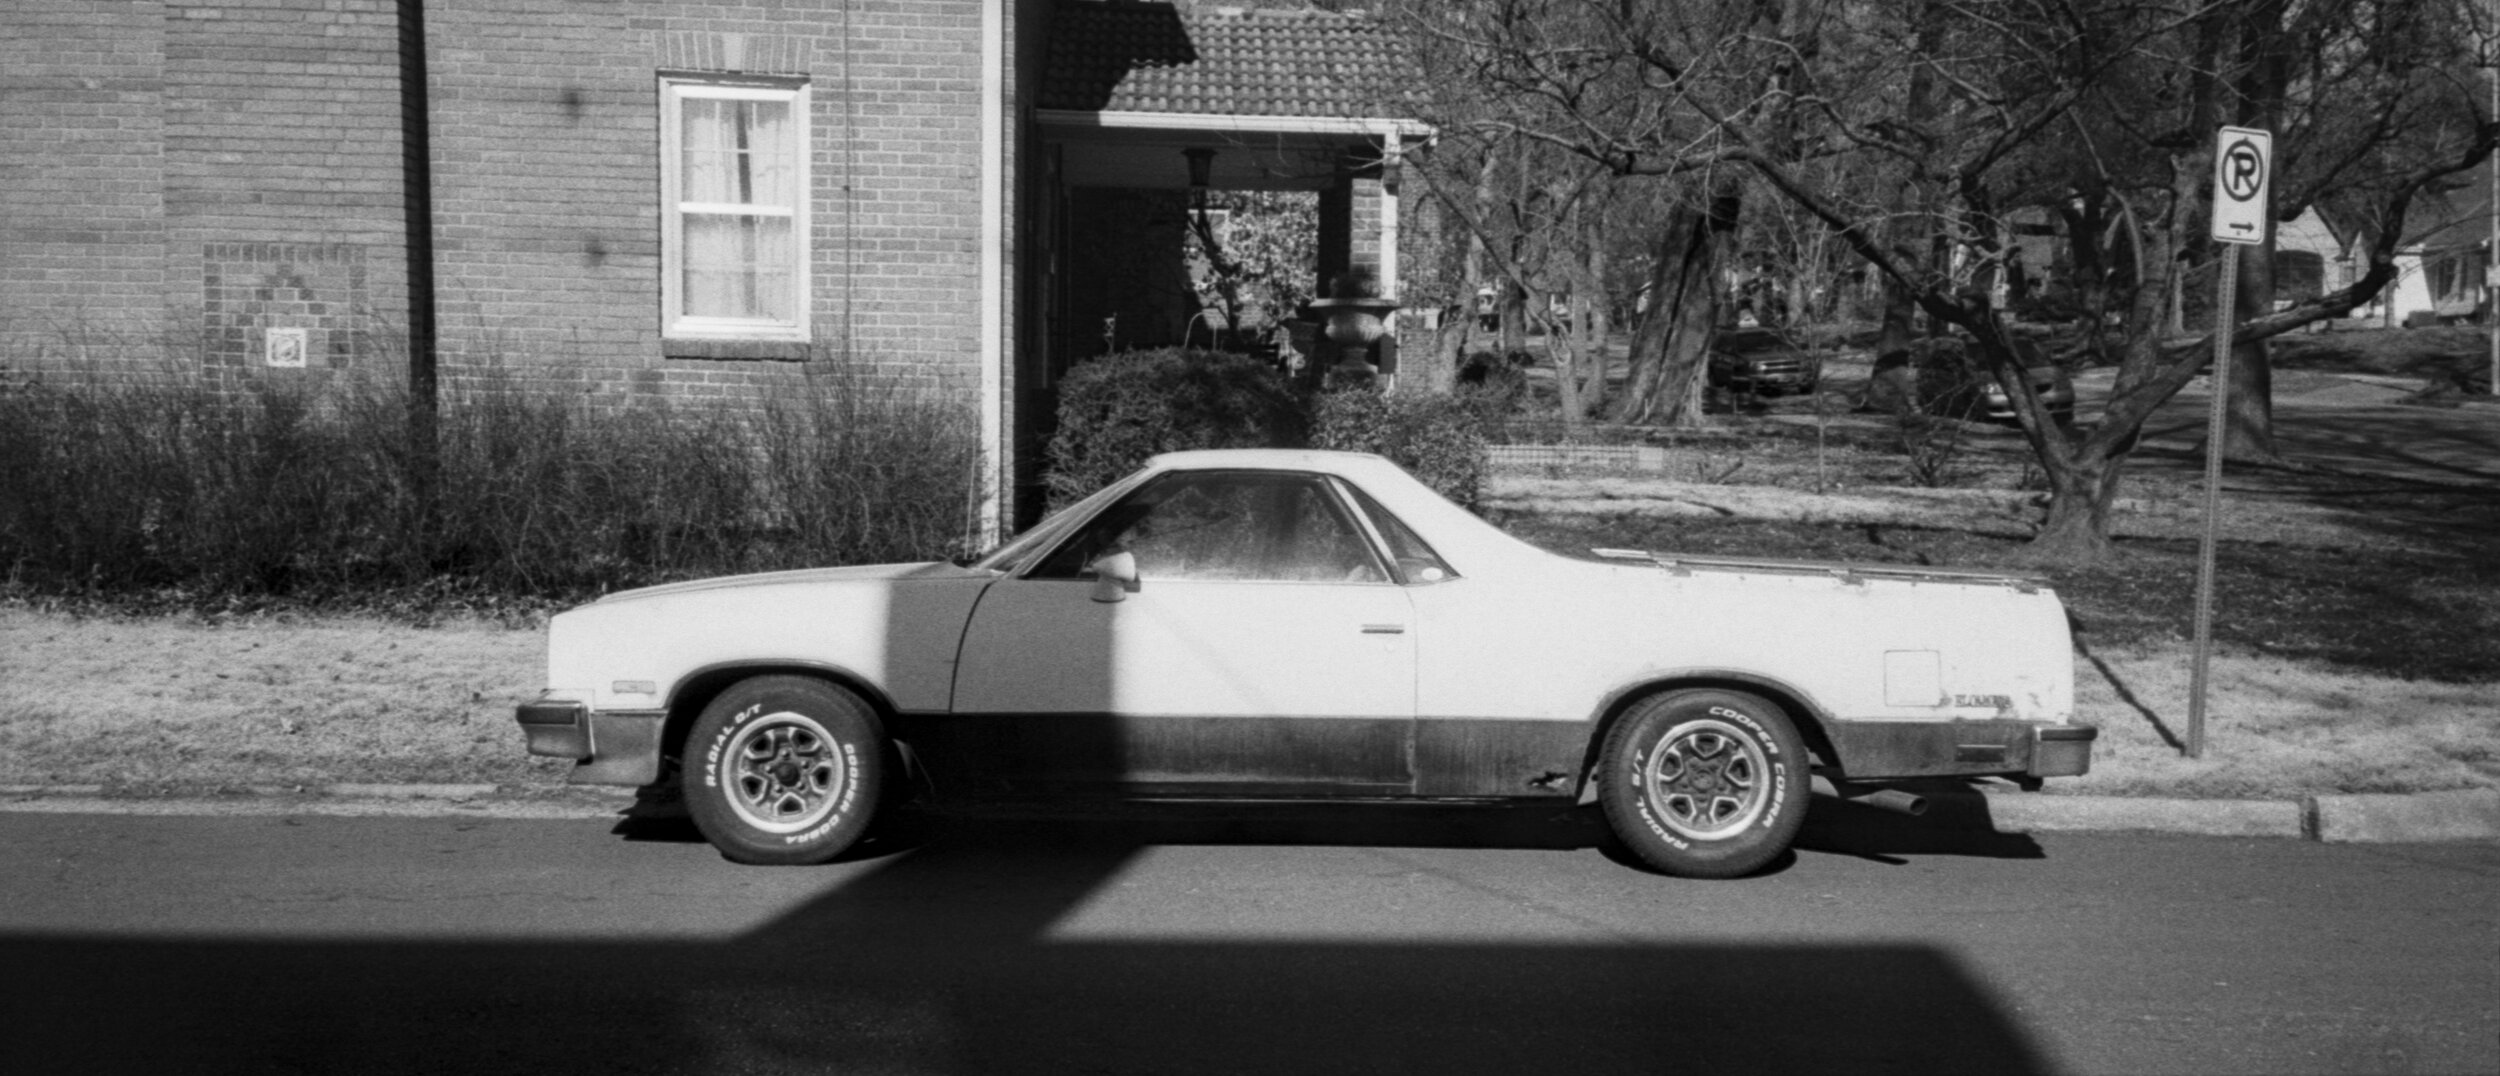
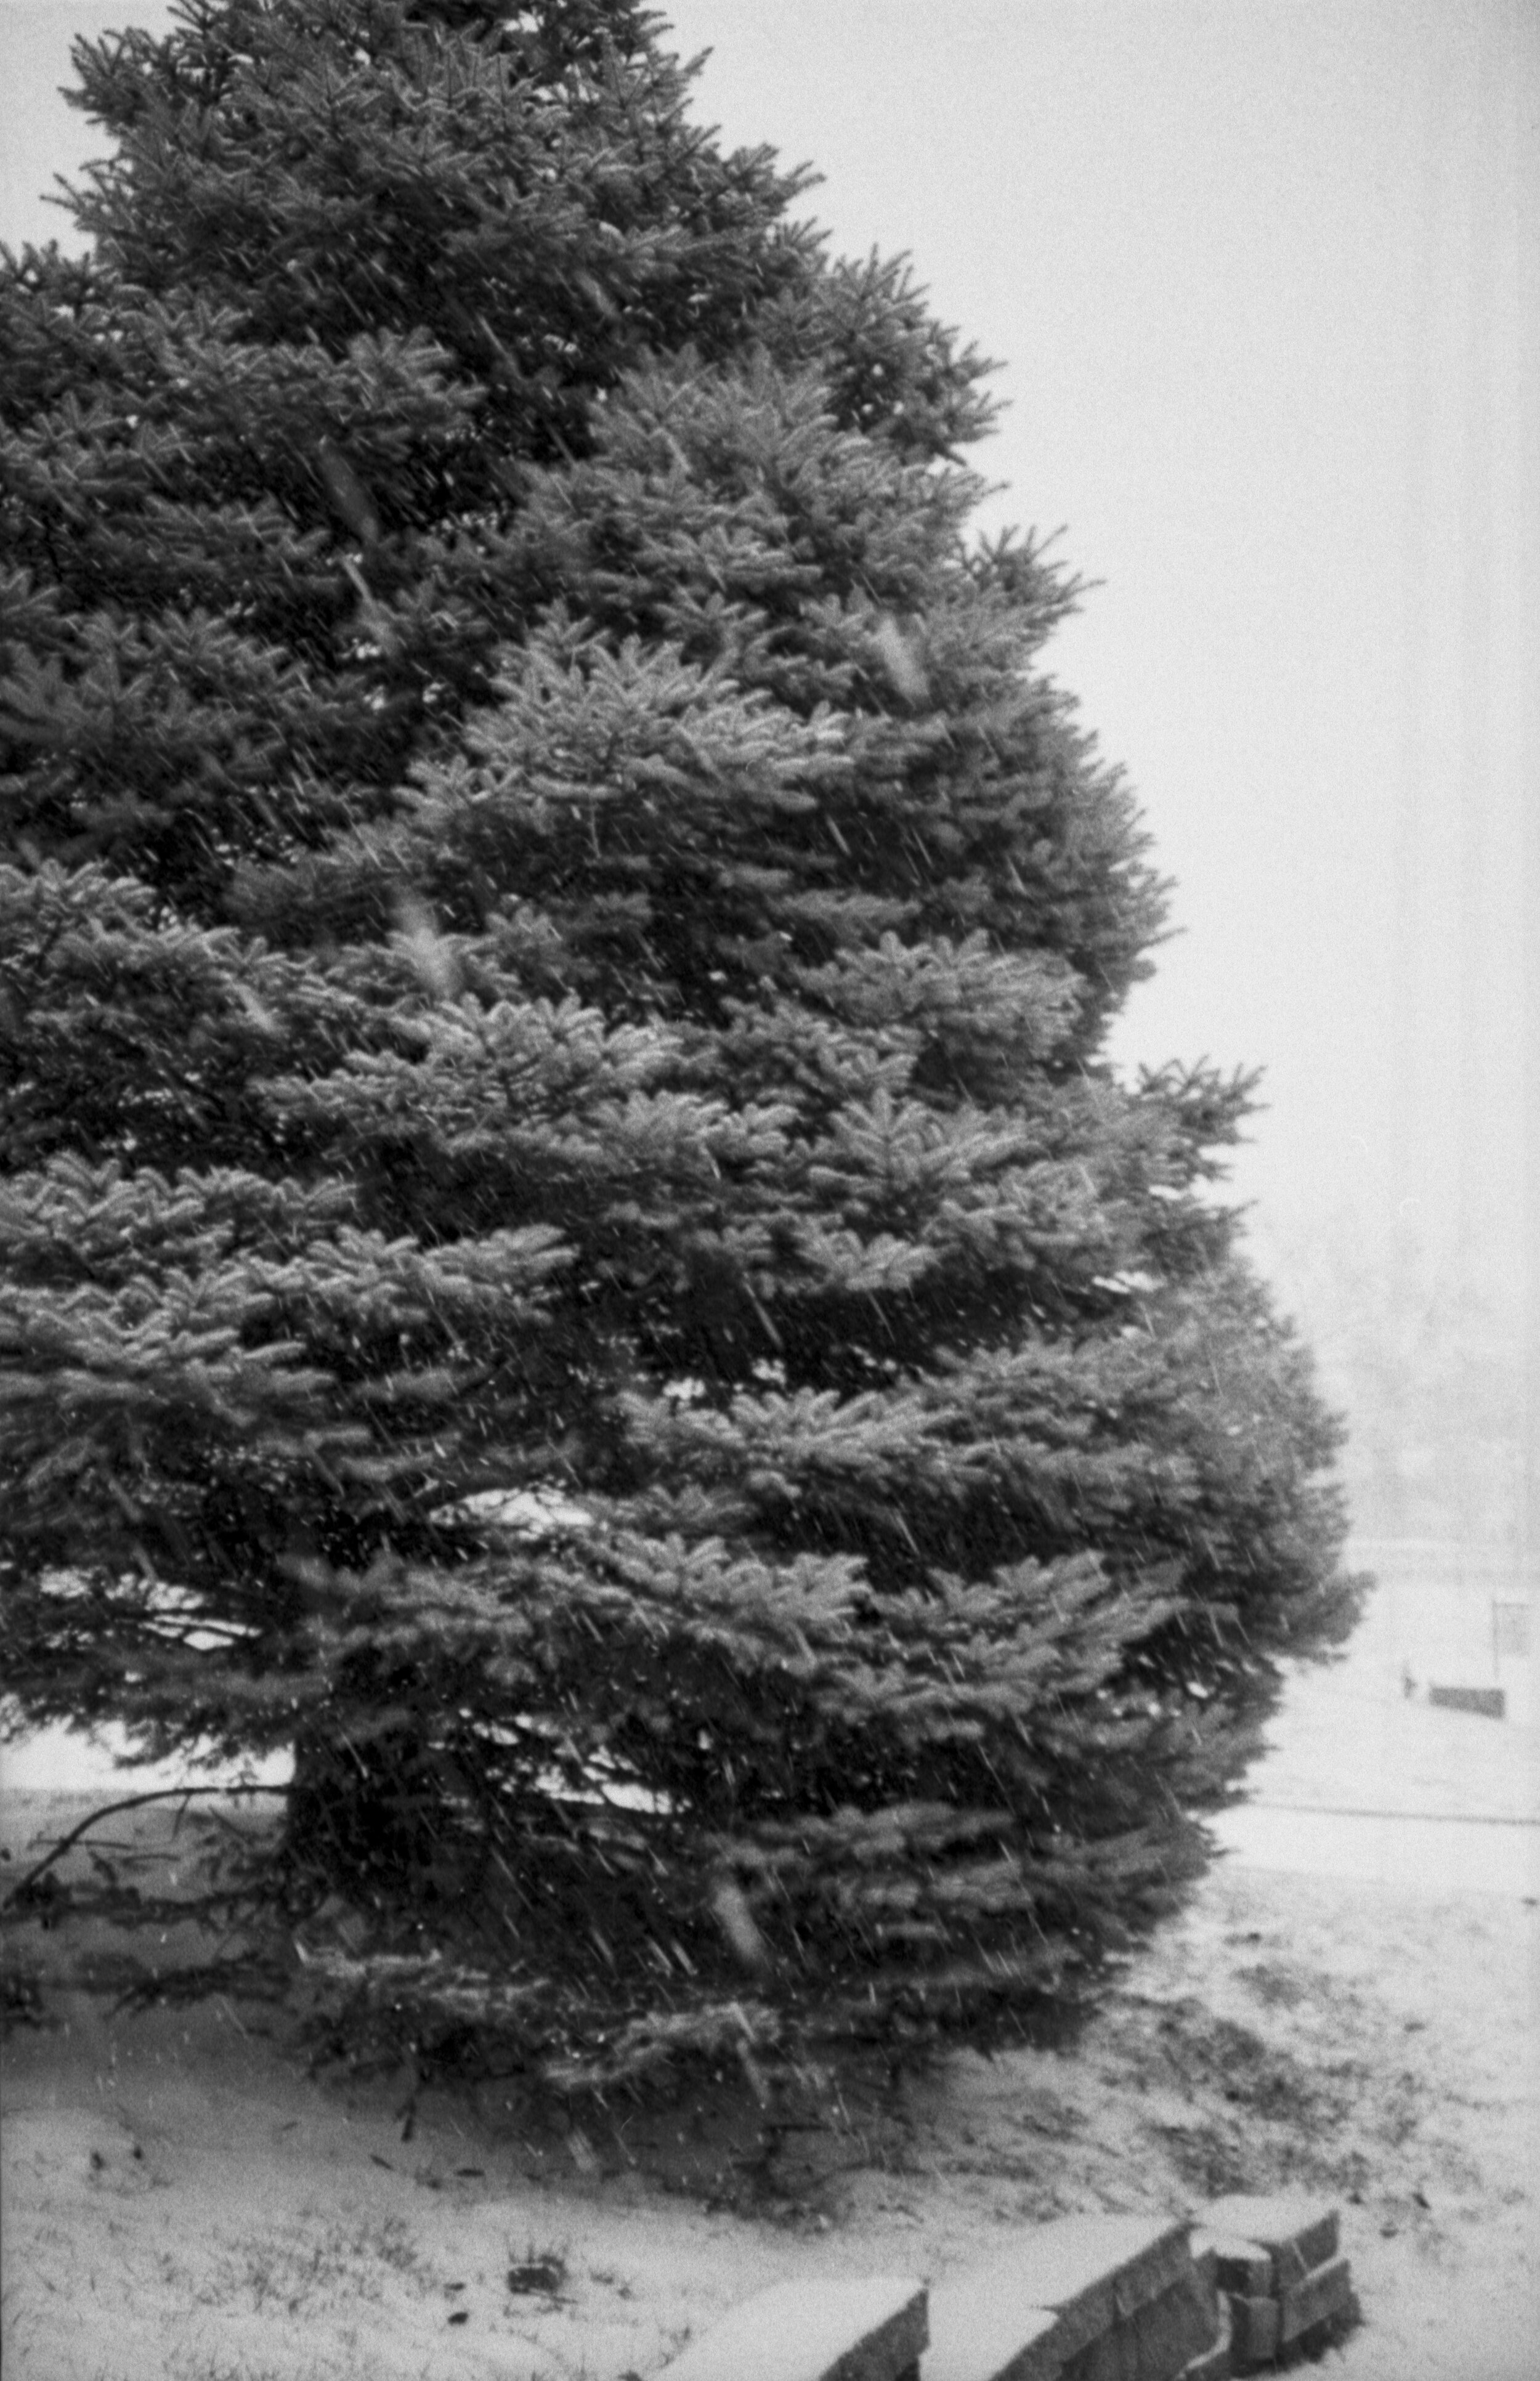
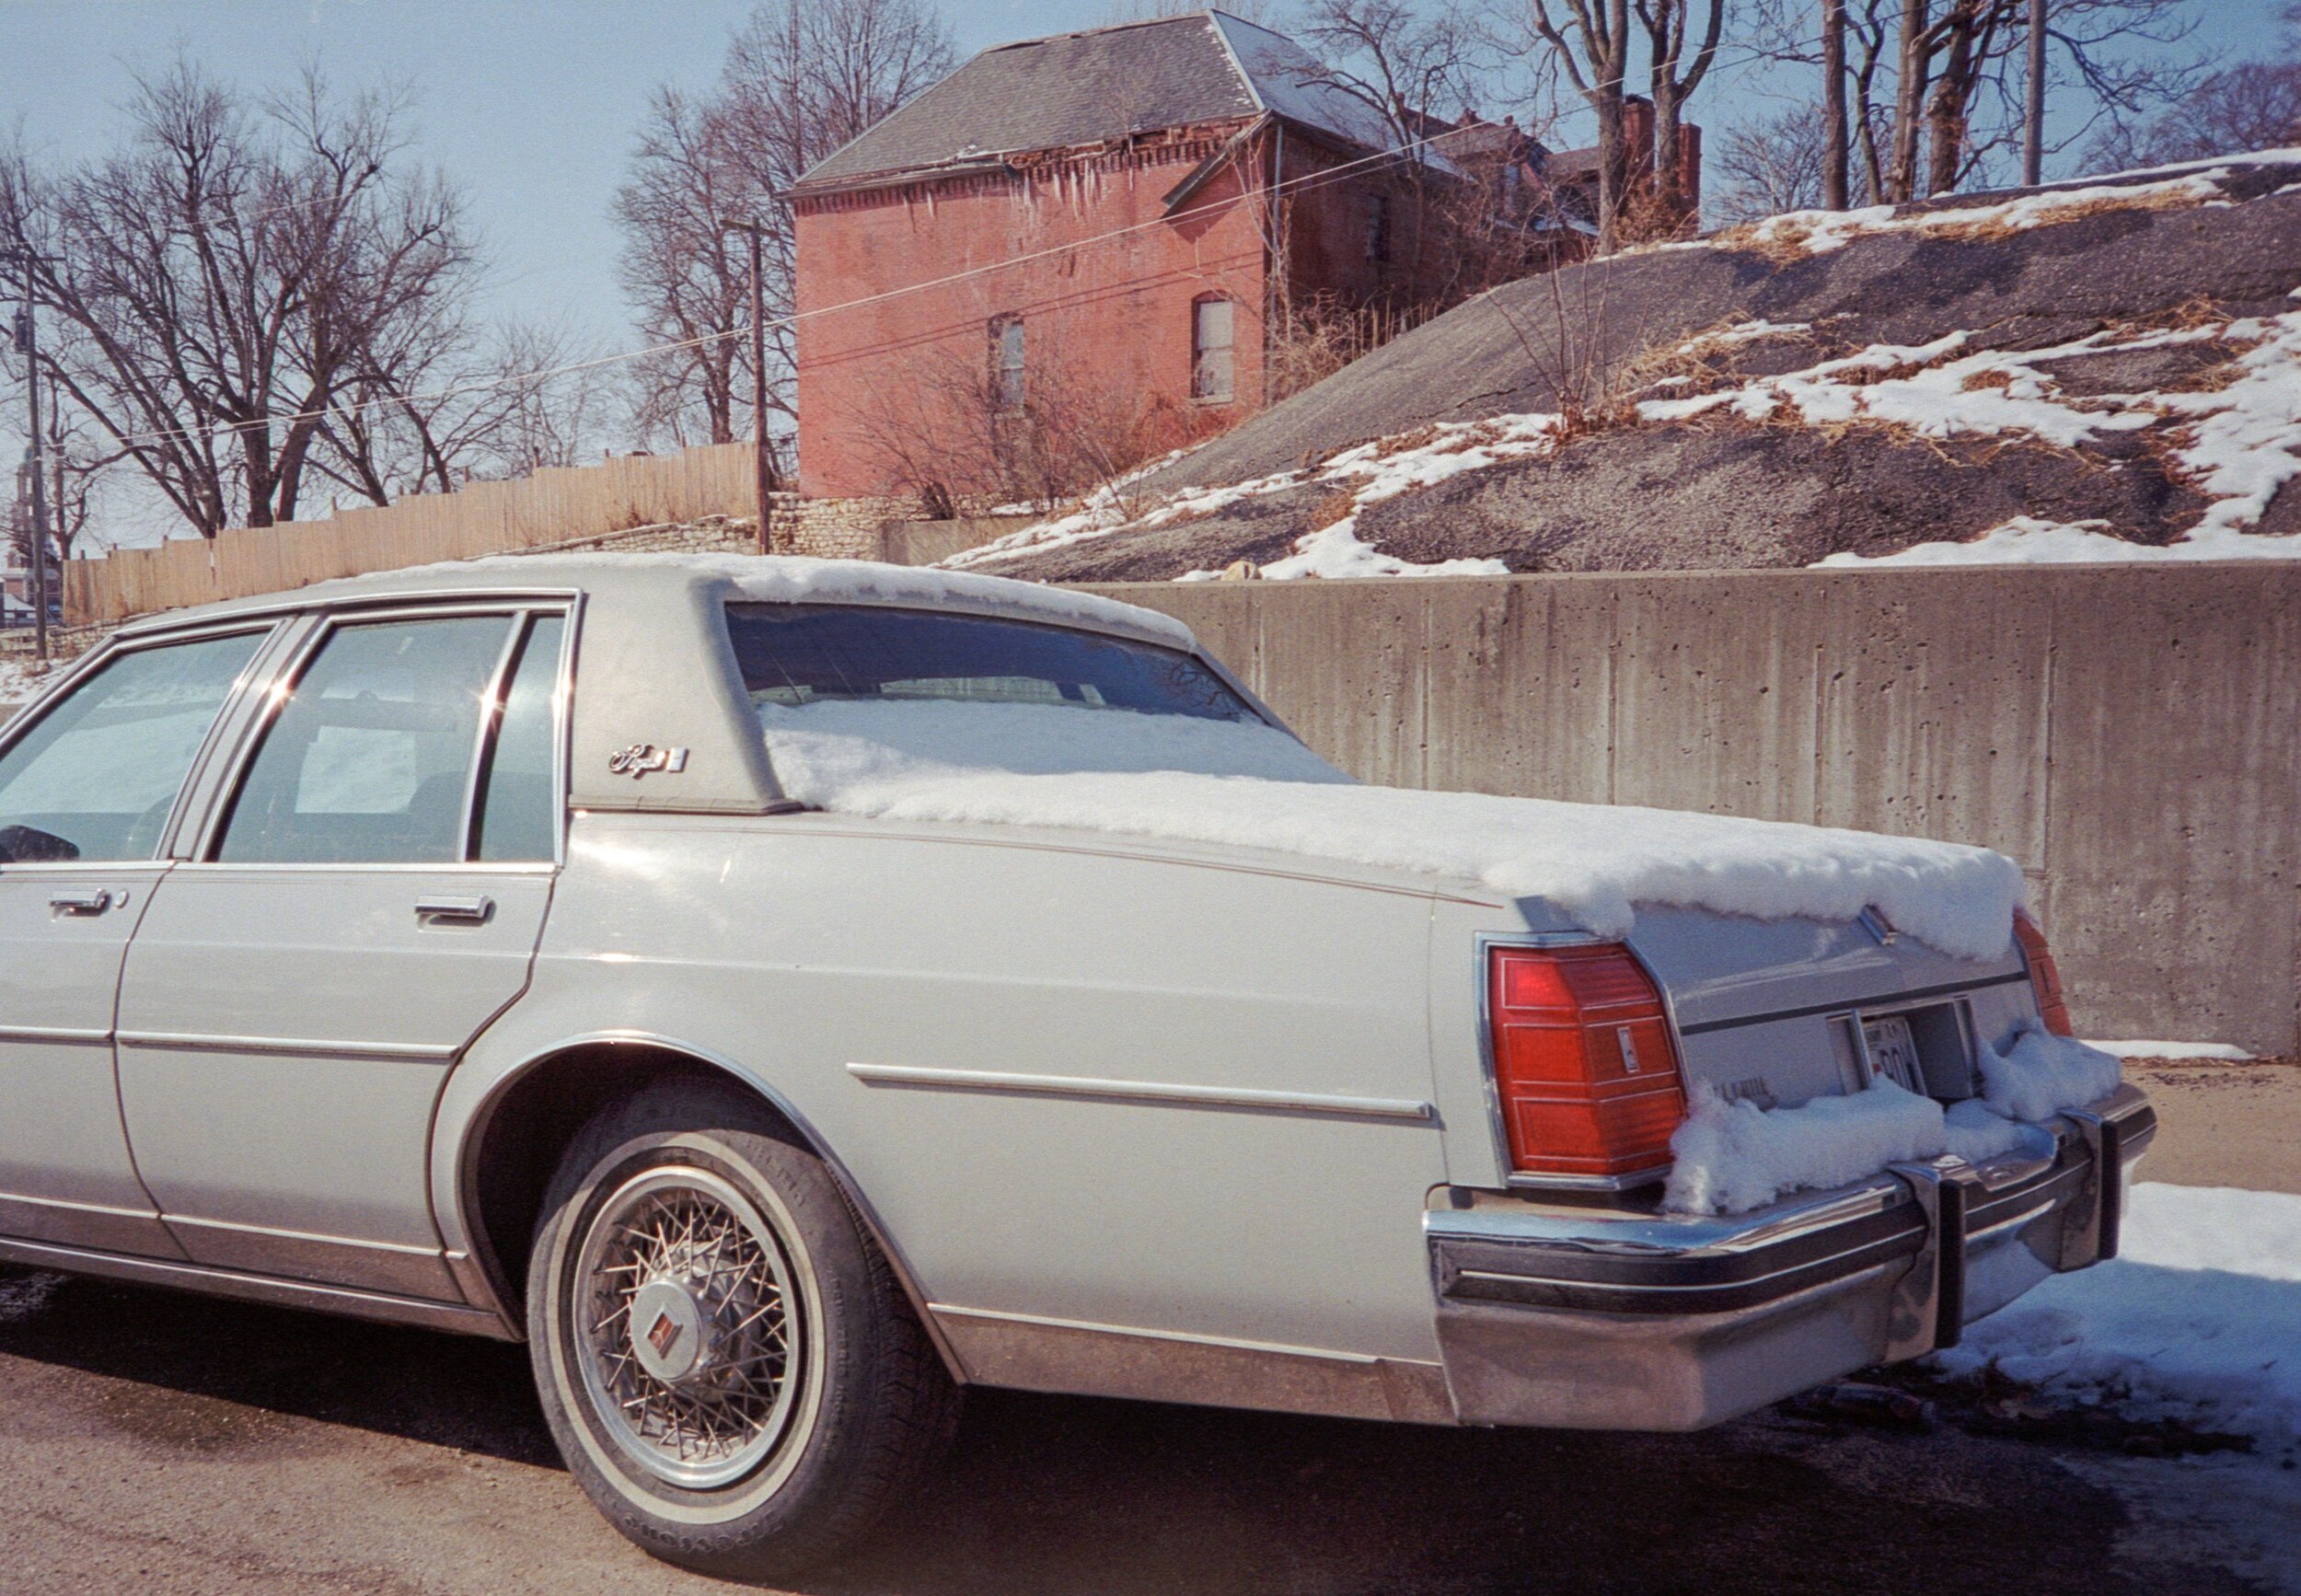
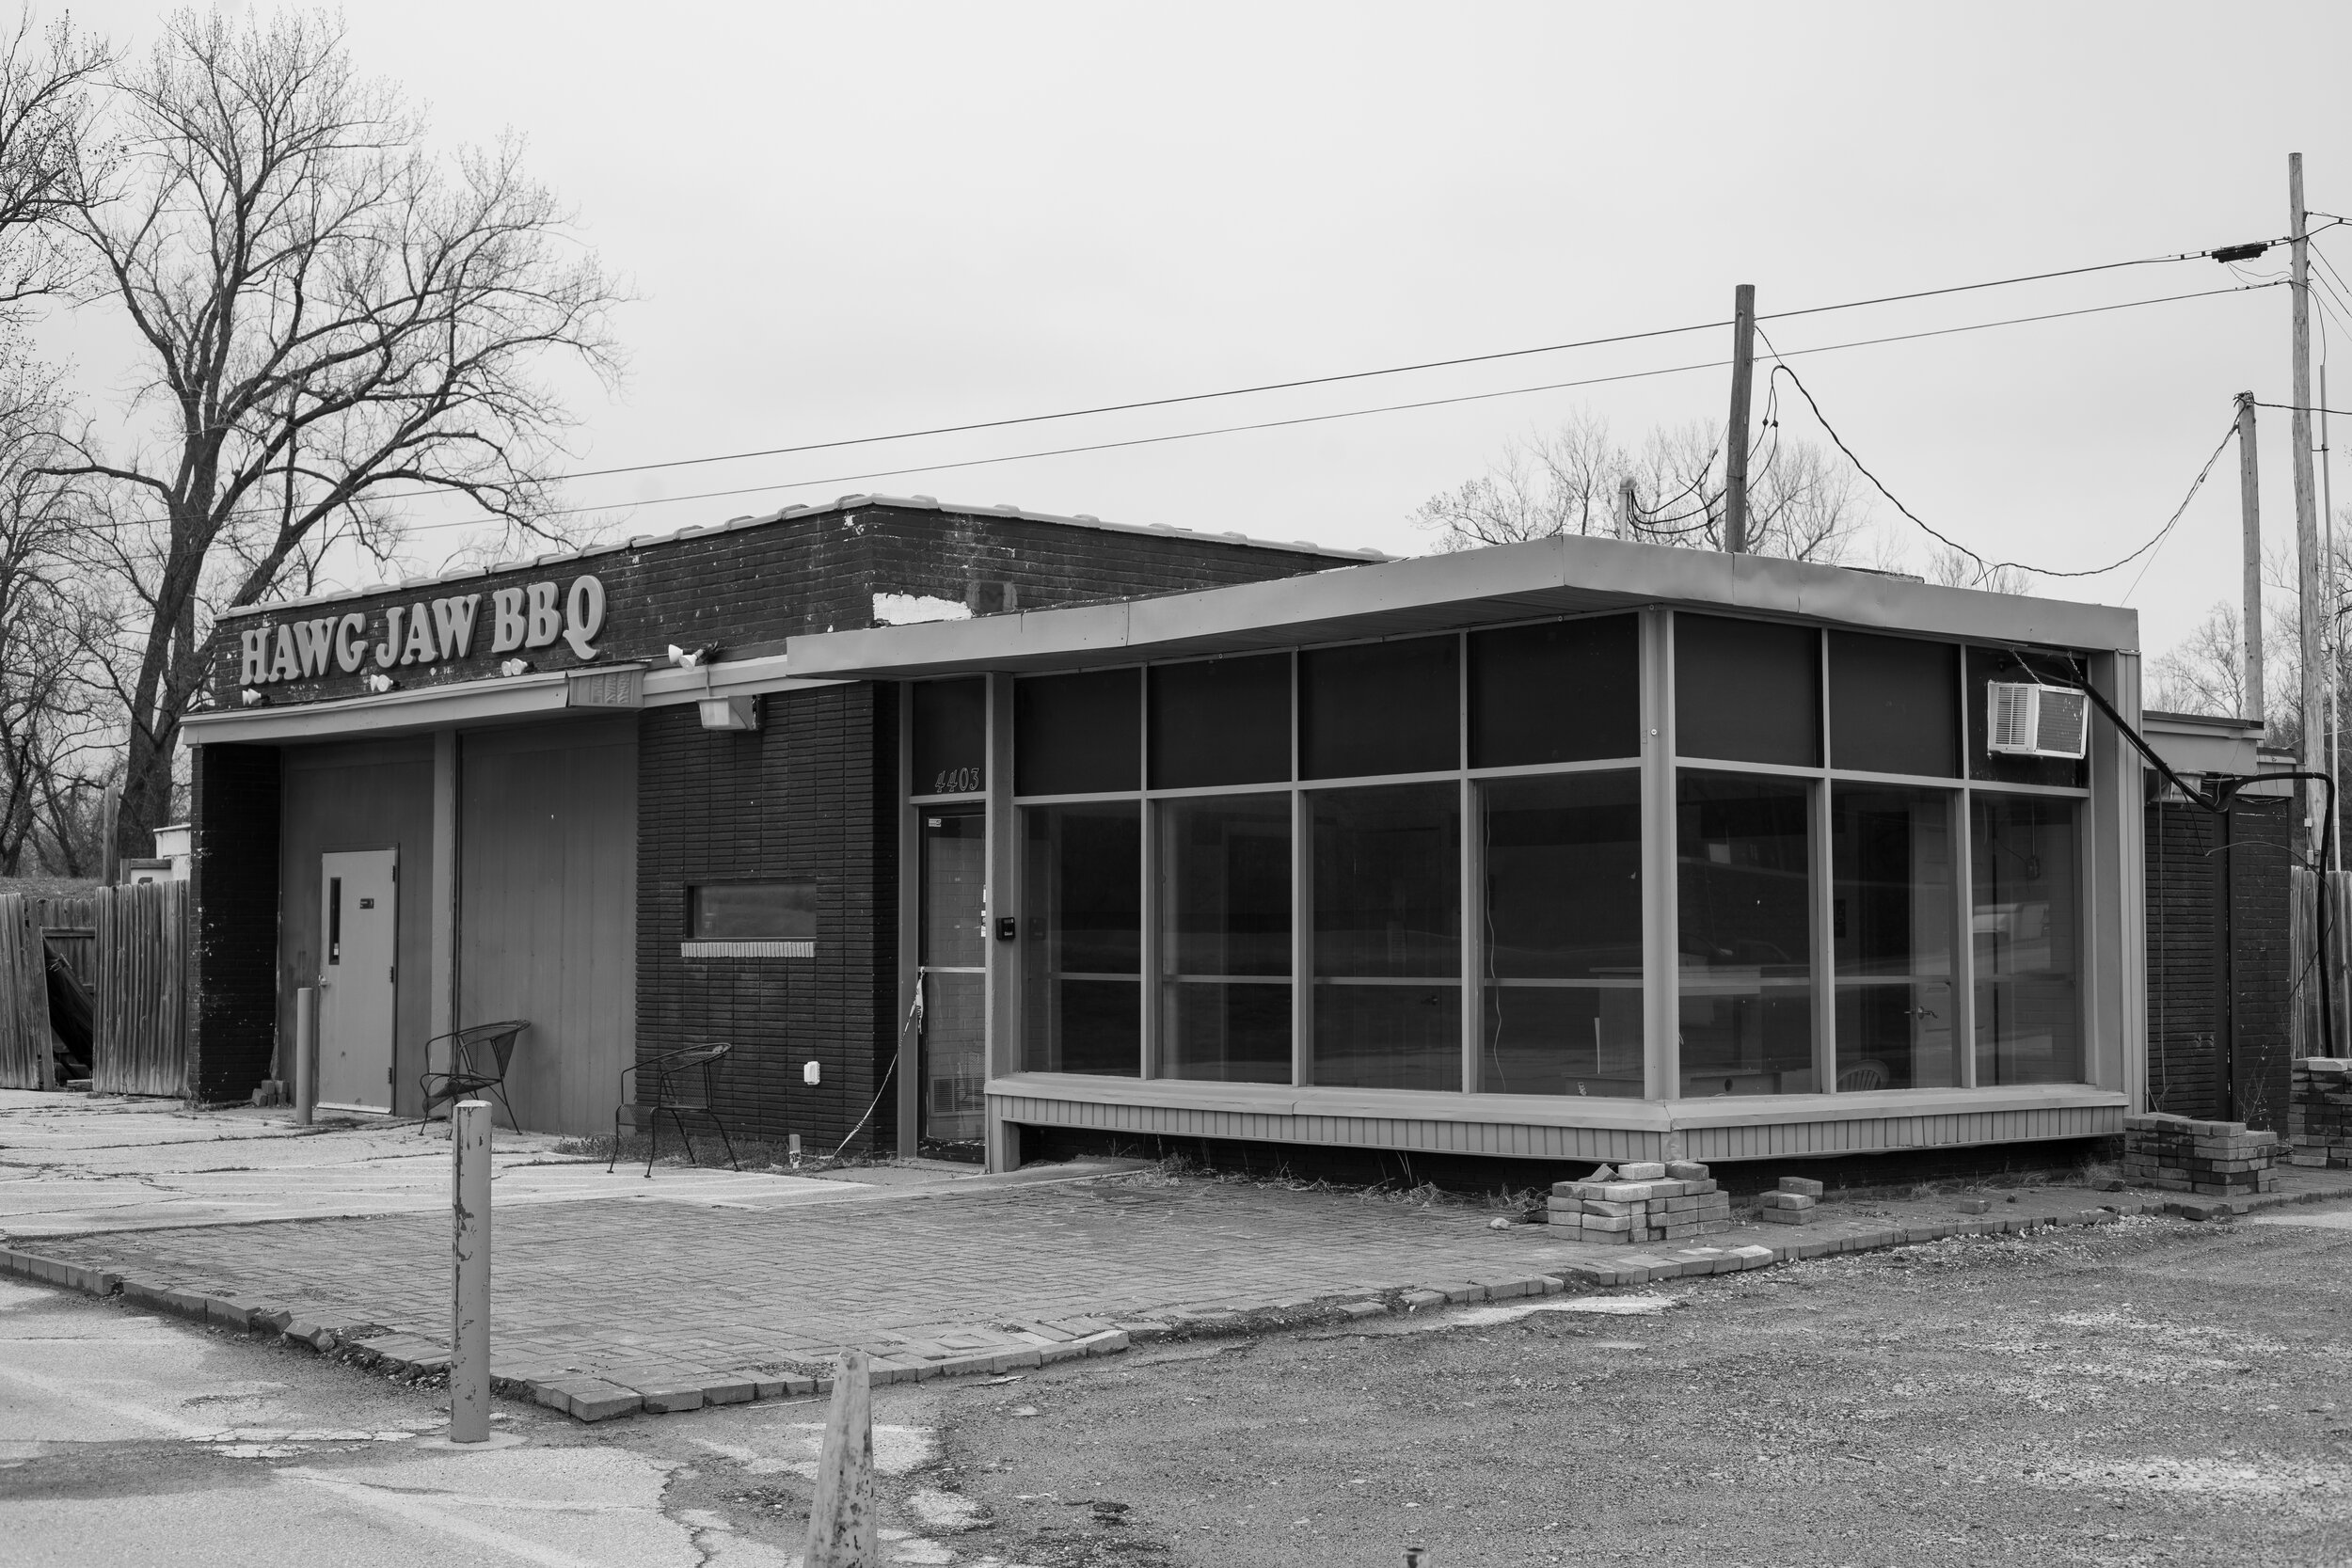
Kodak Portra 400 Sample Images:

I think that 7Artisans makes fantastic lenses. They’re great for Leica shooters who want to try out different focal lengths and not spend thousands in the process. Considering the price, it is impossible to find a better 35mm f/1.4 M-mount lens.

Journey Into Film

by Anthony Gyzen and Sara Long

Most of my life I’ve used digital cameras, including some early Kodak and Nikon point & shoots. My first DSLR was the Canon T3i, and I loved it. I used the Canon system for a while, upgrading to the 7D and then later, the 70D. About three years ago, I started using Sony mirrorless cameras—first the a6000, and then a7S. When the Sony a7 III was announced, I sold my 70D and a7S to purchase that camera. In late 2018, I noticed I was going out to shoot less and less, and really only using the a7 III only as a tool for recording video. Bored of digital but missing the fun part of using a camera, I started looking into film photography for the first time in my adult life.

Other than using disposable cameras on vacations or school field trips, my only real experience with shooting film was during the holidays. My mom inadvertently started an annual tradition where we would spend an entire December evening in front of the Christmas tree with her Pentax ME Super, attempting to get an acceptable family photo. She would go through at least four rolls of film every year because my brother liked to make faces right before the flash popped. All that effort to just get one photo turned me off of film photography.

Screen Shot 2020-09-06 at 9.18.19 AM.png

After my grandfathers passed away, I inherited their film cameras. My paternal grandfather left me the Kodak Retina IIIc, and my maternal grandfather left me his Pentax Spotomatic. I never got around to putting film in either of these cameras, and they sat on shelves.

Two and a half years ago, I bought a gigantic lot of film cameras, lenses, and accessories off of Craigslist on a whim. I thought I might resell them individually to help fund the a7 III, but I figured I’d keep a few, at least the lenses I could adapt to my Sony alpha cameras.

I ended up hanging onto a Hasselblad 500cm, an Olympus OM-1 with some lenses, and a couple Minolta MD lenses which I’ve featured in episodes one and two of the Adapting Vintage Lenses series. I also kept this Leica IIIa with a Summar 5cm (50mm) f/2 lens. I had been interested in the Leica M series in particular, but since this was older thread mount, I didn’t get around to trying it out until early 2019. I found the manual online and shot my first roll of Fuji S200 on the Leica IIIa with a Russian Zeiss copy, the Jupiter-8 5cm f/2. I picked this lens because the glass was much cleaner than the Summar, which was scratched up when I acquired it.

I did some research into basic film developing, but we were about to move, so I held off on buying equipment and chemicals. But I had a stoke of luck in May 2019, when I found an incredible deal on a silver Leica M6 that I couldn’t pass up. The seller included a few accessories and extra rolls of film, but I still needed to get a proper M mount lens.

Screen Shot 2020-09-10 at 11.42.26 AM.png

I had an LTM/L39 to M mount adapter handy, so I shot my first 30 rolls using my Jupiter-8 on the M6 in the two months before we moved from Bellingham to Kansas City. Because I wasn’t developing any rolls yet, I was worried about a number of issues, like missing focus or whether the expired film I used was ruining shots (it was).

So began the process of developing and scanning, as soon as I was able in the summer of 2019. The process was nerve-wracking the first few times, but everything turned out acceptable, but there is still so much to improve on. I spoke with a Steve at Express Photo, a professional film developer here in Kansas City, and he advised me that other than maintaining my use of good quality chemicals, only time and practice would perfect my technique.

During my first year, I almost exclusively used the M6 with the 7Artisans 75mm f/1.25, 35mm f/2, and 28mm f/1.4, as well as the 50mm Jupiter-8 lens.

As of right now in late summer 2020, I’ve shot and developed over a hundred 35mm rolls and about twenty rolls of 120 film, experimenting with several different film stocks in color as well as black & white, from companies like Kodak, Fuji, Arista, Kenmere, Ilford, and Bergger.

My current setup still includes the a7 III for work, but my personal favorite cameras are the Leica M6, M3, M 240 and Rolleiflex 2.8D.

After a year and a half of use, my M6 light meter no longer reads a scene, so I’ve had to carry around a Sekonic L-508 Zoom Master light meter. I love this tool for accurate spot metering, especially on distant objects. Even with a working internal meter, the M6 does not have that kind of accuracy to correctly estimate the necessary amount of exposure.

I’ve learned a lot in my journey into shooting film, but I believe I could shoot and develop for years and still continue to discover new things. That’s what excites me about film. I enjoy the entire process, from capture to the ritual of developing to scanning, and I like how much control this format gives me. Film just makes me want to take pictures.

Olympus Stylus Point and Shoot

by Sara Long and Anthony Gyzen

http://antnie.com/articles | http://instagram.com/antnie Pricing & Availability : https://ebay.to/2OlQerI In this video I review four Olympus Stylus Point & ...

Olympus recently announced they will be ending their 84 year tenure as titans of the camera market, so I thought it might be appropriate to talk about some of my favorite Olympus products, the Stylus point and shoot cameras.

The nomenclature used for these cameras varies by region, the time they were released, and their features. In some countries they are called Mju but here in the states, most are called Stylus or Stylus Epic.

These cameras were marketed towards enthusiast consumers, who wanted feature filled cameras with great optics and ease of use. My primary use with the Olympus point and shoots was capturing personal and family moments. I don’t feel like the autofocus is reliable enough to use in a professional setting.

There are a ton of different Olympus Stylus cameras with varying features, optics, and builds. The Stylus comes with either fixed focal length or a zoom lens. There are a lot more zooms to choose from, though they are less desirable. They are cheaper, thicker, and tend to have poorer optics than the fixed focal length models.

As of right now, you can get these cameras from $50-300. The more expensive and sought after models are the ones with fixed lenses, like the Infinity Stylus 35mm f/3.5, or the Mju 35mm f/2.8. The zoom models often come in the champagne color, and fixed ones tend to come in black.

I have four Olympus Stylus 35mm cameras to share with you today, and any of these cameras would be a fine entry into point and shoots. They’re all compact, have useful sets of features and good optics. They have self timer mode and built in flash. The zoom models have a pop-out flash, which can kind of get in the way, and adds another mechanical component that may fail over time. The flash on the fixed lens models, like the Infinity Stylus, is under the slide out cover.

These four cameras are completely auto-focusing, with no manual shooting options. At times, this can be frustrating, because only after developing and scanning the film you will notice that some shots were not in focus, but that’s just late 90’s autofocus technology. Not every shot will be perfect. This may not be ideal considering the cost of developing, scanning, and the film itself. If you have the means develop and scan yourself to save money, you might feel more in control of the whole photography process, but you shouldn’t expect perfection. Though we may strive for perfection in everything we do, at the end of the day we’re all only human and I’m sure you’re doing your very best. I shot 18 rolls of film with these cameras, and about 1/5 of the photos taken on these four cameras were out of focus.

A half press of the shutter when you’re aiming at your subject can make two LED lights appear in the viewfinder. The green light will appear when your subject is in focus, and the orange light indicates that flash will be used.

It’s relatively easy to load a roll of film in these cameras, and if you do it wrong, the LCD display will let you know you need to reload. Once you’ve finished shooting a roll of film, the camera will automatically start to rewind for you.

All of these cameras can read DX coded film canisters at speeds 100, 200, 400, 800, 1600, and 3200. They all have a basic LCD display that frame count, flash settings, and the mode it is in.

In all four of these models, I find that the viewfinder is too small. Sometimes when I quickly bring the camera up to my eye, I’ll struggle to find the viewfinder, spending too much time moving my eye around the back of the camera. I will say that the viewfinders are all generally bright and clear.

To begin, here is the Olympus Stylus Epic Zoom 115 Deluxe with zoom lens 38-115mm f/4.5-9.7. The max aperture isn’t very large at 4.5, so you may need to use flash more than you’d expect. The fastest shutter speed is 1/500th of a second and the slowest is 4 seconds. It has an all-weather sealed body, quartz date and mode features such as landscape, close up, etc. as well as faux panoramic mode—not like a Hasselblad X-pan style panoramic, it’s actually just a standard 35mm frame with the top and bottom 1/5ths cut off. It’s pointless, you could just crop it yourself for the same effect. I don’t recommend buying this. It’s 8.7oz.

Next we have the Olympus Stylus 150 with 37.5-150mm Zoom lens f5.1-13.3. The minimum aperture depends on the focal length. The shutter speed goes from 1/690ths of second to 4 seconds. This model has a camera shake indicator built in, as well as quartz date and mode feature. It has an all-weather sealed body and weighs 8.3oz.

This is the Olympus Stylus Epic Zoom 170 with 38-170mm f4.8-13 lens. The shutter speed range is 1/400ths of a second to 4 seconds. It has an all-weather sealed body, and it’s the bulkiest and heaviest of this bunch, weighing a solid 10.3oz, and it is the most versatile of the bunch.

Back in November 2019, the rolls I shot with the Olympus Stylus 170 were actually the first that I used to develop black and white at home with the Cinestill DF96 monobath. In the first roll, some images have reticulation because my water and chemicals were not the same temperature. Live and learn. 

And last, we have the Olympus Infinity Stylus 35mm f3.5, and I should note that there are different versions that have an f2.8 lens. At 6.7oz, this is the lightest and most compact of the four, and though it feels the cheapest in the hand compared to the others, it seems just as durable. I’ve dropped it a couple times over the last year and it still performs very well. I actually like that this camera has fewer features than the other three, because I don’t feel like there is ever a setting between me and a photo. It’s incredibly pocketable for a film camera. I did notice that the Olympus Infinity Stylus had the least amount of photos in focus upon development, but it’s possible that problem may be specific to the model I own.

I recommend going with the fixed focal length point and shoots. They produce higher quality and sharper images with less vignetting, and the cameras themselves are durable and pocketable. Of these four, my favorite is the Infinity Stylus. It has replaced the RX100 series camera I used to use. It’s easy to pull out, snap and put away. I like to bring one of these Olympus Stylus cameras when we go on trips. It’s easy to use in the moment, no need to worry about exposure or focusing.

I have a hunch these cameras are going to continue to go up in price over the next couple of years, though I doubt they will hit Contax point and shoot prices. It might be a good idea to pick up one or two of these now, before they become expensive.

Minolta MD - Adapting Vintage Lenses

by Sara Long and Anthony Gyzen

The Minolta MD camera line was Minolta’s longest running SLR lens mount system, produced from 1977 to 2001. Today we’ll be exploring six SLR lenses from 28mm to 200mm.

The MD lenses were designed for a 35mm film camera, so I adapted these to my full-frame Sony a7III, using adapters by Fotasy and Fotga. I prefer the Fotasy adapter because the lens release button on the Fotga adapter is sharp and difficult to release, though it is an ounce lighter.

We’ll begin with the Minolta Celtic 28mm f/2.8. The Celtic line for the MD system are generally less expensive, this one in particular costs around $40. The prices that I refer to are the current going rate at the time of this publication in June 2020.

The Celtic 28mm f/2.8 lens has a 49mm front filter thread, aperture range of f/2.8-22, and minimum focusing distance is .3m or one foot, with a short focus throw from minimum to infinity.

It weighs 6.6 ounces due to its plastic and metal construction. I find it has minimal distortion and vignetting for an old, wide angle lens. Images are very sharp in the center, with only slight sharpness fall of towards the edges. I love the contrast I get with this lens, it’s my second favorite of the bunch.

Next up is the Minolta Rokkor-X 45mm f/2, which goes for around $50. It has a 49mm filter thread and an aperture range of f/2-16. This lens has an interesting focal length that I have never used before, though I think after testing it, I would prefer to stick with a 50mm or go wider with a 35mm. The minimum focusing distance is .6m or two feet, and it weighs four and a half ounces with a mostly plastic construction. It’s compact, sharp, and is the smallest of these lenses, which is more convenient when you have to use an adapter.

Third, we have the Minolta Rokkor-X 50mm f/1.7, which goes for around $45. It has a 55mm filter thread and aperture range of f/1.7-16, with a minimum focusing distance is .45m or one and a half feet. It’s 6.7 ounces and has a plastic and metal construction. I notice that the bokeh can feel busy at times, and I was expecting better results at low aperture for this Rokkor lens. Stopped down, I really enjoy the images because I get higher contrast and sharper images across the whole frame.

Next, we have another in the Celtic line, the Minolta Celtic 135mm f/3.5 which goes for around $25. It has a 49mm filter thread and range of f/3.5-22, and the minimum focusing distance is 1.5m, or about five feet. It’s nine and a half ounces of plastic and metal, with a built in retractable lens hood. This produces images with very noticeable chromatic aberration, especially compared to the f/2.8 Rokkor-PF version, which we will get into next. The 135mm Celtic is smaller in size and weight than the Rokkor-PF, but that is the only apparent benefit. This may be my least favorite of the lenses I’m reviewing today.

The Minolta MC Rokkor-PF 135mm f/2.8 goes for about $50. It has a 55mm filter thread and range of f/2.8-22, with a minimum focusing distance is 1.5m or about five feet. It weighs one pound and two ounces, all glass and metal, with a built in retractable lens hood. I find the image quality to be far superior to the 135mm Celtic. I have only used this 135mm f/2.8 and the 200mm f/3.5 for portraits so far. All of the portraits were taken wide open at f/2.8, and the sharpness and contrast were exceptional.

The Minolta MC Rokkor-QF 200mm f/3.5 costs around $70 and has a range of f/3.5-22 with a minimum focusing distance is 2.5m, or about eight feet. It’s one pound and 11.4 ounces of glass and metal with a built in retractable lens hood, which is quite large on a mirrorless camera, especially when using an adapter. The portraits I shot with this lens were a little softer than with the MC Rokkor-PF 135mm f/2.8, but it’s not really noticeable unless you’re pixel peeping.

For under $300, you can get a really useful six lens kit for your digital camera, with plenty of options to customize your kit to your needs. Most modern lenses cost more than this whole kit.

Pergear 25mm f/1.8 Review: Ultra Budget Manual APS-C Lens

by Anthony Gyzen and Sara Long

The Pergear 25mm f/1.8 all manual lens is available for multiple camera systems like Fujifilm, Olympus, Panasonic, and the one that I tested, Sony E-mount. This small lens is a good affordable companion to the lower-end Sony APS-C cameras.

Due to stay at home orders, my testing with this lens has been limited. I mostly used it to snap pictures on the trails between neighborhoods and on simple solo photo walks.

This lens has a 12-bladed aperture with a range of f/1.8-f/16. The aperture transition is declicked and smooth, which is ideal for video shooters who don’t need hard stops.

The minimum focus distance is .2 meters, or about 8 inches. The focus throw from minimum to infinity is short, which I find convenient in a manual only lens at this focal length. The aperture ring is more smooth than the focus ring, but it requires a little more force to move. I like that the focus ring uses a different style grip so that I don’t accidentally change aperture when I wanted to change focus.

Some things to note:

Shooting with a 25mm lens on an APS-C camera is equivalent to using a 37.5mm lens on a full frame sensor. It’s close enough to being a classic 35mm field of view.

If you’re not accustomed to manual focusing, your mirrorless camera probably has some handy features to assist, like focus peaking and focus magnification. Check your camera settings so that you can get accurate focus.

Without caps, this lens weighs about 7 ounces. Only measuring 1 and 1/4 inches from the mount, this lens doesn’t add much bulk to the small a6000 series camera.

The Pergear is extremely small and pocketable, and because of that convenience, I tend to take it out shooting more often than not. It’s one of the most affordable lenses for Sony E-mount, so I’m not too concerned with keeping it pristine. The metal exterior makes the lens feel more premium than the price would suggest, and it’s solid in the hand.

At times I was pleasantly surprised at how well this little budget lens performed, but sometimes I was puzzled by the occasional soft centers of the photos. Around f/1.8 to about 2.8, I noticed some vignetting.

The sharpness and contrast was adequate for what I was shooting, but it was definitely not something that I would use in a professional environment. I liked the color rendition, but that can vary greatly based on your personal camera and color profile settings.

Overall, it’s a decent performer for less than $70. Keep in mind that this is an ultra budget lens, so you should not expect to get image quality that is comparable to Sony, Zeiss, Sigma or other such lenses. But if you are looking for a budget manual APS-C lens, this might be one of your best options.

Bellingham Blue: A Meditation on Nostos, Memory, and Learning to Work with Film

by Sara Long

When I was a young girl, I was fascinated in the idea of nostos. How grand it must be, I thought, reading about Odysseus washing up on the shores of Ithaca, to return home after a long journey. Of course, I never thought about how leaving home is necessary to be able to return one day, nor of how desperate Odysseus was to stay home in the first place.

Last summer, Anthony and I moved from Bellingham, Washington, where we lived for five years while I attended WWU, to Kansas City, Missouri. During the spring of that year, Anthony had begun experimenting with shooting film. Much to my dismay, he used a lot of expired film at that time, but when he wasn’t, he got some fantastic images of the Bellingham area that we knew and loved.

Bellingham blue is a feeling as much as an idea. Taken in the springtime, within these photos lives a natural warmth and often, bittersweetness. With just weeks left before moving halfway across the country, we went out in search of the things that felt familiar and brought us joy, but in each photo there is a bit of sadness in all that blue. A part of us knew that by taking these photos, we were letting go of all the things that made Bellingham, home. The quiet homes that we walked past in the evenings, the neighborhood cats and front lawn dogs, the trails we’d trod on hundred of times—taking photos was a way of saying goodbye, I love you, I’ll miss you terribly.

Bellingham blue bled into periwinkle and almost purple sometimes. Much like Bellingham itself, this collection is eclectic, ranging from clean lines on buildings to forgotten doorways and abandoned vehicles splattered with light through tree branches.

I asked Anthony why he focused on blue, and he told me it was as simple as noticing a pattern. “Bellingham blue was a self-imposed challenge,” he told me, “I was trying to set limitations for myself, and still find a way to be creative.” When I pressed further, he explained that he was still trying to get used to the basics of film photography, after switching from digital. “You don’t want to shoot through a whole roll of 36 photos on just anything,” he said, “by only taking photos of the color blue, I was forced to think about the photo I wanted beforehand, rather than just snapping away and hoping I would end up with something I liked.”

Photos I am especially grateful for:

The houses. Antnie and I often went on walks in the evenings through our neighborhood and beyond. Things that never registered to me would catch Antnie’s eye, and he would capture an image like this - House V - so dreamy and picturesque shown here, with its sloping roofs and shrubbery peeking out through the fence.

The art exhibition at the Black Drop coffeehouse in downtown, depicting art by brilliant local creative and visionary Delaney S. Saul, @coven.art on Instagram.

The Boulevard Pier in Fairhaven. The first time I went down here was with my good friend Oonagh, who took me down the overwater boardwalk in our sophomore year. We climbed trees together while the sun set, watching people from the branches as they walked their dogs, played frisbee, and splashed in the Bellingham Bay.

The Masonic Hall across the street from our old apartment. The hard angles and jutting edges were, I think, some of Antnie’s favorites to shoot. You can see the shadows created by the angular architecture made for some really clean photos, especially on days where the sky was Bellingham blue.

The beach shops at Birch Bay, where my family would go on vacation when my siblings and I were kids. I remember getting ice cream across the street from here in the summer after long afternoons spent walking along the beach, collecting perfect seashells, skipping rocks and arguing with my brother.

The laundromat parking lot that we crossed through in the evenings on our way home, sometimes stopping across the street at a burger joint called To and Go. That business didn’t last more than a year, but during the winter they were open, I was always grateful for a paper bag of fresh, hot waffle fries after a brisk evening walk.

Memory is a fickle thing, saturated with feeling. I want to remember Bellingham the way it was captured in these photos, the way I felt before leaving: full of joy and potential, blue in the sky and the ocean and the homes, with the smell of rain and earth in the air, so that when I do return in all my homecoming glory, those feelings might flood back.

Viltrox 85mm f/1.8 AF STM Review - Specs, Image Quality, Build Quality

By Sara Long and Anthony Gyzen

Viltrox sent me their 85mm f/1.8 AF STM lens for Sony E-mount to review. It also comes in a Fuji X-mount, and you can get either on the Viltrox website for $399.

A budget friendly option is the Viltrox 85mm f/1.8 MF for $199, which does not have autofocus, only manual. The MF will give you just as good images as the AF, but for my purposes, the convenience and versatility of the autofocus is worth the $200 more. In comparison, Sony’s 85mm f/1.8 costs around $550-600 depending on where you buy.

The Viltrox 85mm lens has a 9 bladed aperture with a range of f/1.8-16, which is a pretty standard aperture range for a portrait lens. The minimum focus distance is .8m or 31.5”.

It does not have lens stabilization, so you’ll have to rely on your camera body’s internal sensor stabilization.

When shooting portraits at the max aperture f/1.8, the image quality was surprisingly sharp, with high contrast for being shot wide open. The autofocus and the eye detect worked well together. I also noticed really smooth, rich bokeh when shooting at f/1.8.

From f/1.8-f/2.8 there is noticeable, but subtle vignetting, and it doesn’t show up beyond f/2.8. At these wider apertures, images come out with slightly softer edges and tack sharp centers, but at f/4 and beyond the whole image comes out sharp. The color rendition and accuracy was very pleasing to me, but that can vary greatly based on your camera color profile settings.

During the day and in good lighting, the autofocus can be fast, smooth and accurate. However, when Sara and I did a photoshoot in overcast weather, 7 of 75 images came out completely blurry. When this started happening, I had to turn the camera off, demount the lens, remount, and turn the camera back on. That fixed the issue in the moment, but I had to do it twice in the ten minutes we spent shooting. It seems like something that could be fixed with a firmware update.

When shooting in low light or at night, the autofocus spent a lot of time hunting, so I found it easier to simply switch to manual focus. The giant focus ring is easy to adjust for precise focus, though the focus throw is far too long.

When shooting video, the autofocus didn’t feel as smooth as it did when shooting still photos. It felt almost choppy, and when it did get the focus, it locked in hard.

For a $400 lens, the build quality was better than I anticipated. Constructed of all metal and glass, it feels more premium than the price tag would suggest. The glass elements are coated with Viltrox’s HD nano multilayer coating with water resistance and antifouling, which helps reduce flaring and ghosting. The coating on the front element is debris repellent. There is one extra-low dispersion element that helps prevent aberrations. It also helps improve color accuracy.

Some other things to note:

Since it’s an E-mount lens, you can use it on any Sony E-mount camera. If you’re adapting it to the a6000 series or any Fuji X-mount, you need to take into account the crop factor. This 85mm, for instance, would function more like a 127.5mm equivalent lens.

There are no gaskets or any type of weather sealing on the body of this lens, though the coating on the glass elements does help to protect them somewhat. I have taken this lens out in mild weather, and it didn’t affect the lens. The included detachable lens hood does a good job of blocking rain, snow, and sun flare from coming in contact with the front element.

When editing photos, the image metadata will just say 85mm and the aperture, and will not list any other information, which can make filtering through images difficult. Keep this in mind for organizational purposes.

When the electronic aperture changes, I notice a slight grinding sound. This lens is advertised to have noiseless STM autofocus motor, but several times now I’ve heard audible sounds of the motor acquiring focus. In most cases, a slight noise isn’t a dealbreaker, but when you’re trying to be discreet, it can be inconvenient. I find that when the focus motor is making an audible noise, turning the camera off, detaching the lens, reattaching and turning back on solves the issue.

Viltrox sells this autofocus 85mm FE Lens for $399, and you can use my code ANTNIE for 10% off of your entire purchase. I do make a small commission that directly supports this website and the Antnie YouTube channel. More information can be found in the video below.

7artisans 75mm f/1.25 Lens Review

by Sara Long & Anthony Gyzen

I’ve spent the last few months getting to know the 7artisans 75mm f/1.25 lens for Leica M-mount. It’s an extremely versatile lens that can be used in all lighting conditions. I often use it for portraits because of its outstanding image quality and reasonable price. I primarily used this lens on a Leica M6, using Kodak Ultra Max 400, 400Tri-X, and Portra 160, 400, and 800. Thank you 7artisans for sending me this lens to review.

The lens has a 12 bladed aperture for a smooth transition from sharp to the bokeh, and an aperture range of f/1.25-f/16, with a nice tactile click to each stop. The max aperture of f/1.25 is extremely handy in low light or nighttime conditions, especially when shooting film.

This type of fast aperture lens is often used to shoot wide open. Many of my film shots with the 75mm were taken at f/2 to f/8, but when lighting conditions were low, I was able to use f/1.25 to f/2. Most of my other rangefinder lenses, such as the 7artisans 35mm for Leica M-mount and the Jupiter 11 85mm, only get as wide as f/2, so I’m unable to capture the low lighting shots that I was with the 7artisans 75mm lens.

It is important to note that the majority of my testing was on film, so there will naturally be some variation in the results. That said, I found the image quality of the 75mm to be exceptional. From f/1.25 to f/2, the contrast is low, and the images are sharp in the center with soft edges and vignetting. There is some noticeable chromatic aberration depending on lighting conditions, and I would note that manual focusing is more difficult in this range. From f/2 to f/16, the images have more contrast with no noticeable vignetting. They’re generally quite sharp from center to edge.

Some other things to note:

The 7artisans 75mm f/1.25 retails for $449. The comparative Leica lens is the 75mm f/1.25 Noctilux-M, which is $14,095. 

It only took me a few small adjustments to get this lens properly calibrated. I have heard that over time you may need to adjust the lens, but after three months of shooting with the 7artisans lens, I have not yet needed to recalibrate.

This lens’s minimum focus distance is 0.8 meters or 2.6 feet. On a digital body with the close focusing adapter, you can focus at 1.5 feet. The focusing is smooth and precise, with a short travel distance from minimum to infinity. 

When shooting on a rangefinder, like the M6, you will notice that the lens blocks some of the viewfinder in the bottom right of your frame. So, when you’re composing an image, keep that in mind.

This lens is not weather sealed. There are no gaskets on the back to block water from getting in. Please exercise caution when shooting in weather. I would NOT take this out in moderate to heavy rain or snow.

During the winter holidays, I brought both the 75mm and the 35mm 7artisans Leica M-mount lenses on our trip to Redmond, Washington. These two lenses made a perfect kit. The compact 35mm is able to shoot the wide angle, and the 75mm has a tighter shot for portraits and indoor low light. I was so impressed by the image quality, especially for such a reasonable price, that after returning from our trip I continued reaching for the 75mm lens. It’s in my kit now as my main portrait lens, and I won’t go out of town without it.

http://antnie.com | http://instagram.com/antnie | http://instagram.com/fireweedhoneybee Pricing & Availability: https://amzn.to/2U5djBe Close Focusing Adapte...

Tamron 28-75mm f/2.8 Di III RXD Lens Review

by Sara Long and Anthony Gyzen

I used the Tamron 28-75mm f/2.8 Di III RXD lens for one year. Retailing for $879, it is the best budget fast aperture zoom lens for the Sony full frame system. I go in depth about the image quality and the lens build in the video below.